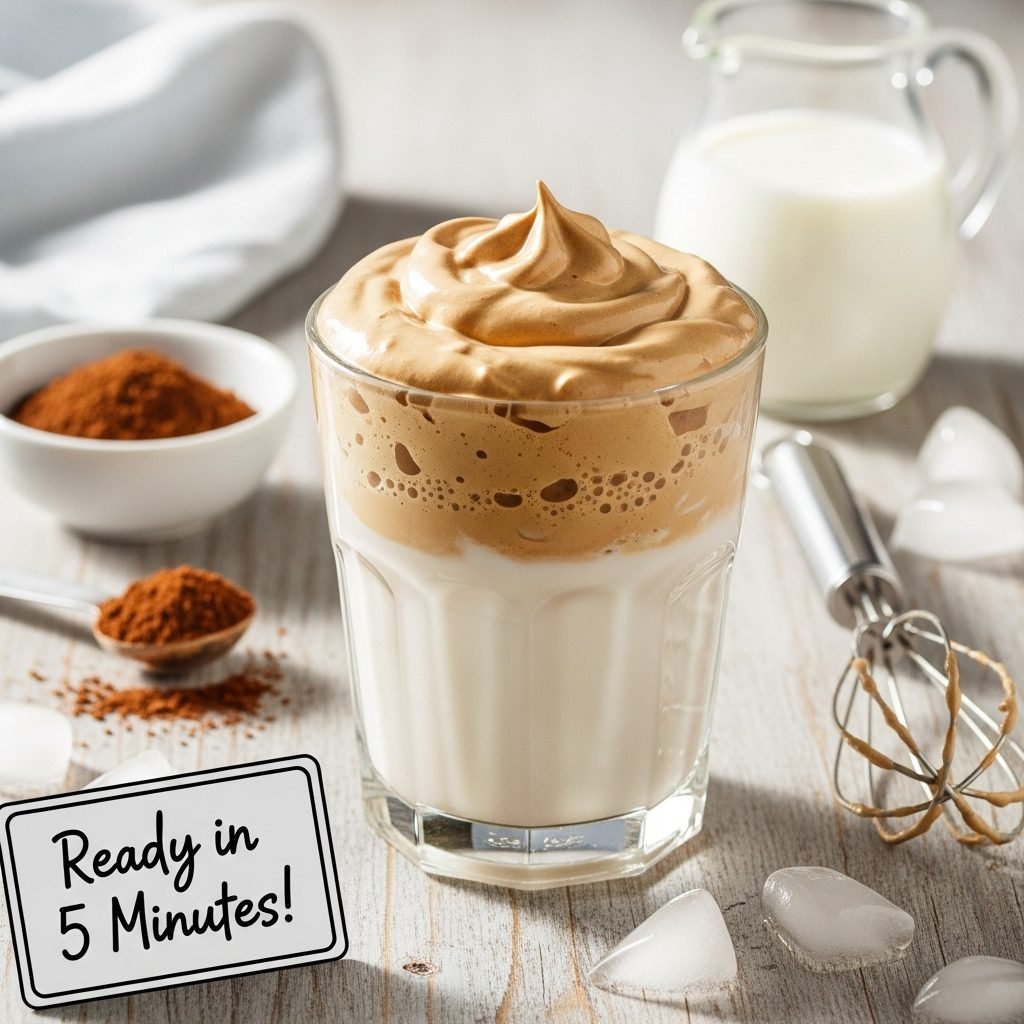
Easy Whipped Coffee Recipe (Fluffy, Creamy & Ready in 5 Minutes!)

If you haven’t yet experienced the pure magic of Whipped Coffee, you’re about to discover your new favorite coffee obsession! Also known as Dalgona Coffee (thanks to its viral fame), Whipped Coffee is that incredibly fluffy, cloud-like coffee foam that transforms a simple glass of milk into a café-worthy masterpiece. And the best part? It requires just three ingredients and takes only five minutes to make!
Whipped Coffee is made by vigorously whisking equal parts instant coffee, sugar, and hot water until the mixture transforms from a dark liquid into a thick, creamy, almost mousse-like foam. This luxurious coffee cloud is then spooned generously over cold or hot milk, creating those stunning layered drinks you’ve been seeing all over Instagram and Pinterest. When you stir it all together, you get the perfect balance of sweet, bitter, and creamy—it’s like a reverse latte that tastes even better than it looks.
This show-stopping beverage is perfect for weekend mornings when you want to treat yourself without leaving home, as an impressive coffee drink for brunch guests (they’ll think you’re a barista!), for afternoon pick-me-ups that feel special and indulgent, or simply when you want your daily coffee to be as beautiful as it is delicious. It became an absolute phenomenon during 2020, giving everyone stuck at home a fun, Instagram-worthy project that actually tasted incredible.
What makes Whipped Coffee truly special is that transformation moment—watching three humble ingredients whip up into voluminous, fluffy peaks is oddly satisfying and almost meditative. Plus, it’s completely customizable, works hot or iced, and requires zero fancy equipment. Just you, a whisk, and a little bit of elbow grease (or an electric mixer if you’re smart!).
History / Background
Whipped Coffee has one of the most fascinating origin stories because it’s both ancient and incredibly modern at the same time. While it exploded into global consciousness in 2020, the technique of whipping instant coffee has actually been practiced across multiple cultures for decades.
The method originated in South Asian countries, particularly India and Pakistan, where it’s been a traditional home preparation for generations. In India, it’s called “phenti hui coffee” or “beaten coffee”—a technique where instant coffee, sugar, and a tiny bit of water are vigorously beaten with a spoon or whisk until creamy and frothy, then added to hot or cold milk. This wasn’t a trendy café drink; it was simply how families made instant coffee taste more luxurious and café-like at home, especially in households where espresso machines weren’t common or affordable.
Pakistan has a nearly identical tradition called “phitti hui coffee,” and across South Asia, this whipped coffee technique has been passed down through families as a way to elevate the humble instant coffee experience. Grandmothers taught mothers, who taught daughters, creating a rich tradition of home coffee culture that predates modern café trends by decades.
Greece also has a long-standing tradition of whipped coffee called “frappé coffee,” invented in 1957 at the Thessaloniki International Fair. While slightly different in preparation (shaken rather than whisked), it shares the same principle of transforming instant coffee into something frothy and special.
So how did this traditional drink become “Dalgona Coffee” and go viral worldwide? In January 2020, Korean actor Jung Il-woo appeared on a Korean TV show where he tried whipped coffee while filming in Macau. He exclaimed that it tasted like “dalgona”—a popular Korean honeycomb toffee candy sold as street food. The name stuck, and when Korean YouTubers and TikTokers started sharing how to make it at home, the timing was absolutely perfect.
As COVID-19 lockdowns began in March 2020 and people around the world were stuck at home with limited café access, this simple, impressive coffee drink became the unofficial beverage of quarantine. The hashtag #dalgonacoffee exploded across TikTok, Instagram, and YouTube, accumulating billions of views. Suddenly, everyone from celebrities to college students to stay-at-home parents was whipping up coffee in their kitchens, sharing their creations, and finding joy in making something beautiful and delicious with just three ingredients.
What made it the perfect viral recipe? It required only basic pantry staples that most people had at home, needed no special equipment, was incredibly photogenic (perfect for social media), provided a satisfying, meditative activity during stressful times, and genuinely tasted amazing. People loved the magic of watching instant coffee transform into fluffy clouds through the simple act of whisking.
Today, Whipped Coffee represents a beautiful blend of cultural heritage and modern internet culture. It honors the South Asian, Greek, and other traditions that have been making whipped coffee for generations while bringing these techniques to a global audience. It’s a perfect example of how food traditions can be reimagined, renamed, and shared across cultures in our connected world.
Why You’ll Love This Recipe
This Whipped Coffee recipe is about to completely change your coffee game, and I’m so excited to share why! Not only does it look absolutely stunning (perfect for impressing literally anyone), but it tastes incredible—rich, sweet, intensely coffee-flavored, and surprisingly satisfying. You’ll feel like a professional barista created it, but you made it yourself in about five minutes with three ingredients.
Making Whipped Coffee at home means you get that expensive café experience for literal pennies, you control every aspect of the sweetness and strength, and honestly, the process of making it is therapeutic and oddly satisfying. There’s genuine magic in watching those three simple ingredients transform into something so beautiful and impressive.
Here’s why this recipe will become your new obsession:
- Only 3 Core Ingredients: Instant coffee, sugar, and hot water—that’s literally it! (Plus milk for serving)
- No Fancy Equipment: A bowl and whisk are all you need (hand mixer makes it even faster!)
- Incredibly Budget-Friendly: Costs about $0.50-0.75 per serving versus $6-8 for specialty café drinks
- Ready in 5 Minutes: From ingredients to first sip in just minutes
- Extremely Impressive: Looks like you spent way more time and effort than you actually did
- Highly Customizable: Adjust sweetness, make it hot or iced, add flavors, choose your milk
- No Coffee Machine Needed: Perfect for dorms, offices, small kitchens, or travel
- Still Instagram-Worthy: The viral moment may have passed, but the photos are still stunning
- Meditative & Satisfying: The whisking process is genuinely relaxing and stress-relieving
- Strong Coffee Kick: Intensely caffeinated and bold—perfect for serious coffee lovers
- Works Year-Round: Enjoy iced in summer, hot in winter
- Make-Ahead Friendly: Whip up multiple servings and store in the fridge for quick coffee all week
- Fun Activity: Great for making with kids, friends, or as a weekend ritual
Ingredient Notes
Let’s break down the three magical ingredients that create this fluffy coffee cloud, plus the milk that completes your drink.
Instant Coffee: This is your star ingredient and it MUST be instant coffee—regular ground coffee absolutely will not work! Instant coffee (also called instant coffee granules, crystals, or powder) dissolves completely in water, which is essential for creating that signature fluffy, whipped texture. The chemical structure of instant coffee, combined with mechanical action (whisking), creates an emulsion that traps air and forms stable foam. You can use any brand—Nescafé, Folgers, Maxwell House, Starbucks VIA, Café Bustelo instant—they all work! Instant espresso powder also works beautifully and creates a deeper, more intense flavor. For decaf lovers, instant decaf coffee works perfectly too. Quality matters for taste: if you typically don’t like instant coffee, invest in a better brand or instant espresso for this recipe—the flavor difference is noticeable! Store instant coffee in an airtight container in a cool, dry place to prevent clumping.
Granulated White Sugar: Regular white sugar is traditional and works perfectly. The sugar serves dual purposes: it adds sweetness AND provides crucial structure to the foam. The sugar helps stabilize the whipped mixture, allowing it to hold those beautiful peaks. You need the full amount for proper structure, so resist the urge to reduce it significantly during the whipping process (you can control final sweetness by how much whipped coffee you add to your milk). Substitution options: brown sugar works but creates darker color and slight molasses flavor, coconut sugar is a natural alternative (expect darker color and less sweetness), or use 1:1 sugar substitutes like Splenda, Swerve, or monk fruit sweetener (texture may vary slightly). Important: Do NOT use liquid sweeteners like honey, maple syrup, or agave—they won’t create the proper structure for whipping.
Hot Water: The water needs to be hot but not actively boiling. Hot tap water or water heated to about 160-180°F works perfectly. The hot temperature helps dissolve the coffee and sugar instantly and aids in creating the chemical reaction that makes the mixture whippable. Cold or room temperature water simply won’t work—you need that heat to begin the emulsification process. Some coffee enthusiasts add a tiny pinch of xanthan gum (about 1/16 teaspoon) to help stabilize the foam even more, but it’s completely optional!
Milk of Choice: This is what you pour your beautiful whipped coffee over. Whole milk creates the richest, creamiest, most indulgent drink, but truly any milk works wonderfully! Oat milk is trendy and naturally sweet with great body, almond milk keeps it light and low-calorie, coconut milk adds subtle tropical notes, cashew milk is luxuriously creamy, soy milk provides protein, or use any other dairy-free alternative for vegan versions. For maximum contrast between the dark whipped coffee and light milk (great for photos!), use white or light-colored milk. You can even use cold brew coffee or regular brewed coffee instead of milk for an ultra-caffeinated, intense version! The milk can be cold with ice (most popular, especially in warmer months) or heated and steamed (perfect for cozy winter mornings).
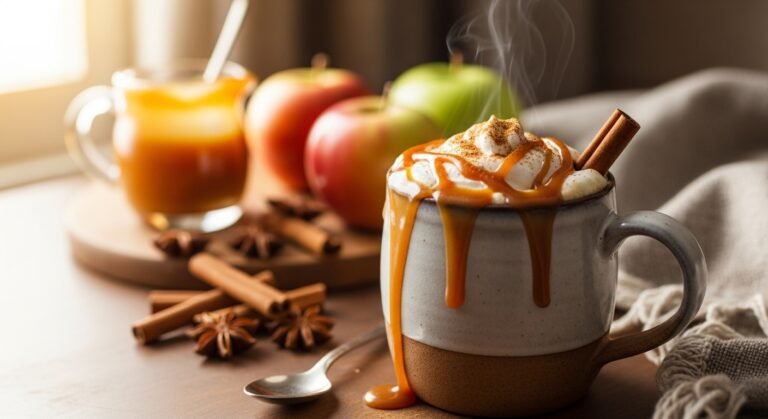
Optional Flavor Add-Ins: Vanilla extract (¼ teaspoon added to whipped coffee), cocoa powder (1 teaspoon for mocha version), ground cinnamon, pumpkin pie spice, or a pinch of sea salt on top for salted caramel vibes!
Equipment Needed
The absolute beauty of Whipped Coffee is its simplicity—you probably already have everything you need in your kitchen right now!
- Medium mixing bowl: For whisking your coffee mixture; medium size works best
- Whisk, hand mixer, or milk frother: Choose your tool! Hand whisk = arm workout + 3-5 minutes of whisking; hand mixer with whisk attachment = easiest and fastest at 1-2 minutes; milk frother works but takes 2-4 minutes
- Measuring spoons: Precise measurements matter for that perfect 1:1:1 ratio!
- Glass or mug: Clear glass shows off those gorgeous layers; 10-12 oz size is ideal
- Spoon: For dolloping the fluffy whipped coffee on top and stirring when you’re ready
- Optional: Stand mixer: If making large batches for multiple servings, this is hands-down the easiest method
- Optional: Jar with tight lid: For the shake method (requires 5-10 minutes of vigorous shaking but no equipment)
- Optional: Ice cube tray: If you want to freeze extra whipped coffee in portions
Print

Whipped Coffee Recipe
This viral Whipped Coffee (also known as Dalgona Coffee) features equal parts instant coffee, sugar, and hot water whipped into incredibly fluffy, cloud-like foam that’s generously spooned over cold or hot milk. It’s the café-quality drink that took the internet by storm—and once you taste it, you’ll understand why! Rich, sweet, beautifully layered, and surprisingly easy to make at home.
- Total Time: 5 minutes
- Yield: 1 serving (easily doubled, tripled, or quadrupled) 1x
Ingredients
ScaleFor the Whipped Coffee:
- 2 tablespoons instant coffee granules (or instant espresso powder)
- 2 tablespoons granulated white sugar
- 2 tablespoons hot water (about 160-180°F, not boiling)
For Serving:
- ¾ to 1 cup milk of your choice (cold or hot)
- Ice cubes (if serving cold)
- Optional: pinch of cocoa powder, cinnamon, or instant coffee for garnish
Instructions
- Combine the Trinity: In a medium mixing bowl, add exactly 2 tablespoons instant coffee, 2 tablespoons sugar, and 2 tablespoons hot water. These equal measurements are crucial—the 1:1:1 ratio is what creates that perfect whipped texture! The mixture will initially look dark, thin, and liquidy.
- Begin Whisking: Grab your tool of choice—hand whisk, hand mixer, or milk frother—and start whisking vigorously. If using a hand whisk, use quick, circular wrist movements (not big arm movements—you’ll tire fast!). If using a hand mixer, start on medium speed and gradually increase to medium-high. If using a milk frother, hold it at an angle and move it around the bowl.
- Watch the Magic: This is where the transformation happens! Within the first minute or two (with electric mixer) or 3-4 minutes (by hand), you’ll notice the mixture beginning to lighten in color, increase dramatically in volume, and thicken in consistency. Keep going! The color will gradually shift from dark espresso brown to a beautiful light caramel or tan shade.
- Achieve Stiff Peaks: Continue whisking until the mixture reaches the consistency of thick mousse, marshmallow fluff, or stiff meringue. You’ll know it’s ready when: the volume has tripled, the color is light tan/caramel, it holds stiff peaks when you lift the whisk (the peaks stand straight up without drooping), and the texture looks glossy and fluffy. Test by turning the bowl upside down (carefully!)—if properly whipped, it shouldn’t fall out. If it’s still droopy or liquidy, keep whisking!
- Prepare Your Milk Base: While your arm recovers (if whisking by hand!), fill your serving glass about ¾ full with milk. For iced version: add several ice cubes first, then pour cold milk. For hot version: heat milk until steaming (microwave for 60-90 seconds or heat on stovetop) and pour into your mug. Leave about 1-2 inches of space at the top for the whipped coffee.
- Dollop the Whipped Coffee: Using a spoon, generously scoop the fluffy whipped coffee on top of your milk. You can make it smooth and flat for a clean look, or create beautiful swirls, peaks, and dramatic height for that Instagram-perfect presentation. Use all of the whipped coffee for maximum impact, or save some in the fridge for another drink later!
- Garnish & Photograph: If desired, dust the top with a tiny pinch of cocoa powder, cinnamon, or instant coffee powder for visual interest and professional flair. Now comes the important part: admire your creation! Take a photo (you know you want to). The layered beauty is temporary, so capture it before stirring.
- Stir & Enjoy: When you’re ready to drink, use a long spoon to stir the whipped coffee down into the milk, combining everything together. The first sip should be sweet and rich—if it’s too sweet for your taste, use less whipped coffee next time or add more milk. Enjoy immediately while cold (or hot) and revel in your homemade café creation!
Notes
- 1:1:1 ratio is essential: Always use equal parts instant coffee, sugar, and water. This specific ratio creates the perfect texture. Don’t eyeball it—measure!
- Must use instant coffee: Regular ground coffee will NOT work. It must be instant coffee that dissolves completely in water.
- Whipping time varies: Hand whisking takes 3-5 minutes of vigorous effort; electric mixer takes 1-2 minutes; milk frother takes 2-4 minutes. Be patient and don’t stop too early!
- Adjust final sweetness: You can’t reduce sugar much during whipping (affects structure), but you can control sweetness by using less whipped coffee per drink or using unsweetened milk.
- Make it in batches: Easily double, triple, or quadruple the recipe. Store extra whipped coffee in an airtight container in the fridge for 3-4 days.
- Texture troubleshooting: If it won’t thicken, ensure you’re using instant coffee (not regular), hot water (not cold), and equal measurements. Keep whisking longer—it will eventually thicken!
- Leftovers are great: The whipped coffee mixture keeps in the fridge and can be used for several drinks throughout the week.
- Prep Time: 2 minutes
- Cook Time: 3 minutes (whipping time)
- Category: Beverage
- Method: Whisking
- Cuisine: Korean-Inspired / International Fusion
- Diet: Gluten Free
Nutrition
- Serving Size: 1 Whipped Coffee (made with whole milk)
- Calories: 175
- Sugar: 26g
- Sodium: 95mg
- Fat: 6g
- Saturated Fat: 3.5g
- Unsaturated Fat: 2g
- Trans Fat: 0g
- Carbohydrates: 28g
- Fiber: 0g
- Protein: 6g
- Cholesterol: 20mg
Granulated White Sugar: Regular white sugar is traditional and works perfectly. The sugar serves dual purposes: it adds sweetness AND provides crucial structure to the foam. The sugar helps stabilize the whipped mixture, allowing it to hold those beautiful peaks. You need the full amount for proper structure, so resist the urge to reduce it significantly during the whipping process (you can control final sweetness by how much whipped coffee you add to your milk). Substitution options: brown sugar works but creates darker color and slight molasses flavor, coconut sugar is a natural alternative (expect darker color and less sweetness), or use 1:1 sugar substitutes like Splenda, Swerve, or monk fruit sweetener (texture may vary slightly). Important: Do NOT use liquid sweeteners like honey, maple syrup, or agave—they won’t create the proper structure for whipping.
Hot Water: The water needs to be hot but not actively boiling. Hot tap water or water heated to about 160-180°F works perfectly. The hot temperature helps dissolve the coffee and sugar instantly and aids in creating the chemical reaction that makes the mixture whippable. Cold or room temperature water simply won’t work—you need that heat to begin the emulsification process. Some coffee enthusiasts add a tiny pinch of xanthan gum (about 1/16 teaspoon) to help stabilize the foam even more, but it’s completely optional!
Milk of Choice: This is what you pour your beautiful whipped coffee over. Whole milk creates the richest, creamiest, most indulgent drink, but truly any milk works wonderfully! Oat milk is trendy and naturally sweet with great body, almond milk keeps it light and low-calorie, coconut milk adds subtle tropical notes, cashew milk is luxuriously creamy, soy milk provides protein, or use any other dairy-free alternative for vegan versions. For maximum contrast between the dark whipped coffee and light milk (great for photos!), use white or light-colored milk. You can even use cold brew coffee or regular brewed coffee instead of milk for an ultra-caffeinated, intense version! The milk can be cold with ice (most popular, especially in warmer months) or heated and steamed (perfect for cozy winter mornings).
Optional Flavor Add-Ins: Vanilla extract (¼ teaspoon added to whipped coffee), cocoa powder (1 teaspoon for mocha version), ground cinnamon, pumpkin pie spice, or a pinch of sea salt on top for salted caramel vibes!
Equipment Needed
The absolute beauty of Whipped Coffee is its simplicity—you probably already have everything you need in your kitchen right now!
- Medium mixing bowl: For whisking your coffee mixture; medium size works best
- Whisk, hand mixer, or milk frother: Choose your tool! Hand whisk = arm workout + 3-5 minutes of whisking; hand mixer with whisk attachment = easiest and fastest at 1-2 minutes; milk frother works but takes 2-4 minutes
- Measuring spoons: Precise measurements matter for that perfect 1:1:1 ratio!
- Glass or mug: Clear glass shows off those gorgeous layers; 10-12 oz size is ideal
- Spoon: For dolloping the fluffy whipped coffee on top and stirring when you’re ready
- Optional: Stand mixer: If making large batches for multiple servings, this is hands-down the easiest method
- Optional: Jar with tight lid: For the shake method (requires 5-10 minutes of vigorous shaking but no equipment)
- Optional: Ice cube tray: If you want to freeze extra whipped coffee in portions
📋 Recipe Card
Prep Time: 2 minutes
Cook Time: 3 minutes (whipping time)
Total Time: 5 minutes
Yield: 1 serving (easily doubled, tripled, or quadrupled)
Category: Beverage
Method: Whisking
Cuisine: Korean-Inspired / International Fusion
Diet: Vegetarian, Gluten-Free, Can be VeganDescription
This viral Whipped Coffee (also known as Dalgona Coffee) features equal parts instant coffee, sugar, and hot water whipped into incredibly fluffy, cloud-like foam that’s generously spooned over cold or hot milk. It’s the café-quality drink that took the internet by storm—and once you taste it, you’ll understand why! Rich, sweet, beautifully layered, and surprisingly easy to make at home.
Ingredients
For the Whipped Coffee:
- 2 tablespoons instant coffee granules (or instant espresso powder)
- 2 tablespoons granulated white sugar
- 2 tablespoons hot water (about 160-180°F, not boiling)
For Serving:
- ¾ to 1 cup milk of your choice (cold or hot)
- Ice cubes (if serving cold)
- Optional: pinch of cocoa powder, cinnamon, or instant coffee for garnish
Instructions
- Combine the Trinity: In a medium mixing bowl, add exactly 2 tablespoons instant coffee, 2 tablespoons sugar, and 2 tablespoons hot water. These equal measurements are crucial—the 1:1:1 ratio is what creates that perfect whipped texture! The mixture will initially look dark, thin, and liquidy.
- Begin Whisking: Grab your tool of choice—hand whisk, hand mixer, or milk frother—and start whisking vigorously. If using a hand whisk, use quick, circular wrist movements (not big arm movements—you’ll tire fast!). If using a hand mixer, start on medium speed and gradually increase to medium-high. If using a milk frother, hold it at an angle and move it around the bowl.
- Watch the Magic: This is where the transformation happens! Within the first minute or two (with electric mixer) or 3-4 minutes (by hand), you’ll notice the mixture beginning to lighten in color, increase dramatically in volume, and thicken in consistency. Keep going! The color will gradually shift from dark espresso brown to a beautiful light caramel or tan shade.
- Achieve Stiff Peaks: Continue whisking until the mixture reaches the consistency of thick mousse, marshmallow fluff, or stiff meringue. You’ll know it’s ready when: the volume has tripled, the color is light tan/caramel, it holds stiff peaks when you lift the whisk (the peaks stand straight up without drooping), and the texture looks glossy and fluffy. Test by turning the bowl upside down (carefully!)—if properly whipped, it shouldn’t fall out. If it’s still droopy or liquidy, keep whisking!
- Prepare Your Milk Base: While your arm recovers (if whisking by hand!), fill your serving glass about ¾ full with milk. For iced version: add several ice cubes first, then pour cold milk. For hot version: heat milk until steaming (microwave for 60-90 seconds or heat on stovetop) and pour into your mug. Leave about 1-2 inches of space at the top for the whipped coffee.
- Dollop the Whipped Coffee: Using a spoon, generously scoop the fluffy whipped coffee on top of your milk. You can make it smooth and flat for a clean look, or create beautiful swirls, peaks, and dramatic height for that Instagram-perfect presentation. Use all of the whipped coffee for maximum impact, or save some in the fridge for another drink later!
- Garnish & Photograph: If desired, dust the top with a tiny pinch of cocoa powder, cinnamon, or instant coffee powder for visual interest and professional flair. Now comes the important part: admire your creation! Take a photo (you know you want to). The layered beauty is temporary, so capture it before stirring.
- Stir & Enjoy: When you’re ready to drink, use a long spoon to stir the whipped coffee down into the milk, combining everything together. The first sip should be sweet and rich—if it’s too sweet for your taste, use less whipped coffee next time or add more milk. Enjoy immediately while cold (or hot) and revel in your homemade café creation!
Notes
- 1:1:1 ratio is essential: Always use equal parts instant coffee, sugar, and water. This specific ratio creates the perfect texture. Don’t eyeball it—measure!
- Must use instant coffee: Regular ground coffee will NOT work. It must be instant coffee that dissolves completely in water.
- Whipping time varies: Hand whisking takes 3-5 minutes of vigorous effort; electric mixer takes 1-2 minutes; milk frother takes 2-4 minutes. Be patient and don’t stop too early!
- Adjust final sweetness: You can’t reduce sugar much during whipping (affects structure), but you can control sweetness by using less whipped coffee per drink or using unsweetened milk.
- Make it in batches: Easily double, triple, or quadruple the recipe. Store extra whipped coffee in an airtight container in the fridge for 3-4 days.
- Texture troubleshooting: If it won’t thicken, ensure you’re using instant coffee (not regular), hot water (not cold), and equal measurements. Keep whisking longer—it will eventually thicken!
- Leftovers are great: The whipped coffee mixture keeps in the fridge and can be used for several drinks throughout the week.
Nutrition Facts
Serving Size: 1 Whipped Coffee (made with whole milk)
Calories: 175
Sugar: 26g
Sodium: 95mg
Fat: 6g
Saturated Fat: 3.5g
Unsaturated Fat: 2g
Trans Fat: 0g
Carbohydrates: 28g
Fiber: 0g
Protein: 6g
Cholesterol: 20mgNote: Nutrition facts vary based on milk type used. Values shown are for whole dairy milk. Using unsweetened almond milk reduces calories to approximately 110 per serving. The whipped coffee portion alone (without milk) contains about 90 calories.
Tips & Variations
Customize Your Perfect Whipped Coffee:
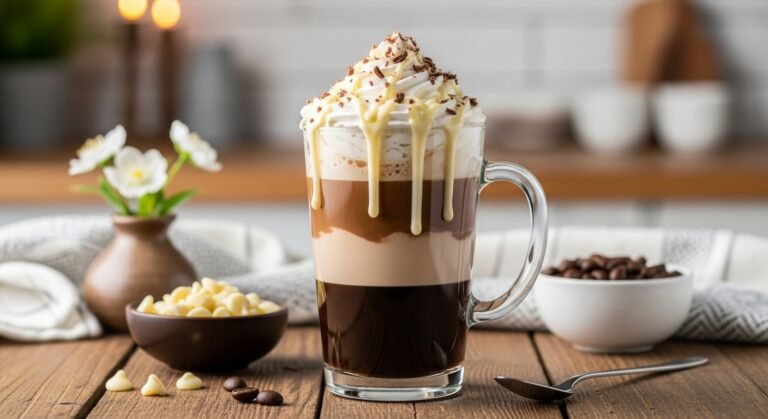
- Mocha Whipped Coffee: Add 1-2 teaspoons unsweetened cocoa powder to the coffee mixture before whipping for a chocolate version. Rich and decadent!
- Vanilla Whipped Coffee: Stir ¼ teaspoon pure vanilla extract into the whipped coffee after it reaches stiff peaks for subtle vanilla notes.
- Cinnamon Sugar Whipped Coffee: Add ¼ teaspoon ground cinnamon to the mixture before whipping, or dust cinnamon on top for warm spice vibes.
- Pumpkin Spice Whipped Coffee: Add ¼ teaspoon pumpkin pie spice to create the ultimate fall coffee drink.
- Salted Caramel Whipped Coffee: Top the finished drink with a tiny pinch of flaky sea salt for that trendy salted caramel effect.
- Matcha Whipped Drink: Replace instant coffee with matcha powder (use warm milk instead of water for better results) for a green tea version.
- Hot Whipped Coffee: Make everything the same but spoon the fluffy coffee over hot steamed milk instead of cold. Perfect for chilly mornings!
- Whipped Coffee Float: Dollop the whipped coffee over vanilla ice cream for an affogato-style dessert. Mind-blowing!
- Coconut Whipped Coffee: Use coconut milk and add a tiny splash of coconut extract for tropical paradise vibes.
- Protein-Packed Version: Stir a scoop of vanilla or unflavored protein powder into your milk before adding whipped coffee for a post-workout treat.
- Adult Whipped Coffee: Add a shot of Kahlúa, Baileys, or your favorite liqueur to the milk for an boozy version.
- Lower Sugar Version: Use a 1:1 sugar substitute and unsweetened plant milk to reduce overall sugar content.
- Whipped Coffee Latte Art: Practice making designs and patterns with your whipped coffee on top—hearts, swirls, geometric shapes!
Pro Chef Tips
Professional Secrets for Perfect Whipped Coffee Every Time:
- Temperature Is Key for Speed: While hot water is necessary, water that’s actively boiling can actually slow down the whipping process by making the mixture too thin initially. The sweet spot is 160-180°F—hot enough to dissolve coffee and sugar instantly, but not so scalding hot that it thins everything out excessively. If you accidentally use boiling water and your mixture seems liquidy, don’t worry—just keep whisking and it will thicken as it cools slightly.
- Understanding Stiff Peaks: You’re creating an emulsion where mechanical action (whisking) incorporates thousands of tiny air bubbles while the dissolved coffee and sugar create structure that traps those bubbles. The instant coffee contains natural stabilizers and emulsifiers that make this possible. Keep whisking until the mixture is so thick that when you lift your whisk, it forms peaks that stand completely upright without drooping or collapsing. Under-whipped coffee will dissolve into your milk quickly instead of sitting on top in beautiful layers.
- Bowl Size Matters: Use a medium-sized bowl (about 4-6 cup capacity), not too large or too small. A bowl that’s too big means the mixture spreads out too thin and takes longer to whip because your whisk can’t work as efficiently. A bowl that’s too small gets messy as the volume triples and threatens to overflow. The right-sized bowl makes whisking easier and faster.
- The Hand-Whisk Technique: If whisking manually, technique matters! Use your wrist, not your entire arm—quick, rapid, circular motions with your wrist joint are exponentially more efficient and less exhausting than big sweeping arm movements. Think of it like whisking eggs or whipping cream: fast, focused, wrist-driven movements. Switch hands when one gets tired! This is genuinely an arm workout, but it’s also oddly meditative once you find your rhythm. Some people put on music and whisk to the beat!
- Quality Instant Coffee = Better Flavor: While any instant coffee will create the proper texture, higher quality instant coffee makes the flavor noticeably better. Instant espresso (brands like Medaglia d’Oro, Café Bustelo instant, or Illy instant espresso) provides richer, deeper, more complex flavor than basic grocery store instant coffee. Specialty instant coffees like Starbucks VIA or Swift Cup Coffee taste significantly better. If you’re not typically a fan of instant coffee, investing in a premium brand for this recipe makes a real difference in enjoyment.
- Photogenic Presentation Tips: For maximum Instagram/Pinterest appeal, use a clear glass to show off layers, fill with mostly milk and minimal ice (too much ice crowds the glass visually), dollop the whipped coffee generously on top with dramatic peaks and swirls, shoot in natural window light (avoid overhead artificial lighting), and photograph immediately—the whipped coffee starts settling and incorporating into the milk within 5-10 minutes. The golden hour (morning or late afternoon sun) creates the most beautiful, warm glow.
- Storage for Meal Prep: If making extra whipped coffee to store in the refrigerator, whip it to an even thicker consistency than you would for immediate use—almost stiff enough to seem “overwhipped.” As it sits in the fridge over several days, it naturally relaxes and thins out slightly. Stored properly in an airtight container, it keeps for 3-5 days and just needs a quick stir before dolloping over milk.
Common Mistakes to Avoid
- Using Regular Ground Coffee Instead of Instant: This is far and away the #1 mistake! Regular coffee grounds will NOT dissolve or emulsify—you’ll end up with gritty, grainy, sandy coffee that won’t whip no matter how long you try. It must be instant coffee (the kind that dissolves completely in water to make coffee). Instant espresso powder works great too. If you only have regular ground coffee at home, you cannot make authentic Whipped Coffee—save this recipe for when you can purchase instant coffee!
- Stopping the Whisking Too Soon: The most common reason for “failure” is giving up before reaching stiff peaks! The mixture needs to be whipped until very thick, very pale (light tan/caramel color), and able to hold dramatic peaks that stand straight up. If it’s still dark brown and somewhat liquidy, keep going! With a hand whisk, this genuinely requires 3-5 solid minutes of vigorous whisking—it’s a workout. With an electric mixer, it takes at minimum 1-2 full minutes. If you stop too early, the coffee will dissolve into your milk instead of floating on top in pretty layers.
- Changing the Sacred 1:1:1 Ratio: The equal parts ratio (instant coffee : sugar : hot water) is scientifically important for creating the proper chemical reaction and texture. Don’t eyeball measurements—use actual measuring spoons! If you significantly reduce sugar, the mixture won’t stabilize and whip properly because sugar provides essential structure. If you add too much water, it becomes too liquidy to whip. If you use too little water, it’s too thick and paste-like to whip. Equal ratios are crucial, especially when you’re learning!
- Using Cold or Room Temperature Water: Cold water won’t dissolve the coffee and sugar quickly enough, and the mixture won’t emulsify properly to create foam. You absolutely need hot water (ideally 160-180°F) to dissolve everything instantly and create the conditions for the mixture to whip up fluffy. Room temperature or lukewarm water simply doesn’t work—the chemistry requires heat.
- Giving Up on Hand Whisking: If you’re whisking by hand and your arm gets tired after just a minute, don’t quit! Switch to your other hand and power through. It genuinely takes 3-5 minutes of consistent, vigorous whisking to reach stiff peaks manually. Put on an upbeat song, get into a rhythm, and embrace the workout. Or invite a friend over and take turns—it can actually be a fun, social activity! Many people find the repetitive motion meditative and stress-relieving once they settle into it. The arm workout is absolutely worth it when those fluffy peaks finally form!
Storage & Meal Prep
Storing Your Whipped Coffee:
- Whipped Coffee Mixture: Here’s the great news—you can absolutely make the whipped coffee portion ahead of time! Store it in an airtight container in the refrigerator for 3-5 days (some people report up to a week with no issues). It will thicken slightly as it chills, which is perfectly fine—just give it a gentle stir before using. This makes Whipped Coffee incredibly convenient for busy mornings!
- Assembled Drinks: Once you’ve added the whipped coffee to milk, the drink is best consumed within 15-30 minutes while the layers are still distinct and beautiful. You can refrigerate an assembled drink for a few hours if needed, but it won’t have that Instagram-worthy layered appearance anymore—the whipped coffee will have started incorporating into the milk.
- Extending Shelf Life: The whipped coffee mixture can last up to a week in the fridge if stored properly in a very clean, airtight container (preferably glass). The top layer might oxidize slightly and darken, but you can just stir it back in—it’s completely fine to use. Make sure no water or milk gets into your stored whipped coffee, as this can cause it to break down faster.
- Freezing: You CAN freeze whipped coffee, though it’s not ideal. The texture changes slightly upon thawing and may become a bit grainy. If you do freeze it, use within 1 month, thaw in the refrigerator overnight, then whisk it again briefly before using to restore some of the fluffy texture.
Smart Batch Prep Strategy:
The most efficient approach is making a large batch (multiply the recipe by 4-6x) once or twice a week. Whip until very thick and fluffy, transfer to an airtight container, and refrigerate. Each morning, simply scoop 2-3 generous tablespoons over your milk. This cuts your daily prep time to literally 30 seconds while still giving you that fancy café experience!
Make-Ahead & Freezer Notes
Strategic Preparation Methods:
- Whip in Bulk Advance: The absolute best make-ahead strategy is whipping a large batch and refrigerating it. Multiply the recipe by 4-6x (so: 8-12 tablespoons instant coffee, 8-12 tablespoons sugar, 8-12 tablespoons hot water), whip until very thick and stiff, then store in an airtight container in the fridge. Each morning, scoop out 2-3 tablespoons per serving. Keeps perfectly for 3-5 days, sometimes longer.
- Individual Portion Prep: Divide your whipped coffee into individual servings using an ice cube tray, small containers, or mini mason jars. Each “cube” or container equals one serving (about 2-3 tablespoons). Pop one out each morning, let it come to room temperature for a minute (or use straight from fridge—still works!), and dollop over milk.
- Dry Ingredient Pre-Mix: While not as time-saving, you can pre-measure the instant coffee and sugar together in small containers or zip-top bags (2 tablespoons coffee + 2 tablespoons sugar per serving). When ready, just add hot water and whisk. Saves maybe 30-60 seconds of measuring time.
- Freeze for Longer Storage: Freezing is possible but comes with texture trade-offs. Place whipped coffee in an airtight, freezer-safe container, freeze for up to 1 month maximum. Thaw overnight in the refrigerator, then give it a quick whisk to restore some fluffiness. The texture will be slightly less smooth and more grainy, but it’s still usable if you need long-term storage.
Best Make-Ahead Method:
Make a big batch (6x the recipe) on Sunday evening. Store in a nice glass jar or container in the refrigerator. Every morning, spoon your desired amount over cold milk and ice. Literally takes 20-30 seconds and you have an impressive, café-quality coffee drink! The preparation itself can remain part of your mindful morning ritual without being time-consuming.
Serving Suggestions
Whipped Coffee is a complete, satisfying drink on its own, but here’s how to create a full café experience at home:
Perfect Food Pairings:
- Breakfast: Serve alongside avocado toast, buttery croissants, bagels with cream cheese, breakfast sandwiches, or egg dishes
- Brunch Spread: Pair with quiche, fruit platters, yogurt parfaits, Belgian waffles, French toast, or eggs Benedict
- Sweet Treats: Enjoy with biscotti (perfect for dipping!), shortbread cookies, banana bread, blueberry muffins, coffee cake, scones, or cinnamon rolls
- Korean-Inspired: Honor the “Dalgona” name by serving with Korean street toast, egg bread, or sweet red bean pastries
- Light Snacks: Pair with granola bars, energy balls, protein balls, mixed nuts, or dark chocolate
Occasion Ideas:
- Weekend Morning Ritual: Make Whipped Coffee part of your leisurely Saturday or Sunday morning routine
- Work-From-Home Coffee Break: A mid-morning or afternoon treat when working remotely
- Virtual Coffee Dates: Make it together over video call with long-distance friends or family
- Brunch Entertaining: Impressive but effortless coffee drink that wows guests
- Study Sessions: Highly caffeinated and fun to make during study breaks
- Afternoon Energy Boost: That 3pm pick-me-up that feels special and indulgent
- Sunday Meal Prep: Batch-make for easy fancy coffee all week long
Create a Whipped Coffee Bar (For Parties!):
Set up a DIY station for gatherings:
- Large batch of pre-whipped coffee in a pretty bowl
- Various milk options (dairy, oat, almond, coconut)
- Toppings bar: cocoa powder, cinnamon, chocolate shavings, whipped cream, caramel sauce
- Mix-ins: vanilla syrup, hazelnut syrup, chocolate syrup, caramel sauce
- Let guests customize their perfect Whipped Coffee creation!
FAQs Section
Q: Can I make Whipped Coffee without instant coffee?
A: Unfortunately, no—instant coffee is absolutely essential and non-negotiable. The instant coffee contains specific stabilizers, emulsifiers, and a chemical structure that allows it to emulsify and trap air when whisked, creating that signature fluffy foam. Regular ground coffee (even finely ground) will not dissolve or emulsify—you’ll just have gritty, grainy coffee grounds suspended in liquid that won’t whip no matter how long you try. If you don’t currently have instant coffee, you’ll need to purchase some specifically for this recipe. Instant espresso powder works as a great substitute!
Q: Why won’t my Whipped Coffee whip up and thicken? It’s staying liquidy!
A: This frustrating problem usually has one of four causes: (1) You’re not using instant coffee—it MUST be instant coffee that dissolves completely, not regular ground coffee; (2) You haven’t whisked long enough—it genuinely takes 3-5 full minutes of vigorous hand whisking or 1-2 minutes with an electric mixer, and the transformation often happens suddenly; (3) Your ingredient measurements aren’t equal—you need exactly equal parts coffee, sugar, and hot water (use measuring spoons, don’t eyeball!); or (4) You used cold or lukewarm water instead of hot water. Check all these factors and keep whisking—it will eventually thicken! Sometimes it just needs more time and elbow grease than expected.
Q: Can I reduce the sugar? It seems like so much!
A: The sugar serves two purposes: sweetness AND structure. You need most of it for the foam to form and stabilize properly—it’s not just for taste. However, you have options: You can reduce it slightly (try 1.5 tablespoons instead of 2), though the foam may not be quite as stable. Better solutions: use a 1:1 sugar substitute like Splenda, Swerve, or monk fruit sweetener (texture may vary slightly); use unsweetened or lightly sweetened milk to reduce overall drink sweetness; or use less whipped coffee per drink (2 tablespoons instead of all of it) so each serving has less sugar. Remember, you’re mixing it into a full cup of milk, which dilutes the sweetness significantly!
Q: How long does the whipped coffee mixture last in the refrigerator?
A: Stored properly in an airtight container, the whipped coffee mixture keeps beautifully for 3-5 days in the refrigerator—some people report it lasting up to a week with no issues! It will thicken slightly as it chills, which is perfectly normal and actually desirable. The top layer might darken a bit from oxidation, but just give it a quick stir before using and it’s perfectly fine. This is why batch-making is so popular—whip up a large amount on Sunday and have instant fancy coffee all week long! The texture and flavor remain excellent throughout the storage period.
Q: Can I make hot Whipped Coffee instead of iced?
A: Absolutely! Whipped Coffee is equally delicious served hot, especially during fall and winter months. Simply prepare the whipped coffee exactly the same way, then dollop it generously over hot steamed milk (instead of cold milk with ice). The whipped coffee will start melting and incorporating into the hot milk faster than it does in cold milk, so serve and enjoy it relatively quickly while it still has that beautiful layered appearance. Some people actually prefer it hot because the warmth helps the flavors blend more seamlessly. It’s like a fancy, fluffy cappuccino!
Q: Is Whipped Coffee stronger/more caffeinated than regular coffee?
A: Yes, significantly! The standard recipe uses 2 tablespoons of instant coffee, which contains approximately 120-140mg of caffeine—equivalent to about 2 shots of espresso or 1.5 cups of regular brewed coffee. That’s a substantial caffeine kick! If you’re sensitive to caffeine, jittery easily, or making it in the afternoon/evening, consider these adjustments: make a smaller batch using 1 tablespoon each of coffee, sugar, and water; use decaf instant coffee (works perfectly and tastes great!); or use less of the whipped coffee per drink (2 tablespoons instead of the full amount). The intensity varies based on how much whipped coffee you use per serving.
Q: Can I make Whipped Coffee without any equipment—just by shaking?
A: Yes, though it requires serious dedication! If you don’t have a whisk or electric mixer, put your instant coffee, sugar, and hot water in a jar or bottle with a very tight-sealing lid. Let the hot water cool for 1-2 minutes (so the container isn’t too hot to hold comfortably), seal the lid tightly, then shake vigorously and continuously for 5-10 minutes. Yes, your arm will get tired—switch arms as needed! The shaking method works because you’re still incorporating air through mechanical action. It takes longer than whisking but requires zero equipment. Make sure your lid is on VERY tight to avoid messy disasters!
Q: Why is it called “Dalgona” Coffee? What does that mean?
A: The drink got its viral name from Korean actor Jung Il-woo, who appeared on a Korean TV show in early 2020 after trying whipped coffee while filming in Macau. He exclaimed that it tasted like “dalgona”—a beloved Korean honeycomb toffee candy that’s popular as street food throughout Korea. The candy has a similar caramel color and sweet taste to the whipped coffee. When Korean content creators shared the recipe on YouTube and TikTok using this catchy name, it stuck and spread globally. Interestingly, this whipped coffee technique has existed in various cultures (Indian “beaten coffee,” Pakistani “phitti hui coffee,” Greek “frappé”) for decades, but it gained its current name and worldwide fame through Korean pop culture during the 2020 pandemic!
Q: Can kids drink Whipped Coffee, or is it too strong?
A: Traditional Whipped Coffee contains a significant amount of caffeine (equivalent to 2 shots of espresso), which is generally too much for children. However, you can easily make kid-friendly versions: Use decaf instant coffee so they can enjoy the fun experience without the caffeine; make a “whipped hot chocolate” using 2 tablespoons cocoa powder, 2 tablespoons sugar, and 2 tablespoons hot milk (instead of water)—it whips up similarly and tastes amazing; or let them help with the whisking process (great activity!) but limit how much they actually drink. The preparation can be a fun kitchen activity for kids even if they don’t consume the full caffeinated version!
Conclusion
And there you have it—your complete, comprehensive guide to making the Whipped Coffee that absolutely took the world by storm! This isn’t just another fleeting food trend that disappeared; it’s a genuinely delicious, fun-to-make, impressive drink that deserves a permanent place in your coffee repertoire. The fact that you can create something so spectacular, café-worthy, and Instagram-beautiful with just three basic pantry ingredients never stops being amazing.
The real magic of Whipped Coffee goes beyond the fluffy peaks or the stunning presentation—it’s about the experience. There’s something deeply satisfying about the transformation process, watching those three simple ingredients whip up into voluminous clouds right before your eyes. The rhythmic whisking can be meditative and stress-relieving, a few minutes of focused activity in our chaotic, distracted world. And when you finally dollop that glossy, fluffy coffee cloud over your milk and see those beautiful layers form, you can’t help but feel proud and a little bit fancy!
Remember the essential keys to success: the 1:1:1 ratio is sacred (equal parts instant coffee, sugar, and hot water), instant coffee is absolutely non-negotiable (regular coffee won’t work), whisk until stiff peaks form (don’t stop too early—keep going until it’s thick and pale!), and hot water is crucial for the chemistry to work. Whether you’re channeling your inner arm strength with a hand whisk or taking the easy route with an electric mixer, you’re just five minutes away from café-quality coffee at home!
Now it’s your turn to whip up some magic! I’d genuinely love to hear how your Whipped Coffee adventure goes. Did you whisk by hand or use a mixer? What milk did you choose? Has it become part of your morning routine, or is it a special weekend treat? Did you try any of the fun variations? Drop a comment below and share your experience—I read every single one and love hearing from you! And if you successfully created those gorgeous fluffy peaks and impressed yourself (or anyone else), please pin this recipe to your favorite Pinterest board so your friends and followers can discover the joy of Whipped Coffee too. Your shares genuinely help build our community and spread the coffee love!
Here’s to fluffy peaks, beautiful layers, strong coffee kicks, and drinks that are as fun to make as they are to drink. May your whisking be vigorous, your peaks be stiff, and your coffee always be Instagram-worthy! Happy whipping, coffee lovers! ☕✨💪