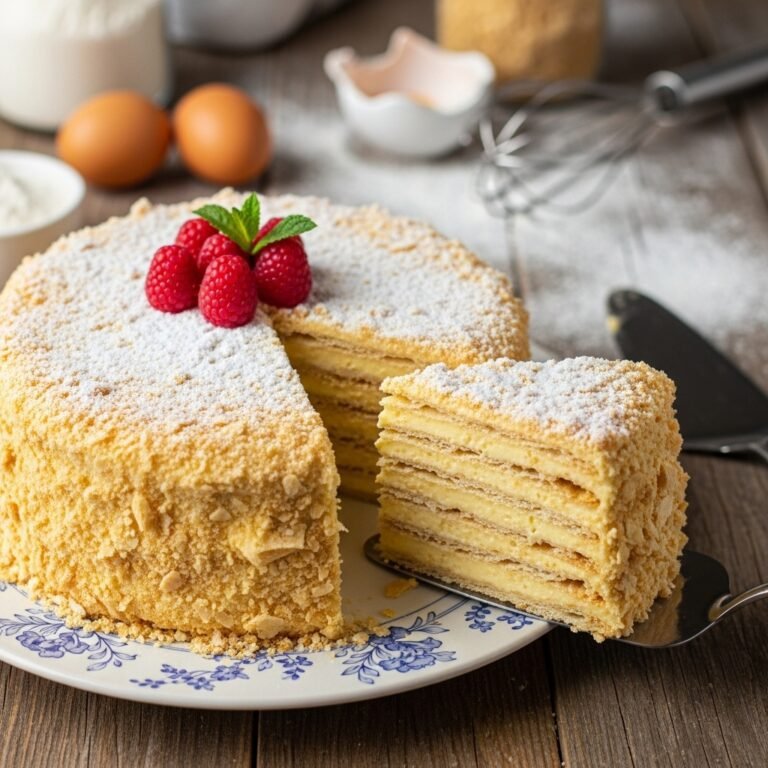
Classic Victoria Sponge Cake (Easy British Layer Cake Recipe)
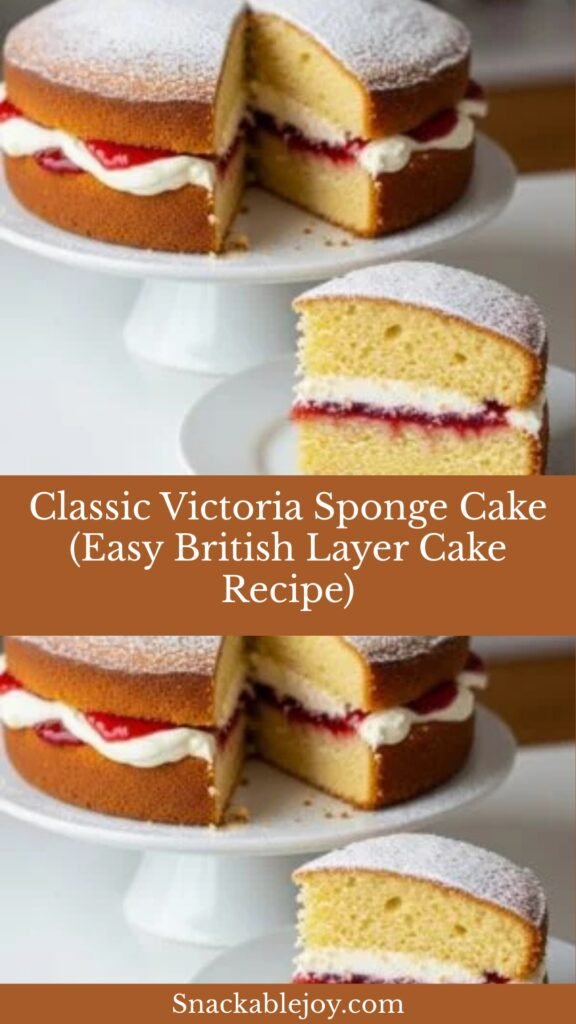
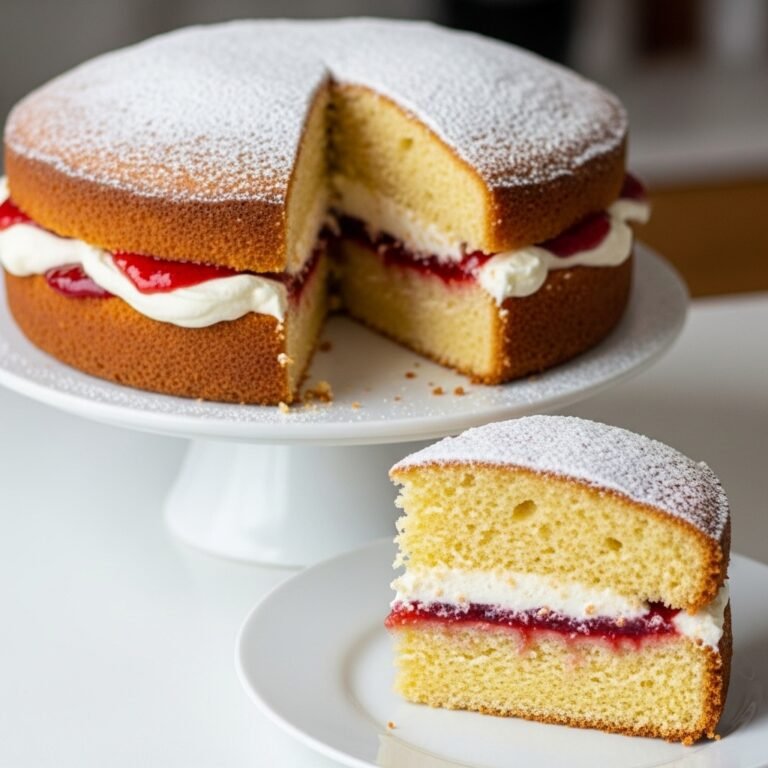
The Victoria Sponge Cake is the quintessential British tea time treat that’s been delighting cake lovers for over 150 years! This elegant yet wonderfully simple layer cake features two perfectly light and fluffy sponge cakes sandwiched together with sweet raspberry jam and luxurious whipped cream or buttercream. A delicate dusting of powdered sugar on top provides the perfect finishing touch to this timeless classic.
What makes the Victoria Sponge so special is its beautiful simplicity—there are no fancy decorations or complicated techniques required, yet it manages to look absolutely stunning on any dessert table. The cake itself is tender and buttery with a fine, even crumb, while the jam adds a fruity sweetness that perfectly complements the rich cream filling. It’s the kind of cake that feels both special enough for celebrations and comforting enough for an everyday afternoon tea.
This beloved cake is perfect for so many occasions: garden parties, baby showers, birthday celebrations, afternoon tea with friends, or simply as a weekend baking project with the family. It’s also wonderfully forgiving for beginner bakers—if you can cream butter and sugar together and fold in flour, you can absolutely master this British classic!
History / Background
The Victoria Sponge Cake has a truly royal pedigree! This iconic cake is named after Queen Victoria of England, who reigned from 1837 to 1901. The story goes that Queen Victoria was particularly fond of enjoying a slice of sponge cake with her afternoon tea, which was a fashionable ritual during the Victorian era. The tradition of afternoon tea itself was popularized by Anna, the Duchess of Bedford, one of Queen Victoria’s ladies-in-waiting, who started requesting tea and light refreshments in the late afternoon to ward off hunger between lunch and dinner.
The original Victoria Sponge was a simpler affair than what we often see today—it traditionally consisted of two sponge cake layers filled with just raspberry jam and perhaps a dusting of caster sugar on top. The addition of cream or buttercream filling came later and has become equally traditional in modern interpretations. The cake was revolutionary for its time because it showcased the newly available baking powder, which allowed home bakers to create lighter, airier cakes without the need for yeast or extensive beating of eggs.
During the Victorian era, having a beautifully presented Victoria Sponge at your tea table was a sign of sophistication and good taste. The cake’s popularity spread throughout Britain and eventually around the world, becoming one of the most recognizable symbols of British baking culture. It’s even featured prominently in “The Great British Bake Off,” where contestants are often challenged to create the perfect Victoria Sponge—a testament to its enduring importance in British culinary tradition.
Interestingly, the Victoria Sponge is so beloved in the UK that it has its own official guidelines from organizations like the Women’s Institute, which hosts baking competitions with strict rules about what constitutes an authentic Victoria Sponge. Traditional purists insist it must be made with equal weights of butter, sugar, eggs, and flour (known as the “four quarters” or “pound cake” method), filled with raspberry jam, and dusted with sugar—no fancy frostings or elaborate decorations allowed!
Why You’ll Love This Recipe
This Victoria Sponge recipe is my absolute favorite version to make at home, and I’ve spent years perfecting it to ensure it works beautifully every single time. I’ve tested countless variations and tweaked the technique to make it as foolproof as possible for home bakers, while still delivering that perfect, tender crumb and delicate flavor that makes this cake so special.
Here’s why this recipe is absolutely worth baking:
- Beginner-Friendly: Uses the simple creaming method with straightforward steps that anyone can follow successfully
- Minimal Ingredients: Made with basic pantry staples you probably already have—no specialty items required
- Light and Fluffy Texture: The perfect balance of tender and sturdy, with a fine, even crumb that slices beautifully
- Not Overly Sweet: The cake itself is delicately sweet, letting the jam and cream filling shine without being cloying
- Quick to Make: From start to finish, you can have this gorgeous cake ready in under an hour
- Impressive Presentation: Looks like you spent hours on it, but it’s actually incredibly simple to assemble
- Versatile Flavor Options: While traditional raspberry jam is classic, you can customize with different jams and fillings
- Perfect Portion Control: Cuts into neat, elegant slices that are just the right size for tea time
- Budget-Friendly: Makes a stunning cake without expensive ingredients or special equipment
- Crowd-Pleaser: I’ve never met anyone who doesn’t love a good Victoria Sponge—it appeals to all ages and tastes
- Makes Your Home Smell Amazing: The buttery, vanilla aroma while it’s baking is absolutely heavenly
Ingredient Notes
Understanding your ingredients is essential for Victoria Sponge success! Here’s what you need and why each component matters:
For the Sponge Cake:
- Unsalted Butter (Softened): The foundation of flavor and texture. It must be at true room temperature—soft enough to leave an indent when pressed, but not greasy or melted. European-style butter with higher fat content creates an even richer cake, but regular unsalted butter works beautifully. Don’t use margarine—the flavor and texture won’t be the same.
- Caster Sugar (Superfine Sugar): Traditional Victoria Sponges use caster sugar because the finer crystals dissolve more easily during creaming, creating a lighter texture. If you only have granulated sugar, pulse it in a food processor for 30 seconds to make your own caster sugar, or use it as-is with slightly longer creaming time.
- Large Eggs (Room Temperature): Eggs provide structure, moisture, and richness. Room temperature eggs incorporate much more smoothly into the batter without curdling the butter. Set them out 30 minutes before baking, or place them in a bowl of warm water for 5 minutes.
- Self-Rising Flour: This is the secret to an authentic British Victoria Sponge! Self-rising flour already contains baking powder and salt in the perfect proportions. If you don’t have it, make your own by adding 1½ teaspoons baking powder and ¼ teaspoon salt per cup of all-purpose flour.
- Vanilla Extract: Pure vanilla extract is essential—imitation vanilla lacks the depth of flavor. For an extra special touch, use vanilla bean paste.
- Milk: Just a splash helps create the perfect consistency. Whole milk is ideal, but any milk works.
For the Filling:
- Raspberry Jam (Seedless): Traditional and classic! Strawberry jam is the second most popular choice. Choose a high-quality jam with good fruit content—it makes a noticeable difference. Seedless is traditional for a smooth filling, but seeded jam works too.
- Heavy Whipping Cream or Buttercream: Traditional Victoria Sponges use whipped cream (called “cream and jam” sponge), though buttercream has become equally popular in modern versions. Heavy cream whips to the best consistency—make sure it’s very cold.
- Powdered Sugar: For sweetening the whipped cream and dusting the top. The fine texture dissolves instantly and creates that beautiful snowy finish.
Substitution Notes: For a dairy-free version, use plant-based butter alternatives and coconut cream. For reduced sugar, you can decrease the sugar by up to 25%, though the texture will be slightly denser. Gluten-free all-purpose flour blend (with xanthan gum) can replace regular flour, but the texture will be a bit more delicate.
Equipment Needed
Having the right equipment makes baking your Victoria Sponge so much easier! Here’s what you’ll need:
- Two 8-inch Round Cake Pans: The traditional size for Victoria Sponge. Make sure they’re the same size for even layers.
- Parchment Paper: For lining the pan bottoms—prevents sticking and ensures easy release
- Electric Mixer (Stand or Hand): Makes the creaming process much easier and creates better volume, though you can do it by hand with serious arm power
- Rubber Spatula: Essential for scraping down bowl sides and folding ingredients gently
- Measuring Cups and Spoons: Accurate measurements are crucial for balanced cake texture
- Kitchen Scale (Optional but Recommended): For the most accurate measurements, especially for flour
- Mixing Bowls (Medium and Large): One for the cake batter, one for whipping cream
- Fine-Mesh Sieve: For sifting flour and dusting powdered sugar
- Wire Cooling Rack: Allows air circulation for even cooling
- Offset Spatula or Butter Knife: For spreading jam and cream evenly
- Cake Stand or Serving Plate: For beautiful presentation
- Toothpick or Cake Tester: To check doneness
Print

Victoria Sponge Cake Recipe
A classic British Victoria Sponge Cake with two light and fluffy vanilla sponge layers filled with raspberry jam and fresh whipped cream, then dusted with powdered sugar. Perfect for afternoon tea or any special occasion!
- Total Time: 1 hour 15 minutes
- Yield: 8-10 servings 1x
Ingredients
ScaleFor the Sponge Cake:
- 1 cup (225g) unsalted butter, softened to room temperature
- 1 cup (200g) caster sugar (superfine sugar)
- 4 large eggs, at room temperature
- 2 cups (250g) self-rising flour
- 2 teaspoons pure vanilla extract
- 2 tablespoons whole milk
- Pinch of salt (if using regular self-rising flour)
For the Filling:
- ¾ cup (240g) high-quality raspberry jam (seedless preferred)
- 1 cup (240ml) heavy whipping cream, cold
- 2 tablespoons powdered sugar, plus extra for dusting
- ½ teaspoon vanilla extract
Instructions
Prepare for Baking:
- Preheat and prep pans: Preheat your oven to 350°F (180°C, Gas Mark 4). Grease two 8-inch round cake pans with butter, then line the bottoms with parchment paper circles. Grease the parchment as well and dust lightly with flour, tapping out excess. This ensures easy release after baking.
- Bring ingredients to room temperature: Make sure your butter is soft enough to leave an indent when pressed (about 65-68°F), and your eggs aren’t cold from the fridge. This is crucial for proper mixing and texture.
Make the Cake Batter:
- Cream butter and sugar: In a large bowl using an electric mixer, beat the softened butter on medium speed for 1 minute until smooth. Add the caster sugar and beat on medium-high speed for 3-4 minutes until the mixture is very pale, light, and fluffy. It should look almost white and have increased in volume. Scrape down the sides of the bowl halfway through.
- Add eggs one at a time: Add eggs one at a time, beating well after each addition (about 30 seconds per egg). The mixture should look smooth and creamy after each egg. If it starts to look curdled, add 1 tablespoon of flour and continue. Don’t worry—it will come together.
- Add vanilla: Beat in the vanilla extract until just combined.
- Fold in flour: Sift the self-rising flour directly over the batter. Using a rubber spatula or large metal spoon, gently fold the flour into the mixture using a figure-eight motion. Fold just until no flour streaks remain—overmixing will create a tough cake.
- Add milk: Add the milk and fold gently just until the batter is smooth and has a soft dropping consistency. The batter should fall from the spoon slowly when lifted. If it’s too stiff, add another tablespoon of milk.
Bake the Cakes:
- Divide batter: Divide the batter evenly between the two prepared pans. Use a kitchen scale for accuracy, or eyeball it—each pan should get about 500g of batter. Smooth the tops gently with a spatula, making a very slight dip in the center (this helps the cakes rise evenly).
- Bake: Place both pans on the middle rack of your preheated oven, spacing them apart so air can circulate. Bake for 23-25 minutes, until the cakes are golden brown, spring back when lightly touched in the center, and a toothpick inserted into the center comes out clean or with just a few moist crumbs.
- Cool in pans: Remove from oven and let the cakes cool in their pans for 5 minutes. This allows them to set and makes them easier to handle.
- Turn out and cool completely: Run a knife around the edges of each pan to loosen. Invert the cakes onto a wire cooling rack, peel off the parchment paper, then flip them right-side up. Let cool completely before filling—at least 30 minutes. Warm cakes will melt the cream and make the jam run.
Prepare the Filling:
- Whip the cream: In a chilled bowl using clean, chilled beaters, whip the cold heavy cream on medium speed until it starts to thicken. Add the 2 tablespoons powdered sugar and vanilla extract, then continue whipping on medium-high speed until stiff peaks form. Don’t overbeat or it will turn to butter—stop when the cream holds its shape firmly.
Assemble the Cake:
- Choose the bottom layer: Select the cake layer that’s most even and place it on your serving plate or cake stand, flat-side up. If the cakes have domed significantly, you can level them by slicing off the dome with a serrated knife, though this isn’t traditional.
- Spread the jam: Spread the raspberry jam evenly over the bottom layer, going all the way to the edges but leaving about ¼ inch border. Use about ¾ cup jam—don’t be stingy! The jam layer should be visible and generous.
- Add the cream: Spoon or pipe the whipped cream over the jam layer, spreading it evenly but keeping it slightly mounded in the center. The weight of the top layer will spread it naturally.
- Top layer: Carefully place the second cake layer on top, flat-side down. Press very gently to help the layers adhere, but don’t squash all the cream out.
- Final touch: Place a paper doily or a stencil on top if desired (for a pretty pattern), then dust generously with powdered sugar using a fine-mesh sieve. Remove the doily carefully if using one. Traditionally, Victoria Sponge has only a simple dusting of sugar on top—no frosting on the sides.
- Serve: Let the assembled cake sit for 15-20 minutes before slicing to allow the filling to set slightly. Cut with a sharp knife, wiping it clean between slices for neat portions.
Notes
- Measuring flour correctly: Spoon flour into your measuring cup and level it off with a knife. Don’t pack it down or scoop directly from the bag, as this adds too much flour and creates a dry cake.
- Testing doneness: The cake should spring back when lightly touched in the center and pull away slightly from the pan sides. Overbaking creates a dry sponge.
- Room temperature ingredients are essential: Cold eggs can curdle the butter mixture, and cold butter won’t cream properly. Plan ahead!
- Don’t skip the cooling time: Warm cakes will melt the cream and make assembly messy and difficult.
- Traditional filling: Authentic Victoria Sponge uses only jam (no cream), but the cream version has become equally traditional and beloved.
- Prep Time: 20 minutes
- Cook Time: 25 minutes
- Category: Desert
- Method: Baking
- Cuisine: British
- Diet: Vegetarian
Nutrition
- Serving Size: 1 slice (1/10 of cake)
- Calories: 445
- Sugar: 38g
- Sodium: 220mg
- Fat: 2g
- Saturated Fat: 15g
- Unsaturated Fat: 8g
- Trans Fat: 0g
- Carbohydrates: 51g
- Fiber: 1g
- Protein: 5g
- Cholesterol: 135mg
Tips & Variations
Flavor Variations:
- Lemon Victoria Sponge: Add 2 tablespoons lemon zest to the batter and use lemon curd instead of raspberry jam
- Chocolate Sponge: Replace ¼ cup flour with cocoa powder and fill with chocolate buttercream
- Strawberry Sponge: Use strawberry jam and add fresh sliced strawberries between the cream layers
- Coffee and Walnut: Add 2 tablespoons instant espresso powder to the batter and fold in ½ cup chopped walnuts, use coffee buttercream filling
- Mixed Berry: Use a combination of raspberry and blackberry jam, or try apricot preserves for something different
Filling Alternatives:
- Buttercream Instead of Cream: Beat ½ cup softened butter with 2 cups powdered sugar and 2 tablespoons milk for a traditional buttercream filling that’s more stable
- Cream Cheese Frosting: Mix 4 oz softened cream cheese with whipped cream for a tangy twist
- Mascarpone Cream: Combine mascarpone cheese with whipped cream for an Italian-inspired filling
- Fresh Fruit Addition: Add thinly sliced strawberries or raspberries on top of the jam before adding cream
Dietary Modifications:
- Gluten-Free: Use a 1:1 gluten-free flour blend with xanthan gum, plus 1½ teaspoons baking powder
- Dairy-Free: Substitute plant-based butter and coconut cream (chilled overnight and whipped)
- Reduced Sugar: Decrease sugar to ¾ cup—the cake will be slightly denser but still delicious
- Egg-Free: Not recommended as eggs are essential to the structure of this cake
Size Variations:
- Make three 6-inch layers for a taller presentation (reduce baking time to 18-20 minutes)
- Bake as cupcakes for individual portions (bake 16-18 minutes at 350°F)
- Use a 9×13 pan and bake for 30-35 minutes, then cut in half horizontally to create layers
Pro Chef Tips
- The “Ribbon Stage” for Perfect Creaming: When creaming butter and sugar, beat until the mixture literally falls from the beaters in thick, slow ribbons. This incorporation of air is what creates the light, fluffy texture—don’t rush this step! It should take 3-4 full minutes and look almost white.
- Test Butter Temperature the Right Way: Press your finger into the butter—it should leave a clear indent but your finger shouldn’t sink all the way through. If the butter is shiny or greasy-looking, it’s too warm. If it’s still firm and doesn’t indent easily, it’s too cold. The perfect temperature is 65-68°F.
- The “Fold, Don’t Stir” Technique: When adding flour, use a gentle folding motion rather than stirring or beating. Cut down through the center of the batter with your spatula, sweep along the bottom of the bowl, and bring it up and over. Rotate the bowl slightly and repeat. This preserves the air bubbles you worked so hard to create during creaming.
- Create a Crumb Coat for Neater Slicing: If you want super clean slices, refrigerate the assembled cake for 30 minutes before serving. This firms up the cream and makes cutting much neater. Wipe your knife between each slice for the cleanest edges.
- The Toothpick Test Timing: Start checking for doneness at 20 minutes even though the recipe says 25. Ovens vary, and it’s better to check early. The toothpick should come out clean or with just a few moist crumbs clinging—if it’s completely clean, you’re already at the edge of overbaking.
- Weigh Your Pans for Even Layers: The secret to level layers is dividing the batter exactly evenly. Place your empty pans on a scale, tare to zero, then divide the batter by weight. Each pan should have exactly half. This prevents one layer from being bigger or taking longer to bake.
- The Professional “Torte” Technique: For even more layers, bake a single 9-inch cake and slice it horizontally into three layers. This creates the ultra-flat, professional look you see in bakeries. Use a long serrated knife and turn the cake as you slice for the most even cut.
- Stabilize Whipped Cream for Longer Hold: If making the cake more than 2 hours ahead, add 1 tablespoon of instant vanilla pudding mix (dry) to the whipped cream. This stabilizes it so it won’t deflate or weep, and you can’t taste it at all.
Common Mistakes to Avoid
1. Not Properly Creaming the Butter and Sugar
This is the number one mistake that leads to dense, heavy sponge cake! Many home bakers stop creaming too soon because 3-4 minutes feels like forever. But this step is where you incorporate the air that makes the cake light and fluffy. The mixture should be almost white, very fluffy, and have noticeably increased in volume. If your butter and sugar mixture is still yellow and grainy-looking, keep beating!
2. Adding Cold Ingredients
Cold eggs will cause your beautifully creamed butter mixture to curdle and seize up, creating an uneven, separated batter. Even if you manage to save it, the texture will never be quite as light. The same goes for cold milk. Always bring eggs and milk to room temperature—it’s not optional! Set them out 30 minutes before you start, or place eggs in a bowl of warm water for 5 minutes.
3. Overmixing After Adding Flour
Once flour is added, gluten development begins. Every stir or beat creates more gluten, which makes the cake tough and dense instead of tender and delicate. Fold gently just until you can’t see any more flour streaks, then STOP. It’s okay if there are a few small lumps—they’ll disappear during baking. I promise you’ll see the difference in texture!
4. Filling the Cake While It’s Still Warm
I know it’s tempting to skip the cooling time because you’re excited to see the finished product, but warm cake will absolutely melt your whipped cream and cause the jam to run out the sides. The cake needs to be completely cool to room temperature—give it at least 30 minutes on the cooling rack. Use this time to make your filling and clean up the kitchen!
5. Overbaking the Sponge
A dry Victoria Sponge is a sad Victoria Sponge! These cakes should be moist and tender, but overbaking creates a dry, crumbly texture. Start checking at 20 minutes even if the recipe says 25—every oven is different. The cake is done when it just barely springs back when touched in the center and a toothpick has a few moist crumbs. Remember, it continues cooking slightly as it cools in the pan.
Storage & Meal Prep
Room Temperature Storage:
A Victoria Sponge filled with buttercream can be stored at room temperature, covered with a cake dome or large bowl, for up to 2 days. The cake will actually taste even better on day two as the flavors meld and the texture softens slightly where it meets the jam.
Refrigerator Storage:
If your Victoria Sponge is filled with whipped cream (rather than buttercream), it MUST be refrigerated. Cover loosely with plastic wrap or store under a cake dome and keep refrigerated for up to 3 days. The whipped cream filling won’t hold up at room temperature. Bring to room temperature for 30 minutes before serving for the best flavor and texture.
Storing Unfilled Cake Layers:
This is my favorite storage method for flexibility! Wrap completely cooled, unfilled cake layers tightly in plastic wrap, then place in an airtight container or zip-top bag. Store at room temperature for up to 3 days. Fill and assemble just before serving for the freshest results.
Signs of Spoilage:
Discard the cake if you notice any mold, off smells, or if the whipped cream filling looks watery or separated. Buttercream-filled cakes last longer than cream-filled versions.
Reheating Tips:
Victoria Sponge is best served at room temperature and shouldn’t be reheated. If refrigerated, remove from the fridge 30-45 minutes before serving to allow it to come to room temperature, which brings out the full flavor and softens the texture beautifully.
Make-Ahead & Freezer Notes
Make-Ahead Timeline:
- 2 Days Ahead: Bake the cake layers, cool completely, wrap tightly, and store at room temperature
- 1 Day Ahead: Make buttercream filling (if using) and refrigerate; make the cake layers if you haven’t already
- Day Of: Whip the cream (if using), assemble the cake 1-4 hours before serving, dust with powdered sugar just before serving
Freezing Unfilled Cake Layers:
This is the best method for long-term storage! Wrap completely cooled cake layers individually in plastic wrap, then wrap again in aluminum foil or place in freezer bags, pressing out as much air as possible. Freeze for up to 3 months. To use, thaw at room temperature for 2-3 hours while still wrapped—this prevents condensation from making the cake soggy. The texture will be just as good as fresh!
Freezing Assembled Cake:
You can freeze an assembled Victoria Sponge, though the texture of the cream filling won’t be quite as perfect when thawed. Freeze the fully assembled cake (without the powdered sugar dusting) uncovered on a flat surface until firm, about 2 hours. Once frozen solid, wrap tightly in plastic wrap and then aluminum foil. Freeze for up to 1 month. Thaw overnight in the refrigerator, still wrapped, then bring to room temperature before serving. Dust with fresh powdered sugar just before serving.
Best Freezing Method:
I recommend freezing unfilled layers and assembling fresh for the absolute best results. The jam and fresh whipped cream only take 10 minutes to prepare, and the texture will be perfect.
Freezing Individual Slices:
Wrap individual slices tightly in plastic wrap, then place in a freezer bag. Freeze for up to 2 months. Thaw individual slices at room temperature for about 1 hour—perfect for portion control or when you want just one slice!
Make-Ahead Filling:
Buttercream can be made up to 1 week ahead and refrigerated, or frozen for 3 months. Bring to room temperature and re-whip before using. Fresh whipped cream doesn’t freeze or make-ahead well—it’s best made the same day you assemble the cake.
Serving Suggestions
A proper Victoria Sponge deserves an equally proper presentation! Here are the best ways to serve this British classic:
Traditional British Afternoon Tea Service:
Serve the Victoria Sponge as the centerpiece of an afternoon tea spread alongside finger sandwiches (cucumber, egg salad, smoked salmon), scones with clotted cream and jam, and a selection of small pastries. Brew a pot of English Breakfast or Earl Grey tea and serve in proper teacups with saucers. This is the most authentic way to enjoy Victoria Sponge!
Modern Tea Party:
Place the cake on a beautiful cake stand as the table centerpiece. Serve with a variety of hot teas (provide 3-4 options), fresh berries on the side, and perhaps some chocolate truffles or petit fours for variety.
Casual Coffee Afternoon:
Victoria Sponge pairs beautifully with coffee too! Serve slices on pretty dessert plates with a fork, alongside freshly brewed coffee or cappuccinos. Add a small dish of fresh raspberries or strawberries on the side.
Perfect Beverage Pairings:
- Hot Tea: English Breakfast, Earl Grey, Lady Grey, or Darjeeling are classic choices
- Coffee: Light to medium roast coffee, cappuccino, or café au lait
- Dessert Wine: A glass of Moscato or late-harvest Riesling complements the sweetness beautifully
- Champagne: For celebrations, a glass of bubbly alongside Victoria Sponge is pure elegance
- Milk: For children (or adults!), a cold glass of milk is perfect with this cake
Plating Suggestions:
- Serve on vintage china plates for an authentic British tea room feel
- Garnish each slice with a fresh raspberry or strawberry and a small mint leaf
- Add a small dollop of whipped cream on the side of the plate
- Dust the plate with a light sprinkling of powdered sugar for a professional touch
Special Occasion Ideas:
- Birthday parties: Add candles to the top layer before assembling for an elegant birthday cake
- Garden parties: Serve on a tiered cake stand surrounded by fresh flowers
- Baby showers: Cut into smaller, dainty slices for elegant finger food-sized portions
- Wedding receptions: Many couples now choose Victoria Sponge as a wedding cake alternative—simple, elegant, and beloved by all
FAQs Section
Q: Can I make Victoria Sponge without self-rising flour?
A: Absolutely! Make your own self-rising flour by combining 1 cup (125g) all-purpose flour with 1½ teaspoons baking powder and ¼ teaspoon salt. Whisk these together thoroughly before using. This homemade version works just as well as store-bought self-rising flour. For this recipe, you’ll need to make two batches of this mixture since it calls for 2 cups of flour total.
Q: Why did my cake sink in the middle?
A: A sunken center usually means one of three things: (1) the oven door was opened too early during baking, causing a sudden temperature drop, (2) there was too much baking powder or the baking powder was old and created too many air bubbles that collapsed, or (3) the cake was underbaked. Always wait at least 20 minutes before opening the oven, check the expiration date on your baking powder, and ensure the cake is fully baked before removing from the oven.
Q: Can I use jam with seeds instead of seedless?
A: Yes, definitely! While traditional Victoria Sponge uses seedless raspberry jam for a smooth, refined filling, seeded jam works perfectly well and many people actually prefer the texture and more intense fruit flavor. Strawberry jam (with or without seeds) is another hugely popular traditional choice. Use whatever jam you love!
Q: How far in advance can I assemble the cake?
A: If using whipped cream filling, assemble no more than 4 hours before serving for the best texture—the cream stays firm and the cake stays crisp. If using buttercream filling instead of whipped cream, you can assemble up to 24 hours ahead. The cake actually improves slightly as it sits and the flavors meld. For longer advance preparation, freeze the unfilled layers and assemble fresh when needed.
Q: My butter and sugar mixture looks curdled after adding eggs—did I ruin it?
A: Don’t panic! This happens when ingredients are at different temperatures (usually cold eggs into room temperature butter). Add 1-2 tablespoons of the flour and continue beating—the mixture should come back together. If it’s still separated, it will likely still work once you fold in all the flour. While not ideal, the cake will still be good even if the batter looks a bit curdled before adding flour.
Q: Can I make this cake in a different pan size?
A: Yes! For two 9-inch pans, use the same recipe but reduce baking time to 20-22 minutes—the layers will be slightly thinner. For one 9×13 inch pan, bake for 30-35 minutes, let cool completely, then slice horizontally to create two layers. For a three-layer 6-inch cake, divide the batter among three 6-inch pans and bake for 18-20 minutes. Always check doneness with a toothpick.
Q: What’s the difference between Victoria Sponge and regular sponge cake?
A: Great question! Victoria Sponge specifically refers to this British classic made with the creaming method (butter creamed with sugar), while other sponge cakes might use different techniques like the genoise method (whole eggs beaten with sugar) or angel food cake method (egg whites only). Victoria Sponge has a specific flavor profile, traditional fillings (jam and cream), and iconic presentation with just powdered sugar on top—no frosting on the sides.
Conclusion
There you have it—everything you need to create an absolutely perfect Victoria Sponge Cake worthy of Queen Victoria herself! I know that baking a layer cake can feel intimidating if you’ve never done it before, but I promise this recipe is truly approachable for bakers of all skill levels. The key is taking your time with each step, especially the creaming process, and not rushing the cooling before you assemble.
This elegant British classic has remained popular for over 150 years for good reason—it’s the perfect balance of simple and special, comforting and impressive. Whether you’re hosting a proper afternoon tea, celebrating a birthday, or just want to treat yourself and your loved ones to something delicious, this Victoria Sponge will not disappoint. The light, buttery cake paired with sweet jam and fresh cream is simply timeless.
I’ve made this cake dozens of times for everything from casual weekend family gatherings to fancy dinner