Easy Homemade Vanilla Fudge Recipe – Creamy, Dreamy & Only 4 Ingredients!
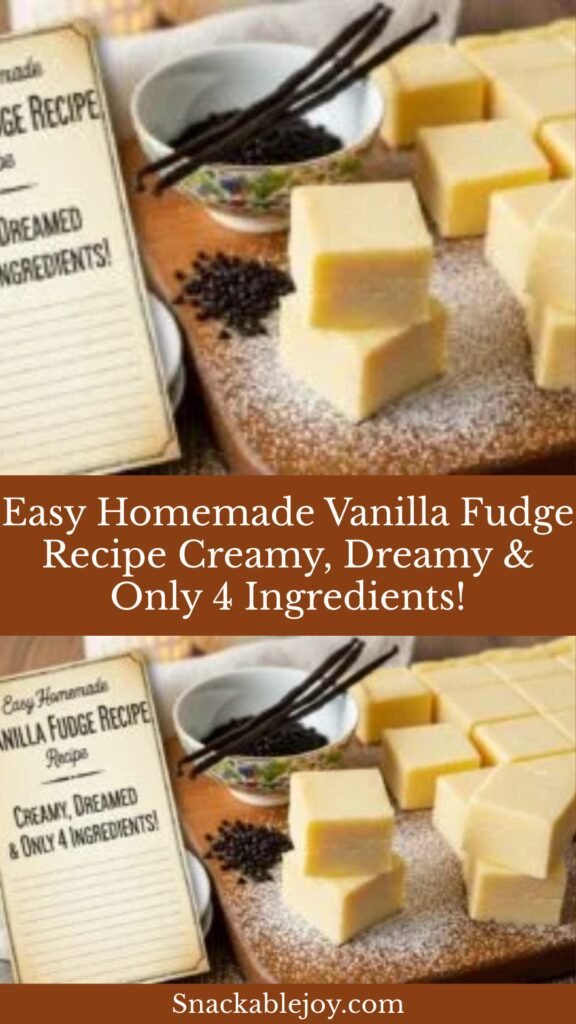
There’s something absolutely magical about homemade vanilla fudge. This classic confection delivers smooth, creamy sweetness in every bite, and the best part? You don’t need fancy equipment or professional candy-making skills to pull it off! This vanilla fudge recipe is gloriously simple, requiring just four basic ingredients and about 15 minutes of active time. Whether you’re planning a holiday cookie exchange, need a last-minute hostess gift, or simply want to satisfy your sweet tooth, this foolproof fudge recipe delivers bakery-quality results right in your own kitchen. The texture is perfectly smooth and melts in your mouth, while the pure vanilla flavor shines through without being overpowering. It’s the kind of treat that disappears quickly at parties, makes neighbors smile when gifted during the holidays, and creates those warm, nostalgic memories we all treasure. Best of all, this recipe is forgiving enough for beginners yet impressive enough to make you look like a candy-making pro!
History / Background
Fudge has a delightfully sweet place in American culinary history, and its origin story is as charming as the candy itself. The creation of fudge is believed to have been a happy accident that occurred in the late 1800s, most likely at women’s colleges along the East Coast. The most popular origin story credits a batch of “fudged” caramels – meaning botched or messed up – at Vassar College in 1886. A student attempted to make caramel but something went wrong in the process, resulting in a grainy yet delicious confection that we now know as fudge.
The name “fudge” itself is thought to come from the exclamation one might make when a recipe doesn’t turn out as planned. Ironically, this “mistake” became one of America’s most beloved candies! By the 1890s, fudge-making had become a popular social activity among college women, who would gather for “fudge parties” where they’d make the treat together late into the night. The recipe quickly spread from campus to campus, with each institution developing its own signature variations.
Vanilla fudge, in particular, represents the pure, classic version of this confection. While chocolate fudge often steals the spotlight, vanilla fudge has maintained its sophisticated charm throughout the decades. It became especially popular in the mid-20th century when home candy-making experienced a boom in American households. The clean, sweet flavor of vanilla allowed the creamy texture and pure sweetness of the fudge to take center stage, making it a favorite for those who appreciated elegant simplicity. Today, vanilla fudge continues to be a staple at candy shops, holiday gatherings, and homemade gift boxes across the country, representing a timeless tradition of American confectionery craft.
Why You’ll Love This Recipe
This vanilla fudge recipe is about to become your go-to dessert for every occasion, and here’s why: it strikes that perfect balance between being incredibly easy to make while still delivering show-stopping results. Unlike complicated candy recipes that require candy thermometers and precise temperature monitoring, this version is wonderfully forgiving and beginner-friendly. You’ll love how the simple ingredient list means you probably already have everything you need in your pantry, and the straightforward method means you can whip up a batch whenever the craving strikes.
Here’s what makes this recipe irresistible:
- Foolproof formula – No candy thermometer required, and the method is straightforward enough for first-time candy makers
- Quick preparation – Active cooking time is just 15 minutes, with most of the process being hands-off cooling time
- Only 4 ingredients – Sweetened condensed milk, white chocolate chips, butter, and vanilla extract create pure magic together
- Perfectly giftable – Cut into neat squares and packaged in a pretty tin, this fudge makes an impressive homemade gift
- Crowd-pleasing flavor – The classic vanilla taste appeals to both kids and adults, making it perfect for parties and potlucks
- Budget-friendly – Makes a generous batch without breaking the bank, perfect for feeding a crowd or making multiple gifts
- Customizable base – Once you master the basic recipe, you can easily add mix-ins like nuts, dried fruit, or swirls of other flavors
- No-bake convenience – Your oven stays off, making this ideal for hot summer months or when your oven is occupied with other dishes
Ingredient Notes
Let’s break down the simple ingredients that come together to create this luscious vanilla fudge, and why each one plays a crucial role in achieving that perfect, creamy texture:
Sweetened Condensed Milk – This is the secret weapon that makes this fudge recipe so foolproof. Sweetened condensed milk provides both sweetness and creaminess while helping the fudge set properly without requiring precise temperature control. I recommend using a full-fat version for the richest texture. One 14-ounce can is typically what you’ll need. Don’t substitute with evaporated milk, as they’re completely different products and won’t yield the same results.
White Chocolate Chips – These create the smooth, melt-in-your-mouth base of your fudge. I prefer using high-quality white chocolate chips (around 2-3 cups) for the best flavor and melting properties. Look for brands that list cocoa butter in the ingredients rather than vegetable oils. If you can’t find white chocolate chips, you can use a white chocolate baking bar chopped into small pieces. Avoid white candy melts or almond bark, as they have a different composition and can result in a waxy texture.
Butter – A few tablespoons of unsalted butter add richness and help achieve that perfect smooth consistency. Butter also contributes to the glossy finish you want in premium fudge. I always use unsalted butter so I can control the overall flavor, but if you only have salted butter on hand, it will work – just be aware the final product will have a subtle salty note (which some people actually prefer!).
Pure Vanilla Extract – This is where the “vanilla” in vanilla fudge comes from! Don’t skimp here – use real vanilla extract rather than imitation for the best flavor. You’ll need about 1-2 teaspoons. The vanilla enhances all the other flavors and gives your fudge that classic, nostalgic taste. For an extra-luxurious version, you can even use vanilla bean paste, which will add beautiful flecks throughout your fudge.
Optional Add-ins – While not traditional, you can customize your vanilla fudge with chopped pecans, walnuts, dried cranberries, mini marshmallows, or even a swirl of raspberry jam. Add these during the final mixing stage before pouring into your pan.
Equipment Needed
The beauty of this recipe is that it requires minimal equipment, most of which you likely already have in your kitchen. Here’s what you’ll need to gather before you start:
- Medium saucepan – For melting and combining your ingredients on the stovetop
- 8×8-inch or 9×9-inch square baking pan – This size creates fudge pieces with the perfect thickness
- Parchment paper or aluminum foil – To line your pan for easy removal and clean-up
- Wooden spoon or heat-resistant silicone spatula – For stirring your mixture as it melts
- Measuring cups and spoons – For accurate ingredient measurements
- Sharp knife – For cutting your set fudge into neat squares
- Cutting board – To protect your countertop when slicing
- Optional: handheld mixer – Some people like to beat the fudge mixture for extra smoothness, though stirring by hand works perfectly well
Print

Vanilla Fudge Recipe
This easy vanilla fudge recipe creates perfectly smooth, creamy squares of pure bliss with just 4 simple ingredients. No candy thermometer needed – just melt, stir, pour, and chill for foolproof results every time!
- Total Time: 2 hours 15 minutes
- Yield: 36-48 pieces (depending on how you cut them) 1x
Ingredients
Scale- 3 cups (18 oz) white chocolate chips
- 1 can (14 oz) sweetened condensed milk
- 3 tablespoons unsalted butter
- 2 teaspoons pure vanilla extract
- Pinch of salt (optional, enhances sweetness)
Instructions
- Prepare your pan: Line an 8×8-inch or 9×9-inch square baking pan with parchment paper, leaving an overhang on two sides for easy removal later. Lightly grease the parchment with butter or non-stick spray. Set aside.
- Combine ingredients: In a medium saucepan over low heat, combine the white chocolate chips, sweetened condensed milk, and butter. Stir constantly with a wooden spoon or heat-resistant spatula to prevent scorching.
- Melt the mixture: Continue stirring over low heat until the white chocolate chips are completely melted and the mixture is smooth and glossy. This should take about 5-7 minutes. Don’t rush this step by turning up the heat – low and slow prevents the chocolate from seizing or becoming grainy.
- Add vanilla: Once everything is melted and smooth, remove the pan from heat. Stir in the vanilla extract and a pinch of salt if using. Mix thoroughly to distribute the vanilla evenly throughout the fudge.
- Pour and spread: Immediately pour the fudge mixture into your prepared pan. Use your spatula to spread it evenly into all corners and smooth the top. Work quickly as the fudge will begin to set as it cools.
- Cool completely: Allow the fudge to cool at room temperature for about 30 minutes, then transfer to the refrigerator to set completely. This will take 2-3 hours, or you can leave it overnight for best results.
- Cut and serve: Once the fudge is completely firm, use the parchment paper overhang to lift it out of the pan. Place on a cutting board and use a sharp knife to cut into squares. For clean cuts, wipe your knife with a damp cloth between each slice.
- Store properly: Keep your vanilla fudge in an airtight container with parchment paper between layers to prevent sticking.
Notes
- Temperature matters: Always use low heat when melting to prevent the chocolate from seizing or becoming grainy.
- Don’t skip the lining: Parchment paper makes removal incredibly easy and prevents sticking.
- Cutting tip: For the cleanest cuts, let the fudge come to room temperature for 10 minutes before slicing, and use a large, sharp knife.
- Flavor variations: Add 1/2 cup of chopped nuts, mini chocolate chips, or crushed candy canes before pouring into the pan for fun variations.
- Make it festive: Top with sprinkles or colored sugar before the fudge sets for holiday-themed treats.
- Prep Time: 10 minutes
- Cook Time: 5 minutes
- Category: Dessert, Candy, Confection
- Method: Stovetop, No-Bake
- Cuisine: American
- Diet: Gluten Free
Nutrition
- Serving Size: 1 piece (based on 48 pieces)
- Calories: 95
- Sugar: 13g
- Sodium: 25mg
- Fat: 4.5g
- Saturated Fat: 3g
- Unsaturated Fat: 1.5g
- Trans Fat: 0g
- Carbohydrates: 14g
- Fiber: 0g
- Protein: 1g
- Cholesterol: 5mg
Tips & Variations
One of the best things about this vanilla fudge recipe is how easily you can customize it to suit your taste or the occasion. Here are some creative ways to make this recipe your own:
Flavor Variations:
- Almond Fudge: Replace the vanilla extract with almond extract for a sophisticated twist, and add sliced almonds on top
- Maple Vanilla: Add 2 tablespoons of pure maple syrup along with the vanilla for a subtle maple undertone
- Citrus Vanilla: Add 1 teaspoon of lemon or orange zest to the mixture for a bright, refreshing note
- Birthday Cake Fudge: Stir in rainbow sprinkles and use cake batter extract instead of vanilla
Texture Add-Ins:
- Fold in 3/4 cup of chopped pecans, walnuts, or macadamia nuts for added crunch
- Swirl in 1/4 cup of salted caramel sauce before cooling for a gourmet touch
- Add mini marshmallows and crushed graham crackers for s’mores-inspired fudge
- Mix in crushed Oreos or other cookies for cookies-and-cream fudge
Presentation Ideas:
- Pour half the mixture into the pan, add a layer of your favorite jam, then top with remaining fudge
- Create a marbled effect by swirling in melted dark chocolate with a knife before setting
- Top with edible flowers, gold leaf, or decorative sprinkles for elegant presentation
- Cut into different shapes using small cookie cutters for special occasions
Pro Chef Tips
These insider secrets will elevate your fudge from good to absolutely irresistible:
Temperature control is crucial: The most common mistake in fudge-making is using heat that’s too high. Always work over low heat and be patient. White chocolate is particularly sensitive to heat and can seize (become grainy and clumpy) if overheated. If you notice the mixture beginning to separate or look oily, it’s too hot – immediately remove from heat and stir vigorously to bring it back together.
Invest in quality ingredients: Since this recipe has so few ingredients, each one really matters. Premium white chocolate chips that contain cocoa butter rather than palm oil will give you a smoother, more luxurious texture. The difference in taste between real vanilla extract and imitation is also very noticeable in the final product.
The stir test: To check if your fudge mixture is ready to pour, lift your spoon and watch how the mixture falls. It should ribbon off the spoon in a thick, smooth stream. If it’s too runny, continue cooking for another minute. If it’s too thick, you’ve overcooked it slightly – quickly pour it into your pan before it sets in the pot.
Line with care: When lining your pan, use enough parchment paper to create a 2-inch overhang on opposite sides. This creates “handles” that make lifting the set fudge out of the pan effortless. Spray or butter the parchment to ensure even the tackiest fudge releases cleanly.
The smooth top trick: For a professional-looking smooth top, immediately after pouring the fudge into your pan, gently tap the pan on the counter several times to release air bubbles and level the surface. Then use an offset spatula dipped in hot water (and dried) to smooth the top in long, even strokes.
Temperature patience: While it’s tempting to cut into your fudge as soon as it looks set, waiting the full 2-3 hours (or overnight) ensures clean cuts and the proper texture. Fudge that’s cut too early will be soft and may not hold its shape well.
Common Mistakes to Avoid
Even with a simple recipe like this, there are a few pitfalls that can affect your results. Here’s how to avoid them:
Mistake #1: Using High Heat – This is the number one culprit behind grainy, separated, or seized fudge. White chocolate is delicate and must be melted slowly over low heat with constant stirring. If you rush this process, you’ll end up with a grainy texture that can’t be fixed. Solution: Always use the lowest heat setting on your stove and be patient. It’s better to take an extra few minutes than to ruin your batch.
Mistake #2: Not Lining the Pan – Attempting to remove set fudge from an unlined pan often results in broken pieces and a frustrating mess. Even greasing the pan isn’t always enough. Solution: Always line your pan with parchment paper or aluminum foil with an overhang for easy removal.
Mistake #3: Skimping on Stirring – If you don’t stir constantly while melting, the chocolate can stick to the bottom of the pan and scorch, giving your fudge a burnt taste. Solution: Commit to standing at the stove and stirring continuously until everything is melted and smooth.
Mistake #4: Cutting Too Soon – Warm fudge won’t cut cleanly and may crumble or stick to your knife. Solution: Wait until the fudge is completely cold and firm before attempting to cut it. For the cleanest cuts, let it set overnight in the refrigerator.
Mistake #5: Using the Wrong Chocolate – White candy melts or almond bark are not the same as white chocolate and will produce different results – often with a waxy texture and artificial taste. Solution: Use real white chocolate chips or baking bars that list cocoa butter in the ingredients.
Mistake #6: Adding Cold Ingredients – If you add very cold vanilla extract or other mix-ins to your hot fudge mixture, it can cause the chocolate to seize. Solution: Let any refrigerated ingredients come to room temperature before adding, or warm the vanilla extract slightly by running the measuring spoon under warm water.
Storage & Meal Prep
Proper storage ensures your vanilla fudge stays fresh, creamy, and delicious for as long as possible:
Room Temperature Storage: Vanilla fudge can be stored at room temperature in an airtight container for up to 1 week. Place parchment or wax paper between layers to prevent pieces from sticking together. Keep the container in a cool, dry place away from direct sunlight and heat sources. This method is ideal if you’re planning to serve or gift the fudge within a few days.
Refrigerator Storage: For longer storage, keep your fudge in the refrigerator for up to 3 weeks. Use an airtight container with parchment paper between layers. The fudge will become quite firm when cold, so allow it to sit at room temperature for about 10-15 minutes before serving for the best texture and flavor. Refrigeration is especially important during hot summer months or in humid climates.
Preventing Stickiness: Fudge can become sticky when exposed to air and humidity. Always store in an airtight container, and consider adding a small food-safe silica gel packet (the kind that comes in vitamin bottles) to your storage container to absorb excess moisture. Just make sure the packet doesn’t directly touch the fudge.
Reheating Note: While fudge is typically enjoyed cold or at room temperature, you can warm it slightly in the microwave for 5-10 seconds if you prefer a softer texture. Be careful not to overheat, or it will melt.
Make-Ahead & Freezer Notes
Vanilla fudge is an excellent make-ahead treat, perfect for preparing before holidays, parties, or whenever you want to have homemade gifts ready to go:
Make-Ahead Timeline: You can make this fudge up to 3 weeks in advance if stored properly in the refrigerator, or up to 3 months in advance if frozen. This makes it perfect for holiday cookie boxes, gift baskets, or party planning. Simply prepare according to the recipe, allow to set completely, cut into pieces, and store appropriately.
Freezing Instructions: Vanilla fudge freezes beautifully! To freeze, cut the fudge into individual pieces and place them in a single layer on a parchment-lined baking sheet. Freeze until solid (about 1 hour), then transfer the pieces to a freezer-safe container or heavy-duty freezer bag. Place parchment or wax paper between layers to prevent sticking. Properly stored, frozen fudge will maintain its quality for up to 3 months.
Thawing Method: When you’re ready to enjoy your frozen fudge, transfer the desired amount to the refrigerator and let it thaw overnight. For quicker thawing, you can leave it at room temperature for 1-2 hours. Never microwave frozen fudge to thaw it, as this can cause it to become grainy or melt unevenly.
Gift-Giving Tip: If you’re making fudge to give as gifts, you can freeze pre-cut, individually wrapped pieces and simply pull out what you need when gift-giving occasions arise. Wrap each piece in wax paper or candy wrappers for a professional presentation.
Serving Suggestions
While vanilla fudge is absolutely divine on its own, here are some creative ways to serve and pair this sweet treat:
Classic Presentations:
- Arrange assorted fudge pieces on a decorative platter with other homemade candies for a candy buffet
- Package in clear cellophane bags tied with ribbons for party favors or holiday gifts
- Layer in a decorative tin with parchment paper between layers for beautiful gift boxes
- Serve alongside after-dinner coffee or espresso for an elegant dessert course
Beverage Pairings:
- Hot chocolate or warm milk – the creaminess complements the fudge’s rich sweetness
- Strong black coffee – the slight bitterness balances the sweet vanilla beautifully
- Dessert wines like Port or sweet Riesling
- Cold milk – a classic combination that never goes out of style
- Hot tea, especially Earl Grey or vanilla chai
Dessert Combinations:
- Crumble pieces over vanilla ice cream for a deconstructed sundae
- Use as a topping for brownies or chocolate cake
- Pair with fresh strawberries for a simple but elegant dessert
- Include in a dessert charcuterie board with fruits, nuts, and other sweets
- Melt pieces and drizzle over warm bread pudding
Cookie and Candy Platters: Vanilla fudge pairs beautifully with other homemade treats on holiday cookie trays. Consider serving alongside chocolate chip cookies, peanut butter blossoms, snickerdoodles, peppermint bark, chocolate truffles, and pralines for a well-rounded selection of sweets.
FAQs Section
Q: Why did my fudge turn out grainy instead of smooth? A: Graininess in fudge is almost always caused by temperature issues. If the chocolate mixture gets too hot, the cocoa butter can separate, creating a grainy texture. Always melt your ingredients over low heat and stir constantly. If you notice graininess starting to develop, immediately remove from heat and stir vigorously – sometimes you can save it by bringing it back together while it’s still warm.
Q: Can I use regular chocolate chips instead of white chocolate chips? A: Yes! You can absolutely make this recipe with semi-sweet or milk chocolate chips instead. The method remains exactly the same, and you’ll end up with a rich chocolate fudge. The setting time and texture will be very similar. Just keep in mind that darker chocolates may require slightly less sweetened condensed milk (reduce by 1-2 tablespoons) since they’re less sweet.
Q: My fudge won’t set properly – what went wrong? A: If your fudge remains soft after several hours in the refrigerator, you likely overheated the mixture or didn’t use enough white chocolate. Try returning the mixture to low heat, adding another 1/2 cup of white chocolate chips, stirring until melted, then pouring back into the pan and refrigerating again. In the future, make sure you’re using the full amount of white chocolate called for and not letting the mixture get too hot.
Q: Can I make this recipe without sweetened condensed milk? A: Sweetened condensed milk is crucial to this particular recipe’s success and ease. However, if you can’t use it, you’d need to follow a completely different fudge recipe that uses other ingredients like marshmallow cream or heavy cream with sugar. Those recipes typically require candy thermometers and more precise temperature control.
Q: How do I get perfectly clean cuts when slicing my fudge? A: The secret to clean cuts is using a large, sharp knife and warming it slightly. Run your knife under hot water, dry it thoroughly, then make your cut. Wipe the blade clean and rewarm it between each cut. Also, make sure your fudge is completely set and cold before cutting – fudge at room temperature tends to stick to the knife.
Q: Is this recipe gluten-free? A: Yes! This vanilla fudge recipe is naturally gluten-free, as none of the ingredients contain gluten. However, always check your specific brand labels, especially for white chocolate chips, as some brands may process their products in facilities that also handle wheat products.
Q: Can I reduce the sugar content in this recipe? A: Unfortunately, fudge is a candy that relies on its sugar content for both flavor and texture. The sweetened condensed milk and white chocolate both provide essential structure to the fudge. Reducing the sugar would fundamentally change the recipe and likely result in fudge that won’t set properly. If you’re looking for a lower-sugar treat, you might want to consider a different type of dessert entirely.
Conclusion
There you have it – your complete guide to making the most incredible, melt-in-your-mouth vanilla fudge! This recipe proves that you don’t need years of candy-making experience or fancy equipment to create something truly special. With just four simple ingredients and a few minutes of your time, you can whip up a batch of creamy, dreamy fudge that tastes like it came from an upscale candy shop.
Whether you’re making this vanilla fudge for a holiday cookie exchange, packaging it up as heartfelt homemade gifts, bringing it to a potluck, or simply treating yourself to something sweet, this recipe delivers every single time. The best part? Once you’ve mastered this basic formula, you can customize it endlessly with different mix-ins, flavors, and presentations to suit any occasion or preference.
I hope you’ll give this recipe a try and experience just how easy and rewarding homemade fudge can be. Don’t forget to let your fudge set completely for the best texture, and remember that patience during the melting process is key to that perfectly smooth consistency we all love. Your kitchen will smell amazing, and your friends and family will be incredibly impressed with your candy-making skills!
If you make this vanilla fudge recipe, I’d absolutely love to hear how it turned out for you! Did you add any creative mix-ins? What occasion did you make it for? Drop a comment below and let me know, and don’t forget to rate the recipe. Happy fudge making, friends – may your batches be smooth, your cuts be clean, and your sweet tooth be thoroughly satisfied! 🍬✨