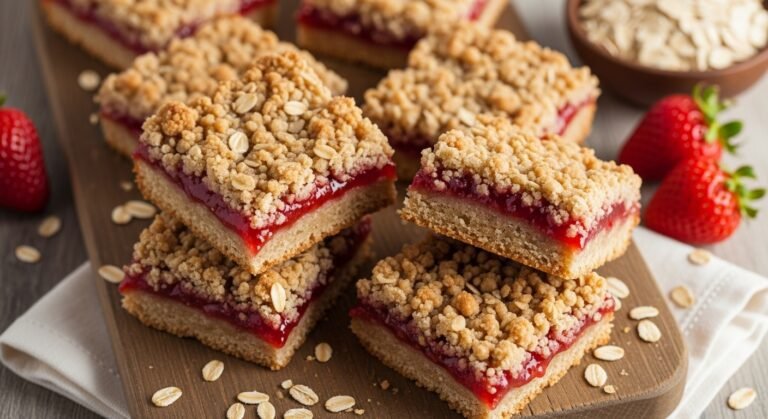
Easy Strawberry Oat Bars Recipe – Buttery, Jammy & Irresistible!
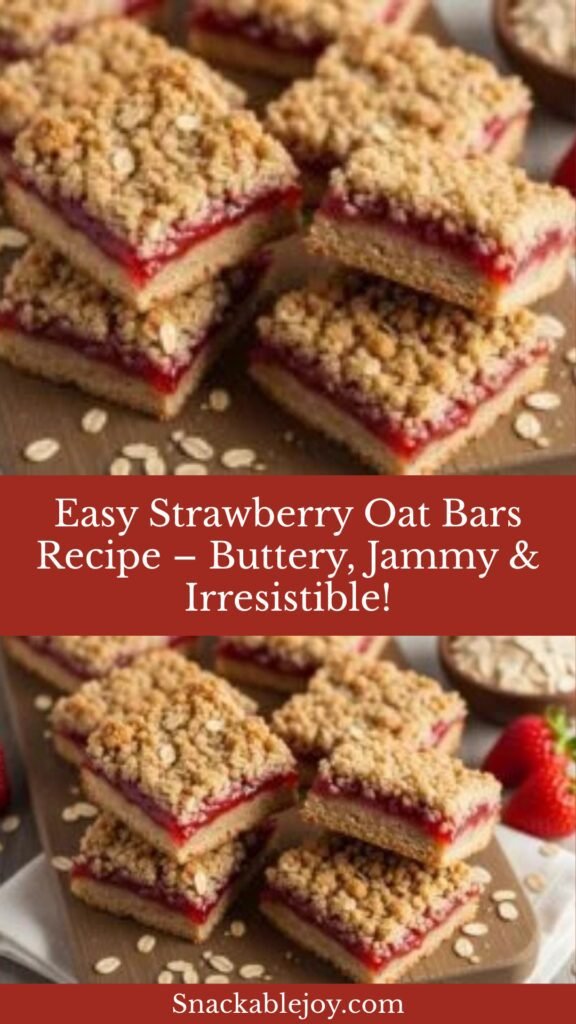
If you’re looking for a simple, crowd-pleasing treat that tastes like it came from a bakery but requires minimal effort, these Strawberry Oat Bars are about to become your new obsession! Imagine buttery, crumbly oat layers sandwiching a vibrant, sweet strawberry filling that’s bursting with fresh fruit flavor. These bars are the perfect combination of wholesome oats and indulgent sweetness, making them ideal for breakfast on the go, afternoon snacks, lunchbox treats, potluck desserts, or even a light dessert after dinner.
What makes these bars so special is their versatility. They’re equally at home at a summer picnic, a holiday cookie exchange, or tucked into your purse for a mid-morning energy boost. The best part? You probably have most of the ingredients in your pantry right now. Whether you’re serving them to kids, bringing them to a bake sale, or simply treating yourself to something homemade and delicious, these Strawberry Oat Bars deliver every single time.
History / Background
Fruit bars have a long and cherished history in American home baking, with roots tracing back to early colonial kitchens where resourceful cooks combined simple pantry staples like oats, butter, and seasonal fruit preserves to create satisfying treats that could feed a family without breaking the bank. The concept of layering a crumbly oat mixture with fruit filling became particularly popular in the Midwest during the mid-20th century, where oats were plentiful and homemakers prided themselves on creating wholesome desserts that doubled as breakfast.
Strawberry oat bars specifically gained momentum in the 1950s and 60s when convenience foods like commercial jam became widely available, but home bakers still wanted that homemade touch. The beauty of this recipe lies in its simplicity—it’s essentially a deconstructed strawberry crumble in bar form. Over the decades, variations have emerged across church cookbooks, community recipe exchanges, and family recipe boxes, with each baker adding their own special touch. Some use fresh strawberries, others prefer jam, and many combine both for maximum flavor.
Today, these bars represent the best of American comfort baking: unpretentious, delicious, and made with love. They remind us of county fairs, grandmother’s kitchens, and the joy of baking something from scratch that brings people together.
Why You’ll Love This Recipe
These Strawberry Oat Bars are the kind of recipe that earns you compliments every time you make them. They strike that perfect balance between being impressive enough for guests yet easy enough for a weeknight baking session. The buttery oat crust and topping have an irresistible texture that’s both crispy and tender, while the strawberry filling adds a bright, fruity contrast that keeps every bite interesting.
Here’s why this recipe deserves a permanent spot in your baking rotation:
- Simple ingredients: No specialty items or hard-to-find ingredients required—just pantry basics and strawberries
- Beginner-friendly: Even if you’re new to baking, you can absolutely master these bars
- Make-ahead magic: Bake them in advance and store for easy grab-and-go snacks all week
- Customizable: Swap strawberries for other berries, add citrus zest, or mix in chocolate chips
- Family-approved: Kids and adults alike devour these—they’re not too sweet, not too tart
- Budget-friendly: This recipe feeds a crowd without costing a fortune
- No mixer needed: Everything comes together by hand, making cleanup a breeze
- Perfect texture: That combination of crumbly, buttery oats with jammy fruit filling is absolutely addictive
Ingredient Notes
Let’s talk about what goes into these delicious bars and why each ingredient matters. Understanding your ingredients helps you make smart substitutions and ensures success every time.
All-purpose flour: Forms the structure of the crust and crumble topping. You can substitute with whole wheat flour for a nuttier flavor, or use a 1:1 gluten-free baking blend if needed. The flour helps bind everything together and creates that tender crumb.
Old-fashioned oats: The star ingredient that gives these bars their signature texture and wholesome flavor. Use old-fashioned rolled oats, not quick oats or steel-cut. Quick oats will make the bars too dense, while steel-cut won’t soften properly. Old-fashioned oats create that perfect chewy-crispy texture we’re after.
Brown sugar: Adds moisture, richness, and a subtle molasses flavor that complements the strawberries beautifully. Light or dark brown sugar both work—dark will give you a slightly deeper caramel note. You can substitute with coconut sugar for a less refined option.
Butter: The key to that irresistible buttery flavor and crumbly texture. Use unsalted butter so you can control the salt level. Make sure it’s softened to room temperature for easy mixing. For a dairy-free version, coconut oil works surprisingly well.
Baking soda: Just a small amount helps the crust spread slightly and creates a tender texture. Don’t skip it!
Salt: Enhances all the flavors and balances the sweetness. Even a pinch makes a huge difference.
Strawberry jam or preserves: This is your filling! Use good-quality jam with real fruit. Seedless is smoother, but seeds add character. You can also make your own quick strawberry compote by cooking down fresh strawberries with sugar and lemon juice.
Fresh strawberries (optional): Adding diced fresh berries to your jam intensifies the fruit flavor and adds delightful texture. This is especially wonderful in summer when strawberries are at their peak.
Vanilla extract: A splash of vanilla in the crust adds warmth and depth. Pure vanilla extract is always worth it.
Lemon juice (optional): A teaspoon brightened up the strawberry filling and cuts through the sweetness perfectly.
Equipment Needed
You don’t need any fancy equipment to make these bars—just some basic kitchen tools you probably already own:
- 9×13-inch baking pan: This is the standard size for this recipe, creating bars that are the perfect thickness
- Parchment paper or aluminum foil: Line your pan for easy removal and cleanup
- Large mixing bowl: For combining your oat mixture
- Medium mixing bowl: For preparing your strawberry filling if using fresh berries
- Measuring cups and spoons: Accuracy matters in baking!
- Wooden spoon or spatula: For mixing the dough by hand
- Fork or pastry blender (optional): Helps create that perfect crumbly texture, though your hands work great too
- Small saucepan (optional): If you’re making your own strawberry filling
- Knife or bench scraper: For cutting the cooled bars into perfect squares
- Cooling rack: Essential for letting your bars cool properly
Print

Strawberry Oat Bars Recipe
These easy Strawberry Oat Bars feature a buttery oat crust and crumble topping with a sweet strawberry filling in the middle. Perfect for breakfast, snacks, or dessert, these homemade bars are simple to make and absolutely delicious!
- Total Time: 55 minutes (plus cooling time)
- Yield: 16-20 bars 1x
Ingredients
ScaleFor the Oat Base and Topping:
- 1½ cups all-purpose flour
- 1½ cups old-fashioned rolled oats
- ¾ cup packed light brown sugar
- ½ teaspoon baking soda
- ½ teaspoon salt
- ¾ cup unsalted butter, melted and slightly cooled
- 1 teaspoon vanilla extract
For the Strawberry Filling:
- 1½ cups strawberry jam or preserves
- 1 cup fresh strawberries, diced small (optional but recommended)
- 1 tablespoon cornstarch
- 1 tablespoon lemon juice
- 2 tablespoons sugar (if using fresh berries)
Instructions
For the Oat Base and Topping:
- 1½ cups all-purpose flour
- 1½ cups old-fashioned rolled oats
- ¾ cup packed light brown sugar
- ½ teaspoon baking soda
- ½ teaspoon salt
- ¾ cup unsalted butter, melted and slightly cooled
- 1 teaspoon vanilla extract
For the Strawberry Filling:
- 1½ cups strawberry jam or preserves
- 1 cup fresh strawberries, diced small (optional but recommended)
- 1 tablespoon cornstarch
- 1 tablespoon lemon juice
- 2 tablespoons sugar (if using fresh berries)
Notes
- For thicker bars, use an 8×8 or 9×9-inch square pan and increase baking time by 5-10 minutes
- The cornstarch in the filling is essential—it prevents the bars from being too wet and soggy
- Don’t skip the cooling time! Cutting warm bars will result in a messy filling that doesn’t hold its shape
- If your strawberry jam is very runny, add an extra teaspoon of cornstarch to help it set
- These bars freeze beautifully for up to 3 months
- Prep Time: 15 minutes
- Cook Time: 40 minutes
- Category: Dessert, Snack, Breakfast
- Method: Baking
- Cuisine: American
- Diet: Vegetarian
Nutrition
- Serving Size: 1 bar (based on 11 bar (based on 16 servings)6 servings)
- Calories: 245
- Sugar: 22g
- Sodium: 125mg
- Fat: 10g
- Saturated Fat: 6g
- Unsaturated Fat: 3.5g
- Trans Fat: 0g
- Carbohydrates: 37g
- Fiber: 2g
- Protein: 3g
- Cholesterol: 25mg
Tips & Variations
One of the best things about this recipe is how adaptable it is. Here are some creative ways to make these bars your own:
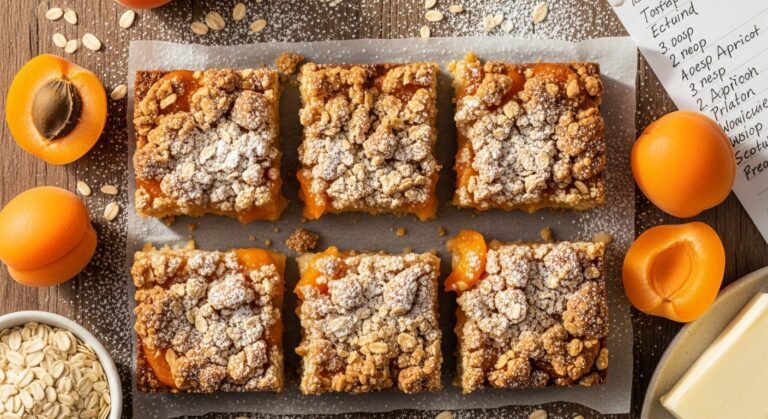
Berry swaps: Try raspberry, blueberry, blackberry, or mixed berry jam. Each brings its own unique flavor profile. Peach or apricot preserves are also delicious for a summery twist.
Chocolate lovers: Sprinkle mini chocolate chips over the filling before adding the top layer, or drizzle melted chocolate over the cooled bars for an extra indulgent treat.
Citrus boost: Add the zest of one lemon or orange to the oat mixture for a bright, fresh flavor that complements the berries beautifully.
Nutty addition: Mix in half a cup of chopped pecans, almonds, or walnuts into the oat topping for extra crunch and richness.
Healthier version: Substitute half the all-purpose flour with whole wheat flour, reduce the sugar slightly, and use coconut oil instead of butter. The bars will be slightly denser but still delicious.
Spiced variation: Add half a teaspoon of cinnamon or a quarter teaspoon of cardamom to the oat mixture for warm, cozy spice notes.
Coconut twist: Replace half a cup of oats with shredded coconut for a tropical variation that pairs wonderfully with strawberries.
Glaze it up: Once cooled, drizzle with a simple powdered sugar glaze made from powdered sugar and milk for bakery-style presentation.
Pro Chef Tips
Want to take your Strawberry Oat Bars from good to absolutely amazing? Here are professional techniques that make all the difference:
Toast your oats: Before adding them to the mixture, spread your oats on a baking sheet and toast them in a 350°F oven for 8-10 minutes until fragrant. This intensifies their nutty flavor and adds incredible depth to the bars.
Brown the butter: Instead of just melting your butter, brown it in a saucepan until it smells nutty and turns golden. This adds a rich, caramelized flavor that elevates the entire recipe to restaurant quality.
Layer your sweetness: Use a combination of granulated and brown sugar—this creates better texture and more complex sweetness. Try two-thirds brown sugar to one-third granulated.
Reduce your jam: If you have time, simmer your jam in a saucepan for 5-10 minutes to thicken it further. This concentrates the flavor and prevents soggy bars.
Salt strategically: Add a tiny pinch of flaky sea salt to the top of your bars right after they come out of the oven. The contrast between sweet and salty is absolutely divine.
Mix textures in filling: Combine smooth jam with some diced fresh or frozen berries for a more interesting filling with varied texture in every bite.
Check doneness properly: The edges should be golden brown and slightly pulled away from the sides of the pan. If you gently shake the pan, the center should be set with just the slightest jiggle.
Score before fully cooling: If you want ultra-clean cuts, score the bars with a knife while they’re still slightly warm, then finish cutting once completely cool.
Common Mistakes to Avoid
Even simple recipes can go wrong if you’re not careful. Here’s how to avoid the most common pitfalls:
Using the wrong oats: Quick oats will make your bars mushy and dense, while steel-cut oats won’t soften properly during baking. Always use old-fashioned rolled oats for the best texture and structure.
Not pressing the bottom layer firmly enough: If your bottom crust isn’t packed down well, it will crumble apart when you try to cut the bars. Really press it down firmly with your hands or the bottom of a measuring cup.
Cutting too soon: This is the number one mistake! If you cut into the bars while they’re still warm, the filling will be runny and everything will fall apart. Patience is key—let them cool completely, even if it takes a few hours.
Overmixing the oat mixture: Once you add the melted butter, mix just until combined. Overmixing can make the bars tough instead of tender and crumbly. The mixture should look like coarse crumbs, not a smooth dough.
Skipping the cornstarch: The cornstarch in the filling helps it set properly. Without it, your bars might be too wet and difficult to cut. Don’t leave it out thinking it’s optional—it’s essential for structure.
Using a pan that’s too large or too small: The 9×13-inch pan is specified for a reason. A larger pan will make the bars too thin and crispy, while a smaller pan will result in undercooked centers.
Not lining the pan: Always line with parchment paper or foil with overhang. This makes removing the bars so much easier and ensures clean cuts. Skipping this step often leads to messy, broken bars stuck to the pan.
Storage & Meal Prep
These Strawberry Oat Bars store beautifully, making them perfect for meal prep or making ahead for busy weeks:
Room temperature storage: Store completely cooled bars in an airtight container with parchment paper between layers for up to 3 days at room temperature. They’ll stay soft and delicious, though the topping may soften slightly over time. This is ideal if you plan to eat them within a few days.
Refrigerator storage: For longer storage, keep the bars in an airtight container in the refrigerator for up to one week. The cool temperature will make the topping a bit firmer and more crumbly. Let them come to room temperature for 15-20 minutes before serving for the best texture, or enjoy them cold for a firmer, more compact bite.
Preventing sogginess: If you’re storing for several days, place a paper towel in the bottom of your container to absorb any excess moisture. This keeps the bottom crust from getting soggy.
Individual wrapping: For lunchboxes or grab-and-go snacks, wrap individual bars in plastic wrap or parchment paper, then store in a container or zip-top bag. They’ll stay fresh and are perfectly portable for school, work, or road trips.
Reheating tips: While these bars are delicious at room temperature or cold, you can warm them slightly in the microwave for 10-15 seconds to bring back that fresh-from-the-oven feel. A quick 5-minute stint in a 300°F oven will re-crisp the topping beautifully.
Make-Ahead & Freezer Notes
These bars are a meal prepper’s dream—they freeze exceptionally well and can be made completely in advance:
Freezing baked bars: Let the bars cool completely, then cut them into squares. Wrap each bar individually in plastic wrap, then place them all in a freezer-safe zip-top bag or airtight container. Freeze for up to 3 months. This method is perfect because you can pull out just one or two bars at a time.
Thawing instructions: Remove bars from the freezer and let them thaw at room temperature for 1-2 hours, or thaw in the refrigerator overnight. You can also microwave individual frozen bars for 30-45 seconds for a warm treat. They taste freshly baked when thawed!
Freezing unbaked bars: You can assemble the entire recipe, cover the pan tightly with plastic wrap and then aluminum foil, and freeze for up to 2 months. When ready to bake, do not thaw—bake directly from frozen, adding 10-15 minutes to the baking time. This is fantastic for having a homemade dessert ready at a moment’s notice.
Partial assembly: Prepare the oat mixture and freeze it in a zip-top bag for up to 3 months. When ready to use, thaw overnight in the fridge, then proceed with pressing into the pan and adding filling as directed. This cuts your active prep time in half.
Make the filling ahead: Cook your strawberry filling up to a week in advance and store it in the refrigerator in an airtight container. This is especially helpful if you’re making multiple batches or want to speed up your baking day.
Best reheating method from frozen: For the best texture when reheating frozen bars, let them thaw completely at room temperature, then warm in a 300°F oven for 8-10 minutes. This restores the crispness of the topping while warming the filling.
Serving Suggestions
These versatile bars work beautifully in so many different contexts. Here’s how to serve them for maximum enjoyment:
Breakfast pairings: Serve these bars alongside your morning coffee or tea for a sweet breakfast treat. They pair wonderfully with Greek yogurt and fresh fruit for a more substantial breakfast. A glass of cold milk or a smoothie rounds out a quick, satisfying morning meal.
Afternoon snack: These bars are perfect with hot tea, especially Earl Grey or chamomile. Add some cheese and crackers or fresh vegetables with hummus for a balanced snack that provides both sweet and savory elements.
Dessert presentation: Elevate these simple bars to an elegant dessert by serving them warm with a scoop of vanilla ice cream or a dollop of whipped cream. A drizzle of chocolate or caramel sauce takes them over the top. Fresh strawberries and a sprig of mint make for beautiful presentation.
Picnic and potluck perfection: These bars travel extremely well and don’t require refrigeration, making them ideal for outdoor gatherings. Cut them into smaller squares for easier eating, and arrange them on a pretty platter lined with parchment paper.
Brunch addition: Add these to your brunch spread alongside quiche, fruit salad, and pastries. They provide a sweet element that guests love, and they’re easy to eat while mingling.
Kid-friendly pairings: Serve with a glass of cold milk, apple slices, or string cheese for a balanced after-school snack that kids actually look forward to.
Coffee shop style: Warm slightly and serve with a latte or cappuccino for a coffeehouse experience at home. The buttery oats pair beautifully with coffee’s rich, roasted notes.
Holiday entertaining: Cut into small squares and arrange on a dessert platter with other bar cookies and brownies for a cookie exchange or holiday party. They add beautiful color and are always a hit.
FAQs Section
Can I use frozen strawberries instead of fresh?
Absolutely! Frozen strawberries work wonderfully in this recipe. Thaw them completely and drain off any excess liquid before mixing with the jam and cornstarch. You may need to add an extra teaspoon of cornstarch since frozen berries release more moisture. Pat them dry with paper towels if they’re very wet.Why are my bars falling apart when I cut them?
This usually happens for two reasons: cutting them while still warm, or not pressing the bottom crust firmly enough. Make sure you let the bars cool completely to room temperature—at least 2 hours—before cutting. Also ensure you’re really packing down that bottom layer so it creates a solid foundation. Using a very sharp knife and wiping it clean between cuts also helps achieve clean edges.Can I make these bars gluten-free?
Yes! Simply substitute the all-purpose flour with your favorite 1:1 gluten-free baking flour blend. Make sure your oats are certified gluten-free as well, since regular oats are often processed in facilities that handle wheat. The texture will be very similar to the original recipe.How do I know when the bars are done baking?
Look for golden brown edges and topping, with the filling bubbling slightly around the edges. The center should be set and not jiggly. If the top is browning too quickly but the center isn’t done, tent loosely with aluminum foil and continue baking. The total bake time is usually 38-42 minutes at 350°F.Can I use quick oats instead of old-fashioned oats?
It’s not recommended. Quick oats are more finely cut and will absorb more liquid, resulting in bars that are dense and mushy rather than having that desirable crumbly texture. Old-fashioned rolled oats are essential for the proper texture and structure of these bars.My strawberry filling seems runny. What did I do wrong?
The cornstarch is crucial for thickening the filling. Make sure you didn’t skip it or reduce the amount. Also, using very liquid jam without adding the cornstarch will result in runny bars. If you notice your jam is particularly thin, add an extra half teaspoon of cornstarch. The bars also need adequate cooling time for the filling to fully set.Can I double this recipe?
Yes, but you’ll need to bake in two separate 9×13-inch pans. Doubling the recipe in one larger pan will result in uneven baking, with the edges overdone and the center undercooked. The baking time remains the same when using two pans of the standard size.What’s the best way to get clean cuts?
Use a large, sharp knife and wipe it clean with a damp cloth between each cut. Cutting straight down rather than sawing back and forth helps too. Make sure the bars are completely cool, and consider chilling them in the refrigerator for 30 minutes before cutting for the cleanest edges possible.Conclusion
There you have it—everything you need to make the most delicious, foolproof Strawberry Oat Bars! These simple yet impressive bars prove that you don’t need complicated techniques or fancy ingredients to create something truly special. With their buttery oat layers and bright strawberry filling, they’re bound to become a staple in your baking repertoire.
Whether you’re packing them in lunchboxes, serving them at your next gathering, or simply enjoying one with your afternoon coffee, these bars deliver comfort and satisfaction in every bite. The best part is how forgiving and adaptable they are—feel free to experiment with different fruits, add your favorite mix-ins, or adjust the sweetness to your liking.
I hope you love these Strawberry Oat Bars as much as my family and I do! They’ve become our go-to recipe for everything from last-minute bake sales to special celebrations. Once you make them, I have a feeling they’ll earn a permanent spot in your recipe collection too.
Happy baking, and don’t forget to share your creations! I’d love to hear how yours turned out and what creative variations you tried. Pin this recipe for later, and come back to let me know how it went. Enjoy every crumbly, jammy, buttery bite!