Ingredients
- 3 cups (18 ounces) semi-sweet chocolate chips
- 1 can (14 ounces) sweetened condensed milk
- 2 tablespoons unsalted butter
- 1 teaspoon pure vanilla extract
- Pinch of salt (optional)
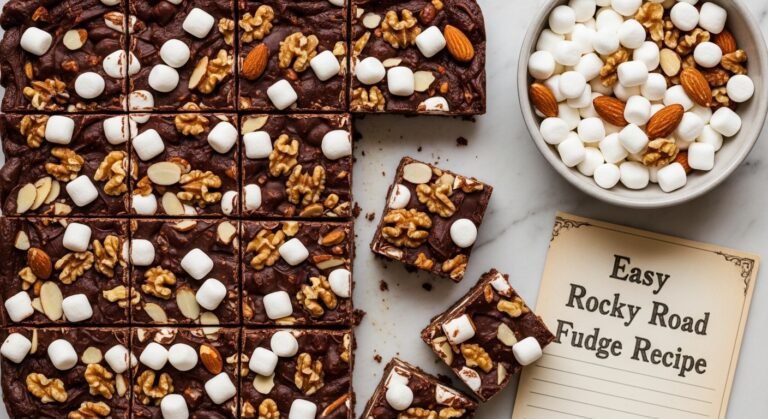
- 2 cups mini marshmallows
- 1 cup chopped walnuts or almonds, toasted
Instructions
Step 1: Prepare Your Pan
Line an 8×8-inch square baking pan with parchment paper or aluminum foil, leaving an overhang on two opposite sides. This overhang will serve as handles to lift the fudge out later, making cutting much easier. Lightly grease the parchment or foil with butter or cooking spray. Set aside.
Step 2: Melt the Chocolate Base
In a medium saucepan, combine the chocolate chips, sweetened condensed milk, and butter. Place over low heat and stir constantly with a wooden spoon or silicone spatula. The mixture will gradually melt together into a smooth, glossy chocolate mixture. This takes about 5-7 minutes. Be patient and keep the heat low – rushing with high heat can cause the chocolate to scorch or seize.
Alternatively, you can melt this mixture in the microwave: Combine in a large microwave-safe bowl and microwave on 50% power for 1 minute. Stir, then continue microwaving in 30-second intervals at 50% power, stirring after each interval, until completely smooth. This takes about 2-3 minutes total.
Step 3: Add Vanilla and Salt
Once the chocolate mixture is completely smooth and melted, remove from heat. Stir in the vanilla extract and a pinch of salt (if using). Mix until fully incorporated. The mixture should be glossy, smooth, and thick but pourable.
Step 4: Fold in Marshmallows and Nuts
Let the chocolate mixture cool for about 2-3 minutes – it should still be warm but not steaming hot. This prevents the marshmallows from completely melting when you add them. Add the mini marshmallows and chopped nuts to the chocolate mixture. Using a rubber spatula, gently fold them in until evenly distributed throughout. Don’t overmix – you want the marshmallows to stay intact, not melt into the fudge.
Step 5: Spread in Pan
Immediately pour the fudge mixture into your prepared pan. Use a spatula or the back of a spoon to spread it evenly into all corners and smooth the top. Work fairly quickly as the fudge will start to set as it cools. You can press a few extra marshmallows and nuts on top for a prettier presentation if desired.
Step 6: Refrigerate to Set
Place the pan in the refrigerator and let the fudge set completely. This takes at least 2 hours, though overnight is even better. The fudge needs to be completely firm before cutting or it will be messy and won’t hold its shape. You’ll know it’s ready when it feels solid to the touch and doesn’t indent when you press it gently.
Step 7: Cut into Squares
Once completely set, use the parchment paper overhang to lift the entire slab of fudge out of the pan. Place it on a cutting board. Using a sharp knife, cut the fudge into squares. For small candy-sized pieces, cut into 1-inch squares (8 rows by 8 rows = 64 pieces). For larger serving pieces, cut into 1.5-inch squares (about 6 rows by 6 rows = 36 pieces).
For the cleanest cuts, wipe your knife with a damp cloth between each cut. You can also warm the knife briefly under hot water, dry it, and then cut – the warm knife glides through the fudge more smoothly.
Step 8: Store or Serve
Serve immediately or store in an airtight container in the refrigerator for up to 2 weeks, or at room temperature for up to 1 week.
Notes
- Toasting Nuts: Don’t skip toasting your nuts! It dramatically improves their flavor. Spread on a baking sheet and bake at 350°F for 7-8 minutes until fragrant.
- Marshmallow Tip: Let the chocolate mixture cool for 2-3 minutes before adding marshmallows so they don’t completely melt.
- Pan Size: An 8×8-inch pan creates thick, generous pieces. A 9×13-inch pan creates thinner fudge, which is also delicious but different.
- Storage: Store in the refrigerator for firmest texture, or at room temperature for softer, more melt-in-your-mouth fudge.
- Nut-Free Version: Omit nuts for allergies. Replace with extra marshmallows, Rice Krispies, or leave plain.
- Chocolate Choice: Semi-sweet is classic, but milk chocolate makes sweeter fudge and dark chocolate creates more sophisticated flavor.
- Prep Time: 15 minutes
- Cook Time: 5 minutes
- Category: Candy, Dessert
- Method: Baking
- Cuisine: American
- Diet: Gluten Free
Nutrition
- Serving Size: 1 piece (1-inch square)
- Calories: 95
- Sugar: 12g
- Sodium: 20mg
- Fat: 5g
- Saturated Fat: 2.5g
- Unsaturated Fat: 2g
- Trans Fat: 0g
- Carbohydrates: 13g
- Fiber: 1g
- Protein: 1g
- Cholesterol: 3mg