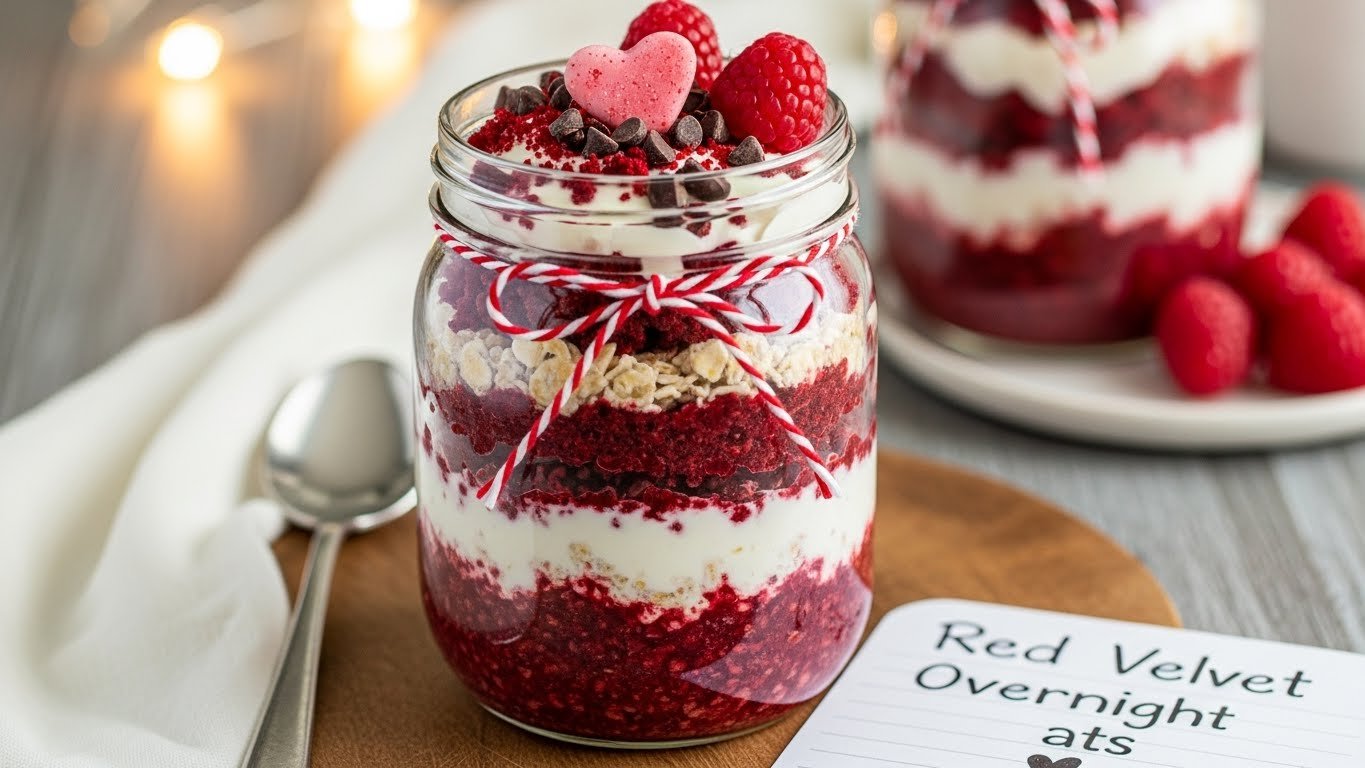
Red Velvet Overnight Oats Recipe (Easy Make-Ahead Valentine’s Breakfast!)
Red Velvet Overnight Oats bring the beloved flavors of classic red velvet cake to your breakfast table in the most convenient, nutritious way possible. This no-cook breakfast combines rich cocoa, tangy cream cheese, and a gorgeous ruby-red color with wholesome rolled oats that soak overnight to create a creamy, pudding-like consistency. It’s the perfect way to enjoy dessert-inspired flavors first thing in the morning while still getting fiber, protein, and sustained energy to power through your day.
These stunning overnight oats are ideal for Valentine’s Day breakfast, anniversary mornings, Galentine’s Day brunches, or any time you want to add a touch of romance and indulgence to your morning routine. They’re also perfect for meal prep Sunday when you want grab-and-go breakfasts that don’t sacrifice flavor for convenience. The dramatic red color and cream cheese swirl make them Instagram-worthy and special enough to serve to guests, yet they’re simple enough to become part of your regular breakfast rotation. Whether you’re surprising a loved one with breakfast in bed or treating yourself to something special on a busy weekday, these Red Velvet Overnight Oats deliver both visual appeal and delicious satisfaction.
History / Background
Red velvet cake has a fascinating and somewhat mysterious history that spans over a century of American baking tradition. While the exact origins are debated, red velvet cake as we know it today emerged in the early 20th century, with the most popular origin story crediting New York’s Waldorf-Astoria Hotel in the 1920s. However, other food historians trace its roots even further back to the Victorian era, when “velvet” cakes referred to fine-textured cakes made with cocoa, which naturally took on a reddish tint when mixed with acidic ingredients like buttermilk and vinegar.
The distinctive bright red color that defines modern red velvet cake became prominent during the Great Depression, when Adams Extract Company began marketing red food coloring alongside their vanilla extract, even including a red velvet cake recipe with each bottle. This marketing strategy helped cement the vibrant red hue as an essential characteristic of the cake, even though the original chemical reaction between cocoa and buttermilk produced only a subtle reddish-brown color.
Red velvet cake gained particular popularity in the American South, where it became a staple at special occasions, holidays, and church gatherings. The traditional pairing of the subtle chocolate cake with tangy cream cheese frosting became iconic, representing the perfect balance of sweet and tangy, rich yet light. The cake’s luxurious appearance and romantic red color made it especially beloved for Valentine’s Day celebrations and weddings.
The transition of red velvet flavor into overnight oats is a thoroughly modern innovation, reflecting our current food culture’s love of transforming classic desserts into breakfast-appropriate formats. As overnight oats exploded in popularity during the 2010s thanks to health food trends and meal prep culture, creative home cooks began experimenting with dessert-inspired flavors. Red velvet quickly became one of the most popular variations because it satisfied the desire for something indulgent and special while still fitting into a healthy breakfast routine. The striking color, familiar flavor combination, and Instagram-worthy presentation made Red Velvet Overnight Oats an instant hit on social media platforms, particularly Pinterest, where the recipe continues to be one of the most saved and shared breakfast ideas every Valentine’s season.
Why You’ll Love This Recipe
Red Velvet Overnight Oats combine everything you love about the classic cake with the convenience and nutrition of a make-ahead breakfast. This recipe transforms a special-occasion dessert into an everyday indulgence that you can feel good about eating. The dramatic presentation and rich flavor make mornings feel celebratory, while the simple preparation means you can enjoy this restaurant-quality breakfast even on your busiest days.
Here’s why this recipe deserves a permanent spot in your breakfast rotation:
- No cooking required – Simply mix the ingredients and let your refrigerator do all the work overnight. Perfect for hot mornings when you don’t want to turn on the stove.
- Tastes like dessert for breakfast – All the rich, chocolatey, tangy flavors of red velvet cake in a nutritious, satisfying breakfast that won’t cause a sugar crash.
- Stunning visual appeal – The vibrant red color and cream cheese swirl create a beautiful presentation that’s perfect for special occasions or social media photos.
- Make-ahead friendly – Prep up to 5 days of breakfasts in one session, saving you precious time during hectic mornings.
- Customizable – Easy to adjust sweetness levels, add extra protein, or modify for dietary restrictions without sacrificing flavor.
- Kid and adult approved – The cake-like flavor appeals to children while the sophisticated taste satisfies adult palates. It’s a rare breakfast that pleases everyone.
- Budget-friendly – Uses affordable pantry staples and everyday ingredients, with no need for expensive specialty items.
- Perfect for meal prep – Stays fresh all week and actually tastes better after the flavors have time to meld together overnight.
- Protein-packed – The combination of Greek yogurt, cream cheese, and oats keeps you satisfied until lunch without the need for mid-morning snacks.
- Celebration-ready – Impressive enough for Valentine’s Day, anniversaries, Mother’s Day, or brunch parties, yet simple enough for everyday enjoyment.
Ingredient Notes
Understanding your ingredients helps you make smart substitutions and achieve the best results every time. Here’s the breakdown of what goes into these gorgeous Red Velvet Overnight Oats:
Rolled Oats (Old-Fashioned Oats) – The foundation of any overnight oats recipe, rolled oats have been steamed and flattened to absorb liquid perfectly overnight without becoming mushy. They provide complex carbohydrates, fiber, and a satisfying texture. Never use instant oats, which turn to mush, and steel-cut oats won’t soften enough without cooking. Quick oats can work in a pinch but may be slightly mushier.
Milk – Provides the liquid base that softens the oats and creates creaminess. Whole milk gives the richest, most cake-like texture, but any milk works. For dairy-free versions, almond milk, oat milk, or cashew milk are excellent choices. Coconut milk adds extra richness if you like that flavor profile.
Greek Yogurt – Adds protein, tanginess, and luxurious creaminess that mimics the texture of red velvet cake’s tender crumb. Plain, unsweetened Greek yogurt is best for controlling sweetness levels. The higher protein content keeps you full longer. Vanilla Greek yogurt can work if you reduce other sweeteners slightly.
Cocoa Powder – Essential for that characteristic red velvet chocolate flavor. Use unsweetened cocoa powder, not hot chocolate mix. Dutch-processed cocoa gives a smoother, less acidic flavor, while natural cocoa is more traditional and slightly tangier. Either works beautifully.
Cream Cheese – This is what makes it truly red velvet. The tangy cream cheese provides that iconic red velvet cake frosting flavor and adds incredible creaminess. Always use softened cream cheese so it blends smoothly without lumps. Full-fat gives the best flavor, but Neufchâtel works for a lighter option. Dairy-free cream cheese alternatives work surprisingly well.
Red Food Coloring – Creates that signature red velvet color that makes these oats special. Gel food coloring provides the most vibrant color with less product, but liquid food coloring works fine. For natural alternatives, use beet powder or freeze-dried raspberry powder, though the color will be more muted and earthy-toned.
Maple Syrup or Honey – Natural sweeteners that enhance the red velvet flavor without refined sugar. Adjust based on your preference and how sweet you like breakfast. Honey adds a floral note, while maple syrup has a deeper, more caramel-like sweetness. Agave nectar also works, or use sugar-free alternatives like monk fruit sweetener.
Vanilla Extract – Amplifies all the other flavors and adds that bakery-style taste. Pure vanilla extract is worth the investment, though imitation vanilla is acceptable. This small ingredient makes a big impact on overall flavor.
Chia Seeds (Optional) – Add extra thickness, fiber, omega-3 fatty acids, and help bind everything together. They’re completely optional but highly nutritious and help create that perfect pudding-like consistency.
Salt – Just a pinch balances the sweetness and makes all the other flavors pop. Never skip the salt, even in sweet recipes.
White Chocolate Chips or Dark Chocolate Chips (Optional) – Add extra indulgence and texture. White chocolate chips are traditional with red velvet, but dark chocolate chips provide antioxidants and less sugar.
Equipment Needed
The beauty of overnight oats is minimal equipment required. Here’s what you’ll need:
- Mason jars or airtight containers – 16-ounce mason jars are ideal for individual servings and create beautiful presentation. Any airtight container works, including glass meal prep containers, small bowls with lids, or plastic containers. Glass is preferred as it doesn’t absorb colors or odors.
- Measuring cups and spoons – For accurate ingredient measurements. Consistent ratios are key to perfect texture every time.
- Small mixing bowl – For softening and blending the cream cheese until smooth. This prevents lumps in your final product.
- Whisk or fork – To thoroughly blend the cream cheese and mix all ingredients together evenly.
- Sifter or fine-mesh strainer (optional) – For sifting cocoa powder to prevent clumps. Not essential but helpful for the smoothest texture.
- Piping bag or zip-top bag (optional) – For creating beautiful cream cheese swirls. You can also just dollop the cream cheese with a spoon.
- Spoon or spatula – For stirring and transferring ingredients between bowls and jars.
- Refrigerator – Obviously essential for the overnight soaking process!
No stove, no oven, no complicated appliances. Just simple tools for a gourmet breakfast experience.
Print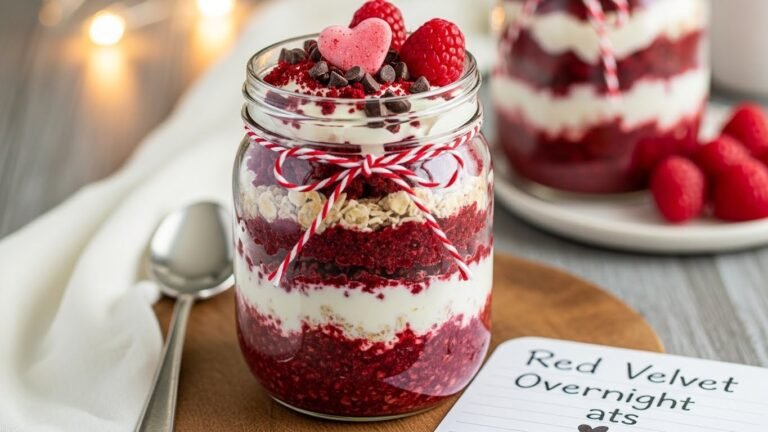
Red Velvet Overnight Oats Recipe
Decadent Red Velvet Overnight Oats that taste like your favorite cake for breakfast! This no-cook recipe features rich cocoa, tangy cream cheese swirl, and that signature red velvet color in a healthy, make-ahead format.
- Total Time: 4 hours 10 minutes (mostly hands-off)
- Yield: 2 servings 1x
Ingredients
For the Overnight Oats:
- 1 cup old-fashioned rolled oats
- 1 cup milk (whole, 2%, or non-dairy alternative)
- ½ cup plain Greek yogurt
- 2 tablespoons unsweetened cocoa powder
- 2-3 tablespoons maple syrup or honey (adjust to taste)
- 1 teaspoon vanilla extract
- 1 tablespoon chia seeds (optional but recommended)
- ½ teaspoon red food coloring (gel or liquid), or 1 tablespoon beet powder for natural coloring
- Pinch of salt
For the Cream Cheese Swirl:
- 2 ounces cream cheese, softened (about ¼ cup)
- 1-2 tablespoons maple syrup or honey
- ½ teaspoon vanilla extract
- 1-2 tablespoons milk (to thin if needed)
For Topping:
- 2 tablespoons white chocolate chips or dark chocolate chips
- Additional cream cheese dollops (optional)
- Crushed graham crackers or cookies (optional)
- Fresh raspberries or strawberries (optional)
- Whipped cream for serving (optional)
Instructions
Step 1: Prepare the Cream Cheese Swirl
In a small bowl, combine the softened cream cheese, 1-2 tablespoons maple syrup, and ½ teaspoon vanilla extract. Use a whisk or fork to blend until completely smooth and creamy with no lumps. If the mixture is too thick to swirl, add 1-2 tablespoons of milk to thin it to a pourable consistency. Set aside.
Step 2: Sift the Cocoa Powder (Optional but Recommended)
To prevent cocoa clumps in your oats, sift the cocoa powder through a fine-mesh strainer into your mixing bowl. If you don’t have a sifter, you can whisk it vigorously with the other dry ingredients.
Step 3: Mix the Red Velvet Oat Base
In a medium mixing bowl, combine the rolled oats, milk, Greek yogurt, sifted cocoa powder, maple syrup, vanilla extract, chia seeds, red food coloring, and a pinch of salt. Stir everything together thoroughly until the mixture is uniformly colored and all ingredients are well incorporated. The mixture should be a beautiful red color. If you want a deeper red, add a few more drops of food coloring.
Step 4: Layer the Jars
Divide half of the red velvet oat mixture between two 16-ounce mason jars or containers. Drizzle or dollop half of the cream cheese mixture over the oats in each jar. Add the remaining oat mixture on top, then finish with the remaining cream cheese mixture. For a marbled effect, use a knife or skewer to gently swirl the cream cheese into the top layer of oats.
Step 5: Refrigerate Overnight
Cover the jars tightly with lids and refrigerate for at least 4 hours, but overnight (8-12 hours) is ideal. This allows the oats to fully absorb the liquid and develop that perfect creamy, cake-like texture. The chia seeds will also gel and help thicken everything beautifully.
Step 6: Add Toppings and Serve
When ready to eat, remove the jars from the refrigerator. Give them a stir if you like a uniform color, or leave them layered for visual appeal. Top with chocolate chips, a dollop of extra cream cheese, crushed cookies, fresh berries, or a swirl of whipped cream. Enjoy cold, or microwave for 30-60 seconds if you prefer them warm (remove chocolate chips before heating).
Notes
- Color Intensity: The amount of food coloring is adjustable based on how vibrant you want the red color. Start with less and add more if needed. Natural coloring from beet powder will give a more burgundy or pink tone rather than bright red.
- Sweetness Level: Red velvet cake is typically quite sweet, but you can adjust the maple syrup based on your preference. Start with 2 tablespoons and taste before adding more.
- Texture Control: For thicker overnight oats, reduce milk by 2 tablespoons or add an extra tablespoon of chia seeds. For thinner consistency, add extra milk 1 tablespoon at a time.
- Cream Cheese Tips: Make sure cream cheese is truly softened (leave at room temperature for 30-60 minutes or microwave for 10-15 seconds) to avoid lumps. Whisk it thoroughly before adding other ingredients.
- Make It Vegan: Use non-dairy milk, dairy-free yogurt, vegan cream cheese, and maple syrup instead of honey. The flavor is nearly identical.
- Gluten-Free: Ensure your oats are certified gluten-free, as regular oats can be cross-contaminated with wheat during processing.
- Prep Time: 10 minutes
- Cook Time: 0 minutes (chilling time: 4 hours minimum, overnight preferred)
- Category: Breakfast
- Method: No-Cook, Make-Ahead
- Cuisine: American
- Diet: Gluten Free
Nutrition
- Serving Size: 1 jar (about 2 cups)
- Calories: 445
- Sugar: 32g
- Sodium: 195
- Fat: 15g
- Saturated Fat: 7g
- Unsaturated Fat: 6g
- Trans Fat: 0g
- Carbohydrates: 65g
- Fiber: 9g
- Protein: 16g
- Cholesterol: 35mg
Red Velvet Overnight Oats Recipe (Easy Valentine’s Breakfast!)
Introduction of Recipe
Red Velvet Overnight Oats bring the beloved flavors of classic red velvet cake to your breakfast table in the most convenient, nutritious way possible. This no-cook recipe combines wholesome rolled oats with rich cocoa powder, a touch of vanilla, and that signature ruby red color to create a breakfast that feels indulgent but is actually packed with fiber, protein, and sustained energy. Topped with a luscious cream cheese frosting swirl, these overnight oats taste remarkably like the real dessert while being meal-prep friendly and ready to grab when you rush out the door.
Perfect for Valentine’s Day breakfast in bed, galentine’s brunch with friends, special birthday mornings, or any time you want to add a little romance and luxury to your morning routine, these oats prove that healthy eating can be exciting and delicious. They’re also fantastic for red velvet lovers who want to enjoy those signature flavors more often without the guilt of eating cake for breakfast. The creamy, slightly chocolatey taste combined with tangy cream cheese creates an unforgettable breakfast experience that will have you actually looking forward to Monday mornings.
History / Background
The story of red velvet overnight oats is really a tale of two beloved recipes coming together. Let’s start with the red velvet cake itself, which has a fascinating and somewhat debated history. While the exact origin is unclear, red velvet cake rose to prominence in the American South during the early 20th century. The Waldorf-Astoria Hotel in New York City famously served a version in the 1920s, and the cake gained widespread popularity when a Texas company began selling red food coloring and cocoa together as a “red velvet cake mix” during the Great Depression.
The characteristic red color originally came from a chemical reaction between natural cocoa powder and acidic ingredients like buttermilk and vinegar, which would give the cake a subtle reddish-brown hue. However, the dramatic crimson color we associate with red velvet today is achieved through red food coloring, which became popular in the 1940s and 1950s. The combination of subtle chocolate flavor, tangy buttermilk, and rich cream cheese frosting made red velvet cake a staple at Southern celebrations, weddings, and holidays.
Overnight oats, on the other hand, trace their roots to Swiss physician Maximilian Bircher-Brenner’s creation of Bircher muesli around 1900. This health-focused dish involved soaking raw oats overnight to make them more digestible and nutritious. The concept lay relatively dormant until the 2010s when overnight oats exploded in popularity thanks to health food bloggers, Pinterest, and the meal prep movement. People loved the convenience of preparing breakfast in advance and the endless flavor possibilities.
The marriage of these two concepts—decadent red velvet cake and practical overnight oats—represents modern food culture at its best. It’s part of a broader trend of “dessert for breakfast” recipes that make healthy eating feel less restrictive and more enjoyable. By transforming an iconic Southern dessert into a nutritious breakfast, home cooks can enjoy familiar flavors in a new context. Red Velvet Overnight Oats became particularly popular on social media around Valentine’s Day and quickly became a year-round favorite for those who love the dramatic presentation and nostalgic flavor of red velvet cake.
Why You’ll Love This Recipe
This Red Velvet Overnight Oats recipe is everything you want in a breakfast: convenient, delicious, Instagram-worthy, and surprisingly good for you. It’s designed for real people with busy lives who still want to eat well and enjoy every bite of their morning meal. The rich, slightly chocolatey flavor with that signature cream cheese tang makes breakfast feel like a celebration rather than a chore.
Here’s why you’ll be making these on repeat:
- Tastes like dessert – All the flavor of red velvet cake with cream cheese frosting, but balanced for breakfast. Your sweet tooth will be satisfied without any guilt.
- No cooking required – Just mix, refrigerate, and wake up to a ready-made breakfast. Perfect for busy mornings when you barely have time to brush your teeth.
- Meal prep champion – Make 4-5 jars on Sunday and have breakfast sorted for the entire work week. One prep session = five stress-free mornings.
- Stunning presentation – The vibrant red color and cream cheese swirl make these perfect for special occasions, holiday breakfasts, or social media photos.
- Protein-packed – Greek yogurt and optional protein powder keep you full and energized until lunch, preventing that mid-morning crash.
- Customizable – Easy to adjust sweetness, make it vegan, add different toppings, or modify for dietary needs.
- Kid and adult approved – Children love the fun color and sweet taste, while adults appreciate the sophisticated flavor profile and convenience.
- Budget-friendly – Uses affordable pantry staples and costs a fraction of buying fancy breakfast pastries or coffee shop oats.
- Perfect for celebrations – Ideal for Valentine’s Day, anniversaries, birthdays, or galentine’s gatherings without any complicated preparation.
- Naturally portion-controlled – Individual jars mean no overserving and easy calorie management.
Ingredient Notes
Understanding your ingredients helps you make smart swaps and achieve the best results. Here’s what goes into these gorgeous red velvet overnight oats:
Rolled Oats (Old-Fashioned Oats) – The foundation of your breakfast. Rolled oats have been steamed and flattened, which allows them to soften perfectly overnight without becoming mushy. They provide fiber, complex carbohydrates, and that satisfying texture. Never use instant oats, as they’ll turn to paste. Steel-cut oats won’t soften enough without cooking. Gluten-free certified oats work perfectly if you need them.
Milk – Provides the liquid that transforms hard oats into creamy breakfast perfection. Whole milk gives the richest, most cake-like flavor, but 2%, 1%, or skim milk all work. For dairy-free versions, use almond milk, oat milk, coconut milk, or cashew milk. Oat milk gives the creamiest dairy-free result and complements the oats beautifully.
Greek Yogurt – Adds protein, tanginess, and ultra-creamy texture that mimics the buttermilk tang in traditional red velvet cake. Plain, unsweetened Greek yogurt is ideal. The higher protein content keeps you satisfied for hours. You can use regular yogurt, but it won’t be as thick or protein-rich. For dairy-free, try coconut yogurt or almond milk yogurt.
Cocoa Powder – Provides that subtle chocolate flavor characteristic of red velvet cake. Use unsweetened cocoa powder, either natural or Dutch-process. Natural cocoa powder is slightly more acidic and traditional for red velvet, but Dutch-process works beautifully too and gives a smoother chocolate flavor. Don’t use hot cocoa mix, as it contains sugar and milk powder.
Red Food Coloring – Creates that iconic ruby red hue that makes these oats special. Gel food coloring provides the most vibrant color with less product and doesn’t thin your oats. Liquid food coloring works but requires more drops. For a natural option, try beet powder (start with 1 teaspoon) or freeze-dried raspberry powder, though the color won’t be as dramatic. You can also skip the coloring entirely for “naked” red velvet oats with all the flavor.
Maple Syrup or Honey – Natural sweeteners that balance the cocoa’s bitterness and enhance the cake-like flavor. Adjust based on your sweetness preference. Maple syrup is vegan-friendly, while honey adds floral notes. You can also use agave nectar, or for sugar-free, try monk fruit sweetener or stevia (start with less and adjust).
Vanilla Extract – Essential for authentic red velvet flavor. Pure vanilla extract is worth the investment for the best taste, though imitation vanilla works. Consider adding a drop of almond extract too for an extra bakery-style dimension.
Cream Cheese – The star of the topping that makes these taste like real red velvet cake. Softened cream cheese blended with a touch of sweetener and milk creates that signature tangy frosting flavor. Full-fat cream cheese provides the best flavor and texture, but Neufchâtel (reduced-fat) works too. For dairy-free, use vegan cream cheese.
Chia Seeds (Optional) – Add thickness, omega-3 fatty acids, extra fiber, and help create that perfect pudding-like consistency. They’re optional but highly recommended for nutrition and texture.
White Chocolate Chips (Optional) – A fun topping that adds sweetness and luxury. Use sparingly as a garnish for special occasions or when you really want to treat yourself.
Salt – Just a pinch enhances all the flavors and prevents flatness. Never skip the salt!
Equipment Needed
Red velvet overnight oats require minimal equipment, which is part of their beauty. Here’s what you’ll need:
- Mason jars or airtight containers – 12-16 ounce mason jars are perfect for individual servings and look beautiful. Any airtight containers, meal prep containers with lids, or even small bowls covered with plastic wrap work fine. Glass is ideal because it doesn’t stain or absorb odors.
- Measuring cups and spoons – For accurate measurements of oats, liquids, cocoa powder, and sweeteners. Precision matters for the best texture and flavor balance.
- Mixing bowl – A medium bowl for combining the oat mixture. Make sure it’s large enough to stir comfortably without spilling.
- Small bowl – For preparing the cream cheese frosting topping.
- Whisk or fork – To thoroughly mix the cocoa powder (which can be clumpy) and to blend the cream cheese frosting smooth.
- Spoon or spatula – For stirring, dividing mixture between jars, and adding toppings.
- Refrigerator – Essential for the overnight magic to happen!
That’s all you need! No stove, no oven, no blender required. Just simple mixing and refrigeration for an effortless breakfast.
Recipe Card
Prep Time: 10 minutes
Cook Time: 0 minutes (chilling time: 4 hours minimum, overnight preferred)
Total Time: 4 hours 10 minutes (mostly hands-off)
Yield: 2 servings
Category: Breakfast
Method: No-Cook, Make-Ahead
Cuisine: American
Diet: Vegetarian (can be made vegan and gluten-free with substitutions)
Description
Decadent Red Velvet Overnight Oats with a creamy cream cheese frosting swirl! This no-cook breakfast tastes like dessert but is packed with fiber and protein. Perfect for Valentine’s Day or any time you want to make breakfast special.
Ingredients
For the Overnight Oats:
- 1 cup old-fashioned rolled oats
- 1 cup milk (dairy or non-dairy)
- ½ cup plain Greek yogurt
- 2 tablespoons unsweetened cocoa powder
- 2-3 tablespoons maple syrup or honey (adjust to taste)
- 1 teaspoon vanilla extract
- ¼ teaspoon almond extract (optional but recommended)
- 6-10 drops red food coloring (or 1 teaspoon beet powder for natural color)
- 1 tablespoon chia seeds (optional but recommended)
- Pinch of salt
For the Cream Cheese Frosting:
- 3 ounces cream cheese, softened (about ⅓ cup)
- 1-2 tablespoons maple syrup or powdered sugar
- 1-2 tablespoons milk (to thin to drizzle consistency)
- ½ teaspoon vanilla extract
Optional Toppings:
- White chocolate chips
- Dark chocolate shavings
- Fresh raspberries or strawberries
- Crushed graham crackers
- Chopped pecans or walnuts
- Coconut flakes
- Extra cream cheese frosting drizzle
Instructions
Step 1: Mix the Dry Base
In a medium mixing bowl, combine the rolled oats, cocoa powder, chia seeds (if using), and a pinch of salt. Whisk these dry ingredients together thoroughly to break up any cocoa powder clumps and ensure even distribution. This step is important because cocoa powder tends to clump, and mixing it with the dry ingredients first prevents chocolate pockets in your oats.
Step 2: Add Wet Ingredients
Add the milk, Greek yogurt, maple syrup, vanilla extract, and almond extract (if using) to the bowl with the dry ingredients. Stir everything together until well combined and smooth. The mixture will look quite liquid at this stage, which is exactly what you want.
Step 3: Add Food Coloring
Add your red food coloring drops and stir thoroughly until you achieve an even, vibrant red color throughout the mixture. If using gel food coloring, start with a small amount and add more as needed. If using beet powder, whisk it in completely. The color will deepen slightly as the oats sit overnight. Don’t worry if it looks almost too red—the oats will absorb some of the color as they soak.
Step 4: Divide into Jars
Divide the red velvet oat mixture evenly between two mason jars or containers. Use a spoon or spatula to transfer the mixture and tap the jars gently on the counter to remove any air bubbles and settle the contents.
Step 5: Prepare Cream Cheese Frosting
In a small bowl, combine the softened cream cheese, maple syrup (or powdered sugar), milk, and vanilla extract. Whisk or beat with a fork until completely smooth and creamy. The mixture should be thick but pourable—like a glaze. Add more milk if needed to achieve a drizzle consistency. Taste and adjust sweetness to your preference.
Step 6: Add Frosting Layer
Spoon or drizzle half of the cream cheese frosting on top of the oat mixture in each jar. You can either spread it in a layer, create swirls with a knife for a marbled effect, or leave it as is on top. For the prettiest presentation, use a piping bag or plastic bag with a corner cut off to pipe the frosting on top.
Step 7: Refrigerate Overnight
Cover the jars tightly with lids and refrigerate for at least 4 hours, but overnight (8-12 hours) is ideal. This allows the oats to fully absorb the liquid and soften to that perfect creamy texture. The chia seeds will also gel and help thicken everything beautifully.
Step 8: Add Toppings and Serve
When you’re ready to eat, remove the overnight oats from the refrigerator. Give them a stir to incorporate the cream cheese frosting throughout (or leave it layered for visual appeal). Add your desired toppings like white chocolate chips, fresh berries, or chocolate shavings. Enjoy cold, or warm in the microwave for 30-45 seconds if you prefer a warm breakfast.
Notes
- Color Intensity: The amount of food coloring needed varies by brand. Start with fewer drops and add more until you reach your desired red shade. Remember that the color will deepen slightly overnight.
- Cocoa Powder: Make sure to use unsweetened cocoa powder, not hot chocolate mix. Natural cocoa powder gives the most authentic red velvet flavor, but Dutch-process cocoa works beautifully too.
- Sweetness Level: Red velvet cake is fairly sweet, but you can adjust the maple syrup to your taste. Start with 2 tablespoons and add more if desired. The cream cheese frosting also adds sweetness.
- Texture Preference: For thicker oats, reduce milk by 2-3 tablespoons or add extra chia seeds. For thinner oats, add more milk 1 tablespoon at a time.
- Make It Vegan: Use non-dairy milk, dairy-free yogurt, vegan cream cheese, and maple syrup instead of honey.
- Gluten-Free: Use certified gluten-free oats.
- Storage: Keeps well in the refrigerator for up to 5 days. Prepare the cream cheese frosting separately and add right before eating if meal prepping for several days.
Nutrition Facts Table
Serving Size: 1 jar (about 2 cups)
Servings Per Recipe: 2
Per Serving:
- Calories: 445
- Sugar: 26g
- Sodium: 195mg
- Fat: 16g
- Saturated Fat: 7g
- Unsaturated Fat: 7g
- Trans Fat: 0g
- Carbohydrates: 60g
- Fiber: 9g
- Protein: 17g
- Cholesterol: 38mg
Nutrition information is approximate and will vary based on specific ingredients and portion sizes used. Add-ons and toppings will alter nutritional values.
Tips & Variations
The beauty of overnight oats is infinite customization. Here are delicious ways to make this recipe your own:
Flavor Variations:
- Red Velvet Chocolate Chunk: Fold in 2-3 tablespoons mini chocolate chips or chopped dark chocolate.
- Red Velvet Raspberry: Add a layer of fresh or frozen raspberries in the middle for tartness that complements the chocolate.
- Extra Chocolatey Red Velvet: Increase cocoa powder to 3 tablespoons for a more pronounced chocolate flavor.
- Red Velvet Mocha: Add 1 teaspoon instant espresso powder for a coffee kick.
- Red Velvet Brownie: Add a tablespoon of nut butter and reduce milk slightly for a fudgier texture.
- Cookies and Cream Red Velvet: Crush a few chocolate sandwich cookies and fold them in before refrigerating.
Dietary Modifications:
- Higher Protein: Add a scoop of vanilla or chocolate protein powder (reduce milk by 2-3 tablespoons to compensate). You can also add 2 tablespoons of protein powder to the cream cheese frosting.
- Lower Sugar: Use sugar-free sweeteners like monk fruit or stevia, and choose unsweetened dairy alternatives. Skip the chocolate chip toppings or use sugar-free versions.
- Dairy-Free: Use coconut milk, almond milk, or oat milk, plus coconut yogurt and vegan cream cheese. The flavor will be slightly different but still delicious.
- Lower Calorie: Use skim milk, non-fat Greek yogurt, and light cream cheese (Neufchâtel). Reduce or eliminate added sweeteners.
- Nut-Free: Stick to oat milk or rice milk instead of almond or cashew milk. Skip the almond extract and any nut toppings.
Topping Ideas:
- Crumbled red velvet cake (for birthdays or special occasions)
- Freeze-dried raspberries or strawberries
- Crushed Oreos or chocolate sandwich cookies
- Candied pecans or walnuts
- Dark chocolate curls or shavings
- Pomegranate arils for a jeweled look
- Coconut whipped cream instead of cream cheese
- Graham cracker crumbs
- Mini marshmallows (reminiscent of hot chocolate)
- A drizzle of chocolate or caramel sauce
Presentation Ideas:
- Layer the oats and cream cheese frosting in clear glasses for a parfait effect
- Use heart-shaped containers for Valentine’s Day
- Top with edible flowers for spring brunches
- Pipe the cream cheese frosting decoratively with a star tip
- Alternate layers of red velvet oats and plain oats for a striped effect
Pro Chef Tips
Elevate your Red Velvet Overnight Oats from good to extraordinary with these professional techniques:
Sift Your Cocoa Powder: Before adding cocoa powder to your oats, sift it through a fine-mesh strainer or whisk it thoroughly with the dry ingredients. Cocoa powder is notorious for clumping, and those chocolate pockets won’t dissolve overnight. Taking 30 extra seconds to sift ensures smooth, evenly chocolatey oats.
Room Temperature Cream Cheese is Non-Negotiable: Cold cream cheese will never blend smoothly and will leave you with lumps in your frosting. Set it out 30-60 minutes before making the recipe, or microwave for 10-15 seconds. Beat it until silky smooth before adding other ingredients. This makes all the difference between amateur and professional-looking frosting.
Balance Your Flavors: Traditional red velvet cake has a subtle tang from buttermilk and a hint of almond or vanilla from the extract. The Greek yogurt provides the tang in this recipe, but don’t skip the almond extract if you have it—that’s the secret to authentic red velvet flavor. Just ¼ teaspoon adds complexity without tasting obviously like almonds.
Layer Your Frosting Strategically: For the most Instagram-worthy presentation, don’t just plop the cream cheese frosting on top. Use a piping bag (or a plastic bag with the corner snipped off) to pipe neat swirls or rosettes. Alternatively, add half the frosting, swirl with a knife to create marble effects, then add the remaining frosting on top just before serving for two distinct visual layers.
Toast Your Oats for Depth (Optional Advanced Step): For an even more complex, nutty flavor reminiscent of actual cake, lightly toast your oats in a dry skillet over medium heat for 3-4 minutes until fragrant before using them. This is completely optional but adds a subtle depth that takes the recipe to the next level.
Mind Your Color Chemistry: If using natural food coloring like beet powder, be aware that acidic ingredients can shift the color toward purple. If this happens, add a tiny pinch of baking soda (like ⅛ teaspoon) to bring the red back. Conversely, if your red velvet oats look too pink rather than red, you probably need more food coloring—don’t be shy with it.
Adjust Sweetness After Tasting: Before refrigerating, taste your oat mixture. Remember that sweetness perception decreases when foods are cold, so if it tastes perfectly sweet at room temperature, it might taste less sweet when cold. Err on the side of slightly sweeter than you think necessary, or keep extra maple syrup handy to drizzle before eating.
Common Mistakes to Avoid
Even simple recipes have potential pitfalls. Here’s how to sidestep the most common issues:
Using Instant Oats or Steel-Cut Oats: This bears repeating because it’s the number one mistake. Instant oats disintegrate into mush, while steel-cut oats stay hard and crunchy even after soaking overnight. Only old-fashioned rolled oats give you that perfect creamy-yet-textured consistency that makes overnight oats so appealing. Quick oats are better than instant but still not ideal—they’ll work in an emergency but won’t be quite right.
Not Mixing the Cocoa Powder Thoroughly: Cocoa powder is hydrophobic, meaning it resists mixing with liquids and loves to form clumps. If you don’t thoroughly whisk it with the dry ingredients first or mix the entire oat mixture very well, you’ll end up with chocolate pockets and uneven color. Take an extra minute to whisk everything thoroughly until completely smooth and evenly colored.
Adding Toppings Too Early: Chocolate chips, crushed cookies, nuts, and other crunchy toppings should always be added right before eating, never the night before. They’ll become soggy and lose their textural contrast if added during the overnight soak. Keep crunchy elements separate until serving time for the best experience.
Using Too Much or Too Little Food Coloring: The right amount varies dramatically by brand and type (gel vs. liquid). Start conservatively with 4-5 drops of liquid food coloring or a tiny amount of gel, then add more until you reach your desired red shade. Remember that the color deepens slightly as the oats sit overnight. Too little looks more pink than red; too much can taste slightly bitter, though this is rare with modern food colorings.
Forgetting to Soften the Cream Cheese: Cold, hard cream cheese will never incorporate smoothly no matter how much you stir or whisk. You’ll end up with chunks and lumps instead of smooth, creamy frosting. Always bring cream cheese to room temperature or microwave briefly to soften, then whisk until perfectly smooth before adding any other ingredients.
Not Soaking Long Enough: While 4 hours is the technical minimum, overnight oats truly live up to their name when given 8-12 hours to soak. This allows the oats to fully hydrate, the chia seeds to gel completely, and all the flavors to meld beautifully. If you try to rush it, the oats will still be somewhat chewy and the overall texture won’t be as creamy and luxurious.
Storage & Meal Prep
Red Velvet Overnight Oats are meal prep superstars. Here’s how to store them properly and make the most of batch preparation:
Refrigerator Storage: Prepared overnight oats keep beautifully in the refrigerator for up to 5 days when stored in airtight containers. The oats actually continue to soften slightly over time, so day 3 or 4 oats are often even creamier than day 1. Glass mason jars with tight-fitting lids are ideal because they don’t absorb odors, allow you to see the gorgeous red color, and stack efficiently.
Best Practices for Meal Prep:
- Make 4-5 servings on Sunday evening for the entire work week
- Prepare the cream cheese frosting separately and store in a small container if making multiple days’ worth. Add it fresh each morning for the best texture and food safety.
- Label jars with dates if preparing different flavors throughout the week
- Keep any crunchy toppings in separate small containers or plastic bags
- Store in the front of your refrigerator for easy grab-and-go access
The Cream Cheese Question: Because cream cheese is perishable, there’s some debate about adding it the night before for meal prep. For optimal food safety, especially if preparing 3+ days in advance, prepare the cream cheese frosting separately and add it each morning. However, if you’ll be eating the oats within 2-3 days and your refrigerator maintains proper temperature (below 40°F), adding the frosting the night before is generally fine.
Liquid Separation: Some liquid separation is completely normal, especially after a day or two. The oats continue to absorb moisture, and the different densities of ingredients naturally separate. Simply give your oats a good stir before eating, and they’ll come right back together. If they seem too thick, stir in a tablespoon or two of fresh milk.
Refreshing Multi-Day Oats: If your oats seem too thick after several days (since they continue to absorb liquid over time), stir in 1-2 tablespoons of fresh milk until you reach your desired consistency. This takes just seconds and makes them taste freshly prepared.
Not Recommended for Room Temperature: Unlike some breakfast items, overnight oats must stay refrigerated due to the dairy components. Never leave them at room temperature for more than 2 hours. If taking them to work or school, use an insulated lunch bag with an ice pack if you won’t have immediate refrigerator access.
Warming Option: While overnight oats are typically enjoyed cold, you can warm them if you prefer hot oatmeal. Remove any chocolate chip toppings first (they’ll melt), transfer oats to a microwave-safe bowl, and heat for 45-60 seconds, stirring halfway through. The texture will be more like traditional cooked oatmeal but still delicious. Add the cream cheese frosting after warming—it will melt into a creamy sauce.
Make-Ahead & Freezer Notes
Make-Ahead Strategies:
Overnight oats are inherently make-ahead, but you can streamline the process even further. Pre-portion the dry ingredients (oats, cocoa powder, chia seeds, salt) into jars or containers and store at room temperature for up to a month. When you’re ready, simply add the wet ingredients, food coloring, stir, and refrigerate. This is perfect for ultra-busy weeks when even measuring feels overwhelming.
You can also prepare the cream cheese frosting in a larger batch, store it in an airtight container in the refrigerator for up to a week, and portion it onto your oats as needed. This makes assembling individual jars lightning-fast.
Freezer Instructions:
The oat mixture itself freezes reasonably well, though the cream cheese frosting should always be added fresh after thawing. Here’s how to successfully freeze red velvet overnight oats:
Prepare the red velvet oat base without the cream cheese frosting. Portion into freezer-safe containers or heavy-duty freezer bags, leaving about half an inch of space for expansion. Remove as much air as possible from bags. Label with the date and contents. Freeze for up to 3 months.
When you’re ready to eat, transfer a portion to the refrigerator the night before to thaw slowly overnight. In the morning, give them a good stir, add fresh cream cheese frosting, and enjoy. The texture will be almost identical to freshly made oats.
Quick Thaw Method: If you forget to thaw overnight, you can microwave frozen oats for 1-2 minutes, stirring every 30 seconds, until thawed and warm. The texture will be more like traditional cooked oatmeal. Let cool slightly if desired, then add your cream cheese frosting and toppings.
Freezer Breakfast Packs: For ultimate convenience, freeze individual portions in single-serve containers. Each morning, grab one from the freezer to thaw in your work refrigerator, and it’ll be ready to eat by mid-morning break or lunch. This is perfect for office workers with access to a refrigerator but no time for breakfast prep.
Best Reheating After Freezing: Slow thawing in the refrigerator overnight preserves the best texture. If reheating from frozen, add a splash of milk after thawing or warming to restore the ideal creamy consistency.
Serving Suggestions
Red Velvet Overnight Oats are satisfying enough to stand alone, but here are wonderful ways to round out your breakfast or create a special brunch spread:
Protein Pairings:
Balance the carb-heavy oats with additional protein for a more complete meal. Serve alongside soft or hard-boiled eggs, turkey bacon or regular bacon, chicken sausage links, smoked salmon with capers, or a simple egg scramble. For plant-based protein, add a side of roasted chickpeas, a handful of almonds, or spread almond butter on whole-grain toast.
Beverage Pairings:
These rich, chocolatey oats pair beautifully with coffee—especially a vanilla latte, mocha, or red eye. For non-coffee drinkers, try them with hot chocolate (for total indulgence), chai tea latte, English breakfast tea with milk, fresh-squeezed orange juice, or a green smoothie for nutritional balance. On special occasions like Valentine’s Day brunch, serve with mimosas, Bellinis, or strawberry champagne cocktails.
Special Occasion Spreads:
For Valentine’s Day breakfast in bed, serve Red Velvet Overnight Oats with heart-shaped strawberries, chocolate-covered strawberries, fresh whipped cream, and a rose. For galentine’s brunch, create a spread with these oats, mini quiches, fruit salad with berries, chocolate croissants, and sparkling rosé. For a birthday breakfast, add birthday cake protein overnight oats in another flavor, colorful fruit kebabs, and mini pancakes.
Side Dishes:
Round out your breakfast with complementary items like fresh fruit salad with berries and melon, whole-grain toast with butter or jam, Greek yogurt parfait with granola, simple arugula salad with lemon vinaigrette for something savory, roasted breakfast potatoes, or cinnamon rolls for a truly indulgent morning.
Seasonal Serving Ideas:
In winter, serve slightly warmed with hot cocoa and snowflake-shaped cookies. For spring, add edible flowers and fresh berries with mimosas. Summer calls for serving these cold with iced coffee and fresh fruit. Fall variations can include warming spices like cinnamon and serving with apple cider and pumpkin muffins alongside.
Portion Considerations:
One jar is typically filling enough for most people due to the fiber and protein content. However, very active individuals, teenagers, or particularly hungry breakfast eaters might want 1.5 servings or additional sides. These oats also work wonderfully as a mid-morning snack or post-workout meal in a smaller portion.
FAQs Section
Can I make these without food coloring?
Absolutely! The food coloring is purely aesthetic and doesn’t affect the flavor. Without it, you’ll have chocolate overnight oats with cream cheese frosting—still delicious and reminiscent of red velvet’s flavor profile, just without the iconic red color. Some people call this “red velvet in disguise.” If you want some color without artificial dyes, try beet powder (1 teaspoon) for a natural pinkish-red hue or freeze-dried raspberry powder for a subtle pink color.
How do I get the red color really vibrant?
The key is using enough food coloring—don’t be shy! Gel food coloring works best because it’s more concentrated and doesn’t water down your oats. Start with a small amount and gradually add more until you reach that classic red velvet ruby color. Liquid food coloring works too but requires more drops (usually 8-12). Remember that the color will deepen slightly overnight as the oats absorb it. For the most vibrant results, use white or light-colored milk and yogurt as your base.
Do I have to add the cream cheese frosting?
Technically no, but you really should! The tangy cream cheese frosting is what makes these taste authentically like red velvet cake rather than just chocolate oats. It’s the signature element that sets red velvet apart from regular chocolate desserts. That said, if you’re avoiding dairy or watching calories, you could substitute with vanilla Greek yogurt mixed with a little sweetener, though it won’t taste quite the same. For a lighter option, try whipped cottage cheese blended smooth with vanilla and sweetener.
Can I make these oats warm instead of cold?
Yes! While overnight oats are traditionally served cold, you can absolutely warm them up if you prefer hot breakfast. Remove any chocolate chips or delicate toppings first, then microwave for 45-60 seconds, stirring halfway through. Add the cream cheese frosting after warming—it will melt into a creamy, dreamy sauce similar to warm cream cheese icing on cinnamon rolls. The texture will be more like traditional cooked oatmeal, but the flavor will still be fantastic. This is especially comforting on cold winter mornings.
How long do these really need to soak?
Minimum 4 hours for edible oats, but 8-12 hours (overnight) is truly ideal for the best texture and flavor. During this time, the oats fully soften, the cocoa powder distributes evenly, the chia seeds gel, and all the flavors meld together beautifully. If you’re really short on time, you can make them in the morning and eat them 4-5 hours later for lunch, but the texture won’t be quite as creamy. The longer they sit (up to 5 days), the softer and creamier they become.
Are these healthy or just dessert in disguise?
They’re genuinely nutritious with 17g protein, 9g fiber, and complex carbohydrates that provide sustained energy. Yes, they taste like dessert, but you’re eating whole grain oats, protein-rich Greek yogurt, and can control the sweetness level. Compare this to actual red velvet cake (450+ calories, 60g+ sugar, minimal fiber or protein) or a sugary breakfast pastry, and these oats are significantly healthier while still satisfying your sweet tooth. They keep you full for hours, whereas cake for breakfast would lead to a sugar crash. It’s about balance—treating yourself to something delicious that also fuels your body properly.
Can I make a big batch for the whole week?
Absolutely! This recipe doubles, triples, or quadruples easily. Prepare 4-5 jars on Sunday for weekday breakfasts. For optimal freshness and food safety with the cream cheese component, consider preparing the cream cheese frosting separately and adding it fresh each morning, especially if making the full 5-day batch. If consuming within 2-3 days, adding the frosting the night before is generally fine as long as your refrigerator stays at proper temperature (below 40°F). Store all jars in the refrigerator and grab one each morning for an effortless breakfast.
Conclusion
And there you have it—the ultimate Red Velvet Overnight Oats that prove healthy eating can be both delicious and exciting! This recipe transforms the beloved flavors of a classic Southern dessert into a convenient, nutritious breakfast that actually makes you look forward to Monday mornings. With just minutes of prep the night before, you’ll wake up to a breakfast that looks stunning, tastes indulgent, and fuels your body with fiber, protein, and sustained energy.
Whether you’re planning a romantic Valentine’s Day breakfast in bed, hosting galentine’s brunch with your besties, celebrating a birthday with a special morning meal, or simply treating yourself to something extraordinary on an ordinary Tuesday, these overnight oats deliver on every level. The rich cocoa flavor, vibrant red color, and tangy cream cheese frosting create an unforgettable breakfast experience that’s both Instagram-worthy and truly satisfying.
The best part? Once you master this basic recipe, you can customize it endlessly with different toppings, mix-ins, and variations to keep breakfast exciting all year long. From meal prep champion to special occasion showstopper, Red Velvet Overnight Oats do it all.
I can’t wait to hear about your Red Velvet Overnight Oats adventures! Did you make them for Valentine’s Day? What toppings did you choose? How did your family react? Drop a comment below sharing your experience and don’t forget to rate this recipe. If you snap a photo of your beautiful red oats, tag me on social media—I absolutely love seeing your creations and featuring reader photos on my page!