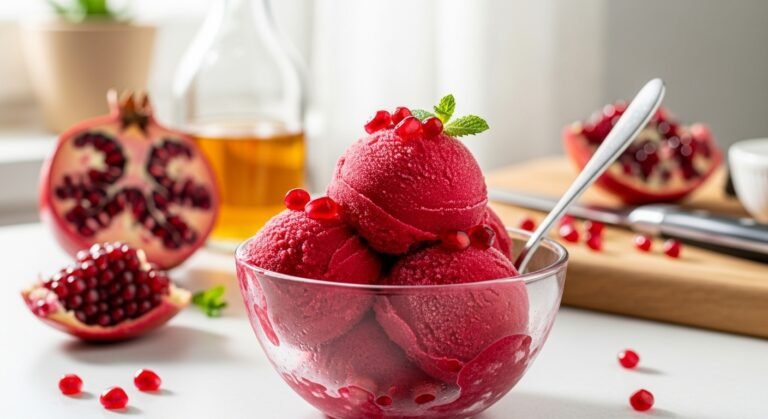
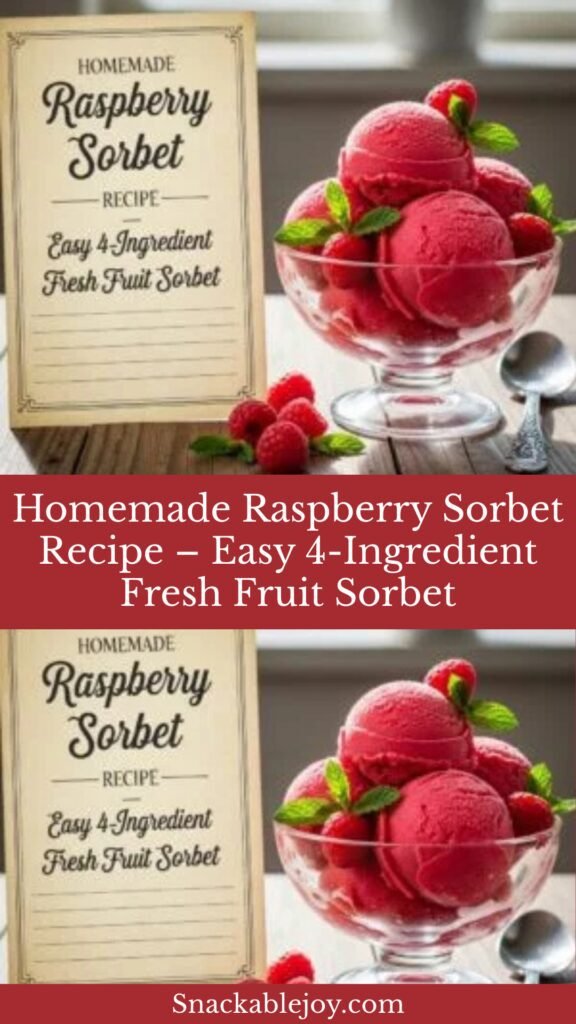
Homemade Raspberry Sorbet Recipe – Easy 4-Ingredient Fresh Fruit Sorbet
Picture this: bright ruby-red sorbet that tastes like biting into the ripest, sweetest raspberries at the peak of summer. That’s exactly what you’ll get with this homemade raspberry sorbet recipe—a refreshing, intensely fruity frozen dessert that’s surprisingly simple to make at home.
Unlike ice cream which relies on dairy for its creamy texture, sorbet is a purely fruit-based frozen dessert that lets the natural flavor of raspberries shine through brilliantly. This recipe creates a smooth, scoopable sorbet with vibrant color and fresh berry flavor that tastes like summer in a bowl. It’s naturally dairy-free, vegan, and gluten-free, making it perfect for guests with dietary restrictions or anyone looking for a lighter, healthier dessert option.
This raspberry sorbet is perfect for so many occasions: elegant dinner party finales, refreshing poolside treats on hot summer days, palate cleansers between courses at fancy meals, light desserts after heavy dinners, or simply as a guilt-free afternoon indulgence. Kids and adults alike adore the bright flavor and beautiful color. And because it requires just four simple ingredients and minimal hands-on time, it’s one of those impressive-looking desserts that’s secretly incredibly easy to make.
Whether you’re using fresh raspberries from your garden, a farmers market haul, or even frozen berries from the grocery store, this recipe transforms humble ingredients into something truly spectacular. Let’s dive into making the most refreshing raspberry sorbet you’ve ever tasted!
History / Background
Sorbet (also called “sorbetto” in Italian) has ancient roots that trace back thousands of years. The earliest versions appeared in ancient Persia, where people mixed snow from the mountains with fruit juices and honey to create refreshing icy treats. The word “sorbet” itself comes from the Turkish “şerbet” and Arabic “sharbat,” both referring to sweetened, chilled beverages.
As the concept traveled along trade routes, it evolved. The Chinese were making frozen milk and rice mixtures around 200 BCE. When Marco Polo returned to Italy from his travels in the 13th century, he brought back techniques for making frozen desserts that would eventually evolve into both sorbet and gelato. However, it was the Arabs who perfected the art of making sharbat—fruit-based frozen treats that closely resemble modern sorbet.
Sorbet truly came into its own during the Renaissance in Italy and France. Italian nobility served “sorbetto” as a palate cleanser between courses during elaborate multi-course feasts. Catherine de’ Medici brought Italian frozen dessert traditions to France when she married King Henry II in 1533, and French chefs further refined the recipes. By the 17th century, elaborate sorbets in various flavors were the height of culinary sophistication in European courts.
Raspberry sorbet specifically became popular because raspberries were (and still are) prized for their intense flavor and stunning color. The berries’ natural acidity and sweetness create a perfectly balanced sorbet that doesn’t require complex flavor additions. In French cuisine, “sorbet framboise” (raspberry sorbet) became a classic, often served between courses at formal dinners to refresh the palate.
Today, sorbet represents the intersection of simplicity and elegance. While modern recipes benefit from ice cream makers and freezers, the core concept remains unchanged: pure fruit flavor, frozen to perfection. Making raspberry sorbet at home connects you to centuries of culinary tradition while creating something that tastes utterly modern and fresh.
Why You’ll Love This Recipe
This homemade raspberry sorbet is one of those rare recipes that delivers restaurant-quality results with minimal effort and maximum flavor payoff. There’s something incredibly satisfying about transforming fresh raspberries into a sophisticated frozen dessert that would cost $8+ per scoop at a fancy ice cream shop.
Here’s why this raspberry sorbet recipe will become your go-to summer dessert:
- Incredibly Simple – Just 4 basic ingredients and about 15 minutes of active work create this stunning dessert
- Pure Raspberry Flavor – No artificial colors or flavors; just the true taste of fresh berries shining through
- Naturally Healthy – Dairy-free, fat-free, and made with real fruit (plus it’s vegan and gluten-free!)
- Gorgeous Color – That natural vibrant pink-red hue makes every serving Instagram-worthy
- Budget-Friendly – Costs a fraction of store-bought premium sorbet and tastes infinitely better
- Allergy-Friendly – Safe for those with dairy, gluten, and nut allergies
- Impressive Yet Easy – Looks and tastes gourmet but requires no special skills
- Customizable – Easily adjust sweetness or add complementary flavors
- Light & Refreshing – Perfect palate cleanser or guilt-free dessert option
- Works with Frozen Berries – No need to wait for berry season; frozen raspberries work beautifully
- Kid-Approved – Even picky eaters love the sweet-tart berry flavor
- Elegant Presentation – Elevates any meal from casual to sophisticated
Ingredient Notes
Let’s break down each ingredient and understand its crucial role in creating perfect raspberry sorbet:
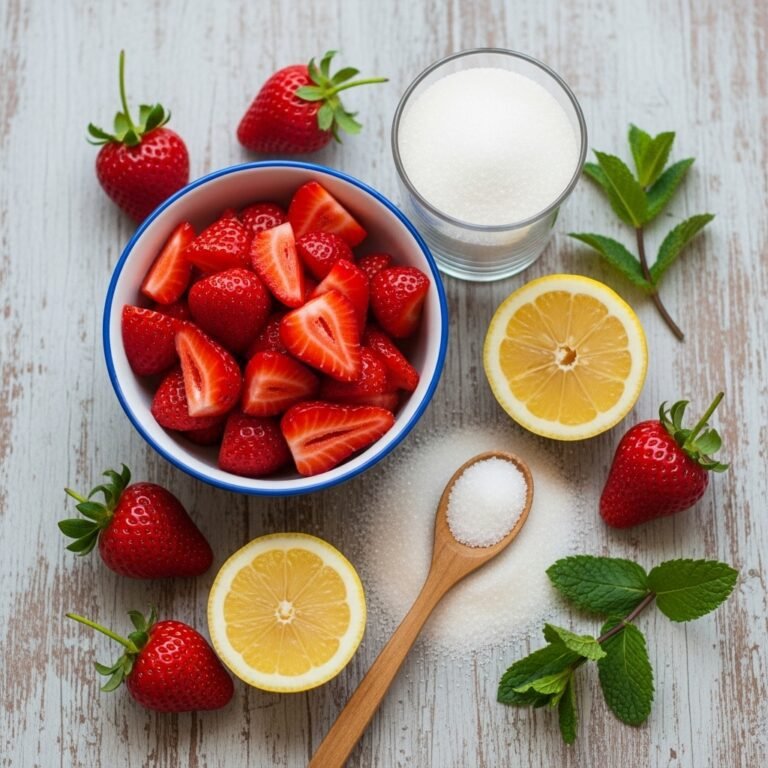
Fresh or Frozen Raspberries: The star of the show! You’ll need 4 cups (about 1 pound) of raspberries. Fresh raspberries at peak ripeness provide the best flavor, but high-quality frozen raspberries work equally well and are often more budget-friendly. Frozen berries are picked and frozen at peak ripeness, so they can actually have better flavor than out-of-season fresh berries. If using frozen, no need to thaw—just add a minute or two to the cooking time. Look for berries that are deep red with no mold or mushiness. Substitution: You can use a mix of raspberries and strawberries (3:1 ratio) for a slightly different flavor profile.
Granulated Sugar: Essential for both sweetness and texture. Sugar doesn’t just add sweetness—it lowers the freezing point of the sorbet, keeping it scoopable rather than rock-hard. The amount here (¾ to 1 cup, depending on your berries’ sweetness and your preference) creates a balanced sorbet that’s sweet but still allows the raspberry tartness to shine. Substitution: Superfine sugar dissolves more easily; honey or agave can work but will slightly alter the flavor and texture (use slightly less as they’re sweeter).
Water: Helps create the simple syrup and dilutes the fruit puree to the perfect consistency. Too little water creates overly thick, icy sorbet; too much makes it bland and watery. The ratio here is carefully balanced. Substitution: You can replace half the water with white wine or champagne for an adult version, or use coconut water for subtle tropical notes.
Fresh Lemon Juice: This is the secret ingredient that makes good sorbet great! Lemon juice brightens the raspberry flavor, balances sweetness, and adds a subtle zing that prevents the sorbet from tasting flat or one-dimensional. Always use fresh-squeezed lemon juice, never bottled—the difference is noticeable. You’ll need about 2 tablespoons (juice of 1 lemon). Substitution: Lime juice works in a pinch, though it creates a slightly different flavor profile.
Optional: Corn Syrup or Vodka: Not essential but professional-level additions. Adding 1-2 tablespoons of light corn syrup or 1 tablespoon of vodka helps prevent ice crystals and keeps sorbet smoother and more scoopable straight from the freezer. Vodka works because alcohol doesn’t freeze, keeping the mixture softer. Corn syrup provides smoothness without adding flavor.
Equipment Needed
Having the right tools makes sorbet-making seamless and ensures professional results:
- Medium Saucepan – For making the simple syrup base; stainless steel or non-reactive material works best
- Wooden Spoon or Silicone Spatula – For stirring the syrup
- Blender or Food Processor – Essential for pureeing the berries into smooth liquid; a high-powered blender (like Vitamix) works best but any blender will do
- Fine-Mesh Strainer or Sieve – Critical for removing raspberry seeds for ultra-smooth sorbet
- Large Bowl – For collecting the strained puree
- Rubber Spatula – For pressing puree through the strainer and scraping down blender
- Ice Cream Maker – Strongly recommended for the smoothest texture; freezer-bowl style or compressor models both work
- Freezer-Safe Container with Lid – A loaf pan or shallow container works best (sorbet freezes better in shallow layers)
- Measuring Cups and Spoons – For precise ingredient amounts
- Citrus Juicer – Makes fresh lemon juice extraction easier
- Ice Cream Scoop – For serving perfect portions
Optional but Helpful:
- Large bowl of ice water for quickly chilling the syrup
- Ladle for easier straining
- Parchment paper or plastic wrap for pressing against sorbet surface during storage
Print

Raspberry Sorbet Recipe
Vibrant homemade raspberry sorbet made with fresh or frozen raspberries, creating an intensely fruity, refreshing frozen dessert. This dairy-free sorbet is smooth, scoopable, and tastes like pure summer in every bite. Perfect for hot days, elegant dinners, or as a palate cleanser.
- Total Time: 2 hours 45 minutes
- Yield: 6-8 servings (about 1 quart) 1x
Ingredients
Scale- 4 cups fresh or frozen raspberries (about 1 pound or 500g)
- ¾ to 1 cup granulated sugar (adjust based on berry sweetness and preference)
- 1 cup water
- 2 tablespoons fresh lemon juice (about 1 lemon)
- Optional: 1-2 tablespoons light corn syrup or 1 tablespoon vodka (for smoother texture)
Instructions
Step 1: Make the Simple Syrup
In a medium saucepan, combine sugar and water. Heat over medium heat, stirring occasionally with a wooden spoon, until the sugar completely dissolves and the mixture becomes clear, about 3-5 minutes. You don’t need to bring it to a boil—just heat until the sugar disappears. Remove from heat and let cool slightly, about 10 minutes.Step 2: Puree the Raspberries
Add the raspberries (fresh or frozen) to a blender or food processor. Pour in the warm simple syrup. Blend on high speed until completely smooth, about 1-2 minutes. If using frozen berries, you may need to stop and scrape down the sides once or twice. The mixture should be completely liquefied with no visible chunks.Step 3: Strain the Mixture
Place a fine-mesh strainer or sieve over a large bowl. Pour the raspberry puree into the strainer. Using a rubber spatula or the back of a ladle, press and stir the mixture firmly against the strainer to push all the liquid through while leaving seeds behind. This takes a few minutes and some elbow grease—keep pressing and stirring until only dry seeds remain in the strainer. You should have about 3 cups of smooth, seedless raspberry liquid.Step 4: Add Lemon Juice
Stir the fresh lemon juice into the strained raspberry mixture. Taste and adjust: if it tastes too tart, stir in 1-2 tablespoons more sugar; if too sweet or flat, add another squeeze of lemon. If using corn syrup or vodka for improved texture, stir it in now.Step 5: Chill Thoroughly
Cover the bowl with plastic wrap and refrigerate for at least 2 hours, or until completely cold (ideally 40°F or below). For faster chilling, place the bowl in a larger bowl filled with ice water and stir occasionally. The colder your mixture, the better your sorbet will turn out. You can also chill overnight.Step 6: Churn the Sorbet
Once completely cold, pour the raspberry mixture into your ice cream maker. Churn according to manufacturer’s instructions, typically 20-25 minutes. The sorbet is ready when it reaches a soft-serve consistency and holds its shape when you lift the dasher. It will be thick, glossy, and scoopable but still quite soft.Step 7: Freeze Until Firm
Transfer the churned sorbet to a freezer-safe container using a rubber spatula. Smooth the top and press a piece of parchment paper or plastic wrap directly onto the surface to prevent ice crystals. Cover with a tight-fitting lid. Freeze for at least 4 hours or until firm enough to scoop into proper portions.Step 8: Serve
Remove sorbet from the freezer 5-10 minutes before serving to soften slightly for easier scooping. Scoop into bowls or elegant glasses and serve immediately. The sorbet is best when it’s firm but not rock-hard—it should scoop smoothly and hold its shape on the scoop.Notes
- Sweetness Adjustment: Raspberry sweetness varies greatly by season and variety. Taste your berry puree after adding lemon juice and adjust sugar accordingly. Start with ¾ cup sugar if berries are very sweet; use the full cup if they’re tart.
- Seed Removal is Key: Don’t skip the straining step! Raspberry seeds create an unpleasant grainy texture. Proper straining takes a few minutes but makes all the difference.
- No Ice Cream Maker?: Pour the chilled mixture into a shallow metal pan and freeze. Every 30-45 minutes for 3-4 hours, remove and vigorously stir with a fork to break up ice crystals. The texture won’t be quite as smooth but will still be delicious.
- Alcohol Note: If adding vodka for texture, the sorbet won’t be kid-friendly anymore. Corn syrup achieves similar smoothness without alcohol.
- Storage: Homemade sorbet is best within 1-2 weeks. After that, ice crystals may form, though flavor remains good.
- Color: Natural raspberry color can fade slightly over time in the freezer—this is normal and doesn’t affect flavor.
- Prep Time: 15 minutes
- Cook Time: 5 minutes
- Category: Desert
- Method: Stovetop + Ice Cream Maker
- Cuisine: French
- Diet: Gluten Free
Nutrition
- Serving Size: ½ cup (approximately 85g)
- Calories: 95
- Sugar: 23g
- Sodium: 2mg
- Fat: 0g
- Saturated Fat: 0g
- Unsaturated Fat: 0g
- Trans Fat: 0mg
- Carbohydrates: 24g
- Fiber: 2g
- Protein: 0.5g
- Cholesterol: 0g
Tips & Variations
Flavor Variations:
- Mixed Berry Sorbet: Use 2 cups raspberries + 2 cups strawberries, or add ½ cup blackberries for deeper flavor
- Raspberry-Lemon Sorbet: Increase lemon juice to ¼ cup and add 1 teaspoon lemon zest for extra zing
- Raspberry-Lime Sorbet: Replace lemon juice with lime juice and add lime zest
- Raspberry-Basil Sorbet: Steep 5-6 fresh basil leaves in the hot simple syrup, then remove before blending
- Raspberry-Champagne Sorbet: Replace ½ cup water with champagne or prosecco (add after chilling for best bubble retention)
- Raspberry-Rose Sorbet: Add 1 teaspoon rose water to the mixture for elegant floral notes
- Dark Raspberry Sorbet: Add 1 tablespoon raspberry liqueur (Chambord) for adult sophistication
Texture Adjustments:
- For extra smooth sorbet: Add 1 tablespoon corn syrup or glucose syrup
- For easier scooping: Add 1 tablespoon vodka or use ½ cup less water
- For lighter sorbet: Fold in 1 beaten egg white during the last 2 minutes of churning (creates “sherbet” texture)
Sweetness Modifications:
- Less Sugar: Reduce to ½ cup sugar, but note sorbet will freeze harder and be less scoopable
- Alternative Sweeteners: Use ¾ cup honey or agave (slightly different flavor; add after syrup cools)
- Sugar-Free: Use sugar substitutes like erythritol, though texture will be affected
Creative Add-Ins:
- Swirl in ¼ cup dark chocolate sauce during the last minute of churning
- Add 2 tablespoons balsamic vinegar for sophisticated sweet-tart complexity
- Mix in ½ cup fresh raspberries during final 2 minutes for fruit pieces throughout
- Layer with vanilla ice cream for a stunning parfait effect
Pro Chef Tips
1. Temperature is Everything
Professional sorbet makers know that serving temperature dramatically affects both texture and flavor perception. Sorbet should be served at about 15°F warmer than ice cream—around 10-12°F. At this temperature, it’s scoopable but still firm, and your taste buds can actually perceive all the delicate raspberry flavors. Remove sorbet from the freezer 8-10 minutes before serving and let it temper at room temperature. If you can easily scoop it but it holds its shape perfectly, it’s ready.2. The “Taste and Adjust” Technique
Before churning, taste your chilled base and adjust boldly. It should taste slightly too sweet and slightly too tart—flavors dull significantly when frozen. If the base tastes perfectly balanced at room temperature, it will taste bland once frozen. Don’t be afraid to add an extra tablespoon of lemon juice or sugar before churning. Professional sorbet makers always taste multiple times and trust their instincts.3. Master the Proper Straining Technique
Getting a perfectly smooth, seedless sorbet requires patience during straining. Use a sturdy fine-mesh strainer and a firm rubber spatula. Press the puree firmly against the mesh in a circular motion, scraping the bottom of the strainer frequently where liquid collects. This process should take 3-5 minutes. If you rush it, you’ll leave behind delicious liquid with the seeds. Every tablespoon of liquid you extract means more flavor in your final sorbet.4. Control Ice Crystal Formation
The enemy of smooth sorbet is ice crystals. Three things prevent them: sufficient sugar (lowers freezing point), proper churning (creates tiny air bubbles), and quick freezing. After churning, transfer sorbet to a shallow container rather than a deep tub—the larger surface area allows it to freeze faster. Place it in the coldest part of your freezer (usually the back) and don’t open the freezer for at least 4 hours. Fast freezing = smaller ice crystals = smoother sorbet.5. Use the “Brix Scale” Mindset
Professional sorbet makers use a refractometer to measure sugar content (called Brix), aiming for 28-32% sugar. While you don’t need fancy equipment, understand the principle: the sugar-to-water ratio determines scoopability. If your sorbet freezes rock-hard, you need more sugar or less water next time. If it won’t firm up, you need less sugar or more water. Keep notes on adjustments so you can perfect your recipe over time.6. The “Hot Syrup, Cold Puree” Alternative
For even smoother texture, try this professional technique: Make simple syrup, let it cool just slightly (still warm), then blend it with frozen raspberries. The residual warmth helps dissolve sugar completely while the frozen berries immediately cool the mixture. Strain, add lemon juice, chill briefly, then churn. This method can shave 30+ minutes off your chilling time.Common Mistakes to Avoid
1. Skipping or Rushing the Straining Process
I know it’s tempting to skip straining or give it a quick 30-second effort, but this is the number one mistake that ruins homemade raspberry sorbet. Those tiny seeds create an unpleasant grainy, gritty texture that no amount of churning can fix. Proper straining takes 3-5 minutes of firm pressing and scraping. Your arm might get tired, but the silky-smooth result is absolutely worth it. If you find yourself with sorbet that has seeds, there’s unfortunately no way to fix it after churning.2. Churning Warm or Room-Temperature Base
Adding insufficiently chilled mixture to your ice cream maker is a recipe for disappointment. The base must be thoroughly cold—ideally under 40°F—before churning. A warm base takes much longer to churn, overworks your machine, and creates larger ice crystals that result in grainy, icy sorbet instead of smooth, creamy texture. Always chill for at least 2 hours, or better yet, overnight. When you think it’s cold enough, wait another 30 minutes. Patience here pays off enormously.3. Using Too Much or Too Little Sugar
Sugar isn’t just about sweetness in sorbet—it’s a crucial structural ingredient. Too little sugar and your sorbet will freeze into an unscoopable brick of raspberry ice that’s impossible to serve. Too much and it won’t freeze properly at all, remaining slushy even after hours in the freezer. The recipe’s ¾ to 1 cup range accounts for natural variations in raspberry sweetness. Always taste before churning and remember: it should taste slightly too sweet at room temperature because freezing dulls sweetness perception by about 30%.4. Not Tasting and Adjusting the Flavor
Many home cooks follow a recipe precisely without tasting along the way. But raspberries vary wildly in sweetness and tartness depending on variety, season, and whether they’re fresh or frozen. Always taste your strained mixture before chilling. Does it taste vibrant and exciting? Or flat and one-dimensional? If it’s flat, add more lemon juice—acid is crucial for making fruit flavors pop. If it’s too tart, add a bit more sugar. Your sorbet will only taste as good as that liquid base tastes.5. Improper Storage Leading to Ice Crystals
You spent all this time making perfect sorbet, then you toss it in a container and freeze it—and three days later it’s covered in ice crystals and tastes freezer-burned. This happens when you don’t press plastic wrap or parchment directly onto the sorbet surface before sealing. Air exposure causes ice crystals to form on the surface. Also, every time you open the container and scoop, you let in warm air and moisture. Minimize this by portioning sorbet into smaller containers so you’re not constantly dipping into your main batch.Storage & Meal Prep
Freezer Storage (Finished Sorbet):
Raspberry sorbet stores well in the freezer for up to 2 weeks at optimal quality, though it remains safe to eat for up to 1 month. Store in an airtight, freezer-safe container (loaf pans work wonderfully). The key to preventing ice crystals is twofold: press plastic wrap or parchment paper directly onto the sorbet surface before covering with the lid, and keep the container in the coldest part of your freezer (back corner, not the door where temperature fluctuates).Texture Over Time:
Unlike commercial sorbet which contains stabilizers and emulsifiers, homemade sorbet will gradually develop small ice crystals after 7-10 days due to natural temperature fluctuations in home freezers. The flavor remains excellent, but texture becomes slightly less smooth. For best quality, consume within the first week. If ice crystals do form on the surface, simply scrape them off—the sorbet underneath is usually still perfect.Refrigerator Storage (Base):
The unstrained raspberry puree base can be refrigerated for up to 2 days before churning. In fact, letting it sit overnight allows flavors to meld beautifully. Store in an airtight container. Give it a good stir before churning as some separation is normal.Softening for Serving:
Sorbet is best served when it’s firm enough to hold its shape but soft enough to scoop easily. Remove from the freezer 5-10 minutes before serving and let it sit at room temperature. The exact time depends on your freezer temperature and room temperature. If it’s scoopable but holds a clean shape on the scoop, it’s perfect. If it’s melting and slumping, it’s too warm.Portioning for Convenience:
If you know you won’t finish the sorbet within a week, consider portioning it into individual servings in small containers or silicone molds right after churning. This way, you can remove just what you need without exposing the entire batch to temperature changes repeatedly. Mason jars, small plastic containers, or even ice cube trays for tiny portions all work well.Preventing Freezer Burn:
Always ensure your container is truly airtight. If using a container without a perfect seal, cover the sorbet with plastic wrap first, then add the lid. Label with the date so you know how long it’s been stored. Keep your freezer at 0°F or below for optimal results.Make-Ahead & Freezer Notes
Make-Ahead Timeline:
2 Days Before: Make the simple syrup, puree and strain the raspberries, add lemon juice, and refrigerate. This actually improves flavor as it gives everything time to meld.
1 Day Before: Churn the sorbet and freeze overnight. It will be at perfect scooping consistency the next day.
Day Of: Remove from freezer 8-10 minutes before serving for optimal texture.
Complete Freezer-Friendliness:
Sorbet is literally meant to be frozen, so yes, it’s completely freezer-friendly! In fact, it MUST be frozen to exist as sorbet. The real question is how long it maintains optimal quality, which is about 2 weeks. Beyond that, ice crystals become more prominent, though the sorbet remains safe and tasty for up to a month.Best Serving Method:
The secret to serving sorbet like a professional is all about temperature. Sorbet should never come straight from the freezer to the bowl—it will be rock-hard and impossible to scoop, plus your taste buds won’t perceive the delicate flavors when it’s that cold. The proper method: remove the sorbet from the freezer and let it sit at room temperature for 8-10 minutes (longer if your house is cold, shorter if it’s warm). You’ll know it’s ready when you can slide a scoop into it with gentle pressure but the sorbet still holds a clean ball shape. This slight softening makes all the difference between “okay” sorbet and “wow” sorbet.Refreshing Icy Sorbet:
If your sorbet has been in the freezer for a while and developed ice crystals, you can refresh it: let it soften considerably (almost melted but still cold), blend it briefly in a food processor or blender, then refreeze. This breaks up ice crystals and reincorporates everything. It won’t be quite as smooth as fresh, but it’s much improved.Freezing in Alternative Forms:
You can freeze this mixture in popsicle molds for homemade raspberry popsicles, in ice cube trays to add to sparkling water or cocktails, or in small portions for grab-and-go treats. The mixture works beautifully in any frozen form.Serving Suggestions
Raspberry sorbet is stunning on its own, but thoughtful pairings can elevate it from delicious to extraordinary:
Classic Elegant Presentations:
- Between Courses: Serve small scoops in chilled shot glasses or espresso cups as a palate cleanser between fish and meat courses at formal dinners
- Champagne Float: Place a scoop in a champagne flute and pour champagne or prosecco over it for a festive adult dessert
- French-Style: Serve in a stemmed coupe glass with a crisp butter cookie (palmier or tuile) on the side
- Raspberry Trio: Serve alongside fresh raspberries and a raspberry coulis for an elegant monochromatic presentation
- Simple Sophistication: Just a perfect scoop in a white bowl with a fresh mint sprig
Dessert Combinations:
- Pair with dark chocolate torte or flourless chocolate cake for stunning color contrast
- Serve alongside vanilla panna cotta for complementary textures
- Layer with lemon sorbet in parfait glasses for a pretty striped effect
- Top angel food cake or pound cake slices with a scoop
- Serve with fresh berries and shortbread cookies
- Create a fruit tart sundae: sorbet on top of a slice of fruit tart
Beverage Pairings:
- Moscato d’Asti or other sweet sparkling wines
- Rosé wine (especially berry-forward varieties)
- Chambord or framboise liqueur drizzled over
- Prosecco for mimosa-style breakfast treats
- Iced tea or lemonade for non-alcoholic pairings
Creative Serving Ideas:
- Sorbet Sandwiches: Between two chocolate wafer cookies or macarons
- Berry Bowl: Serve in a bowl made from a chocolate shell
- Affogato-Style: Pour hot espresso over a scoop for dramatic effect
- Waffle Cone: Classic and fun for casual summer gatherings
- Layered Desserts: Alternate layers with whipped cream or vanilla ice cream in mason jars
Garnishes That Shine:
- Fresh raspberries or mixed berries
- Fresh mint or basil leaves
- White chocolate shavings
- Edible flowers (pansies or violas)
- Crushed pistachios for color contrast
- A small drizzle of high-quality balsamic reduction
- Candied lemon zest
FAQs Section
Q: Can I make this without an ice cream maker?
A: Yes! While an ice cream maker produces the smoothest texture, you can make a no-churn version. Pour the chilled mixture into a shallow metal pan or baking dish and freeze. Every 30-45 minutes for 3-4 hours, remove from the freezer and vigorously stir/scrape with a fork to break up ice crystals. The texture will be slightly grainier but still delicious. For better results, you can also blend the partially frozen mixture in a food processor after 2 hours, then return to the freezer.Q: Why is my sorbet too hard/icy?
A: This usually means there’s not enough sugar in the mixture. Sugar lowers the freezing point and keeps sorbet scoopable. If you’ve already made it, let it soften at room temperature for 15 minutes before serving. For next time, increase sugar by 2-4 tablespoons, or add 1-2 tablespoons corn syrup or 1 tablespoon vodka to the mixture before churning.Q: Do I really have to strain out the seeds?
A: For the best texture, yes. Raspberry seeds are small and hard, creating an unpleasant grainy mouthfeel that detracts from the otherwise smooth sorbet. It takes a few minutes of effort but makes a dramatic difference. If you truly don’t mind seeds (some people don’t!), you can skip this step—your sorbet will still taste great, just have a different texture.Q: Can I use frozen raspberries?
A: Absolutely! Frozen raspberries actually work wonderfully for this recipe and are often more economical. They’re picked and frozen at peak ripeness, so flavor is excellent. No need to thaw them—just blend them with the warm simple syrup. You may need to blend for an extra 30 seconds to ensure everything is completely smooth before straining.Q: How can I make my sorbet less sweet?
A: Reduce the sugar to ½-⅔ cup, but be aware this will make the sorbet freeze harder and become less scoopable. You’ll need to let it sit out longer before serving. Also, increase the lemon juice slightly (to 3 tablespoons) to maintain bright flavor. The tartness will help balance the reduced sweetness. Remember that frozen desserts taste less sweet than their unfrozen base, so reduce conservatively.Q: My sorbet turned out grainy/icy instead of smooth. What went wrong?
A: Several factors can cause this: (1) the base wasn’t cold enough before churning, (2) there’s not enough sugar, (3) it was churned too long or not long enough, (4) large ice crystals formed during storage due to temperature fluctuations. Make sure your base is thoroughly chilled, use the full amount of sugar, churn only until it reaches soft-serve consistency, and store properly with plastic wrap touching the surface.Q: How long does homemade raspberry sorbet last?
A: Homemade sorbet is at its peak quality for about 1-2 weeks in the freezer. It remains safe to eat for up to a month, but texture may deteriorate over time as ice crystals form. For best results, consume within the first week when texture is optimal. Always store in an airtight container with plastic wrap pressed against the surface to minimize ice crystal formation.Q: Can I add alcohol to this recipe?
A: Yes! Adding 1-2 tablespoons of complementary liqueur (like Chambord, Grand Marnier, or even vodka) enhances flavor and improves texture by keeping the sorbet slightly softer and more scoopable Just remember that alcohol doesn’t freeze, so too much will prevent the sorbet from setting properly. Stick to 1-2 tablespoons maximum, added after the base is chilled but before churning. Note that this makes the dessert adults-only.Conclusion
There’s something truly magical about making your own raspberry sorbet at home. From watching those vibrant red berries transform into a smooth puree, to that satisfying moment when you take the first taste of freshly churned sorbet, to seeing the delight on your guests’ faces when you serve them this beautiful dessert—every step of the process is rewarding.
This recipe proves that you don’t need fancy equipment, culinary school training, or exotic ingredients to create something truly spectacular. Just four simple ingredients, a little patience, and attention to detail result in sorbet that rivals (and often surpasses!) what you’d find in high-end restaurants and gelaterias. The pure, intense raspberry flavor, that gorgeous natural color, and the refreshing lightness make this one of those recipes you’ll return to again and again, especially during berry season.
Whether you’re serving this as an elegant palate cleanser at a dinner party, enjoying it poolside on a hot summer day, offering a dairy-free option to guests with dietary restrictions, or simply treating yourself to something special, homemade raspberry sorbet never disappoints. It’s proof that the simplest recipes, executed with care, often deliver the most memorable results.
Ready to make your kitchen smell like a raspberry field in summer? Grab your raspberries and get started! I’d love to hear how your sorbet turns out—leave a comment below sharing your experience, any creative variations you tried, or questions you have. And if this recipe brought a little summer sunshine to your table, please give it a five-star rating and save it to your Pinterest dessert board so you can find it again easily!
Don’t forget to snap a photo of your beautiful raspberry sorbet and share it on social media—tag me so I can see your creations! There’s nothing I love more than seeing these recipes come to life in your kitchens.
Now grab that ice cream maker and let’s create some frozen magic. Happy scooping! 🍨✨