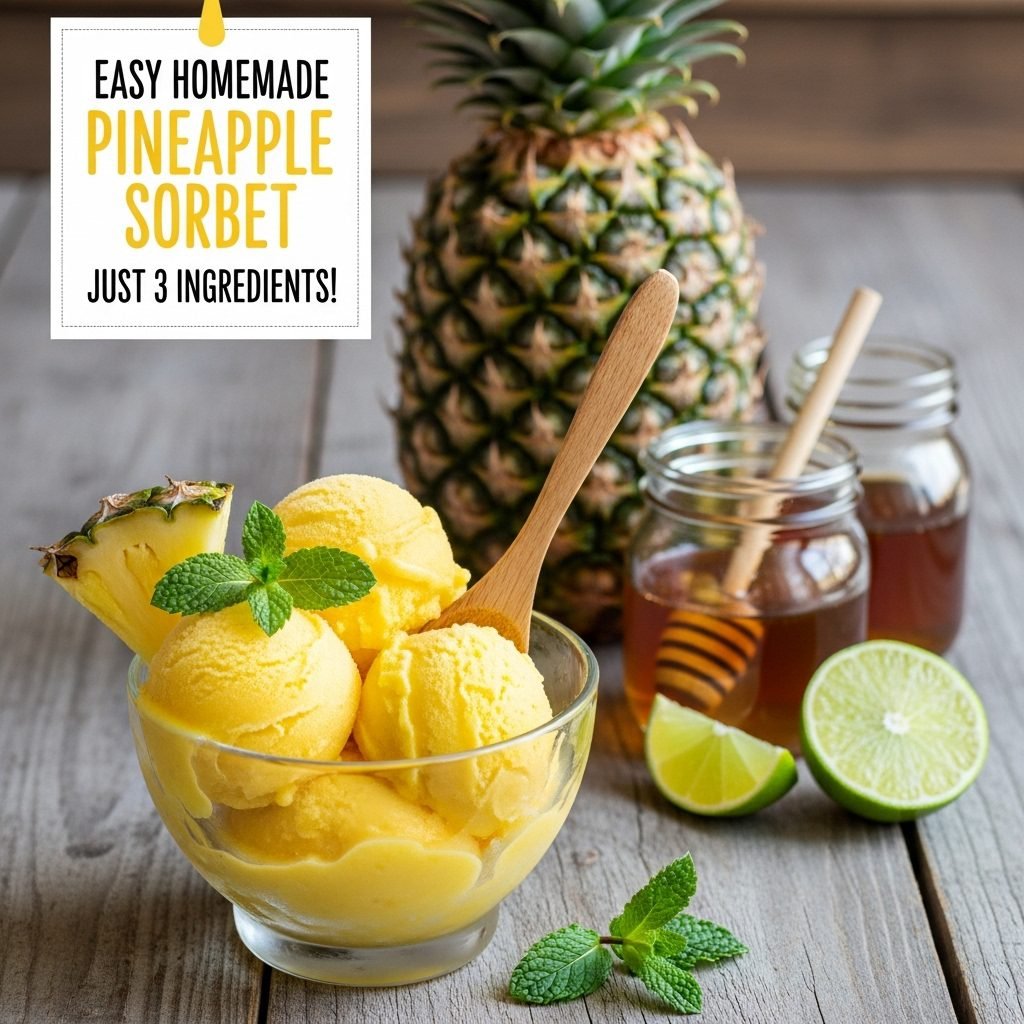
Easy Homemade Pineapple Sorbet Recipe (Just 3 Ingredients!)
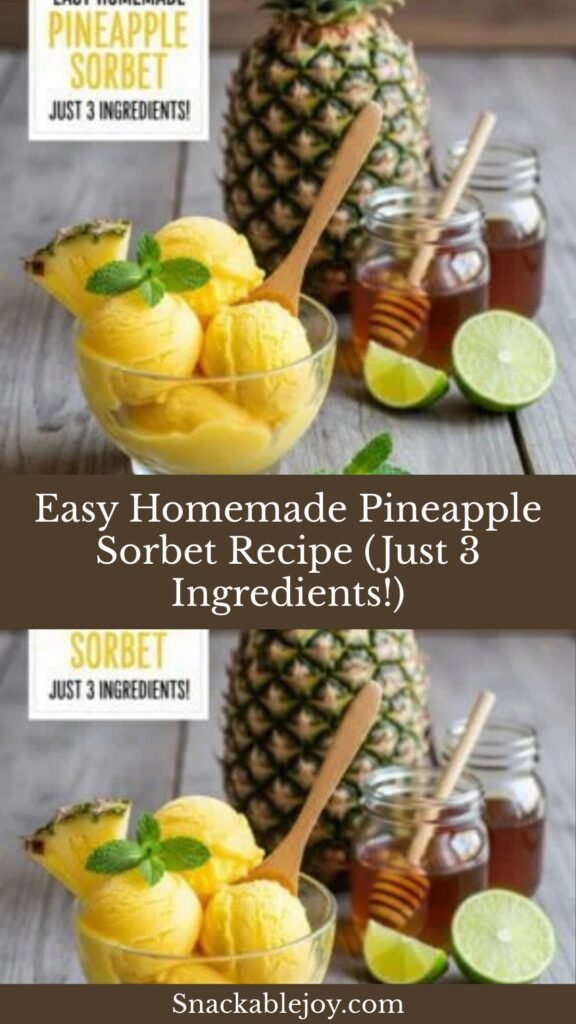
Get ready to make the most refreshing, tropical, incredibly simple frozen dessert you’ll ever taste—Homemade Pineapple Sorbet! If you’ve been craving something cold, fruity, and naturally sweet on hot summer days, or you want a light, refreshing dessert that feels both indulgent and healthy, this recipe is about to become your new obsession. The best part? It requires just three basic ingredients and tastes like pure, concentrated pineapple sunshine in frozen form!
Pineapple Sorbet is a dairy-free, egg-free frozen dessert made from pureed fresh or frozen pineapple, a touch of sweetener, and a splash of citrus juice. Unlike ice cream or gelato, sorbet contains no dairy, making it naturally vegan and lighter while still being incredibly creamy and satisfying. The result is an intensely fruity, refreshing frozen treat with bright tropical flavor that cleanses your palate and cools you down on the hottest days. Each spoonful delivers pure pineapple flavor—sweet, tangy, tropical, and absolutely addictive!
This delightful frozen dessert is perfect for hot summer afternoons when you need serious refreshment, as a palate cleanser between courses at dinner parties (very French and sophisticated!), after spicy meals when you want something cooling and sweet, for those following dairy-free or vegan diets who want frozen treats, when you have overripe pineapple to use up, or simply when you want a guilt-free dessert that tastes indulgent but is actually just fruit. Sorbet has been a beloved frozen treat for centuries, and pineapple’s natural sweetness and acidity make it one of the best flavors for this simple preparation.
What makes this homemade version truly special is the freshness and purity—you control the sweetness, use real fruit (not artificial flavors), and create something that tastes far superior to store-bought versions that often contain gums, stabilizers, and corn syrup. Plus, it’s ridiculously easy! If you have a blender or food processor and a freezer, you can make restaurant-quality pineapple sorbet at home. No ice cream maker required (though you can use one if you have it!), no complicated techniques, just blend and freeze. It’s frozen dessert making at its simplest and most delicious!
History / Background
Sorbet has a fascinating history that spans thousands of years and multiple continents, while pineapple’s journey from South American delicacy to global fruit adds another layer to this dessert’s story. Understanding both helps us appreciate why pineapple sorbet is such a perfect combination.
The concept of frozen desserts dates back to ancient times. The Chinese were making ice and snow-based treats as early as 3000 BCE, mixing snow with honey and fruit juices. The Romans and Greeks also enjoyed frozen treats, with Emperor Nero reportedly sending runners to mountain tops to collect snow and ice, which was then flavored with honey and fruit.
The word “sorbet” comes from the Arabic “sharbat” (or Turkish “şerbet”), which referred to sweetened, chilled fruit drinks popular throughout the Middle East and Persia from around the 10th century. These weren’t frozen solid like modern sorbet, but they were the conceptual ancestors—fruit juice, sugar, and ice or snow mixed together for refreshment.
The technique of creating truly frozen sorbet—solid enough to scoop—likely developed in the 16th-17th centuries when Europeans learned to use salt mixed with ice to lower temperatures enough to freeze liquids solid. Italian and French chefs became masters of sorbet-making, with France particularly embracing it as an elegant palate cleanser between courses in elaborate multi-course meals. By the 18th century, sorbet (or “sorbetto” in Italian) had become a sophisticated element of European haute cuisine.
Now, let’s talk about pineapple! Pineapples are native to South America, specifically the region that is now Paraguay and southern Brazil. Indigenous peoples cultivated pineapples for centuries before European contact. Christopher Columbus and other explorers encountered pineapples in the Caribbean in the 1490s and brought them back to Europe, where they became a sensation—a symbol of exotic luxury and hospitality.
However, pineapples were incredibly rare and expensive in Europe for centuries because they don’t ship well and couldn’t be grown in European climates. In the 1600s-1700s, a single pineapple could cost the equivalent of thousands of dollars today! Wealthy Europeans would display pineapples as centerpieces at parties (sometimes renting them just for display, not even eating them!), and the pineapple became a symbol of wealth, hospitality, and welcome—which is why you still see pineapple motifs in architecture and design today.
It wasn’t until the 20th century, with improved transportation and cultivation in Hawaii, the Caribbean, Central America, and Southeast Asia, that pineapples became affordable and widely available. Canned pineapple, introduced in the early 1900s, made the fruit accessible year-round to people worldwide.
The combination of pineapple and sorbet likely became popular in the early-to-mid 20th century as pineapples became more available and home freezers became common. Pineapple’s natural characteristics make it ideal for sorbet: high sugar content means it freezes well without becoming rock-hard, natural acidity provides bright flavor that remains vibrant when frozen, high water content creates smooth texture, and the tropical flavor is refreshing and universally appealing.
In French cuisine, where sorbet is taken very seriously, pineapple sorbet (sorbet à l’ananas) became a classic flavor alongside lemon, raspberry, and mango. In tropical regions where pineapples grow abundantly—Hawaii, the Caribbean, Central America, Southeast Asia—pineapple sorbet and similar frozen treats have long been popular ways to use abundant fruit and provide relief from heat.
Today, pineapple sorbet represents the democratization of what was once an exotic luxury. Fresh or frozen pineapple is available year-round in most US grocery stores, home freezers are standard, and blenders are common kitchen equipment. What once would have been an impossible delicacy—frozen pineapple dessert—is now something anyone can make at home with minimal effort and expense. That’s pretty remarkable when you think about it!
Why You’ll Love This Recipe
This Homemade Pineapple Sorbet recipe is about to become your go-to summer dessert, and I’m genuinely thrilled to share why! Not only does it taste like pure, concentrated tropical paradise—sweet, tangy, refreshing, and intensely pineapple-flavored—but it’s also one of the simplest frozen desserts you’ll ever make. We’re talking three ingredients, one blender, and about 10 minutes of active time. If you can blend fruit and use a freezer, you can make professional-quality sorbet!
Making Pineapple Sorbet at home means you control everything: the sweetness level (adjust to your pineapple’s natural sweetness and your preference), the texture (blend more or less for smooth or slightly chunky), the intensity (more or less fruit concentrate), and you avoid all the additives, stabilizers, corn syrup, and artificial colors found in many commercial sorbets. Plus, it’s naturally vegan, dairy-free, gluten-free, and made from real fruit—it feels virtuous while tasting indulgent!
Here’s why this recipe will become your summer staple:
- Only 3 Ingredients: Pineapple, sweetener, lime juice—that’s it!
- No Ice Cream Maker Required: Blend and freeze method works perfectly (though ice cream makers work too!)
- Incredibly Easy: If you can use a blender, you can make this
- Ready in Hours, Not Days: Freeze for 4-6 hours and it’s ready
- Naturally Vegan & Dairy-Free: Perfect for dietary restrictions
- Gluten-Free & Nut-Free: Allergen-friendly dessert
- Tastes Like Fresh Pineapple: Pure, natural fruit flavor
- Refreshingly Light: Not heavy like ice cream—perfect after meals
- Uses Frozen or Fresh Pineapple: Flexible and convenient
- Budget-Friendly: Costs $3-5 to make vs. $6-8 for store-bought pint
- No Artificial Anything: Just real fruit and natural sweeteners
- Kid-Approved: Children love the sweet, fruity flavor
- Impressive to Serve: Looks professional and elegant
- Healthy-ish Dessert: Fruit-based with no dairy or eggs
- Customizable: Add herbs, other fruits, or flavor variations easily
Ingredient Notes
Let’s explore the simple ingredients that create this tropical frozen treat!
Pineapple: Your star ingredient! You’ll need about 4 cups of pineapple chunks (fresh or frozen). Options:
Fresh Ripe Pineapple: Choose one that’s golden-yellow, smells sweet at the base, and has leaves that pull out easily. You’ll need 1 large or 1.5 medium pineapples. Peel, core, and chop into chunks, then freeze solid before blending (unless using the ice cream maker method). Fresh provides the best, brightest flavor!
Pre-Cut Fresh Pineapple: Convenient! Buy those containers of fresh pineapple chunks from the produce section. Freeze them before using.
Frozen Pineapple Chunks: The most convenient option and works perfectly! No need to freeze further—use straight from the bag. Often more affordable too!
The pineapple should be ripe and sweet. Unripe pineapple is too acidic and sour for good sorbet. Taste it before using—it should be sweet and juicy!
Sweetener: About ¼ to ½ cup, depending on your pineapple’s sweetness and your preference. Options:
Granulated Sugar: Classic choice, dissolves well, neutral flavor. Start with ⅓ cup and adjust.
Honey: Adds floral notes, complements pineapple beautifully. Use slightly less (about ¼ cup) as it’s sweeter than sugar.
Agave Nectar: Neutral sweetness, dissolves easily, vegan-friendly.
Simple Syrup: If you have it on hand, it blends even more easily than granulated sugar (⅓ to ½ cup).
Maple Syrup: Works but adds its own flavor—better for apple or pear sorbet.
Sugar-Free Options: Stevia, erythritol, or monk fruit sweetener for lower-sugar versions. Use equivalents per package directions.
The amount of sweetener depends on your pineapple’s natural sweetness. Taste your mixture before freezing and adjust!
Lime Juice: 2-4 tablespoons freshly squeezed lime juice brightens the flavor, adds acidity to balance sweetness, and enhances the pineapple flavor. Fresh lime is best, but bottled 100% lime juice works in a pinch. Lemon juice can substitute, though lime is more tropical and complementary.
Optional Add-Ins:
- Pinch of salt (enhances sweetness)
- Fresh mint leaves (tropical twist)
- Splash of rum or coconut rum (adult version)
- Coconut milk (1-2 tablespoons for creamier texture)
- Fresh ginger (¼ teaspoon grated for spicy kick)
Equipment Needed
Making pineapple sorbet requires minimal equipment!
Essential:
- High-powered blender or food processor: For pureeing frozen pineapple into smooth sorbet. Vitamix, Blendtec, or similar high-power blenders work best. Standard blenders can work but may struggle with frozen fruit.
- Freezer-safe container: For storing the sorbet (airtight container, loaf pan covered with plastic wrap, or ice cream container)
- Measuring cups and spoons: For accurate measurements
- Spatula: For scraping blender and transferring sorbet
Optional but Helpful:
- Ice cream maker: If you have one, you can churn the mixture for even smoother texture (not required!)
- Fine-mesh strainer: If you want ultra-smooth sorbet without any fiber (optional)
- Ice cream scoop: For serving perfect scoops
- Baking sheet: If freezing fresh pineapple chunks before blending
Print

Pineapple Sorbet Recipe
This easy Homemade Pineapple Sorbet requires just 3 ingredients and tastes like pure tropical sunshine! Made with frozen pineapple, a touch of sweetener, and fresh lime juice, it’s refreshing, naturally vegan, and incredibly simple to make. No ice cream maker required!
- Total Time: 4-6 hours (includes freezing time)
- Yield: g time) Yield: About
Ingredients
Scale- 4 cups (about 600g) frozen pineapple chunks (or fresh pineapple, frozen solid)
- ⅓ cup (65g) granulated sugar or honey (adjust to taste)
- 2-3 tablespoons fresh lime juice
- Optional: Pinch of salt
- Optional: 1-2 tablespoons coconut milk for creamier texture
Instructions
Method 1: Blender Method (No Ice Cream Maker)
Step 1: Freeze the Pineapple
- If using fresh pineapple: Peel, core, and chop into 1-inch chunks. Spread on a baking sheet in a single layer and freeze until solid (at least 4 hours or overnight).
- If using pre-frozen pineapple chunks: They’re ready to use straight from the bag!
Step 2: Blend the Sorbet
- Add frozen pineapple chunks to a high-powered blender or food processor.
- Add ⅓ cup sugar, 2 tablespoons lime juice, and a pinch of salt.
- Blend on high speed, stopping frequently to scrape down sides and stir the mixture. It will be chunky at first, then gradually become smoother.
- Keep blending and scraping until the mixture transforms into a smooth, creamy consistency resembling soft-serve. This takes 3-5 minutes. Be patient—it will happen!
- Taste and adjust: Add more sugar if you want it sweeter, more lime if you want it tangier.
Step 3: Serve or Freeze
- At this point, the sorbet is at “soft-serve” consistency. You can serve immediately for soft, creamy sorbet!
- For firmer, scoopable sorbet: Transfer to a freezer-safe container, smooth the top, press plastic wrap directly against the surface, cover, and freeze for 4-6 hours until firm.
Step 4: Scoop and Enjoy
- Remove from freezer and let sit at room temperature for 5-10 minutes to soften slightly (sorbet is best enjoyed at 10-15°F, not rock-hard).
- Scoop and serve!
Method 2: Ice Cream Maker Method
Step 1: Make the Base
- In a blender, combine 4 cups fresh (not frozen) pineapple chunks, ⅓ cup sugar, 2-3 tablespoons lime juice, and optional pinch of salt.
- Blend until completely smooth.
- Taste and adjust sweetness/tartness.
- Cover and refrigerate until very cold (at least 2 hours, preferably overnight).
Step 2: Churn
- Pour the chilled mixture into your ice cream maker.
- Churn according to manufacturer’s instructions (typically 20-25 minutes) until thick and frozen to soft-serve consistency.
- Transfer to a freezer-safe container and freeze for 2-4 hours until firm.
Notes
- Frozen pineapple is KEY for blender method: Fresh pineapple won’t blend into sorbet—it must be frozen solid first!
- Blender power matters: High-powered blenders (Vitamix, Blendtec) make this easiest. Standard blenders work but take longer and may need more scraping/stirring.
- Sweetness is personal: Start with ⅓ cup sugar, taste after blending, adjust. Riper pineapple needs less sweetener.
- Texture tip: For ultra-smooth sorbet, strain the blended mixture through a fine-mesh sieve before final freezing (removes fiber).
- Storage: Keeps well in freezer for up to 2 weeks. After that, ice crystals may form but it’s still safe to eat.
- Re-freezing after scooping: If sorbet becomes too hard after several days, let it soften, re-blend briefly, and freeze again.
- Prep Time: 10 minutes
- Cook Time: 0 minutes
- Category: Desert
- Method: Blending + Freezing
- Cuisine: Tropical / French-Inspired
- Diet: Gluten Free
Nutrition
- Serving Size: ½ cup
- Calories: 80
- Sugar: 18g
- Sodium: 2mg
- Fat: 0g
- Saturated Fat: 0g
- Unsaturated Fat: 0g
- Trans Fat: 0g
- Carbohydrates: 21g
- Fiber: 1g
- Protein: 0g
- Cholesterol: 0mg
Tips & Variations
Customize Your Perfect Pineapple Sorbet:
- Coconut-Pineapple Sorbet: Add ¼ cup coconut milk and ¼ teaspoon coconut extract for piña colada vibes!
- Mint-Pineapple Sorbet: Blend in 10-15 fresh mint leaves for refreshing herbal notes.
- Mango-Pineapple Sorbet: Use 2 cups pineapple + 2 cups mango for tropical fruit blend.
- Strawberry-Pineapple: Combine 2 cups pineapple + 2 cups strawberries for sweet-tart combo.
- Spicy Pineapple: Add ¼ teaspoon grated fresh ginger or tiny pinch of cayenne for heat.
- Rum-Spiked (Adult Version): Add 2-3 tablespoons rum or coconut rum before final freeze.
- Basil-Pineapple: Steep 5-6 basil leaves in warm simple syrup, strain, add to sorbet. Sophisticated!
- Champagne Pineapple Sorbet: Replace lime juice with 2 tablespoons champagne or prosecco.
- Less Sweet Version: Reduce sugar to ¼ cup or use stevia for lower-sugar option.
- Extra Creamy: Add 2-3 tablespoons coconut cream or a ripe banana for creamier texture (technically not sorbet anymore, but delicious!).
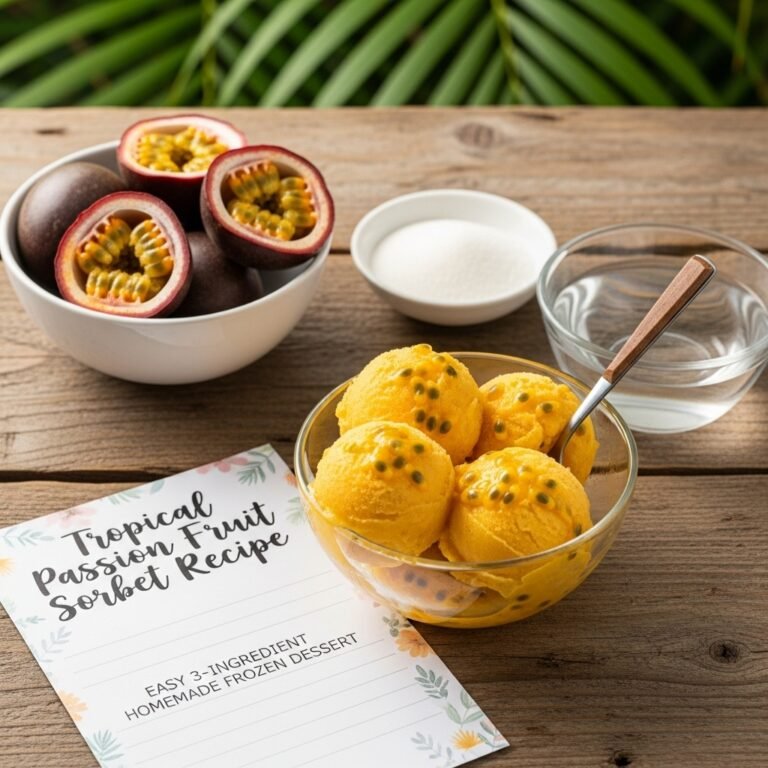
- Passion Fruit Swirl: Fold in passion fruit pulp after blending for tropical complexity.
- Lime-Heavy Version: Increase lime juice to ¼ cup for more tangy, less sweet profile.
Pro Chef Tips
Professional Secrets for Perfect Sorbet:
- Sugar is Texture, Not Just Sweetness: Professional sorbet makers understand that sugar does more than sweeten—it controls texture! Sugar lowers the freezing point of liquids, which keeps sorbet scoopable instead of rock-hard. If you reduce sugar too much (below about ¼ cup for this recipe), your sorbet will freeze too hard and become icy instead of creamy. The “right” amount of sugar creates that perfect scoopable texture. If making sugar-free versions with alternative sweeteners, you may need to add a tablespoon of vodka or corn syrup (which also lower freezing points) to maintain proper texture.
- The Soft-Serve Window: Right after blending frozen pineapple into smooth puree, professional chefs know there’s a magical “soft-serve window” of about 10-15 minutes where the sorbet is at perfect soft-serve consistency—creamy, scoopable, and at ideal eating temperature. This is actually the best moment to serve it for maximum creaminess and flavor! If you freeze it solid and then scoop, it will be firmer and require softening time. Many high-end restaurants serve sorbet at this soft-serve stage rather than rock-hard.
- Blade Position Matters When Blending: Professional technique: When blending frozen fruit, add liquid (lime juice) and sugar to the blender FIRST, then add frozen fruit on top. Start blending on lowest speed to get things moving, then gradually increase to high. This prevents frozen chunks from jamming the blades. Also, use the tamper (if your blender has one) to push fruit toward blades while blending—game-changer for smooth texture! Without a tamper, stop frequently, scrape down sides, and stir with a spatula to redistribute fruit.
- The “Rest and Re-Blend” Technique: If your sorbet becomes too hard after days in the freezer (ice crystals forming, hard to scoop), professional ice cream makers use this trick: Let it sit at room temperature for 10-15 minutes until softened, break into chunks, re-blend briefly in the blender or food processor until smooth again, then return to freezer. This breaks up ice crystals and restores creamy texture. You can do this multiple times if needed!
- Press-and-Seal Storage: Professional gelato and sorbet shops store their products with plastic wrap pressed directly against the surface before sealing the container. This prevents air exposure that causes ice crystals and freezer burn. At home, do the same: smooth the sorbet surface, press plastic wrap or parchment directly onto it, then seal the container lid. This keeps your sorbet fresh and creamy for much longer.
- The Lemon/Lime Rule: Professional sorbet recipes always include citrus juice (lemon or lime) even if it’s not a citrus sorbet. Why? Acid brightens flavors and prevents sorbet from tasting flat or one-dimensional. For tropical fruits like pineapple, lime works better than lemon (more complementary flavor). The ratio is typically 1-2 tablespoons of citrus juice per cup of fruit puree. Don’t skip it—it’s the secret to sorbet that tastes vibrant and professional!
- Temperature and Serving Timing: Professional sorbet is served at about 10-15°F, which is warmer than typical home freezer temperature (0°F). At warmer temperatures, flavors are more pronounced and texture is creamier. Always let sorbet sit at room temperature for 5-10 minutes before serving. If you’re serving at a dinner party, you can even transfer sorbet to the refrigerator 20-30 minutes before dessert time—it’ll be at perfect serving consistency when you’re ready!
Common Mistakes to Avoid
- Not Using Frozen-Solid Pineapple: The blender method only works with rock-hard frozen fruit. If your pineapple is only partially frozen or has thawed at all, it won’t blend into smooth sorbet—you’ll just get cold pineapple puree/slush. Solution: Freeze pineapple chunks until completely solid (at least 4 hours, overnight is better). They should be as hard as ice cubes. If using store-bought frozen pineapple, make sure it’s been in your freezer and hasn’t partially thawed. The frozen fruit is what creates that smooth, creamy, soft-serve-like texture when blended!
- Blender Not Powerful Enough: Standard blenders often struggle with frozen fruit—the motor isn’t strong enough, the blades can’t break up the hard chunks, and you’ll hear the motor straining. Continuing to blend when the motor is struggling can burn out the motor! Solution: Use a high-powered blender if possible (Vitamix, Blendtec, Ninja Professional). If you only have a standard blender, let the frozen pineapple sit at room temperature for 5-10 minutes to soften slightly before blending, add more liquid (extra tablespoon of lime juice or small splash of water), and blend in smaller batches.
- Not Adjusting for Pineapple’s Natural Sweetness: Pineapple sweetness varies HUGELY depending on ripeness, variety, and season. A super-ripe, golden pineapple needs much less added sugar than an underripe, pale one. Many home cooks follow the recipe exactly without tasting, ending up with sorbet that’s too sweet or too tart. Solution: Always taste your mixture after blending but before final freezing. It should taste slightly sweeter than you want the final product (freezing dulls sweetness perception). Adjust sugar or lime juice as needed. Start with less sugar, add more if needed—you can’t remove sugar once added!
- Freezing in Too-Large Container: If you freeze sorbet in a wide, shallow container, the top layer is exposed to more air and develops ice crystals faster (freezer burn). If you freeze in a very deep container, the sorbet at the bottom takes forever to freeze and the texture becomes grainy. Solution: Use a container that’s appropriately sized for the amount of sorbet—about 1-2 inches of space above the sorbet is ideal. A standard loaf pan or quart-sized ice cream container works perfectly for this recipe’s yield. Always press plastic wrap against the surface before covering.
- Giving Up on Blending Too Soon: When you first start blending frozen pineapple, it’s chunky, the blender struggles, and it seems like it will never become smooth. Many people give up, thinking their blender can’t do it. But if you’re patient, stop to scrape down sides, stir things around, and keep blending, it WILL eventually turn creamy—it just takes 3-5 minutes. The transformation is sudden—one moment it’s chunky, then suddenly it becomes smooth and soft-serve-like. Solution: Be patient! Stop frequently, scrape down, stir, blend again. Use the tamper if you have one. Keep going—the sorbet will come together if you persist!
Storage & Meal Prep
Storing Your Pineapple Sorbet:
- Airtight Container: Transfer sorbet to a freezer-safe, airtight container. Glass, plastic, or metal all work—just ensure it seals well.
- Press-and-Seal Method: Press plastic wrap or parchment directly against the sorbet surface before sealing the container lid. This prevents ice crystal formation from air exposure.
- Optimal Freezer Temperature: Store at 0°F or below. Sorbet stored at slightly warmer temperatures (like in the freezer door) will become icy faster.
- Shelf Life: Homemade sorbet is best enjoyed within 1 week for optimal texture and flavor, but properly stored, it remains delicious for up to 2 weeks. After 2 weeks, ice crystals may form and texture may become icier, though it’s still safe to eat for up to 1 month.
- Re-Blending Trick: If your sorbet becomes too icy or hard after several days, let it soften for 10-15 minutes, break into chunks, re-blend in your blender or food processor until smooth, then re-freeze. This restores creamy texture!
Make-Ahead & Freezer Notes
Perfect Make-Ahead Timeline:
Days or Weeks Ahead:
- Freeze pineapple chunks (if using fresh)
- Store in freezer bags until ready to make sorbet
1 Day Ahead:
- Make the sorbet, blend, transfer to container
- Freeze overnight
- Perfect texture for serving the next day
Day of Serving:
- Remove from freezer 5-10 minutes before serving to soften slightly
- Scoop and serve!
Long-Term Freezer Storage:
- Properly stored, sorbet keeps for up to 1 month in freezer
- After 2 weeks, texture may become icier but can be restored by re-blending
- Always press plastic wrap against surface to prevent freezer burn
Can You Refreeze Melted Sorbet?
If sorbet partially melts, yes, you can refreeze it (safe), but texture will be icier (quality issue). Completely melted sorbet can be re-blended and re-frozen, though it may separate slightly. Best practice: serve what you’ll eat and keep the rest frozen solid.
Serving Suggestions
Pineapple Sorbet is delicious on its own but here are ways to make it extra special:
Classic Presentations:
- Serve in chilled glass bowls or cocktail glasses
- Garnish with fresh mint sprig and pineapple wedge
- Add a sprinkle of toasted coconut
- Serve with crisp wafer cookies or shortbread
Creative Serving Ideas:
- Pineapple Bowl: Hollow out a halved pineapple, fill with sorbet—dramatic presentation!
- Tropical Fruit Salad: Scoop sorbet over fresh mango, papaya, and kiwi
- Float: Add a scoop to sparkling water or ginger ale for a refreshing float
- Palate Cleanser: Serve small scoops between courses at dinner parties (very French!)
- Dessert Topping: Top pound cake, angel food cake, or coconut cake with sorbet
- Smoothie Bowl Base: Let soften slightly, blend with fresh fruit for smoothie bowl
Beverage Pairings:
- Sparkling wine or champagne (the classic combination!)
- Coconut water
- Iced green tea
- Rum cocktails (sorbet can be a cocktail ingredient!)
After These Meals:
- Spicy Thai, Indian, or Mexican food (cooling contrast)
- Grilled seafood or chicken
- Heavy pasta dishes (light, refreshing finish)
- Rich BBQ (cuts through heaviness)
FAQs Section
Q: Can I make sorbet without a high-powered blender?
A: It’s challenging but possible! Standard blenders struggle with frozen fruit. Your best options: (1) Use a food processor instead—often works better than weak blenders for frozen fruit. (2) Let frozen pineapple sit at room temperature for 5-10 minutes to soften slightly before blending. (3) Add more liquid (extra tablespoon lime juice or splash of water) to help things move. (4) Blend in smaller batches. (5) Stop frequently to scrape and stir. If your blender really can’t handle it, invest in the ice cream maker method instead—puree fresh (not frozen) pineapple, chill, then churn in an ice cream maker. Or consider upgrading to a high-powered blender—they’re incredibly useful for smoothies, sauces, soups, and frozen treats!
Q: Why is my sorbet icy instead of creamy?
A: Several reasons: (1) Not enough sugar—sugar prevents ice crystals. If you reduced sugar too much, sorbet freezes too hard. (2) Stored too long—after 1-2 weeks, ice crystals naturally form. (3) Temperature fluctuations—if freezer temp varies or sorbet partially thawed then refroze, texture suffers. (4) Not enough blending—under-blended sorbet has poor texture. (5) Served too cold—sorbet should be slightly softened before serving (10-15°F, not 0°F). Solution: Let sorbet soften slightly, re-blend in blender or food processor until smooth, then refreeze. Going forward, use recommended sugar amount, store with plastic wrap pressed to surface, and let soften before serving!
Q: Can I use canned pineapple instead of fresh or frozen?
A: Yes, but with caveats. Drain canned pineapple thoroughly (save juice for smoothies!), pat dry with paper towels, then freeze solid before using in blender method. Canned pineapple is softer and less acidic than fresh, so you may need more lime juice to brighten flavor. The texture will be slightly different—often smoother because canned fruit is so soft. Canned pineapple in its own juice (not heavy syrup) works best. You’ll likely need less added sugar since canned fruit is quite sweet. Taste and adjust accordingly!
Q: How do I make sorbet without an ice cream maker or high-powered blender?
A: The “granita method” works! Pure fresh pineapple with sugar and lime juice in a regular blender until smooth. Pour into a shallow metal baking pan and freeze. Every 30-45 minutes for the first 3-4 hours, remove from freezer and scrape/stir with a fork, breaking up ice crystals. This creates a flaky, icy texture (more like granita than smooth sorbet), but it’s still delicious and requires no special equipment! Alternatively, freeze the pure in ice cube trays, then process the frozen cubes in a food processor. Less smooth than blender method but works without high-powered equipment!
Q: Can I add alcohol to sorbet?
A: Yes! Alcohol lowers the freezing point, which keeps sorbet softer and more scoopable (professional secret!). Add 2-3 tablespoons of rum, vodka, or coconut rum to this recipe. Don’t add more than that or the sorbet won’t freeze properly (alcohol prevents freezing when there’s too much). This creates a slight “adult” flavor and noticeably improves texture—sorbet stays creamy rather than rock-hard. If making for kids, obviously skip the alcohol. But for adult parties, it’s a great addition!
Q: Why do I need lime juice? Can’t I just skip it?
A: You technically CAN skip it, but your sorbet will taste flat and one-dimensional rather than bright and vibrant. Lime juice (or lemon juice) adds acidity that balances sweetness and enhances the pineapple flavor.