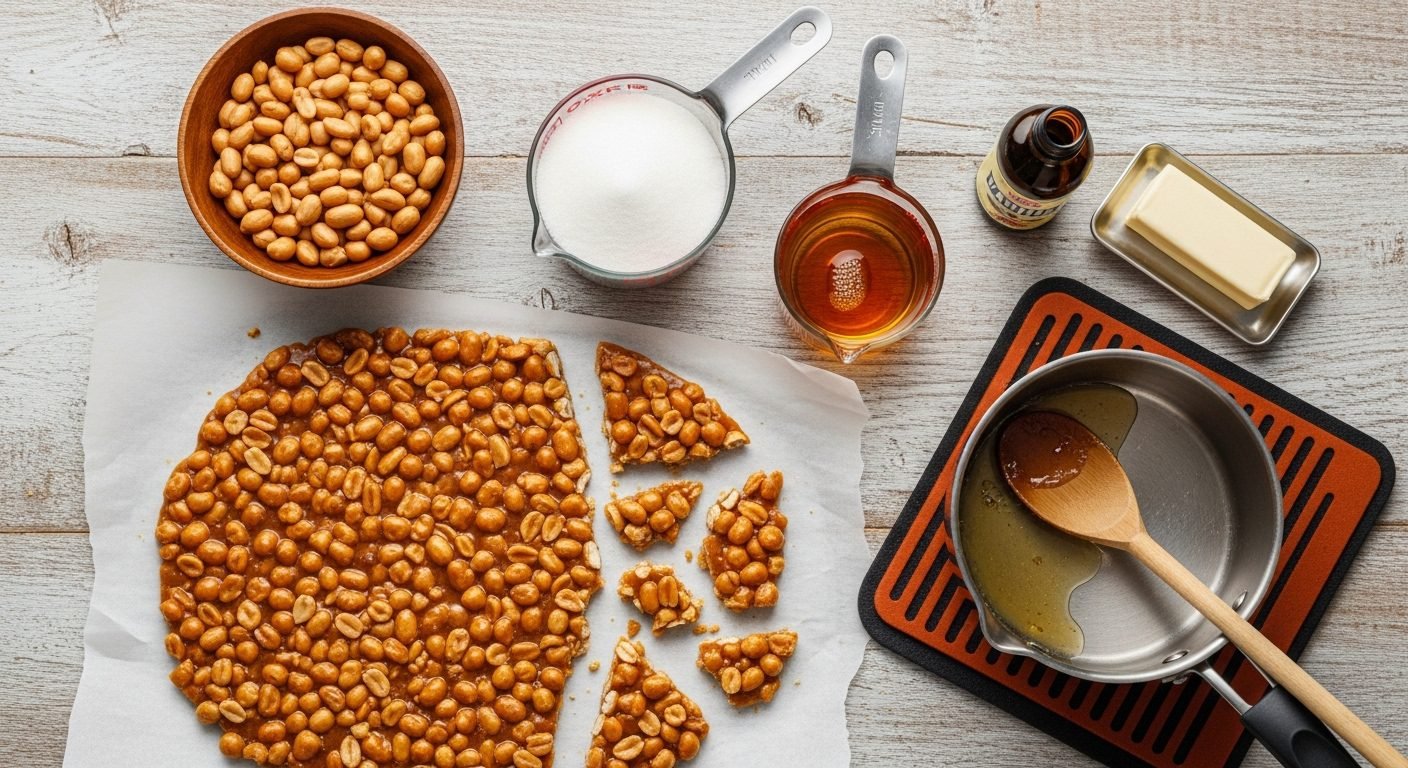
Easy Homemade Peanut Brittle Recipe (Old-Fashioned & Crunchy!)
There’s nothing quite like the satisfying crack of homemade peanut brittle breaking into golden, crunchy shards. This classic candy combines caramelized sugar with roasted peanuts to create that perfect balance of sweet, salty, and buttery flavors that keeps you reaching for just one more piece. Whether you’re making it for the holidays, gift-giving, or simply satisfying a sweet tooth craving, this peanut brittle recipe delivers that authentic old-fashioned taste that brings back memories of grandma’s kitchen.
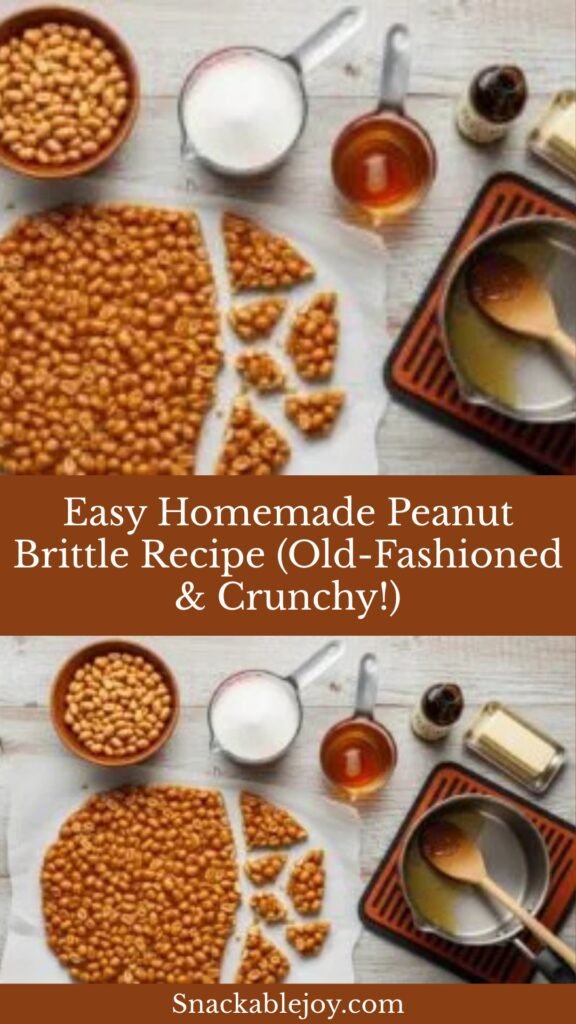
What makes this recipe truly special is how simple it is to create such an impressive confection at home. With just a handful of pantry ingredients and about 30 minutes, you can produce candy that rivals anything you’d find at a specialty shop. The glossy, amber-colored brittle studded with crunchy peanuts looks beautiful packaged in cellophane bags tied with ribbon, making it an ideal homemade gift for teachers, neighbors, coworkers, or anyone who appreciates handcrafted sweets. Plus, once you master the basic technique, you’ll find yourself making batch after batch during the holiday season.
History / Background
Peanut brittle has a rich history that’s as sweet as the candy itself. While the exact origins are debated, most food historians believe that brittle-style candies date back to ancient times when cooks discovered that heating sugar until it caramelized and mixing it with nuts created a delicious, shelf-stable treat. The specific combination we know as peanut brittle, however, is distinctly American.
Legend has it that peanut brittle was accidentally invented in the late 1800s when a woman in New England was making taffy. The story goes that she accidentally used baking soda instead of cream of tartar, and when she poured the mixture onto a pan, it spread thin and crispy instead of remaining chewy. Rather than throwing away her “mistake,” she tasted it and discovered she’d created something even better than what she’d intended. While this charming story may be apocryphal, it speaks to the serendipitous nature of many great culinary inventions.
What we do know for certain is that peanut brittle became wildly popular in the United States during the late 19th and early 20th centuries. This timing coincided perfectly with peanuts becoming a major American crop, particularly in the South. George Washington Carver’s work promoting peanuts as an alternative crop for cotton farmers in the early 1900s made peanuts more accessible and affordable than ever before.
Peanut brittle quickly became a staple at county fairs, candy shops, and home kitchens across America. The candy’s long shelf life made it practical for both commercial production and home candy-making. During the Great Depression, peanut brittle remained popular because the ingredients were relatively inexpensive and the recipe stretched a small amount of nuts into a substantial amount of candy.
By the mid-20th century, peanut brittle had secured its place in American holiday traditions. It became a favorite homemade gift, alongside fudge and divinity, that home cooks would make in large batches to give to friends, family, and neighbors during Christmas. The satisfying crack when you break a piece, the way it shatters into irregular golden shards, and that perfect balance of sweet and salty have made peanut brittle a timeless classic that continues to delight generations of candy lovers.
Why You’ll Love This Recipe
This peanut brittle recipe is going to become your go-to candy recipe for so many reasons. It produces perfectly crispy, not-too-sweet brittle that’s loaded with peanuts and has that authentic old-fashioned flavor. Unlike many candy recipes that require precise timing and specialized equipment, this one is surprisingly forgiving and uses simple techniques that even beginner candy-makers can master.
Here’s why this recipe is absolutely irresistible:
- Simple ingredients – Just sugar, corn syrup, peanuts, butter, vanilla, and baking soda
- No candy thermometer required – Visual cues and timing make it foolproof (though a thermometer helps if you have one)
- Quick cooking time – Ready in about 30 minutes from start to finish
- Perfect texture – Thin, crispy, and shatters beautifully with that satisfying crack
- Incredibly giftable – Makes a thoughtful, homemade present that everyone loves
- Customizable – Easy to adapt with different nuts or flavor additions
- Long shelf life – Stays fresh for weeks when stored properly
- Impressive results – Looks and tastes professional despite being easy to make
- Budget-friendly – Makes a large batch for very little money
- Naturally gluten-free – Perfect for those avoiding gluten (just verify your ingredients)
- Holiday tradition – A nostalgic treat that brings back wonderful memories
- Kid-approved – Children love helping and watching the magical transformation
Ingredient Notes
Let me walk you through each ingredient so you understand exactly what’s happening in this recipe and why each component matters.
Granulated Sugar: This is the base of your brittle and provides the sweetness and structure. As the sugar cooks, it caramelizes, giving peanut brittle its characteristic amber color and rich, slightly caramel-like flavor. Use regular white granulated sugar – don’t substitute with brown sugar or other sweeteners as they have different moisture contents and will affect the final texture.
Light Corn Syrup: This ingredient is crucial and shouldn’t be skipped. Corn syrup prevents the sugar from crystallizing as it cooks, which would make your brittle grainy instead of smooth and glassy. It also adds a slight chewiness to the initial bite before the brittle shatters. There’s no good substitute for corn syrup in this recipe – honey or other liquid sweeteners will change both the flavor and texture significantly.
Raw Peanuts: Use raw, unsalted peanuts for the best results. They’ll roast perfectly as the candy cooks. You can find raw peanuts in the baking aisle or bulk section of most grocery stores. Don’t use already-roasted peanuts as they can burn during the cooking process. Spanish peanuts (the smaller variety with red skins) are traditional and work wonderfully, but regular raw peanuts are perfect too. For the best flavor, use peanuts with their skins on.
Butter (Unsalted): Butter adds richness and helps create that melt-in-your-mouth quality. It also contributes to the brittleness and helps the mixture release easily from the pan. Always use unsalted butter so you can control the salt level. The butter should be at room temperature so it melts quickly when stirred in.
Baking Soda: This is the secret ingredient that creates those tiny air bubbles throughout the brittle, making it lighter and easier to bite through. When baking soda hits the hot sugar mixture, it reacts and causes foaming, which aerates the candy. Don’t skip this – it’s what makes the difference between rock-hard candy and proper brittle that shatters with a satisfying crack.
Vanilla Extract: Pure vanilla extract adds depth and rounds out all the flavors beautifully. Use real vanilla extract, not imitation, for the best flavor. The vanilla is added near the end so the heat doesn’t cook off all those wonderful aromatic compounds.
Salt: A small pinch of salt enhances the sweetness and brings out the peanut flavor. Even though peanuts naturally have some saltiness, a little extra salt in the mixture creates that addictive sweet-salty balance.
Water: Just a small amount helps dissolve the sugar initially and prevents burning at the start of cooking. It will all evaporate during the cooking process.
Equipment Needed
Peanut brittle doesn’t require a lot of specialized equipment, but having the right tools will make the process much smoother and safer. Here’s what you’ll need:
- Heavy-bottomed saucepan (at least 3-quart capacity) – The heavy bottom prevents hot spots and burning. A larger pan is important because the mixture will bubble up significantly when you add the baking soda
- Wooden spoon or heat-resistant silicone spatula – For stirring the hot candy mixture
- Candy thermometer (optional but helpful) – Clips onto the side of your pan and makes it easier to know when the candy has reached the right temperature
- Large rimmed baking sheet – A standard half-sheet pan (18×13 inches) works perfectly
- Parchment paper or silicone baking mat – Essential for easy release; do not use wax paper as it will melt
- Measuring cups and spoons – For accurate measurements
- Oven mitts or thick kitchen towels – The pan gets extremely hot
- Metal spatula or butter knife – For spreading the brittle thin while it’s still hot
- Wire cooling rack – To cool the baking sheet after pouring
Safety Equipment:
- Long sleeves – Protects your arms from splatters of hot candy
- Closed-toe shoes – Just in case any hot mixture drips
Print

Peanut Brittle Recipe
This classic homemade peanut brittle is crispy, buttery, and loaded with roasted peanuts. It’s an old-fashioned candy that’s surprisingly easy to make and perfect for holidays, gift-giving, or anytime you want a crunchy sweet treat.
- Total Time: 30 minutes (plus cooling time)
- Yield: About 1.5 pounds (approximately 24 servings) 1x
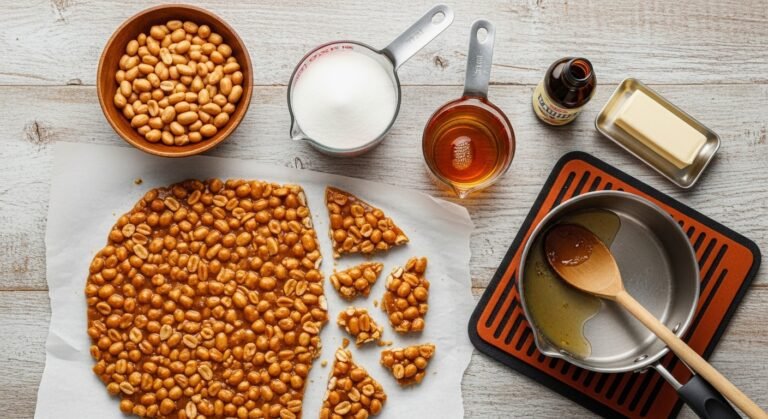
Ingredients
Scale- 2 cups granulated sugar
- 1 cup light corn syrup
- 1/2 cup water
- 2 cups raw, unsalted peanuts
- 2 tablespoons unsalted butter, at room temperature
- 1 teaspoon baking soda
- 1 teaspoon vanilla extract
- 1/4 teaspoon salt
Instructions
Step 1: Prepare Your Workspace
Before you start cooking, set up your workspace completely. Line a large rimmed baking sheet with parchment paper or a silicone baking mat. Have all your measured ingredients ready and within arm’s reach – once the candy starts cooking, things move quickly and you won’t have time to measure. Place the butter, baking soda, vanilla, and salt in small separate bowls near your stove. This preparation is crucial for success.
Step 2: Combine Sugar, Corn Syrup, and Water
In a heavy-bottomed 3-quart (or larger) saucepan, combine the sugar, corn syrup, and water. Stir gently with a wooden spoon or heat-resistant spatula until the sugar is mostly dissolved. Don’t worry if some sugar crystals remain on the sides of the pan – they’ll dissolve as the mixture heats.
Step 3: Cook the Sugar Mixture
Place the saucepan over medium-high heat. If using a candy thermometer, clip it to the side of the pan now, making sure the bulb doesn’t touch the bottom of the pan. Bring the mixture to a boil, stirring occasionally to prevent scorching. Once it reaches a full boil, stop stirring and let it cook undisturbed. This prevents crystallization.
Continue cooking until the mixture reaches 250°F (121°C) on your candy thermometer. This is called the hard ball stage. If you don’t have a thermometer, this will take about 10-12 minutes of boiling. The mixture will be clear and bubbling rapidly.
Step 4: Add the Peanuts
Once the mixture reaches 250°F, carefully stir in the raw peanuts. The temperature will drop when you add the cold peanuts – this is normal. Continue cooking, stirring frequently now to prevent the peanuts from burning on the bottom. The peanuts will start to roast and become fragrant.
Cook, stirring constantly, until the mixture reaches 300°F (149°C). This is called the hard crack stage. The mixture will turn a beautiful golden amber color. If you don’t have a thermometer, this takes about 5-7 minutes after adding the peanuts. You’ll know it’s ready when the mixture turns a deep golden color (like honey) and you can smell the peanuts roasting. You can also test by dropping a small amount into cold water – it should immediately harden and crack.
Step 5: Add Butter, Vanilla, Salt, and Baking Soda
Remove the pan from heat immediately when it reaches 300°F. Working quickly but carefully, stir in the butter until it melts completely. Then add the vanilla and salt and stir to combine. Finally, add the baking soda and stir vigorously. The mixture will foam up dramatically – this is exactly what should happen! The foaming action is what creates those air pockets that make the brittle crispy rather than tooth-breakingly hard. Keep stirring for about 5-10 seconds until the baking soda is fully incorporated and the mixture is lighter in color and foamy.
Step 6: Pour and Spread
Immediately pour the hot brittle mixture onto your prepared baking sheet. Work quickly – the candy starts to set as soon as it hits the cool pan. Using a buttered metal spatula or the back of a wooden spoon, quickly spread the brittle as thin as possible across the pan. You want it about 1/4 inch thick for the best texture. Don’t worry about making it perfectly even – rustic and irregular is part of peanut brittle’s charm.
Step 7: Cool Completely
Let the peanut brittle cool completely at room temperature. This will take about 30-45 minutes. Don’t try to speed up the process by putting it in the refrigerator, as this can cause the brittle to absorb moisture and become sticky. You’ll know it’s completely cool when it’s no longer warm to the touch and has a hard, glassy appearance.
Step 8: Break into Pieces
Once completely cool, break the brittle into irregular pieces. You can do this by hand – just lift the whole sheet off the pan and break it apart. Or use the handle of a butter knife to tap and crack it into shards. There’s something wonderfully satisfying about breaking peanut brittle! Aim for pieces that are 2-3 inches across, though they’ll naturally break wherever they want to.
Notes
- Humidity Warning: Don’t make peanut brittle on humid or rainy days. The candy absorbs moisture from the air, which will make it sticky instead of crispy. Choose a dry day for best results.
- Temperature Accuracy: If you don’t have a candy thermometer, you can test the mixture by dropping a small amount into a cup of cold water. At 300°F (hard crack stage), it will immediately harden and crack when you try to bend it.
- Peanut Size: The recipe works with any size peanuts, but smaller Spanish peanuts distribute more evenly throughout the brittle.
- Color Guide: The mixture should be a golden amber color, similar to honey, when it reaches the right temperature. If it’s too light, it won’t have enough flavor. If it’s too dark, it will taste burnt.
- Storage: Store in an airtight container with layers separated by wax paper or parchment paper. Keeps at room temperature for up to 3 weeks.
- Prep Time: 10 minutes
- Cook Time: 20 minutes
- Category: Candy, Dessert, Snack
- Method: Stovetop
- Cuisine: American
- Diet: Gluten Free
Nutrition
- Serving Size: 1 ounce (about 1-2 pieces)
- Calories: 165
- Sugar: 22g
- Sodium: 85mg
- Fat: 6g
- Saturated Fat: 1.5g
- Unsaturated Fat: 4g
- Trans Fat: 0g
- Carbohydrates: 26g
- Fiber: 1g
- Protein: 3g
- Cholesterol: 3mg
Tips & Variations
Once you’ve mastered the basic peanut brittle, the fun begins! Here are some creative variations and customization ideas to make this recipe your own.
Cashew Brittle: Replace peanuts with raw cashew pieces for a more luxurious, buttery brittle. Cashews are softer and more delicate than peanuts, creating a different but equally delicious texture.
Mixed Nut Brittle: Use a combination of peanuts, pecans, and almonds for a gourmet version. Keep the total amount of nuts at 2 cups. Chop larger nuts into peanut-sized pieces so everything cooks evenly.
Spicy Peanut Brittle: Add 1/4 teaspoon of cayenne pepper or red pepper flakes along with the vanilla for a sweet-and-spicy kick. The heat plays beautifully against the sweet caramel.
Chocolate-Drizzled Brittle: Once the brittle is completely cool, melt 4 ounces of dark or milk chocolate and drizzle it over the top using a fork or piping bag. Let the chocolate set before breaking into pieces.
Bacon Peanut Brittle: Add 1/2 cup of crumbled, cooked bacon along with the peanuts for a sweet-and-savory twist that’s absolutely addictive. Make sure the bacon is very crispy and well-drained.
Coconut Brittle: Replace 1/2 cup of the peanuts with unsweetened shredded coconut for a tropical variation. The coconut will toast beautifully in the hot sugar.
Pepita Brittle: Use roasted, salted pepitas (pumpkin seeds) instead of peanuts for a nut-free version that’s perfect for those with peanut allergies.
Sea Salt Caramel Brittle: Sprinkle flaky sea salt over the brittle immediately after spreading it on the pan, while it’s still hot. This creates a gourmet salted caramel effect.
Sesame Seed Brittle: Replace peanuts with sesame seeds for an Asian-inspired brittle similar to traditional sesame candy. Reduce cooking time slightly as sesame seeds are smaller.
Pro Chef Tips
Want to achieve candy-shop quality peanut brittle at home? Here are professional techniques that will take your candy-making to the next level.
Use a Heavy Pan: A heavy-bottomed pan is non-negotiable for candy-making. Thin pans create hot spots that cause the sugar to burn in some areas while remaining uncooked in others. Invest in a good heavy saucepan – it makes all the difference.
Don’t Stir Once Boiling: After the sugar mixture comes to a boil, resist the urge to stir until you add the peanuts. Stirring can cause sugar crystals to form on the sides of the pan, which can then fall back into the mixture and cause the entire batch to crystallize and become grainy.
Work in a Cool, Dry Environment: Professional candy makers know that humidity is the enemy of brittle. The ideal conditions for making peanut brittle are a cool, dry day with low humidity (below 60% if possible). Rainy or humid days will result in sticky, soft brittle that never fully crisps up.
Butter Your Spatula: Before spreading the hot brittle, butter your spatula or the back of a spoon. This prevents sticking and allows you to spread the mixture much more easily and thinly.
Spread Thin for Maximum Crispness: The thinner you spread your brittle, the crispier and more delicate it will be. Aim for about 1/4 inch thick. Thick spots will be harder to bite through and won’t have that satisfying shatter.
Toast Your Peanuts First (Optional): For even more intense peanut flavor, you can toast raw peanuts in a 350°F oven for 5-7 minutes before adding them to the candy. Let them cool completely first. This is an extra step that professionals sometimes use for deeper flavor.
Have Everything Ready: Candy making moves fast once you start. Mise en place (everything in its place) is crucial. Have your baking sheet lined, your thermometer clipped on, and all ingredients measured and ready before you turn on the heat.
Don’t Double the Recipe: If you need more brittle, make multiple batches rather than doubling. Doubling the recipe changes the cooking time and makes it much harder to control the temperature accurately. Plus, the larger volume is harder to spread thin enough.
Listen to the Candy: As the mixture cooks, it will sound different at different stages. At first, it bubbles quietly. As it approaches the right temperature, the bubbles become smaller and faster, and the sound changes to a higher-pitched, rapid bubbling. Experienced candy makers often identify the right stage by sound as much as by temperature.
Common Mistakes to Avoid
Even though peanut brittle is relatively straightforward, there are a few common pitfalls that can derail your candy-making. Here’s how to avoid them.
Crystallization (Grainy, Cloudy Brittle): This happens when sugar crystals form during cooking. To prevent it, avoid stirring once the mixture comes to a boil (until you add the peanuts). Make sure your pan and stirring utensil are completely clean – even a tiny bit of fat or other substance can cause crystallization. Corn syrup helps prevent this, so don’t reduce or eliminate it. If you notice sugar crystals forming on the sides of the pan, you can brush them down with a wet pastry brush.
Burnt Brittle: If your brittle tastes bitter or is dark brown instead of golden amber, it’s been cooked too long or at too high a temperature. The color should be honey-like or light amber. Once you reach 300°F, remove from heat immediately – the temperature continues to rise for a few moments even off the heat. If you don’t have a thermometer, watch the color carefully and remove from heat when it’s golden, before it turns brown.
Sticky, Soft Brittle: This is usually caused by either not cooking the mixture to a high enough temperature or making candy on a humid day. The mixture must reach 300°F (hard crack stage) for proper texture. Also, moisture in the air will be absorbed by the candy, making it sticky. Only make peanut brittle on dry days, and store it in an airtight container with minimal air space.
Burnt Peanuts: If your peanuts taste burnt but the candy isn’t overcooked, you may have used roasted peanuts instead of raw, or you didn’t stir frequently enough after adding them. Raw peanuts are essential – they roast perfectly as the candy cooks. Stir constantly once you add the peanuts to ensure they cook evenly and don’t burn on the bottom of the pan.
Thick, Hard-to-Bite Brittle: If your brittle is rock-hard and difficult to bite through, either you didn’t add the baking soda or it wasn’t mixed in well enough. The baking soda creates tiny air bubbles that make the brittle lighter and easier to bite. Make sure you stir vigorously for several seconds after adding it – you should see the mixture foam up and become lighter in color. Also, spreading the mixture thin helps create a more delicate texture.
Storage & Meal Prep
Proper storage is key to keeping your peanut brittle crispy and fresh. Here’s everything you need to know about storing this delicious candy.
Room Temperature Storage: Store peanut brittle in an airtight container at room temperature. Layer the pieces with wax paper or parchment paper between each layer to prevent sticking. A tin with a tight-fitting lid works wonderfully and keeps the brittle fresh and crispy for up to 3 weeks. Make sure the container is truly airtight – even small amounts of moisture will make the brittle sticky.
Avoid Humid Environments: Never store peanut brittle in the refrigerator or in a humid environment like next to the stove. The candy is hygroscopic, meaning it absorbs moisture from the air. This will turn your crispy brittle soft and sticky. If you live in a very humid climate, consider adding a food-safe silica gel packet to your storage container to absorb any moisture.
Signs of Moisture Damage: If your brittle becomes sticky or soft, it has absorbed too much moisture. While there’s no way to completely reverse this, you can try placing it in a 200°F oven for 5-10 minutes to dry it out slightly. However, prevention is much better than trying to fix moisture-damaged brittle.
Gift Storage: When packaging peanut brittle as gifts, use cellophane bags with twist ties or decorative ribbons. Make sure to include a note that the brittle should be stored in a dry place in an airtight container. For extra protection, you can place the cellophane bag inside a tin or rigid container.
Travel Tips: Peanut brittle travels well, making it perfect for shipping to distant friends and family. Pack pieces in an airtight container, then cushion the container with bubble wrap or packing peanuts. Place in a sturdy box and ship via the fastest method possible to minimize exposure to varying temperatures and humidity.
Make-Ahead & Freezer Notes
Peanut brittle is an excellent make-ahead treat, which is one reason it’s so popular during the busy holiday season. Here’s how to prepare it in advance.
Making Ahead for the Holidays: You can make peanut brittle up to 3 weeks in advance if stored properly in an airtight container. This makes it perfect for holiday cookie plates and gift baskets. Many people make large batches in early December and have it ready for all their holiday giving needs.
Freezing Peanut Brittle: While not necessary, peanut brittle can be frozen for up to 3 months if you want to make it even further in advance. Wrap pieces tightly in plastic wrap, then place in a freezer-safe bag or container, removing as much air as possible. The key is preventing moisture and air from reaching the candy.
Thawing: Remove frozen peanut brittle from the freezer and let it come to room temperature while still wrapped. This prevents condensation from forming on the candy. Once at room temperature (about 1 hour), unwrap and store in an airtight container. Don’t rush this process – if you unwrap it while still cold, condensation will make it sticky.
Gifting Timeline: If giving peanut brittle as gifts, plan to make it no more than 1-2 weeks before giving for optimal freshness. Package it in attractive containers 1-2 days before gifting. This ensures your recipients get the freshest, crispiest brittle possible.
Batch Cooking: Many experienced candy-makers make multiple batches in one day since each batch only takes about 30 minutes. You can easily make 3-4 batches in an afternoon, giving you plenty for gifts, parties, and personal enjoyment. Just make sure to clean your pan thoroughly between batches.
Serving Suggestions
While peanut brittle is absolutely delicious on its own, there are many creative ways to serve and enjoy this classic candy.
With Coffee or Tea: Peanut brittle is the perfect accompaniment to your morning coffee or afternoon tea. The sweetness pairs beautifully with bitter coffee, and it’s sturdy enough to dunk briefly without falling apart. Try it with a latte, cappuccino, or strong black coffee.
Crushed Over Ice Cream: Break peanut brittle into small pieces and sprinkle over vanilla, butter pecan, or chocolate ice cream for incredible texture and flavor. It adds a satisfying crunch that stays crispy even as the ice cream softens slightly.
Dessert Garnish: Use small shards of peanut brittle as an elegant garnish for cakes, pies, cheesecakes, or puddings. It adds height, visual interest, and a professional touch to plated desserts.
In Cookie Plates: Include peanut brittle alongside other holiday favorites like chocolate chip cookies, fudge, snickerdoodles, and brownies. The variety in texture and flavor makes cookie plates more interesting.
With Cheese: Surprisingly, peanut brittle pairs wonderfully with certain cheeses. Try it with sharp cheddar, aged gouda, or creamy brie. The sweet-salty-creamy combination is unexpectedly delicious and makes for an impressive cheese board addition.
Chopped in Baked Goods: Crush peanut brittle and fold it into cookie dough, brownie batter, or blondie batter before baking. It adds pockets of caramelized crunch throughout your baked goods.
Holiday Gift Baskets: Create beautiful gift baskets featuring peanut brittle alongside other homemade treats like cookies, fudge, hot cocoa mix, or flavored coffee. Arrange in a decorative tin or basket with festive tissue paper.
Movie Night Snack: Combine broken peanut brittle pieces with popcorn for a sweet-and-salty movie snack mix that’s absolutely addictive.
FAQs Section
Can I make peanut brittle without a candy thermometer?
Yes, absolutely! While a candy thermometer makes things easier, you can successfully make peanut brittle without one. Use the cold water test: drop a small amount of the hot mixture into a cup of cold water. At the hard crack stage (300°F), it will immediately harden and crack when you try to bend it. Also watch the color – it should be golden amber, like honey. The mixture will also sound different, with faster, smaller bubbles making a higher-pitched sound when it’s ready.
Why is my peanut brittle chewy instead of crunchy?
Chewy brittle means it hasn’t been cooked to a high enough temperature. The mixture must reach 300°F (hard crack stage) for proper crispiness. If you don’t have a thermometer, cook until it’s a deep golden amber color and passes the cold water test. Another cause of chewy brittle is humidity – making candy on humid days results in softer, stickier candy because it absorbs moisture from the air.
Can I use salted peanuts or roasted peanuts?
It’s best to use raw, unsalted peanuts. Salted peanuts will make your brittle too salty, and already-roasted peanuts can burn during the cooking process since they’ll be exposed to high heat twice. Raw peanuts roast perfectly in the hot sugar mixture, developing great flavor without burning. If you can only find roasted peanuts, reduce your cooking time slightly after adding them.
What’s the white coating that sometimes appears on peanut brittle?
That white coating is called “sugar bloom” and happens when moisture causes some of the sugar to crystallize on the surface. It’s harmless and doesn’t affect the taste, but it does indicate the brittle has been exposed to moisture or humidity. To prevent it, store your brittle in a completely airtight container in a cool, dry place. If your brittle develops sugar bloom, it’s still safe to eat.
Can I make this recipe nut-free for allergies?
Yes! You can replace the peanuts with sunflower seeds or pepitas (pumpkin seeds) to make a nut-free brittle. Sunflower seed brittle is delicious and safe for those with nut allergies. You could also make it without any add-ins at all for a simple sugar brittle, though you’ll want to reduce the cooking time slightly since there’s nothing absorbing heat.
Why didn’t my brittle foam up when I added baking soda?
If your mixture didn’t foam when you added baking soda, several things could be wrong. Your baking soda might be old and have lost its potency – test it by adding a pinch to vinegar; it should fizz vigorously. The mixture might not have been hot enough, or you didn’t stir vigorously enough after adding the baking soda. Finally, make sure you’re using baking soda, not baking powder – they’re not the same thing.
How do I clean my pan after making peanut brittle?
Cleaning the hardened candy from your pan is actually easy. Fill the pan with hot water and let it sit for 15-20 minutes. The hot water will dissolve the hardened sugar. If there are stubborn spots, bring the water to a simmer on the stove and the remaining candy will dissolve completely. Don’t scrub or try to scrape it off while it’s still hard – the water method works much better and won’t damage your pan.
Conclusion
Congratulations! You now have everything you need to make absolutely perfect peanut brittle at home. This classic candy is truly one of those special recipes that brings joy both in the making and the eating. Whether you’re creating batches for holiday gifts, sharing with friends and family, or simply treating yourself to something sweet and crunchy, homemade peanut brittle is always a winner.
I hope this recipe becomes a treasured tradition in your kitchen, just as it has in mine. There’s something magical about transforming simple ingredients into that golden, crunchy candy that everyone loves. The best part? Once you master this basic recipe, you can experiment with all the variations and make it uniquely your own.
Don’t forget to save this recipe to your Pinterest boards so you can find it easily whenever the peanut brittle craving strikes! And if you make this recipe, I’d love to hear how it turned out for you. Did you try any fun variations? Did you give it as gifts?
Happy candy making, and enjoy every sweet, crunchy, perfectly caramelized bite of your homemade peanut brittle!