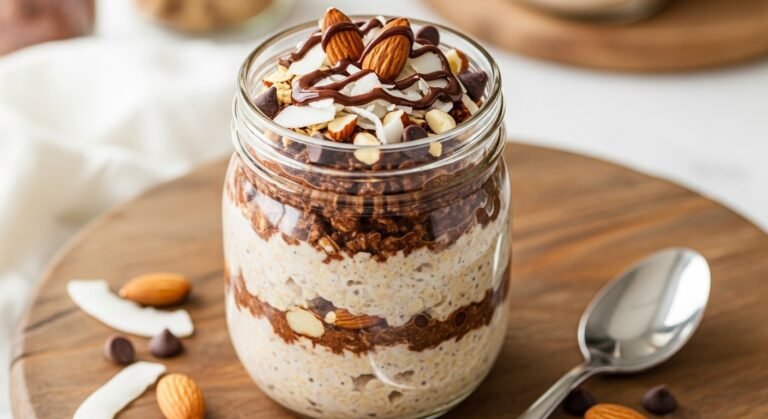
Easy Overnight Oats Recipe (5 Minutes Prep!)
Say goodbye to hectic mornings and hello to the easiest, most delicious breakfast you’ll ever make – Overnight Oats! This no-cook wonder combines rolled oats with your choice of milk, yogurt, and sweetener, then magically transforms in your refrigerator overnight into a creamy, pudding-like breakfast that’s ready to grab and go. Perfect for busy professionals rushing out the door, parents trying to feed hungry kids before school, or anyone who wants a nutritious breakfast without the morning stress. Overnight oats have exploded in popularity because they’re endlessly customizable, incredibly healthy, and actually taste better than traditional cooked oatmeal thanks to their cool, refreshing texture. Serve them for breakfast on hectic weekday mornings, pack them for meal prep Sunday to fuel your entire week, bring them along for road trips or camping, or even enjoy them as a healthy snack or light dessert. The beauty is that you literally prepare them the night before – just five minutes of stirring, then your refrigerator does all the work while you sleep. Wake up to breakfast that’s already made and waiting for you!
History / Background
Overnight oats, despite feeling like a modern invention born from Instagram and meal prep culture, actually have roots stretching back centuries to traditional European bircher muesli. The story begins in Switzerland around 1900, when Dr. Maximilian Bircher-Brenner, a pioneering nutritionist, created “Birchermüesli” for his hospital patients. His original recipe soaked raw oats in water overnight, then mixed them with grated apple, lemon juice, condensed milk, and ground hazelnuts in the morning. This revolutionary approach to eating oats – raw and cold rather than cooked and hot – was initially met with skepticism but gradually gained acceptance as people discovered how delicious and digestible it was.
The concept remained relatively niche outside of Europe until the 21st century, when several cultural shifts converged to make overnight oats a phenomenon. The rise of meal prep culture in the 2010s, driven by busy professionals seeking healthier eating habits, created the perfect environment for overnight oats to thrive. Pinterest and Instagram provided visual platforms where beautiful mason jar breakfasts could be shared and admired, turning a simple breakfast into an aesthetic experience. Health and fitness influencers embraced overnight oats as the ultimate clean eating breakfast – customizable, portable, and packed with whole grains, protein, and fiber.
The American adaptation simplified the Swiss original, focusing on convenience and customization rather than specific ingredients. Today’s overnight oats can be anything you want them to be: high-protein with Greek yogurt, vegan with plant milk, fruit-forward with berries and banana, indulgent with chocolate and peanut butter, or elegantly simple with just oats and milk. This flexibility transformed overnight oats from a specific Swiss health food into a versatile breakfast template that anyone can make their own. The COVID-19 pandemic further boosted their popularity as people sought easy, healthy meals they could prepare at home. Now, overnight oats represent the intersection of ancient food wisdom, modern convenience culture, and social media food trends – proving that sometimes the simplest ideas have the most staying power.
Why You’ll Love This Recipe
This Overnight Oats recipe is about to become your breakfast best friend, and once you try it, you’ll wonder how you ever survived mornings without it! The genius of overnight oats lies in their incredible simplicity combined with endless possibility – you get a nutritious, filling breakfast with literally zero morning effort. No cooking, no cleaning pots, no standing over the stove when you’re barely awake.
- Zero Morning Effort: Prepare the night before, grab from fridge, and go – literally ready in 0 minutes on busy mornings
- Extremely Budget-Friendly: Costs less than $1 per serving, far cheaper than store-bought breakfast or café meals
- Infinitely Customizable: Endless flavor combinations mean you’ll never get bored – sweet, fruity, nutty, chocolatey, or tropical
- Meal Prep Champion: Make 5 jars on Sunday for the entire work week of grab-and-go breakfasts
- No Special Equipment: Just a jar or container with a lid – no blender, no stove, no appliances needed
- Naturally Healthy: Whole grains, fiber, protein, and sustained energy without refined sugars or processed ingredients
- Perfect Temperature: Eaten cold, which is actually refreshing and more satisfying than hot oatmeal in warm months
- Portable Perfection: Eat at your desk, in the car, at the park, or anywhere life takes you
- Family-Friendly: Kids love them and can even help prepare their own flavors
- Dietary Flexibility: Easily made vegan, gluten-free, dairy-free, high-protein, or low-sugar
Ingredient Notes
Rolled Oats (Old-Fashioned Oats): The foundation of your overnight oats and the only truly non-negotiable ingredient. Use old-fashioned rolled oats, not quick oats or steel-cut oats. Rolled oats have the perfect texture – they soften overnight but maintain a pleasant, chewy consistency. Quick oats become mushy and slimy, while steel-cut oats stay too hard. For gluten-free overnight oats, use certified gluten-free oats. One serving is typically 1/2 cup of dry oats.
Milk of Choice: Any liquid works beautifully here! Dairy milk (whole, 2%, skim), almond milk, oat milk, coconut milk, cashew milk, soy milk, or even just water. The type of milk affects creaminess and flavor – full-fat options create richer overnight oats, while plant milks add subtle flavors. For extra creaminess, use half milk and half cream. The basic ratio is 1:1 (1/2 cup oats to 1/2 cup milk), though you can adjust to your preferred consistency.
Greek Yogurt: Optional but highly recommended for extra creaminess, tanginess, and protein. Plain Greek yogurt works best so you control sweetness, but flavored yogurt can add extra taste. Use 1/4 to 1/2 cup per serving. For dairy-free versions, coconut yogurt or almond yogurt work nicely. You can skip this entirely and just use more milk, though the texture will be less thick and pudding-like.
Sweetener: Natural sweeteners like honey, maple syrup, or agave nectar add just enough sweetness without refined sugar. Start with 1-2 tablespoons per serving and adjust to taste. Alternatively, use mashed banana, dates, or even a touch of vanilla extract with no added sweetener. For sugar-free versions, use stevia, monk fruit, or skip sweetener entirely if using sweet toppings like fruit.
Chia Seeds: These tiny superfoods are optional but incredible – they absorb liquid and create an even thicker, more pudding-like consistency while adding omega-3 fatty acids, fiber, and protein. Use 1 tablespoon per serving. Substitute with ground flaxseed for similar benefits. If you dislike the slight “seedy” texture, simply omit them.
Vanilla Extract: A small addition that makes a big difference in flavor. Just 1/2 teaspoon adds warmth and enhances sweetness perception, meaning you need less actual sweetener. Pure vanilla extract is preferred over imitation.
Pinch of Salt: Never skip the salt! It enhances all the other flavors and prevents the oats from tasting bland. Just a tiny pinch (1/8 teaspoon) makes everything taste better.
Toppings: This is where creativity shines! Fresh berries, sliced banana, nuts, seeds, nut butter, granola, coconut flakes, cacao nibs, dried fruit, or even dark chocolate chips. Add toppings in the morning right before eating to maintain the best texture, though some (like nuts) can be added the night before.
Equipment Needed
- Mason jars with lids (16 oz/pint size is perfect) OR any container with tight-fitting lid
- Measuring cups (dry and liquid)
- Measuring spoons
- Stirring spoon or small whisk
- Small bowl for mixing (optional – you can mix directly in jar)
- Knife and cutting board for preparing toppings
- Refrigerator for overnight storage
Print

Overnight Oats Recipe
This easy Overnight Oats recipe requires just 5 minutes of prep time the night before for a creamy, delicious, grab-and-go breakfast that’s ready when you wake up. Endlessly customizable and perfect for meal prep!
- Total Time: 5 minutes prep + 8 hours refrigeration
- Yield: 1 serving (easily multiplied) 1x
Ingredients
ScaleFor the Basic Overnight Oats:
- 1/2 cup rolled oats (old-fashioned oats, not quick oats)
- 1/2 cup milk of choice (dairy, almond, oat, coconut, or soy)
- 1/4 cup plain Greek yogurt (optional but recommended)
- 1 tablespoon chia seeds (optional but recommended)
- 1 tablespoon honey or maple syrup (adjust to taste)
- 1/2 teaspoon vanilla extract
- Pinch of salt (about 1/8 teaspoon)
Optional Mix-Ins (add night before):
- 1/2 mashed banana
- 1 tablespoon cocoa powder
- 1 tablespoon peanut or almond butter
- 1/4 teaspoon cinnamon
- 1 tablespoon protein powder
- 2 tablespoons dried fruit (raisins, cranberries, chopped dates)
Suggested Toppings (add in morning):
- Fresh berries (strawberries, blueberries, raspberries)
- Sliced banana
- Chopped nuts (almonds, walnuts, pecans)
- Seeds (pumpkin, sunflower, hemp hearts)
- Granola or muesli
- Coconut flakes
- Nut butter drizzle
- Fresh fruit compote
- Dark chocolate chips
Instructions
- Choose Your Container: Select a mason jar, bowl with lid, or any airtight container. A 16-ounce mason jar is the perfect size for one serving. If meal prepping multiple servings, line up several jars for efficient assembly.
- Combine Base Ingredients: In your chosen container, add the rolled oats, milk, Greek yogurt (if using), chia seeds (if using), sweetener, vanilla extract, and salt. If you’re adding any optional mix-ins like cocoa powder, peanut butter, or mashed banana, add them now as well.
- Mix Thoroughly: Stir everything together very well, making sure all the dry oats are fully moistened and no dry pockets remain at the bottom. Use a spoon or small whisk to ensure the chia seeds are evenly distributed and not clumping. Scrape down the sides of the jar to incorporate everything.
- Press Down: Use the back of your spoon to gently press the mixture down, ensuring all the oats are submerged in the liquid. This helps them soften evenly overnight. If the mixture seems too thick, add an extra splash of milk.
- Seal and Refrigerate: Place the lid tightly on your container and give it one final gentle shake to redistribute everything. Place in the refrigerator for at least 4 hours, but ideally overnight (8-12 hours). The longer they sit, the softer and creamier they become.
- Check Consistency in Morning: Remove from refrigerator and give it a stir. The oats should have absorbed most of the liquid and have a thick, creamy, pudding-like consistency. If they’re too thick for your liking, stir in a splash more milk. If too thin, they may need more oats next time or less liquid.
- Add Fresh Toppings: This is the fun part! Add your chosen toppings right before eating. Fresh fruit, nuts, seeds, granola, nut butter drizzles, or anything else you love. Layer them artfully on top or stir some in – whatever makes you happy.
- Enjoy: Overnight oats can be eaten cold straight from the fridge (most popular), at room temperature if left out for 15-20 minutes, or even warmed in the microwave for 45-60 seconds if you prefer them warm. Stir before eating to incorporate any toppings, then dig in with a spoon!
Notes
- The standard ratio is 1:1 (oats to liquid), but you can adjust based on preference. Use 1:1.5 for creamier, thinner oats, or 1:0.75 for thicker, more textured oats.
- Old-fashioned rolled oats are essential – don’t substitute with quick oats (too mushy) or steel-cut oats (too hard).
- Overnight oats keep for up to 5 days in the refrigerator, making them perfect for meal prep.
- If your oats seem too thick in the morning, just stir in additional milk until you reach desired consistency.
- For nut-free versions, use oat milk or soy milk and skip nut butters, using seed butter instead.
- Chia seeds are optional but highly recommended – they add thickness, nutrition, and help everything bind together beautifully.
- Prep Time: 5 minutes
- Cook Time: 0 minutes (overnight refrigeration: 8+ hours)
- Category: Breakfast, Meal Prep
- Method: No-Cook, Refrigeration
- Cuisine: American, European-inspired
- Diet: Gluten Free
Nutrition
- Serving Size: 1 jar (basic recipe with Greek yogurt, made with almond milk and honey)
- Calories: 325
- Sugar: 16g
- Sodium: 155mg
- Fat: 8g
- Saturated Fat: 1.5g
- Unsaturated Fat: 6g
- Trans Fat: 0g
- Carbohydrates: 52g
- Fiber: 9g
- Protein: 13g
- Cholesterol: 5mg
Tips & Variations
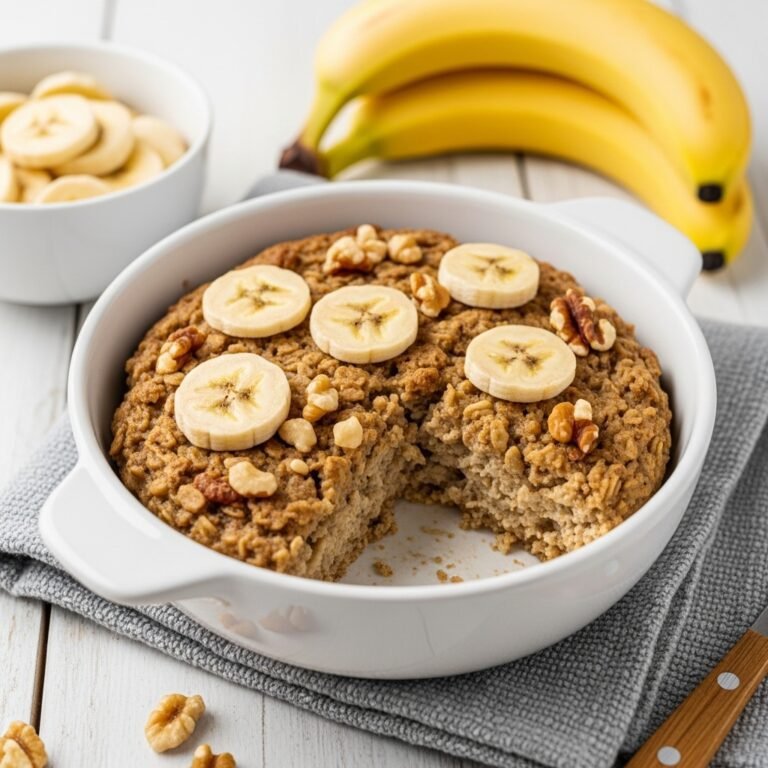
Peanut Butter Banana: Add 1 tablespoon peanut butter and 1/2 mashed banana to base. Top with banana slices, crushed peanuts, and a peanut butter drizzle.
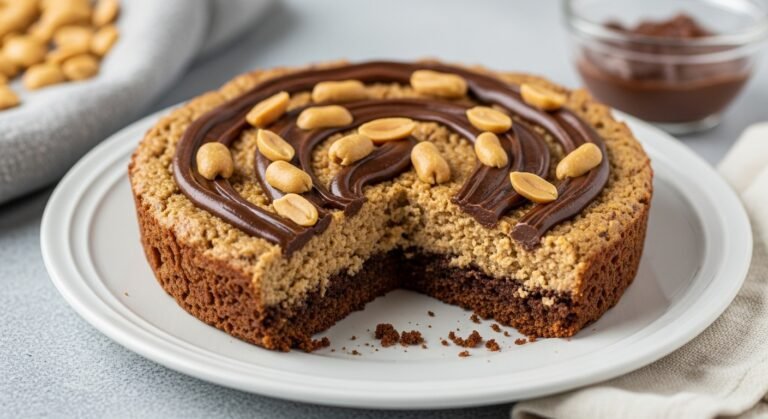
Chocolate Lovers: Mix 1-2 tablespoons cocoa powder into base with extra sweetener. Top with banana, cacao nibs, and chocolate chips.
Apple Cinnamon: Stir in 1/2 cup diced apple, 1/2 teaspoon cinnamon, and pinch of nutmeg. Top with more apple, walnuts, and granola for “apple pie” vibes.
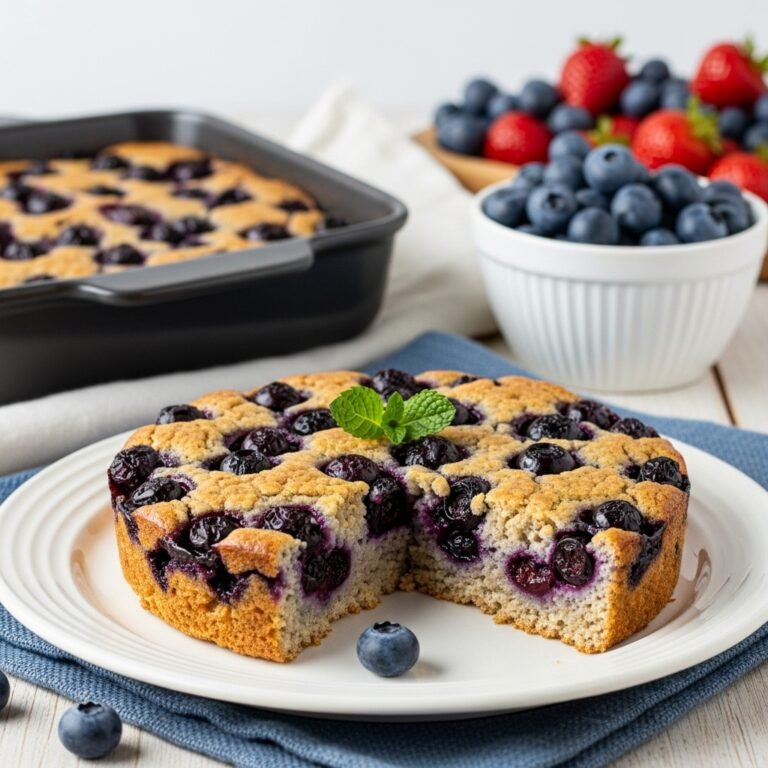
Berry Blast: Layer mixed berries (strawberries, blueberries, raspberries) with the oat base. Top with more fresh berries and almond slices.
Tropical Paradise: Use coconut milk, add 1/4 cup crushed pineapple and 2 tablespoons shredded coconut to base. Top with mango, kiwi, and macadamia nuts.
Protein-Packed: Add 1 scoop protein powder and extra Greek yogurt to base. Use high-protein milk. Top with nuts, seeds, and nut butter for 25g+ protein.
Pumpkin Spice: Mix in 1/4 cup pumpkin puree, 1/2 teaspoon pumpkin pie spice, and extra sweetener. Perfect for fall mornings!
Carrot Cake: Add grated carrot, raisins, cinnamon, and a touch of maple syrup. Top with cream cheese (or Greek yogurt), walnuts, and coconut.
Almond Joy: Use coconut milk, add cocoa powder and almond extract. Top with coconut flakes, sliced almonds, and chocolate chips.
Savory Overnight Oats: Skip sweetener, add salt, pepper, and herbs. Top with avocado, cherry tomatoes, everything bagel seasoning, and a soft-boiled egg.
Pro Chef Tips
Toast Your Oats First: For deeper, nuttier flavor, toast your oats in a dry skillet for 3-5 minutes before making overnight oats. This extra step adds complexity that really elevates the final dish.
Layer for Visual Appeal: When making overnight oats in clear jars, create layers – oat mixture, then fruit or nut butter, then more oat mixture. This creates a beautiful presentation and ensures flavors are distributed throughout.
The Yogurt Makes the Difference: Don’t skip the Greek yogurt if you want truly creamy, thick overnight oats. The yogurt adds protein, tanginess, and a pudding-like texture that milk alone can’t achieve. It’s worth the extra cost.
Mash Your Bananas: If adding banana, mash it with a fork before mixing in. This distributes the banana flavor throughout instead of leaving chunks, plus it adds natural sweetness so you need less added sweetener.
Warm Them Strategically: If you prefer warm oats, microwave for 45-60 seconds and stir halfway through. Add a splash of milk after heating as it thickens when warmed. Add fresh toppings after warming for the best texture contrast.
Use the Right Container Size: A 16-ounce jar is perfect for one serving. Too large and your oats look sparse; too small and they overflow. The right size makes portion control easier and looks more appealing.
Soak Longer for Creamier: While 8 hours is the minimum, 12-24 hours creates even creamier oats. The longer soak breaks down the oats more, creating a smoother texture. They’re safe up to 5 days refrigerated.
Balance Your Ratios: The golden ratio is 1 part oats: 1 part liquid: 0.5 parts yogurt: 0.1 parts chia seeds. This creates perfect consistency every time. Adjust minimally from there based on personal preference.
Common Mistakes to Avoid
Using Quick Oats or Steel-Cut Oats: This is the most common mistake! Quick oats turn slimy and mushy overnight – they’re processed to cook faster, which means they over-soften when soaked. Steel-cut oats stay too hard and chewy because they’re not rolled thin. Only old-fashioned rolled oats create the perfect texture. Always check your oat package carefully.
Not Mixing Thoroughly: Dry oat pockets lurking at the bottom will stay hard and crunchy even after 12 hours. When you first combine ingredients, stir very well and use your spoon to ensure every single oat is moistened. Scrape the bottom and sides of your container. Give it a shake after sealing for good measure.
Adding Crunchy Toppings the Night Before: Granola, nuts, and crispy elements become soggy and lose their appeal if added the night before. Always add crunchy toppings in the morning right before eating. The contrast between creamy oats and crunchy toppings is half the appeal – don’t lose it to premature soaking!
Using Too Little Liquid: Oats need adequate liquid to soften properly. If you use less than a 1:1 ratio, you’ll end up with hard, partially soaked oats that are unpleasant to eat. Start with the recommended amount and increase if needed. You can always add more liquid in the morning, but you can’t remove it.
Forgetting the Salt: Even sweet overnight oats need salt! A tiny pinch enhances all the other flavors and prevents bland, flat-tasting oats. This is basic cooking science – salt makes sweet things taste sweeter and brings out natural flavors. Don’t skip this crucial step.
Not Planning for Thickness Changes: Overnight oats continue absorbing liquid even after the initial night, so day-5 meal prep oats will be thicker than day-1. Always keep extra milk handy to add in the morning. Better to make them slightly thinner than having them become a thick paste by mid-week.
Storage & Meal Prep
Overnight oats are the ultimate meal prep breakfast, and proper storage ensures they stay fresh, delicious, and safe to eat throughout the week. Once prepared, overnight oats keep beautifully in the refrigerator for up to 5 days in airtight containers. This makes Sunday meal prep incredibly efficient – you can prepare five jars in about 15 minutes total and have breakfast ready for the entire work week.
Store your overnight oats in containers with tight-fitting lids to prevent them from absorbing refrigerator odors and to maintain moisture levels. Mason jars are popular because they’re perfectly portioned, stackable, and visually appealing, but any glass or plastic container with a good seal works just as well. Keep them toward the back of the refrigerator where temperature is most consistent, not in the door where temperature fluctuates.
As overnight oats sit in the refrigerator over multiple days, they continue absorbing liquid and become progressively thicker. This is completely normal and safe. By day 4 or 5, you’ll likely need to stir in an extra splash of milk to return them to your preferred consistency. Keep a small bottle of milk at work or in your bag for easy adjustment.
If your overnight oats develop any off smell, visible mold, or the jar lid bulges (indicating fermentation), discard them immediately. Properly stored, this should never happen within 5 days, but always use your senses to check. Fresh fruit toppings should always be added the morning you eat them, never stored with the oats for multiple days, as fruit deteriorates quickly and can make everything soggy or spoiled.
For true grab-and-go convenience, portion your dry toppings (nuts, seeds, dried fruit, granola) into small containers or bags labeled with the day. Each morning, grab one jar of overnight oats and its corresponding topping container, add toppings, and go. This system means zero morning prep beyond opening lids.
Overnight oats travel surprisingly well! They stay cold for 2-3 hours out of refrigeration, making them perfect for commutes. For longer periods, use an insulated lunch bag with an ice pack. Many people take them camping or on road trips since they require no cooking or reheating.
Make-Ahead & Freezer Notes
Overnight oats are literally designed to be made ahead – that’s the entire point and their greatest strength! The most common make-ahead approach is the weekly meal prep: set aside 15-20 minutes on Sunday evening to prepare 5 jars for Monday through Friday. Line up your jars, add ingredients assembly-line style, seal, and refrigerate. This small time investment gives you breakfast for the entire week.
For even more advanced planning, you can prepare the dry ingredients well ahead of time. Measure out the oats, chia seeds, sweetener, and any dry spices or cocoa powder into individual jars or bags. Store these at room temperature in your pantry for weeks. When ready to use, simply add the liquid ingredients, stir, and refrigerate overnight. This technique is perfect for people who travel frequently – take your dry mix with you and add liquid at your destination.
Interestingly, overnight oats can be frozen, though it’s not commonly done since they’re so easy to make fresh. If you want to freeze them, prepare as directed but use slightly less liquid. Freeze in individual portions in freezer-safe containers for up to 3 months. Thaw overnight in the refrigerator before eating. The texture will be slightly different – a bit more watery and less creamy – so you may need to stir in yogurt or additional chia seeds after thawing. Honestly, it’s easier to just make them fresh weekly rather than dealing with freezer storage.
One clever make-ahead trick: freeze individual portions of fruit (berries, banana slices, diced mango) in small containers. When you make your overnight oats, add the frozen fruit right to the jar. By morning, the fruit will be thawed and will have released its juices into the oats, creating a beautifully flavored, naturally sweetened breakfast.
For those who prefer warm oats but still want the convenience, prepare as directed for overnight oats, then microwave in the morning. They reheat beautifully in 45-60 seconds, creating a warm, comforting breakfast with zero morning effort beyond pressing a button. Add a splash of milk after reheating as warming thickens them.
Serving Suggestions
Overnight oats are substantial enough to be a complete breakfast on their own, especially when topped generously with fruit, nuts, and seeds. However, there are several ways to round out your morning meal or create a more substantial brunch:
Complete Breakfast Pairing: Serve your overnight oats alongside a hard-boiled egg or two for extra protein that keeps you satisfied until lunch. The combination of whole grains and protein creates sustained energy perfect for busy mornings. Alternatively, pair with a slice of whole-grain toast topped with avocado or nut butter.
Coffee Bar: Create a beautiful breakfast moment by enjoying your overnight oats with a freshly brewed coffee, latte, cappuccino, or chai tea. The convenience of overnight oats gives you time to actually make a good coffee instead of rushing through both.
Smoothie Duo: Some people enjoy overnight oats alongside a small green smoothie for extra fruits and vegetables. This combination creates a filling, nutrient-dense breakfast that covers all your bases.
Brunch Spread: When entertaining for brunch, set up an overnight oats bar! Prepare several large batches in different base flavors (plain, chocolate, vanilla, cinnamon), then set out an array of toppings in small bowls so guests can customize their own creation. This is incredibly budget-friendly for feeding a crowd.
Portable Breakfast: Pack your overnight oats with a piece of fruit (apple, pear, or orange) and a small handful of nuts in a lunch bag for a complete breakfast on-the-go. Perfect for eating at your desk or between meetings.
Light Lunch: On hot days or after a heavy breakfast, overnight oats make a refreshing, light lunch. The cold temperature is actually perfect for warm weather, unlike hot oatmeal which can feel too heavy.
Post-Workout Fuel: Eat overnight oats within 30 minutes after exercising for excellent recovery. The carbohydrates replenish glycogen stores while the protein (especially if using Greek yogurt) supports muscle recovery.
Healthy Dessert: Serve as a guilt-free dessert that satisfies sweet cravings without derailing your nutrition. Make a chocolate version, top with berries and whipped coconut cream, and you have a dessert that’s actually nourishing.
FAQs Section
Can I use steel-cut oats or quick oats instead of rolled oats?
No, unfortunately these don’t work well for overnight oats. Quick oats become mushy and slimy because they’re pre-processed to cook quickly, which means they over-soften when soaked overnight. Steel-cut oats stay hard and crunchy because they’re not rolled thin and need actual cooking to soften properly. Old-fashioned rolled oats are specifically processed to soften when soaked, creating that perfect creamy-but-chewy texture. Stick with rolled oats for best results!
Do overnight oats need to be refrigerated, or can I leave them on the counter?
Always refrigerate overnight oats! While oats themselves are shelf-stable, once you add milk and yogurt, you’ve created a perishable product that needs refrigeration to stay safe. Leaving them at room temperature overnight creates the perfect environment for bacteria growth. The only exception is if you’re using only shelf-stable ingredients (oats, water, dried fruit, no dairy) and plan to consume within a few hours.
How long do overnight oats really need to soak?
The minimum is 4 hours for oats to soften adequately, but 8-12 hours (overnight) is ideal for the creamiest texture. Interestingly, you can soak them even longer – up to 5 days in the refrigerator! The texture continues improving over time as the oats break down more. Many people actually prefer day-2 or day-3 overnight oats because they’re even creamier than day-1.
Can I warm up overnight oats if I prefer hot oatmeal?
Absolutely! Despite the name, you can eat overnight oats warm. Transfer to a microwave-safe bowl and heat for 45-60 seconds, stirring halfway through. Add a splash of milk after heating as they thicken when warmed. Some people prep overnight oats all week but warm each portion in the morning, getting the convenience of meal prep with the comfort of warm oatmeal.
My overnight oats are too thick/too thin. How do I fix this?
If they’re too thick in the morning, simply stir in milk or water one tablespoon at a time until you reach your preferred consistency. This is very common, especially with meal-prepped oats that have sat for several days. If they’re too thin, you used too much liquid – next time use less, or stir in extra chia seeds or yogurt to thicken them up. You can also add a tablespoon of dry oats to absorb excess liquid.
Are overnight oats actually healthy, or just trendy?
Overnight oats are genuinely nutritious! They’re made with whole grain oats high in fiber (especially soluble fiber called beta-glucan that supports heart health), they provide sustained energy without blood sugar spikes, and they’re customizable to meet any nutritional goal. When you control the ingredients, avoiding excess sugar and adding nutritious toppings like fruit, nuts, and seeds, you have an excellent breakfast. The health benefits aren’t just hype – they’re supported by the whole grains and nutrients you’re consuming.
Can I make overnight oats without dairy/gluten/nuts?
Yes to all! Overnight oats are incredibly adaptable to dietary restrictions. For dairy-free, use any plant milk and skip the yogurt or use coconut/almond yogurt. For gluten-free, use certified gluten-free oats. For nut-free, use oat milk or soy milk and avoid nut butters, using seed butter instead. You can make overnight oats to fit virtually any dietary need while still tasting delicious.
What’s the best container for overnight oats?
Mason jars (16-ounce/pint size) are popular because they’re perfectly portioned, have tight-sealing lids, and look pretty, but any container with a good lid works. Glass is preferred over plastic because it doesn’t absorb odors or stain, plus you can see the beautiful layers. Wide-mouth jars are easier to eat from and clean than narrow-mouth. Some people use bowls with plastic lids, meal prep containers, or even cleaned yogurt containers. Choose what works for your lifestyle!
Conclusion
And there you have it – everything you need to know to master the art of Overnight Oats and transform your mornings forever! I can’t emphasize enough how much this simple recipe has changed my breakfast routine. Gone are the days of skipping breakfast, grabbing processed pastries, or standing over a hot stove when I’m barely awake. Now I wake up to breakfast that’s already made, delicious, nutritious, and waiting for me in the fridge. It feels like having a personal chef who works while I sleep!
The best part about overnight oats is that they never get boring. I’ve been making them for years and still discover new flavor combinations that excite me. Don’t be afraid to experiment – try that weird flavor combo you’re curious about, add unexpected spices, or get creative with seasonal fruit. Some of my best overnight oats “recipes” happened by accident when I threw together whatever I had in the fridge.
I’d absolutely love to hear about your overnight oats adventures! Drop a comment below and tell me what flavor combinations you’ve tried, which ones became instant favorites, or any creative variations you discovered. Are you team peanut butter banana or team berry blast? Do you prefer them thick or thin? Warm or cold? Share your beautifully topped jars on Pinterest and tag me – I genuinely love seeing how people customize this recipe!
If you’re new to overnight oats, start with the basic recipe this week and see how it changes your mornings. I promise you’ll be making them every Sunday by week two! And if you’re already an overnight oats fan, be sure to check out my other make-ahead breakfast recipes and meal prep guides on the blog.
Here’s to easier mornings, healthier breakfasts, and never having to skip the most important meal of the day again. Happy prepping, friends! 🥣✨