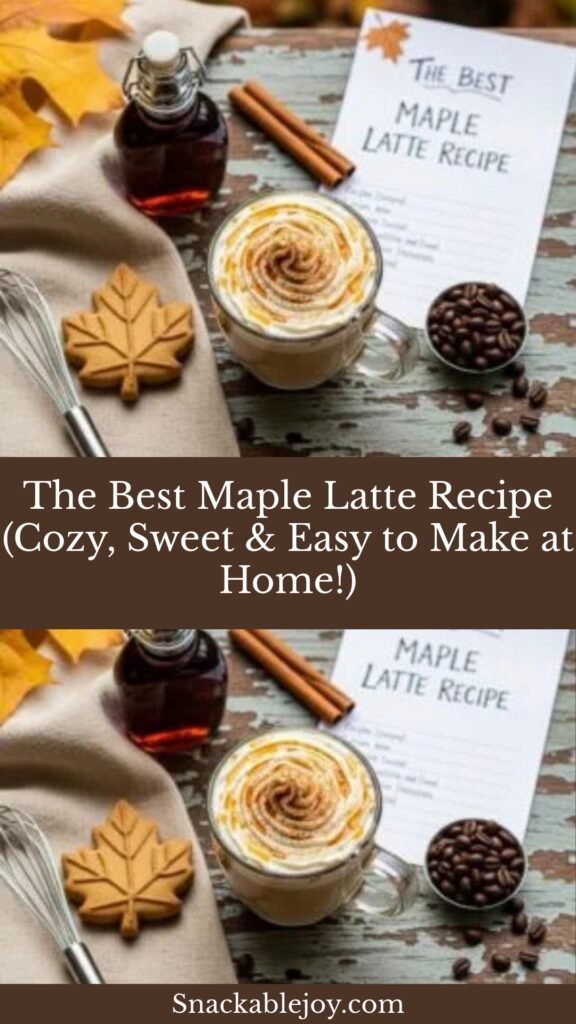
The Best Maple Latte Recipe (Cozy, Sweet & Easy to Make at Home!)
There’s something magical about wrapping your hands around a warm mug of maple latte on a crisp fall morning—or really, any morning when you need a little extra comfort. This maple latte recipe combines rich espresso with creamy steamed milk and the natural sweetness of pure maple syrup, creating a drink that’s both indulgent and surprisingly wholesome.
Unlike the heavily processed syrups you’ll find at coffee chains, this homemade version uses real maple syrup, which means you’re getting actual nutrients along with that gorgeous amber sweetness. It’s the perfect balance of bold coffee flavor and gentle sweetness, with a touch of vanilla that makes everything come together beautifully. Whether you’re looking for a special weekend treat, a cozy afternoon pick-me-up, or a signature drink to serve at your next brunch gathering, this maple latte delivers café-quality results right in your own kitchen.
The best part? You don’t need any fancy equipment or barista training. With just a few simple ingredients and about 5 minutes, you can create a drink that rivals anything you’d pay $6 for at your local coffee shop. Serve it in your favorite mug, maybe with a cinnamon stick for stirring, and you’ve got yourself a moment of pure comfort in a cup.
History / Background
The maple latte is a beautiful marriage of two beloved North American traditions: specialty coffee culture and maple syrup production. While espresso-based drinks have Italian roots dating back to the early 20th century, the maple latte is a distinctly North American creation that celebrates one of the continent’s most treasured ingredients.
Maple syrup has been harvested for over 8,000 years, with Indigenous peoples in northeastern North America being the first to discover the sweet sap of maple trees. They developed techniques for collecting and concentrating the sap, traditions that were later shared with European settlers. Canada and the northeastern United States—particularly Vermont, New York, and Maine—remain the world’s primary maple syrup producers, with Quebec alone producing over 70% of the world’s supply.
The maple latte emerged in the early 2000s as part of the craft coffee movement, when independent coffee shops began experimenting with natural, locally-sourced sweeteners as alternatives to artificial syrups. Coffee roasters in maple-producing regions were among the first to feature this drink, recognizing that the complex flavor profile of pure maple syrup—with its notes of caramel, vanilla, and woodiness—actually complements coffee’s natural flavors rather than masking them.
The drink gained widespread popularity through social media, particularly on Pinterest and Instagram, where its beautiful amber color and cozy aesthetic made it a fall and winter favorite. Today, the maple latte has become a seasonal staple at coffee shops across North America, with home baristas embracing it as an accessible way to create café-quality drinks at home. It represents a move toward cleaner, more natural ingredients in specialty coffee, and celebrates the rich agricultural heritage of North American maple production.
Why You’ll Love This Recipe
This maple latte is about to become your new favorite homemade coffee drink, and here’s why: it strikes that perfect balance between feeling like a special treat and being genuinely easy to make at home. The natural maple syrup adds a sophisticated sweetness that’s worlds apart from artificial syrups—it actually enhances the coffee rather than overwhelming it. Plus, knowing exactly what goes into your drink means no mystery ingredients, just pure, simple goodness.
Here’s what makes this recipe a winner:
- Ready in 5 minutes – Faster than driving to a coffee shop and waiting in line
- Budget-friendly – Costs less than $1.50 per serving compared to $5-7 at cafés
- Natural ingredients – Real maple syrup means no artificial flavors or processed sugars
- Customizable sweetness – Adjust the maple syrup to your exact taste preference
- No special equipment required – Works with a French press, Moka pot, or even instant espresso
- Impressive but simple – Perfect for serving guests without any fuss
- Kid-friendly option – Make it with decaf or omit the espresso for a maple steamer
- Year-round enjoyment – While it’s especially cozy in fall, it’s delicious any season
- Nutrient bonus – Pure maple syrup contains minerals like manganese, zinc, and antioxidants
Ingredient Notes
Let me walk you through what makes this maple latte so delicious. Each ingredient plays an important role, and I’ll share some tips for getting the best results.
Espresso or Strong Coffee: The foundation of your latte. You’ll want a bold, concentrated coffee that can stand up to the milk and sweetness. Espresso is traditional and ideal, but double-strength coffee from a French press, Moka pot, or AeroPress works beautifully too. For a shortcut, you can even use instant espresso powder—just make it extra strong. Avoid regular drip coffee as it’s too weak and will get lost in the milk.
Pure Maple Syrup: This is your star ingredient, so quality matters. Always use 100% pure maple syrup, not “pancake syrup” or maple-flavored corn syrup. Grade A Dark Amber or Grade A Dark Color offers the richest maple flavor, while Grade A Golden Color is more delicate. The darker grades have more robust, complex flavors that really shine in coffee drinks. Store it in the refrigerator after opening to maintain freshness.
Milk: Whole milk creates the creamiest, most luxurious texture and froths beautifully. However, 2% milk works well if you prefer something lighter. For dairy-free options, oat milk is absolutely fantastic in lattes (it froths almost as well as dairy milk), while almond milk and coconut milk also work, though they’re a bit thinner. Avoid skim milk as it doesn’t froth well and lacks richness.
Vanilla Extract: Just a small splash enhances both the maple and coffee flavors, adding a warm, aromatic quality. Use pure vanilla extract rather than imitation for the best flavor. This is optional but highly recommended—it’s one of those secret ingredients that makes people wonder what makes your latte taste so good.
Optional Toppings: A sprinkle of cinnamon or nutmeg adds warmth and visual appeal. Whipped cream makes it extra indulgent, and a drizzle of additional maple syrup on top is both pretty and delicious for special occasions.
Equipment Needed
You don’t need a professional espresso machine to make an amazing maple latte at home. Here’s what will make your life easier:
- Espresso maker, Moka pot, French press, or AeroPress – For brewing strong coffee
- Small saucepan or milk frother – To heat and froth your milk
- Measuring spoons – For precise maple syrup amounts
- Coffee mug (12-16 oz) – Your favorite large mug or latte glass
- Whisk or small frother – If not using a milk frother, a small whisk works for creating foam
- Thermometer (optional but helpful) – To ensure milk reaches 150-155°F without scalding
- Spoon – For stirring and spooning foam
Nice to have but not essential: A handheld milk frother (around $15-20) or an electric milk frother makes the process even easier and creates beautiful microfoam. But honestly, vigorously whisking heated milk works surprisingly well!
Print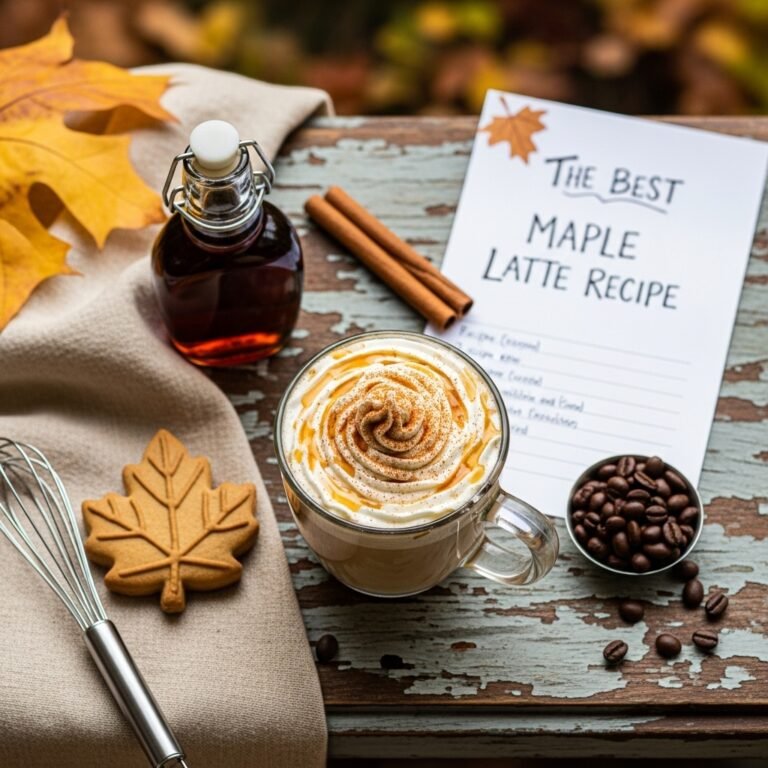
Maple Latte Recipe
A cozy, naturally sweetened maple latte made with rich espresso, creamy steamed milk, and pure maple syrup. This café-style drink takes just 5 minutes to make at home and uses simple, wholesome ingredients. Perfect for fall mornings, winter afternoons, or anytime you need a comforting coffee treat!
- Total Time: 5 minutes
- Yield: 1 serving (12-16 oz latte) 1x
Ingredients
- 2 shots espresso (about 2 oz or 60 ml), or ½ cup strong brewed coffee
- 1 cup (240 ml) whole milk (or milk of choice)
- 1½ to 2 tablespoons pure maple syrup (adjust to taste)
- ¼ teaspoon pure vanilla extract
- Pinch of cinnamon or nutmeg for garnish (optional)
- Whipped cream for topping (optional)
Instructions
☕ The Best Maple Latte Recipe (Cozy, Sweet & Easy to Make at Home!)
Introduction of Recipe
There’s something magical about wrapping your hands around a warm mug of maple latte on a crisp fall morning—or really, any morning when you need a little extra comfort. This maple latte recipe combines rich espresso with creamy steamed milk and the natural sweetness of pure maple syrup, creating a drink that’s both indulgent and surprisingly wholesome.
Unlike the heavily processed syrups you’ll find at coffee chains, this homemade version uses real maple syrup, which means you’re getting actual nutrients along with that gorgeous amber sweetness. It’s the perfect balance of bold coffee flavor and gentle sweetness, with a touch of vanilla that makes everything come together beautifully. Whether you’re looking for a special weekend treat, a cozy afternoon pick-me-up, or a signature drink to serve at your next brunch gathering, this maple latte delivers café-quality results right in your own kitchen.
The best part? You don’t need any fancy equipment or barista training. With just a few simple ingredients and about 5 minutes, you can create a drink that rivals anything you’d pay $6 for at your local coffee shop. Serve it in your favorite mug, maybe with a cinnamon stick for stirring, and you’ve got yourself a moment of pure comfort in a cup.
History / Background
The maple latte is a beautiful marriage of two beloved North American traditions: specialty coffee culture and maple syrup production. While espresso-based drinks have Italian roots dating back to the early 20th century, the maple latte is a distinctly North American creation that celebrates one of the continent’s most treasured ingredients.
Maple syrup has been harvested for over 8,000 years, with Indigenous peoples in northeastern North America being the first to discover the sweet sap of maple trees. They developed techniques for collecting and concentrating the sap, traditions that were later shared with European settlers. Canada and the northeastern United States—particularly Vermont, New York, and Maine—remain the world’s primary maple syrup producers, with Quebec alone producing over 70% of the world’s supply.
The maple latte emerged in the early 2000s as part of the craft coffee movement, when independent coffee shops began experimenting with natural, locally-sourced sweeteners as alternatives to artificial syrups. Coffee roasters in maple-producing regions were among the first to feature this drink, recognizing that the complex flavor profile of pure maple syrup—with its notes of caramel, vanilla, and woodiness—actually complements coffee’s natural flavors rather than masking them.
The drink gained widespread popularity through social media, particularly on Pinterest and Instagram, where its beautiful amber color and cozy aesthetic made it a fall and winter favorite. Today, the maple latte has become a seasonal staple at coffee shops across North America, with home baristas embracing it as an accessible way to create café-quality drinks at home. It represents a move toward cleaner, more natural ingredients in specialty coffee, and celebrates the rich agricultural heritage of North American maple production.
Why You’ll Love This Recipe
This maple latte is about to become your new favorite homemade coffee drink, and here’s why: it strikes that perfect balance between feeling like a special treat and being genuinely easy to make at home. The natural maple syrup adds a sophisticated sweetness that’s worlds apart from artificial syrups—it actually enhances the coffee rather than overwhelming it. Plus, knowing exactly what goes into your drink means no mystery ingredients, just pure, simple goodness.
Here’s what makes this recipe a winner:
- Ready in 5 minutes – Faster than driving to a coffee shop and waiting in line
- Budget-friendly – Costs less than $1.50 per serving compared to $5-7 at cafés
- Natural ingredients – Real maple syrup means no artificial flavors or processed sugars
- Customizable sweetness – Adjust the maple syrup to your exact taste preference
- No special equipment required – Works with a French press, Moka pot, or even instant espresso
- Impressive but simple – Perfect for serving guests without any fuss
- Kid-friendly option – Make it with decaf or omit the espresso for a maple steamer
- Year-round enjoyment – While it’s especially cozy in fall, it’s delicious any season
- Nutrient bonus – Pure maple syrup contains minerals like manganese, zinc, and antioxidants
Ingredient Notes
Let me walk you through what makes this maple latte so delicious. Each ingredient plays an important role, and I’ll share some tips for getting the best results.
Espresso or Strong Coffee: The foundation of your latte. You’ll want a bold, concentrated coffee that can stand up to the milk and sweetness. Espresso is traditional and ideal, but double-strength coffee from a French press, Moka pot, or AeroPress works beautifully too. For a shortcut, you can even use instant espresso powder—just make it extra strong. Avoid regular drip coffee as it’s too weak and will get lost in the milk.
Pure Maple Syrup: This is your star ingredient, so quality matters. Always use 100% pure maple syrup, not “pancake syrup” or maple-flavored corn syrup. Grade A Dark Amber or Grade A Dark Color offers the richest maple flavor, while Grade A Golden Color is more delicate. The darker grades have more robust, complex flavors that really shine in coffee drinks. Store it in the refrigerator after opening to maintain freshness.
Milk: Whole milk creates the creamiest, most luxurious texture and froths beautifully. However, 2% milk works well if you prefer something lighter. For dairy-free options, oat milk is absolutely fantastic in lattes (it froths almost as well as dairy milk), while almond milk and coconut milk also work, though they’re a bit thinner. Avoid skim milk as it doesn’t froth well and lacks richness.
Vanilla Extract: Just a small splash enhances both the maple and coffee flavors, adding a warm, aromatic quality. Use pure vanilla extract rather than imitation for the best flavor. This is optional but highly recommended—it’s one of those secret ingredients that makes people wonder what makes your latte taste so good.
Optional Toppings: A sprinkle of cinnamon or nutmeg adds warmth and visual appeal. Whipped cream makes it extra indulgent, and a drizzle of additional maple syrup on top is both pretty and delicious for special occasions.
Equipment Needed
You don’t need a professional espresso machine to make an amazing maple latte at home. Here’s what will make your life easier:
- Espresso maker, Moka pot, French press, or AeroPress – For brewing strong coffee
- Small saucepan or milk frother – To heat and froth your milk
- Measuring spoons – For precise maple syrup amounts
- Coffee mug (12-16 oz) – Your favorite large mug or latte glass
- Whisk or small frother – If not using a milk frother, a small whisk works for creating foam
- Thermometer (optional but helpful) – To ensure milk reaches 150-155°F without scalding
- Spoon – For stirring and spooning foam
Nice to have but not essential: A handheld milk frother (around $15-20) or an electric milk frother makes the process even easier and creates beautiful microfoam. But honestly, vigorously whisking heated milk works surprisingly well!
📋 Recipe Card
Prep Time: 2 minutes
Cook Time: 3 minutes
Total Time: 5 minutes
Yield: 1 serving (12-16 oz latte)
Category: Beverage
Method: Stovetop
Cuisine: North American
Diet: Vegetarian, Gluten-Free
Description
A cozy, naturally sweetened maple latte made with rich espresso, creamy steamed milk, and pure maple syrup. This café-style drink takes just 5 minutes to make at home and uses simple, wholesome ingredients. Perfect for fall mornings, winter afternoons, or anytime you need a comforting coffee treat!
Ingredients
- 2 shots espresso (about 2 oz or 60 ml), or ½ cup strong brewed coffee
- 1 cup (240 ml) whole milk (or milk of choice)
- 1½ to 2 tablespoons pure maple syrup (adjust to taste)
- ¼ teaspoon pure vanilla extract
- Pinch of cinnamon or nutmeg for garnish (optional)
- Whipped cream for topping (optional)
Instructions
- Brew the espresso: Prepare 2 shots of espresso using your espresso machine, Moka pot, or preferred brewing method. If using a French press or AeroPress, brew a very strong, concentrated coffee. Pour the espresso into your serving mug.
- Add maple syrup and vanilla: While the espresso is still hot, stir in the maple syrup and vanilla extract until completely dissolved. Start with 1½ tablespoons of maple syrup and adjust to taste—you can always add more later. The heat from the espresso helps the maple syrup incorporate smoothly.
- Heat the milk: Pour the milk into a small saucepan and heat over medium heat, stirring occasionally to prevent scorching. Heat until the milk reaches 150-155°F (65-68°C)—it should be steaming but not boiling. You’ll see small bubbles forming around the edges, but don’t let it come to a full boil or it will scald and taste burnt.
- Froth the milk: Remove the saucepan from heat. Use a handheld milk frother, whisk vigorously for 30-60 seconds, or pour the milk into a jar with a tight lid and shake vigorously for 30 seconds until foamy. You want to create a nice layer of microfoam on top. If using a jar method, be careful as the milk is hot—use a towel to protect your hands.
- Combine and serve: Slowly pour the steamed milk into your mug with the espresso and maple syrup mixture, holding back the foam with a spoon. Once the mug is nearly full, spoon the foam on top to create that classic latte look.
- Garnish and enjoy: Sprinkle with a pinch of cinnamon or nutmeg if desired. For an extra special touch, drizzle a small amount of maple syrup over the foam and add a dollop of whipped cream. Serve immediately while hot and enjoy your homemade maple latte!
Notes
- Maple syrup amounts: Sweetness preferences vary widely. Start with 1½ tablespoons and add more if needed. Remember that maple syrup is less sweet than white sugar, so don’t be shy about adjusting to your taste.
- Milk alternatives: Oat milk froths exceptionally well and has a naturally creamy texture. Almond and soy milk work but produce less foam. For coconut milk, use the canned full-fat version for best results.
- Make it iced: Brew espresso and stir in maple syrup while hot to dissolve. Let cool, then pour over ice and add cold milk. Shake with ice for a frothy iced version.
- Decaf option: Use decaffeinated espresso for an evening treat or for those sensitive to caffeine.
- Bulk preparation: You can make a maple syrup and vanilla mixture in advance (combine ½ cup maple syrup with 1 teaspoon vanilla). Store in the refrigerator and use 1½ to 2 tablespoons per latte.
- Prep Time: 2 minutes
- Cook Time: 3 minutes
- Category: Beverage
- Method: Stovetop
- Cuisine: North American
- Diet: Gluten Free
Nutrition
- Serving Size: 1 latte (12-16 oz)
- Calories: 185
- Sugar: 24g
- Sodium: 110mg
- Fat: 6g
- Saturated Fat: 3.5g
- Unsaturated Fat: 2g
- Trans Fat: 0g
- Carbohydrates: 26g
- Fiber: 0g
- Protein: 8g
- Cholesterol: 20mg
Tips & Variations
The beauty of this maple latte is how easily you can make it your own. Here are some of my favorite ways to customize it:
Maple Cinnamon Latte: Add ¼ teaspoon ground cinnamon to the milk while heating for a warm, spiced version that’s perfect for fall. You can also add a cinnamon stick for stirring—it looks beautiful and adds subtle flavor.
Maple Vanilla Latte: Double the vanilla extract to ½ teaspoon for a more pronounced vanilla flavor that complements the maple beautifully. Consider using vanilla bean paste for an even more luxurious touch.
Iced Maple Latte: Brew espresso extra strong and dissolve maple syrup while it’s hot. Let the mixture cool completely or pour over ice immediately. Add cold milk and plenty of ice, then shake or stir vigorously. This is incredibly refreshing on warm days.
Maple Lavender Latte: Add 1 teaspoon of culinary lavender to the milk while heating, then strain before frothing. The floral notes pair surprisingly well with maple and create an elegant, sophisticated drink.
Pumpkin Maple Latte: Stir 2 tablespoons of pumpkin puree and ¼ teaspoon pumpkin pie spice into the espresso along with the maple syrup. This creates the ultimate fall latte that’s naturally sweetened.
Salted Maple Latte: Add a tiny pinch (just a few crystals) of sea salt to the maple syrup mixture. The salt enhances the sweetness and adds complexity—it’s a game-changer!
Dairy-Free/Vegan: Use oat milk, almond milk, or coconut milk and ensure your maple syrup is vegan (most are, but double-check). Oat milk is my top recommendation for the best texture and taste.
Lower Sugar Version: Reduce maple syrup to 1 tablespoon or even ½ tablespoon if you prefer less sweetness. The vanilla extract helps maintain flavor even with less sweetener.
Maple Mocha: Add 1 tablespoon of cocoa powder to the espresso along with the maple syrup. The chocolate and maple combination is absolutely divine.
Pro Chef Tips
After making hundreds of lattes, here are the insider secrets that truly elevate this drink from good to extraordinary:
Temperature is everything: The sweet spot for steamed milk is 150-155°F. Any hotter and you’ll scald the milk, which destroys the natural sweetness and creates a burnt taste. Use a thermometer until you can judge by sight—you want steaming hot with tiny bubbles around the edges, but never boiling.
Dissolve maple syrup in hot espresso first: This is crucial. Maple syrup won’t incorporate well into cold or even warm milk, so always mix it with the hot espresso. This ensures even distribution throughout your drink and prevents sticky clumps at the bottom of your mug.
Use fresh coffee beans: Espresso loses its peak flavor within minutes of brewing, and coffee beans start losing flavor within two weeks of roasting. Buy whole beans from a local roaster if possible and grind them right before brewing. The difference in taste is remarkable.
Create microfoam, not just bubbles: Professional baristas aim for microfoam—tiny, velvety bubbles that create a smooth, creamy texture rather than large, airy bubbles. To achieve this, keep the frother or whisk just below the surface of the milk and move it in a circular motion. You want the milk to look glossy and thick, almost like wet paint.
Choose your maple grade wisely: For coffee drinks, Grade A Dark Color (formerly Grade B) offers the boldest maple flavor that can stand up to coffee. Grade A Golden Color is more delicate and can get lost. The darker grades have more mineral content and complex caramel notes that complement espresso beautifully.
Prime your espresso machine: If using an espresso machine, run a blank shot through the portafilter before brewing to ensure the machine is at optimal temperature. This “primes” the system and results in better extraction.
The pour technique matters: When combining milk and espresso, pour slowly and from a slight height at first (about 4-6 inches), then lower as the cup fills. This helps incorporate the espresso and milk. If you want to attempt latte art, pour the last bit of foam with the pitcher close to the surface.
Warm your mug: Rinse your serving mug with hot water before adding espresso. This keeps your latte hot longer and prevents temperature shock that can affect flavor.
Common Mistakes to Avoid
Learn from the most frequent missteps so your maple latte turns out perfect every time:
Using artificial maple syrup or pancake syrup: This is the biggest mistake! Those products are mostly corn syrup with artificial maple flavoring. They’ll make your latte taste artificial and overly sweet without any of the complex, natural maple flavor. Always invest in 100% pure maple syrup—it’s worth every penny and a bottle lasts a long time.
Boiling the milk: When milk boils, the proteins break down and create an unpleasant burnt taste and smell. Scalded milk also won’t froth properly. Keep a close eye on your saucepan and remove it from heat as soon as you see steam and tiny bubbles forming around the edges. If you accidentally boil it, start over with fresh milk.
Using weak coffee: A latte is mostly milk, so you need strong, concentrated coffee that won’t get lost. Regular drip coffee is too weak—you’ll end up with maple-flavored milk instead of a true latte. Use espresso or brew your coffee at double or triple strength.
Not warming the maple syrup enough: Cold maple syrup won’t dissolve properly and will sink to the bottom, creating an overly sweet last sip and a less sweet beginning. Always add it to hot espresso and stir well until completely dissolved.
Over-frothing the milk: More foam isn’t always better. Over-frothed milk becomes stiff and dry rather than creamy and velvety. You want about ¼ to ½ inch of foam on top of a latte, not several inches of stiff foam. The milk should still be mostly liquid, just with a silky microfoam texture.
Using pre-ground coffee that’s been sitting around: Coffee goes stale quickly after grinding. If you’re using pre-ground, buy small amounts and store in an airtight container away from light and heat. Even better, grind whole beans right before brewing.
Wrong milk-to-espresso ratio: A traditional latte is about 2/3 steamed milk, 1/3 espresso, with a small layer of foam on top. Too much espresso makes it bitter; too much milk makes it taste like sweetened coffee milk. Stick to 2 shots of espresso (2 oz) and 1 cup of milk for the perfect balance.
Storage & Meal Prep
Here’s the truth about lattes: they’re really best enjoyed fresh. The magic of a great latte is in that moment when the hot espresso meets creamy steamed milk and creates that perfect temperature and texture. That said, I understand life gets busy, so here are your options:
Immediate consumption is ideal: Honestly, lattes don’t store well in their completed form. The milk and espresso separate, the foam collapses, and reheating never quite recaptures that fresh-brewed magic. Plan to drink your maple latte within 10-15 minutes of making it for the best experience.
Espresso storage: If you’re batch-brewing espresso, store it in an airtight container in the refrigerator for up to 3 days. Reheat gently before adding maple syrup and milk. However, be aware that espresso loses its vibrant flavor within hours of brewing, so this is more about convenience than optimal taste.
Maple syrup mixture: This is where meal prep shines! Combine ½ cup pure maple syrup with 1 teaspoon vanilla extract in a small jar or squeeze bottle. Store in the refrigerator for up to 3 months. Use 1½ to 2 tablespoons per latte. This makes morning prep incredibly quick—just brew espresso, add your pre-made mixture, and steam milk.
Cold brew concentrate option: For a different approach, make cold brew coffee concentrate that can sit in your fridge for up to 2 weeks. When you want a latte, heat the concentrate, add maple syrup, and proceed with the milk. The flavor profile is smoother and less acidic than espresso.
Reheating notes: If you absolutely must reheat a maple latte, do so gently in a saucepan over low heat, stirring constantly. Don’t use the microwave as it heats unevenly and can scald the milk. But truly, it’s better to make a fresh one—it only takes 5 minutes!
Make-Ahead & Freezer Notes
While lattes themselves aren’t ideal for freezing, there are some smart make-ahead strategies to speed up your morning routine:
Coffee ice cubes for iced maple lattes: Brew extra-strong coffee or espresso and freeze it in ice cube trays. Store the cubes in a freezer bag for up to 3 months. When you want an iced maple latte, blend the coffee cubes with cold milk, maple syrup, and vanilla—instant iced latte without any dilution!
Maple syrup vanilla concentrate: As mentioned in the storage section, making a large batch of maple syrup mixed with vanilla is perfect for meal prep. Keep it in a squeeze bottle in the fridge, and you’ll have perfectly measured, flavor-enhanced sweetener ready to go for weeks.
Pre-portioned espresso: If you have an espresso machine, pull multiple shots at once and freeze them in silicone ice cube trays (use 1-2 tablespoons per compartment). When you want a latte, thaw 2 cubes in the microwave for 20-30 seconds, add maple syrup, and steam your milk. The quality won’t match fresh espresso, but it’s much faster on busy mornings.
Batch brew cold brew concentrate: Make a large batch of cold brew coffee concentrate on Sunday night. Store it in a pitcher in the fridge for up to 2 weeks. Each morning, heat ¼ cup concentrate, add maple syrup and vanilla, and add steamed milk for a quick latte. Cold brew is naturally smoother and less acidic, so it actually holds up better than espresso.
The semi-homemade approach: If you’re really pressed for time during the week, brew your espresso and mix in the maple syrup and vanilla while hot. Store this mixture in the fridge in individual portions (small mason jars work great). Each morning, heat one portion in the microwave for 30-45 seconds until steaming (not boiling), froth your milk, and combine. It’s not quite as perfect as fresh, but it cuts your prep time to under 2 minutes.
What doesn’t work: Don’t try to freeze completed lattes or steamed milk. The dairy separates and the texture becomes grainy and unpleasant when thawed. Milk doesn’t freeze and reheat well, so always plan to steam fresh milk when you’re ready to drink.
Serving Suggestions
A maple latte is delicious on its own, but pairing it with the right foods can create a memorable coffee experience. Here are my favorite ways to serve it:
For Breakfast:
- Buttermilk pancakes or waffles (keeping the maple theme going!)
- Cinnamon rolls or sticky buns—the sweet spice complements the maple perfectly
- Homemade granola with yogurt and berries
- Blueberry or banana muffins
- Everything bagel with cream cheese for a sweet-savory balance
- French toast with fresh fruit
For Brunch:
- Quiche or frittata—the richness balances the sweet latte
- Avocado toast with poached eggs
- Smoked salmon bagel platter
- Fresh fruit salad with mint
- Yogurt parfait bar for guests
For Afternoon Coffee:
- Biscotti or almond cookies for dunking
- Shortbread cookies—buttery and not too sweet
- Pumpkin bread or zucchini bread (especially in fall)
- Apple crisp or apple pie
- Chocolate chip cookies—the maple enhances the chocolate
- Pecan pie bars
- Cinnamon sugar donuts
For Entertaining:
- Cheese and fruit platter with crackers
- Mini scones with clotted cream and jam
- Croissants or pain au chocolat
- Assorted tea sandwiches for an elegant coffee break
- Chocolate-covered strawberries for something special
Complementary Beverages: If you’re serving a crowd and not everyone drinks coffee, offer fresh orange juice, apple cider (hot or cold depending on season), or sparkling water with lemon.
Seasonal Pairings: In fall and winter, pair with anything featuring warm spices—pumpkin, cinnamon, nutmeg, and ginger all play beautifully with maple. In spring and summer, lighter options like lemon loaf, berry tarts, or almond pastries provide a nice contrast to the rich, sweet latte.
FAQs Section
Can I make a maple latte without an espresso machine?
Absolutely! You have several options. A Moka pot (stovetop espresso maker) produces coffee that’s strong enough for lattes and costs around $30-40. A French press or AeroPress also works—just use a higher coffee-to-water ratio (about 1:8 instead of the usual 1:15) to create concentrated coffee. In a pinch, instant espresso powder works too—use about 2 teaspoons dissolved in 2 ounces of hot water. The flavor won’t be as complex as fresh-brewed espresso, but you’ll still get a delicious maple latte.
What’s the difference between Grade A and Grade B maple syrup?
The grading system changed in 2015, which causes confusion. What used to be called Grade B is now “Grade A Dark Color, Robust Flavor.” These darker syrups are harvested later in the season and have a stronger, more caramelized maple flavor that stands up beautifully to coffee. “Grade A Golden Color, Delicate Taste” is lighter and more subtle—it’s lovely on pancakes but can get lost in lattes. For coffee drinks, always reach for the dark amber or dark color varieties.
Is maple syrup healthier than regular sugar in coffee?
While maple syrup is still a sugar and should be consumed in moderation, it does offer some advantages. It contains minerals like manganese, zinc, potassium, and calcium, plus antioxidants and anti-inflammatory compounds. It has a lower glycemic index than white sugar (54 compared to 65), meaning it causes a slower rise in blood sugar. It’s also less processed and contains no additives. That said, the amounts of minerals in a tablespoon aren’t huge, so think of these as bonuses rather than making it a health food.
Can I make this latte dairy-free?
Yes! Oat milk is hands-down the best dairy-free option for lattes. It froths beautifully, has a naturally creamy texture, and a mild, slightly sweet flavor that complements maple. Brands like Oatly Barista Edition are specifically formulated for coffee drinks. Soy milk and almond milk also work but produce thinner foam. For the richest dairy-free latte, try full-fat canned coconut milk (though the coconut flavor will come through). Make sure your milk alternative is unsweetened or lightly sweetened to avoid making the latte too sweet.
How much caffeine is in a maple latte?
A maple latte made with 2 shots of espresso contains approximately 120-150mg of caffeine, depending on the type of coffee beans and brewing method. That’s roughly the same as a standard cup of coffee. If you’re sensitive to caffeine, you can use decaf espresso (which still contains about 5-15mg of caffeine) or make a “maple steamer” by omitting the coffee entirely—just heat milk with maple syrup and vanilla for a cozy, caffeine-free treat.
Why does my maple latte taste watery?
This usually means either your espresso wasn’t concentrated enough, or you used too much milk. A proper latte ratio is 1 part espresso (2 oz) to 4-5 parts steamed milk (8-10 oz), plus foam. Make sure you’re brewing strong espresso or concentrated coffee, not regular-strength coffee. Also check that you’re not overheating the milk—when milk boils, it becomes thin and watery. Finally, make sure you’re using whole milk or a full-fat alternative, as skim milk and some plant milks are naturally thinner.
Can I use honey or agave instead of maple syrup?
You can, but you’ll be making a honey latte or agave latte rather than a maple latte, as the flavor will be quite different. Honey has a distinct floral sweetness and works beautifully in lattes, while agave is more neutral and very sweet. The beauty of maple syrup is its unique caramelized, woodsy flavor that pairs specifically well with coffee. If you do substitute, use slightly less honey or agave than you would maple syrup, as they’re sweeter. Start with 1 tablespoon and adjust to taste.
Conclusion
There you have it—everything you need to make a café-quality maple latte right in your own kitchen! This cozy, naturally sweetened drink proves that you don’t need expensive equipment or complicated techniques to create something truly special. With just a few simple, wholesome ingredients and five minutes of your time, you can enjoy a warm, comforting beverage that tastes even better than what you’d find at your local coffee shop.
The beauty of this maple latte is its versatility. Make it exactly as written for a classic, perfectly balanced drink, or customize it with any of the variations to make it your own. Serve it at your next brunch gathering, enjoy it as a quiet morning ritual, or whip one up on a chilly afternoon when you need a pick-me-up. However you choose to enjoy it, you’re getting real ingredients, incredible flavor, and that satisfying feeling of creating something delicious with your own hands.
I’d love to hear how your maple latte turns out! Did you try any of the variations? Do you have your own special twist? Drop a comment below and share your experience. And if you loved this recipe, please Pin it to your favorite coffee or fall recipe board on Pinterest so you can find it again—and so others can discover how easy it is to make this delicious drink at home! Don’t forget to share a photo of your beautiful maple latte creation; I always love seeing how your recipes turn out. Happy sipping! ☕🍁