Kiwi Smoothie Bowl Recipe – Fresh, Vibrant, and Incredibly Easy!
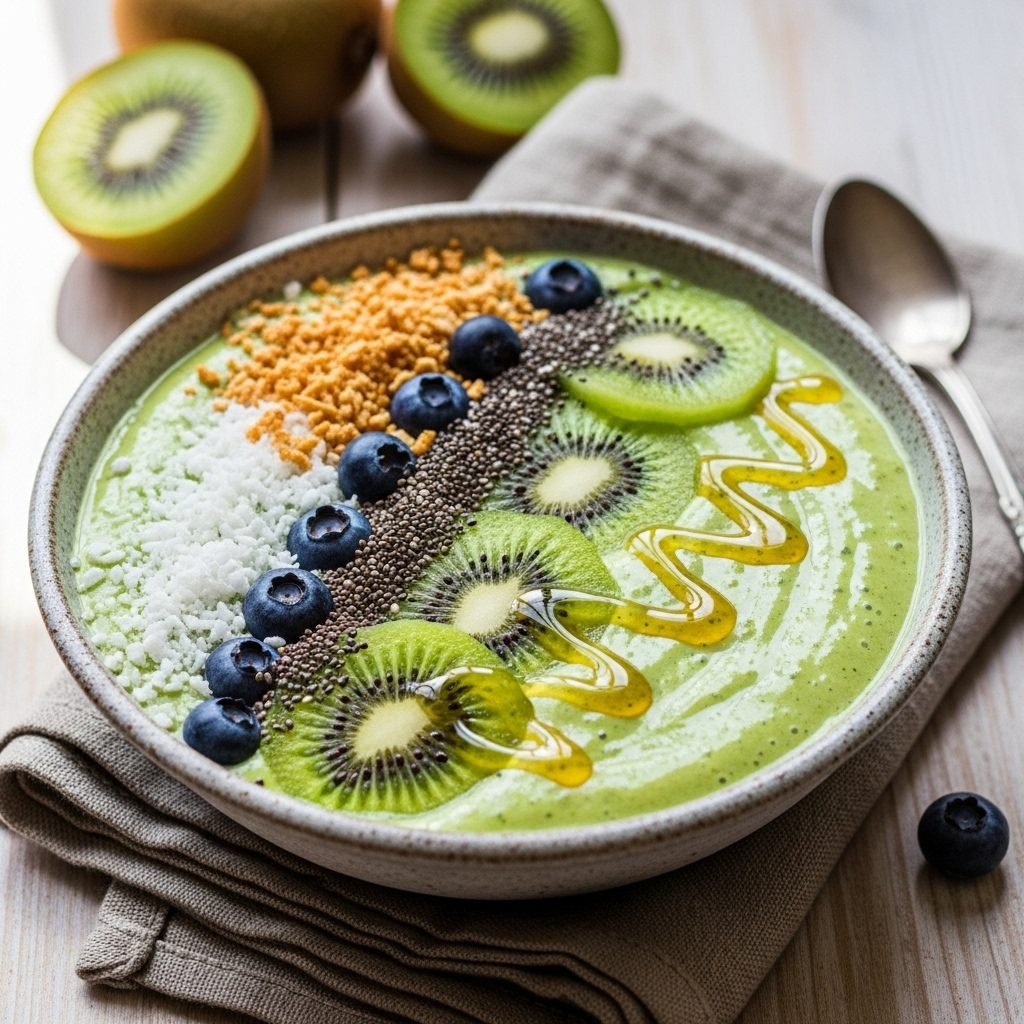
Looking for a breakfast that’s as gorgeous as it is delicious? This Kiwi Smoothie Bowl Recipe is your answer! It’s a thick, creamy, spoonable smoothie served in a bowl and topped with fresh fruits, crunchy granola, and whatever else your heart desires. Think of it as the Instagram-worthy cousin of your regular smoothie—but so much more fun to eat!
Smoothie bowls have taken the breakfast world by storm, and kiwi brings such a beautiful bright green color with a tangy-sweet flavor that’s absolutely refreshing. This bowl is perfect for lazy weekend mornings, post-workout fuel, or even as a light lunch on a hot summer day. It’s naturally sweet, packed with nutrients, and customizable to your taste preferences. Plus, it’s ready in just 5 minutes, which means you can enjoy a nutritious, beautiful meal without any morning stress.
What I love most about this recipe is how versatile it is. You can make it tropical with mango and coconut, add protein powder for a gym-friendly version, or keep it simple with just kiwi and banana. The thick, frosty texture makes every spoonful satisfying, and the toppings add that perfect crunch. Whether you’re a smoothie bowl veteran or trying one for the first time, this kiwi version is going to blow your mind!
History / Background
Smoothie bowls originated from the surf culture of Hawaii and Southern California in the 1970s, where health-conscious surfers wanted something more substantial than a drinkable smoothie after catching waves. The açaí bowl became the most famous version, but creative home cooks began experimenting with all kinds of fruits—including our star ingredient, kiwi.
Kiwi fruit itself has a fascinating history. While it’s now synonymous with New Zealand (hence the name “kiwi”), the fruit actually originated in China, where it was called “yang tao.” Chinese gooseberries were brought to New Zealand in the early 1900s, and clever marketers rebranded them as “kiwifruit” in the 1950s to make them more appealing to international buyers. The name stuck, and New Zealand became the world’s leading kiwi exporter.
The smoothie bowl trend exploded on social media platforms, particularly Instagram and Pinterest, around 2014-2015. The visual appeal of these colorful, artfully arranged bowls made them perfect for food photography. Suddenly, everyone wanted to create their own edible masterpieces. The beauty of smoothie bowls is that they combine the health benefits of smoothies with the satisfaction of eating with a spoon—a small psychological difference that makes you feel more full and satisfied.
Today, smoothie bowls have evolved from a trendy health food into a breakfast staple in households across America. They’re served in cafés, featured in cookbooks, and have become a canvas for culinary creativity. The kiwi smoothie bowl represents this evolution perfectly—it’s healthy, gorgeous, delicious, and endlessly customizable.
Why You’ll Love This Recipe
This Kiwi Smoothie Bowl isn’t just another breakfast option—it’s a morning game-changer that brings together nutrition, flavor, and visual appeal in one gorgeous package. Here’s why this recipe deserves a permanent spot in your breakfast rotation:
Key Benefits:
- Ready in 5 minutes – Seriously! Toss ingredients in a blender, blend, and you’re done. Perfect for busy mornings.
- Naturally vegan and gluten-free – No special substitutions needed; it’s automatically friendly for most dietary preferences.
- Packed with Vitamin C – One kiwi contains more vitamin C than an orange, boosting your immune system right from breakfast.
- Budget-friendly – Uses simple, affordable ingredients you can find at any grocery store.
- Kid-approved – The bright green color and sweet taste make it fun for kids, and you can let them design their own toppings.
- Customizable – Swap toppings, adjust sweetness, add protein powder—make it exactly how you like it.
- Energy-boosting – The natural sugars from fruit combined with healthy fats keep you energized all morning.
- No cooking required – Just blending! No stove, no oven, no cleanup beyond one blender.
Ingredient Notes
Let’s talk about what goes into this beautiful bowl and why each ingredient matters:
Kiwi: The star of the show! Use ripe kiwis for the best sweetness—they should yield slightly to gentle pressure. You can use green kiwi or golden kiwi (which is sweeter and less tart). If kiwis aren’t available, substitute with mango or pineapple for a tropical twist.
Frozen Banana: This is the secret to that thick, creamy, ice-cream-like texture. Always use frozen bananas for smoothie bowls—fresh ones make the mixture too thin. The banana also adds natural sweetness, so you won’t need much (or any) added sweetener. Substitute with frozen cauliflower rice for a lower-sugar option.
Greek Yogurt or Plant-Based Yogurt: Adds creaminess and protein to keep you full longer. Greek yogurt gives a tangier flavor and more protein, while coconut yogurt keeps it dairy-free with a subtle tropical taste. You can also use regular yogurt or skip it entirely and add avocado for creaminess.
Spinach (Optional): A handful of fresh spinach boosts the nutritional value without affecting the taste at all. The kiwi and banana completely mask any “green” flavor. If you’re new to green smoothies, start with less spinach and work your way up.
Liquid Base: Use minimal liquid—just 2-3 tablespoons of almond milk, coconut milk, or regular milk. Too much liquid makes it drinkable instead of spoonable. You want that thick, soft-serve consistency.
Sweetener (Optional): Honey, maple syrup, or agave nectar can be added if your kiwis are particularly tart. Most of the time, the banana provides enough sweetness.
Toppings: This is where you get creative! Fresh fruit (sliced kiwi, berries, banana), granola, coconut flakes, chia seeds, hemp hearts, nut butter drizzle, cacao nibs—the possibilities are endless.
Equipment Needed
You don’t need a fancy kitchen to make this smoothie bowl! Here’s what you’ll need:
- High-powered blender – A Vitamix, Blendtec, or Ninja works best for getting that thick consistency. Regular blenders work too, but you may need to add slightly more liquid and blend longer.
- Measuring cups and spoons – For accurate ingredient amounts.
- Serving bowl – Choose a wide, shallow bowl so you have plenty of surface area for beautiful topping arrangements.
- Knife and cutting board – For slicing fresh toppings.
- Spoon – For eating! A regular tablespoon works perfectly.
Pro tip: If your blender struggles with frozen ingredients, use a tamper tool (most high-powered blenders come with one) to push ingredients down toward the blade while blending.
Print
Kiwi Smoothie Bowl Recipe
A thick, creamy, and refreshing Kiwi Smoothie Bowl made with ripe kiwis, frozen banana, and Greek yogurt. Topped with fresh fruit, granola, and seeds for a nutritious breakfast that’s as beautiful as it is delicious. Ready in just 5 minutes!
- Total Time: 5 minutes
- Yield: 1 serving (2 servings if smaller portions) 1x
Ingredients
For the Smoothie Base:
- 2 ripe kiwis, peeled and roughly chopped
- 1 large frozen banana (pre-sliced)
- ½ cup Greek yogurt (or coconut yogurt for vegan)
- 1 handful fresh spinach (about 1 cup, optional)
- 2-3 tablespoons almond milk (or milk of choice)
- 1 teaspoon honey or maple syrup (optional, for sweetness)
- ½ teaspoon vanilla extract (optional)
For Toppings:
- 1 kiwi, sliced
- ¼ cup fresh berries (strawberries, blueberries, or raspberries)
- 2-3 tablespoons granola
- 1 tablespoon coconut flakes
- 1 tablespoon chia seeds or hemp hearts
- Drizzle of almond butter or peanut butter
- Fresh mint leaves (optional garnish)
Instructions
- Prepare your ingredients: Peel and chop your kiwis. Make sure your banana is already frozen (slice and freeze at least 2 hours ahead, or use pre-frozen banana slices).
- Add to blender: Place the chopped kiwi, frozen banana, Greek yogurt, spinach (if using), and almond milk into your blender. Start with just 2 tablespoons of liquid—you can always add more if needed.
- Blend until thick and creamy: Blend on high speed, using the tamper tool to push ingredients down toward the blade if necessary. Stop and scrape down the sides as needed. Blend until completely smooth and thick—it should be the consistency of soft-serve ice cream, not pourable. This usually takes 30-60 seconds.
- Adjust consistency: If the mixture is too thick to blend, add liquid 1 tablespoon at a time. If it’s too thin, add more frozen banana or a few ice cubes.
- Taste and adjust sweetness: Taste your smoothie base. If it’s too tart, add honey or maple syrup and blend again briefly.
- Pour into bowl: Scoop the thick smoothie mixture into a wide, shallow serving bowl. Use a spoon or spatula to smooth the surface.
- Arrange toppings: Now comes the fun part! Arrange your toppings in sections or rows for that Instagram-worthy look. Place kiwi slices on one side, berries on another, then add granola, coconut flakes, and seeds. Drizzle with nut butter if desired.
- Serve immediately: Smoothie bowls are best enjoyed right away while they’re still thick and cold. Grab a spoon and dig in!
Notes
- Consistency is key: The secret to a perfect smoothie bowl is using minimal liquid and frozen fruit. If your smoothie is drinkable, you’ve added too much liquid.
- Frozen banana is essential: Don’t skip freezing the banana—it creates that thick, creamy texture. Slice bananas and freeze them in ziplock bags for easy smoothie bowl prep.
- Customize your toppings: Use whatever fruits, nuts, and seeds you have on hand. The toppings are where you can get creative and make it your own.
- Make it protein-rich: Add a scoop of vanilla protein powder to the base for a post-workout breakfast.
- Prep ahead: You can pre-portion your smoothie base ingredients in freezer bags for grab-and-blend convenience.
- Prep Time: 5 minutes
- Cook Time: 0 minutes
- Category: Breakfast, Smoothie Bowl
- Method: Blending
- Cuisine: American, Hawaiian-inspired
- Diet: Gluten Free
Nutrition
- Serving Size: 1 bowl (with suggested toppings)
- Calories: 385
- Sugar: 42g
- Sodium: 95mg
- Fat: 9g
- Saturated Fat: 3g
- Unsaturated Fat: 5g
- Trans Fat: 0g
- Carbohydrates: 68g
- Fiber: 11g
- Protein: 14g
- Cholesterol: 8mg
Tips & Variations
Tropical Twist: Add ½ cup frozen pineapple or mango to the base for extra tropical flavor.
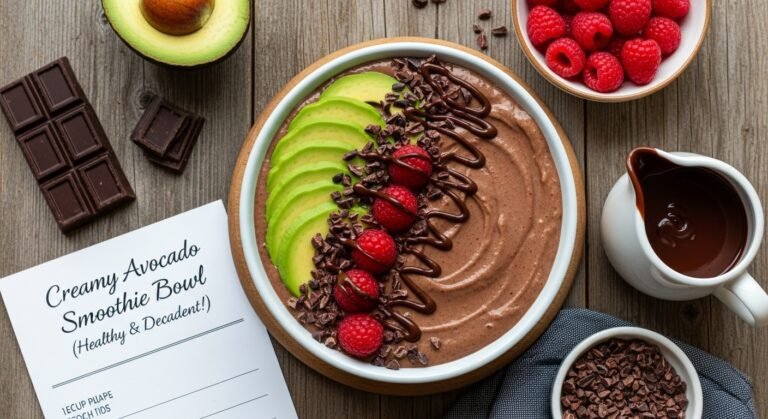
Chocolate Kiwi Bowl: Add 1 tablespoon cacao powder and use chocolate protein powder for a dessert-like breakfast.
Extra Protein: Stir in a scoop of vanilla or unflavored protein powder, or add 2 tablespoons nut butter to the base.
Berry Kiwi Blend: Add ½ cup frozen mixed berries to create a purple-green swirled effect.
Lower Sugar Version: Use frozen zucchini or cauliflower instead of banana, and add a few drops of stevia for sweetness.
Nut-Free: Use sunflower seed butter instead of almond butter, and skip nuts in toppings.
Thick vs. Thin: For an even thicker bowl, use less liquid and add a few ice cubes. For a thinner consistency, add more milk.
Topping Ideas: Try sliced almonds, goji berries, cacao nibs, pumpkin seeds, fresh mint, edible flowers, or a drizzle of honey.
Pro Chef Tips
Freeze your bowl: Pop your serving bowl in the freezer for 10-15 minutes before assembling. This keeps your smoothie bowl cold and thick for longer while you eat.
Layer your smoothie: Make a green kiwi layer and a white yogurt layer by blending separately, then swirling them together in the bowl for a marbled effect.
Use a flat blender: If your smoothie won’t blend because it’s too thick, turn your blender upside down (if it’s a personal blender like a Ninja) or tilt it at an angle to get the blade moving.
Toast your toppings: Lightly toast coconut flakes and nuts in a dry pan for 2-3 minutes to enhance their flavor and add extra crunch.
Create texture contrast: Always include a mix of creamy (nut butter), crunchy (granola), chewy (dried fruit), and fresh (fresh fruit) elements in your toppings.
Blend frozen spinach: If you’re nervous about the texture of fresh spinach, use frozen spinach cubes instead—they blend more smoothly.
Make it prettier: Use a knife to score decorative lines in your kiwi slices before placing them on the bowl, or cut strawberries into fan shapes.
Common Mistakes to Avoid
Adding too much liquid: This is the #1 mistake! If your smoothie is pourable, it’s a regular smoothie, not a smoothie bowl. Start with just 2 tablespoons of liquid and add more only if absolutely necessary.
Using fresh banana instead of frozen: Fresh banana creates a thin, runny consistency. Always use frozen banana for that thick, ice cream-like texture.
Forgetting to taste before serving: Always taste your smoothie base before pouring it into a bowl. You can’t easily adjust sweetness or flavor once it’s topped!
Adding toppings too early: Smoothie bowls start to melt quickly, so add your toppings right before eating. If you’re taking photos, work fast!
Over-blending: Blend just until smooth. Over-blending generates heat and can make your smoothie warm and thin.
Storage & Meal Prep
Refrigerator Storage: Smoothie bowls are best eaten immediately, but you can store the base (without toppings) in an airtight container in the fridge for up to 24 hours. It will thicken considerably, so you may need to stir in a splash of milk before serving.
Freezer Storage: You can freeze the smoothie base in individual portions using silicone muffin cups or small containers for up to 3 months. Thaw for 5-10 minutes at room temperature until it’s spoonable but still cold.
Prep-Ahead Smoothie Packs: Portion out your smoothie base ingredients (chopped kiwi, banana slices, spinach) into freezer bags. When ready to make, dump the frozen contents into your blender with yogurt and liquid. This makes smoothie bowls incredibly convenient for busy mornings!
Topping Storage: Prep your toppings in advance by slicing fresh fruit and storing it in airtight containers in the fridge for up to 2 days. Keep granola, seeds, and coconut flakes in separate containers at room temperature.
Reheating: No reheating needed! This is meant to be enjoyed cold and fresh.
Make-Ahead & Freezer Notes
Make-Ahead Base: Blend your smoothie base the night before and store it in a mason jar or container in the freezer. In the morning, let it sit at room temperature for 5-10 minutes to soften slightly, then stir and pour into your bowl.
Freezer-Friendly: Yes! Freeze smoothie base portions in silicone muffin molds or ice cube trays. Pop out 6-8 frozen cubes, blend with a splash of liquid until smooth, and you have an instant smoothie bowl.
Pre-Portioned Bags: This is my favorite meal prep trick. Fill quart-sized freezer bags with 2 peeled kiwis (chopped), 1 sliced banana, and 1 cup spinach. Flatten the bag, label it, and freeze. You’ll have 5-7 ready-to-blend smoothie bases that last up to 3 months.
Frozen Toppings: Granola, nuts, and seeds can be portioned into small containers or bags for grab-and-go convenience. Fresh fruit should be sliced right before serving for best quality.
Best Reheating Method: No heating needed—this recipe is all about that cold, refreshing texture! If your smoothie base is too frozen, let it sit at room temperature for 5 minutes or microwave for 10-15 seconds to soften just enough to blend or stir.
Serving Suggestions
This kiwi smoothie bowl is filling enough to be a complete breakfast on its own, but here are some delicious pairing ideas:
Pair With:
- Green tea or matcha latte – The earthy flavors complement the fruity bowl perfectly.
- Whole grain toast with avocado – For extra protein and healthy fats if you need a more substantial meal.
- Breakfast protein muffins – Great for meal prep; enjoy alongside your smoothie bowl for a balanced breakfast.
- Fresh-squeezed orange juice – Extra vitamin C boost!
- Coconut water – Keeps the tropical theme going and adds electrolytes.
Occasion Ideas:
- Brunch gatherings – Set up a smoothie bowl bar with different bases and toppings so guests can customize their own bowls.
- Post-workout fuel – Add protein powder to the base for muscle recovery.
- Kid-friendly breakfast – Let kids design their own “faces” or patterns with the toppings.
- Poolside snack – Perfect for hot summer afternoons by the pool.
- Light lunch – Serve with a side of whole grain crackers and cheese for a balanced midday meal.
FAQs Section
Can I make this without a high-powered blender?
Yes, but you may need to add slightly more liquid and blend longer. A regular blender works, though the texture might not be quite as smooth. If your blender struggles, thaw the frozen banana for 5 minutes before blending, or add ingredients in stages.
How do I make this sweeter without adding sugar?
Use very ripe bananas (those with brown spots are sweetest), choose golden kiwis instead of green (they’re naturally sweeter), or add a couple of pitted dates while blending. You can also add a splash of vanilla extract, which enhances perceived sweetness.
Can I use frozen kiwi instead of fresh?
Absolutely! Frozen kiwi works great and you may need even less liquid since you’ll have more frozen ingredients. The color might be slightly less vibrant, but the taste will be just as delicious.
Why is my smoothie bowl too runny?
You’ve added too much liquid. The key is using very minimal liquid—just enough to get the blender moving. Next time, start with only 2 tablespoons and add more only if the blender absolutely won’t blend. You can also add a few ice cubes or more frozen banana to thicken it up.
Is this recipe kid-friendly?
Definitely! Kids love the bright green color and sweet taste. You can make it fun by letting them arrange their own toppings or creating faces and designs. The spinach (if you add it) is completely undetectable in taste, making this a sneaky way to add greens to their diet.
Can I prep this the night before?
You can prep the base and store it in the freezer overnight, then let it soften slightly in the morning. However, it’s best blended fresh since the texture changes as it sits. Definitely don’t add toppings until right before eating or they’ll get soggy.
What if I can’t find ripe kiwis?
If your kiwis are too firm and tart, you can substitute half of them with frozen mango or pineapple to add sweetness. Or add an extra tablespoon of honey to balance the tartness. You can also ripen kiwis faster by placing them in a paper bag with a banana for 1-2 days.
Conclusion
This Kiwi Smoothie Bowl is more than just a trendy breakfast—it’s a delicious, nutritious way to start your day with energy and excitement! The vibrant green color, refreshing taste, and endless customization options make it a recipe you’ll return to again and again. Whether you’re meal prepping for the week, looking for a post-workout recovery meal, or simply want something beautiful and tasty for breakfast, this smoothie bowl delivers on all fronts.
The best part? It comes together in just 5 minutes with minimal cleanup. No cooking, no complicated techniques—just throw ingredients in a blender and create something amazing. The thick, creamy base paired with crunchy, fresh toppings creates the perfect texture contrast that makes every bite satisfying.
I’d love to see your kiwi smoothie bowl creations! Take a photo of your beautifully arranged bowl and share it on Pinterest—don’t forget to tag me so I can see your masterpiece. Try this recipe this week and let me know in the comments below what toppings combination you loved most. Did you go tropical with coconut and pineapple? Keep it simple with berries and granola? Or get creative with chocolate and nut butter?
Save this recipe to your Pinterest breakfast board so you can find it easily whenever you need a quick, healthy, gorgeous meal. Your mornings are about to get a whole lot more colorful and delicious!
Happy blending! 🥝💚