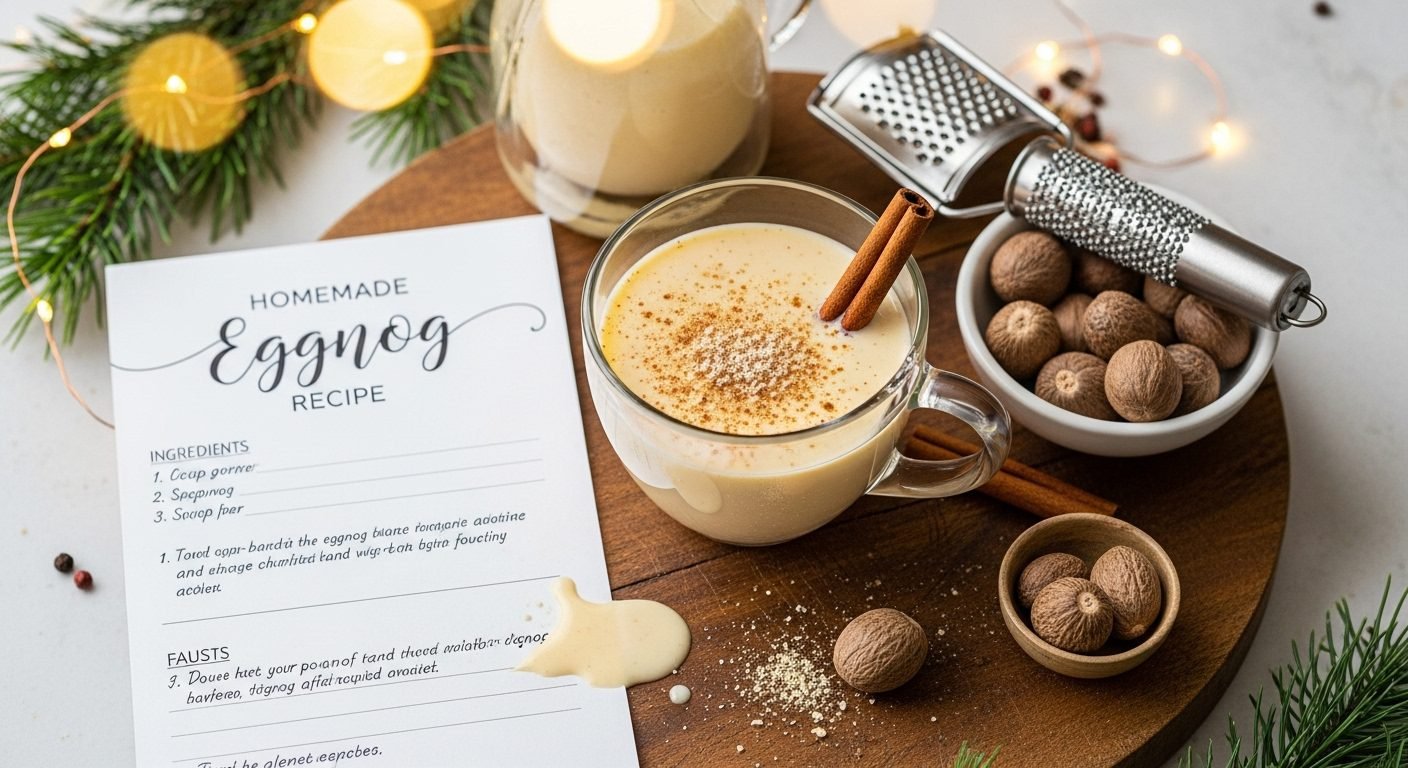
Homemade Eggnog Recipe – Creamy, Rich Holiday Classic
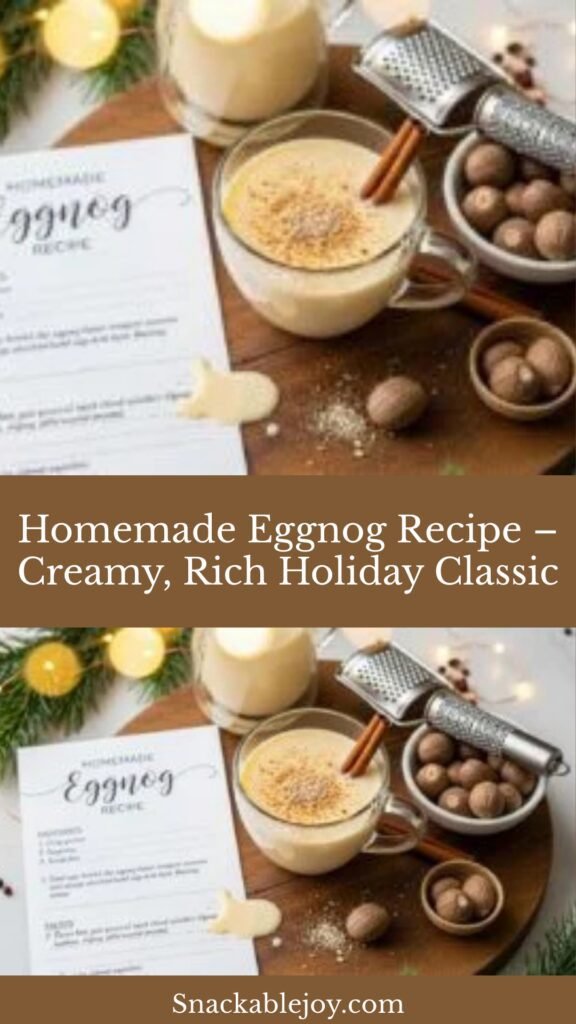
There’s nothing quite like homemade eggnog to make the holidays feel truly special. This rich, creamy beverage is a beloved holiday tradition that tastes infinitely better than anything you’ll find in a store carton. With its velvety texture, warm spices, and perfect balance of sweetness, homemade eggnog is a celebration in a glass that brings comfort and joy to any gathering.
What makes this eggnog recipe so wonderful is how it transforms simple ingredients like eggs, milk, cream, and sugar into something absolutely magical. The hint of nutmeg and vanilla creates an aromatic experience that screams “holidays,” while the creamy richness feels indulgent without being overwhelming. You can serve it chilled as a non-alcoholic treat for the whole family, or spike it with your favorite spirit for an adults-only version.
This recipe is perfect for Christmas parties, Thanksgiving dinners, New Year’s Eve celebrations, or any time during the holiday season when you want to create special memories. It’s also wonderful for gifting in pretty bottles to friends and neighbors. Best of all, once you taste the homemade version, you’ll never want to go back to store-bought again.
History / Background
Eggnog has a fascinating history that spans centuries and crosses continents. The drink’s origins can be traced back to medieval Britain, where a hot milk-based beverage called “posset” was popular among the aristocracy. Posset was made with eggs, milk, and ale or wine, and was often used as a cold and flu remedy as well as a celebratory drink.
When British colonists came to America in the 18th century, they brought their love of this creamy concoction with them. However, the expensive ingredients like sherry and brandy that were common in England were harder to come by in the colonies. Americans adapted the recipe by using more readily available spirits like rum from the Caribbean and eventually bourbon and whiskey. The name “eggnog” likely comes from “noggin,” which was a small wooden cup used to serve alcohol, combined with “egg” for the obvious ingredient.
By the 19th century, eggnog had become firmly established as an American holiday tradition, particularly popular during Christmas and New Year’s celebrations. George Washington was known to have his own eggnog recipe that included rye whiskey, rum, and sherry, and he served it to guests at Mount Vernon. The drink became associated with prosperity and celebration since eggs, milk, and spirits were considered luxury items for much of history.
Throughout the 20th century, eggnog evolved from a homemade specialty to a commercial product available in stores. However, many families have kept the tradition of making eggnog from scratch alive, passing down treasured recipes through generations. The holiday season just wouldn’t be the same without that distinctive flavor and creamy texture that only real eggnog can provide.
Why You’ll Love This Recipe
This homemade eggnog recipe is everything you want in a holiday beverage and so much more. It delivers authentic flavor and texture that commercial versions simply cannot match, and it’s surprisingly easy to make in your own kitchen.
Here’s why this recipe will become a cherished holiday tradition:
- Tastes infinitely better than store-bought – Fresh ingredients create incomparable flavor and texture
- Customizable sweetness and spice – Adjust sugar and nutmeg to your exact preferences
- Made with real, wholesome ingredients – No artificial flavors, stabilizers, or preservatives
- Family-friendly base recipe – Serve non-alcoholic or add spirits for adults
- Ready in just 20 minutes – Quick enough for last-minute entertaining
- More economical than premium brands – Makes generous servings at a fraction of the cost
- Impressive for guests – Homemade touches show you care
- Perfect consistency every time – Thick, creamy, and velvety smooth
- Naturally gluten-free – Suitable for most dietary needs
- Makes wonderful gifts – Bottle it beautifully for friends and neighbors
- Keeps well in the refrigerator – Make ahead and serve all week long
- Traditional holiday flavor – That nostalgic taste that brings back memories
Whether you’re continuing a family tradition or starting a new one, this eggnog recipe delivers the authentic holiday experience that brings warmth and joy to cold winter days.
Ingredient Notes
Understanding each ingredient and its role helps you make the best possible eggnog and know what substitutions might work.
Eggs – The star ingredient that gives eggnog its name and creates that signature rich, creamy texture. Use fresh, high-quality eggs for the best flavor and to minimize food safety concerns. The yolks provide richness and color, while the whites (if used) can be whipped to create an airy texture. Always use eggs that are well within their expiration date.
Whole Milk – Provides the liquid base and contributes to the creamy mouthfeel. Whole milk is essential for proper richness; don’t substitute with low-fat or skim milk or your eggnog will taste thin and watery. The milk’s natural sweetness complements the sugar and spices beautifully.
Heavy Cream – Adds luxurious richness and creates that thick, coating texture that makes eggnog feel so indulgent. The high fat content is what makes eggnog taste so decadent. You can adjust the milk-to-cream ratio slightly for a lighter or richer result, but don’t eliminate the cream entirely.
Granulated Sugar – Sweetens the eggnog and helps balance the rich dairy flavors. The amount can be adjusted to taste, but remember that eggnog should be pleasantly sweet without being cloying. Sugar also helps preserve the eggnog slightly by inhibiting bacterial growth.
Vanilla Extract – Provides depth and aromatic warmth that complements the nutmeg beautifully. Use pure vanilla extract rather than imitation for the best flavor. This ingredient adds complexity that makes homemade eggnog taste so much better than store-bought versions.
Ground Nutmeg – The signature spice that makes eggnog taste like the holidays. Freshly grated nutmeg is far superior to pre-ground, offering a more aromatic and complex flavor. Nutmeg provides that warm, slightly sweet, earthy taste that’s essential to authentic eggnog.
Ground Cinnamon – Adds warmth and a subtle sweet-spicy note that enhances the nutmeg. While optional, cinnamon rounds out the spice profile and adds festive flavor. A little goes a long way, so don’t overdo it.
Salt – Just a pinch enhances all the other flavors and balances the sweetness. Salt is a secret ingredient that makes everything taste more like itself.
Optional Spirits – Bourbon, dark rum, brandy, or whiskey are traditional additions for adults-only eggnog. Each brings its own character – bourbon adds warmth and vanilla notes, rum brings molasses sweetness, brandy offers fruity elegance, and whiskey provides bold flavor.
Equipment Needed
Having the right tools makes preparing eggnog straightforward and ensures smooth, creamy results.
- Medium saucepan – For gently heating the milk mixture and tempering eggs
- Large mixing bowl – For whisking eggs and combining ingredients
- Whisk – Essential for beating eggs and mixing ingredients smoothly; a balloon whisk works best
- Measuring cups and spoons – For accurate measurements of all ingredients
- Fine mesh strainer – For straining the eggnog to remove any cooked egg bits and ensure silky smoothness
- Instant-read thermometer – Optional but helpful for monitoring temperature when heating milk
- Large pitcher or container – For storing finished eggnog in the refrigerator
- Ladle – For serving eggnog from the pitcher
- Nutmeg grater or microplane – For freshly grating nutmeg (highly recommended)
- Electric mixer (optional) – If you want to whip egg whites separately for a lighter version
Print

Homemade Eggnog Recipe
Rich, creamy homemade eggnog made with eggs, milk, heavy cream, and warm spices. This classic holiday beverage is infinitely better than store-bought and can be served non-alcoholic or spiked with your favorite spirits. Ready in just 20 minutes with a velvety smooth texture that’s perfectly festive.
- Total Time: 20 minutes (plus chilling time)
- Yield: 8 servings (about 2 quarts) 1x
Ingredients
Scale- 6 large eggs
- ¾ cup granulated sugar
- 2 cups whole milk
- 1 cup heavy cream
- 1 teaspoon pure vanilla extract
- ½ teaspoon ground nutmeg, plus extra for garnish
- ¼ teaspoon ground cinnamon
- Pinch of salt
- Optional: ½ to 1 cup bourbon, dark rum, brandy, or whiskey (for spiked version)
- Whipped cream, for serving (optional)
- Cinnamon sticks, for garnish (optional)
Instructions
- Separate and whisk eggs: Crack the eggs into a large mixing bowl. Add the sugar and whisk vigorously for 2-3 minutes until the mixture is thick, pale yellow, and ribbony. This aerates the eggs and dissolves the sugar completely.
- Heat the milk mixture: In a medium saucepan, combine the whole milk, heavy cream, nutmeg, cinnamon, and salt. Heat over medium-low heat, stirring occasionally, until the mixture is steaming and reaches about 160°F (71°C). Do not let it boil. Remove from heat.
- Temper the eggs: This is the crucial step. Very slowly pour about 1 cup of the hot milk mixture into the egg mixture while whisking constantly. This gradually raises the temperature of the eggs without scrambling them. Continue whisking for about 30 seconds.
- Combine everything: Slowly pour the tempered egg mixture back into the saucepan with the remaining milk mixture, whisking constantly. Place the saucepan back over medium-low heat.
- Cook gently: Cook the mixture, stirring constantly with a whisk or wooden spoon, until it slightly thickens and reaches 160°F (71°C). This takes about 5-8 minutes. The eggnog should coat the back of a spoon. Do not let it boil or the eggs will scramble.
- Strain and cool: Remove from heat and immediately strain the eggnog through a fine mesh strainer into a large pitcher or bowl. This removes any bits of cooked egg and ensures silky smoothness. Stir in the vanilla extract.
- Chill thoroughly: Cover the eggnog and refrigerate for at least 4 hours or overnight. Eggnog is best served very cold. If adding alcohol, stir it in after the eggnog has chilled.
- Serve and garnish: Give the eggnog a good stir before serving, as it may settle slightly. Pour into glasses or mugs. Top with freshly grated nutmeg, a dollop of whipped cream if desired, and a cinnamon stick for stirring. Serve immediately.
Notes
- For food safety, the mixture must reach 160°F to pasteurize the eggs
- Eggnog thickens as it chills, so don’t worry if it seems thin when first made
- Adjust sweetness by adding sugar 1 tablespoon at a time while mixture is still warm
- For a frothy texture, separate eggs and whip whites to soft peaks, fold in after chilling
- Store-bought pasteurized eggs can be used for added food safety
- If mixture curdles, strain through fine mesh strainer and whisk vigorously
- Eggnog continues to develop flavor as it sits, so it’s even better the next day
- Prep Time: 10 minutes
- Cook Time: 10 minutes
- Category: Beverage / Holiday Drink
- Method: Stovetop
- Cuisine: American
- Diet: Gluten Free
Nutrition
- Serving Size: 1 cup (8 oz)
- Calories: 285
- Sugar: 22
- Sodium: 95mg
- Fat: 17g
- Saturated Fat: 10g
- Unsaturated Fat: 6g
- Trans Fat: 0g
- Carbohydrates: 24g
- Fiber: 0g
- Protein: 8g
- Cholesterol: 185mg
Tips & Variations
Eggnog is wonderfully versatile and can be customized to suit different tastes and dietary preferences. Here are creative ways to make this recipe your own.
Flavor Variations:
- Pumpkin Spice Eggnog: Add ⅓ cup pumpkin puree and ½ teaspoon pumpkin pie spice
- Chocolate Eggnog: Stir in ¼ cup cocoa powder with the sugar; increase sugar to 1 cup
- Maple Eggnog: Replace half the sugar with pure maple syrup for subtle maple flavor
- Gingerbread Eggnog: Add ½ teaspoon ground ginger, extra cinnamon, and a pinch of cloves
- Coconut Eggnog: Replace 1 cup milk with coconut milk and add ½ teaspoon coconut extract
- Coffee Eggnog: Stir in ½ cup strong brewed espresso after chilling
Alcohol Options:
- Classic Bourbon: Adds vanilla and caramel notes; use 4-6 ounces per quart
- Dark Rum: Traditional choice with molasses sweetness; Caribbean favorite
- Brandy: Elegant and fruity; often used in European versions
- Whiskey: Bold and warming; particularly good with rye whiskey
- Mixed Spirits: Combine rum and brandy for complexity
- Irish Cream Liqueur: For extra creamy, dessert-like eggnog
Dietary Modifications:
- Lighter Version: Use 2% milk and half-and-half instead of whole milk and cream
- Dairy-Free: Use coconut milk and coconut cream, or almond milk with cashew cream
- Sugar-Free: Use sugar substitute appropriate for heating (like Swerve)
- Lower Cholesterol: Use egg substitute or reduce egg yolks to 4 and add 2 whites
- Vegan: Use plant milk, vegan cream, and aquafaba (chickpea liquid) instead of eggs
Texture Adjustments:
- Thicker Eggnog: Increase eggs to 8 or add 1 cup more heavy cream
- Lighter, Frothier: Whip egg whites separately to stiff peaks and fold in after chilling
- Extra Smooth: Blend chilled eggnog in blender for 30 seconds before serving
Pro Chef Tips
These professional techniques will elevate your homemade eggnog from delicious to absolutely exceptional.
Master the tempering technique – This is the single most important step in making eggnog. When adding hot milk to eggs, pour it in a very slow, thin stream while whisking constantly. Adding too much too quickly will cook the eggs into scrambled bits. Take your time with this step – it’s worth the patience to ensure silky smooth eggnog without any lumps.
Use freshly grated nutmeg – Pre-ground nutmeg loses its aromatic oils quickly and tastes flat and dusty. Freshly grated whole nutmeg is incredibly fragrant and adds complex, warm flavor that makes homemade eggnog taste restaurant-quality. A microplane grater makes this easy, and whole nutmeg keeps its flavor for years.
Monitor your temperature carefully – The sweet spot for cooking eggnog is 160°F to 165°F. This temperature pasteurizes the eggs for safety while creating a thick, custard-like consistency. Under 160°F and the eggs aren’t safe; over 170°F and you risk curdling. An instant-read thermometer takes the guesswork out.
Don’t rush the chilling process – Eggnog needs at least 4 hours to chill thoroughly, but overnight is even better. As it chills, the flavors meld together, the spices bloom, and the texture becomes creamier. Cold eggnog also thickens considerably, so what seems thin when warm will be perfect when cold.
Strain without exception – Even if your eggnog looks perfectly smooth, always strain it through a fine mesh strainer. This catches any tiny bits of cooked egg that might have formed and ensures restaurant-quality silkiness. This step is non-negotiable for professional results.
Age it for better flavor – While eggnog is good immediately, it’s actually better after a day or two in the refrigerator. The flavors develop and deepen, becoming more complex and balanced. If making spiked eggnog, add the alcohol after chilling and let it sit another day for the best taste.
Whisk before serving every time – Eggnog naturally separates as it sits, with the cream rising to the top. Always give it a good whisk or stir before pouring to redistribute the fats and create uniform consistency throughout.
Common Mistakes to Avoid
Even experienced cooks can encounter issues when making eggnog. Here are the most common pitfalls and how to avoid them.
Adding hot milk too quickly to eggs – This is the number one mistake that results in scrambled eggs floating in your eggnog. The key is patience: add the hot milk in a very slow, steady stream while whisking constantly. The eggs need time to gradually warm up. If you rush this tempering process, you’ll end up with a grainy, unpleasant texture that can’t be fixed.
Letting the mixture boil – Eggnog should never boil. Once eggs get above 170°F, they begin to curdle and scramble. Keep your heat at medium-low and stir constantly. The mixture should steam and thicken gradually, not bubble vigorously. If you see bubbles forming, immediately remove from heat and keep whisking.
Using low-fat milk or cream – Eggnog is meant to be rich and indulgent. Using 2% milk or light cream will result in thin, watery eggnog that lacks the luxurious mouthfeel that makes this beverage special. The fat content is essential for both flavor and texture. If you want a lighter version, reduce the cream slightly, but don’t eliminate it.
Not straining the finished eggnog – Even if your eggnog looks smooth, tiny bits of cooked egg protein can form during heating. These create an unpleasant grainy texture. Always strain through a fine mesh strainer – this simple step is what separates homemade eggnog that tastes professional from homemade eggnog that tastes, well, homemade in a bad way.
Serving eggnog warm or room temperature – Eggnog must be served ice cold to taste its best. The cold temperature balances the richness and makes it refreshing rather than cloying. Additionally, warm eggnog can separate and doesn’t have the proper consistency. Always chill thoroughly and serve directly from the refrigerator.
Over-spicing the base recipe – It’s tempting to add lots of cinnamon, cloves, and other spices, but eggnog should be delicately spiced with nutmeg as the star. Too many spices make it taste like liquid pumpkin pie and overpower the eggs and cream. Start with the recommended amounts and add more only after tasting the chilled eggnog.
Storage & Meal Prep
Proper storage keeps your homemade eggnog fresh, safe, and delicious throughout the holiday season.
Refrigerator Storage:
Store homemade eggnog in an airtight container or covered pitcher in the refrigerator at 40°F or below. Because this recipe is cooked to 160°F, it’s pasteurized and safe to store for 4-5 days. Always keep it refrigerated and never leave it at room temperature for more than 2 hours.Container Choice:
Glass containers or food-safe plastic pitchers with tight-fitting lids work best. Glass doesn’t absorb odors and makes it easy to see when you’re running low. Avoid metal containers as they can impart a slight metallic taste over time.Shelf Life:
- Cooked, pasteurized eggnog: 4-5 days refrigerated
- Store-bought pasteurized eggnog: Check package date, usually 5-7 days after opening
- Raw eggnog (not recommended): 1-2 days maximum
- Spiked eggnog: 5-7 days due to alcohol’s preservative properties
Signs of Spoilage:
Discard eggnog if it develops an off smell, unusual color, mold, or extremely thick, gelatinous texture. Fresh eggnog should smell sweet and creamy with hints of vanilla and nutmeg. If you’re ever unsure, throw it out.Serving from Storage:
Before serving, always whisk or shake the container vigorously. Eggnog naturally separates with the cream rising to the top and the thinner liquid settling at the bottom. A quick stir redistributes everything for the proper consistency.Food Safety Note:
This recipe heats the mixture to 160°F, which pasteurizes the eggs and makes it safe for pregnant women, elderly individuals, and those with compromised immune systems. However, if using raw eggnog recipes (not recommended), these groups should avoid consumption.Make-Ahead & Freezer Notes
Eggnog is an excellent make-ahead beverage, perfect for preparing before holiday gatherings to reduce stress.
Make-Ahead Timeline:
Eggnog actually improves with age. Make it 1-3 days before you plan to serve it for the best flavor. The spices bloom, the texture becomes creamier, and all the flavors meld together beautifully. Many families make eggnog on December 23rd to serve on Christmas Eve and Christmas Day.Best Make-Ahead Method:
Prepare the eggnog completely, strain it, and refrigerate in an airtight container. Wait to add alcohol (if using) until the day of serving, or add it 24 hours ahead at most. This prevents the alcohol flavor from becoming too intense. Store garnishes separately and add fresh nutmeg just before serving.Freezing Eggnog:
While not traditional, you can freeze eggnog for up to 3 months. Freeze in an airtight, freezer-safe container, leaving 1-2 inches of headspace for expansion. The texture may change slightly upon thawing – it might separate or become grainy. To restore texture, thaw in the refrigerator overnight, then blend in a regular blender or use an immersion blender to re-emulsify.Thawing and Serving Frozen Eggnog:
Never thaw eggnog at room temperature. Transfer from freezer to refrigerator and allow 24 hours to thaw completely. Once thawed, whisk vigorously or blend briefly to restore creamy texture. The flavor will be intact, but expect the texture to be slightly different from fresh. Use thawed eggnog within 2-3 days.Individual Portions:
For easy serving, freeze eggnog in ice cube trays, then transfer cubes to freezer bags. Use these cubes to chill fresh eggnog without diluting it, or blend frozen cubes with a splash of milk for an eggnog slushie.Pre-Party Prep:
- 3 days before: Make eggnog, strain, and refrigerate
- 1 day before: Add alcohol if desired; prepare garnishes
- Day of: Whisk well, pour into serving pitcher, add fresh nutmeg
Aging Spiked Eggnog:
Some enthusiasts age spiked eggnog for weeks or even months in the refrigerator. The high alcohol content (at least 20% by volume) and the aging process create complex flavors similar to aged spirits. If attempting this, use only pasteurized eggs or cook to 160°F first, and ensure your refrigerator maintains 40°F or below.Serving Suggestions
Eggnog is wonderfully versatile and pairs beautifully with various holiday treats and occasions.
Perfect Food Pairings:
- Holiday cookies – Sugar cookies, gingerbread, snickerdoodles, and shortbread
- Cinnamon rolls – The spices complement each other beautifully for breakfast or brunch
- Fruitcake or pound cake – Traditional holiday cakes are perfect alongside
- Apple pie or pumpkin pie – Classic Thanksgiving and Christmas dessert pairings
- Pecan pralines or brittle – Nutty sweets balance the creamy richness
- Dark chocolate – High-quality dark chocolate with sea salt is exceptional
- Cheese and crackers – Sharp cheddar or aged Gouda with water crackers
- Warm bread pudding – Especially bread pudding made with eggnog itself
Occasion Ideas:
- Christmas morning breakfast – Serve with cinnamon rolls and coffee
- Holiday open house – Keep a pitcher chilled for guests to serve themselves
- Christmas Eve dinner – Serve as an after-dinner drink with dessert
- New Year’s Eve toast – Countdown to midnight with spiked eggnog
- Cookie decorating parties – Perfect beverage for family baking sessions
- Caroling parties – Warm guests with chilled eggnog when they return
- Gift-giving occasions – Bottle in decorative containers with recipe cards
Creative Serving Ideas:
- Eggnog bar: Set up a station with plain eggnog and various spirits, toppings (whipped cream, chocolate shavings, crushed candy canes), and spices
- Eggnog flight: Serve small portions of different variations (traditional, chocolate, coffee) for tasting
- Eggnog cocktails: Use as base for special holiday cocktails with creative garnishes
- Warm eggnog: Gently heat portions in a saucepan (don’t boil) and serve in mugs
Presentation Tips:
- Serve in clear glass mugs or coupes to showcase the beautiful color
- Rim glasses with cinnamon sugar for extra festivity
- Add cinnamon sticks as edible stirrers
- Float star anise on top for an elegant look
- Use vintage glass punch cups for retro charm
- Serve from a decorative crystal punch bowl for parties
Other Uses for Eggnog:
- Pour over hot coffee for an eggnog latte
- Use as base for French toast batter
- Add to pancake batter for festive breakfast
- Make eggnog ice cream or popsicles
- Use in trifles or bread pudding recipes
- Create eggnog hot chocolate
FAQs Section
Is it safe to make eggnog with raw eggs?
While traditional recipes use raw eggs, this recipe cooks the mixture to 160°F, which pasteurizes the eggs and eliminates salmonella risk. This makes it safe for everyone, including pregnant women, young children, and elderly individuals. If you prefer, you can also use pasteurized eggs, which are available in most grocery stores and can be used raw or cooked.Can I make eggnog without cooking it?
You can, but it’s not recommended due to food safety concerns with raw eggs. If you must make raw eggnog, use only pasteurized eggs sold specifically for that purpose. However, cooked eggnog has a creamier, more custard-like texture and is simply better in every way, so there’s really no advantage to making it raw.How can I fix curdled eggnog?
If your eggnog curdles from overheating, immediately remove it from heat and strain it through a fine mesh strainer into a clean bowl. Whisk vigorously or blend it in a blender on high for 30-60 seconds. While this can salvage some texture, prevention is better – always use low heat, stir constantly, and don’t let the mixture exceed 170°F.What’s the best alcohol to add to eggnog?
This is largely personal preference, but the most traditional choices are bourbon, dark rum, or brandy. Bourbon adds vanilla and caramel warmth, rum brings molasses sweetness, and brandy offers fruity elegance. Many people mix rum and brandy for complexity. Start with 4-6 ounces of alcohol per quart of eggnog and adjust to taste. Remember, you can always add more but can’t take it out!Can I make eggnog dairy-free or vegan?
Yes! For dairy-free eggnog, use full-fat coconut milk and coconut cream in place of regular milk and cream. For vegan eggnog, also replace the eggs with a mixture of ½ cup aquafaba (chickpea liquid) whisked to soft peaks, and add 2 tablespoons cornstarch to help with thickening. The flavor will be slightly different but still delicious.Why is my homemade eggnog thin?
If your eggnog seems thin, remember that it thickens considerably as it chills. If it’s still too thin after 4+ hours of refrigeration, you likely didn’t cook it long enough or hot enough. The mixture needs to reach 160°F to properly thicken. Next time, cook a bit longer while stirring constantly. You can also add an extra egg yolk or two to increase richness and thickness.How long does homemade eggnog last in the fridge?
Cooked, pasteurized eggnog like this recipe lasts 4-5 days in the refrigerator when stored in an airtight container. Spiked eggnog with a good amount of alcohol (at least 20% by volume) can last 5-7 days or even longer. Always smell and inspect eggnog before serving – if it smells off or looks unusual, discard it. Store-bought pasteurized eggnog typically lasts until the date on the package.Conclusion
And there you have it – everything you need to create the most incredible, velvety-smooth homemade eggnog that will make your holiday season truly special! Once you’ve tasted the real thing made from scratch, those store-bought cartons will never be able to compare. The rich, creamy texture and the perfect balance of sweetness and spice make this recipe absolutely unforgettable.
Whether you’re starting a new family tradition, continuing one passed down through generations, or simply looking to impress your holiday guests, this eggnog recipe delivers every single time. The best part is how easy it is to make – in just 20 minutes of active time, you’ll have a beverage that tastes like you spent hours in the kitchen.
I hope this recipe brings warmth, joy, and delicious memories to your holiday celebrations! I’d absolutely love to hear how your eggnog turns out – did you spike it or keep it family-friendly? What garnishes did you use? Drop a comment below and share your experience. And if this recipe makes your holidays a little brighter, plea