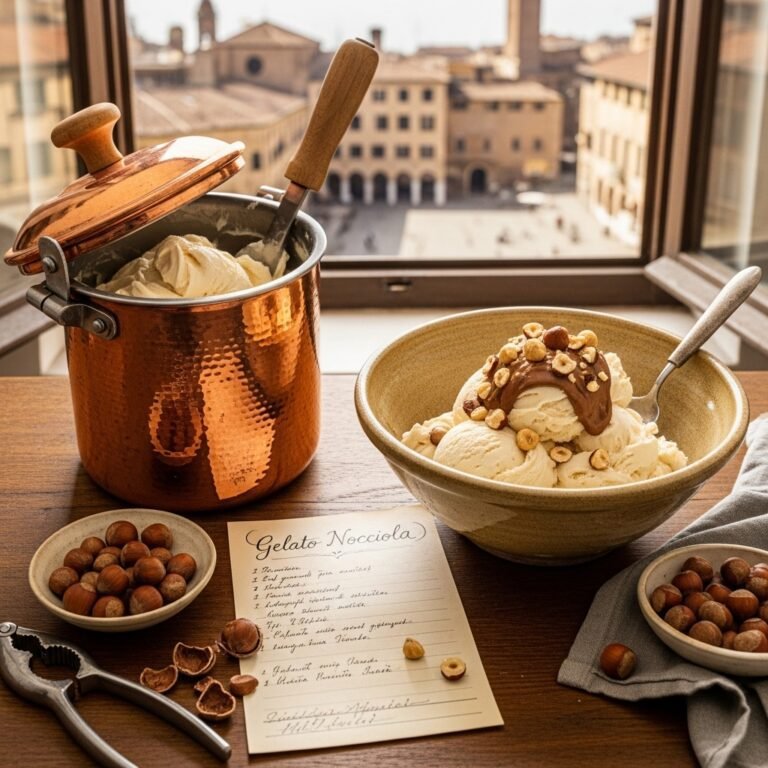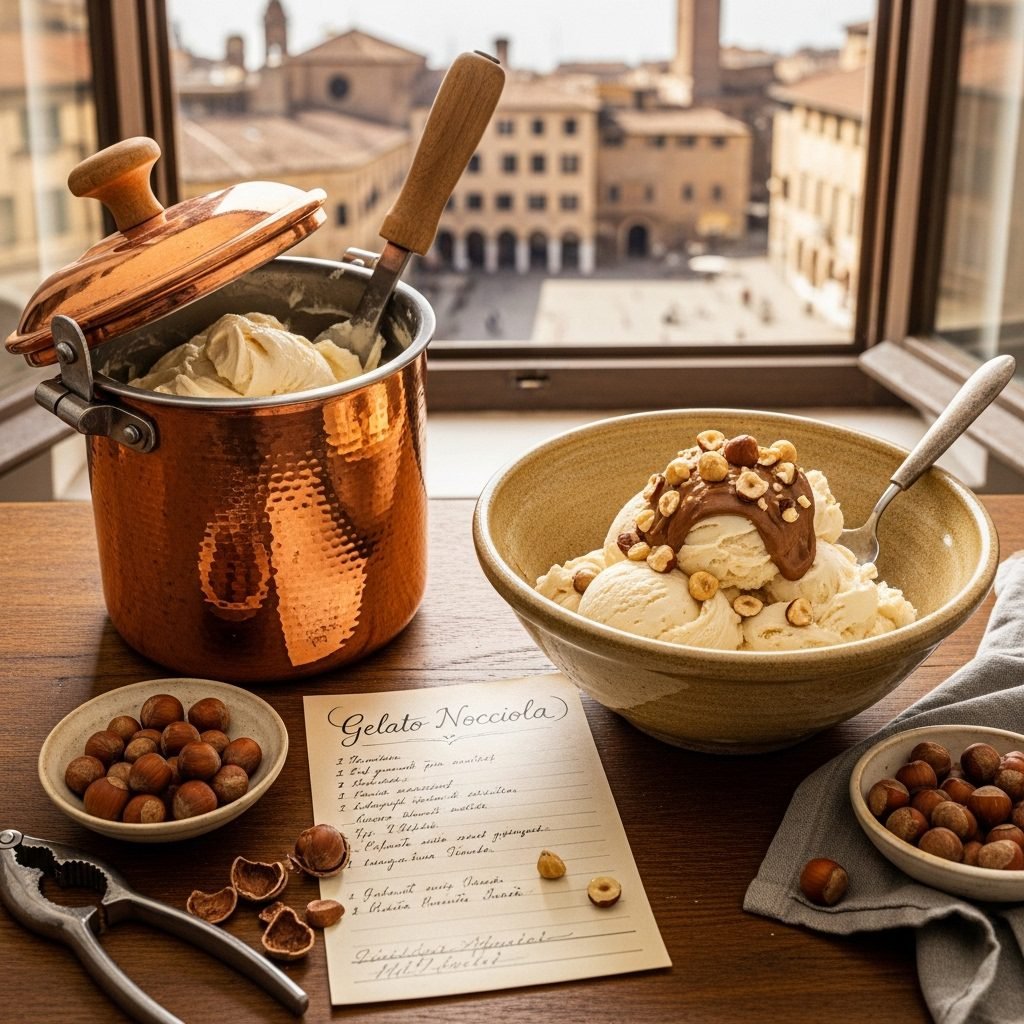
Creamy Homemade Hazelnut Gelato Recipe (Italian Gelato di Nocciola!)
Get ready to transport yourself straight to a charming Italian gelateria with this incredible Homemade Hazelnut Gelato! If you’ve ever wandered the cobblestone streets of Rome or Florence, stopping for a cone of rich, nutty gelato di nocciola, you know this isn’t just any frozen dessert—it’s an experience. And guess what? You can recreate that authentic Italian magic right in your own kitchen, and it’s easier than you might think!
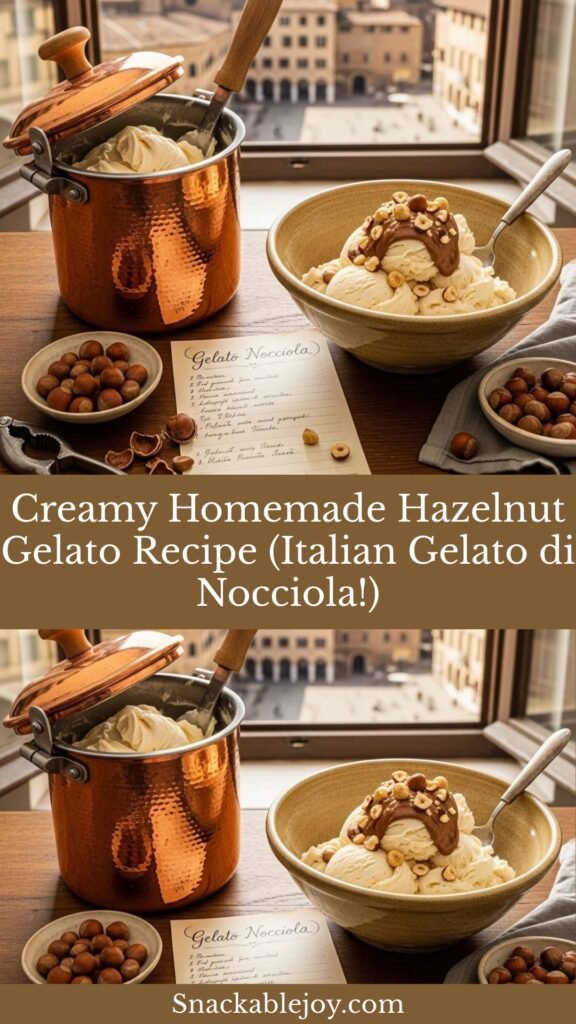
Hazelnut Gelato (Gelato di Nocciola in Italian) is a classic Italian frozen dessert that’s denser, silkier, and more intensely flavored than American ice cream. Made with a rich custard base, roasted hazelnuts (or high-quality hazelnut paste), whole milk, and just enough cream, it delivers pure, concentrated hazelnut flavor in every spoonful. The texture is impossibly smooth and creamy, the flavor is sophisticated yet comforting, and the experience is authentically Italian. Unlike ice cream, gelato is churned slower and served at a slightly warmer temperature, creating that signature dense, silky texture.
This luxurious frozen treat is perfect for summer afternoons when you want something cold and indulgent, as an impressive dessert for Italian dinner parties (imagine serving this after homemade pasta!), special occasions when you want to showcase your culinary skills, when you’re craving authentic Italian flavors at home, or simply when you want to treat yourself to something truly special. Hazelnut gelato is one of Italy’s most beloved classic flavors, right alongside stracciatella and pistachio, and once you taste homemade, you’ll understand why Italians are so passionate about their gelato!
What makes this homemade version truly special is the quality control—you choose premium hazelnuts, use real ingredients (no artificial flavors!), adjust the sweetness to your preference, and create a gelato that rivals or exceeds what you’d find in Italian gelaterias. Plus, there’s something incredibly satisfying about making gelato from scratch. The process is meditative, the results are spectacular, and your kitchen will smell like a Tuscan hazelnut grove!
History / Background
Hazelnut Gelato has a rich history deeply rooted in Italian culinary tradition, particularly in the Piedmont region of northwestern Italy, which is famous for producing some of the world’s finest hazelnuts. To understand gelato di nocciola, we need to explore both the history of gelato itself and the special relationship between Italy and hazelnuts.
Gelato’s origins trace back to ancient times—the Romans and Egyptians enjoyed frozen treats made from snow and ice mixed with honey and fruit. However, modern gelato as we know it began in Renaissance Italy. During the 16th century, Florentine architect Bernardo Buontalenti is often credited with creating the first “modern” gelato when he presented a frozen dessert to the court of Catherine de’ Medici. The technique spread throughout Italy, with each region developing its own flavors and methods.
By the 17th and 18th centuries, Italian gelato makers (gelatieri) had refined the craft to an art form. They discovered that churning the mixture slowly while freezing created a denser, smoother texture than the quickly-churned French ice creams. They also learned that serving gelato at slightly warmer temperatures (around 10-15°F warmer than ice cream) enhanced flavor perception—your taste buds can actually taste more when the dessert isn’t frozen rock-solid.
Now, let’s talk about hazelnuts. The Piedmont region, particularly the area around Alba and the Langhe hills, has been cultivating hazelnuts (nocciole) for centuries. The Tonda Gentile delle Langhe variety is considered the finest hazelnut in the world—round, intensely flavorful, with perfect oil content and a thin skin that removes easily when toasted. These hazelnuts have been grown in Piedmont since Roman times, and by the Middle Ages, they were a significant trade commodity.
Piedmont’s hazelnut culture exploded in the 19th century when chocolate makers discovered that hazelnuts paired beautifully with chocolate. This led to the creation of gianduia (chocolate-hazelnut paste) in Turin around 1865, and eventually to products like Nutella in the 1940s. But before all of this, Italians were already celebrating pure hazelnut flavor in their gelato.
Gelato di nocciola likely emerged in the 18th or early 19th century in Piedmont, where gelato makers had access to the world’s best hazelnuts right in their backyard. The rich, buttery nuts were roasted to enhance their flavor, then ground into a paste or finely chopped and incorporated into the custard base. The result was a gelato that captured the essence of Piedmont’s most prized agricultural product.
By the early 20th century, hazelnut gelato had become one of the “classic” flavors found in every proper Italian gelateria, alongside flavors like stracciatella (chocolate chip), pistachio, and fior di latte (sweet cream). When Italian immigrants brought gelato-making traditions to other countries, they always included nocciola in their repertoire, spreading its popularity worldwide.
Today, authentic gelato di nocciola remains a point of pride for Italian gelato makers. The best versions use IGP (Protected Geographical Indication) Piedmont hazelnuts, which are protected by law and can only be called “Nocciola del Piemonte” if they meet strict quality standards and are grown in specific areas. Artisan gelaterias in Italy often tout their use of these premium nuts, and the flavor difference is noticeable—richer, more complex, truly capturing the terroir of the Langhe hills.
Making hazelnut gelato at home connects you to this centuries-old Italian tradition. While you might not have access to Piedmont hazelnuts (though you can order them online!), using high-quality hazelnuts and traditional techniques allows you to create something authentically Italian, carrying on a culinary tradition that has brought joy to millions for generations.
Why You’ll Love This Recipe
This Homemade Hazelnut Gelato recipe is about to become your new favorite frozen dessert obsession, and I’m thrilled to share why! Not only does it taste absolutely divine—rich, nutty, creamy, with intense hazelnut flavor that’s sophisticated yet comforting—but making it at home gives you that authentic Italian gelato texture and quality that’s hard to find even in premium stores. Once you taste the difference between real, homemade gelato and mass-produced ice cream, there’s no going back!
Making Hazelnut Gelato at home means you control everything: the quality of hazelnuts (choose the best!), the sweetness level (Italian gelato is often less sweet than American ice cream), the richness (adjust milk-to-cream ratio), and you avoid all the stabilizers, gums, and artificial flavors found in commercial products. Plus, the process itself is surprisingly straightforward—if you can make custard and operate an ice cream maker, you can make authentic gelato. The ingredients are simple, the technique is traditional, and the results are spectacular!
Here’s why this recipe will transport you to Italy:
- Authentically Italian: Uses traditional gelato techniques for that signature dense, silky texture
- Intensely Flavorful: Real roasted hazelnuts create pure, concentrated nut flavor
- Impossibly Creamy: That gelato texture is smoother and silkier than ice cream
- Naturally Gluten-Free: Perfect for those avoiding gluten
- Surprisingly Simple: Easier than you think—just custard-making and churning
- Premium Quality: Better than most store-bought, rivals Italian gelaterias
- Customizable Sweetness: Adjust sugar to your preference
- No Artificial Anything: Pure, real ingredients you can pronounce
- Impressive to Serve: Guests always amazed you made gelato at home
- Economical: Makes about 1 quart for the cost of a pint of premium ice cream
- Long Freezer Life: Keeps well for weeks (if it lasts that long!)
- Versatile: Delicious on its own or paired with other desserts
- Perfect Base Recipe: Once mastered, adapt for other nut flavors
- Sophisticated Yet Comforting: Elegant enough for dinner parties, comforting enough for a Tuesday night treat
Ingredient Notes
Let’s explore the essential ingredients that create authentic Italian hazelnut gelato!
Hazelnuts: Your star ingredient! You’ll need about 1 to 1½ cups of hazelnuts. Options:
Whole Raw Hazelnuts: Buy raw, roast them yourself at home (creates the best, freshest flavor). Look for Turkish or Oregon hazelnuts if you can’t find Piedmont.
Pre-Roasted Hazelnuts: More convenient, still delicious. Check that they’re fresh (taste one—should be sweet and buttery, not rancid).
Hazelnut Paste or Praline Paste: Professional option! If you can find high-quality hazelnut paste (like those used by pastry chefs), you’ll get incredibly smooth texture. Use about ½ cup paste instead of whole nuts.
Quality matters! Fresh, recently harvested hazelnuts have much better flavor than old ones. Store hazelnuts in the freezer to keep them fresh.
Whole Milk: The backbone of gelato! You’ll need about 2 cups. Gelato uses more milk and less cream than American ice cream, creating that characteristic dense texture. Use whole milk (3.25% fat), not skim or 2%—the fat is necessary for proper texture and mouthfeel. Can substitute with high-quality oat milk for dairy-free version (the results won’t be identical but still delicious).
Heavy Cream: About ½ to 1 cup adds richness without making it too heavy. Traditional gelato has less cream than ice cream. You want richness, but milk should be the primary dairy. For lighter gelato, use ½ cup; for richer, use 1 cup.
Granulated Sugar: About ¾ cup sweetens and affects texture (sugar lowers freezing point, keeping gelato scoopable). Italian gelato is often less sweet than American ice cream, allowing flavors to shine. Adjust to taste—some prefer ⅔ cup, others prefer ⅞ cup.
Egg Yolks: 4-5 large egg yolks create the custard base that gives gelato its silky texture. The yolks add richness, smoothness, and help emulsify the mixture. Use fresh eggs at room temperature for best results. Save the whites for meringues or omelets!
Salt: Just a pinch enhances all flavors and balances sweetness. Essential!
Vanilla Extract: ½ teaspoon complements hazelnut flavor without overpowering. Use pure vanilla, not imitation. Optional but recommended.
Equipment Needed
Making gelato requires some specific equipment, but nothing too specialized!
Essential:
- Ice cream maker: Absolutely necessary for proper texture. Either: electric countertop model (Cuisinart-style with freezer bowl), compressor model (more expensive but no pre-freezing needed), or attachment for stand mixer (KitchenAid).
- Medium saucepan: For heating milk mixture and making custard
- Fine-mesh strainer: For straining custard and removing any bits
- Whisk: For stirring custard
- Mixing bowls: Various sizes for mixing and chilling
- Instant-read thermometer: Critical for custard-making (need to reach 170-175°F without scrambling eggs)
- Baking sheet: For roasting hazelnuts
- Food processor or high-powered blender: For grinding roasted hazelnuts into paste/flour
- Measuring cups and spoons: For accurate measurements
- Airtight freezer container: For storing finished gelato
Optional but Helpful:
- Ice bath setup: Large bowl filled with ice and water for rapidly cooling custard
- Rubber spatula: For scraping every bit of custard
- Nut milk bag or cheesecloth: If you want ultra-smooth gelato, strain the hazelnut-infused milk
Print

Hazelnut Gelato Recipe
This authentic Italian Hazelnut Gelato (Gelato di Nocciola) features a rich custard base infused with roasted hazelnuts, creating an intensely flavored, impossibly creamy frozen dessert with that signature silky gelato texture. Better than any gelateria, made in your own kitchen!
- Total Time: 5+ hours (includes chilling and churning)
- Yield: About 1 quart (8 servings) 1x
Ingredients
Scale- 1¼ cups (150g) raw hazelnuts (or 1 cup pre-roasted)
- 2 cups (480ml) whole milk
- ½ to 1 cup (120-240ml) heavy cream (use ½ cup for traditional lighter gelato, 1 cup for richer version)
- ¾ cup (150g) granulated sugar
- 4-5 large egg yolks
- Pinch of salt
- ½ teaspoon vanilla extract (optional)
Instructions
Step 1: Roast the Hazelnuts
- Preheat oven to 350°F (175°C).
- Spread raw hazelnuts on a baking sheet in a single layer.
- Roast for 12-15 minutes, stirring halfway through, until fragrant and skins are darkened and starting to crack. Watch carefully—they go from perfect to burnt quickly!
- Transfer hot hazelnuts to a clean kitchen towel. Wrap them up and let steam for 1-2 minutes.
- Rub the hazelnuts vigorously in the towel to remove most of the skins. Don’t worry if some skin remains—it adds flavor!
- Let hazelnuts cool completely, then roughly chop them.
Step 2: Infuse the Milk
- In a food processor or high-powered blender, grind the roasted, cooled hazelnuts until they form a coarse flour or paste (don’t turn it into butter—stop when it’s finely ground but still dry-ish).
- In a medium saucepan, combine milk, cream, half the sugar (about ⅜ cup), and the ground hazelnuts.
- Heat over medium heat, stirring occasionally, until the mixture just begins to steam and tiny bubbles form around the edges (do NOT boil). About 5-7 minutes.
- Remove from heat, cover, and let steep for 30 minutes to 1 hour. The longer it steeps, the more intense the hazelnut flavor.
- Strain the mixture through a fine-mesh strainer into a clean bowl, pressing on the hazelnut solids to extract maximum flavor. Discard the solids. You now have hazelnut-infused milk!
Step 3: Make the Custard (Gelato Base)
- Return the strained hazelnut milk to the saucepan. Add the remaining sugar and the pinch of salt. Heat over medium heat until steaming (about 150°F), stirring to dissolve sugar.
- In a separate bowl, whisk the egg yolks until smooth.
- Tempering technique: Slowly drizzle about 1 cup of the hot hazelnut milk into the egg yolks while whisking constantly. This gradually raises the egg temperature without scrambling them.
- Pour the tempered egg mixture back into the saucepan with the remaining hazelnut milk, whisking constantly.
- Cook over medium-low heat, stirring constantly with a whisk or wooden spoon, until the mixture thickens enough to coat the back of a spoon (about 170-175°F on an instant-read thermometer). This takes 5-8 minutes. Do NOT let it boil or the eggs will scramble!
- The custard is ready when you can run your finger through the coating on the spoon and it leaves a clear trail.
- Immediately remove from heat and stir in vanilla extract if using.
Step 4: Chill the Base
- Strain the custard through a fine-mesh strainer into a clean bowl to remove any bits.
- Set up an ice bath (large bowl filled with ice and water) and place the bowl of custard in it. Stir occasionally until cooled to room temperature.
- Cover with plastic wrap pressed directly against the surface (prevents skin formation) and refrigerate for at least 4 hours, preferably overnight. The base must be completely cold (40°F or below) before churning!
Step 5: Churn the Gelato
- Make sure your ice cream maker bowl is properly frozen (if using that type).
- Pour the chilled custard into your ice cream maker.
- Churn according to manufacturer’s instructions, typically 20-30 minutes, until the mixture has thickened to soft-serve consistency. Gelato is churned more slowly than ice cream and should be denser.
- The gelato is ready when it pulls away from the sides of the bowl and has a smooth, thick texture.
Step 6: Freeze
- Transfer the churned gelato to an airtight freezer container.
- Press plastic wrap directly against the surface to prevent ice crystals.
- Freeze for at least 2-4 hours until firm enough to scoop.
- For serving, let gelato sit at room temperature for 5-10 minutes to soften slightly—gelato is traditionally served at a slightly warme
Notes
- Hazelnut quality is everything: Fresh, high-quality hazelnuts make all the difference. Taste them before using—they should be sweet and buttery, not rancid or bitter.
- Don’t skip the infusion: Steeping ground hazelnuts in the milk extracts maximum flavor. The longer you steep (up to 2 hours), the more intense the hazelnut taste.
- Custard temperature is critical: Use a thermometer! 170-175°F is the sweet spot—thick enough for proper texture, not so hot that eggs scramble.
- Chill thoroughly: Cold base churns better and creates smoother texture. Overnight chilling is ideal.
- Serve at proper temperature: Gelato should be slightly soft, not rock-hard. Let it warm up slightly before scooping.
- Storage: Keeps well for up to 2 weeks in the freezer, though best enjoyed within the first week.
- Prep Time: 30 minutes
- Cook Time: 30 minutes
- Category: Desert
- Method: Stovetop + Ice Cream Maker
- Cuisine: Italian
- Diet: Gluten Free
Nutrition
- Serving Size: ½ cup (about 100g)
- Calories: 285
- Sugar: 22g
- Sodium: 45mg
- Fat: 19g
- Saturated Fat: 6g
- Unsaturated Fat: 12g
- Trans Fat: 0g
- Carbohydrates: 25g
- Fiber: 1g
- Protein: 6g
- Cholesterol: 140mg
Tips & Variations
Customize Your Hazelnut Gelato:
- Gianduja Gelato: Add 2-3 oz melted dark chocolate to the warm custard for chocolate-hazelnut gelato (like frozen Nutella!)
- Hazelnut-Coffee Gelato: Add 2 tablespoons finely ground espresso to the milk infusion for sophisticated coffee-nut flavor.
- Salted Caramel Hazelnut: Swirl in homemade salted caramel sauce after churning for decadent layers.
- Hazelnut-Vanilla Swirl: Make half hazelnut gelato, half vanilla (fior di latte), and swirl together before final freeze.
- Extra Crunchy: Fold in chopped toasted hazelnuts after churning for added texture.
- Dairy-Free Version: Use high-quality oat milk or cashew milk, coconut cream instead of dairy cream. Won’t be identical but still delicious!
- Less Sweet: Reduce sugar to ⅔ cup for more European-style sweetness that lets hazelnut flavor shine.
- Hazelnut-Praline: Make hazelnut praline (caramelized hazelnuts ground to paste) instead of plain roasted nuts for more complex flavor.
- Affogato Style: Serve a scoop with a shot of hot espresso poured over—classic Italian dessert!
Pro Variation – Using Hazelnut Paste:
If you can find professional hazelnut paste (pastry supply stores or online), use ½ cup paste instead of grinding whole nuts. Mix directly into the hot milk, skip the infusion step. Creates ultra-smooth texture!
Pro Chef Tips
Professional Secrets for Perfect Gelato:
- The Gelato Temperature Sweet Spot: Professional gelato makers serve their gelato at 10-15°F (about 5-8°C), which is significantly warmer than American ice cream (typically served at 0-5°F). This warmer serving temperature is crucial because it allows your taste buds to perceive flavors more fully—when desserts are too cold, it actually numbs your taste receptors. Before serving homemade gelato, let it sit at room temperature for 5-10 minutes. It should be soft enough to scoop easily but still frozen and creamy. This is the secret to why gelato at Italian gelaterias tastes so much more flavorful than ice cream!
- The Infusion is Where Flavor Happens: Professional gelato makers know that the hazelnut infusion step is non-negotiable and the longer, the better (within reason). While the recipe says 30 minutes to 1 hour, Italian gelato masters often steep for 2-3 hours or even overnight in the refrigerator. The ground hazelnuts release their oils, flavors, and aromatic compounds into the milk over time. Don’t rush this step—it’s the difference between “nice hazelnut flavor” and “WOW, that tastes like pure hazelnuts!” Just strain thoroughly afterward to remove all solids.
- Custard Texture is Everything: Professional pastry chefs use the “nappe” test (French term meaning “to coat”) to know when custard is perfect. Dip a wooden spoon or spatula into the custard, lift it out, and run your finger across the back. If the line stays clean and doesn’t fill in, the custard is thick enough (170-175°F). Under-cooked custard (below 165°F) will be thin and icy when frozen; over-cooked (above 180°F) risks scrambling. A thermometer removes guesswork, but learning to recognize the nappe stage by sight and texture is a professional skill worth developing.
- The Rapid Chill Technique: Professional gelato makers chill their base as quickly as possible using an ice bath with lots of ice and some salt (which makes the ice water even colder). This rapid chilling prevents bacteria growth and, more importantly, prevents any accidental continued cooking from residual heat. Transfer your hot custard to a metal bowl (conducts heat away faster than glass), set it in the ice bath, and stir frequently for the first 20 minutes. This can cut your cooling time in half and results in smoother gelato because smaller ice crystals form when you eventually churn it.
- Churning Speed Matters: Unlike American ice cream makers that churn quickly to incorporate air (creating lighter, fluffier ice cream), gelato should be churned more slowly to minimize air incorporation. If your ice cream maker has speed settings, use the slowest one for gelato. This creates that signature dense, creamy gelato texture (gelato typically has about 25-30% air vs. ice cream’s 50%+ air). If your machine doesn’t have speed settings, that’s okay—just know that authentic Italian gelato in gelaterias is churned much more slowly than what home machines do.
- Storage is an Art: Professional gelato shops store their gelato in specialized display freezers that maintain perfect temperature and have minimal air exposure. At home, use these tricks: Press plastic wrap or parchment directly against the gelato surface before sealing the container (prevents ice crystals), store in the back of the freezer where temperature is most stable (not the door!), and keep the container as full as possible (less air space = less freezer burn). For ultimate protection, place the sealed container in a freezer bag for double protection against temperature fluctuations.
- The “Rest” Period After Churning: Professional gelato makers know that gelato needs a “hardening” or “rest” period in the freezer after churning before it reaches optimal texture. Fresh from the machine, it’s soft-serve consistency. After 2-4 hours in the freezer at proper temperature (-10 to -15°F), the texture firms up but remains scoopable and creamy—this is the perfect moment to serve it. After several days, gelato becomes harder as more water freezes, but the flavor actually improves slightly as it “matures.” Let it warm slightly before scooping if it’s been frozen for more than 3 days.
Common Mistakes to Avoid
- Using Rancid or Low-Quality Hazelnuts: Nuts contain oils that go rancid over time, especially if stored improperly (warm, exposed to light). Rancid hazelnuts taste bitter, soapy, or “off,” and they’ll ruin your gelato. Always taste your hazelnuts before using them—they should taste sweet, buttery, and fresh. If they taste bitter, flat, or have any weird flavors, don’t use them! Solution: Buy fresh hazelnuts from a reputable source, store them in the freezer in an airtight container, and use within 6 months. If purchasing pre-roasted, check the package date and smell them—fresh roasted nuts should smell wonderfully toasty and nutty.
- Letting the Custard Boil: The moment custard boils, the eggs scramble and you get chunky, curdled custard that’s ruined (there’s no fixing it—you have to start over). This happens when the heat is too high or you stop stirring. The custard needs gentle, constant heat and continuous stirring. Solution: Use medium-low heat, stir constantly without stopping, and watch the temperature carefully with a thermometer. The target is 170-175°F—thick enough for proper texture, safely below the 180°F scrambling point. Remove from heat the moment it reaches temperature or thickens to coat a spoon. If you do see little bits forming, immediately strain through a fine-mesh sieve and pray—sometimes you can save it if caught early!
- Not Chilling the Base Long Enough: Trying to churn warm or room-temperature custard is a recipe for disaster. The ice cream maker can’t freeze it properly, you’ll get icy texture instead of creamy, and you might even warm up your machine’s freezer bowl too much, making it completely ineffective. The base must be thoroughly chilled—40°F or below, and the colder the better. Solution: Always chill overnight if possible (4-24 hours works best). The custard should feel very cold to the touch, almost like touching refrigerated milk. If you’re in a rush, use the ice bath method to cool it quickly, then refrigerate for at least 4 hours minimum. Proper chilling is directly correlated with smooth, creamy texture!
- Over-Churning or Under-Churning: Under-churned gelato is soupy and icy because the mixture hasn’t properly emulsified and frozen. Over-churned gelato can become grainy and develop a buttery texture (you’ve essentially started making butter from the cream!). You want to stop churning when the gelato is thick like soft-serve, holds its shape, and pulls away from the sides of the bowl—usually 20-30 minutes. Solution: Watch the gelato closely during the last 5-10 minutes of churning. It should transform from liquid to thick and creamy relatively suddenly. Stop the machine when it reaches soft-serve consistency. Don’t walk away during churning—stay nearby to catch the perfect moment!
- Serving It Too Cold/Hard: One of the biggest differences between gelato and ice cream is serving temperature, yet home cooks often serve gelato straight from the freezer at ice-cream temperature (0-5°F). At this temperature, gelato is rock-hard, difficult to scoop, and you can’t taste the subtle hazelnut flavors—your tongue is too numb from the cold! Solution: Remove gelato from the freezer 5-10 minutes before serving (longer if your freezer is very cold). It should soften slightly—still frozen and holding its shape, but scoopable without arm workout and soft enough that flavors bloom on your tongue. Italians call this “mantecato” texture—soft, smooth, creamy. This one change will make your homemade gelato taste exponentially better!
Storage & Meal Prep
Storing Your Hazelnut Gelato:
- Airtight Container is Essential: Transfer churned gelato to an airtight, freezer-safe container. Glass, plastic, or metal all work—just ensure it seals well.
- Press-and-Seal Method: Press a piece of plastic wrap or parchment directly against the surface of the gelato before sealing the lid. This prevents ice crystals from forming on the surface (freezer burn).
- Optimal Storage Temperature: Store at 10-15°F (-12 to -10°C) if your freezer allows temperature control. Standard home freezers (0°F) work fine but gelato will be harder—just let it warm slightly before serving.
- Shelf Life: Homemade gelato is best enjoyed within 1 week for optimal texture and flavor, but properly stored, it remains delicious for up to 2 weeks. After 2 weeks, ice crystals may form and texture may deteriorate, though it’s still safe to eat for up to 1 month.
- Prevent Freezer Burn: Keep the container as full as possible (less air space = less opportunity for ice crystals). If you’ve eaten half the gelato, press plastic wrap against the remaining portion before resealing.
- Location Matters: Store in the back of the freezer where temperature is most stable, not in the door where temperature fluctuates every time it opens.
No “Reheating”: Gelato is a frozen dessert—you don’t reheat it! Just let it soften slightly at room temperature before scooping.
Make-Ahead & Freezer Notes
Perfect Make-Ahead Timeline:
Day 1 (or several days ahead):
- Roast hazelnuts
- Make custard base
- Infuse with hazelnuts
- Strain and chill overnight
Day 2 (or Day of Serving):
- Churn the gelato (20-30 minutes)
- Transfer to container
- Freeze until firm (2-4 hours minimum)
- Serve!
Freezer Storage:
- Custard Base (Pre-Churning): Can be refrigerated for up to 3 days before churning. Actually benefits from this time as flavors meld!
- Churned Gelato: Keeps in freezer for up to 2 weeks at peak quality, up to 1 month still delicious but texture may be icier.
- Hazelnut-Infused Milk: Can make this component up to 2 days ahead and refrigerate until ready to make custard.
Best Make-Ahead Strategy:
Most people make the entire custard base 1-2 days before they want to serve gelato. Chill it thoroughly, then churn the morning of (or up to 3 days before) your dinner party. The gelato will be perfectly frozen and ready by evening. This eliminates any last-minute stress!
Can You Re-Freeze Melted Gelato?
Technically yes (safe), but not recommended (quality). If gelato partially melts and you refreeze it, the texture changes—becomes icier and grainy because the original ice crystal structure was disrupted. Best to eat it if it melts! However, if it’s only slightly softened (not fully melted), refreezing is fine and texture won’t be dramatically affected.
Serving Suggestions
Hazelnut Gelato is spectacular on its own, but here are ways to elevate the experience:
Classic Italian Service:
- Serve in a chilled glass bowl or cup (chill dishes in freezer 20 minutes before serving)
- Use a traditional flat gelato spatula/paddle for authentic scooping
- Garnish with a single toasted hazelnut on top
- Pair with a tiny almond biscotti or pizzelle cookie
Dessert Combinations:
- Affogato: Pour a shot of hot espresso over a scoop—the ultimate Italian dessert!
- With Chocolate: Drizzle with warm chocolate sauce or serve alongside chocolate torte
- Fruit Pairing: Fresh figs, poached pears, or berry compote complement hazelnut beautifully
- Pastry Pairing: Serve with warm apple tart, pear crostata, or chocolate hazelnut cake
Beverage Pairings:
- Espresso or strong Italian coffee
- Vin Santo or other Italian dessert wine
- Frangelico (hazelnut liqueur) for adults
- Hot chocolate in winter
Italian Dinner Party Finale:
- Serve after pasta, risotto, or osso buco for authentic Italian meal
- Present with assorted Italian cookies (biscotti, amaretti, cantucci)
- Offer small portions (Italians serve smaller scoops than Americans)
- Serve at proper temperature (slightly soft, never rock-hard)
FAQs Section
Q: Do I need an ice cream maker to make gelato?
A: Unfortunately, yes—an ice cream maker is essential for achieving proper gelato texture. The churning process breaks up ice crystals as they form, creating that smooth, creamy texture that defines gelato. Without churning, you’d get a solid block of flavored ice with large, crunchy crystals (like a granita, but not in a good way). You need the constant agitation that an ice cream maker provides. The good news: ice cream makers are widely available and start around $30-50 for basic models. If you make frozen desserts even a few times a year, it’s worth the investment! The same machine works for ice cream, gelato, sorbet, and frozen yogurt.
Q: Can I make this without eggs (egg-free gelato)?
A: Traditional Italian gelato uses egg yolks for that silky custard texture, but you CAN make egg-free versions! They’re technically called “sorbetto al latte” (milk sorbet) rather than gelato, but they’re still delicious. Replace the custard base with a mixture of milk, cream, sugar, and a stabilizer like cornstarch (2-3 tablespoons) or tapioca starch. Heat the mixture until thickened, cool, and churn. The texture will be slightly icier and less rich, but many people prefer this lighter style. Some gelato shops in Italy actually make both egg-based and egg-free versions of their flavors!
Q: My gelato is too hard/icy. What went wrong?
A: Several factors can cause icy gelato: (1) Not enough fat—gelato needs the fat from milk, cream, and egg yolks for smooth texture. Don’t use skim milk! (2) Not enough sugar—sugar lowers the freezing point and keeps gelato scoopable. If you reduced sugar too much, it freezes harder. (3) Custard wasn’t cooked enough—under-thickened custard doesn’t have the body to stay smooth. Cook to 170-175°F. (4) Churning issues—under-churned or over-churned both create ice crystals. Churn to proper soft-serve consistency. (5) Storage temperature too cold—home freezers at 0°F freeze gelato harder than gelato shop freezers at 10-15°F. Solution: Let gelato sit at room temperature 5-10 minutes before serving until it reaches proper scoopable texture!
Q: Can I use hazelnut butter or Nutella instead of whole hazelnuts?
A: Hazelnut butter can work! Use about ⅓ cup smooth, unsweetened hazelnut butter (not the spread with sugar/oils added). Mix it directly into the warm milk—no need to infuse. The texture will be incredibly smooth! However, Nutella is tricky—it contains cocoa, lots of sugar, and palm oil, which changes the flavor profile (you’d get chocolate-hazelnut, not pure hazelnut) and the oil can create texture issues. If you want gianduja (chocolate-hazelnut) gelato, add chocolate separately to a hazelnut base rather than relying on Nutella. But if you’re curious, ⅓ cup Nutella stirred into the custard can work—just reduce sugar by half since Nutella is very sweet!
Q: What’s the difference between gelato and ice cream?
A: Several key differences: (1) Fat content—Ice cream has more cream (typically 14-25% butterfat), gelato has more milk (6-9% butterfat). (2) Churning speed—Ice cream is churned quickly to incorporate lots of air (50%+ air, making it fluffy); gelato is churned slowly with minimal air (25-30% air, making it dense). (3) Serving temperature—Ice cream is served very cold (0-5°F/rock-hard); gelato is served warmer (10-15°F/soft and scoopable). (4) Flavor intensity—Less fat and warmer serving temp means gelato flavors taste more intense. (5) Texture—Gelato is denser, silkier, more elastic; ice cream is lighter, fluffier, creamier. Both are delicious, just different experiences!
Q: How do I make gelato without a thermometer?
A: While a thermometer is highly recommended (they’re inexpensive and prevent disasters!), you can use the “nappe test” that chefs have used for centuries. As you stir the custard over heat, dip a wooden spoon or rubber spatula into it. Lift it out and run your finger across the back of the spoon. If the custard coats the spoon in a thin layer and the line you drew with your finger stays clean (doesn’t fill back in), the custard is thick enough and cooked properly. This happens around 170-175°F. The mixture should look noticeably thicker than when you started, coat surfaces smoothly, and have a slight sheen. If it’s still thin and watery, keep cooking while stirring constantly. Practice makes perfect with this method!
Q: Why do I need to chill the base overnight? Can’t I churn it sooner?
A: While technically you only need to chill until it’s cold (40°F or below, which takes about 4 hours with an ice bath), overnight chilling (8-12 hours) is strongly recommended for several reasons: (1) Better texture—The fats, proteins, and sugars have time to fully hydrate and the mixture becomes more stable, resulting in smoother gelato. (2) Enhanced flavor—Flavors meld and intensify as the base rests. Day-old base tastes noticeably better than freshly made. (3) Easier churning—Very cold base (36-40°F) churns faster and more efficiently than just-cold base. (4) Food safety—Egg custard should be refrigerated promptly and kept cold. So while you CAN churn after 4 hours if you’re in a rush, overnight is definitely best practice for optimal results!
Conclusion
And there you have it—your complete guide to making authentic, Italian-style Hazelnut Gelato that rivals (or surpasses!) what you’d find in the gelaterias of Rome, Florence, or Milan! This recipe might seem like it has many steps, but once you break it down, it’s really just: roast nuts, infuse milk, make custard, chill, churn, freeze. Simple techniques that anyone can master with a little patience and attention to detail. And the reward? The most intensely flavored, silky-smooth, genuinely Italian frozen dessert you’ve ever tasted!
The real magic of homemade gelato is how it connects you to centuries of Italian culinary tradition. Every time you make this, you’re following in the footsteps of Italian gelato masters who’ve been perfecting this craft for generations. You’re using techniques developed in Renaissance Italy, celebrating the finest hazelnuts from Piedmont, and creating something that brings joy—just as gelato has brought joy to millions of people for hundreds of years. That’s pretty special for something that starts with just hazelnuts, milk, eggs, and sugar!
Remember the essential keys to success: use fresh, high-quality hazelnuts (taste them first—they should be sweet and buttery!), infuse the milk thoroughly for maximum flavor (patience here pays off!), cook the custard to exactly 170-175°F using a thermometer (prevents scrambling), chill the base completely before churning (overnight is best), churn to soft-serve consistency (dense, not fluffy), and serve at proper gelato temperature (let it soften 5-10 minutes before scooping). Follow these principles and you’ll create gelato that makes people close their eyes and sigh with happiness—the ultimate compliment!
Now it’s time to channel your inner Italian gelato maker! I’m genuinely excited to hear about your hazelnut gelato journey. Did you roast your own hazelnuts or use pre-roasted? How long did you infuse the milk? Did your custard turn out silky and perfect? What did your family and friends say when they tasted it? Drop a comment below and share your gelato-making experience—I read every comment and absolutely love hearing about your culinary adventures! And if you successfully created that smooth, intensely nutty, authentically Italian gelato that transported you straight to a Roman gelateria, please pin this recipe to your favorite Pinterest board so your friends can discover the joy of making real Italian gelato at home. Your shares help our community grow and inspire others to try traditional recipes!
Here’s to frozen desserts that taste like pure, concentrated flavor, to Italian culinary traditions alive in our kitchens, to the satisfaction of making something from scratch that’s genuinely special, to summer afternoons with gelato in hand, and to the pure happiness that comes from creating and sharing something delicious. May your hazelnuts always be fresh, your custard always be smooth, your churning always be perfect, and your gelato always transport you to Italy with every spoonful! Buon appetito e felice gelateria, friends! 🌰🍨🇮🇹✨