Glazed Walnuts Recipe: Sweet, Crunchy, and Perfectly Addictive
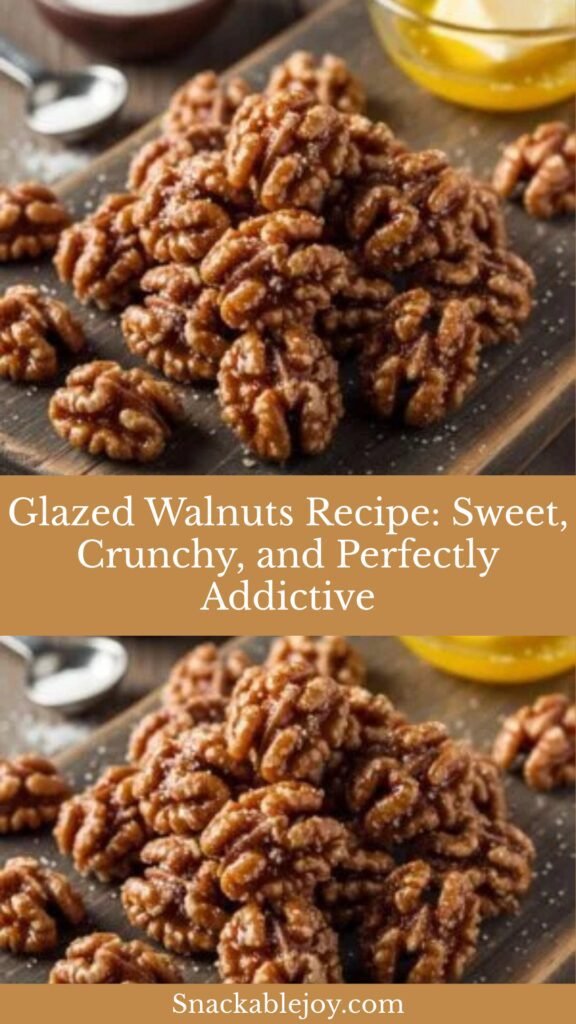
Glazed walnuts are irresistibly sweet, perfectly crunchy, caramelized nuts that transform ordinary walnuts into an elegant treat that’s both sophisticated and simple to make! These candied walnuts feature a beautiful glossy coating made from sugar, butter, and warm spices that creates a delicate, crispy shell around each toasted walnut, delivering the perfect balance of sweet, nutty, and slightly salty flavors in every bite. The combination of caramelized sugar with the rich, earthy taste of walnuts creates a snack that’s simultaneously indulgent and satisfying. This easy candied walnuts recipe is perfect for countless occasions: serve them as an elegant appetizer at holiday gatherings and dinner parties, sprinkle them over salads for gourmet restaurant-style crunch, package them as homemade gifts during the holidays, add them to cheese boards for sophisticated entertaining, toss them with roasted vegetables for extra texture, use them as ice cream toppings for dessert perfection, or simply keep a jar on hand for snacking when you need something sweet and crunchy. The beauty of this sweet roasted walnuts recipe lies in its incredible simplicity—it requires just a handful of pantry ingredients, comes together in about 20 minutes, creates an impressive gourmet result that looks and tastes expensive, and fills your kitchen with the most amazing warm, caramelized aroma. Whether you’re a holiday baker looking for homemade gift ideas, someone who loves adding gourmet touches to everyday meals, a salad enthusiast seeking the perfect crunchy topping, or simply a nut lover who appreciates sweet and savory combinations, this glazed walnuts recipe delivers incredible flavor, beautiful presentation, satisfying crunch, and pure addictive deliciousness that will make them disappear faster than you can imagine!
History / Background
Glazed and candied nuts have a rich history that spans cultures and centuries, with the practice of coating nuts in sweeteners dating back to ancient civilizations. To understand glazed walnuts, we need to explore both the history of walnuts themselves and the tradition of candying nuts.
Walnuts are one of the oldest tree foods known to humanity, with evidence of walnut consumption dating back to 7,000 B.C. Originally native to Persia (modern-day Iran), walnuts spread along the Silk Road trade routes to Europe and eventually to the Americas. The Romans called them “Juglans regia,” meaning “Jupiter’s royal acorn,” believing them to be food for the gods. The English walnut, which is the variety most commonly used today, was brought to California by Franciscan missionaries in the 1700s, and California is now the world’s largest producer of walnuts.
The tradition of coating nuts in sugar has ancient roots across multiple cultures. In the Middle East and Persia, nuts coated in honey or sugar syrup have been enjoyed for millennia as both treats and ceremonial foods. Medieval European confectioners created “comfits”—nuts and seeds coated in layers of sugar—which were expensive luxuries for the wealthy. In China, candied walnuts have been a traditional delicacy for centuries, often served at celebrations and banquets.
The specific style of glazed walnuts we know today—where nuts are coated in caramelized sugar with butter and spices—likely emerged from European and American confectionery traditions in the 18th and 19th centuries as sugar became more accessible and candy-making techniques were refined. The French technique of “pralines” (nuts coated in caramelized sugar) influenced American nut-candying traditions.
In American cuisine, candied nuts became particularly popular in the South, where pecans were often candied for holidays. Glazed walnuts followed a similar tradition and became especially popular during the 1950s and 1960s as entertaining at home became more common. They were featured in women’s magazines as elegant additions to cocktail parties and holiday tables.
The resurgence of glazed walnuts in contemporary cooking came with the farm-to-table movement and artisanal food trends of the 2000s and 2010s. Chefs began featuring them on gourmet salads, cheese boards, and as garnishes for upscale dishes. The “gourmet salad” trend—particularly the popularization of combinations like pear and walnut salad or arugula with candied walnuts—made these nuts a restaurant staple.
Food bloggers and Pinterest users embraced glazed walnuts as the perfect homemade gift and entertaining item. They represented achievable gourmet cooking—something impressive that home cooks could make easily. Today, glazed walnuts embody the intersection of tradition and contemporary food culture: a simple technique with ancient roots that feels both nostalgic and modern, perfect for both everyday snacking and special occasions.
Why You’ll Love This Recipe
This glazed walnuts recipe shows you exactly how to create that perfect balance of sweet, crunchy, and nutty that makes these nuts absolutely irresistible! While candying nuts might seem intimidating—concerns about burning sugar or ending up with sticky messes—there are actually specific techniques that make this foolproof: controlling temperature carefully, stirring at the right moments, understanding when the glaze has reached the perfect consistency, and spreading the nuts properly for that signature crispy coating.
What makes this particular approach to the easy candied walnuts recipe special is the attention to achieving professional results with simple, accessible methods. We’re not just tossing nuts in sugar—we’re thinking about how to create even coating, how to develop complex flavor with spices, how to achieve that perfect crunch without burning, and how to create nuts that stay crispy rather than becoming sticky. The result is glazed walnuts that rival anything you’d find at fancy food stores, at a fraction of the cost!
Here’s why this sweet roasted walnuts recipe will become your new favorite:
- Ready in 20 Minutes – Faster than running to the store
- Just 5 Ingredients – Simple pantry staples you probably have
- Impressive & Gourmet – Looks and tastes expensive and fancy
- Perfect for Gifting – Beautiful homemade presents people love
- Incredibly Versatile – Use in salads, desserts, or snacking
- Budget-Friendly – Much cheaper than store-bought candied nuts
- Naturally Gluten-Free – Safe for gluten-sensitive diets
- Customizable Flavors – Easy to add spices and variations
- Great for Meal Prep – Make ahead and store for weeks
- Kid-Friendly – Children love helping make (and eat!) these
- Holiday Essential – Perfect for Thanksgiving, Christmas, and entertaining
- Addictively Delicious – Warning: you won’t be able to stop eating them!
Ingredient Notes
This recipe uses simple ingredients where quality and technique shine!
Walnuts: The star ingredient! Raw walnut halves or pieces work perfectly—halves look more elegant, pieces are more economical. Freshness matters: Fresh walnuts have a sweet, mild flavor; old walnuts taste bitter. Amount: Typically 2 cups. Storage before using: Keep walnuts in the freezer to maintain freshness. Quality: Look for California walnuts for the best flavor. Substitution: Pecans, almonds, or cashews work beautifully with this same method—just adjust cooking time slightly as different nuts toast at different rates.
Granulated Sugar: Creates the sweet, caramelized coating! White granulated sugar melts evenly and creates that classic glossy glaze. Amount: Typically ½ cup for 2 cups nuts. Type: Regular white sugar works best—brown sugar can be used but creates a different, softer coating. Purpose: Provides sweetness and creates the crispy shell when caramelized. Substitution: Coconut sugar for a deeper, caramel-like flavor; honey or maple syrup create a different, stickier coating (adjust technique accordingly).
Butter: Adds richness and helps the glaze coat evenly! Butter provides fat that helps sugar caramelize beautifully and adds delicious richness. Amount: 2-3 tablespoons. Type: Unsalted butter is preferred so you can control salt level. Purpose: Creates smooth, even coating and adds flavor. Substitution: Coconut oil for dairy-free version (use refined for neutral flavor); vegan butter works too.
Spices: Add warmth and complexity! Cinnamon is classic—sweet, warm, and universally loved. Vanilla extract adds sweet, aromatic depth. Salt balances sweetness and enhances all flavors. Optional additions: Nutmeg, cardamom, ginger, or cayenne for unique flavor profiles.
Water: Helps dissolve sugar initially! A small amount of water (2-3 tablespoons) helps the sugar dissolve evenly before caramelizing. Purpose: Prevents sugar from crystallizing and burning. Important: Don’t skip this—it’s crucial for smooth glaze!
Equipment Needed
This simple recipe requires basic kitchen equipment!
- Large skillet or sauté pan (preferably non-stick or well-seasoned)
- Wooden spoon or silicone spatula (for stirring)
- Measuring cups and spoons
- Baking sheet (lined with parchment paper or silicone mat)
- Parchment paper or silicone baking mat (crucial for preventing sticking)
- Small bowl (for mixing spices)
- Timer (for monitoring cooking time)
- Fork or tongs (for separating nuts as they cool)
That’s it! Simple stovetop cooking with basic tools.
Print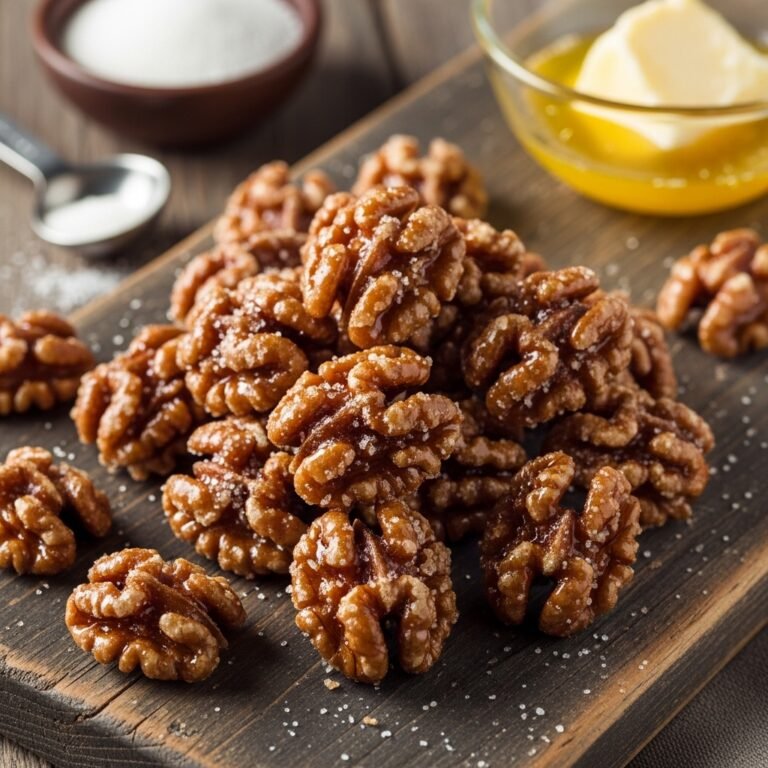
Glazed Walnuts Recipe
Easy glazed walnuts with a sweet, crunchy caramelized coating. Perfect for snacking, salads, or gift-giving. Ready in just 20 minutes!
- Total Time: 20 minutes
- Yield: 2 cups (about 8 servings) 1x
Ingredients
- 2 cups raw walnut halves or pieces
- ½ cup granulated sugar
- 3 tablespoons unsalted butter
- 3 tablespoons water
- 1 teaspoon ground cinnamon
- ½ teaspoon vanilla extract
- ¼ teaspoon salt (plus more for sprinkling)
Optional flavor additions:
- ¼ teaspoon nutmeg
- Pinch of cayenne pepper (for spicy version)
- ½ teaspoon orange zest
Instructions
Prepare:
- Line Baking Sheet: Line a large baking sheet with parchment paper or a silicone baking mat. Set aside near your stove—you’ll need it ready when the walnuts are done. Do NOT skip this step or use an unlined pan—the hot, sugary nuts will stick permanently!
- Prep Walnuts: If using walnut pieces with small crumbles, sift out the smallest bits (they’ll burn). Have walnuts measured and ready near the stove.
Cook the Glaze:
- Combine Wet Ingredients: In a large skillet over medium heat, combine sugar, butter, and water. Stir gently to help everything melt together. The water helps the sugar dissolve evenly and prevents burning.
- Dissolve Sugar: Cook, stirring frequently, until the butter melts and the sugar completely dissolves, about 2-3 minutes. The mixture should be smooth with no sugar granules visible.
- Bring to Simmer: Increase heat slightly to medium-high and bring the mixture to a gentle simmer. Let it bubble for 2-3 minutes, stirring occasionally. The mixture will become slightly thicker and more syrupy. Watch carefully—don’t let it darken too much or it will taste burnt.
Add Walnuts:
- Add Walnuts to Glaze: Add the walnuts to the simmering sugar mixture. Stir immediately to coat all nuts evenly with the glaze.
- Toast and Coat: Cook, stirring constantly, for about 5-7 minutes. The walnuts will toast, the glaze will thicken and coat the nuts, and the mixture will become more caramelized. You’ll notice the glaze going from liquid to thicker and eventually crystallizing slightly on the nuts—this is perfect! Keep stirring to prevent burning.
- Add Flavorings: When the glaze has thickened significantly and coats the nuts (they’ll look matte and sugary rather than wet and shiny), remove from heat. Immediately add cinnamon, vanilla extract, and salt. Stir vigorously to coat all nuts with the spices. The heat will release the cinnamon’s aroma beautifully.
Cool and Separate:
- Transfer to Baking Sheet: Working quickly (the mixture hardens fast!), pour the glazed walnuts onto your prepared parchment-lined baking sheet. Use your wooden spoon or spatula to spread them into a single layer as much as possible.
- Separate Nuts: Working quickly while the nuts are still warm (but not too hot to touch), use a fork or your fingers to separate the walnuts from each other. This is important! If you let them cool completely in a clump, they’ll harden into one big cluster. You want individual nuts. Work quickly but carefully—they’re hot!
- Cool Completely: Let the walnuts cool completely on the baking sheet, about 15-20 minutes. As they cool, they’ll become crispy and crunchy. If some stick together despite your efforts, break them apart once completely cool.
- Sprinkle with Salt (Optional): For extra flavor dimension, sprinkle the cooled nuts with a tiny pinch of flaky sea salt. The sweet-salty combination is addictive!
Notes
- Don’t Walk Away: This recipe requires constant attention, especially once the walnuts are added. The sugar can burn quickly if unattended.
- Parchment is Essential: Seriously, don’t skip lining your baking sheet. Hot caramelized sugar is like glue and will ruin your pan.
- Work Quickly: Once you remove the nuts from heat, work fast to spread and separate them before they harden.
- Storage: Store in an airtight container at room temperature for up to 2 weeks, or refrigerate for up to 1 month.
- Humidity Warning: These stay crispiest in low-humidity environments. In humid climates, they may soften slightly but still taste delicious.
- Prep Time: 5 minutes
- Cook Time: 12-15 minutes
- Category: Snack, Appetizer, Salad Topping
- Method: Stovetop
- Cuisine: American
- Diet: Gluten Free
Nutrition
- Serving Size: ¼ cup
- Calories: 220
- Sugar: 13g
- Sodium: 75mg
- Fat: 17g
- Saturated Fat: 3g
- Unsaturated Fat: 14g
- Trans Fat: 0g
- Carbohydrates: 15g
- Fiber: 2g
- Protein: 4g
- Cholesterol: 10mg
Tips & Variations
Spicy Glazed Walnuts: Add ¼-½ teaspoon cayenne pepper along with the cinnamon for sweet-spicy heat that’s perfect for cheese boards.
Maple Glazed: Replace half the sugar with pure maple syrup for rich, autumn-flavored nuts (reduce water to 2 tablespoons).
Orange Cinnamon: Add ½ teaspoon orange zest and ¼ teaspoon orange extract for citrusy brightness.
Savory Rosemary: Skip vanilla and cinnamon; instead add 1 tablespoon fresh minced rosemary and extra salt for savory nuts perfect with cocktails.
Holiday Spice: Add ¼ teaspoon nutmeg, ⅛ teaspoon cloves, and ⅛ teaspoon ginger along with cinnamon for festive flavor.
Brown Butter Version: Brown the butter before adding sugar for deep, nutty, caramelized flavor.
Coconut Glazed: Add 2 tablespoons shredded coconut to the finished nuts for tropical flair.
Honey Glazed: Replace sugar with honey for a different sweetness (cooking time will be shorter as honey caramelizes faster).
Chocolate Drizzled: Once cooled, drizzle with melted dark chocolate for extra indulgence.
Mix-In Magic: Use half walnuts and half pecans or almonds for variety.
Pro Chef Tips
The Temperature Sweet Spot: Professional candy makers know that sugar caramelization happens in a specific temperature range (around 320-350°F). While you don’t need a thermometer for this recipe, understanding that you’re looking for that light amber color (not dark brown) helps you know when to stop. The sugar should smell sweet and caramelized, not burnt. If it starts smelling burnt or turning very dark, you’ve gone too far.
Constant Stirring is Key: Once the walnuts are added to the glaze, restaurant chefs never stop stirring. Constant movement ensures even coating, prevents burning, and helps the nuts toast evenly. Set a timer and commit to stirring continuously for those 5-7 minutes—it’s the difference between perfect nuts and burnt ones.
The Crystallization Phase: Professional candy makers recognize when sugar transitions from syrupy to crystallized. You’ll see the glaze go from shiny and wet to matte and sugary-looking on the nuts. This crystallization is exactly what you want—it creates that crispy coating. Don’t panic when you see it happen; it’s the sign you’re almost done!
Work Station Setup: Restaurant kitchens practice “mise en place”—everything in its place before cooking. Have your parchment-lined sheet pan ready, your spices measured, and your fork or tools for separating nuts within arm’s reach before you start. Once those nuts come off the heat, you have maybe 60-90 seconds to spread and separate them before they harden. Preparation is everything.
The Salt Finish: Professional chefs always finish sweet dishes with a touch of salt to enhance and balance flavors. A light sprinkle of flaky sea salt (like Maldon) over the cooled nuts elevates them from good to restaurant-quality. The salt crystals add textural interest and make the sweetness pop rather than feel flat.
Fresh Walnuts Matter: Chefs know that nuts go rancid quickly, especially walnuts which are high in delicate oils. Always taste a raw walnut before starting—if it’s bitter or “off,” your glazed nuts won’t be good no matter how perfect your technique. Buy from stores with high turnover, and store walnuts in your freezer to maintain freshness.
Room Temperature Storage: While it seems counterintuitive, glazed nuts stay crispiest stored at room temperature in an airtight container, not refrigerated. Refrigeration introduces moisture that softens the glaze. Keep them in a cool, dry place for maximum crunch.
Common Mistakes to Avoid
Skipping the Parchment Paper: The biggest mistake! Hot caramelized sugar bonds permanently to metal pans, creating a mess that’s nearly impossible to clean and wasting your beautiful nuts. Always, always, ALWAYS line your baking sheet with parchment paper or a silicone mat. This is non-negotiable.
Not Stirring Constantly: Walking away or stirring only occasionally once the nuts are in the glaze leads to uneven coating and burnt spots. Sugar burns very quickly. From the moment you add walnuts to the glaze until you remove them from heat, you must stir constantly. Set a timer and commit to those 5-7 minutes of continuous stirring.
Overcooking the Sugar: Letting the sugar mixture get too dark before adding nuts, or cooking the nut mixture too long, creates bitter, burnt-tasting glaze. The sugar should be light amber/caramel colored, not dark brown. If you smell burning, it’s too late—you’ve gone too far. Watch carefully and remove from heat when nuts are glossy and coated, not when the mixture is dark.
Not Separating the Nuts Quickly: Letting the glazed nuts cool in a pile creates one giant, inseparable cluster of nuts instead of individual pieces. You must work quickly while they’re still warm to separate them. Have your fork ready and work fast! Even if you don’t get every single one separated, breaking apart clumps while still warm prevents cement-like hardening.
Using Old or Rancid Walnuts: Walnuts go rancid faster than most nuts due to their high polyunsaturated fat content. Using old, bitter walnuts means no amount of sugar will fix the off flavor. Always taste your raw walnuts before starting—they should taste mildly sweet and nutty, never bitter or “painty.” Buy from reputable sources and store properly.
Adding Spices Too Early: Adding cinnamon or other spices to the hot sugar while cooking can cause them to burn and taste bitter. Always add spices at the very end, off the heat, when the nuts are coated and done cooking. The residual heat will release their aromatics without burning them.
Storage & Meal Prep
Room Temperature Storage: Store completely cooled glazed walnuts in an airtight container at room temperature for up to 2 weeks. Make sure they’re completely cool before sealing—any residual warmth creates condensation that makes them sticky. Glass jars with tight-fitting lids, plastic containers, or zip-top bags all work well.
Refrigerator Storage: While room temperature is ideal for crispness, you can refrigerate glazed walnuts for up to 1 month. They may soften slightly due to moisture in the fridge but will still taste delicious. Bring to room temperature before serving for best texture.
Maintaining Crispness: The enemy of crispy glazed nuts is moisture. Store in the driest, coolest place possible (not near the stove or dishwasher). In humid climates, consider adding a food-safe desiccant packet to your storage container. If nuts soften, you can re-crisp them: spread on a baking sheet and warm in a 300°F oven for 5-7 minutes, then cool completely.
Gifting Preparation: For homemade gifts, package glazed walnuts in clear cellophane bags tied with ribbon, small mason jars with decorative labels, or pretty tins. Add a label with the date and storage instructions. They make beautiful, delicious, affordable gifts!
Signs of Spoilage: While the sugar coating preserves the nuts somewhat, walnuts can still go rancid. Discard if they taste bitter or “off,” smell stale or paint-like, or develop mold (rare but possible in humid conditions).
Make-Ahead & Freezer Notes
Make-Ahead Excellence: Glazed walnuts are perfect for making ahead! In fact, they’re ideal because the flavors develop and meld over the first 24 hours. Make them up to 2 weeks before you need them—they stay crispy and delicious when properly stored. This makes them ideal for holiday entertaining prep, gift-giving prep, or having on hand for salads and snacking.
Batch Cooking: Double or triple this recipe easily for large-scale prep. Just work in batches—don’t overcrowd your pan or the nuts won’t cook evenly. Make multiple batches and combine once cooled. This is perfect for holiday gift-giving when you need lots of portions.
Freezing Glazed Walnuts: Yes, you can freeze them! Glazed walnuts freeze beautifully for up to 3 months. Freeze in airtight containers or freezer bags. They can be used directly from frozen (no thawing needed) or let come to room temperature for 15-20 minutes. The glaze protects them from freezer burn and they maintain their crunch beautifully.
Freezing Raw Walnuts: If you buy walnuts in bulk, always freeze what you won’t use immediately. Raw walnuts stored in the freezer maintain freshness for 6-12 months, preventing rancidity. Then you can make fresh glazed walnuts whenever you want!
No Need to Reheat: Unlike many recipes, glazed walnuts don’t need reheating. Serve them at room temperature for optimal crunch and flavor. If you’ve refrigerated or frozen them, simply let them come to room temperature before serving.
Serving Suggestions
On Salads:
- Classic pear and walnut salad with blue cheese
- Arugula salad with goat cheese and balsamic
- Spinach salad with strawberries and feta
- Autumn harvest salad with roasted squash
- Mixed green salad with cranberries and chicken
On Cheese Boards:
- Pair with brie, camembert, or soft cheeses
- Serve with sharp cheddar and aged gouda
- Add to charcuterie boards for sweet element
- Arrange with fresh figs and honey
As Dessert Toppings:
- Vanilla ice cream or gelato
- Yogurt parfaits
- Apple crisp or pie
- Pumpkin cheesecake
- Chocolate mousse
In/On Other Dishes:
- Roasted Brussels sprouts or green beans
- Sweet potato casserole
- Oatmeal or yogurt bowls
- Grain bowls and Buddha bowls
- Baked brie (arrange on top before baking)
For Snacking:
- Mixed nuts party bowl
- Trail mix with dried fruit
- Standalone snack (addictive!)
- Movie night treat
- Afternoon pick-me-up with tea or coffee
Beverage Pairings:
- Coffee or espresso
- Black tea or chai
- Hot apple cider
- Dessert wines or port
- Bourbon or whiskey (for adults)
FAQs Section
Q: Can you make glazed walnuts without butter?
A: Yes! For a dairy-free version, substitute coconut oil (use refined for neutral flavor) or a vegan butter substitute. The butter adds richness and helps with coating, but coconut oil works wonderfully and keeps them vegan. The technique and proportions remain the same.
Q: Why did my glazed walnuts turn out sticky instead of crispy?
A: Several possible causes: 1) The sugar mixture wasn’t cooked long enough—keep cooking until it crystallizes on the nuts; 2) Humidity in your environment—store in airtight containers with desiccant packets if you live in humid climates; 3) They weren’t separated while cooling—nuts stuck together trap moisture; 4) They weren’t completely cool before storing—residual heat creates condensation. Solution: Re-crisp in a 300°F oven for 5-7 minutes.
Q: Can I use pecans instead of walnuts?
A: Absolutely! Pecans work beautifully with this exact recipe. The technique and proportions are identical. Pecans have a slightly sweeter, more buttery flavor than walnuts. Almonds and cashews also work but may need slightly less cooking time as they’re denser and toast faster. Always watch closely to prevent burning.
Q: How do you prevent glazed walnuts from sticking together?
A: Work quickly to separate them while they’re still warm (but cool enough to touch) using a fork or your fingers. Spread them in a single layer immediately after removing from heat. Don’t let them cool in a pile. If they do stick together, break apart once completely cool—they’ll be harder to separate but it’s still possible. Next time, work more quickly during the cooling phase!
Q: Are glazed walnuts healthy?
A: They’re healthier than many desserts! Walnuts are incredibly nutritious—high in omega-3 fatty acids, antioxidants, protein, and fiber. The sugar coating does add calories and sugar, making them a treat rather than a health food. Enjoy them in moderation (a small handful) as a better-for-you sweet snack or use them to add nutrition and flavor to salads. The healthy fats and protein from walnuts provide satiety that pure candy doesn’t.
Q: How long do homemade glazed walnuts last?
A: Stored properly in an airtight container at room temperature, they last up to 2 weeks. Refrigerated, they last up to 1 month (may soften slightly). Frozen, they last up to 3 months. They’ll stay crispiest at room temperature in a cool, dry place. Always ensure they’re completely cool before sealing to prevent moisture buildup.
Q: Can you make glazed walnuts in the oven instead of stovetop?
A: Yes, though the technique is different! Toss walnuts with melted butter, sugar, cinnamon, and salt, spread on a parchment-lined baking sheet, and roast at 350°F for 15-20 minutes, stirring every 5 minutes. The stovetop method gives more control and a glossier coating, but the oven method works well for hands-off cooking. Watch carefully to prevent burning.
Conclusion
And there you have it—everything you need to make the most delicious, perfectly crunchy, beautifully glazed walnuts that will have everyone begging for your recipe! While candying nuts might seem intimidating, the techniques, tips, and step-by-step guidance we’ve covered make it foolproof and accessible for any home cook. From understanding the crystallization process to knowing when to separate the nuts, you now have all the insider knowledge to create professional-quality results.
This easy candied walnuts recipe is proof that gourmet doesn’t have to be complicated. With just 20 minutes, five simple ingredients, and one pan, you can create a versatile treat that works for everything from elegant appetizers to midnight snacking. These sweet roasted walnuts make ordinary salads extraordinary, transform cheese boards into showstoppers, and create homemade gifts that people genuinely treasure.
Whether you’re making this glazed walnuts recipe for holiday entertaining, salad toppings, homemade gifts, special occasions, or simply because you want a delicious snack that’s infinitely better than anything store-bought, this recipe delivers every single time. It’s sweet, crunchy, versatile, impressive, and genuinely addictive—everything a great recipe should be!
Now it’s your turn to create your own batch of perfectly glazed, irresistibly crunchy walnuts! I’d love to hear about your experience—what flavor variations did you try? What did you serve them with? Did you gift them or keep them all for yourself (no judgment!)? Share your thoughts, creative uses, and beautiful photos in the comments below! Your feedback and ideas inspire other readers and help build our cooking community.
Don’t forget to save this glazed walnuts recipe to your Pinterest boards—pin it to “Holiday Recipes,” “Homemade Gifts,” “Salad Toppings,” or “Easy Snacks” so you can find it whenever you need impressive homemade goodness. If you know someone who loves entertaining, needs gift ideas, or appreciates gourmet touches, share this article with them. And when you make your perfectly candied, beautifully glazed batch, snap a photo and tag me on social media—I absolutely love seeing your delicious creations!
Now go make these amazing nuts and prepare for them to become your new obsession! 🌰✨