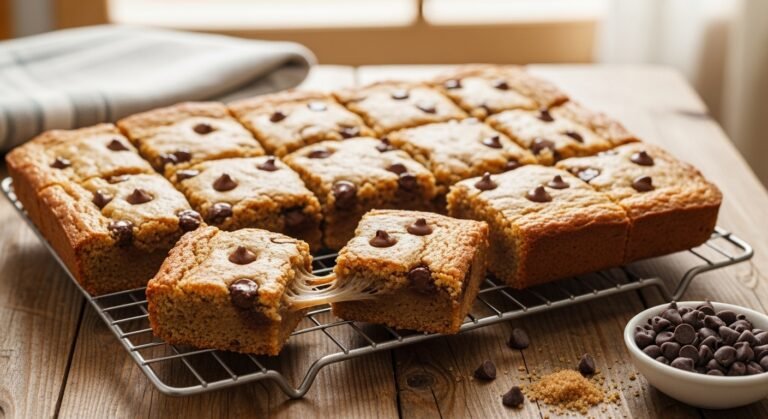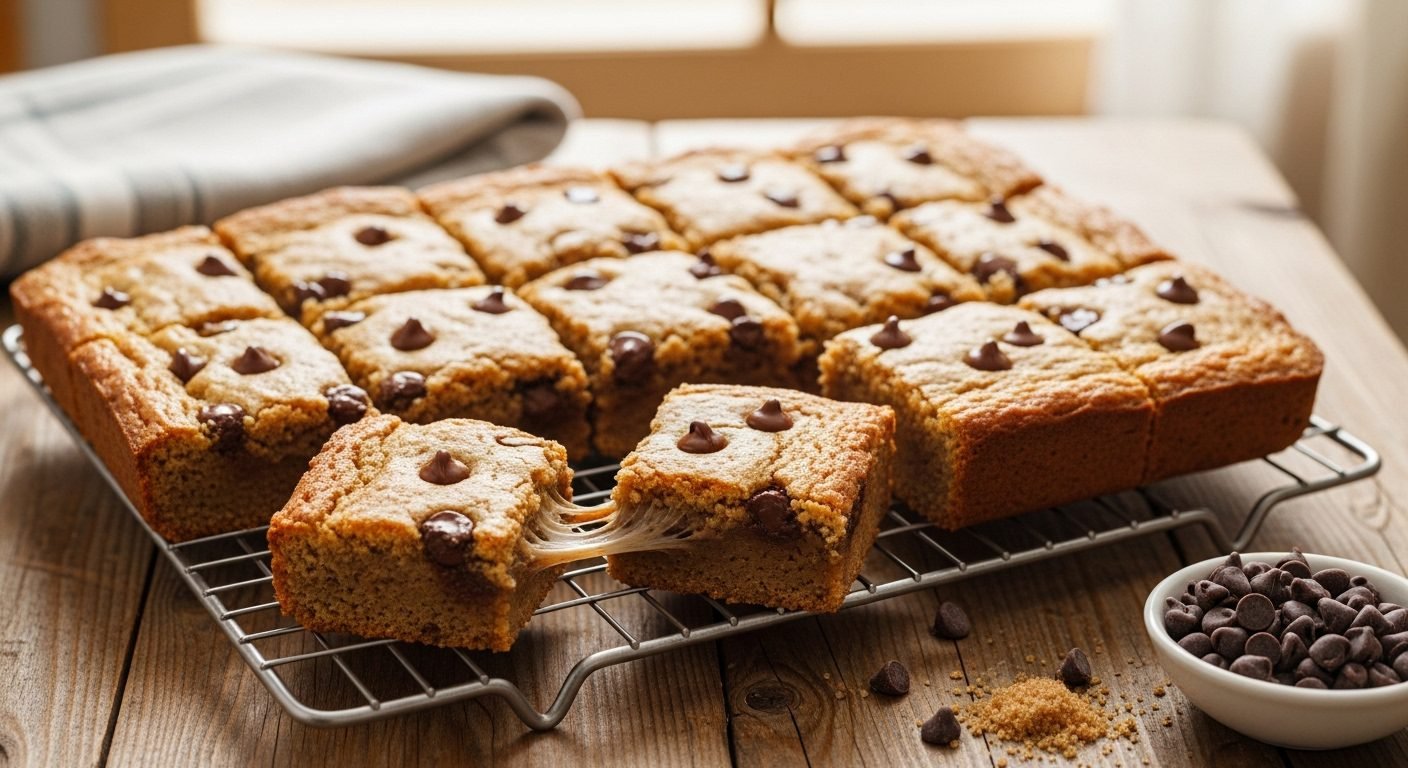
Chewy Congo Bars Recipe – Easy Brown Sugar Blondies with Chocolate Chips
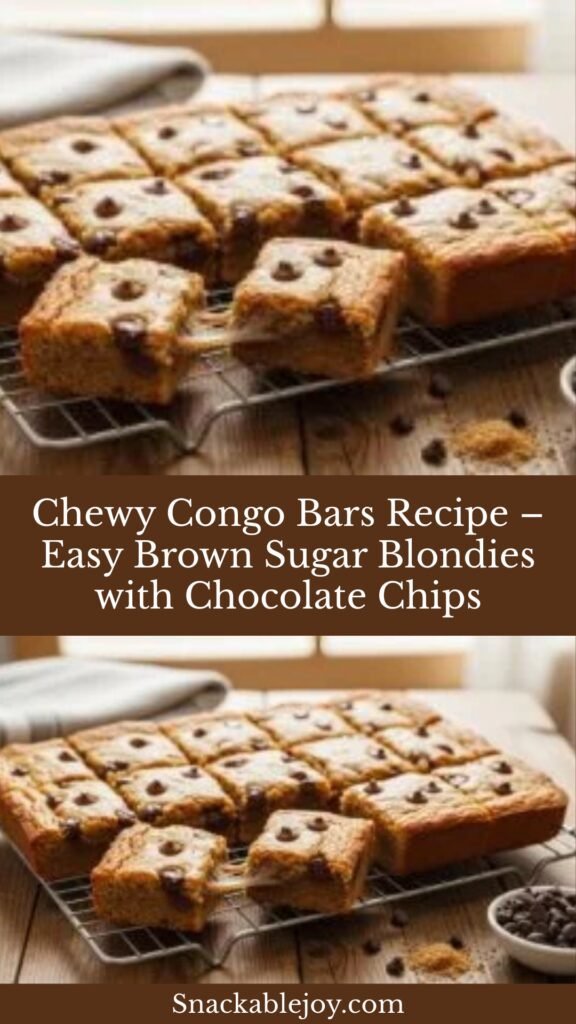
Congo Bars are thick, chewy, butterscotch-flavored blondies loaded with chocolate chips and a crispy golden top. These irresistible bars are made with brown sugar (instead of white sugar like traditional brownies), which gives them a rich, caramel-like flavor and incredibly moist, chewy texture. With their dense, fudgy interior and crackly top, Congo Bars deliver all the satisfaction of brownies but with a unique butterscotch twist that sets them apart.
These crowd-pleasing bars are perfect for bake sales, potlucks, lunch boxes, after-school snacks, or any time you’re craving something sweet and satisfying. They’re wonderfully portable, travel well, and please just about everyone from kids to adults. The best part? They come together in one bowl with just a handful of pantry staples—no mixer required. Whether you call them Congo Bars, Blondies, or Butterscotch Brownies, these bars are guaranteed to become a regular in your baking rotation.
History / Background
Congo Bars have an interesting and somewhat mysterious history that traces back to mid-20th century American home baking. The exact origin of the name “Congo Bars” is debated among food historians, but most agree the recipe emerged in the 1950s and 1960s when convenience baking was at its peak in American kitchens. Some sources suggest the name came from the dark brown color resembling the Congo River region, though this connection is somewhat controversial today.
What we do know is that Congo Bars represent the evolution of the “blondie”—essentially a brownie made without cocoa powder. The earliest blondie recipes appeared in American cookbooks in the 1890s, originally called “brownies” before chocolate brownies took over that name. These vanilla-based bar cookies eventually became known as blonde brownies or blondies due to their golden color.
Congo Bars are a specific type of blondie that relies heavily on brown sugar for flavor and texture. The recipe became popular in church cookbooks, community recipe collections, and homemaker magazines during the post-World War II era when easy, one-bowl desserts were celebrated. Unlike their chocolate brownie cousins, Congo Bars showcased the deep, molasses-rich flavor of brown sugar paired with vanilla and often included chocolate chips or butterscotch chips as mix-ins.
The recipe has remarkable staying power because it’s so adaptable. Every family seems to have their own version passed down through generations—some with nuts, some without, some with coconut, others with different chips. The basic formula of butter, brown sugar, eggs, flour, and chips remains constant, but the variations are endless.
In many Southern states, these bars are beloved comfort food, often appearing at church suppers and family reunions. They’re also popular in Midwestern potluck culture and New England school bake sales. The recipe has that wonderful quality of tasting homemade and nostalgic while being simple enough for beginner bakers to master. Today, Congo Bars are experiencing a resurgence as bakers rediscover classic American desserts and appreciate their simplicity and delicious flavor.
Why You’ll Love This Recipe
These Congo Bars are about to become your new favorite go-to dessert, and here’s why: they deliver incredible flavor with minimal effort and maximum reward. These bars prove that simple ingredients can create something truly special when combined correctly.
Here’s what makes this recipe exceptional:
- One-bowl wonder – No mixer required, just a bowl and spoon
- Ready in 35 minutes – Quick prep and baking time
- Foolproof technique – Nearly impossible to mess up
- Incredible texture – Chewy, fudgy, with crispy edges
- Rich butterscotch flavor – Brown sugar creates depth
- Customizable mix-ins – Swap chips and add-ins to your preference
- Feeds a crowd – One 9×13 pan makes 24 generous bars
- Budget-friendly – Uses pantry staples you likely have on hand
- Kid-approved – Perfect for lunch boxes and after-school snacks
- Travel-friendly – Hold up well for potlucks and bake sales
- Make-ahead friendly – Taste great for days
- No special equipment – Just basic kitchen tools needed
- Versatile occasions – Perfect for casual and special events alike
Ingredient Notes
Light Brown Sugar: This is the star ingredient that gives Congo Bars their signature butterscotch flavor and chewy texture. Brown sugar is white sugar mixed with molasses, which adds moisture, chewiness, and that distinctive caramel-like taste. Light brown sugar (as opposed to dark brown sugar) provides the perfect balance—enough molasses flavor without being too intense. The moisture in brown sugar also keeps these bars soft and chewy for days. Don’t substitute with white sugar or you’ll lose the essential character of Congo Bars. Make sure your brown sugar is fresh and soft, not hard and dried out.
Unsalted Butter: Butter provides richness, flavor, and contributes to the tender texture. Use unsalted butter so you can control the salt level in your bars. The butter should be melted and slightly cooled before adding—melted butter creates a denser, fudgier texture (which is exactly what we want) compared to creamed butter. Don’t substitute with oil or margarine as butter provides irreplaceable flavor.
Large Eggs: Eggs provide structure, moisture, and richness. They bind all the ingredients together and contribute to the fudgy texture. Use large eggs at room temperature for best results—they incorporate more smoothly into the batter. The eggs should be lightly beaten before adding to ensure even distribution.
All-Purpose Flour: The foundation of the bars, flour provides structure. All-purpose flour works perfectly—no need for cake flour or bread flour. Measure carefully using the spoon-and-level method (spoon flour into measuring cup and level off) rather than scooping directly from the bag, which can pack too much flour and make the bars dry.
Baking Powder: A small amount of baking powder gives the bars a slight lift and helps create that beautiful crackly top. Don’t confuse baking powder with baking soda—they’re different. Make sure your baking powder is fresh (test it by mixing a little with hot water—it should fizz vigorously).
Salt: Salt enhances all the flavors and balances the sweetness. Don’t skip it! The small amount won’t make the bars taste salty—it will make all the other flavors taste more pronounced and delicious.
Pure Vanilla Extract: Vanilla rounds out the flavors and adds warmth and depth. Use pure vanilla extract rather than imitation for the best flavor. The vanilla complements the butterscotch notes from the brown sugar beautifully.
Semi-Sweet Chocolate Chips: Chocolate chips add pockets of melty chocolate throughout the bars and provide contrast to the butterscotch flavor. Semi-sweet chocolate chips are traditional, but you can use milk chocolate for a sweeter bar or dark chocolate for a more sophisticated flavor. You can also use butterscotch chips, peanut butter chips, or white chocolate chips.
Optional Add-ins: Many bakers love adding chopped nuts (pecans or walnuts), shredded coconut, or a mix of different chips. These additions are traditional but not required—the bars are delicious either way.
Equipment Needed
Congo Bars require minimal equipment, which is part of their appeal:
- 9×13-inch baking pan – Standard size for this recipe (metal or glass)
- Parchment paper or cooking spray – For easy removal and cleanup
- Large microwave-safe bowl – For melting butter and mixing batter
- Whisk or wooden spoon – For mixing ingredients
- Measuring cups and spoons – For accurate measurements
- Rubber spatula – For scraping and spreading batter
- Wire cooling rack – For cooling the bars
- Sharp knife – For cutting clean bars
- Toothpick – For testing donenes
Print

Congo Bars Recipe
These classic Congo Bars are chewy, butterscotch-flavored blondies packed with chocolate chips and baked to golden perfection. Made in one bowl with melted butter and brown sugar, these easy bars have a rich caramel flavor, fudgy texture, and crispy edges. Perfect for bake sales, potlucks, or any time you need a crowd-pleasing dessert that comes together quickly with pantry staples.
- Total Time: 35 minutes (plus cooling time)
- Yield: 24 bars 1x
Ingredients
Scale- ¾ cup (170g) unsalted butter, melted and slightly cooled
- 2 cups (400g) packed light brown sugar
- 3 large eggs, at room temperature
- 2 teaspoons pure vanilla extract
- 2½ cups (315g) all-purpose flour
- 2 teaspoons baking powder
- ½ teaspoon salt
- 2 cups (340g) semi-sweet chocolate chips
- 1 cup (120g) chopped pecans or walnuts (optional)
Instructions
Prepare for Baking:
- Preheat and prep: Preheat your oven to 350°F (175°C). Line a 9×13-inch baking pan with parchment paper, leaving some overhang on two sides for easy removal. Alternatively, grease the pan well with butter or cooking spray. Parchment paper is highly recommended for easiest removal and cleanup.
Make the Batter:
- Melt the butter: In a large microwave-safe bowl, melt the butter in the microwave (about 45-60 seconds). Let it cool for a few minutes until it’s warm but not hot—you should be able to comfortably touch the bowl. If the butter is too hot, it will cook the eggs in the next step.
- Mix butter and sugar: Add the brown sugar to the melted butter. Stir vigorously with a wooden spoon or whisk for about 1 minute until the mixture is smooth, glossy, and well combined. The sugar won’t dissolve completely—that’s normal and expected. The mixture should look like thick, wet sand.
- Add eggs and vanilla: Crack the eggs into a small bowl first to check for shells, then add them one at a time to the butter-sugar mixture, stirring well after each addition. The batter will look separated and slightly curdled at first—keep stirring and it will come together. Add the vanilla extract and mix until the batter is smooth and glossy. Beat vigorously for about 30 seconds to incorporate some air, which helps create that beautiful crackly top.
- Add dry ingredients: In a separate medium bowl, whisk together the flour, baking powder, and salt. This ensures even distribution of the leavening and salt. Pour the dry ingredients over the wet ingredients and stir gently with a rubber spatula or wooden spoon just until no flour streaks remain. Don’t overmix—stop as soon as you don’t see any dry flour. Overmixing develops gluten and makes the bars tough instead of tender.
- Fold in chips: Add the chocolate chips (and nuts if using) to the batter. Fold them in gently with a spatula until evenly distributed throughout the batter. Reserve a handful of chocolate chips to sprinkle on top if desired for a prettier presentation.
Bake:
- Spread in pan: Scrape the batter into the prepared pan. It will be quite thick and sticky—this is correct! Use a spatula to spread it evenly to all corners of the pan, smoothing the top. The batter should be about 1 inch thick. If you reserved some chips, sprinkle them evenly over the top now.
- Bake the bars: Bake in the preheated oven for 25-30 minutes. The bars are done when the top is golden brown with a beautiful crackly surface, the edges are set and slightly pulling away from the pan, and a toothpick inserted in the center comes out with just a few moist crumbs (not wet batter, but definitely not completely clean). The center should still look slightly soft—it will continue to firm up as it cools. Don’t overbake or the bars will be dry instead of chewy and fudgy.
Cool and Cut:
- Cool completely: Remove the pan from the oven and place it on a wire cooling rack. Let the bars cool completely in the pan—this takes at least 1 hour. Congo Bars need to cool fully to set up properly and achieve their signature chewy texture. Cutting them warm will result in a gooey mess.
- Cut into bars: Once completely cool, use the parchment paper overhang to lift the entire slab out of the pan onto a cutting board. Using a sharp knife (wipe it clean between cuts for neatest bars), cut into 24 squares (6 rows by 4 rows). For extra clean cuts, refrigerate the bars for 30 minutes before cutting.
Notes
- Brown sugar measurement: Pack the brown sugar firmly into your measuring cup for accurate measurement. Loose brown sugar will result in less sugar than the recipe needs.
- Don’t overbake: These bars should look slightly underdone in the center when you remove them. They continue to cook from residual heat and will firm up perfectly as they cool.
- One-bowl simplicity: You can mix everything in one bowl to minimize cleanup. Just add dry ingredients to the wet ingredients.
- Chocolate chip distribution: For even chocolate distribution in every bite, toss the chocolate chips with a tablespoon of flour before adding to the batter. This prevents them from sinking.
- Customize your mix-ins: Feel free to swap or combine different chips, add nuts, coconut, or dried fruit based on your preferences.
- Prep Time: 10
- Cook Time: 25 minutes
- Category: Desert
- Method: Baking
- Cuisine: American
- Diet: Vegetarian
Nutrition
- Serving Size: 1 bar (1/24 of recipe)
- Calories: 235
- Sugar: 24g
- Sodium: 110mg
- Fat: 11g
- Saturated Fat: 6g
- Unsaturated Fat: 4g
- Trans Fat: 0g
- Carbohydrates: 33g
- Fiber: 1g
- Protein: 3g
- Cholesterol: 40mg
Tips & Variations
Triple Chocolate Congo Bars: Use dark brown sugar for deeper flavor, add 2 tablespoons of cocoa powder to the batter, and use a combination of dark chocolate chips, milk chocolate chips, and white chocolate chips for ultimate chocolate indulgence.
Peanut Butter Congo Bars: Replace ½ cup of the butter with ½ cup of creamy peanut butter. Use peanut butter chips instead of chocolate chips and add chopped peanuts. Drizzle with melted peanut butter after baking.
Coconut Congo Bars: Add 1 cup of sweetened shredded coconut to the batter along with the chocolate chips. Toast the coconut first for even more flavor. Use butterscotch chips instead of chocolate for a tropical butterscotch-coconut combination.
S’mores Congo Bars: Replace 1 cup of the flour with graham cracker crumbs. Use milk chocolate chips and add mini marshmallows during the last 5 minutes of baking so they get golden and toasty on top.
Espresso Congo Bars: Add 1 tablespoon of instant espresso powder to the melted butter. The coffee enhances the chocolate and adds sophisticated depth. This is perfect for coffee lovers.
Salted Caramel Congo Bars: Swirl dulce de leche or caramel sauce into the batter before baking. Sprinkle flaky sea salt over the top before baking for a sweet-salty combination that’s irresistible.
Toffee Crunch Congo Bars: Replace half the chocolate chips with Heath toffee bits or chopped chocolate-covered toffee bars. Add chopped pecans for extra crunch.
White Chocolate Cranberry Congo Bars: Use white chocolate chips and add ½ cup of dried cranberries for a festive holiday variation. Add orange zest for even more flavor.
Loaded Congo Bars: Go all out with chocolate chips, butterscotch chips, peanut butter chips, coconut, and nuts all in one batch. Use 2 cups total of mixed add-ins.
Pro Chef Tips
Brown sugar quality matters: Fresh, moist brown sugar is essential for proper texture. If your brown sugar has hardened, soften it before using by placing it in a bowl with a damp paper towel, covering, and microwaving for 20-30 seconds. Hard, dried brown sugar won’t incorporate properly and will create lumpy bars.
The butter temperature trick: Melted butter should be warm but not hot when you add the brown sugar—ideally around 110-120°F. If it’s too hot, it will cook the eggs when you add them, creating scrambled egg bits in your batter. Let melted butter cool for 5 minutes before proceeding.
Beating for the crackly top: Professional bakers know that vigorous mixing after adding eggs creates that gorgeous crackly, shiny top. Beat the butter-sugar-egg mixture energetically for 30-60 seconds to incorporate air. This creates the signature appearance of Congo Bars.
Gentle folding after flour: Once you add flour, switch from vigorous beating to gentle folding. Overmixing after flour is added develops too much gluten, making bars tough and cake-like instead of dense and fudgy. Mix just until you don’t see dry flour—a few lumps are fine.
The toothpick test interpretation: For brownies and blondies, “a few moist crumbs” is the goal. If the toothpick comes out completely clean, you’ve overbaked and the bars will be dry. Look for moist crumbs clinging to the toothpick but no wet batter. The center should look slightly underdone—it firms up during cooling.
Strategic chip placement: For picture-perfect bars, reserve ¼ cup of chocolate chips to press into the top of the batter before baking. This creates a professional bakery appearance with visible chips on the surface.
Temperature control: Let eggs come to room temperature for 30 minutes before using—they incorporate more smoothly and create better texture. Cold eggs can cause the melted butter to solidify and create a grainy batter.
The waiting game: Patience during cooling is crucial. Congo Bars are at their absolute best when completely cool—the texture transforms from sticky and cake-like when warm to chewy and fudgy when cool. For ultimate chewiness, refrigerate for 30 minutes before cutting.
Common Mistakes to Avoid
Mistake #1: Using white sugar instead of brown sugar. This completely changes the recipe. White sugar doesn’t have the molasses that gives Congo Bars their signature butterscotch flavor and chewy texture. Brown sugar is essential—it’s not just about color but about flavor and moisture. Without brown sugar, you’ll essentially make chocolate chip cookie bars instead of Congo Bars. Always use light or dark brown sugar, never white sugar.
Mistake #2: Overbaking the bars. This is the most common error that leads to dry, cake-like bars instead of fudgy, chewy ones. Congo Bars should look slightly underdone in the center when you remove them from the oven—the top will be golden with some cracks, but the center should still look soft and shiny. They continue baking from residual heat and firm up dramatically as they cool. If you bake until they look completely done, they’ll be overdone.
Mistake #3: Cutting the bars before they’re completely cool. Warm Congo Bars are sticky, gooey, and will fall apart or create messy cuts. You need to let them cool completely—at least 1 hour—so they set up properly and develop their signature chewy texture. The cooling process is when the sugar crystallizes slightly and the bars transform from cake-like to dense and chewy.
Mistake #4: Measuring flour incorrectly. Scooping flour directly from the bag packs it down, giving you too much flour, which results in dry, tough bars. Always use the spoon-and-level method: fluff the flour in the bag, spoon it into your measuring cup, and level off with a knife. Even better, weigh flour on a kitchen scale for perfect accuracy (2½ cups = 315g).
Mistake #5: Overmixing after adding flour. Once you add flour to the batter, gluten development begins. The more you mix, the more gluten develops, creating tough, cake-like bars instead of tender, fudgy ones. Mix just until you don’t see dry flour streaks—some small lumps are fine. Stop mixing immediately once the flour is incorporated.
Storage & Meal Prep
Room Temperature Storage: Congo Bars stay fresh at room temperature for up to 4 days when stored properly. Place them in an airtight container with parchment paper between layers to prevent sticking. They’ll stay chewy and delicious, making them perfect for lunch boxes and snacking throughout the week.
Refrigerator Storage: For longer storage or if your kitchen is very warm, store Congo Bars in an airtight container in the refrigerator for up to 1 week. Cold bars have a different texture—more fudgy and dense—which many people actually prefer. Let them sit at room temperature for 10-15 minutes before eating if you want a softer texture.
Texture Over Time: These bars actually improve over the first 24 hours as the flavors meld together and the texture becomes more uniformly chewy. Day 2 is often even better than Day 1, making them an excellent make-ahead option.
Preventing Drying: To keep bars from drying out, make sure they’re in a truly airtight container. You can also place a piece of bread in the container—it will go stale while keeping your bars moist. Replace the bread every couple of days.
Individual Wrapping: For grab-and-go convenience, wrap individual bars in plastic wrap or place them in small sandwich bags. This makes them perfect for lunch boxes, road trips, or portion control.
Make-Ahead & Freezer Notes
Make-Ahead Instructions: Congo Bars are perfect for making ahead. Bake them up to 3 days before you need them and store in an airtight container at room temperature or in the refrigerator. The flavor and texture actually improve with time, making them ideal for party planning and holiday baking. You can bake multiple batches weeks in advance and freeze them for ultimate convenience.
Freezing Baked Bars: Congo Bars freeze exceptionally well for up to 3 months. Let them cool completely, then cut into individual bars. Wrap each bar individually in plastic wrap, then place all wrapped bars in a freezer-safe zip-top bag or airtight container. Remove as much air as possible to prevent freezer burn. Individually wrapped bars make it easy to grab just one or two at a time.
Thawing Instructions: Thaw frozen bars at room temperature for 1-2 hours or in the refrigerator overnight. You can also microwave a frozen bar for 15-20 seconds for a warm, gooey treat. Many people enjoy eating them partially frozen for a firmer, fudgier texture.
Freezing Unbaked Batter: You can also freeze the unbaked batter. Spread it in the pan, cover tightly with plastic wrap and aluminum foil, and freeze for up to 2 months. Bake directly from frozen, adding 5-10 minutes to the baking time. This is great if you want fresh-baked bars with minimal effort.
Gift-Giving: Frozen bars are perfect for gifting. Stack individually wrapped bars in a decorative tin or box—they’ll thaw during transport and stay fresh for days. Include reheating instructions if desired.
Serving Suggestions
Congo Bars are delicious on their own, but here are some wonderful ways to enjoy and present them:
Classic Presentation: Serve at room temperature on a pretty platter. Dust with powdered sugar for an elegant finish, or drizzle with melted chocolate or caramel sauce for extra decadence.
À la Mode: Serve warm Congo Bars with a scoop of vanilla ice cream for an incredible dessert. The contrast of warm, chewy bar and cold, creamy ice cream is heavenly. Try it with butter pecan or salted caramel ice cream too.
Coffee Pairing: These bars are perfect alongside your morning coffee or afternoon espresso. The butterscotch flavor pairs beautifully with coffee’s bitter notes. They’re ideal for coffee breaks, book clubs, or brunch dessert.
Dessert Boards: Include Congo Bars on a dessert platter alongside brownies, cookies, and fresh fruit. Cut them into smaller bite-sized pieces for easier sampling.
Beverage Pairings: Serve with cold milk (a classic combination), hot chocolate, coffee, tea, or apple cider. For adults, they pair surprisingly well with bourbon, whiskey, or coffee liqueur.
Ice Cream Sandwiches: Cut the bars slightly thicker, then sandwich a scoop of ice cream between two bars. Roll the edges in mini chocolate chips or chopped nuts. Wrap individually in plastic wrap and freeze for amazing ice cream sandwiches.
Warm from the Oven: While the bars need to cool for clean cutting, eating them slightly warm with a fork straight from the pan is a wonderful indulgence. The chocolate is still melty and the texture is extra gooey.
Holiday Cookie Platters: Congo Bars are perfect for holiday cookie exchanges even though they’re technically bars, not cookies. Their butterscotch flavor feels especially festive during fall and winter holidays.
FAQs Section
What’s the difference between Congo Bars and Blondies?
Congo Bars are a type of blondie—all Congo Bars are blondies, but not all blondies are Congo Bars. Blondies are a broad category of brownies made without chocolate. Congo Bars specifically use brown sugar for a butterscotch flavor and traditionally include chocolate chips. Some blondies use white sugar and have a more vanilla flavor.Can I use dark brown sugar instead of light brown sugar?
Yes! Dark brown sugar has more molasses than light brown sugar, which means even deeper butterscotch flavor and a slightly chewier texture. Your bars will be darker in color and have a more pronounced molasses taste. This is a great option if you love intense butterscotch flavor.Why are my Congo Bars cakey instead of chewy?
Several factors can cause this: overbaking (most common), too much flour (measure carefully), overmixing the batter after adding flour, or using white sugar instead of brown sugar. Make sure you’re using brown sugar, measuring flour correctly, mixing gently after adding flour, and pulling the bars from the oven when they still look slightly underdone in the center.Can I make these without nuts?
Absolutely! Nuts are optional and many people prefer Congo Bars without them. Simply omit the nuts or replace them with more chocolate chips, coconut, toffee bits, or leave them out entirely. The bars will still be delicious.Do I need to use parchment paper?
While not absolutely necessary, parchment paper makes removal and cleanup much easier. Without it, you’ll need to grease the pan very well and cut the bars in the pan, which can be messier. The parchment overhang lets you lift the entire slab out for clean, easy cutting.Can I make these gluten-free?
Yes! Substitute the all-purpose flour with a 1:1 gluten-free flour blend that contains xanthan gum. Bob’s Red Mill and King Arthur both make excellent options. The texture might be slightly different but still delicious. Make sure your other ingredients (especially chocolate chips and baking powder) are certified gluten-free.How do I know when they’re done baking?
Look for golden-brown color on top, edges that are set and pulling slightly from the pan, and a center that still looks soft and shiny. When you insert a toothpick in the center, it should come out with a few moist crumbs but no wet batter. The bars should jiggle very slightly when you shake the pan gently. They’ll firm up during cooling.Conclusion
Congratulations—you’re now ready to make perfect Congo Bars that will have everyone asking for your recipe! These butterscotch-flavored beauties are proof that the best desserts don’t need to be complicated. With one bowl, simple ingredients, and about 35 minutes from start to finish, you’ll create bars that taste like they came from a professional bakery.
The beauty of Congo Bars is their versatility and forgiving nature. Once you master the basic recipe, you can customize them endlessly to match your preferences and whatever you have in your pantry. They’re equally at home at elegant dinner parties and casual family gatherings, and they make wonderful gifts that show you care without requiring hours in the kitchen.
I hope these Congo Bars become a cherished recipe in your home. There’s something special about sharing homemade treats with the people you love, and these bars make it so easy to spread joy through baking. Whether you’re making them for a special occasion or just because Tuesday needed something sweet, these bars deliver every single time.
If you try this recipe, I’d absolutely love to hear about it! Drop a comment below sharing how your bars turned out, any creative variations you tried, or questions you might have. And if you loved these Congo Bars as much as I think you will, please share this recipe on Pinterest so other home bakers can discover this classic American treat too.
Happy baking, and here’s to creating delicious memories, one chewy bar at a time! 🍫✨