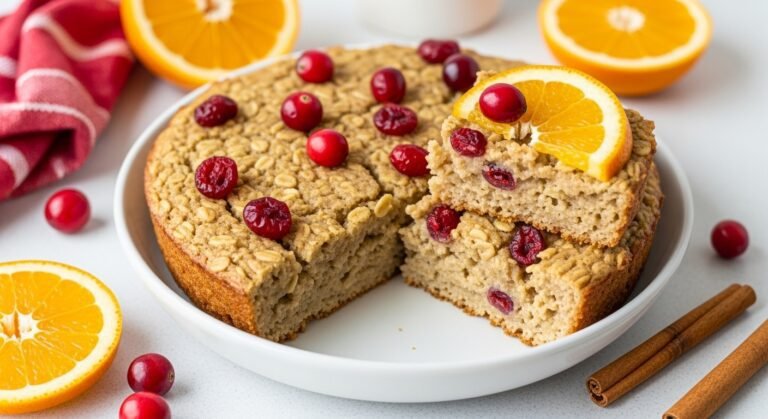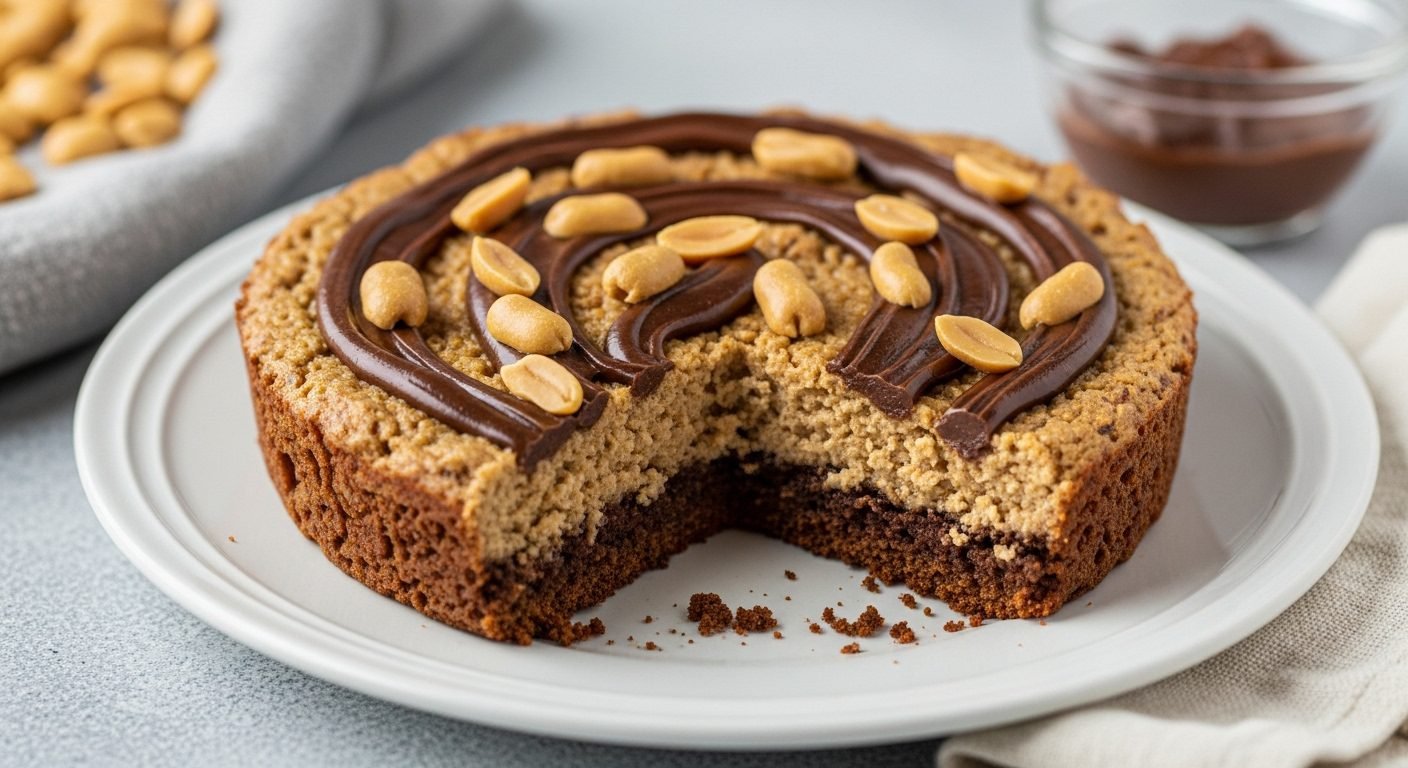
Chocolate Peanut Butter Baked Oatmeal: The Ultimate Protein-Packed Breakfast
If you’ve ever wanted to eat a peanut butter cup for breakfast without the guilt, this Chocolate Peanut Butter Baked Oatmeal is your dream come true. This decadent yet nutritious breakfast combines rich cocoa, creamy peanut butter, and hearty oats into a fudgy, satisfying dish that tastes like dessert but fuels you like a power breakfast.
Perfect for meal prep Sundays, busy weekday mornings, or weekend brunch gatherings, this baked oatmeal delivers the classic chocolate-peanut butter flavor combination we all crave in a wholesome, filling format. The texture is wonderfully unique—slightly crispy edges give way to a moist, almost brownie-like center, studded with melty chocolate chips throughout. Whether you’re feeding chocolate-loving kids, fueling up before a workout, or just treating yourself to something special, this recipe checks all the boxes. It’s hearty enough to keep you satisfied until lunch, protein-packed from the peanut butter and eggs, and so delicious that you’ll forget you’re eating something healthy.
History / Background
The chocolate and peanut butter combination is quintessentially American, though its origins are surprisingly recent. While peanut butter has been around since the late 1800s (popularized at the 1904 St. Louis World’s Fair), the magical pairing with chocolate didn’t become mainstream until 1928 when H.B. Reese, a former dairy farmer and Hershey employee, created the peanut butter cup. This combination quickly became one of America’s most beloved flavor pairings, eventually inspiring countless recipes beyond candy.
Baked oatmeal itself has roots in Pennsylvania Dutch and Amish communities, where practical, wholesome breakfasts that could feed large families were essential. Traditional baked oatmeal was simple—oats, milk, eggs, and perhaps some cinnamon and raisins. It was designed to be economical, filling, and easy to prepare ahead of time, allowing farm families to have a hot breakfast ready after morning chores.
The evolution toward more indulgent flavored baked oatmeals, like this chocolate peanut butter version, reflects modern America’s desire to balance health consciousness with flavor satisfaction. As the wellness movement gained momentum in the 2000s and 2010s, home cooks began experimenting with ways to make nutritious breakfasts more appealing, especially for kids and reluctant healthy eaters. Adding cocoa powder and peanut butter to baked oatmeal was a stroke of genius—it transformed a humble, sometimes boring breakfast into something exciting and crave-worthy while maintaining the nutritional benefits of whole grains and protein.
This recipe also aligns with the fitness community’s love of “proats” (protein oats) and the meal prep culture that emerged in the 2010s. The combination provides sustained energy from complex carbs, protein for muscle recovery and satiety, and healthy fats from peanut butter—making it popular among athletes, busy professionals, and health-conscious families alike. It’s become especially trendy on Pinterest and Instagram, where the photogenic chocolate-studded squares appeal to our eyes as much as our taste buds.
Why You’ll Love This Recipe
This Chocolate Peanut Butter Baked Oatmeal is about to revolutionize your breakfast routine, and here’s why. It delivers that irresistible chocolate-peanut butter flavor we all love while packing in serious nutrition—whole grains, protein, and energy to power your morning. The texture is absolutely incredible, with that slightly firm exterior and soft, almost fudgy interior that makes every bite interesting.
Here’s what makes this recipe absolutely irresistible:
- Tastes like dessert, acts like breakfast: Satisfies your chocolate cravings while providing sustained energy and nutrition. It’s the best of both worlds!
- High in protein: With peanut butter, eggs, and optional protein powder, this keeps you full for hours. No mid-morning energy crashes here.
- Perfect for meal prep: Make it once on Sunday and enjoy grab-and-go breakfasts all week long. Busy mornings just got so much easier.
- Kid-approved: Even picky eaters devour this because it tastes like brownies. Parents everywhere are celebrating!
- Customizable: Easily adapt for dietary needs—vegan, gluten-free, extra protein, less sugar, nut-free options all work beautifully.
- Budget-friendly ingredients: Uses pantry staples and affordable ingredients. No fancy or expensive items required.
- Great pre or post-workout fuel: The perfect balance of carbs, protein, and healthy fats makes this ideal for active lifestyles.
- Freezer-friendly: Make a double batch and freeze portions for those mornings when you need breakfast in 90 seconds.
- One-bowl preparation: Minimal dishes and simple mixing. No complicated techniques or fancy equipment needed.
- Satisfies sweet tooth healthily: When you want something sweet in the morning but don’t want empty calories, this delivers completely.
- Naturally energizing: No refined sugars or artificial ingredients—just real food that makes you feel good.
Ingredient Notes
Understanding your ingredients helps you make the best version of this recipe and adapt it to your preferences. Let’s break down what goes into this chocolate peanut butter masterpiece.
Old-Fashioned Rolled Oats: The foundation of the recipe. These provide fiber, complex carbohydrates, and a hearty texture. Use old-fashioned rolled oats specifically, not quick oats (which turn mushy) or steel-cut oats (which won’t cook through). For gluten-free diets, use certified gluten-free oats.
Cocoa Powder: This is what gives the recipe its rich chocolate flavor. Use unsweetened cocoa powder, not hot chocolate mix. Dutch-processed cocoa creates a deeper, more mellow chocolate flavor, while natural cocoa powder is slightly more acidic and intense. Either works beautifully—choose based on your preference.
Peanut Butter: The star ingredient that creates creaminess, protein, and that iconic flavor. Use creamy peanut butter for smooth texture, though natural chunky peanut butter adds nice texture contrast. Natural peanut butter (just peanuts and salt) works great, as does conventional. Avoid “low-fat” versions as they contain added sugars and won’t provide the same richness.
Milk: Any milk works here—dairy, almond, oat, soy, or coconut. The milk creates moisture and helps bind everything together. Whole milk or full-fat alternatives create the richest result, but any percentage works. Chocolate almond milk takes the chocolate flavor over the top!
Eggs: Essential for structure and protein. They bind everything together and create that firm, sliceable texture. For vegan versions, use flax eggs (1 tablespoon ground flaxseed + 3 tablespoons water per egg, let sit 5 minutes).
Maple Syrup or Honey: Provides natural sweetness that complements the chocolate and peanut butter. Maple syrup is vegan-friendly and adds subtle caramel notes. Honey brings floral sweetness. You can also use agave nectar or even mashed banana for natural sweetness.
Vanilla Extract: Enhances all the other flavors and adds depth. Always use pure vanilla extract—the real stuff makes a noticeable difference.
Baking Powder: Gives the baked oatmeal a slight lift and lighter texture. Don’t skip it—it prevents the dish from being too dense.
Salt: Absolutely essential! Salt enhances the chocolate flavor, balances sweetness, and makes the peanut butter taste more pronounced. Never skip the salt in baking.
Chocolate Chips: Semi-sweet or dark chocolate chips add pockets of melty chocolate throughout. You can use milk chocolate for sweeter results or dark chocolate for a more sophisticated, less sweet version. Mini chocolate chips distribute more evenly, while regular chips create bigger chocolate moments.
Optional Add-Ins: Sliced bananas add natural sweetness and pair beautifully with chocolate-peanut butter. Chopped peanuts or other nuts add crunch. A handful of shredded coconut creates tropical vibes. A swirl of raspberry or strawberry jam adds fruity contrast.
Equipment Needed
This recipe keeps equipment simple—just basic kitchen tools you probably already own:
- 8×8-inch or 9×9-inch baking dish (or a 9×13-inch dish for thinner portions)
- Large mixing bowl for combining ingredients
- Whisk for mixing wet ingredients and incorporating cocoa
- Measuring cups and spoons for accurate measurements
- Rubber spatula or wooden spoon for stirring and folding
- Small microwave-safe bowl (if melting peanut butter for easier mixing)
- Oven mitts for safe handling
- Cooling rack for letting the dish cool before cutting
- Sharp knife for cutting into portions
- Parchment paper (optional, but makes cleanup easier)
Print

Chocolate Peanut Butter Baked Oatmeal
This Chocolate Peanut Butter Baked Oatmeal combines rich cocoa, creamy peanut butter, and hearty oats into a protein-packed breakfast that tastes like a peanut butter cup. Perfect for meal prep, kid-friendly, and satisfying enough to fuel your entire morning.
- Total Time: 45 minutes
- Yield: 6-9 servings 1x
Ingredients
ScaleFor the Baked Oatmeal:
- 2 cups old-fashioned rolled oats (certified gluten-free if needed)
- ⅓ cup unsweetened cocoa powder
- 1 teaspoon baking powder
- ½ teaspoon salt
- ¼ teaspoon cinnamon (optional, but enhances chocolate flavor)
- 2 cups milk (dairy or non-dairy)
- ½ cup creamy peanut butter (natural or conventional)
- ⅓ cup maple syrup or honey
- 2 large eggs
- 2 teaspoons vanilla extract
- ¾ cup chocolate chips (semi-sweet or dark), divided
Optional Toppings & Mix-Ins:
- 1 sliced banana
- ¼ cup chopped peanuts or other nuts
- Extra peanut butter for drizzling
- Extra chocolate chips
Instructions
- Preheat and Prepare: Preheat your oven to 350°F (175°C). Grease an 8×8-inch or 9×9-inch baking dish generously with cooking spray, butter, or coconut oil. Alternatively, line with parchment paper leaving an overhang on two sides for easy removal. Set aside.
- Mix Dry Ingredients: In a large mixing bowl, whisk together the rolled oats, cocoa powder, baking powder, salt, and cinnamon (if using). Make sure the cocoa powder is well distributed with no clumps—this ensures even chocolate flavor throughout.
- Prepare Wet Ingredients: In a separate medium bowl (or in a microwave-safe measuring cup), warm the peanut butter slightly in the microwave for 20-30 seconds to make it pourable. This helps it mix more easily. Add the milk, maple syrup or honey, eggs, and vanilla extract. Whisk vigorously until the peanut butter is fully incorporated and the mixture is smooth with no streaks.
- Combine Everything: Pour the wet ingredients into the dry ingredients and stir until just combined. Don’t overmix—a few small lumps are fine. Fold in ½ cup of the chocolate chips, reserving the remaining ¼ cup for topping.
- Assemble the Pan: Pour the mixture into your prepared baking dish and spread evenly with a spatula. If using banana slices, arrange them on top now. Sprinkle the remaining ¼ cup chocolate chips over the surface. If desired, drizzle with a little extra peanut butter in a zigzag pattern.
- Bake: Place in the preheated oven and bake for 30-35 minutes, or until the center is set and a toothpick inserted comes out mostly clean with just a few moist crumbs (not wet batter). The edges should be pulling slightly away from the sides of the pan, and the top should look set and slightly firm to the touch. Don’t overbake or it will be dry.
- Cool and Serve: Remove from the oven and let cool on a wire rack for at least 10-15 minutes before cutting. This cooling time is crucial—it allows the structure to set so you get clean slices. Cut into 6-9 portions depending on desired serving size. Serve warm with your favorite toppings.
- Store: Cover any leftovers tightly and refrigerate for up to 5 days, or freeze individual portions for up to 3 months.
Notes
- Peanut Butter Consistency: If your peanut butter is very thick or natural (oil-separated), warming it slightly makes mixing much easier and ensures even distribution throughout the oatmeal.
- Sweetness Level: This recipe is moderately sweet. For sweeter results, increase maple syrup to ½ cup. For less sweet, reduce to ¼ cup and let the chocolate chips provide most of the sweetness.
- Texture Preferences: For a fudgier, denser texture, reduce milk to 1¾ cups. For a lighter, cakier texture, use the full 2 cups or even add 2 tablespoons more.
- Make It Vegan: Use non-dairy milk (oat or almond work great), replace eggs with 2 flax eggs (2 tablespoons ground flaxseed + 6 tablespoons water, let sit 5 minutes), use maple syrup instead of honey, and choose vegan chocolate chips.
- Gluten-Free: Simply use certified gluten-free oats. Everything else is naturally gluten-free.
- Protein Boost: Add ¼ cup chocolate or vanilla protein powder to the dry ingredients, or stir in 2 tablespoons of additional peanut butter.
- Nut-Free Version: Replace peanut butter with sunflower seed butter, tahini, or even mashed banana (though the flavor will be different). Use nut-free chocolate chips if needed.
- Extra Chocolate: For serious chocoholics, increase cocoa powder to ½ cup and add an extra handful of chocolate chips.
- Prep Time: 10 minutes
- Cook Time: 35 minutes
- Category: Breakfast, Brunch
- Method: Baking
- Cuisine: American
- Diet: Gluten Free
Nutrition
- Serving Size: 1 piece (⅙ of recipe)
- Calories: 365
- Sugar: 20g
- Sodium: 265mg
- Fat: 15g
- Saturated Fat: 4g
- Unsaturated Fat: 10g
- Trans Fat: 0g
- Carbohydrates: 48g
- Fiber: 6g
- Protein: 12g
- Cholesterol: 55mg
Chocolate Peanut Butter Baked Oatmeal: Healthy Breakfast That Tastes Like Dessert
Introduction of Recipe
Imagine starting your morning with something that tastes like a warm peanut butter cup but is actually packed with wholesome ingredients that fuel your day. That’s exactly what you’ll get with this Chocolate Peanut Butter Baked Oatmeal! This decadent breakfast combines rich cocoa powder, creamy peanut butter, and hearty oats into one irresistible dish that will have everyone asking for seconds.
Perfect for busy weekday mornings when you need grab-and-go breakfast options, leisurely weekend brunches, or even as a post-workout treat, this baked oatmeal delivers on both flavor and nutrition. The combination of chocolate and peanut butter is universally loved, making this recipe a hit with kids and adults alike. It’s the kind of breakfast that makes you actually excited to wake up in the morning, and it’s impressive enough to serve guests yet simple enough to whip up on a regular Tuesday. Whether you’re meal prepping for the week or feeding a hungry family, this Chocolate Peanut Butter Baked Oatmeal is about to become your new breakfast obsession.
History / Background
The marriage of chocolate and peanut butter is one of the most beloved flavor combinations in American culinary history, dating back to when H.B. Reese created the iconic Reese’s Peanut Butter Cup in 1928. This flavor pairing quickly became embedded in American food culture, inspiring countless recipes from cookies to smoothies to breakfast dishes like this one.
Baked oatmeal itself has roots in traditional American and Pennsylvania Dutch cooking, where practical, economical meals were essential for feeding large families. The concept of transforming simple stovetop oatmeal into a baked casserole-style dish emerged as a way to serve many people at once while creating a more interesting texture—crispy edges with a soft, almost pudding-like center.
The addition of chocolate and peanut butter to baked oatmeal is a more modern innovation, reflecting our contemporary desire to make nutritious foods more exciting and indulgent. As health-conscious eating gained popularity in the 2000s and 2010s, home cooks and food bloggers began experimenting with ways to satisfy sweet cravings while incorporating whole grains, protein, and other beneficial ingredients. The result? Recipes like this one that feel like dessert but provide sustained energy and nutrition.
This particular combination also taps into the nostalgia many of us feel for childhood favorites—those chocolate peanut butter treats from lunchboxes and after-school snacks—while delivering the nutritional profile adults need. It’s comfort food reimagined for the modern breakfast table, proving that healthy eating doesn’t have to mean sacrificing flavor. Today, chocolate peanut butter baked oatmeal has become a staple in meal prep routines, fitness circles, and family kitchens across America, beloved for making breakfast feel like a treat while delivering genuine nutritional benefits.
Why You’ll Love This Recipe
This Chocolate Peanut Butter Baked Oatmeal is about to revolutionize your breakfast routine, and here’s why. It tastes absolutely indulgent—seriously, it’s like eating a peanut butter brownie for breakfast—but it’s actually made with wholesome ingredients that give you lasting energy. The rich chocolate flavor combined with creamy peanut butter creates a taste sensation that satisfies cravings while keeping you full until lunch.
Here’s why this recipe is an absolute game-changer:
- Tastes like dessert, fuels like breakfast: Get your chocolate fix first thing in the morning guilt-free! This satisfies sweet cravings while providing protein, fiber, and complex carbohydrates.
- Meal prep superhero: Make it once on Sunday and enjoy delicious breakfasts all week long. Perfect for those rushed mornings when you barely have time to pour coffee.
- Kid-approved nutrition: Even the pickiest eaters will devour this because it tastes like a treat. Parents love sneaking in those whole grains and protein without any complaints.
- Protein-packed: With peanut butter, eggs, and milk, this breakfast keeps you satisfied for hours. No mid-morning energy crashes here!
- Budget-friendly: Uses pantry staples you probably already have. No expensive or exotic ingredients required.
- Incredibly versatile: Easily customizable for various dietary needs—make it vegan, gluten-free, dairy-free, or add protein powder for an extra boost.
- One-dish simplicity: Everything bakes together in one pan, which means minimal cleanup. More time enjoying, less time scrubbing!
- Great for entertaining: Impressive enough for brunch guests but easy enough that you won’t stress. Your friends will think you spent hours on it.
- Freezer-friendly champion: Double the batch and freeze individual portions for those mornings when you need breakfast in 60 seconds.
- Post-workout perfect: The combination of carbs and protein makes this ideal for refueling after exercise.
- Satisfies chocolate cravings: Start your day with chocolate and feel good about it. It’s the breakfast version of having your cake and eating it too!
Ingredient Notes
Understanding your ingredients helps you make smart substitutions and achieve the best results. Let’s break down what makes this Chocolate Peanut Butter Baked Oatmeal so delicious and satisfying.
Old-Fashioned Rolled Oats: The foundation of this recipe. Use old-fashioned rolled oats specifically—not quick oats (which turn mushy) or steel-cut oats (which won’t cook through). Rolled oats provide the perfect texture and are packed with fiber that keeps you full. For gluten-free needs, use certified gluten-free oats.
Cocoa Powder: This gives you that rich chocolate flavor without added sugar or fat. Use unsweetened cocoa powder, either natural or Dutch-processed. Natural cocoa powder provides a more intense, slightly acidic chocolate flavor, while Dutch-processed is smoother and milder. Both work beautifully—use what you have!
Peanut Butter: The star ingredient that makes this recipe truly special. Use creamy or crunchy peanut butter—your choice! Natural peanut butter (just peanuts and salt) works great, as does conventional peanut butter. Avoid reduced-fat versions as they often contain extra sugar and lack the richness needed here. For allergies, substitute with almond butter, cashew butter, or sunflower seed butter.
Milk: Any milk works—dairy, almond, oat, soy, or coconut milk all produce great results. Whole milk or full-fat alternatives create the richest texture, but lower-fat options work perfectly too. The milk creates that creamy, custard-like consistency.
Eggs: Essential for binding everything together and creating structure. They transform loose oatmeal into a sliceable baked dish and add protein. For vegan versions, use flax eggs (1 tablespoon ground flaxseed + 3 tablespoons water per egg, let sit 5 minutes).
Maple Syrup or Honey: Provides natural sweetness that complements the chocolate without being overwhelming. Pure maple syrup adds depth with subtle caramel notes, while honey brings floral sweetness. You can also use agave nectar, coconut sugar, or brown sugar.
Chocolate Chips: These melty pockets of chocolate throughout make every bite special. Use semi-sweet, dark, or milk chocolate chips based on your preference. Mini chocolate chips distribute more evenly. For healthier options, use dark chocolate chips with 70% cacao or sugar-free chocolate chips.
Vanilla Extract: Enhances all the other flavors and adds warmth. Always use pure vanilla extract rather than imitation for the best flavor.
Baking Powder: This is crucial—it gives the baked oatmeal lift and a lighter, more cake-like texture. Don’t skip it!
Salt: Essential for balancing sweetness and making all the flavors pop. Even chocolate dishes need salt to taste their best.
Optional Add-ins: Chopped bananas add natural sweetness and moisture. Chopped nuts like walnuts or pecans add crunch and healthy fats. A swirl of extra peanut butter on top creates beautiful marbling and extra peanut butter flavor. Protein powder can be added for an extra boost.
Equipment Needed
You don’t need any fancy kitchen gadgets for this recipe—just basic tools you probably already own. Here’s what you’ll need to make this delicious breakfast:
- 8×8-inch or 9×9-inch baking dish (or a 9×13-inch dish for thinner portions that serve more people)
- Large mixing bowl for wet ingredients
- Medium mixing bowl for dry ingredients
- Whisk for combining ingredients smoothly
- Measuring cups and spoons for accurate measurements
- Rubber spatula or wooden spoon for stirring and spreading
- Small microwave-safe bowl (if melting peanut butter)
- Oven mitts for safe handling of hot dishes
- Cooling rack to let the oatmeal set properly after baking
- Knife or offset spatula for cutting and serving portions
🍫 Recipe Card
Prep Time: 10 minutes
Cook Time: 35 minutes
Total Time: 45 minutes
Yield: 6-8 servings
Category: Breakfast, Brunch
Method: Baking
Cuisine: American
Diet: Can be made Vegetarian, Vegan, Gluten-Free, Dairy-FreeDescription
This Chocolate Peanut Butter Baked Oatmeal combines rich cocoa, creamy peanut butter, and wholesome oats into a decadent breakfast that tastes like dessert. Perfect for meal prep, family breakfasts, or post-workout fuel, this naturally sweetened dish delivers comfort, nutrition, and incredible flavor in every bite.
Ingredients
For the Oatmeal Base:
- 2 cups old-fashioned rolled oats (certified gluten-free if needed)
- ⅓ cup unsweetened cocoa powder
- 1 teaspoon baking powder
- ½ teaspoon salt
- ½ teaspoon ground cinnamon (optional, but adds warmth)
- 2 cups milk (dairy or non-dairy)
- ½ cup creamy or crunchy peanut butter, slightly melted
- ⅓ cup pure maple syrup or honey
- 2 large eggs
- 2 teaspoons vanilla extract
- ½ cup chocolate chips (semi-sweet, dark, or milk chocolate)
Optional Add-ins and Toppings:
- 1 ripe banana, sliced
- ¼ cup chopped walnuts or pecans
- 2 tablespoons extra peanut butter for swirling on top
- Extra chocolate chips for topping
- Flaky sea salt for sprinkling
Instructions
- Preheat and Prepare: Preheat your oven to 375°F (190°C). Grease an 8×8-inch or 9×9-inch baking dish generously with butter, coconut oil, or cooking spray. You can also line it with parchment paper for easy removal and cleanup. Set aside.
- Mix the Dry Ingredients: In a medium mixing bowl, whisk together the rolled oats, cocoa powder, baking powder, salt, and cinnamon (if using). Make sure the cocoa powder is fully incorporated with no lumps—this ensures even chocolate flavor throughout. Set aside.
- Prepare the Peanut Butter: If your peanut butter is thick or cold, microwave it for 15-20 seconds until it’s pourable but not hot. This makes it easier to incorporate into the wet ingredients. Natural peanut butter separates, so stir it well before measuring.
- Combine the Wet Ingredients: In a large mixing bowl, whisk together the milk, melted peanut butter, maple syrup (or honey), eggs, and vanilla extract. Whisk vigorously until the peanut butter is completely emulsified and the mixture is smooth with no streaks. This should take about 30-45 seconds of whisking.
- Combine Wet and Dry: Pour the dry oat mixture into the wet ingredients. Gently fold everything together with a spatula until just combined. Don’t overmix—it’s okay if there are a few small lumps. Fold in about ¾ of the chocolate chips, reserving the rest for topping.
- Assemble the Dish: Pour the oatmeal mixture into your prepared baking dish and spread it evenly with a spatula. If using sliced bananas, press them gently into the top. Sprinkle the remaining chocolate chips over the surface. For an extra peanut butter swirl, dollop spoonfuls of peanut butter on top and use a knife to swirl it decoratively through the surface.
- Bake: Place the baking dish in the preheated oven and bake for 30-35 minutes, or until the edges are set and slightly pulling away from the sides, and the center is just barely jiggly when you gently shake the pan. A toothpick inserted into the center should come out with just a few moist crumbs. Don’t overbake—the oatmeal continues to set as it cools.
- Cool and Serve: Remove from the oven and let cool on a wire rack for 10-15 minutes. This resting time is crucial—it allows the structure to set so you can cut clean slices. Serve warm with your favorite toppings like a drizzle of peanut butter, extra chocolate chips, sliced bananas, or a splash of milk.
Notes
- Peanut Butter Consistency: If using natural peanut butter, make sure it’s well-stirred before measuring. The oil separation is normal—just stir it back in. Slightly warming the peanut butter helps it incorporate smoothly into the batter.
- Chocolate Intensity: For a more intense chocolate flavor, increase the cocoa powder to ½ cup. For a milder chocolate taste, reduce it to ¼ cup. You can also add espresso powder (1 teaspoon) to deepen the chocolate flavor.
- Sweetness Level: This recipe is moderately sweet. If you prefer sweeter oatmeal, increase the maple syrup to ½ cup, or add 2 tablespoons of brown sugar to the dry ingredients.
- Texture Preference: For a creamier, more pudding-like texture, use 2¼ cups of milk. For a firmer, more cake-like texture that slices cleanly, stick with 2 cups.
- Make It Vegan: Use non-dairy milk (almond, oat, or soy work great), replace eggs with flax eggs (2 tablespoons ground flaxseed + 6 tablespoons water, let sit 5 minutes), ensure chocolate chips are vegan, and use maple syrup instead of honey.
- Gluten-Free: Simply use certified gluten-free oats. Regular oats are often cross-contaminated with wheat during processing.
- Protein Boost: Add ¼ cup of chocolate or vanilla protein powder to the dry ingredients, or stir in 2 extra tablespoons of peanut butter. Greek yogurt can also be added (reduce milk by ¼ cup).
- Storage Tip: This tastes even better the next day after the flavors have melded together. The chocolate flavor becomes more pronounced and the texture sets beautifully.
Nutrition Facts Table
Serving Size: 1 slice (⅙ of recipe)
Calories: 365
Sugar: 20g
Sodium: 265mg
Fat: 15g
Saturated Fat: 4g
Unsaturated Fat: 10g
Trans Fat: 0g
Carbohydrates: 48g
Fiber: 6g
Protein: 12g
Cholesterol: 55mgNote: Nutrition information is approximate and will vary based on specific ingredients used, brands chosen, and portion sizes. Calculations include chocolate chips and use 2% milk.
Tips & Variations
One of the best things about this recipe is how easily you can customize it to match your preferences, dietary needs, or whatever ingredients you have in your pantry. Here are some delicious ways to make this recipe your own:
Flavor Variations:
- Double Chocolate: Add ½ cup of dark chocolate chunks in addition to the chocolate chips for ultra-decadent chocolate lovers.
- Chocolate Almond: Replace peanut butter with almond butter and add ½ teaspoon of almond extract. Top with sliced almonds.
- Chocolate Coconut: Use coconut milk, add ½ cup shredded coconut to the batter, and top with coconut flakes before baking.
- Mocha: Add 1-2 teaspoons of instant espresso powder to the dry ingredients for a coffee-chocolate flavor.
- Chocolate Banana: Mash 1 ripe banana into the wet ingredients and top with sliced bananas before baking.
- Chocolate Cherry: Add ½ cup of dried cherries or fresh pitted cherries for a Black Forest vibe.
Dietary Adaptations:
- Lower Sugar: Reduce maple syrup to 3 tablespoons and use sugar-free chocolate chips. The peanut butter provides natural sweetness too.
- Higher Protein: Add ¼ cup vanilla or chocolate protein powder to the dry ingredients, or serve topped with Greek yogurt.
- Nut-Free: Replace peanut butter with sunflower seed butter or tahini. Use seed-based chocolate chips or omit them.
- Oil-Free: The peanut butter provides enough fat, so you don’t need additional oil. Just make sure to grease your pan well.
- Keto-Friendly: This recipe doesn’t adapt well to keto, but you could experiment with keto-approved sweeteners and reduce the oats (though it will change the texture significantly).
Add-In Ideas:
- Chopped peanut butter cups (because why not?)
- White chocolate chips for contrast
- A swirl of raspberry or strawberry jam
- Crushed pretzels for sweet and salty contrast
- Peanut butter powder mixed into the batter for extra PB flavor
- Chia seeds or ground flaxseed for extra fiber and omega-3s
- Sliced strawberries (chocolate-covered strawberry vibes!)
- A handful of granola on top before baking for extra crunch
Pro Chef Tips
Want to take your Chocolate Peanut Butter Baked Oatmeal from delicious to absolutely phenomenal? Here are professional secrets that make all the difference:
Bloom Your Cocoa Powder: Before mixing everything, whisk the cocoa powder with ¼ cup of hot water or hot milk to create a paste. This “blooms” the cocoa, intensifying the chocolate flavor dramatically. Let it cool slightly before adding to the wet ingredients. This single step makes the chocolate taste so much richer and more complex.
Room Temperature Ingredients: Let your eggs and milk come to room temperature before mixing. This helps everything combine more smoothly and bake more evenly. Cold ingredients can cause the peanut butter to seize up into clumps instead of blending smoothly.
Don’t Skimp on Mixing the Peanut Butter: Really whisk that peanut butter into the wet ingredients until it’s completely smooth and emulsified. If you don’t mix it well enough, you’ll end up with peanut butter clumps instead of that even, rich peanut butter flavor throughout.
Use Quality Cocoa Powder: Not all cocoa powder is created equal. Dutch-processed cocoa (like Droste or Valrhona) provides a smoother, less acidic chocolate flavor. Natural cocoa (like Hershey’s) is more intense and slightly fruity. Either works, but quality matters—cheap cocoa can taste chalky.
The Toothpick Test Is Your Friend: Start checking for doneness at 30 minutes. Insert a toothpick into the center—it should come out with a few moist crumbs, not wet batter. Remember, it continues cooking from residual heat after you remove it from the oven. Slightly underdone is better than overbaked and dry.
Create Layers of Peanut Butter: Instead of just mixing peanut butter into the batter, also swirl some on top before baking. This creates beautiful marbling and gives you intense pockets of peanut butter flavor. Use a butter knife to make figure-eight patterns through the dollops.
Let It Rest—Seriously: I know it’s tempting to dive right in, but letting it cool for 10-15 minutes makes a huge difference. The structure sets, the flavors meld, and you’ll get clean, beautiful slices instead of a mushy scoop.
Reheat with Care: When reheating portions, add a tablespoon of milk before microwaving. This restores moisture and keeps the texture creamy rather than dry. Heat at 50% power for even warming that won’t create hot spots.
Common Mistakes to Avoid
Even simple recipes can go wrong with small missteps. Here are the most common mistakes people make with this baked oatmeal and how to avoid them:
Using the Wrong Type of Oats: This is the number one mistake! Quick oats turn into mush, losing all texture and becoming gummy. Steel-cut oats stay too hard and won’t cook through in the baking time. You absolutely must use old-fashioned rolled oats for the perfect texture that’s tender but still has pleasant chew.
Not Properly Incorporating the Peanut Butter: If your peanut butter is cold or you don’t whisk it well enough, it will form clumps instead of distributing evenly. Always slightly warm your peanut butter so it’s pourable, then whisk vigorously into the wet ingredients until completely smooth and no streaks remain.
Overmixing the Batter: Once you add the dry ingredients to the wet, stir just until combined. Overmixing develops gluten in the oats and creates a tough, dense texture instead of tender and fluffy. A few small lumps are perfectly fine—they’ll disappear during baking.
Skipping the Resting Time: I know it smells amazing and you want to eat it immediately, but cutting into it right out of the oven results in a messy, falling-apart disaster. The 10-15 minute rest allows the structure to set properly so you get beautiful, clean slices.
Overbaking: The center should still jiggle very slightly when you remove it from the oven. It will continue to cook and set from residual heat. Overbaking creates a dry, crumbly texture instead of that perfect moist, fudgy interior. Start checking at 30 minutes, and remember that every oven is different.
Not Greasing the Pan Well Enough: There’s nothing worse than beautiful baked oatmeal that sticks stubbornly to the pan. Use plenty of butter, oil, or cooking spray, paying special attention to the corners. Parchment paper is your insurance policy for perfect release every time.
Using Low-Quality or Old Cocoa Powder: Cocoa powder loses potency over time and cheap cocoa can taste bitter or chalky. Use fresh, quality cocoa powder for the best chocolate flavor. If your cocoa has been sitting in the pantry for years, it’s time for a fresh container.
Storage & Meal Prep
This Chocolate Peanut Butter Baked Oatmeal is a meal prep champion, and proper storage keeps it tasting fresh and delicious all week long.
Refrigerator Storage: Let the baked oatmeal cool completely to room temperature—this prevents condensation that can make it soggy. Cover the baking dish tightly with plastic wrap or aluminum foil, or cut it into individual portions and store in airtight containers. It will keep beautifully in the refrigerator for 5-6 days. The chocolate flavor actually deepens and improves after a day or two!
Individual Portion Strategy: For ultimate meal prep convenience, cut the cooled oatmeal into 6-8 portions and store each in its own container. This makes grab-and-go mornings effortless. You can even portion them into mason jars for an Instagram-worthy breakfast!
How to Reheat for Best Results: For individual portions, place in a microwave-safe bowl or plate, add a splash of milk (about 1-2 tablespoons), and microwave for 60-90 seconds until heated through. The milk restores moisture and creaminess. For larger portions, reheat in a 350°F oven for 10-15 minutes, covered with foil to prevent drying out. You can also enjoy it cold straight from the fridge—it’s delicious that way too, almost like a brownie!
Meal Prep Game Plan: Make this on Sunday evening or Monday morning, and you’ve got breakfast sorted for the entire work week. Pair it with different toppings each day (Greek yogurt Monday, sliced bananas Tuesday, extra peanut butter drizzle Wednesday, etc.) to keep things interesting.
Taking It On the Go: This travels beautifully! Pack individual portions in microwave-safe containers with a small container of milk on the side. It stays fresh at room temperature for 2-3 hours, making it perfect for taking to work or school. If you have access to a microwave, you can reheat it for a warm breakfast. If not, it’s equally delicious enjoyed cold.
Make-Ahead & Freezer Notes
This recipe is incredibly freezer-friendly, making it perfect for batch cooking and long-term meal prep.
Make-Ahead Option 1 (Unbaked): Assemble the entire recipe in your baking dish, cover tightly with plastic wrap and then aluminum foil, and refrigerate overnight. In the morning, let it sit at room temperature while the oven preheats (about 15 minutes), then bake as directed. You may need to add 5-10 extra minutes to the baking time since you’re starting with a cold dish. This is perfect for holiday mornings or when you’re hosting brunch guests.
Make-Ahead Option 2 (Baked): Bake completely, let cool, then cover and refrigerate for up to 2 days before serving. Reheat individual portions or the whole dish as needed. The flavors actually meld and improve, making day-two oatmeal taste even better.
Freezing the Whole Dish: Bake completely and let cool to room temperature. Wrap the entire dish tightly in plastic wrap, then wrap again in heavy-duty aluminum foil or place in a large freezer bag. Label with the date and contents. Freeze for up to 3 months. To serve, thaw overnight in the refrigerator, then reheat covered at 350°F for 20-25 minutes until warmed through.
Freezing Individual Portions (BEST METHOD FOR BUSY PEOPLE): This is my favorite method! Cut the completely cooled baked oatmeal into individual servings. Wrap each portion in plastic wrap, then place all wrapped portions in a large freezer bag or container. Label and date. Freeze for up to 3 months. This method is perfect because you can grab exactly the number of portions you need without thawing the entire batch.
Reheating from Frozen: For frozen individual portions, unwrap and place on a microwave-safe plate. Microwave on 50% power for 2-3 minutes, checking and flipping halfway through. Add a splash of milk before reheating for best texture. You can also thaw overnight in the refrigerator, then reheat as you would fresh leftovers. For a whole frozen dish, always thaw in the refrigerator overnight first—don’t try to bake from frozen.
Flash Freezing for Easy Storage: For the cleanest freezer storage, place cut portions on a parchment-lined baking sheet and freeze until solid (about 2 hours), then transfer to freezer bags. This prevents them from sticking together, so you can grab individual portions without having to thaw the whole batch.
Serving Suggestions
While this Chocolate Peanut Butter Baked Oatmeal is absolutely delicious on its own, the right toppings and accompaniments can take it from wonderful to absolutely incredible. Here are my favorite ways to serve it:
Classic Toppings:
- A generous drizzle of warm peanut butter or almond butter
- A splash of cold milk poured over the top
- Fresh sliced bananas (the classic PB pairing!)
- A dollop of Greek yogurt or vanilla yogurt for protein and creaminess
- Extra chocolate chips because you can never have too much chocolate
- A sprinkle of flaky sea salt for sweet-and-salty perfection
Indulgent Additions:
- Whipped cream or coconut whipped cream for special occasions
- A scoop of vanilla ice cream (breakfast sundae, anyone?)
- Nutella or chocolate hazelnut spread drizzled on top
- Chocolate syrup or hot fudge sauce for ultimate decadence
- Peanut butter cups, chopped
- Crushed pretzels for crunch and saltiness
Healthy Boosts:
- Fresh berries like strawberries, raspberries, or blueberries
- Sliced strawberries for a chocolate-covered strawberry vibe
- A spoonful of chia seeds or hemp hearts
- Chopped nuts like almonds, walnuts, or pecans
- A drizzle of almond butter for extra protein
- A dollop of cottage cheese mixed with a little honey (trust me on this!)
Complete Breakfast Spread: Serve your Chocolate Peanut Butter Baked Oatmeal alongside:
- Scrambled eggs or a vegetable omelet for extra protein
- Turkey sausage or crispy bacon
- Fresh fruit salad with melon and berries
- Coffee, hot chocolate, or protein smoothies
- Orange juice or green juice
Brunch Menu Ideas: When entertaining, pair with:
- Veggie frittata or quiche
- Avocado toast with everything bagel seasoning
- Yogurt parfait bar with various toppings
- Fresh pastries or muffins
- Mimosas, Bloody Marys, or sparkling cider
- Fresh-squeezed juice station
Post-Workout Fuel: For post-exercise recovery, serve with:
- Protein shake or chocolate milk
- Sliced banana and a spoonful of peanut butter
- Greek yogurt for extra protein
- A handful of almonds or walnuts
FAQs Section
Can I make this without peanut butter?
Absolutely! While peanut butter is what makes this recipe special, you can substitute it with any nut or seed butter. Almond butter, cashew butter, and sunflower seed butter all work beautifully and create delicious variations. Keep the measurement the same (½ cup). If you have a tree nut allergy, sunflower seed butter is your best bet—it’s nut-free and has a similar consistency. The flavor will be slightly different but still delicious. Tahini also works in a pinch, though it has a more distinct savory flavor.
Can I use steel-cut oats or quick oats instead of rolled oats?
No, I really don’t recommend it. Steel-cut oats are too coarse and won’t cook through properly in the baking time—you’ll end up with crunchy, hard oats that are unpleasant to eat. Quick oats are too fine and will turn into a mushy, gummy texture with no structure. Old-fashioned rolled oats are the perfect middle ground, providing the right texture and cooking time. They’re what makes this recipe work properly. If you only have quick oats, you could try reducing the milk by ¼ cup, but I can’t guarantee good results.
How do I know when the baked oatmeal is done?
The baked oatmeal is done when the edges are set and slightly pulling away from the sides of the pan, the top looks dry rather than wet, and the center jiggles only very slightly when you gently shake the pan. A toothpick or knife inserted into the center should come out with a few moist crumbs (not wet batter, but not completely clean either). Remember, it will continue to set as it cools, so slightly underdone is better than overbaked and dry. Start checking at 30 minutes, but most ovens will need the full 35 minutes.
Can I make this recipe vegan?
Yes! This recipe adapts beautifully to vegan diets with just a few simple swaps. Replace the eggs with flax eggs: mix 2 tablespoons of ground flaxseed with 6 tablespoons of water and let sit for 5 minutes until gel-like. Use any non-dairy milk (almond, oat, soy, or coconut all work great). Make sure your chocolate chips are dairy-free (most dark chocolate chips are naturally vegan). Use maple syrup instead of honey. The texture will be very similar to the original—you won’t miss the eggs at all!
Why is my baked oatmeal too dry or too mushy?
If your baked oatmeal is too dry, you may have used too little liquid, overbaked it, or your oven runs hot. Try adding an extra ¼ cup of milk next time and check for doneness 5 minutes earlier. Make sure you’re not skipping the resting time—it needs those 10-15 minutes for moisture to redistribute. If it’s too mushy or wet, you may have used too much liquid, underbaked it, or accidentally used quick oats instead of rolled oats. Make sure you’re measuring ingredients accurately and baking until the center is just barely set.