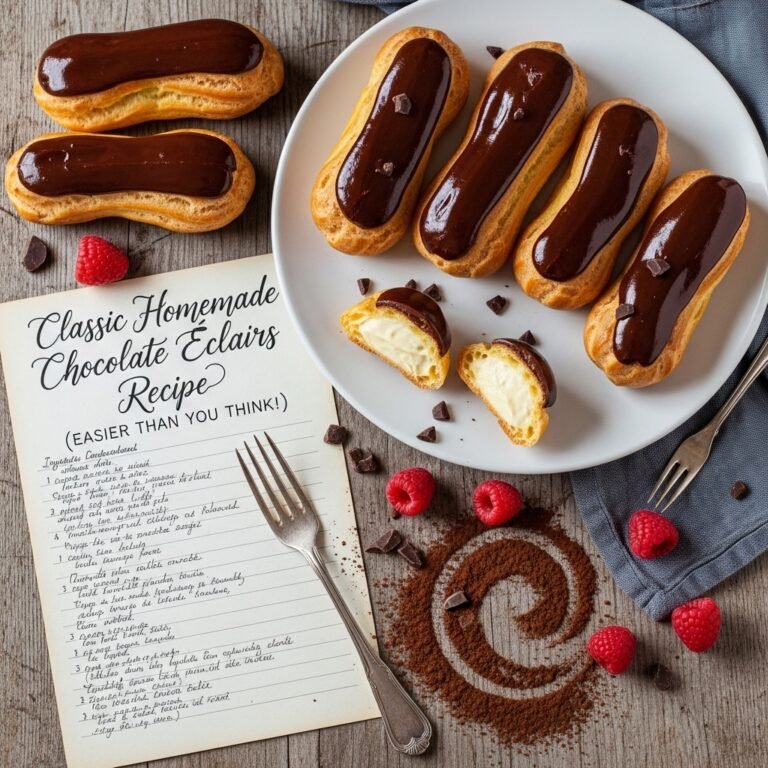
Classic Homemade Chocolate Éclairs Recipe (Easier Than You Think!)

Chocolate éclairs are the crown jewel of French pastry—delicate choux pastry shells filled with rich vanilla cream and topped with glossy chocolate ganache. These elegant treats might look intimidating, but I’m here to tell you that making éclairs at home is absolutely achievable, even if you’ve never attempted French pastry before!
Perfect for special occasions, afternoon tea parties, or whenever you want to impress your family and friends, these éclairs deliver that wow factor every single time. The combination of crispy pastry, silky custard filling, and decadent chocolate coating creates a symphony of textures and flavors that’ll transport you straight to a Parisian patisserie. Whether you’re celebrating a birthday, hosting a brunch, or simply treating yourself to something special, homemade chocolate éclairs are always the right choice.
History / Background
The éclair has a fascinating history that dates back to 19th century France. The word “éclair” literally means “lightning” in French, and there are two charming theories about how this pastry got its name. Some say it’s because the glossy chocolate topping glistens like a flash of lightning, while others believe it’s because these treats are so delicious they disappear as quickly as a lightning bolt!
The éclair was first documented around 1850, with the famous French chef Marie-Antoine Carême often credited with developing the choux pastry technique that makes éclairs possible. During France’s Second Empire (1852-1870), éclairs became wildly popular in Parisian bakeries and quickly spread throughout Europe and eventually to America.
Originally, éclairs were filled with various creams and topped with different glazes—coffee, caramel, and fruit flavors were all common. However, the chocolate éclair with vanilla pastry cream filling has become the most beloved classic worldwide. In France, you’ll still find creative variations in patisseries, but the traditional chocolate version remains the gold standard that every pastry chef masters.
Today, éclairs represent the pinnacle of French pastry artistry, and making them at home connects you to centuries of baking tradition. While they were once only available in fancy bakeries, home bakers everywhere have discovered that with the right technique and a little patience, these stunning pastries are absolutely within reach.
Why You’ll Love This Recipe
This chocolate éclair recipe breaks down every step into manageable parts, making French pastry approachable for home bakers of all skill levels. I’ve tested this recipe countless times to ensure it works perfectly in a standard home kitchen without any fancy equipment or hard-to-find ingredients.
Here’s what makes this recipe special:
- Surprisingly simple – The technique is straightforward once you understand the basics of choux pastry
- Make-ahead friendly – You can prep components in advance and assemble when ready
- Impressive presentation – These look like they came from an expensive bakery
- Customizable – Easy to adjust sweetness levels or add your own flavor twists
- Satisfying textures – Crispy shell + creamy filling + smooth chocolate = perfection
- Budget-friendly luxury – Costs a fraction of bakery éclairs
- Great for entertaining – Makes 12-14 éclairs, perfect for gatherings
- Teaching moment – Master choux pastry and you can make cream puffs, profiteroles, and more
Ingredient Notes
For the Choux Pastry:
- All-purpose flour – Provides structure. Bread flour can work but creates a slightly chewier texture.
- Butter – Unsalted is best so you control the salt level. Must be cut into small pieces for even melting.
- Eggs – Room temperature eggs incorporate more smoothly. You’ll need 4 large eggs.
- Water – Some recipes use milk, but water creates a crisper shell.
- Salt – Just a pinch enhances flavor without making the pastry salty.
For the Pastry Cream:
- Whole milk – Full-fat milk creates the richest, creamiest filling. Low-fat works but won’t be as luxurious.
- Egg yolks – The key to silky custard. Don’t skip tempering them or you’ll get scrambled eggs.
- Vanilla extract – Pure vanilla is worth it here. Vanilla bean paste adds beautiful specks.
- Cornstarch – Thickens the cream. Can substitute with flour but cornstarch gives a smoother texture.
- Sugar – Granulated white sugar works perfectly.
- Butter – Added at the end for richness and glossy finish.
For the Chocolate Topping:
- Semi-sweet chocolate – Balances sweetness perfectly. Dark chocolate (60-70%) works for less sweet version.
- Heavy cream – Creates smooth, pourable ganache.
- Corn syrup – Optional but adds beautiful shine to the chocolate.
Equipment Needed
- Large saucepan (for choux pastry)
- Medium saucepan (for pastry cream)
- Mixing bowls (various sizes)
- Whisk (both balloon and flat whisks helpful)
- Wooden spoon or sturdy spatula
- Piping bags (16-inch works well)
- Large round piping tip (about ½ inch opening)
- Small round piping tip (for filling)
- Baking sheets (2 sheets recommended)
- Parchment paper or silicone baking mats
- Wire cooling rack
- Fine-mesh strainer
- Measuring cups and spoons
- Kitchen thermometer (optional but helpful)
- Plastic wrap
- Sharp knife or kitchen scissors
Print

Classic Homemade Chocolate Éclairs Recipe (Easier Than You Think!)
These classic homemade chocolate éclairs feature crispy choux pastry shells filled with silky vanilla pastry cream and topped with glossy chocolate ganache. This detailed recipe guides you through each step to create bakery-quality French pastries in your own kitchen.
- Total Time: 2 hours
- Yield: 3 hours 25 minutes 1x
Ingredients
ScaleChoux Pastry:
- 1 cup (240ml) water
- ½ cup (115g) unsalted butter, cut into pieces
- ¼ teaspoon salt
- 1 cup (125g) all-purpose flour
- 4 large eggs, room temperature
Vanilla Pastry Cream:
- 2 cups (480ml) whole milk
- ½ cup (100g) granulated sugar, divided
- 5 large egg yolks
- ¼ cup (30g) cornstarch
- 2 tablespoons (28g) unsalted butter
- 2 teaspoons pure vanilla extract
Chocolate Ganache:
- 6 ounces (170g) semi-sweet chocolate, finely chopped
- ½ cup (120ml) heavy cream
- 1 tablespoon light corn syrup (optional, for shine)
Instructions
Make the Pastry Cream (Do This First):
- In a medium saucepan, heat milk over medium heat until it just begins to steam (don’t boil). Remove from heat.
- In a mixing bowl, whisk together egg yolks and ¼ cup sugar until pale and thick, about 2 minutes.
- Whisk cornstarch into the egg mixture until smooth and no lumps remain.
- Slowly pour about ½ cup of hot milk into the egg mixture while whisking constantly (this is tempering). Then gradually whisk in the remaining hot milk.
- Pour the entire mixture back into the saucepan. Cook over medium heat, whisking constantly, until it thickens and bubbles, about 3-5 minutes.
- Remove from heat and whisk in butter, vanilla, and remaining ¼ cup sugar until smooth.
- Pour through a fine-mesh strainer into a clean bowl to remove any lumps. Press plastic wrap directly onto the surface to prevent skin from forming. Refrigerate for at least 2 hours until completely cold.
Make the Choux Pastry:
- Preheat your oven to 425°F (220°C). Line two baking sheets with parchment paper.
- In a large saucepan, combine water, butter, and salt. Bring to a rolling boil over medium-high heat, ensuring butter is completely melted.
- Remove from heat and immediately dump in all the flour at once. Stir vigorously with a wooden spoon until a smooth ball forms and pulls away from the sides of the pan.
- Return pan to low heat and cook for 1-2 minutes, stirring constantly, to dry out the dough slightly. You’ll see a thin film form on the bottom of the pan.
- Transfer dough to a mixing bowl and let cool for 5 minutes (it should still be warm, not hot).
- Add eggs one at a time, beating well after each addition. The dough will look broken at first but will come together. After the final egg, the dough should be smooth, glossy, and hold a V-shape when you lift the spoon.
- Transfer dough to a piping bag fitted with a large round tip. Pipe 4-inch long strips onto prepared baking sheets, spacing them 2 inches apart. You should get 12-14 éclairs.
- Use a damp finger to gently smooth any peaks on top (they’ll burn otherwise).
- Bake at 425°F for 15 minutes, then reduce heat to 375°F (190°C) and bake for another 20-25 minutes until deep golden brown and hollow-sounding when tapped. DO NOT open the oven door during baking or they’ll collapse.
- Remove from oven and immediately poke a small hole in each end of each éclair with a skewer to release steam. Let cool completely on a wire rack.
Make the Chocolate Ganache:
- Place chopped chocolate in a heatproof bowl. Heat cream in a small saucepan until it just begins to simmer.
- Pour hot cream over chocolate and let sit for 1 minute, then whisk until smooth and glossy. Stir in corn syrup if using. Let cool for 10 minutes until slightly thickened but still pourable.
Assemble the Éclairs:
- Once éclairs are completely cool, use a small round piping tip to poke a hole in both ends of each éclair (on the bottom).
- Beat the cold pastry cream with a whisk until smooth. Transfer to a piping bag fitted with a small round tip.
- Fill each éclair through one hole, stopping when cream starts coming out the other end. Wipe off excess.
- Dip the top of each filled éclair into the chocolate ganache, letting excess drip off. Place on a wire rack and let chocolate set for 15-20 minutes.
- Serve immediately or refrigerate for up to 4 hours before serving.
Notes
Notes
- Moisture is the enemy: Make sure éclairs are completely baked through and fully cooled before filling, or they’ll get soggy.
- Don’t rush the pastry cream: It must be completely cold before piping into éclairs.
- Ganache too thick? Gently reheat it for a few seconds and stir until it’s dipping consistency again.
- Best enjoyed fresh: Éclairs are best the day they’re assembled, though components can be made ahead.
- Piping tip alternatives: If you don’t have piping tips, cut the corner off a sturdy plastic bag for piping.
- Prep Time: 45 minutes
- Cook Time: 40 minutes
- Category: 12-14 éclairs
- Method: Dessert
- Cuisine: French
- Diet: Vegetarian
Nutrition
- Serving Size: 1 éclair
- Calories: 285
- Sugar: 18g
- Sodium: 95gm
- Fat: 17g
- Saturated Fat: 10g
- Unsaturated Fat: 6g
- Trans Fat: 0g
- Carbohydrates: 28g
- Fiber: 1g
- Protein: 6g
- Cholesterol: 165mg
Tips & Variations
Flavor Variations:
- Coffee Éclairs: Add 1 tablespoon instant espresso powder to the pastry cream and use coffee-flavored ganache
- Caramel Éclairs: Top with salted caramel instead of chocolate ganache
- Strawberry Éclairs: Fold fresh strawberry puree into pastry cream and use white chocolate topping
- Pistachio Éclairs: Add pistachio paste to pastry cream and sprinkle chopped pistachios on chocolate
Dietary Modifications:
- For lighter filling: Use half pastry cream and half whipped cream
- For less sweet version: Use dark chocolate (70% cacao) for the topping
- For dairy-free: Substitute coconut milk and dairy-free chocolate (results will vary)
Size Variations:
- Make mini éclairs (2 inches) for bite-sized party treats—baking time reduces to 20-25 minutes total
- Make extra-large éclairs (6 inches) for dramatic presentation
Pro Chef Tips
The Choux Secret: The key to perfect choux pastry is achieving the right consistency. After adding eggs, the dough should slowly slide off a lifted spoon in a V-shape. Too thick means add another egg (beaten first); too thin means the éclairs won’t hold their shape.
Steam is Everything: Never open the oven door while baking choux pastry. The steam inside creates the hollow center. Opening the door releases steam and causes collapse. If your éclairs are browning too quickly, reduce heat rather than opening the door.
Temperature Matters: Your pastry cream must be completely cold before filling éclairs. If it’s even slightly warm, it will make the pastry soggy. I recommend making it the day before if possible.
The Shine Factor: Professional bakers brush éclairs with egg wash before baking for extra shine, but I find it unnecessary. The ganache provides enough gloss. However, if you want that glossy shell, lightly brush éclairs with beaten egg before baking.
Ganache Consistency: The perfect ganache should coat the back of a spoon but still drip slowly. If it’s too thick, add a teaspoon of warm cream at a time. Too thin? Let it cool for a few more minutes while stirring occasionally.
Fill Just Before Serving: While you can make all components ahead, fill éclairs no more than 4-6 hours before serving for the crispiest shells.
Common Mistakes to Avoid
Mistake #1: Flat, Dense Éclairs
The Fix: This happens when the choux dough is too wet or oven temperature is too low. Make sure your dough holds that V-shape and preheat your oven fully. Use an oven thermometer if you suspect temperature issues.
Mistake #2: Éclairs Collapse After Baking
The Fix: They weren’t baked long enough. Éclairs need to be deeply golden brown and feel light and hollow. If they’re pale or still feel heavy, give them another 5 minutes. Also, poking holes immediately after baking releases steam and prevents collapse.
Mistake #3: Scrambled Egg Pastry Cream
The Fix: You didn’t temper the eggs properly or the heat was too high. Always add hot milk to eggs slowly while whisking vigorously, and never let the mixture stop moving once it’s on the heat.
Mistake #4: Soggy Éclairs
The Fix: The shells weren’t completely cool before filling, or the pastry cream was too warm. Both components must be 100% cool. Also, filling too far in advance makes them soggy—aim for same-day assembly.
Mistake #5: Lumpy Ganache
The Fix: The chocolate wasn’t chopped finely enough or the cream wasn’t hot enough to melt it. Always chop chocolate into small, uniform pieces and make sure cream is just simmering. If lumps form, gently reheat the bowl over simmering water while stirring.
Storage & Meal Prep
Unfilled Éclair Shells:
Store baked, cooled shells in an airtight container at room temperature for up to 2 days. They’ll lose some crispness but can be refreshed in a 350°F oven for 5 minutes, then cooled before filling.
Pastry Cream:
Store covered in the refrigerator for up to 3 days. Press plastic wrap directly on the surface to prevent skin formation. Whisk vigorously before using to restore smooth texture.
Chocolate Ganache:
Keep in an airtight container in the refrigerator for up to 1 week. Gently reheat in the microwave in 10-second intervals, stirring between each, until it returns to dipping consistency.
Assembled Éclairs:
Best enjoyed within 4-6 hours of assembly. Store in the refrigerator in a single layer in an airtight container. Bring to room temperature for 15 minutes before serving for best flavor. Consume within 24 hours—after that, the shells become soft.
Reheating Tips:
Don’t reheat assembled éclairs. However, if you have leftover unfilled shells that have gone soft, warm them in a 350°F oven for 5 minutes to crisp them up again.
Make-Ahead & Freezer Notes
Perfect Make-Ahead Timeline:
- 3 days ahead: Make pastry cream, store refrigerated
- 2 days ahead: Bake éclair shells, store airtight at room temperature
- 1 day ahead: Make chocolate ganache, store refrigerated
- Day of: Fill and assemble éclairs 2-4 hours before serving
Freezing Unfilled Shells:
Yes! Baked éclair shells freeze beautifully for up to 2 months. Cool completely, then place in a single layer in a freezer bag with parchment between layers. Freeze flat. To use, thaw at room temperature for 30 minutes, then crisp in a 350°F oven for 5 minutes. Cool completely before filling.
Freezing Pastry Cream:
Not recommended. Pastry cream can separate and become grainy when frozen and thawed. It’s better to make it fresh or up to 3 days ahead and keep refrigerated.
Freezing Assembled Éclairs:
I don’t recommend freezing filled éclairs. The texture suffers significantly—the shells become soggy and the cream can separate. However, in a pinch, they can be frozen for up to 1 month. Thaw overnight in the refrigerator and expect a softer texture.
Best Reheating Method:
For frozen unfilled shells: Place in a 350°F oven directly from frozen for 8-10 minutes until crisp. Let cool completely before filling. This restores almost all of the original crispness.
Serving Suggestions
Chocolate éclairs are quite rich, so they pair beautifully with lighter, complementary items:
Beverages:
- Freshly brewed coffee or espresso (classic pairing)
- Hot chocolate with a splash of cream
- Earl Grey or English Breakfast tea
- Champagne or sparkling wine for celebrations
- Cold milk for a nostalgic treat
Complementary Desserts for a Dessert Spread:
- Fresh berry salad with mint
- Lemon sorbet or vanilla ice cream
- Fruit tart or fresh fruit platter
- Macarons in various flavors
- Light angel food cake
For Afternoon Tea:
- Cucumber and cream cheese finger sandwiches
- Scones with clotted cream and jam
- Fresh strawberries
- Assorted petit fours
Party Presentation Ideas:
- Arrange éclairs on a tiered dessert stand
- Garnish plate with fresh berries and mint leaves
- Dust with powdered sugar for extra elegance
- Serve with small dessert forks and pretty napkins
- Create a “Build Your Own Éclair” station with different fillings and toppings
FAQs Section
Q: Can I make éclairs without a piping bag?
A: Yes! You can use a large zip-top bag with the corner cut off (about ½-inch opening). For filling, a squeeze bottle works well. You can also carefully spoon the dough onto baking sheets, though they won’t be as uniform.
Q: Why did my éclairs deflate after I took them out of the oven?
A: This usually means they weren’t baked long enough or you opened the oven door too early. The shells need to be fully dry and deeply golden. Always poke holes immediately after baking to release steam, which also helps prevent deflation.
Q: Can I use instant pudding instead of making pastry cream?
A: While instant pudding is quicker, it doesn’t provide the same silky texture or authentic flavor. However, if you’re short on time, use French vanilla instant pudding and fold in some whipped cream for a lighter texture.
Q: How do I know when the choux dough has the right consistency?
A: After adding the eggs, lift your spoon or spatula from the dough. The dough should slowly slide off in a V-shape or thick ribbon. If it’s too stiff and doesn’t fall, beat in another egg (add it beaten, one tablespoon at a time). If it’s too runny and falls immediately, the éclairs won’t hold their shape.
Q: My pastry cream has lumps. Can I fix it?
A: Yes! Pour it through a fine-mesh strainer while it’s still warm, pressing it through with a spatula or the back of a spoon. This removes any cooked egg bits or lumps. You can also use an immersion blender to smooth it out.
Q: Can I make éclairs ahead for a party?
A: Absolutely! Bake shells up to 2 days ahead, make pastry cream up to 3 days ahead, and make ganache up to 1 week ahead. Assemble them 2-4 hours before serving for best results. They’ll hold up better than if assembled the night before.
Q: What’s the difference between an éclair and a cream puff?
A: Both use choux pastry, but éclairs are piped into oblong shapes while cream puffs (profiteroles) are round. Éclairs are traditionally filled with pastry cream and topped with chocolate, while cream puffs can have various fillings and toppings, including ice cream.
Conclusion
There you have it—your complete guide to making stunning, bakery-quality chocolate éclairs right in your own kitchen! While these French pastries have a reputation for being difficult, I hope this detailed recipe has shown you that with the right techniques and a little patience, anyone can master them.
The crispy shell, silky vanilla cream, and rich chocolate ganache come together to create something truly special. Yes, there are several steps involved, but each one is straightforward when broken down. Plus, the look on your family’s or guests’ faces when you serve homemade éclairs? Absolutely priceless.
Remember, even if your first batch isn’t picture-perfect, they’ll still taste absolutely delicious. Like any skill, making éclairs gets easier with practice. Don’t be discouraged if they’re not Instagram-worthy the first time—keep trying, and soon you’ll be piping éclairs like a pro!
I’d love to hear how your éclairs turn out! Leave a comment below with your results, any questions, or your favorite flavor variations. And if you loved this recipe, please share it on Pinterest to help other home bakers discover that éclairs are totally achievable. Don’t forget to pin this to your dessert board so you can find it again when éclair cravings strike!
Happy baking, and enjoy every delicious bite of your homemade chocolate éclairs! ✨