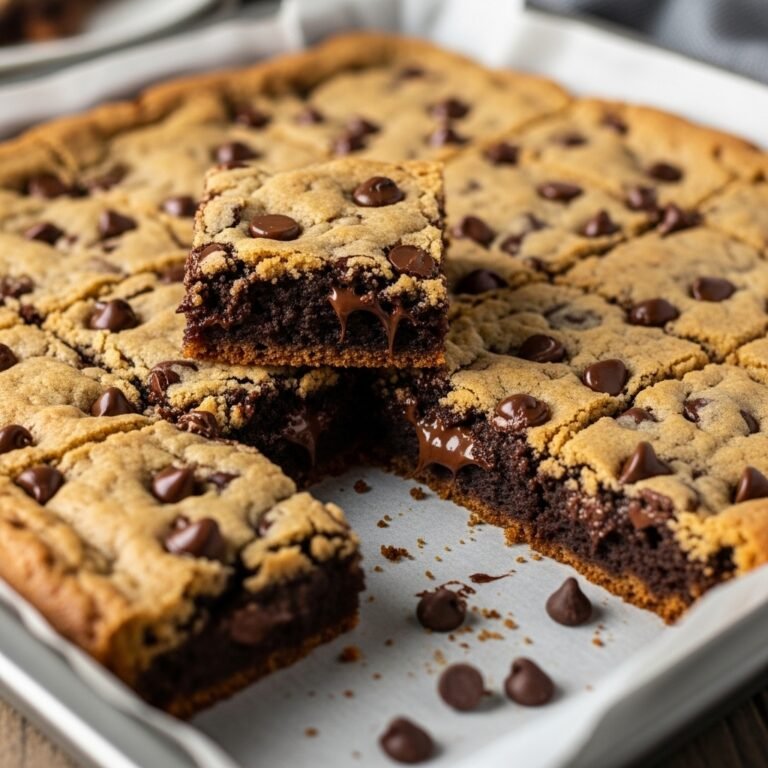
Chocolate Chip Cookie Bars Recipe: Thick, Chewy, and Ready in 30 Minutes
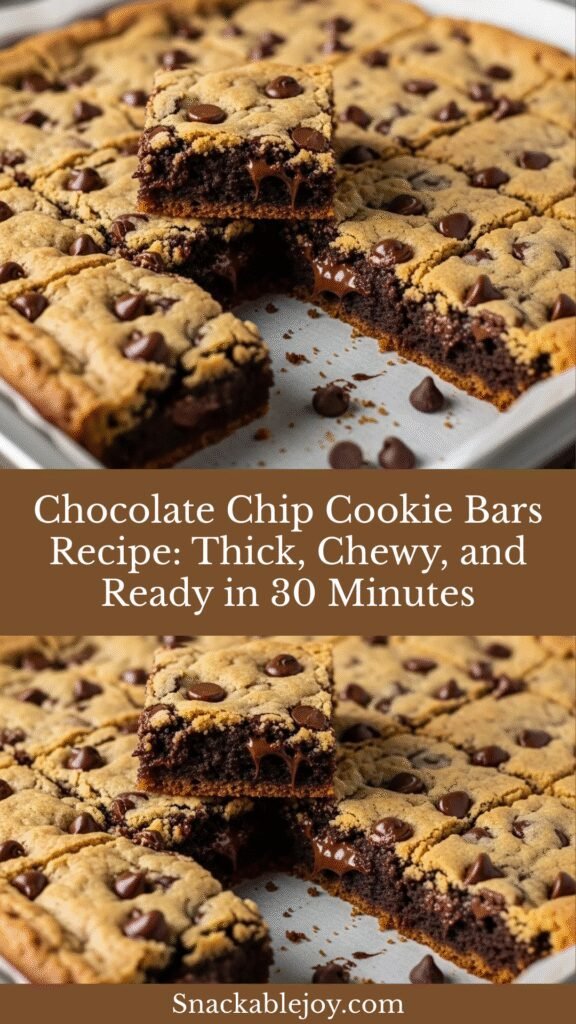
Chocolate chip cookie bars are the ultimate solution for cookie lovers who want that fresh-baked taste without the hassle of scooping dozens of individual cookies. These thick, chewy bars deliver all the classic chocolate chip cookie flavor you crave—buttery dough, melty chocolate chips, and golden edges—but in a fraction of the time. Just press the dough into a pan, bake, and cut into squares!
These bars are perfect for any occasion where you need a crowd-pleasing dessert fast. They’re ideal for potlucks, bake sales, birthday parties, after-school snacks, or those nights when you need dessert but don’t have time for traditional cookie batches. Kids love them because they’re sweet and familiar, while adults appreciate how easy they are to make and transport. Plus, there’s no waiting between batches—just one pan and you’re done!
History / Background
The chocolate chip cookie itself has a legendary origin story that dates back to 1938 at the Toll House Inn in Whitman, Massachusetts. Ruth Wakefield, who owned the inn with her husband, was preparing her popular Butter Drop Do cookies when she ran out of baker’s chocolate. She substituted broken pieces of a Nestlé semi-sweet chocolate bar, expecting them to melt and disperse throughout the dough. Instead, the chips held their shape, and the chocolate chip cookie was born.
The recipe became so popular that Nestlé began selling scored chocolate bars specifically for breaking into chunks. By 1939, they introduced chocolate morsels (chips) to meet the growing demand. During World War II, soldiers from Massachusetts received care packages containing these cookies, and when they returned home, they shared the recipe across the country. By the 1950s, chocolate chip cookies had become America’s favorite homemade cookie.
The bar cookie adaptation emerged later, likely in the 1960s and 1970s, as home bakers looked for time-saving shortcuts. Betty Crocker and other home economics writers began promoting the concept of “pan cookies” or “cookie bars” as a practical solution for busy families. Instead of baking multiple batches of individual cookies, you could press all the dough into a single pan and cut it into squares after baking. This innovation maintained the beloved chocolate chip cookie flavor while cutting preparation time in half.
Today, chocolate chip cookie bars (sometimes called “cookie squares” or “blondies with chocolate chips”) remain a staple in American home baking. They represent the perfect marriage of convenience and comfort food—delivering nostalgic flavor with modern efficiency. They’re particularly popular for school events, church potlucks, and family gatherings where you need to feed a crowd without spending hours in the kitchen.
Why You’ll Love This Recipe
Chocolate chip cookie bars are a game-changer for anyone who loves homemade cookies but doesn’t always have time for traditional baking. These bars deliver maximum flavor with minimum effort, making them perfect for busy weeknights, last-minute gatherings, or whenever that cookie craving hits.
Here’s why this recipe deserves a permanent spot in your baking rotation:
- Super fast prep – Mix everything in one bowl, press into a pan, and you’re done in under 10 minutes
- No scooping required – Skip the tedious process of portioning individual cookies
- Thick and chewy texture – These bars are wonderfully dense and satisfying, not thin or crispy
- Feeds a crowd – One 9×13 pan makes 24 generous bars, perfect for parties
- Kid-friendly baking – Simple enough for children to help make with minimal supervision
- Minimal cleanup – Just one bowl, one pan, and basic utensils to wash
- Consistent results – No worrying about uneven baking or cookies spreading differently
- Budget-friendly – Uses basic pantry staples and costs less than store-bought cookies
- Portable and sturdy – These bars travel beautifully without breaking or crumbling
- Customizable – Easy to add mix-ins or adapt to your preferences
Ingredient Notes
All-Purpose Flour: The foundation of your cookie bar structure. Measure correctly by spooning flour into your measuring cup and leveling it off—scooping directly from the bag packs in too much flour, making bars dry and cakey.
Baking Soda: The leavening agent that gives these bars their perfect lift and tender texture. It also helps with browning. Make sure yours is fresh (under 6 months old) for best results.
Salt: Essential for balancing sweetness and enhancing the chocolate flavor. Don’t skip it, even if you’re using salted butter.
Unsalted Butter: The key to rich, buttery flavor. Melted butter creates a denser, chewier texture than softened butter would. Let it cool slightly after melting so it doesn’t cook the eggs when mixed.
Granulated Sugar: Provides sweetness and helps create crispy edges. The combination of white and brown sugar together is the secret to the perfect texture.
Brown Sugar: Adds moisture, chewiness, and that characteristic caramel undertone that makes chocolate chip cookies so irresistible. Dark brown sugar will give more intense molasses flavor, while light brown is more subtle.
Eggs: Bind everything together and add richness. Room temperature eggs incorporate more easily and create a smoother batter. Take them out of the fridge 30 minutes before baking.
Vanilla Extract: A must-have for depth of flavor. Pure vanilla extract is worth the investment—imitation just doesn’t taste the same in simple recipes like this.
Semi-Sweet Chocolate Chips: The star of the show! Semi-sweet is traditional, but you can use milk chocolate for sweeter bars or dark chocolate for a more sophisticated flavor. You can also mix varieties.
Equipment Needed
- 9×13-inch metal baking pan
- Parchment paper or aluminum foil (for easy removal)
- Large mixing bowl
- Medium mixing bowl
- Whisk
- Rubber spatula or wooden spoon
- Measuring cups and spoons
- Small saucepan or microwave-safe bowl (for melting butter)
- Cooling rack
- Sharp knife for cutting
Print

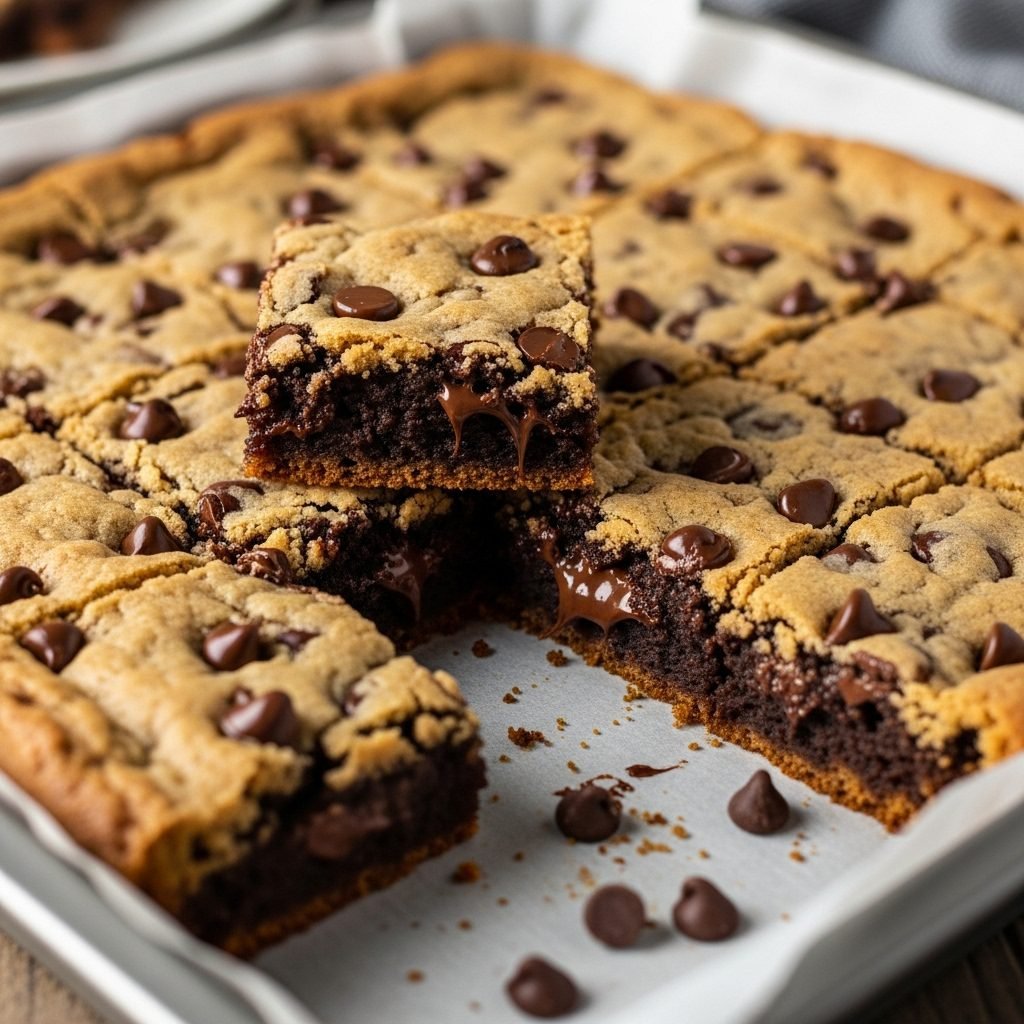
Chocolate Chip Cookie Bars
Classic chocolate chip cookie bars with a thick, chewy texture and plenty of melty chocolate chips. Easier and faster than traditional cookies with all the same delicious flavor!
- Total Time: 32 minutes (plus cooling)
- Yield: 24 bars 1x
Ingredients
Scale- 2 1/4 cups all-purpose flour
- 1 teaspoon baking soda
- 1 teaspoon salt
- 1 cup (2 sticks) unsalted butter, melted
- 3/4 cup granulated sugar
- 3/4 cup packed light brown sugar
- 2 large eggs, room temperature
- 2 teaspoons vanilla extract
- 2 cups semi-sweet chocolate chips (12 oz)
Instructions
- Preheat oven: Preheat your oven to 350°F (175°C). Line a 9×13-inch baking pan with parchment paper, leaving a 2-inch overhang on two opposite sides to create handles for easy removal.
- Mix dry ingredients: In a medium bowl, whisk together the flour, baking soda, and salt. Set aside.
- Melt butter: Melt the butter in a small saucepan over low heat or in the microwave in 30-second intervals. Let it cool for 5 minutes so it’s warm but not hot.
- Combine wet ingredients: In a large mixing bowl, whisk together the melted butter, granulated sugar, and brown sugar until smooth and well combined, about 1 minute.
- Add eggs and vanilla: Add the eggs one at a time, whisking well after each addition until fully incorporated. Stir in the vanilla extract until the mixture is smooth and glossy.
- Fold in flour: Add the flour mixture to the wet ingredients. Using a rubber spatula or wooden spoon, fold gently until just combined and no flour streaks remain. Don’t overmix—some lumps are okay.
- Add chocolate chips: Fold in the chocolate chips, reserving about 1/4 cup to sprinkle on top if you like a pretty presentation.
- Press into pan: Transfer the thick cookie dough to your prepared pan. Using your hands or a spatula, press and spread the dough evenly to all corners. It will be thick—that’s perfect! Sprinkle reserved chocolate chips on top if using.
- Bake: Bake for 22-25 minutes, until the edges are golden brown and the center looks set but still slightly soft. A toothpick inserted in the center should come out with a few moist crumbs. Don’t overbake!
- Cool and cut: Remove from the oven and let cool in the pan on a wire rack for at least 30 minutes. For cleanest cuts, cool completely (about 1 hour) or chill for 20 minutes. Use the parchment overhang to lift out the entire slab, then cut into 24 bars with a sharp knife.
Notes
- For extra chewy bars, slightly underbake (20-21 minutes) and let them finish setting as they cool.
- The dough will be very thick—don’t worry, this is what creates that perfect cookie bar texture!
- Pressing the dough evenly is important for consistent baking. Take your time with this step.
- For cleaner cuts, wipe your knife between each slice.
- Store in an airtight container at room temperature for up to 5 days.
- These bars taste even better the next day after the flavors meld!
- Prep Time: 10 minutes
- Cook Time: 22 minutes
- Category: Desert
- Method: Baking
- Cuisine: American
- Diet: Vegetarian
Nutrition
- Serving Size: 1 bar (1/24 of recipe)
- Calories: 215
- Sugar: 18g
- Sodium: 150mg
- Fat: 11g
- Saturated Fat: 7g
- Unsaturated Fat: 3g
- Trans Fat: 0g
- Carbohydrates: 28g
- Fiber: 1g
- Protein: 2g
- Cholesterol: 35mg
Tips & Variations
Extra chocolate lover: Use 2 1/2 or even 3 cups of chocolate chips for maximum chocolate in every bite. You can also add 1/2 cup of chocolate chunks for varied texture.
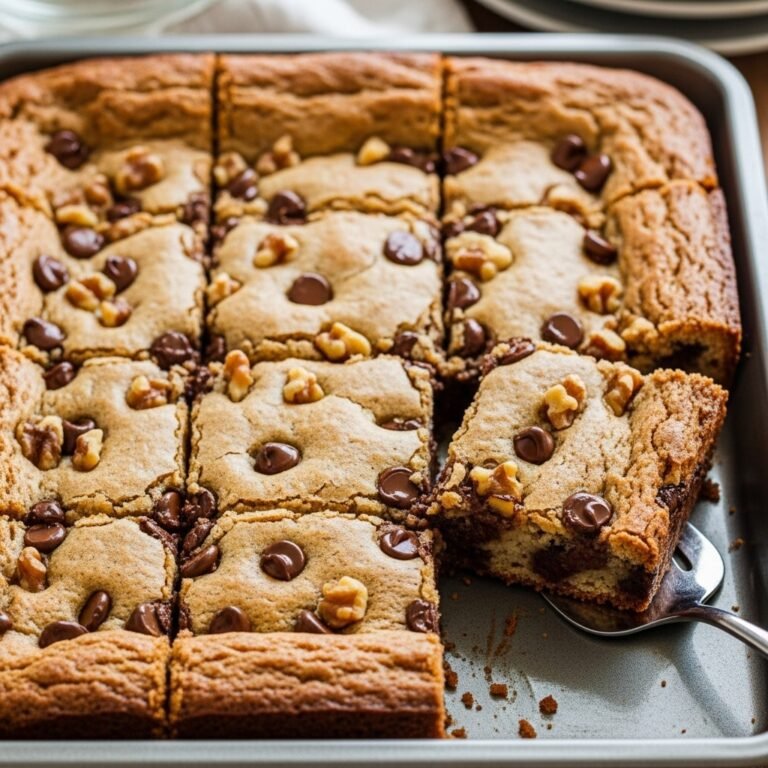
Mix-in madness: Add 1 cup of chopped walnuts, pecans, or peanut butter chips along with the chocolate chips for variety.
Brown butter upgrade: Brown the butter instead of just melting it for a nutty, caramelized flavor that takes these bars to the next level. Let it cool to room temperature before using.
Sea salt finish: Sprinkle flaky sea salt over the top immediately after removing from the oven for a sweet-salty contrast.
Peanut butter swirl: Drop spoonfuls of peanut butter over the dough before baking, then swirl with a knife for peanut butter chocolate chip bars.
Make them thicker: Use a 9×9-inch pan and increase baking time to 28-32 minutes for ultra-thick, bakery-style bars. This will yield 16 larger bars.
Gluten-free version: Use a 1:1 gluten-free baking flour blend. The texture will be slightly more crumbly but still delicious.
Reduce sugar: You can reduce both sugars by 2 tablespoons each if you prefer less sweet desserts. The bars will be slightly less chewy but still tasty.
M&M bars: Replace chocolate chips with M&M’s for a colorful, fun variation kids love.
Browned edges: Bake an extra 3-4 minutes for crispier, more caramelized edges if that’s your preference.
Pro Chef Tips
Room temperature eggs are crucial: Cold eggs don’t emulsify well with melted butter, creating a grainy texture. Let eggs sit at room temperature for 30 minutes, or place them in warm water for 5 minutes before using.
Don’t skip cooling the butter: Hot melted butter will cook the eggs when you mix them together, creating scrambled bits in your dough. Let butter cool for 5 minutes after melting—it should be warm but not hot to the touch.
Press dough firmly and evenly: Use real pressure when spreading the dough into the pan. An even layer ensures consistent baking. Take your time—it makes a big difference in the final result.
Slightly underbake for perfection: The bars continue cooking from residual heat after you remove them from the oven. Taking them out when they look slightly underdone ensures they’ll be chewy, not dry.
The parchment overhang is essential: This creates handles that allow you to lift the entire slab out of the pan for easy cutting. Without it, you’ll struggle to get clean bars.
Let them cool before cutting: This is hard, but necessary! Warm bars fall apart. Wait at least 30 minutes, or better yet, cool completely. For the cleanest cuts, chill for 20 minutes.
Quality chocolate matters: Since chocolate chips are a main ingredient, use good quality chips. Ghirardelli, Guittard, or Toll House all work beautifully. Avoid bargain brands that don’t melt well.
Weigh your flour for accuracy: If you have a kitchen scale, 2 1/4 cups flour = 281 grams. This eliminates measuring errors and ensures perfect results every time.
Common Mistakes to Avoid
Overbaking the bars: This is the most common mistake! Cookie bars should look slightly underdone in the center when you remove them. They’ll firm up as they cool. Overbaked bars are dry and crumbly instead of chewy and soft.
Using hot melted butter: If your butter is too hot when you add the eggs, you’ll end up with scrambled egg bits in your dough. Always let melted butter cool for 5 minutes before proceeding with the recipe.
Overmixing the dough: Once you add the flour, mix just until combined. Overmixing develops gluten, which makes bars tough and cakey instead of tender and chewy. A few flour streaks are fine—they’ll disappear.
Not pressing dough evenly: Uneven dough means uneven baking. Thick spots will be underdone while thin spots burn. Take time to spread the dough evenly to all corners and smooth the top.
Skipping the parchment paper: Without a parchment sling, you’ll damage the bars trying to remove them from the pan, and you’ll likely lose the bottom layer. Always line your pan with overhang for easy removal.
Cutting too soon: Warm bars are fragile and fall apart. Even though they smell amazing, wait at least 30 minutes before cutting. Better yet, wait until completely cool for bakery-perfect squares.
Storage & Meal Prep
Room temperature storage: Store completely cooled cookie bars in an airtight container at room temperature for up to 5 days. Place parchment paper between layers if stacking to prevent sticking.
Maintaining softness: To keep bars soft and chewy, add a slice of white bread to your storage container. The bars will absorb moisture from the bread, staying fresh while the bread gets stale instead.
Refrigerator storage: While not necessary, you can refrigerate these bars for up to 2 weeks in an airtight container. Let them come to room temperature for 15 minutes before serving for best texture.
Reheating: For that fresh-baked experience, microwave individual bars for 8-10 seconds. The chocolate chips get melty and delicious again!
Packaging for gifts: These bars make wonderful gifts! Wrap individual bars in cellophane bags tied with ribbon, or stack in clear containers with decorative labels.
Lunch box friendly: These bars are perfect for school lunches. Wrap individually in plastic wrap for easy grab-and-go treats that won’t crumble in transit.
Party serving: Keep bars in the pan covered with foil until serving time. Cut just before serving for the freshest taste and best presentation.
Make-Ahead & Freezer Notes
Bake ahead: These bars actually improve after a day! The flavors meld together beautifully. Bake up to 3 days in advance, let cool completely, then store covered at room temperature.
Prepare dough ahead: You can make the dough and press it into the pan up to 24 hours before baking. Cover tightly with plastic wrap and refrigerate. Let it sit at room temperature for 20 minutes before baking, and add 2-3 minutes to the baking time.
Freezer friendly – whole slab: Wrap the entire uncut cooled slab tightly in plastic wrap, then in aluminum foil. Freeze for up to 3 months. Thaw overnight in the refrigerator still wrapped, then cut when ready to serve.
Freezer friendly – individual bars: Cut into squares, wrap each bar individually in plastic wrap, then place in a freezer bag. Freeze for up to 3 months. This makes it easy to grab single servings whenever the craving hits!
Thawing instructions: For the whole slab, thaw in the refrigerator overnight, then bring to room temperature before cutting. Individual bars thaw at room temperature in 30 minutes, or microwave from frozen for 15-20 seconds.
Flash freezing for clean wrapping: If freezing individual bars, place unwrapped bars on a baking sheet and freeze for 30 minutes until firm, then wrap. This prevents them from sticking together or getting misshapen.
Cookie dough freezing: You can also freeze the unbaked dough! Press into the pan, cover tightly with plastic wrap and foil, and freeze for up to 3 months. Bake from frozen, adding 5-8 minutes to the baking time.
Best reheating method: Thawed bars are delicious at room temperature, but warming them brings back that fresh-baked magic. Microwave for 10 seconds or warm in a 300°F oven for 5 minutes.
Serving Suggestions
Chocolate chip cookie bars are incredibly versatile and can be enjoyed many different ways:
Classic presentation: Serve at room temperature on a pretty platter, dusted lightly with powdered sugar for an elegant touch.
Ice cream sandwich: Use two bars to sandwich a scoop of vanilla ice cream for an impressive homemade ice cream sandwich that’s better than any store-bought version.
With milk: The ultimate classic combo—serve with a tall glass of cold milk for dunking. It’s perfect for after-school snacks or late-night treats.
Warm with ice cream: Serve bars slightly warm with a scoop of vanilla ice cream melting on top and drizzle with hot fudge or caramel sauce for a decadent dessert.
Coffee pairing: These bars are excellent with hot coffee, cappuccino, or a latte. The chocolate and butter flavors complement coffee perfectly.
Dessert board: Cut into small squares and arrange on a dessert charcuterie board with fresh fruit, nuts, brownies, and other treats for parties.
S’mores style: Warm a bar slightly, add a toasted marshmallow on top, and sandwich with another bar for a cookie bar s’more!
Breakfast treat: Okay, it’s dessert, but these make an indulgent weekend breakfast with coffee—we won’t tell!
Party presentation: Stack bars in a pyramid on a cake stand, garnish with fresh berries, and dust with powdered sugar for an impressive buffet centerpiece.
FAQs Section
Q: Can I use salted butter instead of unsalted?
A: Yes! If you use salted butter, reduce the added salt in the recipe to 1/2 teaspoon. Salted butter can vary in salt content between brands, so you might need to adjust to taste.Q: Why are my bars cakey instead of chewy?
A: This usually happens from too much flour (measuring incorrectly) or overbaking. Make sure to spoon flour into your measuring cup and level it off, don’t scoop from the bag. Also, remove bars from the oven when they still look slightly underdone in the center.Q: Can I make these without brown sugar?
A: Yes, but they won’t be as chewy. Brown sugar adds moisture and that characteristic chewiness. If you must substitute, use all granulated sugar, but expect a crispier, less chewy texture.Q: How do I prevent the edges from getting too dark?
A: Use a light-colored metal pan rather than dark non-stick or glass. Dark pans absorb more heat and can overbrown the edges. You can also reduce oven temperature to 325°F and bake for 2-3 minutes longer.Q: Can I use milk chocolate or dark chocolate chips?
A: Absolutely! Use whatever chocolate you prefer. Milk chocolate makes sweeter bars, dark chocolate (60-70% cacao) creates a more sophisticated, less sweet flavor. You can also mix varieties—half semi-sweet, half dark, for example.Q: My dough seems too thick to spread. Is this normal?
A: Yes! Cookie bar dough is much thicker than regular cookie dough. It should be quite dense and sticky. Use your hands or the back of a spatula and real pressure to press it into the pan. It will spread as it bakes.Q: Can I add nuts to this recipe?
A: Definitely! Fold in 1 cup of chopped walnuts or pecans along with the chocolate chips. Toasting the nuts first brings out even more flavor.Q: How do I get clean, bakery-style cuts?
A: Cool the bars completely (or chill for 20 minutes), use a large sharp knife, and wipe the blade clean between each cut. Dipping the knife in hot water and drying it also helps cut through cleanly.Conclusion
Chocolate chip cookie bars are proof that the best recipes are often the simplest ones! With just basic pantry ingredients and one pan, you can create thick, chewy, chocolate-loaded bars that taste just as good as traditional cookies—maybe even better. No more standing at the oven scooping batch after batch. Just mix, press, bake, and cut!
These bars have become my go-to dessert when I need something delicious in a hurry. They’re perfect for satisfying sudden cookie cravings, bringing to parties, or keeping in the freezer for emergency treats. My kids request them constantly, and I love how quickly I can make them happen.
I’d absolutely love to see your chocolate chip cookie bars! When you make this recipe, snap a photo and share it on Pinterest—tag me so I can see your delicious creations. Did you add any fun mix-ins? Serve them warm with ice cream? I want to hear all about it!
Please leave a comment below and let me know how your bars turned out. Your feedback helps me create more easy, delicious recipes, and it helps other home bakers know what to expect. Plus, I just love hearing from you!
Now grab that mixing bowl and get baking—fresh, homemade cookie bars are just 30 minutes away! 🍪🤎