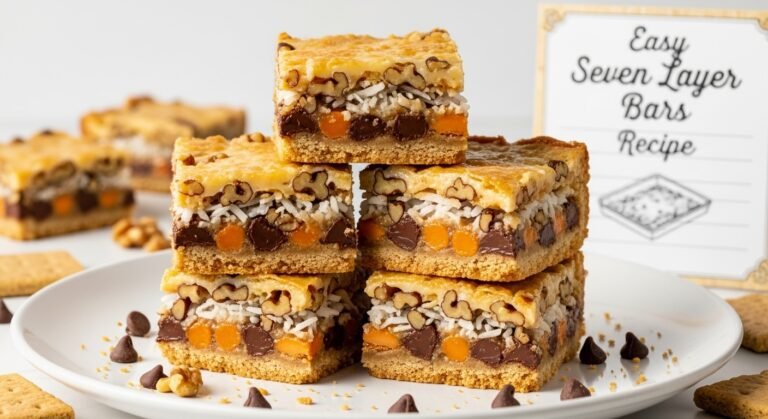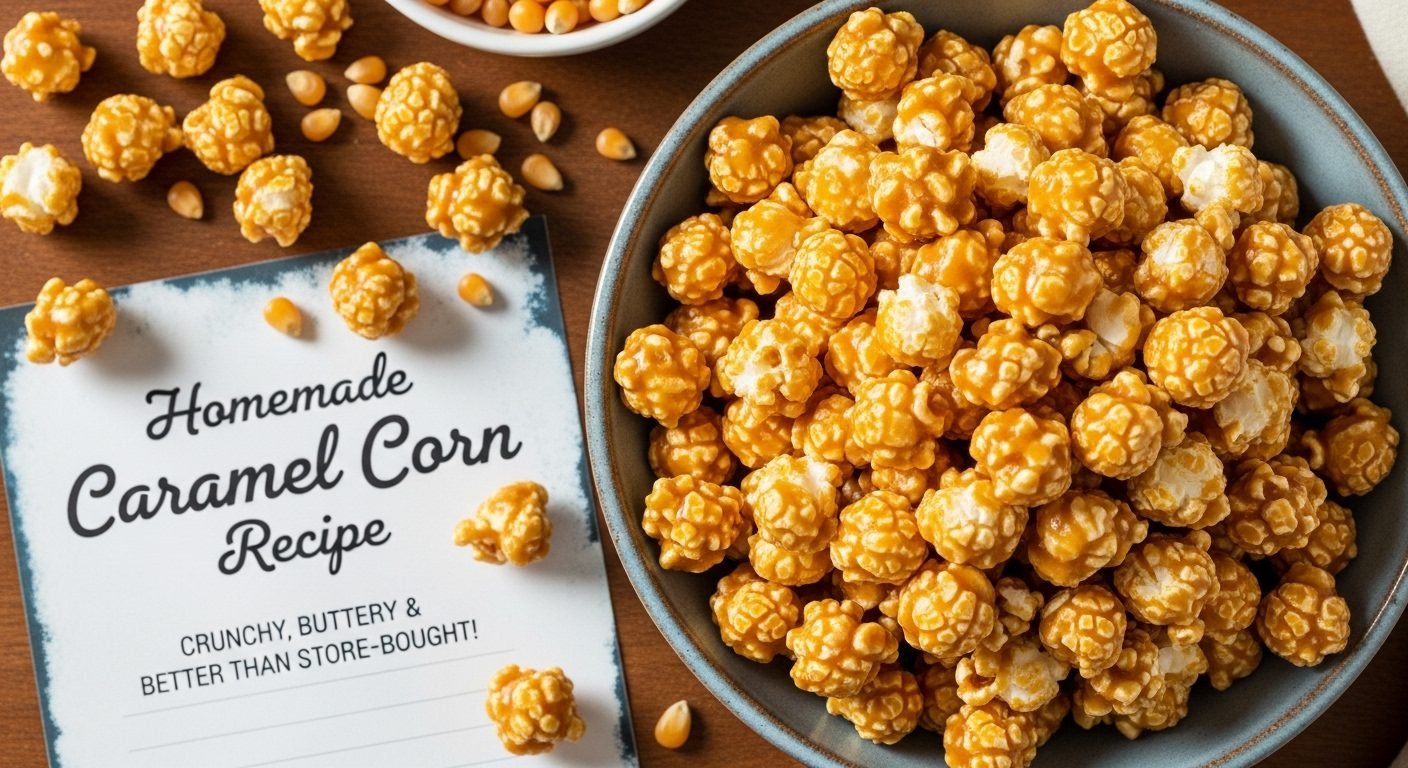
Homemade Caramel Corn Recipe – Crunchy, Buttery & Better Than Store-Bought!
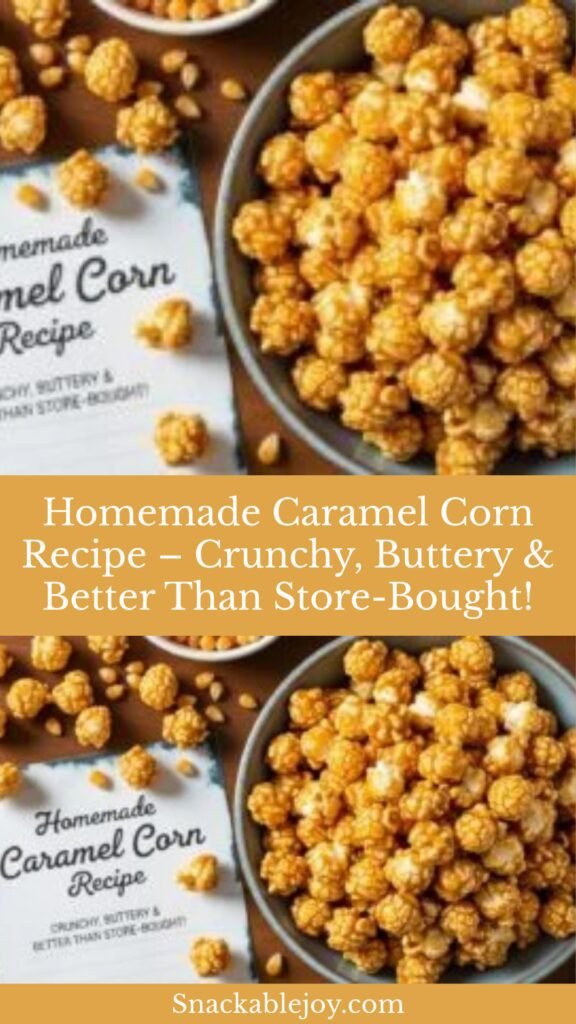
There’s something absolutely magical about homemade caramel corn – that perfect combination of crunchy popcorn coated in sweet, buttery caramel that’s impossible to stop eating! This classic American snack is surprisingly easy to make at home, requiring just a handful of simple ingredients and about 45 minutes from start to finish. Unlike store-bought versions that can taste artificial or stale, homemade caramel corn is fresh, flavorful, and customizable to your exact preferences. Whether you’re planning a movie night with the family, need a crowd-pleasing party snack, want to create homemade gifts during the holidays, or simply crave that irresistible sweet-and-salty combination, this recipe delivers every single time. The caramel coating is perfectly balanced – not too hard, not too sticky – with a satisfying crunch that keeps everyone reaching for more. It’s the kind of treat that disappears quickly at gatherings, makes your house smell absolutely amazing while it’s baking, and creates those warm, nostalgic memories that last long after the last kernel is gone. Best of all, once you’ve mastered this basic recipe, you can customize it endlessly with nuts, chocolate drizzles, spices, or whatever your heart desires!
History / Background
Caramel corn holds a sweet spot in American culinary history, with roots that stretch back over a century. The marriage of popcorn and caramel is a distinctly American innovation that emerged during the late 19th century, a time when both ingredients were becoming increasingly popular across the United States.
Popcorn itself has ancient origins – archaeological evidence shows that people in the Americas were popping corn as far back as 5,000 years ago. However, popcorn’s commercial popularity in America really exploded in the 1890s with the invention of mobile popcorn carts and the first popcorn machines by Charles Cretors in Chicago. Suddenly, popcorn was available at fairs, circuses, and street corners across the country, becoming a beloved snack food.
The creation of caramel corn as we know it today is often credited to the 1893 World’s Columbian Exposition in Chicago, where two German immigrant brothers, Frederick and Louis Rueckheim, introduced a confection that combined popcorn, molasses, and peanuts. They called it “Candied Popcorn and Peanuts.” This treat was so popular that the brothers refined the recipe and, by 1896, had created the version we recognize today. The name “Cracker Jack” was trademarked in 1896, and the product became a national phenomenon, especially after the company started including prizes in each box in 1912.
While Cracker Jack is perhaps the most famous commercial caramel corn, homemade versions became popular across American households throughout the early 20th century. The recipe appeared in community cookbooks, church fundraiser collections, and family recipe boxes, with each region and family adding their own special touches. Some versions included nuts (pecans were especially popular in the South), others added butter for richness, and many experimented with different types of sugar and flavorings.
The 1960s and 1970s saw a resurgence in homemade caramel corn’s popularity, particularly during the holidays. It became a staple of Christmas gift-giving – packaged in decorative tins or cellophane bags tied with ribbons, homemade caramel corn was a thoughtful, delicious gift that showed someone had taken the time to make something special. This tradition continues today, with caramel corn remaining one of the most popular homemade holiday treats.
The rise of gourmet popcorn shops in the 2000s and 2010s (like Garrett Popcorn in Chicago and countless others) demonstrated that Americans’ love affair with caramel corn was stronger than ever. These shops elevated caramel corn to an artisanal product, experimenting with different flavors, quality ingredients, and innovative combinations. This gourmet movement inspired home cooks to revisit their caramel corn recipes, focusing on quality ingredients and perfect technique.
Today, caramel corn represents American comfort food at its finest – simple ingredients transformed into something greater than the sum of their parts. It’s a treat that bridges generations, evoking childhood memories of fairs and carnivals while remaining relevant in modern snack culture. The recipe’s enduring popularity speaks to its perfect balance of sweet and salty, crunchy and satisfying – a combination that never goes out of style.
Why You’ll Love This Recipe
This homemade caramel corn recipe is about to change your snacking game forever! Once you taste how much better fresh, homemade caramel corn is compared to anything you can buy at the store, there’s no going back. The caramel coating is perfectly crisp with just the right amount of sweetness, and the whole house fills with the most incredible buttery, caramel aroma while it’s baking. This recipe strikes that magical balance between being easy enough for beginners yet producing results that look and taste professional.
Here’s why you’ll fall in love with this recipe:
- Simple ingredients – You probably have everything you need already: popcorn, butter, brown sugar, corn syrup, and baking soda
- Foolproof method – The step-by-step process is straightforward and forgiving, perfect even if you’ve never made candy before
- No candy thermometer needed – While helpful, you don’t need specialized equipment to get perfect results
- Incredibly fresh flavor – Homemade caramel corn tastes exponentially better than store-bought versions
- Perfectly crunchy texture – The baking process ensures every piece is crispy, not sticky or chewy
- Endlessly customizable – Add nuts, chocolate, spices, or whatever mix-ins your heart desires
- Budget-friendly – Makes a huge batch for just a few dollars, perfect for feeding crowds or gifting
- Impressive presentation – Looks gourmet and professional with minimal effort
- Great for gifting – Package in decorative tins or bags for impressive homemade gifts
- Family-friendly activity – Kids love helping pop corn and stir (with supervision for the hot caramel parts)
- Crowd-pleaser – Appeals to all ages and disappears quickly at any gathering
- Long shelf life – Stores well for weeks, making it perfect for advance preparation
- Addictively delicious – That perfect sweet-salty combination keeps everyone coming back for more
Ingredient Notes
Let’s explore each ingredient that creates this irresistible treat and understand why they’re important:
Popcorn Kernels – You’ll need about ½ to ⅔ cup of unpopped kernels, which yields approximately 12-15 cups of popped corn. Use plain popcorn kernels (not microwave popcorn bags) for the best results. You can pop them using an air popper, stovetop method, or even microwave in a brown paper bag. Yellow kernels produce a more traditional-looking caramel corn with larger, fluffier pieces, while white kernels create a more delicate, tender result. Avoid pre-popped popcorn as it’s often stale and won’t absorb the caramel as well. Make sure to remove any unpopped kernels before coating – biting into one of those can be unpleasant!
Unsalted Butter – About 1 cup (2 sticks) of butter adds essential richness and helps the caramel coating adhere to the popcorn. Butter also contributes to that irresistible flavor and creates a smoother, more professional caramel. I strongly recommend using unsalted butter so you can control the salt level yourself. If you only have salted butter, reduce or omit the additional salt in the recipe. Don’t substitute with margarine or oil – real butter is crucial for authentic flavor and proper texture.
Brown Sugar – Approximately 2 cups of packed brown sugar creates the caramel’s signature deep, molasses-rich flavor and beautiful golden color. Light brown sugar is most common and produces a milder caramel flavor, while dark brown sugar creates a more robust, almost toffee-like taste. The molasses in brown sugar also helps create that perfect chewy-then-crunchy texture after baking. Make sure to pack the brown sugar firmly into your measuring cup for accurate measurements.
Corn Syrup – About ½ cup of light corn syrup prevents the sugar from crystallizing and helps create a smooth, glossy caramel. It also contributes to the coating’s ability to stay crisp rather than becoming grainy. While some recipes omit corn syrup, including it produces more reliable, consistent results. Light corn syrup is preferred for its neutral flavor, though dark corn syrup can be used if you want a deeper, more molasses-forward taste.
Baking Soda – Just ½ to 1 teaspoon of baking soda is a crucial ingredient that many people overlook. When added to the hot caramel, it creates a chemical reaction that aerates the mixture, making the coating lighter and crispier rather than dense and tooth-sticking. It also helps the caramel coat the popcorn more evenly. Don’t skip this ingredient – it’s the secret to professional-quality caramel corn!
Salt – About ½ to 1 teaspoon of salt enhances all the other flavors and creates that addictive sweet-salty balance that makes caramel corn so irresistible. If you’re using salted butter, reduce the added salt by half. You can also use fine sea salt for a more sophisticated flavor.
Vanilla Extract – One teaspoon of pure vanilla extract adds aromatic depth and rounds out the caramel flavor beautifully. Always use real vanilla extract rather than imitation for the best flavor. Add this after removing the caramel from heat to preserve its delicate aromatic compounds.
Optional Add-Ins:
- Peanuts or pecans (1-2 cups) for traditional flavor and added crunch
- Sea salt flakes for finishing
- Cinnamon or pumpkin pie spice for warmth
- Chocolate drizzle after cooling
- Crushed candy canes during holidays
Equipment Needed
You’ll need several pieces of equipment for this recipe, most of which you likely already have:
- Large pot or popcorn maker – For popping your kernels; an air popper works great, or use a large pot with a lid for stovetop popping
- Two large baking sheets with sides (half-sheet pans) – For spreading the coated popcorn to bake; rimmed baking sheets prevent overflow
- Parchment paper or silicone baking mats – For lining your baking sheets and ensuring easy cleanup
- Large roasting pan or extra-large mixing bowl – For holding the popped corn; it needs to be big enough to toss the popcorn with caramel
- Medium to large heavy-bottomed saucepan – For making the caramel; heavy bottom prevents scorching
- Wooden spoon or heat-resistant silicone spatula – For stirring the caramel and coating the popcorn
- Measuring cups and spoons – For accurate ingredient measurements
- Candy thermometer – Optional but helpful for monitoring caramel temperature
- Oven mitts – For handling hot pans when stirring the caramel corn during baking
- Large mixing spoon or spatula – For stirring the caramel corn every 15 minutes while baking
- Airtight containers or resealable bags – For storing the finished caramel corn
Print

Caramel Corn Recipe
This homemade caramel corn features perfectly popped kernels coated in buttery, sweet caramel with just the right crunch. Better than any store-bought version and surprisingly easy to make!
- Total Time: 55 minutes
- Yield: About 12-15 cups 1x
Ingredients
ScaleFor the Popcorn:
- ½ to ⅔ cup popcorn kernels (makes 12-15 cups popped)
- 2 tablespoons vegetable oil (if popping on stovetop)
For the Caramel Coating:
- 1 cup (2 sticks) unsalted butter
- 2 cups packed light brown sugar
- ½ cup light corn syrup
- 1 teaspoon salt (reduce to ½ teaspoon if using salted butter)
- ½ teaspoon baking soda
- 1 teaspoon pure vanilla extract
Optional Add-Ins:
- 1½ to 2 cups roasted peanuts or pecans
- Additional sea salt for topping
Instructions
- Prep your workspace: Preheat your oven to 250°F (120°C). Line two large baking sheets with parchment paper or silicone baking mats. Have all your ingredients measured and ready – once you start making caramel, things move quickly!
- Pop the corn: Pop your popcorn using your preferred method (air popper, stovetop, or microwave). You want about 12-15 cups of popped corn. Pour the popped corn into a very large roasting pan or mixing bowl, removing any unpopped kernels as you go. If using nuts, add them to the popcorn now and toss to combine.
- Make the caramel: In a medium-large, heavy-bottomed saucepan, combine the butter, brown sugar, corn syrup, and salt. Place over medium heat and stir constantly until the butter melts and the sugar dissolves completely. This should take about 3-4 minutes.
- Bring to a boil: Once everything is melted and combined, stop stirring and let the mixture come to a boil. Allow it to boil without stirring for exactly 4-5 minutes. The mixture will bubble vigorously and darken slightly. If using a candy thermometer, it should reach about 250°F (hard-ball stage), but timing works well too.
- Remove from heat and add finishing touches: After the boiling time, immediately remove the pan from heat. Quickly stir in the baking soda and vanilla extract. The mixture will foam up dramatically when you add the baking soda – this is normal and expected! Stir until the foaming subsides and everything is well combined. Work quickly as the caramel begins to thicken as it cools.
- Coat the popcorn: Immediately pour the hot caramel over the popcorn in your large bowl or roasting pan. Using a large spoon or spatula, stir and fold the popcorn quickly but thoroughly, ensuring every piece gets coated with caramel. This step requires some elbow grease – keep mixing until the caramel is evenly distributed. The caramel will be very hot, so be careful not to touch it directly.
- Spread on baking sheets: Divide the caramel-coated popcorn between your two prepared baking sheets, spreading it out in an even layer. Don’t worry if some pieces clump together – you’ll break these apart later.
- Bake and stir: Place both baking sheets in the preheated oven. Bake for 45 minutes total, but every 15 minutes, remove the pans from the oven and use a large spatula to stir and redistribute the caramel corn. This stirring is crucial – it ensures even coating and helps the caramel corn bake uniformly. Return the pans to the oven after each stir, rotating their positions on the racks for even baking.
- Cool completely: After the full 45 minutes of baking, remove the pans from the oven and let the caramel corn cool completely on the baking sheets. As it cools, it will harden and become crispy. This usually takes 30-45 minutes at room temperature. Resist the urge to taste it while hot – the caramel retains heat for a long time and can burn your mouth!
- Break apart and store: Once completely cool and crispy, break the caramel corn into individual pieces or bite-sized clusters. Store in airtight containers or resealable bags. If gifting, package in decorative tins, jars, or cellophane bags tied with ribbon.
Notes
- Humidity affects results: Caramel corn is best made on dry days. High humidity can prevent the coating from getting perfectly crispy.
- Don’t skip the stirring: Stirring every 15 minutes during baking is essential for even coating and crispiness.
- Work quickly: Once the caramel is made, work fast to coat the popcorn before it hardens in the pan.
- Hot caramel warning: The caramel mixture is extremely hot and can cause serious burns. Keep children at a safe distance and work carefully.
- Baking soda reaction: The dramatic foaming when you add baking soda is normal – just stir it through quickly.
- Fresh popcorn is best: Use freshly popped corn for the best texture and flavor absorption.
- Prep Time: 10 minutes
- Cook Time: 5 minutes (15 minutes caramel + 30 minutes baking)
- Category: Snack, Dessert, Candy
- Method: Stovetop & Baking
- Cuisine: American
- Diet: Vegetarian
Nutrition
- Serving Size: 1 cup
- Calories: 180
- Sugar: 18g
- Sodium: 150mg
- Fat: 9g
- Saturated Fat: 5g
- Unsaturated Fat: 4g
- Trans Fat: 0g
- Carbohydrates: 25g
- Fiber: 1g
- Protein: 1g
- Cholesterol: 20mg
Tips & Variations
Caramel corn is wonderfully versatile! Here are creative ways to customize this classic recipe:
Flavor Variations:
- Cinnamon Caramel Corn: Add 1-2 teaspoons of ground cinnamon to the caramel mixture for warm, spicy notes
- Maple Caramel Corn: Replace ¼ cup of the corn syrup with pure maple syrup for subtle maple flavor
- Chocolate Caramel Corn: Drizzle melted dark or milk chocolate over cooled caramel corn for a decadent twist
- Pumpkin Spice Caramel Corn: Add 1 tablespoon pumpkin pie spice to the caramel for a fall-inspired treat
- Coconut Caramel Corn: Toss 1 cup toasted coconut flakes with the popcorn before coating
- Coffee Caramel Corn: Add 2 teaspoons instant espresso powder to the caramel for sophisticated depth
- Orange Caramel Corn: Add 1 tablespoon orange zest to the finished caramel for bright citrus notes
Nut and Mix-In Options:
- Add 1½ cups roasted peanuts for classic Cracker Jack style
- Use pecans for a Southern twist
- Try cashews for buttery richness
- Add almonds (sliced or whole) for elegant crunch
- Mix in M&Ms or chocolate chips after cooling for candy-studded corn
- Toss in ½ cup mini pretzels before baking for sweet-salty contrast
- Add ½ cup dried cranberries or cherries after cooling for chewy fruit bursts
Sweet-Salty Variations:
- Salted Caramel Corn: Sprinkle flaky sea salt over the hot caramel corn immediately after baking
- Bacon Caramel Corn: Crumble 6-8 strips of cooked, crispy bacon and toss with the finished corn
- Cheddar Caramel Corn: Mix half traditional caramel corn with half cheddar popcorn for a “Chicago mix”
Holiday Variations:
- Christmas Caramel Corn: Add ½ teaspoon peppermint extract and crushed candy canes
- Halloween Caramel Corn: Toss with candy corn and candy pumpkins after cooling
- Valentine’s Caramel Corn: Drizzle with pink or red melted chocolate and add conversation hearts
- Easter Caramel Corn: Mix in pastel M&Ms and mini chocolate eggs after cooling
Dietary Adaptations:
- Vegan Caramel Corn: Use vegan butter (like Earth Balance) and substitute maple syrup for corn syrup
- Lower Sugar: Reduce brown sugar to 1½ cups (though this affects texture slightly)
- Nut-Free: Simply omit nuts or substitute sunflower seeds or pumpkin seeds
Pro Chef Tips
These insider secrets will elevate your caramel corn from good to absolutely extraordinary:
Perfect popcorn matters: The quality of your popped corn directly affects your final result. Use fresh kernels (check the expiration date), and pop them properly – neither under-popped (which leaves tough kernels) nor over-popped (which creates burnt pieces). Air-popped corn tends to be lighter and better at absorbing caramel, while oil-popped corn adds a bit more richness. Either way, make sure to remove ALL unpopped kernels before coating – biting into a hidden unpopped kernel can crack a tooth!
Temperature control is crucial: The caramel needs to reach the right temperature to achieve that perfect crispy-not-sticky texture. While you can time it (4-5 minutes of boiling), using a candy thermometer ensures consistency. You’re aiming for 250°F (hard-ball stage). Too cool and your caramel corn will be sticky; too hot and it becomes rock-hard and can taste burnt. If you don’t have a thermometer, test by dropping a small amount of caramel into cold water – it should form a firm ball that holds its shape.
The baking soda secret: That dramatic foaming when you add baking soda isn’t just for show – it’s chemistry! The baking soda reacts with the acidic caramel to create carbon dioxide bubbles, which aerate the mixture and make it lighter and crispier. This is what prevents your caramel corn from being a dense, tooth-sticking mess. Don’t reduce or omit the baking soda, and add it quickly after removing from heat so the mixture is still very hot for the best reaction.
Stir, stir, stir: When coating the popcorn with caramel, thorough mixing is essential. Use a large spoon or your hands (once the caramel has cooled slightly on the popcorn) to really work the caramel into every nook and cranny. The caramel hardens quickly, so you need to be efficient. Having a helper for this step can be useful – one person pours while the other stirs.
Oven stirring is non-negotiable: Those 15-minute stirring intervals aren’t optional suggestions – they’re the secret to evenly coated, perfectly crispy caramel corn. During baking, the oven heat redistributes the caramel coating, and stirring ensures no pieces get overly dark while others stay pale. It also breaks up clumps and exposes different surfaces to heat for even crisping. Set a timer so you don’t forget!
Low and slow baking: The 250°F temperature might seem unnecessarily low, but this gentle heat allows the caramel to dry out and crisp up without burning the popcorn or making the caramel too hard. Higher temperatures will brown the popcorn too much and can cause the caramel to become bitter. Patience is key here.
Humidity is the enemy: Caramel corn hates humid weather. On very humid days, the caramel absorbs moisture from the air and can turn sticky even after proper baking. If you live in a humid climate, try to make caramel corn on drier days, or add an extra 10-15 minutes to the baking time. You can also store it with silica gel packets to absorb any moisture.
The cooling patience test: This might be the hardest part – waiting for the caramel corn to cool completely before tasting! Hot caramel retains tremendous heat and can cause serious burns to your mouth. Additionally, the caramel doesn’t reach its final crispy texture until fully cooled. Wait the full 30-45 minutes, as difficult as that may be while your kitchen smells amazing.
Common Mistakes to Avoid
Even with a straightforward recipe like this, there are pitfalls that can affect your results. Here’s how to avoid them:
Mistake #1: Not Removing Unpopped Kernels – Those rock-hard unpopped kernels (called “old maids”) can hide in your finished caramel corn and create a dental disaster when someone bites into one. They’re also unpleasant to encounter and can make your caramel corn feel lower quality. Solution: After popping, transfer the popped corn to your large bowl carefully, leaving the unpopped kernels in the popper or pot. You can also pour the popcorn through a large colander to let the unpopped kernels fall through.
Mistake #2: Skipping or Under-Timing the Caramel Boil – If you don’t let the caramel boil for the full 4-5 minutes, it won’t reach the proper temperature and your coating will be sticky rather than crispy. Many people get nervous about the vigorous boiling and remove it from heat too soon. Solution: Watch the clock and trust the process. The mixture should boil vigorously for the full time. If using a candy thermometer, wait until it reads 250°F. Under-cooked caramel will result in sticky, gooey popcorn that never properly crisps up.
Mistake #3: Forgetting to Stir During Baking – This is one of the most common mistakes and one of the most detrimental to your final result. If you don’t stir every 15 minutes, the caramel corn will bake unevenly. The pieces on the edges will get too dark while those in the middle stay pale and soft. You’ll also end up with large, hard-to-break-apart clumps instead of individual crispy pieces. Solution: Set a timer for 15-minute intervals and be diligent about stirring. Yes, it’s a bit of effort, but the difference in your final product is dramatic.
Mistake #4: Using Microwave Popcorn – Pre-made microwave popcorn contains oils, salt, and sometimes butter flavoring that interfere with the caramel coating’s ability to adhere properly. The popcorn is also often inconsistent in quality and can taste off when combined with caramel. Solution: Always start with plain popcorn kernels and pop them yourself using an air popper, stovetop method, or plain kernels in a microwave-safe brown paper bag.
Mistake #5: Working Too Slowly – Once the caramel is made, you have a limited window to coat the popcorn before the caramel hardens in the pan. If you’re too slow, the caramel will solidify and you won’t be able to distribute it evenly over the popcorn. Solution: Have everything ready before you start making the caramel – popcorn popped, nuts measured, baking sheets prepared, and a clear workspace. As soon as you add the baking soda and vanilla, immediately pour and start stirring.
Mistake #6: Tasting While Hot – Hot caramel can cause serious burns to your mouth and throat. The caramel retains heat for a surprisingly long time, and biting into a hot piece can be dangerous. Additionally, the texture isn’t right until it’s fully cooled – you won’t get an accurate sense of the final product. Solution: Exercise patience and wait until the caramel corn is completely cool before tasting. This usually takes 30-45 minutes. Trust me, the wait is worth it!
Mistake #7: Improper Storage – Storing caramel corn while it’s still warm or in non-airtight containers will cause it to become sticky and lose its crunch. Exposure to air and humidity are the enemies of crispy caramel corn. Solution: Wait until the caramel corn is completely cool, then store it in airtight containers or resealable bags. If your climate is humid, consider adding a silica gel packet to your storage container.
Storage & Meal Prep
Proper storage ensures your caramel corn stays crunchy and delicious for weeks:
Room Temperature Storage: Caramel corn stores beautifully at room temperature in an airtight container for up to 2-3 weeks, sometimes longer if conditions are right. The keys are complete cooling before storage and truly airtight containers. Mason jars, plastic containers with tight-sealing lids, or resealable plastic bags all work well. Keep the container in a cool, dry place away from direct sunlight and heat sources. Avoid storing in the refrigerator, as this can actually introduce moisture and make the caramel corn sticky.
Humidity Considerations: If you live in a humid climate, caramel corn can become sticky even when properly stored. The sugar in the caramel coating is hygroscopic, meaning it absorbs moisture from the air. In very humid conditions, consider adding a food-safe silica gel packet (the kind found in vitamin bottles or shoe boxes) to your storage container. Just make sure it doesn’t directly touch the caramel corn. Alternatively, you can re-crisp slightly sticky caramel corn by spreading it on a baking sheet and warming it in a 250°F oven for 10-15 minutes, then cooling completely again.
Maintaining Crispness: The enemy of caramel corn is moisture in any form. Always make sure your caramel corn is completely cool before storing, as any residual warmth can create condensation in your container. Don’t store caramel corn with other baked goods that might introduce moisture. If you’re layering caramel corn in a container, you can place parchment or wax paper between layers, though this usually isn’t necessary if everything is properly dry.
Signs of Staleness: Fresh caramel corn should be crispy and crunchy with no hint of chewiness. If it’s become sticky, chewy, or lost its crunch, it has absorbed too much moisture. While still safe to eat, the texture won’t be optimal. You can sometimes rescue slightly stale caramel corn by recrisping in the oven as mentioned above.
Container Choices: The best containers for caramel corn are those with tight-sealing lids. Large glass jars with rubber-sealed lids are excellent and look beautiful for gift-giving. Plastic containers with snap-on lids work well for everyday storage. For gifting, those decorative holiday tins work perfectly – just make sure there are no gaps in the lid. Heavy-duty resealable plastic bags are fine for shorter-term storage but aren’t as reliable for the full 2-3 week period.
Make-Ahead & Freezer Notes
Caramel corn is one of the best make-ahead treats, making it perfect for holiday preparation and stress-free entertaining:
Make-Ahead Timeline: Not only can you make caramel corn ahead, but it actually benefits from a day or two of storage! The flavors deepen and meld together beautifully, and the texture becomes even more uniformly crispy. You can make caramel corn up to 3 weeks in advance if stored properly at room temperature in airtight containers. This makes it ideal for holiday baking marathons, gift preparation, or simply having a homemade snack ready whenever you want it.
Freezing Instructions: Here’s great news – caramel corn freezes exceptionally well! Once completely cooled, place the caramel corn in heavy-duty freezer bags or airtight freezer-safe containers. Remove as much air as possible from bags before sealing. You can freeze in one large batch or divide into smaller portions for easier use. Properly stored, frozen caramel corn maintains excellent quality for up to 3 months. The texture actually holds up remarkably well through freezing because the coating is so dry and crispy to begin with.
Thawing Method: Thawing caramel corn couldn’t be easier – simply remove from the freezer and let it come to room temperature. There’s no special process needed. You can take out just what you need and leave the rest frozen. The caramel corn will be ready to eat as soon as it reaches room temperature, usually within 30-60 minutes depending on the quantity. There’s no quality loss from freezing, and most people can’t tell the difference between freshly made and properly frozen-then-thawed caramel corn.
Gift-Giving Strategy: One of my favorite strategies is to make several batches of caramel corn in early December (or before any major gifting occasion), freeze them in gift-sized portions, and pull them out as needed. You can package frozen caramel corn directly into decorative tins or bags – by the time you deliver it or the recipient opens it, it will be perfectly thawed. This allows you to do all the work during a less hectic time while still providing fresh-tasting treats.
Batch Cooking: Because the recipe makes such a large quantity and stores so well, many people double or triple the recipe and make caramel corn in big batches. You can have multiple baking sheets in the oven at once (just rotate their positions when you stir every 15 minutes). This is especially practical if you’re gifting to many people or want to have caramel corn on hand throughout the holiday season without making multiple batches.
No Re-Freezing: Once you’ve thawed caramel corn, don’t re-freeze it. The temperature fluctuations can affect the texture and introduce moisture. Only thaw what you plan to use within the next 2-3 weeks.
Serving Suggestions
While caramel corn is perfect on its own as a snack, here are creative ways to serve and enjoy it:
Party and Entertainment Ideas:
- Serve in individual paper cones or bags at casual parties for easy, mess-free snacking
- Fill large apothecary jars or glass containers for a beautiful self-serve snack station
- Create a popcorn bar with bowls of plain popcorn, caramel corn, cheese popcorn, and various toppings
- Package in small boxes or bags as party favors for birthdays, showers, or weddings
- Arrange on a large platter with other finger foods for game day or movie night
Beverage Pairings:
- Cold milk – classic and refreshing
- Hot apple cider – perfect for fall gatherings
- Hot chocolate or cocoa – double the sweet indulgence
- Cold beer – the sweet