Ultimate Caramel Apple Milkshake Recipe: Fall’s Most Delicious Drink!
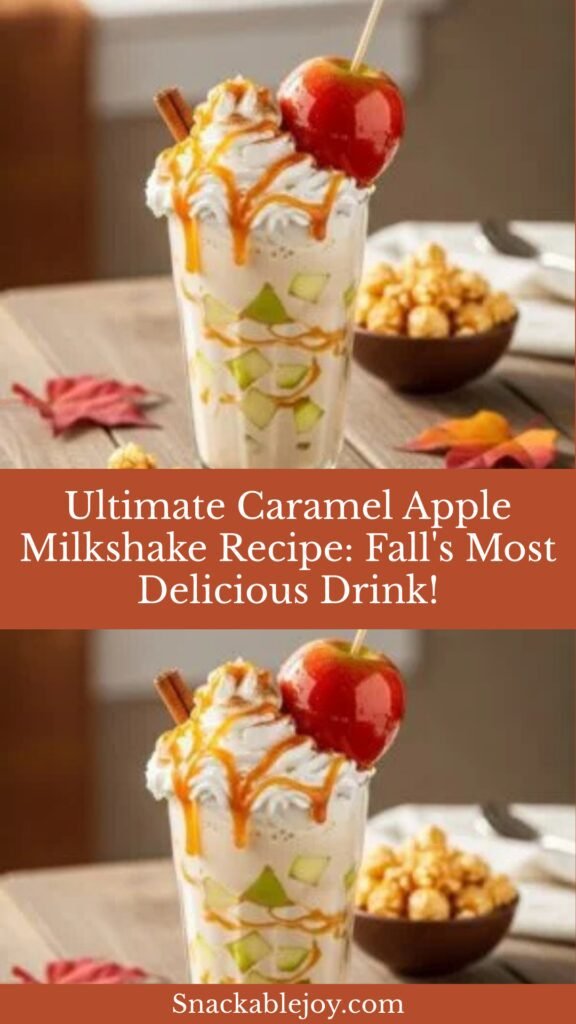
Imagine capturing the essence of fall’s favorite treat—warm caramel apples from the county fair—and transforming it into the most indulgent, creamy milkshake you’ve ever tasted. That’s exactly what this Caramel Apple Milkshake delivers! This sensational drink combines sweet, crisp apple flavor with rich caramel sauce and creamy vanilla ice cream to create a dessert beverage that tastes like autumn in a glass.
This isn’t just another apple-flavored drink. The Caramel Apple Milkshake captures that perfect marriage of tart-sweet apples and buttery caramel that makes caramel apples so irresistible, but in a thick, spoonable, incredibly satisfying milkshake form. Each sip delivers creamy vanilla ice cream, real apple flavor (from fresh apples or apple pie filling), ribbons of gooey caramel, and often a hint of warm spices like cinnamon and nutmeg that make it taste like drinking apple pie à la mode.
Caramel apple milkshakes have become wildly popular at fall festivals, apple orchards, trendy burger joints, and ice cream shops across America, especially from September through November when apple season is in full swing. They’re the perfect treat for so many occasions: after apple picking at the orchard, during Halloween parties, at Thanksgiving gatherings, for cozy movie nights, autumn birthday celebrations, or simply when you’re craving the ultimate comfort drink on a crisp fall evening.
The best part? This restaurant-quality creation comes together in your home kitchen in just 10 minutes with simple ingredients. No carnival required, no standing in line—just pure caramel-apple bliss whenever the craving strikes. Whether you’re an apple dessert fanatic, a milkshake enthusiast, or someone who lives for all things fall, this recipe is about to become your new seasonal obsession!
History / Background
To understand the caramel apple milkshake, we need to explore the delicious history of caramel apples themselves, which are a uniquely American creation with surprisingly specific origins. Unlike many traditional recipes that evolved gradually over time, the caramel apple has a documented invention story.
Caramel apples were created in the 1950s by Dan Walker, a sales representative for Kraft Foods who worked at their plant in Oak Brook, Illinois. In 1950, Walker was experimenting with ways to promote Kraft’s caramels during Halloween. He had the innovative idea of melting down Kraft caramels and dipping apples into the mixture, creating the first caramel apples. Kraft began promoting this treat in 1960, providing recipes and encouragement for families to make caramel apples at home as a fun Halloween activity.
The timing was perfect—post-World War II America was experiencing prosperity, and families were looking for fun, wholesome activities. Making caramel apples became a beloved autumn tradition, particularly around Halloween and at fall festivals and county fairs. The treat paired the abundance of fall apple harvests with the growing availability of commercial caramel candies, creating an affordable luxury that felt special.
By the 1960s and 70s, caramel apples had become fixtures at carnivals, state fairs, and apple orchards across America. Vendors would dip apples on sticks into vats of hot caramel, then roll them in chopped nuts, creating that iconic treat we all recognize. The visual appeal—that shiny caramel coating covering a crisp apple—made them as much fun to look at as they were to eat.
Apples themselves have deep roots in American culture, particularly in the Northeast and Midwest where apple cultivation has been important since colonial times. The phrase “as American as apple pie” reflects how central apples became to American identity. Fall apple harvests were (and still are) major agricultural events, spawning festivals, cider pressing traditions, and countless apple-based desserts.
The evolution from caramel apples to caramel apple milkshakes represents the American tradition of taking beloved classics and reimagining them in new forms. As milkshake culture exploded in the 2000s and 2010s with restaurants creating increasingly elaborate specialty shakes, it was only natural that someone would think to capture caramel apple flavor in drinkable form.
The caramel apple milkshake likely emerged in upscale burger restaurants and gourmet ice cream shops in the late 2000s as chefs sought to create seasonal menu items that captured fall flavors in innovative ways. The combination was perfect: apples represent fall harvest, caramel adds indulgent richness, and the milkshake format makes it feel special and treat-worthy. The drink gained traction on social media as food photography became popular, with that gorgeous caramel drizzle and apple garnish making it incredibly photogenic.
Today, the caramel apple milkshake has become a seasonal staple at many American restaurants, particularly chains like Steak ‘n Shake and Johnny Rockets, which feature it as a limited-time autumn offering. Home cooks have embraced making their own versions, discovering that these restaurant-quality shakes are surprisingly simple to recreate and customize at home.
Why You’ll Love This Recipe
This caramel apple milkshake is about to become your ultimate fall indulgence—the drink you crave the moment temperatures drop and leaves start changing colors. It’s the kind of recipe that makes you feel like you’re at a cozy apple orchard or sitting by a bonfire, even if you’re just in your own kitchen on a Tuesday evening.
What makes this milkshake truly special is how it captures the complete caramel apple experience without any of the struggles of eating an actual caramel apple (you know—trying to bite through that hard caramel shell, getting it stuck in your teeth, having the caramel slide off the apple). This gives you all the flavor in an easy-to-enjoy, incredibly smooth form that feels luxurious and comforting.
Here’s why you’re going to absolutely love this caramel apple milkshake:
- Ready in 10 minutes – Faster than driving to the cider mill and waiting in line!
- Tastes like fall in a glass – Captures everything we love about autumn flavors
- Real apple flavor – Uses actual apples or apple pie filling, not artificial flavoring
- Gooey caramel ribbons – Swirls of rich caramel throughout create pockets of sweet heaven
- Perfectly spiced – Cinnamon and nutmeg add that warm, cozy feeling
- Thick and creamy – That ideal milkshake consistency that requires a spoon
- Impressive presentation – The caramel drizzle and garnishes look absolutely Pinterest-worthy
- Kid and adult approved – The whole family will go crazy for this treat
- No baking required – All the flavor of apple pie without turning on your oven
- Customizable sweetness – Adjust caramel and sugar to your exact preference
- Makes great photos – Those caramel drips are Instagram gold
- Perfect for fall entertaining – Impress guests at Halloween parties, Thanksgiving, or autumn gatherings
- Restaurant-quality at home – Save $8-10 per shake by making your own
- Captures seasonal nostalgia – Reminds you of county fairs, apple picking, and cozy autumn memories
Whether you’re obsessed with anything apple-flavored, love the classic combination of caramel and apples, or simply want to enjoy a taste of fall in the most delicious way possible, this recipe delivers on every level. It’s indulgent enough to feel like a special treat but simple enough to make whenever the craving hits!
Ingredient Notes
Let’s break down what creates this amazing fall flavor experience. Each ingredient plays a crucial role in capturing that authentic caramel apple taste:
Vanilla Ice Cream: Your creamy base! Use high-quality vanilla ice cream with a high butterfat content—premium brands like Häagen-Dazs, Tillamook, Ben & Jerry’s, or Blue Bell work beautifully because they’re richer, denser, and create a more luxurious shake. You’ll need about 3-4 generous scoops (roughly 2 cups) per serving. Let it soften at room temperature for 5-10 minutes before blending—it should be soft enough to scoop easily but not melted. Some people actually use butter pecan or cinnamon ice cream as the base for even more fall flavor, which is absolutely delicious! Avoid “frozen dairy dessert” or cheap brands with lots of air—they create thin, watery shakes.
Fresh Apples or Apple Pie Filling: This provides the essential apple flavor! You have two excellent options: Fresh apples – Use sweet, crisp varieties like Honeycrisp, Gala, Fuji, or Pink Lady. You’ll need about 1 cup of peeled, cored, and diced apple per serving. Some people cook the apples briefly with a little butter and cinnamon to soften them and intensify flavor before blending. Apple pie filling – This is actually the shortcut many restaurants use! Canned apple pie filling already contains cooked, spiced apples in a thick sauce that blends beautifully and adds authentic apple pie flavor. You’ll need about ¾ to 1 cup per serving. The pie filling adds both apple flavor and those warm spices automatically. Both options work wonderfully—fresh apples taste brighter and fresher, while pie filling tastes more like baked apple desserts.
Caramel Sauce: The star ingredient that makes this a caramel apple shake! Use high-quality caramel sauce—store-bought works perfectly (brands like Ghirardelli, Torani, or Mrs. Richardson’s are excellent), or make your own if you’re feeling ambitious. You’ll need about ¼ cup blended into the shake, plus extra for drizzling inside the glass and on top. The caramel provides that buttery, rich sweetness and creates gorgeous ribbons throughout the shake. Ice cream topping caramel is ideal because it’s designed to stay somewhat liquid when cold, while hard caramels or caramel candies can become too stiff when blended with ice cream.
Milk: Helps achieve the right consistency and makes blending easier. Whole milk creates the richest result, but 2% works fine. You’ll typically need ½ to ¾ cup depending on how thick you want your shake and what other ingredients you’re using. Apple cider or apple juice can replace some or all of the milk for even more intense apple flavor! This is a game-changer—using ½ cup apple cider instead of milk amplifies the apple taste significantly.
Ground Cinnamon: Essential for that warm, spiced flavor that makes this taste like fall! You’ll need about ½ to 1 teaspoon. Cinnamon pairs perfectly with both apples and caramel, adding warmth and depth. Don’t skip this—it’s what transforms the shake from just “caramel flavored” to “caramel apple.”
Ground Nutmeg: Just a pinch (⅛ to ¼ teaspoon) adds complexity and that characteristic apple pie spice profile. Nutmeg is more subtle than cinnamon but creates depth. Freshly grated nutmeg tastes even better than pre-ground if you have it.
Brown Sugar or Granulated Sugar: Optional, depending on the sweetness of your apples, caramel sauce, and ice cream. Brown sugar adds a lovely molasses note that complements caramel beautifully. Start with 1-2 tablespoons and adjust to taste. If using very sweet apple pie filling and sweet caramel sauce, you might not need any additional sugar at all.
Vanilla Extract: Just ½ teaspoon enhances all the other flavors and adds that bakery-fresh taste. Use pure vanilla extract, not imitation, for the best flavor.
Optional – Whipped Cream: For topping! Homemade whipped cream tastes incredible, but canned is perfectly acceptable and much easier. The whipped cream provides a lovely contrast to the thick shake and serves as a base for your caramel drizzle and garnishes.
Optional – Apple Slices, Caramel Pieces, Crushed Graham Crackers: For garnish. Fresh apple slices dipped in caramel look stunning perched on the rim. Caramel candy pieces or toffee bits add texture. Graham cracker crumbs give that “pie crust” element that completes the apple pie experience.
Equipment Needed
Making this spectacular fall milkshake requires minimal equipment that you likely already own:
- High-powered blender: Essential for creating that smooth, creamy texture and properly blending the apples. Vitamix, Blendtec, Ninja, or any standard countertop blender works. The more powerful your blender, the smoother your apple pieces will become.
- Measuring cups and spoons: For accurate measurements of ingredients
- Ice cream scoop: Makes portioning the ice cream consistent and easy
- Vegetable peeler and knife: If using fresh apples, you’ll need these to peel, core, and dice them
- Small saucepan (optional): If you’re pre-cooking fresh apples to soften them, or making homemade caramel sauce
- Spatula: For scraping down the blender sides and ensuring everything is incorporated
- Tall glasses: Caramel apple milkshakes look stunning in tall, clear glasses—16-20 ounce capacity is ideal. Mason jars work beautifully for a rustic fall vibe.
- Squeeze bottle or spoon: For drizzling caramel sauce inside the glass and on top. A squeeze bottle gives you the most control for pretty patterns.
- Thick straws: Wide milkshake straws are essential—regular straws collapse under the pressure of this thick shake
- Long-handled spoons: For eating the whipped cream and garnishes, and because this shake is thick enough to require a spoon!
- Small bowl (optional): For dipping apple slice garnishes in caramel
That’s all you need! The blender does most of the work, and everything else is simple assembly and styling.
Print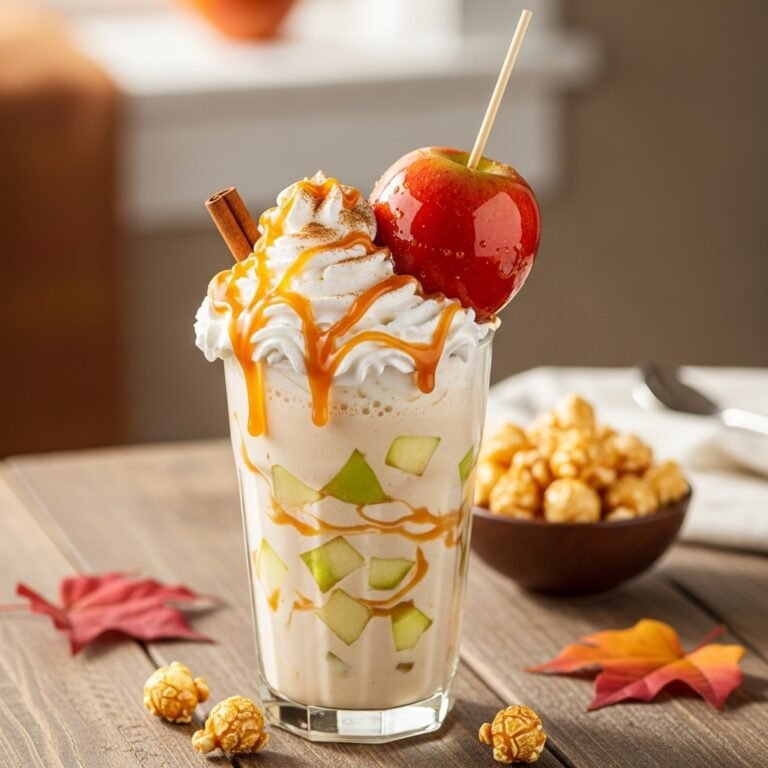
Caramel Apple Milkshake Recipe
This incredible Caramel Apple Milkshake captures all the flavors of fall’s favorite treat! It’s thick, creamy, loaded with real apple flavor, swirled with gooey caramel, and tastes exactly like drinking a caramel apple. Perfect for autumn celebrations!
- Total Time: 10 minutes
- Yield: 2 large milkshakes 1x
Ingredients
For the Milkshake:
- 4 cups (8 scoops) vanilla ice cream, slightly softened
- 1 cup apple pie filling (or 1 cup fresh apple, peeled, cored, diced)
- ½ cup whole milk (or apple cider for more apple flavor)
- ⅓ cup caramel sauce, plus more for drizzling
- 1 teaspoon ground cinnamon
- ¼ teaspoon ground nutmeg
- 1-2 tablespoons brown sugar (optional, adjust to taste)
- ½ teaspoon vanilla extract
For Topping & Garnish:
- Whipped cream (homemade or canned)
- Extra caramel sauce for drizzling
- Apple slices (optionally dipped in caramel)
- Crushed graham crackers or cinnamon sugar
- Toffee bits or caramel candy pieces (optional)
Instructions
- Prepare your apples (if using fresh): Peel, core, and dice 1 large apple into small pieces (about ½-inch cubes). For extra flavor and easier blending, you can quickly sauté the apple pieces in 1 tablespoon of butter over medium heat for 3-4 minutes until slightly softened, then let cool completely. This step is optional but adds a cooked apple pie flavor. If using canned apple pie filling, no preparation is needed—just measure it out.
- Soften ice cream: Remove ice cream from the freezer and let it sit at room temperature for 5-10 minutes until it’s soft enough to scoop easily but not melted. Properly softened ice cream blends much more smoothly and creates better texture.
- Prepare your glasses: For an impressive presentation, drizzle caramel sauce inside your serving glasses in a spiral pattern, rotating the glass so the caramel creates decorative lines down the interior. Place the prepared glasses in the freezer while you make the shake—this keeps them cold and prevents the shake from melting too quickly.
- Add ingredients to blender: Start with the milk (or apple cider) on the bottom—liquids first help the blending process. Add the apple pieces or apple pie filling, then the caramel sauce, cinnamon, nutmeg, brown sugar (if using), and vanilla extract. Finally, add the softened ice cream scoops on top. Layering ingredients this way helps your blender grab everything properly.
- Blend on low first: Start blending on low speed for about 10-15 seconds to break everything down initially. This prevents splashing and helps ingredients start incorporating. You may need to stop and use a spatula to push ingredients toward the blades if your blender isn’t catching everything right away.
- Increase to high speed: Once roughly combined, increase to high speed and blend for 30-45 seconds until completely smooth and creamy. If using fresh apples, you may need to blend a bit longer (up to 60 seconds) to ensure no apple chunks remain. The mixture should be uniformly thick and creamy with caramel swirled throughout. Stop as soon as it’s smooth—over-blending melts the ice cream.
- Check consistency and adjust: Stop the blender and check your shake’s thickness. Insert a spoon—it should stand upright but slowly fall over. Too thick to blend or pour? Add 2-4 tablespoons more milk or cider and pulse briefly. Too thin and runny? Add another scoop or two of ice cream and blend again. Remember, the shake thickens slightly as it sits.
- Taste and adjust flavors: Dip a clean spoon and taste. Need more apple flavor? Add another spoonful of apple pie filling or a splash of apple cider. Not enough caramel? Add another 2 tablespoons of caramel sauce. Want more spice? Add a pinch more cinnamon. Not sweet enough? Add another tablespoon of brown sugar. Blend briefly after any additions.
- Add final caramel swirl (optional): For beautiful caramel ribbons throughout, after blending, drizzle in an additional 2 tablespoons of caramel sauce and pulse just 2-3 times. This creates gorgeous caramel streaks rather than blending it completely smooth. Don’t over-pulse or you’ll fully incorporate it.
- Pour into prepared glasses: Remove your caramel-drizzled glasses from the freezer. Pour the milkshake slowly into the glasses. The shake should be thick and pour in a slow, steady stream. Fill to about 2 inches from the top to leave room for whipped cream and garnishes.
- Top generously: Add a generous swirl or dollop of whipped cream on top of each shake. The whipped cream should be piled high and look abundant—don’t be shy!
- Drizzle with caramel: Generously drizzle more caramel sauce over the whipped cream, allowing some to drip down the sides of the glass for that classic “caramel apple” look. Use a squeeze bottle or spoon for this.
- Add final garnishes: Sprinkle crushed graham crackers or a pinch of cinnamon sugar over the whipped cream. Add toffee bits or caramel candy pieces if using. Make a small cut in an apple slice and perch it on the rim of the glass. For extra wow-factor, dip the apple slice in caramel first.
- Serve immediately: Insert thick straws and long spoons. Serve right away while perfectly cold and thick. These shakes wait for no one—they’re at their absolute best within the first 10 minutes!
Notes
- Fresh vs. canned apples: Apple pie filling is easier and adds authentic spiced apple flavor, but fresh apples taste brighter. Choose based on your preference and what you have available.
- Apple cider upgrade: Replacing milk with apple cider intensifies apple flavor dramatically—highly recommended!
- Adjust thickness: The ratio of ice cream to liquid controls thickness. Start with less liquid than you think you need.
- Sweetness varies: Depending on your caramel sauce, ice cream brand, and apple sweetness, you may need more or less sugar. Always taste before serving.
- Make it thicker: Use frozen apple pieces, less milk, or more ice cream.
- Spice level: Adjust cinnamon and nutmeg to your preference. Some people love lots of spice; others prefer subtle.
- Serve immediately: Milkshakes are best within 5-10 minutes of making them, before they start to melt and thin out.
- Prep Time: 10 minutes
- Cook Time: 0 minutes
- Category: Dessert, Beverage, Treat
- Method: Blending
- Cuisine: American
- Diet: Gluten Free
Nutrition
- Serving Size: 1 large milkshake (about 20 oz)
- Calories: 695
- Sugar: 85g
- Sodium: 265mg
- Fat: 28g
- Saturated Fat: 17g
- Unsaturated Fat: 9g
- Trans Fat: 0.5g
- Carbohydrates: 105g
- Fiber: 2g
- Protein: 9g
- Cholesterol: 95mg
Tips & Variations
This caramel apple milkshake is wonderfully adaptable! Here are some creative ways to customize it:
Salted Caramel Apple Shake: Use salted caramel sauce instead of regular caramel, or add a pinch (⅛ teaspoon) of sea salt to regular caramel. The salt-sweet combination is absolutely addictive and very trendy.
Apple Pie Milkshake: Add 2-3 crushed graham crackers or vanilla wafer cookies to the blender for that pie crust element. You can also rim the glass with crushed graham crackers mixed with cinnamon sugar for extra pie vibes.
Caramel Apple Crisp Shake: Blend in ¼ cup of granola or oat crumble topping for texture and that apple crisp experience. Top with more granola for crunch.
Boozy adult version: Add 1-2 ounces of spiced rum, apple-flavored vodka, Fireball whiskey, or butterscotch schnapps for a grown-up treat. Irish cream liqueur also pairs beautifully with caramel apple flavors.
Lighter version: Use low-fat vanilla ice cream or frozen yogurt, skim milk, and sugar-free caramel sauce. Replace some ice cream with frozen banana for natural sweetness and creaminess. It won’t be as indulgent but still delicious!
Protein-packed: Add a scoop of vanilla or cinnamon-flavored protein powder to make this more substantial. Greek yogurt can also be added for protein and tanginess that complements apples.
Dairy-free/vegan: Use dairy-free vanilla ice cream (coconut, cashew, or oat-based work well), non-dairy milk, and ensure your caramel sauce is vegan (many are, but check labels).
Peanut butter caramel apple: Add 2 tablespoons of peanut butter to the blender. Peanut butter and caramel apples are a classic combination that works beautifully in shake form.
Maple caramel apple: Replace half the caramel sauce with pure maple syrup for a different sweetness profile with maple undertones.
Apple cider donut shake: Use apple cider instead of milk and add ¼ cup of cake donut crumbles to the blender. Top with cinnamon sugar. This tastes exactly like those amazing cider donuts from apple orchards!
Caramel apple cheesecake shake: Add 2-3 ounces of softened cream cheese to the blender for a tangy cheesecake element that pairs wonderfully with apples and caramel.
Extra spiced version: Add a pinch of ground ginger, allspice, or cardamom along with the cinnamon and nutmeg for a more complex spice profile similar to chai or pumpkin spice.
Pro Chef Tips
After researching professional recipes and testing extensively, I’ve discovered some tricks that elevate this shake from great to extraordinary:
Cook your apples first: Even if using apple pie filling, try this professional technique: sauté fresh diced apples in 1 tablespoon of butter with a pinch of cinnamon and brown sugar for 3-4 minutes until slightly soft and caramelized. Let cool completely before blending. This intensifies the apple flavor and adds a cooked, pie-like quality that raw apples can’t achieve.
Layer the caramel: Don’t just blend all the caramel in. Use it in three stages: blend some into the shake for overall flavor, drizzle some inside the glass before pouring for visual drama, and drizzle more on top for garnish. This creates multiple layers of caramel experience.
Freeze apple cider into cubes: Make apple cider ice cubes and use 3-4 of these instead of regular milk. As they blend and melt, they add intense apple flavor without thinning the shake. This is a professional ice cream shop trick!
Toast your spices: For deeper, more complex flavor, toast your cinnamon and nutmeg in a dry pan for 30-60 seconds before adding to the shake. This releases aromatic oils and intensifies the spice flavor. Let cool before using.
Add a secret ingredient: A tiny splash (just ¼ teaspoon) of apple cider vinegar brightens all the flavors and makes the apple taste more pronounced without being detectable as vinegar. This is a chef’s secret for enhancing fruit flavors.
Caramelize your garnish apples: If garnishing with apple slices, quickly sear them in a hot pan with butter and brown sugar for 30 seconds per side. These caramelized apples look stunning and taste incredible perched on your shake.
Use apple butter: Add 2 tablespoons of apple butter to your shake for concentrated apple flavor and extra richness. Apple butter is essentially apple concentrate and adds incredible depth.
Rim your glass: Before adding the shake, rim your glass with caramel sauce, then dip it in a mixture of crushed graham crackers and cinnamon sugar. This creates an edible, flavorful rim that looks professional and tastes amazing.
Temperature control: Keep your ice cream very cold (take it out of freezer just minutes before using) but have your other ingredients at room temperature. This contrast helps maintain thick consistency while ensuring smooth blending.
The soft-serve secret: Add 1 tablespoon of corn syrup or honey to your shake. This is what professional ice cream makers use—it prevents ice crystals and creates impossibly smooth, soft-serve-like texture.
Common Mistakes to Avoid
Even with a simple recipe, several common errors can prevent your caramel apple milkshake from being perfect:
Using too much liquid: This is the #1 mistake! Adding too much milk or cider creates a thin, runny shake instead of that thick, spoonable consistency. Always start with less liquid (just ½ cup) and add more only if your blender is truly struggling. Remember: you can always thin a shake, but thickening it is much harder. A proper milkshake should be thick enough that a straw stands upright in it!
Not softening ice cream enough: Rock-hard ice cream straight from the freezer is difficult to blend and can burn out weaker blenders. Let it soften for 5-10 minutes at room temperature first. It should scoop easily but not be melted or soupy.
Skipping the spices: Some people think the apples and caramel are enough, but the cinnamon and nutmeg are what transform this from just “apple caramel flavored” to true “caramel apple” that tastes like fall. The warm spices are essential to the flavor profile—don’t skip them!
Using artificial apple flavoring: Artificial apple extract or apple-flavored syrups taste fake and chemical compared to real apples or apple pie filling. Always use real apples or quality pie filling for authentic flavor. The real thing makes all the difference.
Over-blending: Once everything is smooth and well-combined, stop blending immediately! Continued blending melts your ice cream, incorporates too much air (creating foam), and warms everything up, resulting in a thin shake. Most shakes only need 30-60 seconds of total blend time—maybe slightly longer if using fresh apples.
Not tasting before serving: Apple sweetness varies wildly depending on variety and season. Caramel sauces have different sweetness levels. Always taste your shake before pouring and adjust sweetness, spice, or apple flavor as needed. A few adjustments can transform it from “pretty good” to “absolutely amazing.”
Serving in warm glasses: Warm glasses melt your shake faster, causing it to thin out before you can enjoy it. Always use chilled glasses—keep them in the freezer for at least 15 minutes before serving, or fill them with ice water while you make the shake, then dump the water right before pouring.
Storage & Meal Prep
Caramel apple milkshakes are definitely best enjoyed fresh and immediately, but here’s what you need to know about storage:
Can you refrigerate caramel apple milkshakes? Not successfully—refrigerating a milkshake causes the ice cream to melt completely, separating into watery milk at the bottom and ice crystals on top. The texture becomes completely unappetizing. If you need to store leftovers, freeze them instead.
Freezer storage: Pour leftover shake into an airtight freezer-safe container and freeze for up to 2-3 days. It will freeze completely solid. To enjoy later, let it sit at room temperature for 15-20 minutes until it reaches soft-serve consistency, then stir vigorously or give it a quick 5-second blend to restore smooth texture.
Texture after storage: Even with proper freezing and thawing, stored milkshake won’t be quite as smooth and creamy as fresh. The texture becomes slightly icier and less velvety. It’s still tasty, but you’ll notice the difference. This is why making fresh is always best!
Component storage: You can store components separately for easier assembly later. Homemade caramel sauce keeps in the refrigerator for up to 2 weeks. Apple pie filling lasts weeks in the fridge once opened. This way, you can quickly make a fresh shake whenever the craving hits.
Why fresh is best: Milkshakes reach peak perfection within 5-10 minutes of making them. That’s when the texture is ideal, the temperature is perfect, everything is well-blended, and all the flavors are bright. Plan to make and serve immediately whenever possible.
Leftover ideas: If you have leftover shake that you don’t want to store, pour it into popsicle molds for caramel apple popsicles—these are incredible and keep for months! You can also freeze it in ice cube trays and blend the cubes later with a bit of milk for a thick, refreshing treat.
Make-Ahead & Freezer Notes
While fresh is ideal, there are smart strategies for making caramel apple milkshakes more convenient:
Pre-cook and freeze apples: Dice and cook apples with butter, cinnamon, and brown sugar, then freeze in single-serving portions (1 cup each). When you want a shake, add the frozen cooked apples directly to the blender with your other ingredients. This actually makes the shake thicker!
Caramel apple “base” packs: Create freezer packs with pre-measured apple pie filling, cinnamon, and nutmeg in small freezer bags or containers. When craving strikes, dump one pack into the blender with ice cream, milk, caramel, and you’re done. Prep time: 2 minutes!
Make caramel sauce in advance: Homemade caramel sauce can be made up to 2 weeks ahead and stored in the refrigerator. Warm it slightly before using to make it pourable, or microwave for 10-15 seconds.
Apple cider ice cubes: Freeze apple cider in ice cube trays. Use 4-6 cubes in place of milk when making your shake. These add intense apple flavor and keep your shake thick without dilution!
Freeze in popsicle molds: Pour your prepared caramel apple milkshake into popsicle molds for amazing caramel apple popsicles! Add a drizzle of extra caramel before freezing. These keep for up to 2 months and make fantastic fall treats.
Ice cream portion prep: Scoop ice cream into individual portions on a parchment-lined baking sheet, freeze solid, then store in freezer bags. Grab pre-portioned ice cream when making shakes—no scooping required!
Spice mix: Combine cinnamon, nutmeg, and brown sugar in the ratios you prefer, then store in a small jar. When making shakes, just add 1-2 tablespoons of your pre-mixed spice blend.
“Reheating” method: There’s no reheating obviously, but to revive frozen leftover shake: remove from freezer, let sit at room temperature for 15-20 minutes until soft-serve consistency, then stir well or blend briefly (5-10 seconds) to restore smooth, creamy texture. Top with fresh whipped cream and caramel.
Serving Suggestions
Caramel apple milkshakes are versatile treats perfect for many occasions and pairings:
Fall festival must-have: These are perfect for Halloween parties, harvest festivals, autumn birthday celebrations, or Thanksgiving dessert. The fall flavors and gorgeous caramel drizzle make them festive and seasonal.
After apple picking: There’s nothing better after a day at the apple orchard than coming home and turning your fresh-picked apples into these incredible milkshakes. It’s the perfect way to enjoy your harvest immediately!
Cozy movie night: Skip the popcorn and serve these indulgent shakes for a special movie night at home. They pair wonderfully with fall-themed movies or anything cozy and heartwarming.
Game day treat: Surprise your football-watching crew with caramel apple milkshakes instead of typical game day snacks. The fall flavors are perfect for autumn Sunday afternoons.
Brunch showstopper: Serve these alongside waffles, pancakes, or French toast for an over-the-top special occasion brunch. They’re basically drinkable dessert for breakfast—no complaints here!
Dessert bar feature: Set up a “build your own” caramel apple milkshake bar at parties with various toppings—whipped cream, different caramel sauces, chopped nuts, toffee bits, cookie crumbles, and fresh apple slices. Let guests customize their own!
Date night at home: Impress your partner with these restaurant-quality shakes for a cozy fall date night. Serve with candles and your favorite autumn playlist for maximum romance.
Kids’ after-school treat: Welcome kids home from school on a crisp fall afternoon with these special shakes. They’ll think you’re the coolest parent ever!
What pairs well:
- Apple pie, apple crisp, or any apple dessert (double the apple goodness!)
- Warm cinnamon donuts or apple cider donuts
- Pumpkin or pecan pie
- Chocolate chip cookies or oatmeal cookies
- Grilled cheese sandwiches (sweet and savory contrast)
- Bacon (yes, seriously—bacon and caramel apple is amazing)
- Roasted nuts or candied pecans
- Cheese and crackers (as a sweet beverage before dessert)
- Hot apple cider or spiced tea
- Nothing—it’s perfect as a standalone treat!
Presentation ideas: Serve in mason jars with handles for rustic fall charm, use clear tall glasses to show off the caramel swirls, add cinnamon sticks as stirrers, rim glasses with caramel and crushed graham crackers, garnish with whole cinnamon sticks and star anise, add a dusting of cinnamon on the whipped cream, serve with long-handled spoons and wide straws, place on a wooden board with autumn leaves for photos.
FAQs Section
Can I use store-bought caramel sauce?
Absolutely! Store-bought caramel sauce works perfectly and is what most people (and restaurants) use. Look for ice cream topping caramel rather than hard caramel candies—brands like Ghirardelli, Smucker’s, Torani, or Mrs. Richardson’s are excellent. Ice cream topping caramel stays pourable and soft when cold, while hard caramels can become too stiff. If you want to go the extra mile, homemade caramel sauce tastes incredible, but it’s completely optional. The convenience and consistent results of quality store-bought caramel make it the practical choice.
Should I use fresh apples or apple pie filling?
Both work beautifully, so choose based on convenience and preference! Apple pie filling is actually easier and what many restaurants use—it’s already cooked, spiced, and sweetened, so it blends smoothly and delivers authentic apple pie flavor immediately. One can typically makes 3-4 shakes. Fresh apples taste brighter and more “apple-forward” but require peeling, coring, and dicing. For best results with fresh, use sweet varieties like Honeycrisp, Gala, or Fuji, and consider cooking them briefly first to soften and intensify flavor. If you want convenience, go with pie filling. If you want the freshest apple taste and have time, use fresh apples.
Can I make this without a high-powered blender?
Yes, though you may need to make some adjustments! A standard blender can handle this recipe, but you’ll want to: use apple pie filling instead of fresh apples (much easier to blend), make sure your ice cream is well-softened, add ingredients in the correct order (liquids first), blend in short pulses and stop to stir/scrape sides frequently, and be patient—it may take 60-90 seconds instead of 30-45. If your blender really struggles, add a bit more liquid to help it along, though this makes a thinner shake. An immersion blender won’t work well for this—you really need a jar-style blender.
How do I make it thicker or thinner?
For a thicker shake: Use less milk (start with just ⅓ cup), use frozen apple pieces instead of fresh or room-temperature pie filling, add an extra scoop or two of ice cream, use apple cider ice cubes instead of liquid milk, or add a handful of regular ice cubes (though this dilutes flavor slightly). For a thinner shake: Add milk 2 tablespoons at a time until desired consistency, use more liquid apple cider, let the ice cream soften more before blending, or blend for a bit longer (though don’t overdo it). Remember that shakes thicken slightly as they sit, so what seems slightly thin when first blended will be perfect after a minute or two.
Can kids have this milkshake?
Yes, absolutely! This is completely kid-friendly with no alcohol or coffee. Children typically love the sweet caramel apple flavor and think the whipped cream and garnishes are fun. However, it is quite rich and high in sugar, so consider it an occasional special treat rather than regular fare. You might want to serve smaller portions to young children (8-12 ounces instead of 16-20), or even split one adult-sized shake between two kids. The recipe easily scales down—just halve all ingredients for smaller servings.
What’s the best apple variety to use?
For fresh apples, choose sweet, crisp varieties that won’t make your shake too tart. Best choices: Honeycrisp (sweet, crisp, juicy—my top pick), Gala (reliably sweet and mild), Fuji (very sweet with great texture), Pink Lady (sweet-tart balance, crisp), or Golden Delicious (sweet, soft when cooked). Avoid: Granny Smith (too tart unless you really love sour apples), Red Delicious (mealy texture, bland flavor), or any apple that’s soft or mealy. If using apple pie filling, the variety doesn’t matter since it’s already prepared and seasoned.
Can I make this dairy-free?
Yes! Use dairy-free vanilla ice cream—coconut-based, cashew-based, or oat-based all work well. Coconut milk ice cream creates the creamiest result with the richest texture. Use non-dairy milk like almond, oat, or coconut milk (full-fat versions are best). Make sure your caramel sauce is dairy-free—surprisingly, many caramel sauces are actually dairy-free or have dairy-free versions available. Check labels carefully. Use coconut whipped cream for topping. The flavor will be slightly different from the dairy version, but still delicious! Coconut milk ice cream actually pairs wonderfully with caramel apple flavors.
Why does my shake taste more like vanilla than caramel apple?
This usually means you need more apple and/or caramel! Make sure you’re using a full cup of apple pie filling or fresh apples—don’t skimp on this. Add more caramel sauce (start with ½ cup total instead of ⅓). Don’t forget the cinnamon and nutmeg—these spices are essential for authentic caramel apple flavor. Consider using apple cider instead of regular milk for more intense apple taste. Also, taste your shake before serving and adjust—add more of whatever flavor you want to come through stronger. Sometimes one extra spoonful of pie filling or caramel makes all the difference!
Conclusion
And there you have it—your complete guide to making the most incredible, autumn-perfect Caramel Apple Milkshake right in your own kitchen! This isn’t just another seasonal drink recipe; it’s a full fall experience captured in a glass, combining everything we love about caramel apples, apple pie, and creamy milkshakes into one spectacular creation.
What I absolutely love about this recipe is how it brings the magic of fall festivals and apple orchards right to your home. No need to wait for the county fair or stand in line at the cider mill—you can create this restaurant-quality treat in just 10 minutes whenever the craving strikes. The combination of sweet-tart apples, buttery caramel, warm spices, and creamy vanilla ice cream creates something truly special that captures the essence of autumn in the most delicious way possible.
Whether you make this for Halloween parties, Thanksgiving celebrations, cozy weeknight treats, or simply because you’re obsessed with all things caramel apple (no judgment—me too!), this recipe delivers every single time. The gorgeous caramel drizzle, towering whipped cream, and festive garnishes make it as beautiful as it is delicious—perfect for sharing on Instagram, Pinterest, or just enjoying in your favorite cozy spot at home.
The best part? It’s endlessly customizable. Make it exactly as written for classic caramel apple perfection, or experiment with any of the variations to create your own signature version. Add peanut butter, make it boozy, use apple cider instead of milk, rim the glass with graham crackers—the possibilities are limited only by your imagination!
Now I’m absolutely dying to hear about YOUR caramel apple milkshake adventure! Did you use fresh apples or pie filling? How did your caramel drizzle turn out? Did you try any creative variations? What did your family think? Drop a comment below and share your experience—I genuinely love hearing from you and seeing how you make this recipe your own! And if this recipe brought some autumn joy into your life (or you know it would brighten someone else’s fall), please pin it to your Pinterest boards and share it with your friends and family. Let’s spread the caramel apple love!
So grab that blender, round up those fall ingredients, and treat yourself to liquid autumn perfection. Your taste buds are about to experience the most delicious way to celebrate the season! 🍎🍂🥤
Happy fall and happy blending!