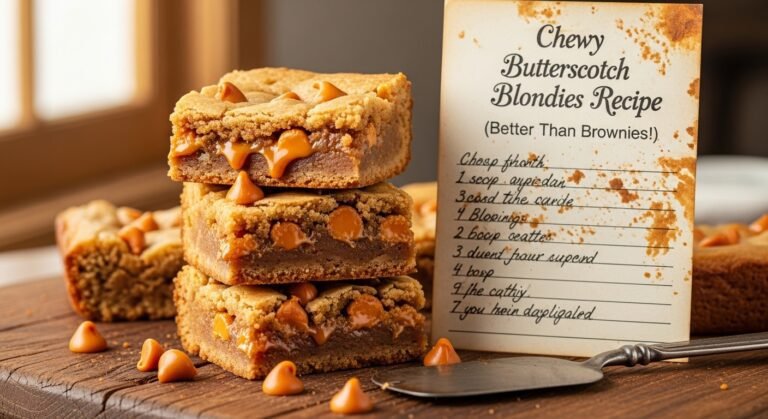
Chewy Butterscotch Blondies Recipe (Better Than Brownies!)
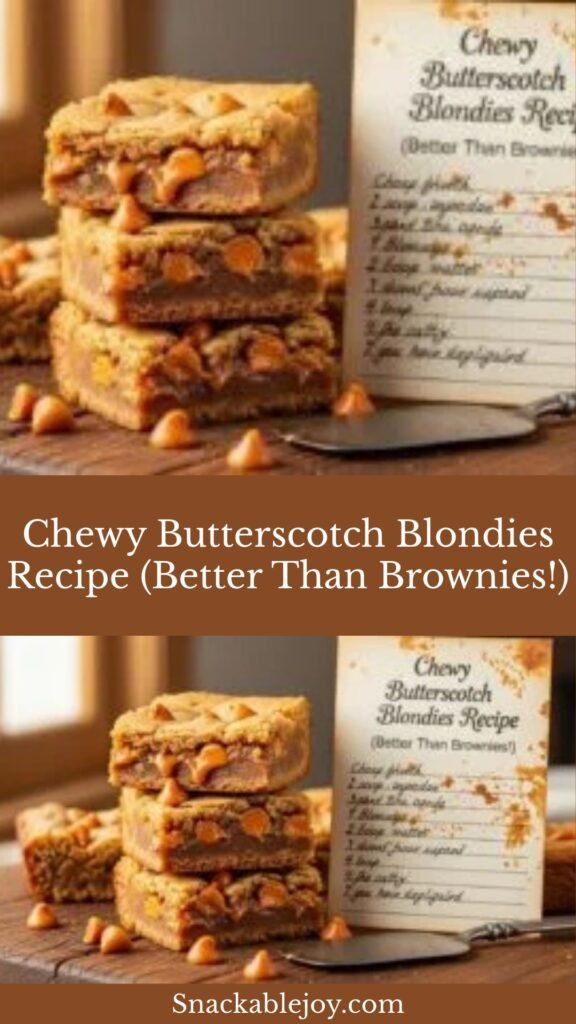
Get ready to fall head over heels for these incredible Butterscotch Blondies! If you love brownies but crave something a little different, these golden bars are about to become your new obsession. Blondies are basically brownies’ sophisticated cousin—they have that same chewy, dense texture and satisfy that same dessert craving, but instead of chocolate, they showcase the rich, caramel-like flavor of brown sugar and butter with plenty of sweet butterscotch chips mixed throughout.
These bars are the ultimate crowd-pleaser, perfect for everything from school bake sales and potluck dinners to afternoon coffee breaks and holiday cookie trays. They’re incredibly easy to make—everything comes together in one bowl with no mixer required—and they bake up into thick, chewy squares with crispy edges and a soft, gooey center. The combination of brown sugar, vanilla, and butterscotch chips creates a flavor that’s warm, nostalgic, and utterly irresistible. Whether you’re packing them in lunchboxes, serving them at parties, or sneaking one (or three) straight from the pan, these Butterscotch Blondies are guaranteed to disappear fast!
History / Background
The history of blondies is surprisingly debated among food historians, but most agree they emerged in the late 19th or early 20th century in the United States. Unlike brownies, which have a more documented origin story (generally credited to Bertha Palmer of Chicago’s Palmer House Hotel in 1893), blondies seem to have evolved more organically in American home kitchens.
The earliest printed recipes for something resembling modern blondies appeared in American cookbooks around the 1890s, though they were called by various names including “brownies” (yes, confusingly!), “blonde brownies,” or simply “butterscotch squares.” The term “blondie” itself didn’t become widely used until the mid-20th century, when it became necessary to distinguish these treats from their chocolate cousins.
The magic of blondies lies in their simplicity and adaptability. During the early 1900s, as American home baking became more accessible with the availability of commercial butter, sugar, and vanilla extract, recipes for easy bar cookies exploded in popularity. Blondies fit perfectly into this trend—they required no special equipment, no fancy frosting, and used pantry staples that most households already had on hand.
Butterscotch as a flavor has its own fascinating history. Despite the name, butterscotch doesn’t actually contain Scotch whisky. The “scotch” part likely comes from the word meaning “to cut” or “to score,” referring to how the candy was traditionally cut into pieces. Butterscotch candy became popular in Yorkshire, England, in the early 19th century, and the flavor combination of butter and brown sugar quickly made its way into American baking.
The addition of butterscotch chips to blondies became particularly popular in the 1960s and 1970s when Nestlé introduced butterscotch morsels as a companion product to their chocolate chips. Suddenly, home bakers could achieve that intense butterscotch flavor without making candy from scratch, and butterscotch blondies became a staple at church socials, school fundraisers, and family gatherings across America.
Today, blondies remain beloved for their nostalgic flavor and foolproof preparation. They represent classic American comfort baking at its finest—no-fuss recipes that deliver maximum satisfaction with minimal effort. They’ve also become infinitely customizable, with bakers adding everything from chocolate chips and nuts to pretzels and caramel swirls, but the classic butterscotch version remains a timeless favorite.
Why You’ll Love This Recipe
These Butterscotch Blondies are about to earn a permanent spot in your baking rotation, and once you taste them, you’ll understand why they’re so beloved. They deliver that perfect balance of crispy edges and chewy centers that makes bar cookies so addictive, all wrapped up in the warm, caramel-like embrace of butterscotch flavor that tastes like happiness in every bite.
Here’s why this recipe is absolutely unbeatable:
- One-bowl simplicity – No mixer required! Just a bowl, a spoon, and 10 minutes of stirring, making cleanup a breeze and the process stress-free
- Foolproof for beginners – If you can stir ingredients together, you can make these. There’s no creaming butter, no tempering chocolate, no complicated steps
- Budget-friendly – Uses basic pantry staples you probably already have, plus an affordable bag of butterscotch chips
- Quick prep time – From deciding you want blondies to sliding the pan into the oven takes just 15 minutes
- Perfect texture every time – The high brown sugar ratio guarantees those coveted chewy, dense bars that never come out cakey or dry
- Crowd-pleasing flavor – That butterscotch-vanilla combo appeals to almost everyone, including people who aren’t huge chocolate fans
- Portable and packable – These bars travel beautifully for potlucks, bake sales, picnics, or care packages
- Endlessly customizable – Add nuts, swirl in caramel, mix in chocolate chips, or keep them classic—they’re delicious any way you make them
- Makes a full 9×13 pan – One batch yields 24 generous bars, perfect for feeding a crowd or stashing in the freezer
- Kid-approved – Children absolutely love the sweet butterscotch flavor, making these perfect for lunchboxes and after-school snacks
- No special ingredients – Everything is available at any regular grocery store, no trips to specialty shops required
Ingredient Notes
Let’s break down what makes these blondies so incredible:
Butter – The foundation of flavor and texture. Use unsalted butter so you can control the salt level. Make sure it’s melted and slightly cooled—hot butter can cook the eggs. The butter provides richness and contributes to that chewy texture. Don’t substitute with margarine or oil; real butter is essential for authentic butterscotch flavor.
Brown Sugar – The star ingredient! Dark brown sugar has more molasses than light brown sugar, which means deeper flavor and chewier texture. Light brown sugar works too and creates a slightly milder butterscotch taste. The molasses in brown sugar is what gives blondies their signature golden color and caramel-like flavor. Don’t substitute with white sugar or your blondies will taste flat and lack that characteristic chewiness.
Eggs – Provide structure and binding. Use large eggs at room temperature for best results. The eggs contribute to the dense, fudgy texture that makes blondies so addictive. Room temperature eggs incorporate more smoothly than cold eggs.
Vanilla Extract – Pure vanilla extract is highly recommended here as it really shines in this recipe. The vanilla enhances the butterscotch flavor and adds warmth and depth. Don’t skip it or use imitation—it makes a noticeable difference.
All-Purpose Flour – Provides structure without making the bars cakey. We use less flour relative to sugar and butter than you’d find in cake recipes, which is why blondies have that dense, chewy texture.
Salt – Balances the sweetness and enhances all the other flavors. Even though these are sweet treats, salt is crucial for preventing them from tasting one-dimensional.
Baking Powder – Just a small amount gives the blondies a tiny bit of lift while maintaining their dense texture. Don’t confuse this with baking soda—baking powder is what you need here.
Butterscotch Chips – The signature mix-in! Nestlé butterscotch morsels are the most common brand, but any butterscotch chips work. They melt slightly during baking, creating pockets of intense butterscotch flavor throughout the bars. If you can’t find butterscotch chips, you can substitute with caramel chips, toffee bits, or white chocolate chips, though the flavor will be different.
Equipment Needed
This is one of the most low-maintenance recipes around. Here’s all you need:
- 9×13-inch baking pan – Metal or glass both work; glass may require slightly longer baking time
- Parchment paper or aluminum foil – For easy removal and cutting (optional but highly recommended)
- Large mixing bowl – For combining all ingredients
- Wooden spoon or sturdy spatula – For mixing the thick batter by hand
- Measuring cups and spoons – For accurate ingredient measurements
- Small saucepan or microwave-safe bowl – For melting the butter
- Whisk or fork – For beating the eggs before adding them
- Toothpick or cake tester – For checking doneness
- Sharp knife – For cutting the cooled blondies into squares
- Cutting board (optional) – Helpful for cutting neat squares
Print

Butterscotch Blondies Recipe
These classic Butterscotch Blondies are thick, chewy, and loaded with butterscotch chips. Made in one bowl with no mixer required, they’re the perfect easy dessert for any occasion—crispy edges, gooey centers, and pure butterscotch bliss in every bite!
- Total Time: 45 minutes
- Yield: 24 bars 1x
Ingredients
Scale- ¾ cup (1½ sticks) unsalted butter, melted and slightly cooled
- 2 cups packed dark brown sugar
- 2 large eggs, room temperature
- 2 teaspoons vanilla extract
- 2 cups all-purpose flour
- 1 teaspoon baking powder
- ½ teaspoon salt
- 1½ cups butterscotch chips, divided
- ½ cup chopped pecans or walnuts (optional)
Instructions
- Preheat and Prep: Preheat your oven to 350°F (175°C). Line a 9×13-inch baking pan with parchment paper, leaving an overhang on two sides for easy removal, or grease the pan well with butter or cooking spray.
- Melt the Butter: In a small saucepan over low heat or in a microwave-safe bowl, melt the butter. Remove from heat and let cool for about 5 minutes—you want it warm but not hot, as hot butter can cook the eggs.
- Mix Wet Ingredients: In a large mixing bowl, combine the melted butter and brown sugar. Stir vigorously with a wooden spoon or sturdy spatula until well combined and smooth, about 1 minute. The mixture will be thick and glossy.
- Add Eggs and Vanilla: Beat the eggs lightly in a small bowl, then add them to the butter-sugar mixture along with the vanilla extract. Stir until completely incorporated and the mixture is smooth and shiny.
- Combine Dry Ingredients: In a separate medium bowl, whisk together the flour, baking powder, and salt. This ensures even distribution of the leavening and salt.
- Mix Batter: Add the dry ingredients to the wet ingredients and stir just until no flour streaks remain. Don’t overmix—stop as soon as everything is combined. The batter will be very thick, almost like cookie dough.
- Add Mix-ins: Fold in 1¼ cups of the butterscotch chips and the nuts (if using), reserving ¼ cup of butterscotch chips for topping. Stir just until evenly distributed throughout the batter.
- Spread and Top: Transfer the thick batter to your prepared pan. Use a spatula to spread it evenly into all corners—it will take a bit of effort as the batter is quite dense. Press the remaining ¼ cup butterscotch chips onto the top of the batter for a pretty presentation.
- Bake: Bake for 28-32 minutes, until the edges are golden brown and set, and a toothpick inserted in the center comes out with just a few moist crumbs (not wet batter). The center should look slightly underdone—it will continue to set as it cools.
- Cool Completely: Let the blondies cool completely in the pan on a wire rack for at least 1 hour before cutting. This cooling time is essential for the texture to set properly. For the cleanest cuts, refrigerate for 30 minutes before slicing.
- Cut and Serve: Using the parchment paper overhang, lift the entire block of blondies out of the pan onto a cutting board. Cut into 24 squares using a sharp knife, wiping the knife clean between cuts for neat edges.
Notes
- Don’t overbake! Blondies continue to firm up as they cool. If the toothpick comes out completely clean, they may be overdone.
- For ultra-thick blondies, use a 9×9-inch pan and increase baking time to 35-40 minutes.
- Pressing down on the batter with a spatula helps achieve those desirable crispy edges.
- Let them cool completely—warm blondies will be too soft to cut cleanly and will fall apart.
- Store airtight to maintain that perfect chewy texture
- Prep Time: 15 minutes
- Cook Time: 30 minutes
- Category: Dessert, Bars & Cookies
- Method: Baking
- Cuisine: American
- Diet: Vegetarian
Nutrition
- Serving Size: 1 bar (1/24 of recipe)
- Calories: 215
- Sugar: 25g
- Sodium: 95mg
- Fat: 9g
- Saturated Fat: 5g
- Unsaturated Fat: 3.5g
- Trans Fat: 0g
- Carbohydrates: 32g
- Fiber: 0.5g
- Protein: 2g
- Cholesterol: 30mg
Tips & Variations
Flavor Variations:
- Chocolate Chip Blondies: Replace butterscotch chips with semi-sweet or milk chocolate chips for a chocolate-studded version
- Triple Butterscotch: Add ½ cup butterscotch sauce swirled into the batter for extra intense flavor
- Salted Caramel Blondies: Use caramel chips instead of butterscotch and sprinkle with flaky sea salt before baking
- Cinnamon Blondies: Add 1 teaspoon ground cinnamon to the dry ingredients for a warm spice note
- Brown Butter Blondies: Brown the butter before using for a nutty, toasted flavor that’s absolutely incredible
- Maple Pecan: Replace ½ cup brown sugar with maple syrup and add 1 cup chopped pecans
- White Chocolate Macadamia: Swap butterscotch chips for white chocolate chips and add chopped macadamia nuts
Mix-In Ideas:
- Chopped pretzels for sweet and salty (add 1 cup)
- Toffee bits (Heath bar pieces) for extra crunch
- Shredded coconut (½ cup, toasted)
- M&Ms or Reese’s Pieces for color and fun
- Dried cranberries or cherries for tartness (½ cup)
- Mini marshmallows folded in after baking while still warm
- Peanut butter chips mixed with butterscotch chips
Dietary Modifications:
- Gluten-Free: Use a 1:1 gluten-free flour blend (Bob’s Red Mill works well)
- Dairy-Free: Use vegan butter and dairy-free butterscotch chips (check labels, as many contain milk)
- Nut-Free: Simply omit the nuts—the recipe works perfectly without them
- Lower Sugar: You can reduce the brown sugar by ¼ cup, though they’ll be slightly less chewy
Presentation Ideas:
- Cut into triangles instead of squares for a different look
- Drizzle with melted butterscotch or caramel sauce
- Dust with powdered sugar before serving
- Serve warm with vanilla ice cream and caramel sauce
- Package individually in cellophane bags tied with ribbon for gifts
Pro Chef Tips
Brown Your Butter for Next-Level Flavor: While regular melted butter is delicious, browning it first takes these blondies into gourmet territory. Cook the butter over medium heat until it turns golden brown with a nutty aroma (about 5-7 minutes). Let it cool before using. The toasted, caramel-like notes complement the butterscotch beautifully and add incredible depth.
Pack That Brown Sugar: When a recipe calls for “packed” brown sugar, really pack it into your measuring cup. Press it down firmly with your fingers or the back of a spoon, add more, and press again until you can’t fit any more. Level it off with a knife. Properly packed brown sugar is key to achieving the right sweetness and texture—too little will make dry, crumbly blondies.
Don’t Skip the Cooling Time: This is crucial! Warm blondies are delicious but impossibly messy to cut. They need at least an hour to cool completely at room temperature so the structure can set properly. For the absolute cleanest cuts, refrigerate the pan for 30 minutes after cooling to room temperature. Cold blondies cut like a dream—you’ll get those perfect bakery-style squares.
The Toothpick Should Have Moist Crumbs: For that ideal chewy texture, you want to pull the blondies from the oven when a toothpick inserted in the center comes out with a few moist crumbs clinging to it—not wet batter, but not completely clean either. They’ll continue baking from residual heat as they cool, and this slightly underdone stage ensures chewy, not cakey, blondies.
Line with Parchment for Easy Removal: Create a parchment paper sling by cutting a piece long enough to hang over two opposite sides of the pan. Press it into the greased pan—the grease helps it stick. After cooling, you can lift the entire block of blondies out, place it on a cutting board, and cut perfect squares without wrestling them out of the pan. Game-changer!
Room Temperature Eggs Mix Better: Cold eggs don’t incorporate as smoothly into the batter, which can create a slightly uneven texture. Take eggs out of the fridge 30 minutes before baking, or place them in a bowl of warm water for 5-10 minutes to quickly bring them to room temperature.
Use a Bench Scraper for Perfect Cuts: Professional bakers use a bench scraper (a rectangular metal blade with a handle) to cut bar cookies. It cuts straight down through the bars without dragging or tearing. Wipe it clean between cuts for the neatest edges. A large, sharp chef’s knife works well too.
Common Mistakes to Avoid
Mistake #1: Using Hot Butter
If you add hot, just-melted butter directly to the eggs, you risk cooking them and creating scrambled egg bits in your blondies. Always let melted butter cool for at least 5 minutes before mixing it into your batter. It should be warm to the touch but not hot. This simple step ensures smooth, even-textured blondies every time.Mistake #2: Overmixing the Batter
Once you add the flour, mix just until you don’t see any more dry flour streaks, then stop. Overmixing develops the gluten in the flour, which creates tough, cakey blondies instead of dense, chewy ones. It should take less than 30 seconds of stirring once the flour is added. Treat it like muffin batter—mix until just combined.Mistake #3: Overbaking
The number one way to ruin blondies is to overbake them. Because they’re meant to be dense and chewy, they should look slightly underdone in the center when you pull them out. If you wait until a toothpick comes out completely clean or until the center looks fully set, you’ve gone too far and will end up with dry, hard bars. Trust the slightly-underdone look—they’ll be perfect.Mistake #4: Cutting While Still Warm
I know it’s tempting to dig in immediately, but warm blondies are structurally unsound and will crumble and fall apart when you try to cut them. They need that full cooling time for the texture to set properly. Patience here pays off with beautiful, clean-cut bars that hold together perfectly.Mistake #5: Using a Dull Knife
A dull knife drags through the blondies, creating ragged edges and pulling up butterscotch chips. Use a large, sharp chef’s knife and wipe it clean with a damp towel between each cut. For extra-clean cuts, spray your knife with cooking spray between slices—the bars release cleanly without sticking.Storage & Meal Prep
Room Temperature Storage:
Butterscotch Blondies store beautifully at room temperature, making them perfect for make-ahead treats. Once completely cooled and cut, store them in an airtight container with parchment paper between layers to prevent sticking. They’ll stay fresh and chewy for up to 5 days at room temperature. Keep them away from heat sources and direct sunlight to maintain the best texture.Refrigerator Storage:
While not necessary, you can refrigerate blondies if you prefer them firmer or if your kitchen is very warm. Store in an airtight container for up to 10 days. Let them come to room temperature for 20-30 minutes before serving for the best flavor and texture, or enjoy them cold if you like a firmer, fudgier bite.Maintaining Chewiness:
The enemy of chewy blondies is air exposure, which makes them dry and hard. Always store them in a truly airtight container, not just loosely covered. Adding a slice of bread to the container is an old baker’s trick—the bars will absorb moisture from the bread, keeping them soft (replace the bread slice every 2 days).Individual Wrapping:
For lunchboxes, portion control, or grab-and-go snacks, wrap individual blondies tightly in plastic wrap or place them in small zip-top bags. This keeps each bar fresh and makes them super convenient for packing. They travel well and are perfect for work lunches, road trips, or kids’ snack bags.Make-Ahead & Freezer Notes
Bake Ahead for Gatherings:
These blondies are actually better the next day after the flavors have had time to meld and the texture has fully set. Bake them 1-2 days before your event, let them cool completely, then store covered at room temperature. This advance prep means one less thing to worry about when you’re preparing for guests.Freezing Baked Blondies:
Blondies freeze exceptionally well for up to 3 months! Once completely cooled, cut them into squares and wrap each piece individually in plastic wrap, then place all wrapped bars in a freezer-safe zip-top bag or airtight container. Freeze in a single layer if possible to prevent them from sticking together.Thawing Instructions:
For individual bars, simply remove from the freezer and let thaw at room temperature for 1-2 hours. For a quicker option, unwrap and microwave on 50% power for 20-30 seconds until warmed through. For multiple bars, transfer them (still wrapped) to the refrigerator the night before you need them, then bring to room temperature before serving.Freeze the Whole Pan:
You can also freeze the uncut pan of blondies. Wrap the entire cooled pan tightly with plastic wrap, then cover with aluminum foil. Freeze for up to 3 months. Thaw overnight in the refrigerator or at room temperature for 3-4 hours, then cut into squares. This method is perfect if you want to bake ahead for a special occasion.Freezing Unbaked Batter:
While possible, freezing unbaked batter isn’t recommended. The leavening starts working as soon as the wet and dry ingredients are mixed, so freezing and then baking later can result in dense, flat blondies. Always freeze after baking for the best results.Reheating for That Fresh-Baked Taste:
To recreate that just-baked warmth, place individual room-temperature blondies on a microwave-safe plate and heat for 10-15 seconds. Or warm them in a 300°F oven for 5-7 minutes. A warm blondie with a scoop of vanilla ice cream is pure heaven!Serving Suggestions
Butterscotch Blondies are delicious on their own, but these serving ideas take them to the next level:
Classic Presentations:
- Serve at room temperature with a tall glass of cold milk (the classic pairing!)
- Warm them slightly and top with vanilla ice cream and caramel sauce for an indulgent dessert
- Dust with powdered sugar just before serving for an elegant touch
- Stack three squares on a dessert plate with whipped cream on the side
Elevated Desserts:
- Create blondie sundaes with ice cream, hot fudge, whipped cream, and a cherry
- Make blondie parfaits by layering crumbled blondies with pudding and whipped cream in glasses
- Serve warm blondies with a scoop of butter pecan or dulce de leche ice cream
- Drizzle with salted caramel sauce and sprinkle with flaky sea salt
- Top with cream cheese frosting for an extra-decadent treat
Beverage Pairings:
- Hot coffee or espresso (the butterscotch flavor pairs beautifully with coffee’s bitterness)
- Cold milk (whole milk is best for balancing the sweetness)
- Hot apple cider in fall
- Chai tea latte for a cozy afternoon treat
- Hot chocolate for an all-out sweet indulgence
Special Occasions:
- Cut into small bite-sized pieces for dessert tables at parties
- Wrap individually in cellophane with ribbon for party favors or gifts
- Arrange on a platter with other bar cookies for variety
- Serve at picnics, potlucks, and bake sales—they travel perfectly
- Include in holiday cookie boxes alongside brownies and sugar cookies
Make Them a Meal:
- Pack in lunchboxes with sandwiches and fruit
- Serve as an after-school snack with apple slices
- Bring to coffee gatherings with friends
- Include in dessert charcuterie boards with fruit and cheese
- Perfect for bake sales, church socials, and school events
FAQs Section
Q: Can I use light brown sugar instead of dark brown sugar?
A: Absolutely! Light brown sugar works perfectly well and is actually what many bakers use. The difference is that dark brown sugar contains more molasses, which gives a deeper, more caramel-like flavor and slightly chewier texture. Light brown sugar will produce blondies that are a bit milder in flavor but still delicious. You can also use a combination of both.Q: Why are my blondies dry and crumbly instead of chewy?
A: This usually happens from overbaking or not measuring the brown sugar correctly. Make sure you’re packing the brown sugar firmly into your measuring cup—there’s a big difference between loosely filled and properly packed. Also, check your oven temperature with an oven thermometer, as many ovens run hot. Finally, pull the blondies out when they still look slightly underdone in the center—they’ll continue to set as they cool.Q: Can I make these without butterscotch chips?
A: Yes! While the butterscotch chips add wonderful pockets of flavor and texture, you can omit them entirely for plain blondies, or substitute with chocolate chips, white chocolate chips, peanut butter chips, or chopped nuts. The base recipe itself has a lovely butterscotch flavor from the brown sugar, so they’ll still taste great without the chips.Q: My blondies came out cakey instead of dense and chewy. What happened?
A: Overmixing the batter after adding the flour is the most common culprit. When you overwork the batter, you develop the gluten, which creates a cake-like texture. Mix just until the flour disappears. Another possible reason is too much leavening—make sure you’re using baking powder, not baking soda, and measuring it accurately (1 teaspoon, not 1 tablespoon).Q: Do I need to use parchment paper?
A: No, it’s optional, but it makes life so much easier! Parchment paper allows you to lift the entire block of blondies out of the pan for cleaner cutting. If you don’t have parchment, grease your pan very well with butter or cooking spray, or use aluminum foil (also greased) which works similarly to parchment.Q: Can I double this recipe?
A: Definitely! This recipe doubles beautifully. You can either make two 9×13 pans or bake the doubled batch in a half-sheet pan (18×13 inches). If using a half-sheet pan, keep a close eye on the baking time as thinner blondies will bake faster—start checking around 20-25 minutes.Q: How do I know when blondies are done?
A: The edges should be golden brown and set, pulling away slightly from the pan sides. The center should still look slightly glossy and soft—not raw, but not fully set either. When you insert a toothpick into the center (not near the edge), it should come out with a few moist crumbs, not wet batter. If it comes out completely clean, you’ve likely overbaked them. Trust the visual cues and remember they’ll continue to firm up as they cool.Conclusion
And there you have it—everything you need to know to make the most incredible, chewy, butterscotch-packed Butterscotch Blondies! This recipe truly is foolproof, requiring nothing more than a bowl, a spoon, and about 15 minutes of your time. The result is a pan of golden, gooey bars that taste like pure nostalgia and happiness baked together.
Whether you’re bringing them to a potluck where you want to impress, baking them for your family’s weekly treat rotation, or making them ahead to stash in the freezer for whenever a sweet craving hits, these blondies deliver every single time. That perfect combination of crispy edges and chewy centers, studded throughout with melty butterscotch chips, is absolutely irresistible.
The best part? Once you master this basic recipe, you can customize it endlessly to suit your tastes and whatever you have in your pantry. Swap the chips, add nuts, swirl in caramel, or keep them classic—they’re always going to be delicious. These bars prove that you don’t need complicated techniques or fancy ingredients to create something truly special.
So grab your mixing bowl and get baking! Your kitchen is about to smell absolutely amazing, and you’re about to understand why blondies have such a devoted following. Don’t forget to save this recipe to your Pinterest boards so you can find it easily next time the craving strikes. Happy baking, friends! 🧈✨