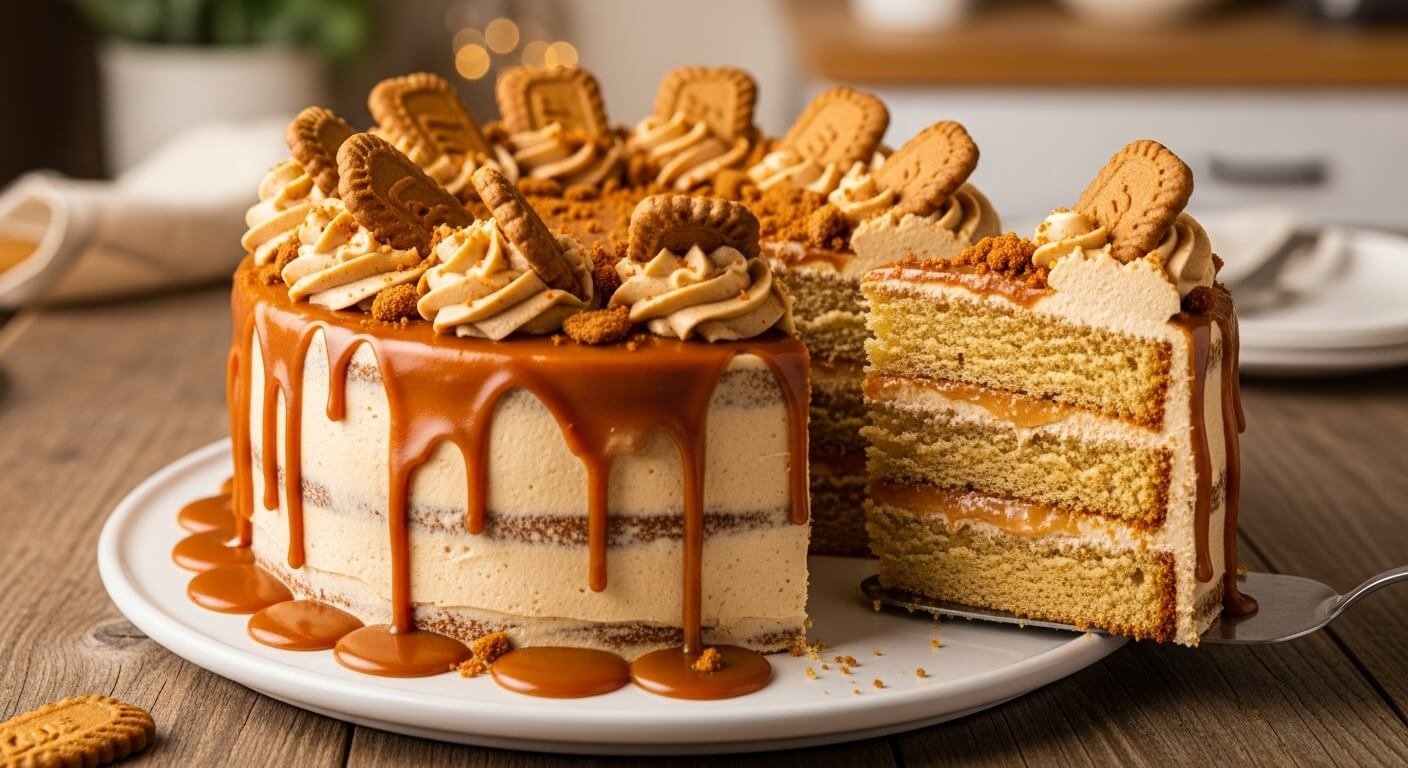
The Ultimate Biscoff Cookie Butter Cake Recipe: A Dreamy Caramelized Delight

If you’ve ever taken a bite of those addictive Biscoff cookies served on airplanes and thought, “I wish I could turn this into a cake,” you’re in for an absolute treat! This Biscoff Cookie Butter Cake is a show-stopping dessert that transforms the beloved caramelized cookie spread into a moist, indulgent layer cake that’ll have everyone begging for seconds.
This isn’t just any cake—it’s a celebration of everything we love about Biscoff: that warm, spiced caramel flavor, the perfectly balanced sweetness, and that irresistible cookie crunch. Whether you’re planning a birthday celebration, hosting a dinner party, or simply treating yourself on a weekend afternoon, this cake delivers restaurant-quality results right from your home kitchen. The best part? It’s surprisingly straightforward to make, even if you’re not an experienced baker.
The combination of tender vanilla cake layers infused with Biscoff cookie butter, paired with a silky smooth frosting that tastes like spreadable heaven, creates a dessert that’s both sophisticated and comforting. Trust me when I say this cake has become my go-to whenever I need to impress, and it never fails to steal the show at any gathering.
History / Background
The story of Biscoff cookies begins in 1932 in a small Belgian town called Lembeke, where a local baker experimented with a unique blend of spices to create what would become an iconic European treat. These thin, caramelized cookies—originally called “Speculoos”—were traditionally baked for St. Nicholas Day celebrations in Belgium and the Netherlands. The name “Biscoff” itself is a clever combination of “biscuit” and “coffee,” highlighting how perfectly these cookies pair with your morning brew.
For decades, Speculoos remained a European secret, enjoyed primarily in Belgium, the Netherlands, and parts of Germany. But everything changed when Delta Air Lines began serving these cookies on their flights in the 1980s. Suddenly, American travelers were falling in love with these crispy, spiced delights, and demand skyrocketed. The cookies became so popular that people would hoard extras from flights or seek them out in specialty stores.
The true game-changer came in 2008 when Lotus Bakeries (the company behind Biscoff) introduced cookie butter—a smooth, spreadable paste made from crushed Biscoff cookies. This innovation sparked a phenomenon that swept across the United States, with food bloggers and home bakers experimenting with creative ways to incorporate this magical spread into their recipes. From stuffed cookies to swirled brownies, Biscoff cookie butter became a pantry staple for dessert enthusiasts.
This cake recipe represents the evolution of Biscoff from a simple travel snack to a versatile baking ingredient that adds incredible depth and flavor to classic desserts. It’s a beautiful example of how traditional European flavors have been embraced and reinvented by American home bakers, creating something that honors its heritage while feeling completely new and exciting.
Why You’ll Love This Recipe
This Biscoff Cookie Butter Cake has earned its place as one of my most-requested recipes, and once you make it, you’ll understand why. The cake strikes that perfect balance between impressive presentation and approachable baking—it looks like something from a fancy bakery but comes together with techniques any home baker can master.
Here’s what makes this recipe absolutely irresistible:
- Incredibly moist texture – The cookie butter adds richness and keeps the cake tender for days
- Unique flavor profile – That signature caramelized, slightly spiced Biscoff taste sets this apart from ordinary vanilla cakes
- Make-ahead friendly – Perfect for party planning since it actually tastes better the next day
- Crowd-pleaser guaranteed – I’ve never met anyone who doesn’t love this cake, from kids to grandparents
- Stunning presentation – The layers look gorgeous when sliced, making every piece Instagram-worthy
- Simple ingredient list – No exotic ingredients required; most items are probably in your pantry already
- Customizable decorating – Top with crushed Biscoff cookies, drizzle with caramel, or keep it elegantly simple
- Great for beginners – Straightforward mixing method with no complicated techniques
- Budget-friendly luxury – Tastes expensive but won’t break the bank to make
Ingredient Notes
Let’s talk about what goes into this magnificent cake and why each ingredient matters. Understanding your ingredients is the first step to baking success!
All-Purpose Flour: This forms the structure of your cake. I recommend measuring by weight if possible (spooning and leveling if using cups) to avoid dense results. You can substitute with a 1:1 gluten-free baking blend if needed, though the texture will be slightly different.
Biscoff Cookie Butter (Smooth): This is the star of the show! Use the smooth variety rather than crunchy for even distribution throughout the batter and frosting. The smooth version melts into the cake beautifully, creating that signature flavor. Don’t substitute with other nut butters—the unique caramelized flavor is essential.
Unsalted Butter: Always use unsalted so you can control the salt level in your recipe. Make sure it’s at true room temperature (should leave a slight indent when pressed) for proper creaming. European-style butter works beautifully here for extra richness.
Granulated Sugar: Provides sweetness and helps create tender crumb structure. The sugar also aids in creaming with butter, incorporating air for a lighter cake.
Eggs: Use large eggs at room temperature. Cold eggs can cause the batter to curdle or deflate. To quickly warm eggs, place them in warm water for 5-10 minutes.
Buttermilk: Creates incredible tenderness and subtle tang that balances the sweetness. You can make a substitute by adding 1 tablespoon of lemon juice or vinegar to regular milk and letting it sit for 5 minutes.
Vanilla Extract: Pure vanilla extract is worth the investment—it adds depth and enhances all other flavors. The imitation stuff just can’t compare.
Baking Powder & Baking Soda: These leavening agents work together to create the perfect rise. Make sure they’re fresh (check expiration dates) for best results.
Salt: Essential for bringing out flavors and balancing sweetness. Don’t skip it!
Powdered Sugar (for frosting): Also called confectioners’ sugar, this dissolves smoothly into the frosting without grittiness. Sift it if it’s lumpy.
Heavy Cream: Adds luxurious richness to the frosting and helps achieve the perfect spreading consistency.
Equipment Needed
Having the right tools makes baking so much easier and more enjoyable. Here’s everything you’ll need for this recipe:
- Three 8-inch or 9-inch round cake pans – For creating beautiful layers
- Parchment paper – Line the bottom of pans to prevent sticking
- Stand mixer or hand mixer – For creaming butter and mixing batter smoothly
- Large mixing bowls (at least 2) – One for dry ingredients, one for wet
- Measuring cups and spoons – Accurate measurements are crucial in baking
- Kitchen scale (optional but recommended) – For precise ingredient measurements
- Wire cooling racks – Allow cakes to cool evenly and completely
- Rubber spatula – For scraping down bowl sides and folding ingredients
- Offset spatula – Makes frosting layers smooth and professional-looking
- Cake turntable (optional) – Makes decorating easier, but not essential
- Toothpick or cake tester – To check if cakes are done baking
- Sifter or fine-mesh strainer – For lump-free flour and powdered sugar
Medium saucepan (if warming ingredients) – For melting butter or warming cookie butter
Print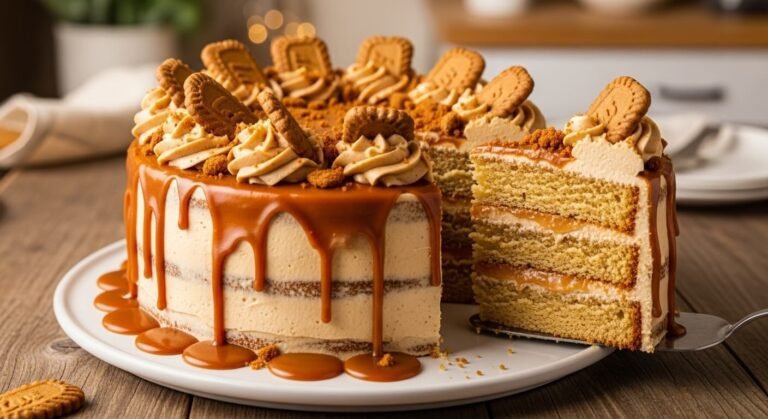
Biscoff Cookie Butter Cake Recipe
This spectacular Biscoff Cookie Butter Cake features three layers of incredibly moist vanilla cake infused with caramelized cookie butter, all covered in a silky smooth Biscoff buttercream frosting. It’s the perfect celebration cake that combines nostalgic Biscoff flavor with impressive bakery-style presentation.
- Total Time: 53 minutes
- Yield: 12-16 servings 1x
Ingredients
For the Cake:
- 3 cups all-purpose flour
- 1 tablespoon baking powder
- ½ teaspoon baking soda
- ¾ teaspoon salt
- 1 cup (2 sticks) unsalted butter, room temperature
- ¾ cup Biscoff cookie butter (smooth), room temperature
- 2 cups granulated sugar
- 4 large eggs, room temperature
- 2 teaspoons pure vanilla extract
- 1½ cups buttermilk, room temperature
For the Biscoff Buttercream Frosting:
- 1½ cups (3 sticks) unsalted butter, room temperature
- 1 cup Biscoff cookie butter (smooth), room temperature
- 5-6 cups powdered sugar, sifted
- ¼ cup heavy cream
- 2 teaspoons vanilla extract
- Pinch of salt
For Decoration (Optional):
- 10-12 Biscoff cookies, crushed or whole
- Extra cookie butter for drizzling
- Caramel sauce
Instructions
Step 1: Prepare Your Pans and Preheat Oven
Preheat your oven to 350°F (175°C). Grease three 8-inch or 9-inch round cake pans with butter or baking spray, then line the bottoms with parchment paper rounds. Grease the parchment too. This double insurance prevents any sticking disasters.
Step 2: Mix Dry Ingredients
In a large bowl, whisk together the flour, baking powder, baking soda, and salt. Set this aside. Whisking ensures everything is evenly distributed, which means even rising and consistent texture throughout your cake.
Step 3: Cream Butter, Cookie Butter, and Sugar
In your stand mixer bowl (or large bowl with hand mixer), beat the room temperature butter and Biscoff cookie butter together on medium speed for about 2 minutes until smooth and combined. Add the sugar and beat on medium-high speed for 3-4 minutes until light, fluffy, and pale in color. This creaming process incorporates air, which creates a lighter cake texture. Scrape down the bowl sides occasionally.
Step 4: Add Eggs and Vanilla
With the mixer on medium-low speed, add eggs one at a time, beating well after each addition. The mixture might look slightly curdled—that’s normal! Add the vanilla extract and mix until combined. Scrape down the bowl.
Step 5: Alternate Dry Ingredients and Buttermilk
With the mixer on low speed, add the flour mixture in three additions, alternating with the buttermilk in two additions. Start and end with flour. The pattern looks like this: flour, buttermilk, flour, buttermilk, flour. Mix just until no streaks remain after each addition. Don’t overmix, or your cake will be tough! The batter should be thick but pourable.
Step 6: Divide and Bake
Divide the batter evenly among your three prepared pans (use a kitchen scale for precision—about 22-24 ounces per pan). Smooth the tops with a spatula. Bake for 26-30 minutes, or until a toothpick inserted in the center comes out with just a few moist crumbs. The tops should spring back when lightly touched.
Step 7: Cool the Cakes
Let cakes cool in pans on wire racks for 15 minutes, then carefully turn them out onto the racks to cool completely. Removing them too early can cause breakage; waiting too long makes them stick. Once cooled, you can wrap them in plastic wrap and refrigerate for easier frosting.
Step 8: Make the Biscoff Buttercream
In a clean mixer bowl, beat the room temperature butter on medium speed for 2 minutes until creamy. Add the Biscoff cookie butter and beat for another 2 minutes until smooth and combined. Reduce speed to low and gradually add the powdered sugar, one cup at a time, mixing well after each addition.
Step 9: Finish the Frosting
Once all the sugar is incorporated, add the heavy cream, vanilla, and salt. Increase speed to medium-high and beat for 3-4 minutes until the frosting is light, fluffy, and spreadable. If it’s too thick, add more cream one teaspoon at a time. If too thin, add more powdered sugar.
Step 10: Assemble the Cake
Place your first cake layer on a serving plate or cake board. Spread about 1 cup of frosting evenly across the top, leaving a small border around the edge. Place the second layer on top and repeat. Add the final layer and spread frosting over the top and sides of the entire cake. Use an offset spatula for smooth, professional results. A crumb coat (thin layer of frosting to seal in crumbs) first, then refrigerate for 15 minutes before adding the final frosting layer, gives the best finish.
Step 11: Decorate and Serve
Decorate the top with crushed Biscoff cookies, arrange whole cookies around the edges, or drizzle with warmed cookie butter or caramel sauce. Get creative! Refrigerate the cake for 30 minutes to set the frosting before slicing for clean cuts.
Notes
Notes
- Room temperature ingredients are crucial – They combine more smoothly and create better texture
- Don’t overbake – Check at 26 minutes; overbaking dries out the cake
- Make cake layers ahead – Bake up to 2 days in advance, wrap tightly, and refrigerate
- Frosting consistency matters – It should spread easily but hold its shape
- Level your layers – Use a serrated knife to trim domed tops for stable stacking
- Warming cookie butter – If it’s too thick to incorporate, warm it gently for 10-15 seconds in the microwave
- Prep Time: 25 minutes
- Cook Time: 28 minutes
- Category: Dessert
- Method: Baking
- Cuisine: American
- Diet: Vegetarian
Nutrition
- Serving Size: 1 slice (1/14 of cake)
- Calories: 685
- Sugar: 68g
- Sodium: 285mg
- Fat: 35g
- Saturated Fat: 21g
- Unsaturated Fat: 12g
- Trans Fat: 0g
- Carbohydrates: 88g
- Fiber: 1g
- Protein: 6g
- Cholesterol: 125mg
Tips & Variations
Flavor Variations:
- Chocolate Biscoff Cake: Replace ½ cup flour with cocoa powder for chocolate cake layers
- Espresso Enhancement: Add 2 tablespoons instant espresso powder to the batter to intensify the caramelized flavor
- Spiced Version: Add ½ teaspoon cinnamon and ¼ teaspoon nutmeg to complement the Biscoff spices
- Salted Caramel Twist: Drizzle salted caramel between layers and on top
Dietary Modifications:
- Gluten-Free: Use a 1:1 gluten-free baking flour blend (add ½ teaspoon xanthan gum if your blend doesn’t include it)
- Reduced Sugar: You can reduce the sugar in the cake by ¼ cup, though it will affect moisture slightly
- Dairy-Free Buttermilk: Use almond or oat milk with 1½ tablespoons vinegar
Presentation Ideas:
- Naked Cake Style: Apply frosting only between layers and on top, leaving sides exposed for a rustic look
- Cookie Crumble Border: Press crushed Biscoff cookies around the bottom edge of the frosted cake
- Drip Effect: Warm some cookie butter until pourable and create drips down the sides
- Two-Layer Version: Make a taller two-layer cake instead of three layers (adjust baking time to 32-35 minutes)
Pro Chef Tips
Temperature Control is Everything: Professional bakers know that ingredient temperature dramatically affects results. When butter, eggs, and buttermilk are all at the same room temperature (around 65-70°F), they emulsify perfectly, creating a smoother batter that bakes more evenly. Cold ingredients can cause the butter to seize up and create a dense, uneven crumb.
The Toothpick Test Technique: Don’t rely solely on baking times—ovens vary wildly. A properly baked cake should have a toothpick come out with a few moist crumbs, not wet batter, but also not completely clean. Completely clean means you’ve slightly overbaked. The residual heat will continue cooking the cake as it cools, so pulling it slightly early ensures perfect moisture.
Crumb Coat Strategy: Professional decorators always apply a thin “crumb coat” layer of frosting first, refrigerate the cake for 15-20 minutes to set it, then apply the final decorative layer. This seals in all the loose crumbs and gives you a flawlessly smooth finish that looks bakery-perfect.
Cookie Butter Warming Trick: If your cookie butter is too thick to mix smoothly (especially if stored in a cool pantry), microwave it for 10-15 seconds to loosen it up. This makes it incorporate much more easily into both the batter and frosting, preventing lumps and ensuring even distribution of that amazing flavor.
The Cake Strip Secret: For perfectly flat cake layers that don’t dome, use cake strips (or make your own by soaking towels in water and pinning them around the pans). This keeps the edges from setting faster than the center, resulting in level cakes that require minimal trimming and give you more cake to enjoy!
Common Mistakes to Avoid
Overmixing the Batter: Once you add the flour, mix only until the ingredients are just combined. Overmixing develops gluten, which makes your cake tough and chewy instead of tender and fluffy. Those few extra seconds of mixing can be the difference between perfection and disappointment.
Using Cold Ingredients: This is the number one rookie mistake! Cold eggs and buttermilk won’t incorporate properly with room temperature butter, leading to a curdled-looking batter and uneven texture in the finished cake. Plan ahead and let everything come to room temperature for at least an hour before baking.
Skipping the Parchment Paper: Even with greased pans, cake layers can stick, especially along the edges. That parchment paper round on the bottom is your insurance policy against a crumbled disaster when you try to remove the cakes. It takes 30 seconds to cut and place—totally worth it.
Frosting Warm Cake Layers: I know you’re excited, but patience pays off here! Frosting a warm cake causes the buttercream to melt, slide off, and create a goopy mess. Your cake layers must be completely cool to the touch—I actually recommend refrigerating them for easier handling and cleaner frosting application.
Not Sifting Powdered Sugar: Those lumps in powdered sugar will remain as lumps in your frosting, creating a grainy texture instead of silky smoothness. A quick sift before adding it to your frosting takes seconds and makes a world of difference in the final result.
Storage & Meal Prep
Room Temperature Storage: This cake stays beautifully moist at room temperature for up to 2 days when stored in an airtight container or under a cake dome. The buttercream frosting is stable and won’t spoil, though if your kitchen is very warm (above 75°F), refrigeration is safer.
Refrigerator Storage: For longer storage, keep the cake covered in the refrigerator for up to 5 days. The frosting will firm up considerably, so let slices sit at room temperature for about 30 minutes before serving for the best flavor and texture. The cake actually becomes even more moist as it sits, as the moisture distributes throughout.
Freezing Individual Slices: This is my favorite trick for portion control and long-term enjoyment! Freeze individual slices on a baking sheet until solid (about 2 hours), then wrap each slice tightly in plastic wrap and aluminum foil. Store in a freezer-safe bag for up to 3 months. Thaw overnight in the refrigerator or at room temperature for 1-2 hours.
Reheating Tips: While this is delicious cold, if you prefer warm cake, microwave individual slices for 10-15 seconds. The frosting will soften beautifully, and the cake becomes even more tender and fragrant. Don’t overdo it, though—you want warm, not hot!
Make-Ahead & Freezer Notes
Baking Cake Layers in Advance: You can bake the cake layers up to 2 days ahead. Let them cool completely, wrap each layer tightly in plastic wrap, then again in aluminum foil, and refrigerate. This actually makes frosting easier since chilled cake is more stable and produces fewer crumbs.
Freezing Unfrosted Layers: For ultimate make-ahead convenience, bake and freeze the cake layers for up to 2 months. Wrap each cooled layer in plastic wrap, then foil, and freeze on a flat surface. Thaw overnight in the refrigerator (still wrapped) before frosting. They’ll taste freshly baked!
Making Frosting Ahead: The Biscoff buttercream can be made up to 3 days in advance and refrigerated in an airtight container. When ready to use, let it come to room temperature, then re-whip it with your mixer for 2-3 minutes to restore the fluffy texture. Add a splash of cream if it seems too thick.
Freezing the Assembled Cake: You can freeze the fully frosted cake! First, freeze it uncovered for 1-2 hours until the frosting is solid, then wrap the entire cake carefully in plastic wrap and aluminum foil. Freeze for up to 1 month. Thaw overnight in the refrigerator, then bring to room temperature before serving. The texture remains remarkably good!
Best Reheating Method: For frozen slices, thaw in the refrigerator overnight, then let them come to room temperature for 30 minutes. If you’re impatient, a quick 15-second microwave zap works wonders, but room temperature thawing preserves the texture best.
Serving Suggestions
This Biscoff Cookie Butter Cake is decadent enough to stand alone, but pairing it with complementary flavors and textures can elevate your dessert experience even further.
Ice Cream Pairings: Serve warm slices with a scoop of vanilla bean ice cream, salted caramel ice cream, or cinnamon ice cream. The cold creaminess against the warm cake creates an incredible contrast. For something special, try brown butter ice cream—it echoes the caramelized notes in the Biscoff.
Coffee and Tea: This cake was practically made to accompany your afternoon coffee or tea. The Biscoff flavor pairs beautifully with espresso, cappuccino, chai latte, or even a simple black tea. It’s the perfect excuse for an elegant coffee break.
Fresh Fruit: Cut through the richness with fresh berries—strawberries, raspberries, or blackberries all provide a tart contrast that balances the sweet, spiced cake. Sliced bananas also work wonderfully, echoing classic banana-Biscoff combinations.
Whipped Cream: A dollop of lightly sweetened whipped cream (perhaps with a hint of cinnamon) adds airiness and helps balance the richness. For extra indulgence, make it a Biscoff whipped cream by folding in a few tablespoons of melted cookie butter.
Caramel or Chocolate Sauce: Drizzle warm caramel sauce or chocolate ganache over individual slices for an extra-special presentation. The combination of Biscoff and salted caramel is particularly heavenly.
Beverage Pairings: Beyond coffee, this cake pairs beautifully with dessert wines like Moscato d’Asti, late-harvest Riesling, or even a creamy Irish coffee for adult gatherings. For non-alcoholic options, try it with spiced apple cider or hot chocolate.
FAQs Section
Can I use crunchy Biscoff cookie butter instead of smooth?
You can, but I don’t recommend it for the cake batter itself. The crunchy version has cookie pieces that won’t distribute evenly and can create pockets in the batter. However, crunchy cookie butter works beautifully in the frosting if you want added texture. For best results, use smooth in the cake and choose either smooth or crunchy for the frosting based on your preference.
Why did my cake layers turn out dense instead of fluffy?
The most common culprits are overmixing the batter after adding flour, using cold ingredients that didn’t cream properly, or expired leavening agents (baking powder/soda). Make sure your baking powder and baking soda are fresh (they lose potency after about 6 months), cream the butter and sugar for the full time specified, and mix gently once the flour is added—just until no streaks remain.
Can I make this as cupcakes instead of a layer cake?
Absolutely! This batter makes approximately 24-28 cupcakes. Fill cupcake liners about ⅔ full and bake at 350°F for 18-22 minutes, until a toothpick comes out with a few moist crumbs. The same frosting recipe works perfectly for topping cupcakes—you might even have a little extra! Decorate each cupcake with a mini Biscoff cookie on top.
How do I prevent my frosting from being too soft or too stiff?
Frosting consistency depends on the ratio of liquid to powdered sugar and the temperature of your butter and cookie butter. If it’s too soft, add more powdered sugar ¼ cup at a time. If it’s too stiff, add more heavy cream 1 teaspoon at a time. Temperature matters too—if your kitchen is very warm, refrigerate the frosting for 10-15 minutes, then re-whip it for perfect spreading consistency.
What’s the best way to get clean, professional-looking cake slices?
Use a long, sharp knife (not serrated) and dip it in hot water, then wipe it completely dry between each cut. The warm knife glides through the frosting without dragging. Make smooth, confident cuts in one motion rather than sawing back and forth. For extra-clean slices, chill the frosted cake for 30 minutes before cutting so the frosting is firmer.
Can I reduce the amount of frosting in this recipe?
Yes, you can make ⅔ of the frosting recipe if you prefer a less-frosted cake or want a thinner layer between the cake layers. However, this recipe intentionally makes generous frosting because it’s so delicious, and leftover frosting can be frozen for up to 2 months or used on cookies, graham crackers, or eaten by the spoonful (no judgment here!).
My cake layers domed in the middle—how do I fix this?
You can level them with a long serrated knife or a cake leveler tool. Place the cooled cake on a flat surface and carefully slice off the dome, keeping your knife parallel to the counter. Save those scraps for snacking or crumble them over ice cream! To prevent doming in future bakes, use cake strips around your pans or bake at a slightly lower temperature (325°F) for a few minutes longer.
Conclusion
There you have it—everything you need to create this absolutely stunning Biscoff Cookie Butter Cake that’ll make you the star of every gathering! This recipe brings together the nostalgic, caramelized flavor of those beloved airplane cookies with the showstopping presentation of a celebration layer cake. And the best part? It’s so much easier than it looks.
Whether you’re celebrating a birthday, hosting a dinner party, or simply treating yourself to something special on a Sunday afternoon, this cake delivers every single time. The moist, tender layers paired with that dreamy Biscoff buttercream create a dessert that’s both comforting and impressive—the kind of recipe that becomes a family favorite and gets requested again and again.
I’d love to hear how your Biscoff Cookie Butter Cake turns out! Did you add any creative decorations? Try any of the variations? Or do you have questions as you’re baking? Drop a comment below and let me know—I read and respond to every single one!
And if you’re as obsessed with this cake as I am, please Pin this recipe to your dessert board on Pinterest so you can find it easily next time that Biscoff craving hits! Snap a photo of your beautiful creation and tag me on social media too—there’s nothing I love more than seeing your baking successes!
Happy baking, friends! May your layers be level, your frosting be smooth, and your cake be absolutely delicious. Now go preheat that oven and make some magic happen! ✨