Classic Battenberg Cake Recipe (Perfect Checkerboard Pattern!)
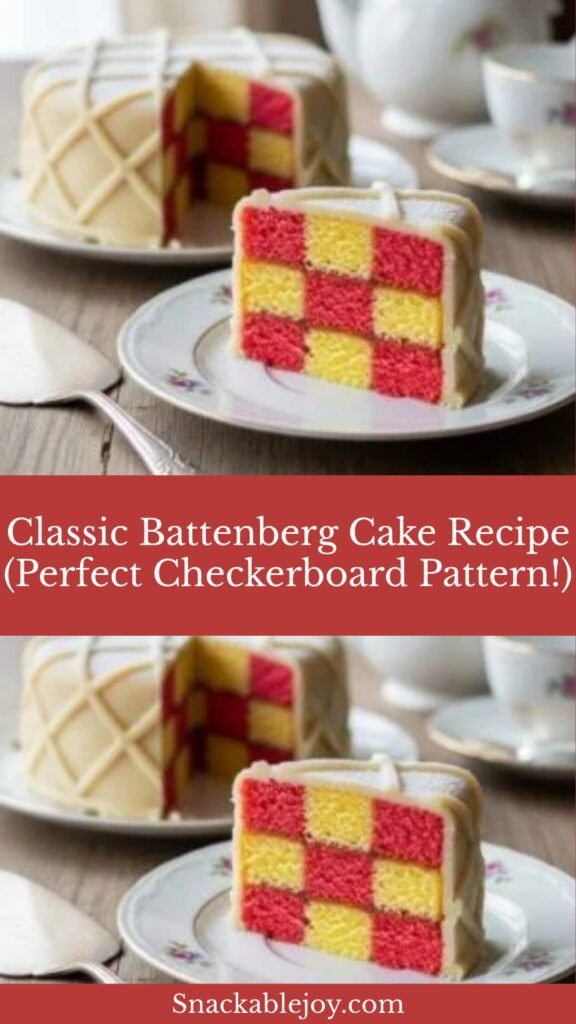
This stunning Battenberg cake is a British baking icon featuring a beautiful pink and white checkerboard pattern wrapped in sweet marzipan. With its eye-catching design and delicate almond flavor, this impressive cake is surprisingly easy to make at home. Perfect for afternoon tea, celebrations, or whenever you want to create something truly special that’ll have everyone asking for your secret!
Introduction of Recipe
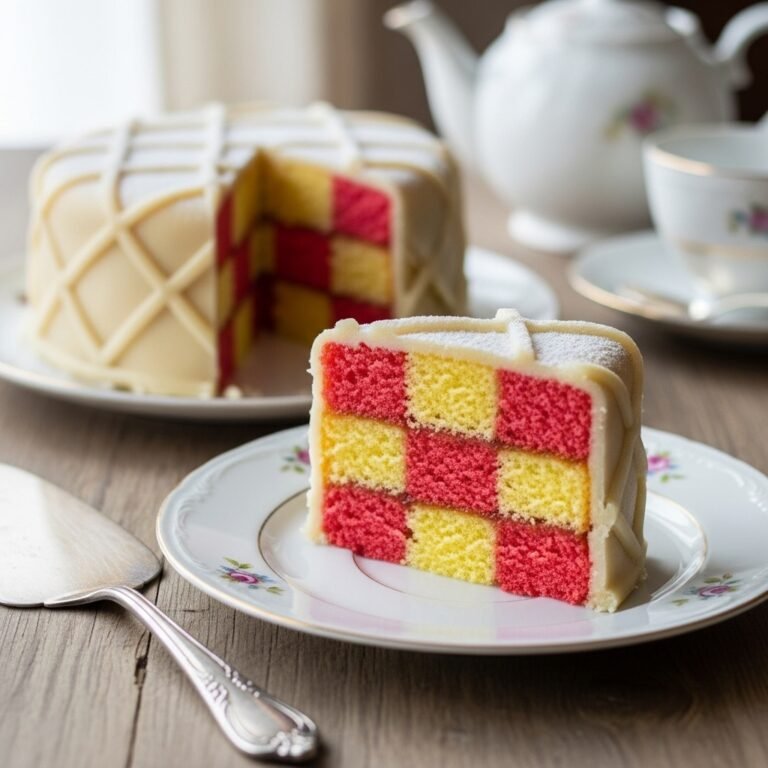
Battenberg cake is one of those show-stopping desserts that looks incredibly impressive but is actually quite achievable for home bakers. This classic British cake features two colors of light, fluffy sponge cake—traditionally pink and yellow (or white)—arranged in a distinctive checkerboard pattern and wrapped in a layer of sweet almond marzipan. When you slice into it, the geometric pattern is revealed, creating a beautiful visual effect that never fails to impress guests.
What makes this cake so special is the perfect balance of textures and flavors. The sponge is light, tender, and delicately flavored with vanilla and almond, while the marzipan coating adds a sweet, nutty richness that complements the cake beautifully. The apricot jam that binds everything together provides just a hint of fruity sweetness that ties all the elements together harmoniously.
This cake is perfect for so many occasions: traditional British afternoon tea, birthday celebrations, baby showers (especially with the pink color!), Mother’s Day, Easter gatherings, or simply when you want to treat yourself to something elegant and homemade. It’s also wonderful for bake sales and potlucks because it travels well and looks absolutely stunning on any dessert table. While it has a reputation for being fancy, this recipe breaks down every step so clearly that even beginners can achieve professional-looking results.
History / Background
The Battenberg cake has a fascinating royal history dating back to Victorian England. The cake was created in 1884 to commemorate the marriage of Queen Victoria’s granddaughter, Princess Victoria of Hesse and by Rhine, to Prince Louis of Battenberg. The Battenberg family was a prominent German noble family, and this distinctive cake was specially designed to honor this important royal union.
The original design featured four squares of cake in pink and yellow, representing the four Battenberg princes: Louis, Alexander, Henry, and Francis Joseph. The pink and yellow colors were said to represent the golden hue of the princes’ German heritage combined with the rosy complexion of English royalty. Some historians also suggest the checkerboard pattern symbolized the union of two families coming together in marriage.
The cake quickly became a fashionable delicacy in Victorian England, appearing at elegant tea parties and society gatherings throughout the late 19th century. It was considered a symbol of refinement and sophistication, as creating the precise geometric pattern required skill and patience—qualities highly valued in Victorian baking culture.
Interestingly, during World War I, when anti-German sentiment ran high in Britain, the Battenberg family anglicized their name to Mountbatten (Prince Philip, Duke of Edinburgh, was actually born into this family). However, the cake retained its original German name, testament to how beloved it had become in British culinary tradition.
Today, Battenberg cake remains a quintessential British classic, regularly featured in traditional tea rooms, bakeries, and home kitchens across the UK. It has also gained popularity internationally, especially among baking enthusiasts who appreciate its beautiful presentation and the technical skills involved in creating the perfect checkerboard pattern. The cake has even appeared multiple times on “The Great British Bake Off,” introducing it to a whole new generation of bakers around the world.
Why You’ll Love This Recipe
This Battenberg cake recipe has been carefully developed to make this classic British treat accessible and foolproof for home bakers. While the finished cake looks incredibly sophisticated, the process is actually quite straightforward when broken down into simple steps with clear instructions.
Here’s why this recipe is absolutely fantastic:
- Stunning visual impact – The checkerboard pattern never fails to impress and makes for gorgeous photos
- Easier than it looks – Step-by-step guidance makes this achievable even for intermediate bakers
- Perfect texture – Light, moist sponge that’s never dry or dense
- Customizable colors – Use pink and white, or get creative with other color combinations
- Make-ahead friendly – Components can be prepared in advance for stress-free entertaining
- Traditional authentic flavor – True to the classic British recipe with delicate almond notes
- Great for gifting – Wrapped beautifully, this makes an incredibly thoughtful homemade gift
- No special equipment needed – A standard 8×8 inch pan divided with foil is all you need
- Impressive but approachable – Looks like a professional bakery cake but uses simple ingredients
- Perfect portion control – Cuts into neat, elegant slices that are perfect for tea parties
- Kids love it – The fun colors and sweet marzipan make this a hit with children too
Ingredient Notes
Understanding your ingredients helps ensure baking success. Here’s what you’ll need and why each component matters:
FOR THE SPONGE CAKE:
Unsalted Butter – Must be at room temperature for proper creaming. Softened butter (should leave an indent when pressed) incorporates air when beaten with sugar, creating a light texture. Don’t use melted butter or the cake will be dense.
Caster Sugar (Superfine Sugar) – The fine texture dissolves easily and creates a tender crumb. If you only have granulated sugar, pulse it in a food processor for 30 seconds to make it finer. This is traditional in British baking and makes a noticeable difference in texture.
Large Eggs – Room temperature eggs emulsify better with butter and sugar. Cold eggs can cause the batter to curdle. Set them out 30 minutes before baking, or place in warm water for 5 minutes.
Self-Rising Flour – This contains the perfect ratio of leavening agents for a light sponge. Don’t have it? Make your own by adding 1½ teaspoons baking powder and ¼ teaspoon salt per cup of all-purpose flour.
Almond Extract – Essential for authentic Battenberg flavor. Use pure extract, not imitation, for the best taste. Just a small amount adds wonderful depth that complements the marzipan.
Vanilla Extract – Pure vanilla enhances all the other flavors. Combined with almond, it creates the signature taste of Battenberg.
Milk – Adds moisture and helps achieve the perfect batter consistency. Whole milk is best, but 2% works fine.
Pink Food Coloring – Gel food coloring gives the most vibrant, true color without making batter too liquid. Start with just a little—you can always add more. Liquid food coloring works but requires more drops.
FOR ASSEMBLY:
Apricot Jam – Traditional and authentic! Its subtle tartness balances the sweet marzipan beautifully. Must be warmed and strained to remove fruit chunks for smooth application. Seedless raspberry jam can substitute if needed.
Marzipan – This sweet almond paste is essential for authentic Battenberg. Buy quality marzipan from the baking aisle (about 7-8 ounces needed). You can make homemade, but store-bought works perfectly and saves time. Look for white or natural-colored marzipan that you can roll out easily.
Powdered Sugar – For dusting your work surface when rolling marzipan to prevent sticking.
Equipment Needed
You don’t need any specialty cake pans for this recipe! Here’s what you’ll use:
FOR BAKING:
- 8×8 inch square baking pan (or similar size)
- Aluminum foil (for creating a divider in the pan)
- Parchment paper (for lining)
- Mixing bowls (medium and large)
- Electric hand mixer or stand mixer (or strong arms and wooden spoon)
- Measuring cups and spoons
- Rubber spatula (for folding and scraping)
- Wire cooling rack
- Toothpick or cake tester (for checking doneness)
FOR ASSEMBLY:
- Sharp serrated knife (for trimming cakes to equal size)
- Ruler (for measuring precise strips)
- Small saucepan (for warming jam)
- Fine-mesh strainer (for straining jam)
- Pastry brush (for applying jam)
- Rolling pin (for rolling marzipan)
- Clean work surface (for rolling marzipan)
- Sharp knife (for trimming marzipan edges)
Print

Battenberg Cake Recipe
A stunning British classic featuring pink and white checkered sponge cake wrapped in sweet almond marzipan. This elegant Battenberg cake looks impressive but is surprisingly achievable at home, perfect for afternoon tea or special celebrations.
- Total Time: 2 hours (including cooling and assembly)
- Yield: 10-12 slices 1x
Ingredients
ScaleFor the Sponge Cake:
- ¾ cup (170g) unsalted butter, softened to room temperature
- ¾ cup (150g) caster sugar (superfine sugar)
- 3 large eggs, room temperature
- 1½ cups (180g) self-rising flour
- ½ teaspoon almond extract
- 1 teaspoon vanilla extract
- 2-3 tablespoons whole milk
- Pink gel food coloring (or red liquid food coloring)
- Pinch of salt
For Assembly:
- ⅓ cup (100g) apricot jam
- 7-8 ounces (200-225g) white marzipan
- Powdered sugar (for dusting)
- Optional: extra apricot jam for brushing the outside before wrapping
Instructions
PREPARE THE PAN:
- Create the divider: Preheat your oven to 350°F (175°C). Line an 8×8 inch square baking pan with parchment paper. Create a divider down the center using a folded piece of aluminum foil (fold it lengthwise 3-4 times to make it sturdy). This creates two equal sections for baking both colors simultaneously.
- Secure the divider: Press the foil divider firmly into the center of the pan so it stands upright and separates the pan into two equal rectangles. Grease both sides of the foil divider with butter or cooking spray.
MAKE THE CAKE BATTER:
- Cream butter and sugar: In a large bowl using an electric mixer, beat the softened butter and caster sugar together on medium-high speed for 3-4 minutes until light, fluffy, and pale in color. Scrape down the sides of the bowl as needed.
- Add eggs: Beat in the eggs one at a time, mixing well after each addition. If the mixture looks slightly curdled, add a tablespoon of flour to bring it back together.
- Add extracts: Beat in the vanilla and almond extracts until well combined.
- Fold in flour: Sift the self-rising flour and salt over the butter mixture. Gently fold using a rubber spatula just until no white streaks remain. Don’t overmix or the cake will be tough.
- Adjust consistency: Add milk one tablespoon at a time, folding gently, until the batter has a smooth, dropping consistency (it should fall slowly from the spatula).
DIVIDE AND COLOR:
- Split the batter: Divide the batter equally between two bowls (use a kitchen scale for precision if you have one—each portion should be about 325g).
- Color one portion: Add pink gel food coloring to one bowl, starting with just a tiny amount. Fold gently to incorporate. Add more coloring drop by drop until you achieve your desired pink shade. Remember that the color will lighten slightly as it bakes.
- Fill the pan: Carefully spoon the plain batter into one side of the divided pan and the pink batter into the other side. Spread each evenly and gently tap the pan on the counter to remove air bubbles.
BAKE:
- Bake the cake: Bake for 23-27 minutes, or until a toothpick inserted into the center of each side comes out clean and the tops spring back when lightly pressed. The cakes should be lightly golden on top.
- Cool: Let the cakes cool in the pan for 10 minutes, then carefully remove the foil divider. Turn the cakes out onto a wire rack, peel off the parchment paper, and let cool completely (at least 1 hour).
TRIM AND ASSEMBLE:
- Trim the cakes: Once completely cool, use a sharp serrated knife to trim the tops of both cakes to make them flat and level. Trim the sides to create clean edges. Cut each cake lengthwise into two equal strips, so you have four long rectangular strips total (two pink, two white).
- Measure for uniformity: Use a ruler to ensure all four strips are the same size—they should be approximately 1 inch wide and 8 inches long. Trim as needed for precision.
- Warm the jam: In a small saucepan, warm the apricot jam over low heat until melted and runny. Press through a fine-mesh strainer to remove any fruit chunks. This creates a smooth “glue” for assembly.
- Create the checkerboard: Brush one long side of a pink strip generously with warm apricot jam. Press a white strip against it firmly. Brush the top of both strips with jam. Place the remaining white strip on top of the pink strip, and the pink strip on top of the white strip, creating a checkerboard pattern when viewed from the end. Press firmly and let sit for 10 minutes to set.
WRAP IN MARZIPAN:
- Roll the marzipan: Dust your work surface lightly with powdered sugar. Roll the marzipan into a rectangle about 8 inches wide and 10 inches long (or long enough to wrap completely around your cake). Aim for about ⅛ inch thickness.
- Brush the cake: Brush the top and all four sides of the assembled checkerboard cake generously with warmed apricot jam.
- Wrap the cake: Place the cake along one short edge of the rolled marzipan. Carefully roll the cake up in the marzipan, pressing gently to adhere. The seam should be on the bottom. Press the marzipan firmly but gently onto all sides of the cake.
- Trim excess: Use a sharp knife to trim the marzipan ends flush with the cake ends for a neat finish. Score a decorative crisscross pattern on top using the back of a knife if desired (traditional presentation).
- Chill and serve: Wrap the cake in plastic wrap and refrigerate for at least 2 hours (or overnight) to let the flavors meld and the marzipan firm up. Bring to room temperature 30 minutes before serving. Slice with a sharp knife, wiping it clean between cuts for the neatest slices.
Notes
- Room temperature ingredients are crucial for proper mixing and texture
- Self-rising flour is traditional—if making your own, ensure accurate measurements
- The foil divider must be secure to prevent batters from mixing
- Don’t overbake or the sponge will be dry—check at 23 minutes
- All four cake strips must be identical in size for a proper checkerboard
- Warm jam is essential—it acts as glue and soaks into the cake slightly
- When rolling marzipan, work quickly as it can dry out and crack
- Store finished cake wrapped tightly—the marzipan prevents the sponge from drying
- For the cleanest slices, use a sharp knife warmed under hot water and wiped dry
- Prep Time: 30 minutes
- Cook Time: 25 minutes
- Category: Desert
- Method: Baking
- Cuisine: British
- Diet: Vegetarian
Nutrition
- Serving Size: 1 slice (1/10 of cake)
- Calories: 365
- Sugar: 32g
- Sodium: 155mg
- Fat: 18g
- Saturated Fat: 9g
- Unsaturated Fat: 8g
- Trans Fat: 0g
- Carbohydrates: 46g
- Fiber: 2g
- Protein: 6g
- Cholesterol: 95mg
Tips & Variations
Color Variations:
- Traditional yellow/pink: Use yellow food coloring instead of white for a more traditional look
- Blue and white: Perfect for baby boy showers or gender reveal parties
- Chocolate and vanilla: Add 2 tablespoons cocoa powder to one batter for chocolate/vanilla combo
- Rainbow: Make four different colored batters for an extra-special presentation
- Natural colors: Use beetroot powder for pink, turmeric for yellow, or spirulina for green
Flavor Variations:
- Lemon Battenberg: Add lemon zest and replace almond extract with lemon extract
- Orange Battenberg: Add orange zest and a splash of orange juice
- Chocolate marzipan: Use chocolate-flavored marzipan for wrapping
- Raspberry: Add freeze-dried raspberry powder to the pink batter for flavor and color
- Coffee: Add 1 tablespoon instant espresso powder to one batter
Design Options:
- Scoring patterns: Create decorative patterns on the marzipan using a knife or fork
- Crimped edges: Use a crimping tool along the top edges for a fancy finish
- Diagonal stripes: Cut the cake at an angle before wrapping for diagonal pattern
- Mini Battenbergs: Make individual portions by cutting into smaller checkerboards
Marzipan Alternatives:
- Fondant (though less traditional and different flavor)
- White chocolate coating (for those who don’t like marzipan)
- Buttercream coating (less authentic but still delicious)
Pro Chef Tips
Achieve perfectly even cake strips: The key to a beautiful checkerboard is precision. After baking, use a ruler and sharp serrated knife to measure and trim all four strips to exactly the same dimensions. Even a few millimeters difference will be noticeable in the final pattern.
The apricot jam trick: Always strain your jam after warming to remove any chunks—this creates a smooth adhesive that won’t interfere with clean slicing. Brush jam generously but not excessively—too much makes the cake soggy, too little won’t hold it together.
Marzipan rolling technique: Roll marzipan between two sheets of parchment paper dusted with powdered sugar for the most even thickness. This prevents sticking and gives you better control. If it cracks while rolling, it’s too cold—warm it slightly between your hands.
The overnight rest is crucial: While tempting to slice immediately, refrigerating the wrapped cake overnight allows the jam to set properly, the flavors to meld, and the marzipan to firm up. This makes slicing exponentially easier and cleaner.
Temperature matters: All ingredients should be at room temperature—especially butter, eggs, and even flour. This ensures even mixing and proper emulsification, creating the lightest texture possible.
Don’t skip the almond extract: While vanilla is more common in American baking, the almond extract is what gives Battenberg its authentic, traditional flavor that complements the marzipan perfectly.
Weighing ingredients is best: For the most accurate results, especially when dividing batter between two colors, use a kitchen scale. This ensures both cakes are identical in size and bake evenly.
Common Mistakes to Avoid
Not making the foil divider sturdy enough: If your foil divider isn’t strong and doesn’t stand up properly, the two batters will mix together during baking, ruining the two-tone effect. Fold the foil 3-4 times and press it firmly into the pan, making sure it’s greased well on both sides.
Overmixing the batter after adding flour: Once you add the flour, mix only until just combined. Overmixing develops gluten, which makes the cake tough and dense instead of light and tender. Use a gentle folding motion rather than vigorous stirring.
Uneven cake strips: If your four strips aren’t the same size, your checkerboard won’t align properly and will look messy when sliced. Take time to measure carefully with a ruler and trim precisely. This step is crucial for professional-looking results.
Applying marzipan to warm cake: If the cake isn’t completely cool, the warmth will make the marzipan soft and difficult to work with, and it may tear or become sticky. Always let the cake cool completely—at least 1 hour—before assembly.
Not using enough jam: Skimping on the apricot jam means your cake strips won’t stick together properly, and the marzipan won’t adhere well. Be generous with the jam—it’s the “glue” that holds everything together and adds moisture and flavor.
Storage & Meal Prep
Room Temperature Storage: Thanks to the marzipan coating, Battenberg cake actually stays fresh at room temperature for 3-4 days when wrapped tightly in plastic wrap or stored in an airtight container. The marzipan acts as a protective barrier that keeps the sponge moist. Keep in a cool, dry place away from direct sunlight.
Refrigerator Storage: For longer storage, refrigerate the wrapped cake for up to 1 week. The texture is actually best when brought to room temperature before serving—let it sit out for 30-45 minutes. The marzipan may sweat slightly when first removed from the fridge, but this disappears as it warms.
Freezer Storage: This cake freezes beautifully! Wrap the finished cake tightly in plastic wrap, then aluminum foil. Freeze for up to 3 months. Thaw overnight in the refrigerator, still wrapped, then bring to room temperature before serving.
Slicing and Serving: For the cleanest slices, use a sharp chef’s knife, not a serrated knife. Warm the knife under hot water, dry it completely, and make one clean cut. Wipe the knife clean between each slice to prevent color transfer and ensure neat edges.
Make-Ahead & Freezer Notes
Full Make-Ahead Strategy: This cake is actually perfect for making ahead! Here’s the best approach:
- 2-3 days before: Bake the sponge cakes, wrap tightly in plastic wrap, and store at room temperature
- 1 day before: Assemble the checkerboard and wrap in marzipan, refrigerate overnight
- Day of serving: Bring to room temperature 30-45 minutes before slicing
Freezing Components Separately: For maximum flexibility, you can freeze components:
- Unfilled sponge cakes: Wrap cooled cakes individually in plastic wrap, then foil. Freeze for up to 3 months. Thaw at room temperature for 2-3 hours before trimming and assembling.
- Assembled but unwrapped cake: The checkerboard can be assembled and frozen before wrapping in marzipan. Freeze on a baking sheet until solid, then wrap well. Thaw and apply marzipan when ready.
Freezing the Finished Cake: The completely finished Battenberg freezes excellently and is actually one of the best cakes for freezing because the marzipan protects it perfectly. Wrap tightly in two layers (plastic wrap, then foil) to prevent freezer burn. Freeze for up to 3 months. Thaw in the refrigerator overnight while still wrapped to prevent condensation from making the marzipan soggy.
Best Reheating Method: This cake doesn’t require reheating, but if you want to refresh day-old cake slightly, place individual slices in the microwave for just 5-7 seconds. This very brief warming makes the sponge tender again without affecting the marzipan.
Marzipan Tips: If making marzipan from scratch ahead, it can be refrigerated for up to 2 weeks or frozen for up to 3 months. Bring to room temperature and knead until pliable before rolling.
Serving Suggestions
Battenberg cake is traditionally served at afternoon tea, but it’s versatile enough for many occasions:
Classic Afternoon Tea Service:
- Serve on a tiered cake stand with finger sandwiches and scones
- Accompany with clotted cream and strawberry jam
- Offer a selection of hot teas (Earl Grey, English Breakfast, Darjeeling)
- Include small pastries and biscuits for variety
- Use fine china plates and proper tea cups for authentic presentation
Beverage Pairings:
- Hot tea: Earl Grey, English Breakfast, or Darjeeling (traditional)
- Coffee: Light or medium roast that won’t overpower the delicate flavors
- Champagne or Prosecco: For celebrations and special occasions
- Dessert wine: Sweet Riesling or Moscato complements the almond flavor
- Milk: Classic and simple, especially great for kids
- Sherry or Port: Traditional British after-dinner drinks for adults
Plating and Presentation:
- Dust individual slices lightly with powdered sugar
- Serve with a small dollop of whipped cream
- Garnish plate with fresh berries (strawberries or raspberries)
- Add a sprig of fresh mint for color
- Drizzle plate with melted white or dark chocolate for elegance
Occasion Ideas:
- Baby showers (pink for girls, blue for boys)
- Bridal showers and wedding celebrations
- Mother’s Day or birthday tea parties
- Easter Sunday dessert
- Christmas afternoon gathering
- Garden parties and outdoor celebrations
- Book club meetings with a British theme
Complementary Desserts:
- Victoria sponge cake
- Shortbread biscuits
- Lemon curd tarts
- Madeleines
- Macarons
- Fresh fruit salad
FAQs Section
Can I make Battenberg without a special pan? Absolutely! You don’t need a special Battenberg pan. A standard 8×8 inch square pan divided with aluminum foil works perfectly. Just fold foil lengthwise several times to create a sturdy divider, press it down the center of your lined pan, and grease both sides. This creates two equal sections for baking both colors simultaneously.
What if I can’t find self-rising flour? No problem! Make your own by combining 1½ cups all-purpose flour with 1½ teaspoons baking powder and ¼ teaspoon salt. Whisk together thoroughly before using. This homemade version works just as well as store-bought self-rising flour.
I don’t like marzipan—can I use something else? While marzipan is traditional and authentic, you can wrap the cake in rolled fondant if you prefer (though the flavor will be different). Some bakers use white chocolate coating or cover it entirely with buttercream frosting. However, I encourage you to try marzipan—quality marzipan tastes much better than many people expect, especially when paired with the almond-flavored cake.
Why did my checkerboard pattern come out messy? This usually happens when the cake strips aren’t trimmed to identical sizes. Use a ruler to measure carefully and trim all four strips to exactly the same dimensions—even a small difference will throw off the pattern. Also ensure you’re assembling them correctly: opposite colors should be diagonal to each other when viewed from the end.
Can I make this cake a day ahead? Yes, and it’s actually better when made ahead! The flavors develop and meld beautifully overnight. Wrap the finished cake tightly and refrigerate. Bring to room temperature 30-45 minutes before serving for the best texture. The marzipan keeps the sponge moist and fresh.
My marzipan cracked when rolling—what went wrong? Marzipan cracks when it’s too cold or has dried out slightly. Warm it between your hands by kneading it for a minute or two before rolling. If it’s very dry, you can knead in a tiny bit of corn syrup or water (just a few drops). Roll it between parchment paper sheets for easier handling and more even thickness.
How do I get such clean, perfect slices? The secret is using a sharp chef’s knife (not serrated) and warming it under hot running water before each cut. Dry the knife completely, make one clean downward cut (don’t saw), then wipe the blade clean before the next slice. The overnight chill also helps tremendously—the jam and marzipan firm up, making cleaner cuts possible.
Can I freeze Battenberg cake? Yes! It freezes exceptionally well. Wrap the finished cake tightly in plastic wrap, then aluminum foil. Freeze for up to 3 months. Thaw overnight in the refrigerator while still wrapped, then bring to room temperature before serving. The marzipan coating actually protects the cake perfectly during freezing.
Conclusion
Congratulations—you now have everything you need to create a stunning, authentic Battenberg cake that would make any British baker proud! While this classic has a reputation for being challenging, I hope this detailed guide has shown you that it’s absolutely achievable for home bakers when you break it down into clear, manageable steps. Yes, there’s precision involved, but there’s nothing in this recipe that requires professional training or special skills.
The beauty of Battenberg cake is that it combines impressive visual impact with wonderful flavor and texture. That moment when you slice into it and reveal the perfect pink and white checkerboard pattern—there’s truly nothing quite like it! Your guests will be amazed, and you’ll have the satisfaction of knowing you created something both beautiful and delicious entirely from scratch.
This is one of those recipes that gets easier each time you make it. Your first Battenberg might not be absolutely perfect, and that’s completely okay! Even a slightly imperfect Battenberg tastes absolutely wonderful, and you’ll learn something with each attempt. Before you know it, you’ll be making these confidently and perhaps even experimenting with different colors and flavors.
Now I’d love to hear from you! Are you going to try making this classic British beauty? What color combination appeals to you most? Have you ever had Battenberg cake before? Share your experiences, questions, and photos in the comments below—I read every single one and love seeing your baking adventures! If you make this recipe, please rate it and let me know how it turned out. And don’t forget to pin this recipe to your favorite Pinterest boards so you can find it easily when you’re ready to bake. Happy baking, and enjoy creating your own little piece of British baking history! 🇬🇧🍰