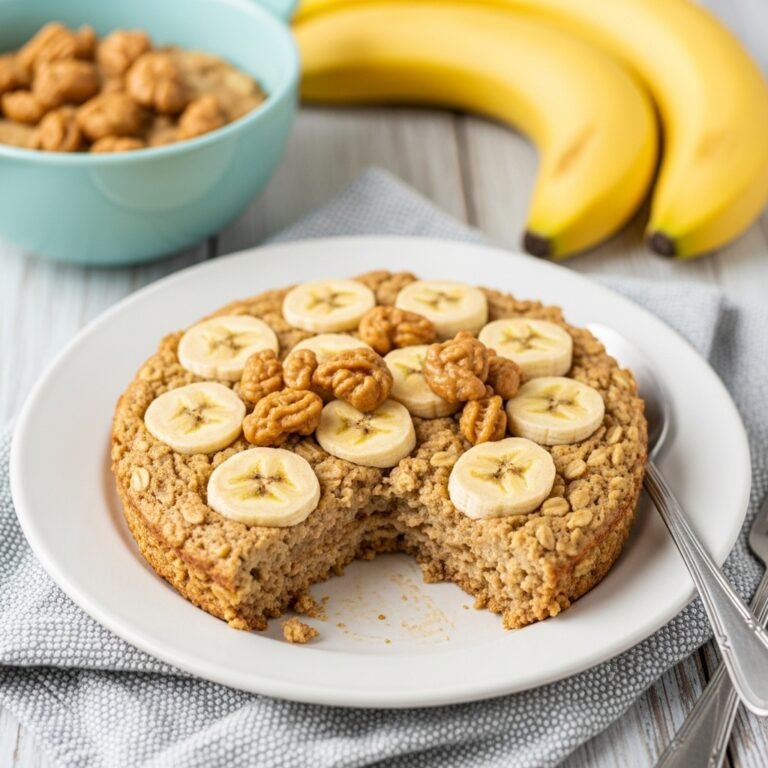
Banana Bread Baked Oatmeal Recipe (Healthy Breakfast Casserole!)
If you love the warm, comforting aroma of banana bread baking in the oven but want something healthier and more practical for busy mornings, this Banana Bread Baked Oatmeal is about to become your new breakfast obsession! This recipe combines all the nostalgic flavors of classic banana bread—sweet caramelized bananas, warm cinnamon, and a hint of vanilla—with the wholesome goodness of hearty oats, creating a breakfast that’s both indulgent and nutritious.
Baked oatmeal has taken the breakfast world by storm, and for good reason. Unlike traditional stovetop oatmeal that requires constant stirring and immediate serving, this banana bread version goes into the oven and emerges as a perfectly portioned breakfast casserole that feeds a crowd or provides grab-and-go breakfast all week long. It’s like having a slice of warm banana bread for breakfast, but with more protein, fiber, and staying power to fuel your morning.
This recipe is incredibly versatile and fits seamlessly into any meal occasion. Serve it for lazy weekend brunches when family gathers around the table, bring it to holiday breakfast gatherings where it’s sure to disappear fast, or meal prep it on Sunday for an entire week of stress-free mornings. It’s equally at home at a Mother’s Day brunch as it is being reheated in the office microwave. Parents love it because kids devour it thinking they’re getting dessert for breakfast, while adults appreciate the sustained energy it provides without the sugar crash.
History / Background
Banana bread itself has a rich history rooted in American home baking ingenuity. The beloved quick bread as we know it emerged during the Great Depression in the 1930s, when resourceful home cooks refused to waste overripe bananas and began incorporating them into baked goods. The timing coincided perfectly with the popularization of baking powder and baking soda, which made quick breads accessible to everyday cooks who didn’t have time for yeast breads.
The publication of banana bread recipes in cookbooks like the Pillsbury Flour Company’s guide helped cement its place in American kitchens. During World War II, when rationing limited access to sugar and other ingredients, banana bread became even more popular because naturally sweet bananas reduced the need for precious sugar rations. By the 1960s, banana bread had become a staple in American households, passed down through handwritten recipe cards and church cookbooks.
Baked oatmeal, on the other hand, traces its roots to Pennsylvania Dutch and Amish communities, where thrifty cooks developed it as a way to feed large families efficiently without standing over the stove. Traditional baked oatmeal was simple—oats, milk, eggs, and basic sweeteners—designed to be prepared the night before and baked in the morning while families tended to farm chores.
The fusion of these two beloved comfort foods is a more recent innovation, born from the modern meal prep movement and the rise of health-conscious home cooking in the 2000s and 2010s. As food bloggers began experimenting with baked oatmeal variations, the banana bread version quickly became one of the most popular, perfectly capturing nostalgic flavors while delivering the nutritional benefits busy families needed. Today, it represents the best of both worlds—the soul-warming comfort of grandma’s banana bread recipe combined with the convenience and wholesomeness of meal prep breakfast.
Why You’ll Love This Recipe
This Banana Bread Baked Oatmeal is about to revolutionize your breakfast routine, and I’m going to tell you exactly why. It solves the eternal breakfast struggle of wanting something delicious, nutritious, and convenient all at the same time. You get the cozy, comforting taste of banana bread fresh from the oven, but in a form that’s actually good for you and works with your busy lifestyle.
Here’s what makes this recipe absolutely irresistible:
- Uses Up Ripe Bananas – Finally, a delicious way to use those spotty bananas sitting on your counter! The riper the better for maximum sweetness and flavor
- Naturally Sweetened – The bananas provide most of the sweetness, meaning you need very little added sugar, making this genuinely healthy
- Perfect Meal Prep – Make it once on Sunday, eat nutritious breakfasts all week long with zero morning effort
- Kid and Picky Eater Approved – Tastes like dessert but packs in whole grains, fruit, and protein that will actually keep them full until lunch
- Budget-Friendly Superstar – Oats and bananas are two of the most affordable ingredients, plus you’re using pantry staples you likely already have
- Customizable to Your Needs – Easily adapt for dietary restrictions: dairy-free, refined sugar-free, add protein powder, make it vegan
- Freezer-Friendly Wonder – Cut into portions and freeze for up to 3 months, then reheat for instant healthy breakfast anytime
- Sustained Energy – Unlike sugary pastries that leave you crashing by 10am, the combination of complex carbs, protein, and healthy fats keeps you satisfied and energized
- One-Bowl Simplicity – Minimal dishes mean minimal cleanup, which is music to the ears of busy parents and anyone who hates doing dishes
- Tastes Even Better the Next Day – The flavors meld and develop overnight, making leftovers genuinely better than the fresh-baked version
Ingredient Notes
Let’s break down what goes into this recipe so you understand the purpose of each ingredient and how to substitute if needed.
Old-Fashioned Rolled Oats – This is your base ingredient, providing the structure and heartiness. You must use old-fashioned rolled oats, not quick oats or instant oats, which will turn mushy. Steel-cut oats won’t work either since they require much longer cooking times. If you need gluten-free, make sure your oats are certified gluten-free. The oats provide filling fiber and create that perfect tender-chewy texture.
Ripe Bananas – The star of the show! You’ll need very ripe bananas with plenty of brown spots or even completely brown skins. The riper the banana, the sweeter and more flavorful your baked oatmeal will be. Underripe yellow bananas won’t provide enough sweetness or that signature banana bread flavor. Plan to use 2-3 large bananas, mashed, which equals about 1 to 1½ cups mashed banana.
Milk – Any type works beautifully here. Regular dairy milk creates the richest texture, but almond milk, oat milk, cashew milk, coconut milk, or soy milk all work wonderfully. Full-fat or whole milk versions create the creamiest result, but low-fat options are fine too. The milk adds moisture and helps bind everything together.
Eggs – These provide structure, protein, and help transform loose oats into a cohesive casserole. They’re essential for binding. For a vegan version, use flax eggs (1 tablespoon ground flaxseed plus 3 tablespoons water per egg, let sit for 5 minutes to thicken).
Maple Syrup or Honey – A small amount of natural sweetener enhances the banana flavor without overwhelming it. Since the bananas provide so much natural sweetness, you only need a little here. You can also use brown sugar, coconut sugar, or even leave it out entirely if your bananas are super ripe.
Vanilla Extract – Pure vanilla extract amplifies that bakery-style banana bread flavor. Don’t skip this! It makes a noticeable difference. Imitation vanilla works in a pinch but pure extract is worth it.
Cinnamon – Warm, aromatic cinnamon is essential for that banana bread character. It complements the banana beautifully and adds depth of flavor.
Baking Powder – This is what gives your baked oatmeal a lighter, fluffier texture similar to banana bread rather than dense, heavy oatmeal. It creates lift and airiness.
Salt – Just a small amount enhances all the other flavors. It might seem odd in a sweet recipe, but it’s absolutely necessary to make everything taste more vibrant.
Optional Add-Ins: Chopped walnuts or pecans (classic banana bread additions), chocolate chips (for an indulgent twist), shredded coconut, dried cranberries, or a handful of oats for sprinkling on top for extra texture.
Equipment Needed
This recipe requires only basic kitchen equipment that most home cooks already have:
- 8×8-inch or 9×9-inch baking dish (a 2-quart casserole dish also works perfectly)
- Large mixing bowl for combining all ingredients
- Medium bowl or fork for mashing bananas
- Whisk or large fork for mixing wet ingredients
- Measuring cups and measuring spoons for accurate measurements
- Rubber spatula or wooden spoon for stirring and folding
- Cooking spray, butter, or oil for greasing the baking dish
- Oven preheated to 350°F (175°C)
- Potato masher or fork for mashing bananas (a potato masher makes it easier)
- Cooling rack (optional but helpful for even cooling)
- Sharp knife for cutting into portions after baking
That’s all you need! No fancy equipment, no special tools—just basic kitchen essentials for a foolproof recipe.
Print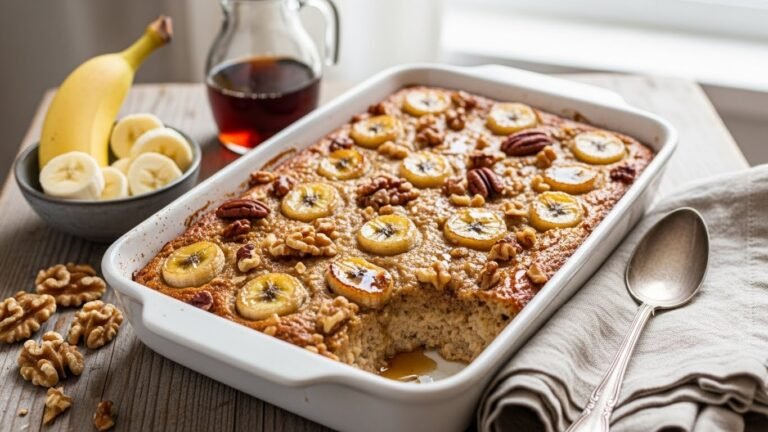
Banana Bread Baked Oatmeal Recipe
This Banana Bread Baked Oatmeal tastes just like your favorite banana bread but in a wholesome, nutritious breakfast casserole form. Made with mashed ripe bananas, hearty oats, warm cinnamon, and naturally sweetened, it’s perfect for meal prep and feeds the whole family. Healthy, filling, and absolutely delicious—breakfast doesn’t get better than this!
- Total Time: 45-50 minutes
- Yield: 6-8 servings 1x
Ingredients
- 2 cups old-fashioned rolled oats (certified gluten-free if needed)
- 1 teaspoon baking powder
- 1½ teaspoons ground cinnamon
- ½ teaspoon salt
- ¼ teaspoon ground nutmeg (optional)
- 1½ cups mashed ripe bananas (about 3 large very ripe bananas)
- 1¾ cups milk (dairy or non-dairy)
- 2 large eggs
- ¼ cup pure maple syrup or honey
- 3 tablespoons melted coconut oil or butter
- 2 teaspoons vanilla extract
- ½ cup chopped walnuts or pecans (optional)
- ¼ cup chocolate chips (optional)
- 1 banana, sliced for topping (optional)
- Extra cinnamon for sprinkling on top
Instructions
- Preheat and prep. Preheat your oven to 350°F (175°C). Generously grease an 8×8-inch or 9×9-inch baking dish with butter, coconut oil, or cooking spray. Set aside.
- Mash the bananas. In a medium bowl, mash your very ripe bananas with a fork or potato masher until mostly smooth. A few small lumps are fine and actually add nice texture. Set aside.
- Mix dry ingredients. In a large mixing bowl, combine the rolled oats, baking powder, cinnamon, salt, and nutmeg (if using). Stir well to ensure the baking powder and spices are evenly distributed throughout the oats.
- Combine wet ingredients. In the bowl with the mashed bananas, add the milk, eggs, maple syrup, melted coconut oil or butter, and vanilla extract. Whisk everything together until well combined and relatively smooth.
- Combine wet and dry. Pour the wet banana mixture over the dry oat mixture. Stir gently with a spatula until everything is well incorporated. The mixture will be quite liquid and pourable—this is exactly right!
- Add mix-ins. If using walnuts, pecans, or chocolate chips, fold them into the batter now, reserving a small handful for topping if desired.
- Pour into baking dish. Transfer the entire mixture to your prepared baking dish and spread it out evenly with your spatula. If desired, arrange banana slices decoratively on top and sprinkle with reserved nuts or chocolate chips and an extra pinch of cinnamon.
- Bake. Place in the preheated oven and bake for 35-40 minutes, until the top is golden brown and the center is set. To test for doneness, insert a toothpick in the center—it should come out mostly clean with just a few moist crumbs.
- Cool slightly. Remove from the oven and let cool for at least 10 minutes before slicing. The baked oatmeal will continue to firm up as it cools, so don’t worry if it seems slightly soft when you first take it out.
- Serve and enjoy! Cut into squares and serve warm with your favorite toppings like a drizzle of maple syrup, a dollop of Greek yogurt, extra banana slices, a sprinkle of nuts, or a splash of milk.
Notes
- Banana ripeness is crucial – Use very ripe bananas with brown spots or fully brown skins for maximum sweetness and that authentic banana bread flavor.
- Don’t skip the resting time – Letting the baked oatmeal cool for 10 minutes allows it to set properly. If you cut into it too soon, it will seem undercooked even when it’s perfectly done.
- Customize the sweetness – If your bananas are extremely ripe, you can reduce the maple syrup to 2-3 tablespoons. Taste your mashed banana mixture—if it’s already very sweet, cut back on added sweetener.
- Test for doneness – The center should be set and not jiggly when gently shaken. The edges may pull away slightly from the pan sides. Better to slightly underbake than overbake.
- Make it dairy-free – Use your favorite non-dairy milk and coconut oil instead of butter.
- Prep Time: 10
- Cook Time: 35-40 minutes
- Category: Breakfast, Brunch
- Method: Baking
- Cuisine: American
- Diet: Gluten Free
Nutrition
- Serving Size: 1 square (based on 8 servings)
- Calories: 235
- Sugar: 14g
- Sodium: 190mg
- Fat: 8g
- Saturated Fat: 4g
- Unsaturated Fat: 3.5g
- Trans Fat: 0g
- Carbohydrates: 36g
- Fiber: 4g
- Protein: 6g
Tips & Variations
The beauty of this recipe is how easily you can customize it to suit your taste preferences and dietary needs. Here are some delicious variations to try:
Flavor Variations:
- Peanut Butter Banana: Swirl in ¼ cup of peanut butter or almond butter for a protein boost and nutty flavor
- Chocolate Banana: Add ¼ cup cocoa powder to the dry ingredients and stir in ⅓ cup chocolate chips
- Tropical Banana: Mix in ½ cup shredded coconut and ¼ cup chopped macadamia nuts
- Banana Nut: Add ¾ cup chopped walnuts or pecans for that classic banana nut bread experience
- Elvis Style: Top with peanut butter and crispy bacon crumbles (trust me on this one!)
Make It Healthier:
- Add 2 tablespoons chia seeds or ground flaxseed for extra omega-3s and fiber
- Stir in ¼ cup of your favorite protein powder (vanilla or unflavored works best)
- Reduce the sweetener to just 2 tablespoons or omit entirely if bananas are very ripe
- Use all whole grain oats for maximum fiber content
Add Extra Texture:
- Sprinkle the top with a simple streusel: mix 2 tablespoons cold butter with ¼ cup flour, 2 tablespoons brown sugar, and a pinch of cinnamon
- Add ¼ cup of granola on top before baking for extra crunch
- Fold in ½ cup of dried cranberries or raisins
- Top with sliced almonds before baking
Make It Indulgent:
- Add ½ cup chocolate chips—because chocolate and banana are best friends
- Drizzle with a simple glaze after cooling: mix 1 cup powdered sugar with 2-3 tablespoons milk
- Serve with a scoop of vanilla ice cream for dessert (yes, this makes a great dessert!)
- Swirl in some Nutella or cookie butter before baking
Pro Chef Tips
Take your banana bread baked oatmeal from delicious to absolutely incredible with these professional techniques:
Caramelize Your Bananas: Before mashing, slice half of your bananas and cook them in a skillet with a little butter and brown sugar for 2-3 minutes until golden and caramelized. Then mash and proceed with the recipe. This adds incredible depth of flavor and intensifies the banana taste exponentially.
Brown Your Butter: Instead of using regular melted butter or coconut oil, brown your butter first. Melt butter in a small saucepan over medium heat, swirling occasionally, until it turns golden brown and smells nutty. This adds a sophisticated, complex flavor that tastes professionally made.
Toast Your Oats: For a deeper, nuttier flavor, spread your oats on a baking sheet and toast them in a 350°F oven for 8-10 minutes before mixing into the recipe. Let them cool slightly first. This extra step adds incredible dimension to the flavor.
Use Dark Brown Sugar Instead: While maple syrup is wonderful, using dark brown sugar (same amount) instead adds molasses notes that enhance that authentic banana bread taste. The moisture in brown sugar also creates a more tender texture.
Add a Touch of Espresso Powder: Mix ½ teaspoon of instant espresso powder into your wet ingredients. It won’t taste like coffee at all—instead, it enhances and deepens the banana and cinnamon flavors dramatically.
Create a Banana Ribbon: Instead of mixing all the mashed banana into the batter, reserve about ⅓ cup and swirl it through the batter in the pan after pouring. This creates gorgeous banana ribbons throughout and intensifies the banana flavor in certain bites.
Water Bath Technique: For an ultra-creamy, custard-like texture, place your baking dish inside a larger roasting pan and add about 1 inch of hot water to the larger pan. This gentle, indirect heat creates an incredibly luscious texture.
Rest Before Baking: After mixing, let the batter sit for 10 minutes before baking. This allows the oats to absorb some liquid and results in better texture and more even baking.
Common Mistakes to Avoid
Even though this recipe is straightforward, avoiding these common pitfalls will ensure perfect results every time:
Using Underripe Bananas – This is the biggest mistake! Yellow bananas without brown spots will not provide enough sweetness or that classic banana bread flavor. Your baked oatmeal will taste bland and require extra sweetener. Wait until your bananas are heavily spotted or even completely brown. The riper, the better!
Cutting It Too Soon – I know it’s tempting, but if you cut into the baked oatmeal immediately after removing it from the oven, it will seem wet and undercooked even if it’s perfectly done. The oatmeal continues to set and firm up significantly as it cools. Give it at least 10 minutes, preferably 15.
Using Quick Oats or Instant Oats – These more processed oat varieties will turn your baked oatmeal into mush. They absorb liquid too quickly and don’t maintain any structure. Always use old-fashioned rolled oats. Steel-cut oats won’t work either as they need much longer cooking times.
Overmixing the Batter – Once you combine wet and dry ingredients, mix just until incorporated. Overmixing can make the texture tough and dense rather than tender. A few lumps are perfectly fine.
Not Greasing the Pan Well – Baked oatmeal can really stick! Use plenty of butter, coconut oil, or cooking spray, making sure to get into all the corners. For foolproof removal, line your pan with parchment paper with overhanging edges to create handles for lifting.
Overbaking – Since the oatmeal continues to firm as it cools, removing it when the center is just barely set is perfect. If you wait until it’s completely firm in the oven, you’ll end up with dry, crumbly oatmeal once cooled. Look for a slightly jiggly center that passes the toothpick test.
Storage & Meal Prep
This recipe is a meal prepper’s absolute dream! Here’s everything you need to know about storing and enjoying your banana bread baked oatmeal throughout the week:
Refrigerator Storage: Once completely cooled, cut the baked oatmeal into individual portions and store in an airtight container in the refrigerator for up to 5 days. You can also keep it whole in the baking dish, covered tightly with plastic wrap or aluminum foil. Individual portions are most convenient for grab-and-go mornings.
Reheating Individual Portions: Microwave method is quickest—place a square on a microwave-safe plate, add a tiny splash of milk if desired, and heat for 45-60 seconds until warmed through. For oven reheating, wrap portions in aluminum foil and warm at 350°F for 10-15 minutes. The oven method preserves texture better but takes longer.
Best Meal Prep Containers: Glass containers with divided sections are ideal for portioning out breakfast for the week. You can add your favorite toppings (nuts, banana slices, a drizzle of maple syrup) in separate compartments so they stay fresh and don’t make the oatmeal soggy.
Room Temperature: Baked oatmeal can sit at room temperature for up to 2 hours, making it great for brunches, potlucks, or breakfast meetings. Beyond 2 hours, refrigerate for food safety.
Maintaining Moisture: The texture will firm up slightly after refrigeration, which many people actually prefer. If you want it softer and more moist, add 1-2 teaspoons of milk before reheating, or cover with a damp paper towel while microwaving to create steam.
Portion Control Tip: Use a sharp knife to cut the cooled oatmeal into 6-8 equal squares. Wrap each square individually in plastic wrap or parchment paper before storing in a container. This makes it super easy to grab just one or two portions without disturbing the rest.
Make-Ahead & Freezer Notes
One of the best features of this recipe is how beautifully it handles advance preparation and freezing. Perfect for batch cooking and always having breakfast ready!
Make-Ahead Option 1 (Unbaked): Prepare the entire recipe through the final step before baking. Cover the unbaked baking dish tightly with plastic wrap, then add a layer of aluminum foil, and refrigerate for up to 24 hours. When ready to bake, remove from the refrigerator while the oven preheats (let it sit for about 10 minutes), then uncover and bake as directed. You’ll likely need to add 5-8 extra minutes to the baking time since it’s starting cold.
Make-Ahead Option 2 (Baked): Bake the oatmeal completely, let it cool to room temperature, then cover and refrigerate. Simply reheat portions throughout the week as needed. This is the most convenient option for truly grab-and-go breakfasts.
Freezing Whole: After baking and cooling completely, wrap the entire uncut oatmeal tightly in plastic wrap, then wrap again in aluminum foil or place in a freezer-safe bag. Freeze for up to 3 months. Thaw overnight in the refrigerator, then reheat portions as needed.
Freezing Individual Portions: This is my favorite method! Cut the cooled oatmeal into individual squares. Wrap each square tightly in plastic wrap, then place all wrapped squares in a large freezer-safe bag or container. Label with the date and freeze for up to 3 months. This way you can grab individual portions as needed.
Reheating from Frozen: You can reheat directly from frozen, which is incredibly convenient. Microwave: unwrap, place on a microwave-safe plate, and heat for 1½-2 minutes, checking halfway through. Oven: wrap in foil and bake at 350°F for 20-25 minutes. For best results, thaw overnight in the refrigerator first, then reheat as you would refrigerated oatmeal.
Freezer Storage Tip: Place small pieces of parchment paper between each wrapped portion before putting them in the storage bag. This prevents them from freezing together and makes it much easier to separate individual portions.
Serving Suggestions
While this banana bread baked oatmeal is absolutely delicious on its own, the right accompaniments can elevate it to a complete, satisfying meal. Here are my favorite ways to serve it:
Classic Toppings:
- A generous dollop of Greek yogurt or vanilla yogurt for extra protein and tanginess
- Fresh banana slices (always a winner with banana bread flavors!)
- A drizzle of pure maple syrup, honey, or agave nectar
- Chopped toasted walnuts or pecans for extra crunch
- A sprinkle of cinnamon or cinnamon sugar
- Granola for added texture and crunch
Nut Butter Lovers:
- Warm almond butter or peanut butter drizzled on top
- Cashew butter with a sprinkle of cacao nibs
- Sunflower seed butter for nut-free option
- Nutella or cookie butter for an indulgent treat
Protein-Packed Additions:
- A side of scrambled eggs or a soft-boiled egg
- Greek yogurt mixed with a little honey
- A protein shake or smoothie on the side
- Cottage cheese (sounds weird but trust me, it’s delicious!)
Beverage Pairings:
- Hot coffee or a caramel latte
- Chai tea latte for spicy-sweet harmony
- Fresh orange juice or a tropical smoothie
- Hot chocolate for weekend breakfast treats
- Cold brew coffee for a refreshing contrast
Make It a Complete Brunch Spread:
- Serve alongside turkey bacon or chicken sausage
- Add a fruit salad with berries and melon
- Include avocado toast for healthy fats
- Offer a yogurt parfait bar with various toppings
Kid-Friendly Presentations:
- Cut into fun shapes with cookie cutters
- Top with a peanut butter drizzle and mini chocolate chips
- Create a “banana split” presentation with yogurt and berries
- Let kids build their own “oatmeal sundaes” with various toppings in small bowls
FAQs Section
Can I use frozen bananas for this recipe?
Absolutely! Frozen bananas actually work wonderfully. Thaw them completely first (I microwave them for 30-60 seconds), then drain off any excess liquid before mashing. Frozen bananas are often extra sweet and perfect for baking. Just note that thawed frozen bananas release more liquid, so you might want to reduce the milk by 2-3 tablespoons.
How ripe do my bananas need to be?
The riper, the better! Look for bananas that are heavily spotted with brown or even completely brown. The peels might look unappealing, but inside they’re perfectly sweet and aromatic—exactly what you need for maximum banana flavor. Yellow bananas without spots won’t provide enough sweetness or that authentic banana bread taste.
Can I make this recipe vegan?
Yes! Replace the eggs with flax eggs (2 tablespoons ground flaxseed mixed with 6 tablespoons water, let sit for 5 minutes), use your favorite non-dairy milk, and substitute coconut oil for butter. The texture will be slightly different but still delicious. Make sure to let it cool fully before cutting, as vegan versions need more time to set.
Why is my baked oatmeal dry and crumbly?
This usually means it was overbaked. Remember that baked oatmeal continues to firm up as it cools, so it should still look slightly moist and soft in the center when you remove it from the oven. Also check that you measured your liquid ingredients correctly—too little milk can cause dryness.
Can I double this recipe for a crowd?
Definitely! Double all ingredients and bake in a 9×13-inch pan. The baking time will increase by about 10-15 minutes, so start checking for doneness around the 45-minute mark. The center should be set and golden brown on top.
What if I don’t have maple syrup?
Honey works beautifully as a substitute in equal amounts. You can also use brown sugar (¼ cup), coconut sugar, or even omit the sweetener entirely if your bananas are very ripe and sweet. Some people use mashed dates or applesauce for natural sweetness.
How do I know when it’s done baking?
Look for these signs: the top should be golden brown, the edges may pull slightly away from the pan sides, and when you insert a toothpick in the center it should come out with just a few moist crumbs (not wet batter). Most importantly, the center should feel firm and set when gently pressed, not jiggly.
Conclusion
There you have it—the ultimate Banana Bread Baked Oatmeal that’s going to transform your breakfast routine! This recipe proves that healthy eating doesn’t have to be boring or time-consuming. With its perfect balance of wholesome oats, naturally sweet bananas, and those cozy banana bread spices we all love, it’s the kind of breakfast you’ll look forward to every single morning.
Whether you’re meal prepping for busy weekdays, feeding a hungry family on weekend mornings, or looking for a impressive-yet-easy dish to bring to brunch, this baked oatmeal has you covered. It’s nourishing, satisfying, and packed with real-food ingredients that make you feel good about what you’re eating. Plus, it uses up those overripe bananas that would otherwise go to waste—win-win!
I truly hope this becomes a staple in your breakfast rotation like it has in mine. If you make this recipe, I’d love to hear how it turned out! Don’t forget to pin this to your breakfast board on Pinterest so you can find it whenever those bananas start getting spotty. Here’s to easier mornings and breakfasts that taste like dessert but fuel you like champions!