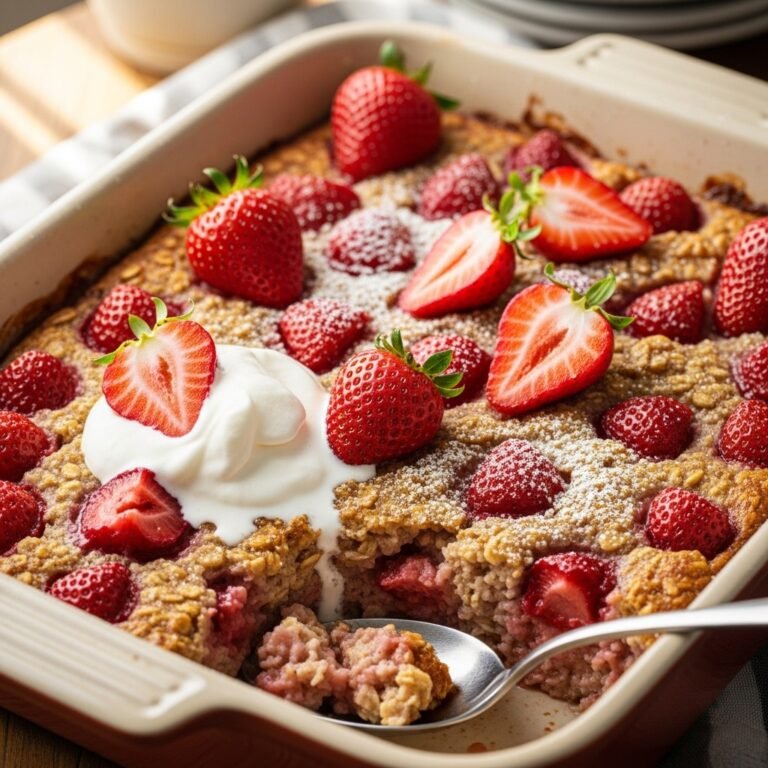
Baked Oatmeal Cups Recipe (Make-Ahead Breakfast Muffins)
Say hello to your new favorite grab-and-go breakfast solution: Baked Oatmeal Cups! These wholesome, portable breakfast muffins are like having a warm bowl of oatmeal you can hold in your hand. Perfectly portioned, naturally sweetened, and endlessly customizable, these little gems transform traditional oatmeal into convenient, meal-prep-friendly muffins that the whole family will love.
Think of them as the love child of oatmeal and a muffin—combining the hearty, nutritious goodness of your favorite morning oats with the convenience of a grab-and-go format. They’re sturdy enough to toss in your bag for a commute breakfast, healthy enough to feel good about feeding your kids, and delicious enough that nobody will realize they’re eating something wholesome.
These baked oatmeal cups are incredibly popular because they solve one of the biggest breakfast challenges: getting something nutritious on the table (or in lunchboxes) when mornings are absolute chaos. Prep them on Sunday, and you’ve got breakfast sorted for the entire week. They’re perfect for busy weekday mornings, after-school snacks, pre-workout fuel, or even a healthier dessert option. Kids love them because they feel like a treat, and parents love them because they’re packed with fiber, protein, and wholesome ingredients that provide sustained energy throughout the morning.
History / Background
Baked oatmeal itself has roots in traditional American and European breakfast culture, where oatmeal has been a breakfast staple for centuries. The concept of baking oatmeal rather than cooking it on the stovetop became popular in Amish and Pennsylvania Dutch communities, where large families needed efficient ways to feed everyone a hearty breakfast.
Traditional baked oatmeal was served in large casserole dishes, cut into squares, and often featured simple ingredients like oats, milk, eggs, and seasonal fruit. It was economical, filling, and could easily feed a crowd—perfect for farm families who needed substantial meals to fuel long days of physical work.
The individual “cup” or muffin-sized version is a much more recent innovation that emerged in the early 2010s alongside the broader meal prep and healthy eating movements. Food bloggers and home cooks began adapting the classic baked oatmeal recipe into muffin tins, creating perfectly portioned servings that were freezer-friendly and ideal for grab-and-go lifestyles.
The rise of baked oatmeal cups coincided with growing interest in make-ahead breakfasts, clean eating, and alternatives to traditional baked goods that often contain refined flour and excessive sugar. These cups offered a way to enjoy something muffin-like in texture and convenience but with whole grain nutrition and the flexibility to control ingredients and sweetness levels.
Today, baked oatmeal cups have become a staple in meal prep communities, particularly among busy parents, fitness enthusiasts, and anyone looking for healthier breakfast alternatives. They represent the modern approach to breakfast: nutritious, convenient, customizable, and delicious enough that healthy eating doesn’t feel like a sacrifice.
Why You’ll Love This Recipe
These Baked Oatmeal Cups are about to revolutionize your breakfast routine, and I’m not exaggerating! Unlike traditional stovetop oatmeal that requires standing over the pot stirring, these cups bake hands-free while you’re getting ready in the morning or catching up on weekend chores. They’re the definition of set-it-and-forget-it cooking.
What makes this recipe truly special is its incredible versatility. The base recipe is a blank canvas that welcomes whatever flavors you’re craving—berries, chocolate chips, nuts, spices, you name it. Make a double batch with different mix-ins so everyone in the family gets their favorite flavor. It’s like running your own breakfast bakery from home!
Here’s why you’ll fall in love with these oatmeal cups:
- Meal prep champion—bake once on Sunday, enjoy breakfast all week long
- Freezer-friendly—make big batches and freeze for up to 3 months
- Perfectly portable—no bowl or spoon required, eat them on the go
- Kid-approved—they feel like muffins but are actually nutritious
- Naturally sweetened—using bananas, honey, or maple syrup instead of refined sugar
- Customizable—endless flavor combinations to keep breakfast exciting
- Budget-friendly—made with affordable pantry staples
- Gluten-free option—naturally GF when using certified gluten-free oats
- High in fiber and protein—keeps you full and energized for hours
- No refined flour—whole grain goodness in every bite
- Great for picky eaters—sneak in fruits and veggies kids might normally refuse
- Perfect texture—soft and moist like a muffin, but heartier and more satisfying
Ingredient Notes
Let’s break down what goes into these magical breakfast cups and why each ingredient matters:
Rolled Oats: The star of the show! Use old-fashioned rolled oats, not quick oats or steel-cut oats. Rolled oats provide the perfect texture—they hold together well when baked and create that classic oatmeal taste and chew. For gluten-free diets, ensure you’re using certified gluten-free oats, as regular oats are often processed in facilities that handle wheat.
Ripe Bananas: Mashed bananas serve triple duty here—they add natural sweetness, moisture, and act as a binder to help everything stick together. The riper the bananas (think brown-spotted), the sweeter and more flavorful your cups will be. If you don’t have bananas, you can substitute with ¾ cup applesauce or pumpkin puree.
Eggs: These provide structure, protein, and help bind everything together. Eggs are what transform loose oats into cohesive, muffin-like cups. For vegan versions, use flax eggs (1 tablespoon ground flaxseed + 3 tablespoons water per egg, let sit 5 minutes).
Milk: Any milk works—dairy or non-dairy. Milk adds moisture and richness. Whole milk creates the most tender texture, while almond or oat milk keeps them lighter. Use whatever you have or prefer.
Baking Powder: This gives the cups a slight lift and lighter texture. Don’t skip it or your cups will be dense and heavy. Make sure your baking powder is fresh (test it by adding a teaspoon to hot water—it should fizz vigorously).
Sweetener: Honey, maple syrup, or even brown sugar work beautifully. Start with ¼ cup and adjust to your sweetness preference. Remember that mix-ins like chocolate chips or dried fruit add additional sweetness.
Vanilla Extract: A tablespoon of vanilla adds warmth and depth of flavor, making your oatmeal cups taste bakery-special rather than plain.
Salt and Cinnamon: Don’t underestimate these flavor enhancers! Salt balances the sweetness and makes all other flavors pop, while cinnamon adds that cozy, breakfast-spice warmth.
Mix-ins (Optional but Recommended): This is where you make the recipe your own! Fresh or frozen berries, chocolate chips, chopped nuts, dried fruit, shredded coconut, nut butter swirls—the possibilities are endless. Add ¾ to 1 cup total of your chosen mix-ins.
Equipment Needed
The beauty of this recipe is its simplicity—you need minimal equipment:
- 12-cup muffin tin (standard size, not jumbo or mini)
- Muffin liners (paper or silicone) or cooking spray
- Large mixing bowl for combining ingredients
- Medium bowl for mashing bananas
- Fork or potato masher for mashing bananas
- Measuring cups and spoons for accurate measurements
- Whisk or large spoon for mixing
- Wire cooling rack for cooling baked cups
- Oven preheated to 350°F
Optional but helpful: An ice cream scoop makes portioning the batter evenly into muffin cups super easy and mess-free!
Print
baked oatmeal cups recipe
Wholesome baked oatmeal cups that taste like muffins but are packed with fiber, protein, and natural ingredients. Perfect for meal prep, freezer-friendly, and endlessly customizable!
- Total Time: 35 minutes
- Yield: 12 oatmeal cups 1x
Ingredients
For the Base:
- 3 cups old-fashioned rolled oats
- 2 large ripe bananas, mashed (about 1 cup)
- 2 large eggs
- 1½ cups milk (dairy or non-dairy)
- ¼ cup honey or maple syrup
- 1 tablespoon vanilla extract
- 2 teaspoons baking powder
- 1 teaspoon ground cinnamon
- ½ teaspoon salt
- 2 tablespoons melted coconut oil or butter (optional, for extra richness)
Mix-in Options (Choose 1-2, totaling ¾ to 1 cup):
- 1 cup fresh or frozen blueberries
- 1 cup diced strawberries
- ¾ cup chocolate chips
- ½ cup chopped walnuts or pecans
- ½ cup dried cranberries or raisins
- ¾ cup diced apples with extra cinnamon
- ½ cup shredded coconut
- 2 tablespoons nut butter swirled in
Instructions
Step 1: Preheat and Prep
Preheat your oven to 350°F (175°C). Line a 12-cup muffin tin with paper liners or silicone cups, or generously spray with non-stick cooking spray. If you skip the liners, make sure to grease very well—these can stick!
Step 2: Mash the Bananas
In a medium bowl, mash your ripe bananas with a fork until mostly smooth. A few small lumps are fine—they’ll add texture. The riper and more spotted your bananas, the sweeter and more flavorful your cups will be.
Step 3: Mix Wet Ingredients
In a large mixing bowl, combine the mashed bananas, eggs, milk, honey (or maple syrup), vanilla extract, and melted coconut oil if using. Whisk everything together until well combined and smooth. The mixture should be liquidy—this is normal!
Step 4: Add Dry Ingredients
Add the rolled oats, baking powder, cinnamon, and salt directly to the wet ingredients. Stir with a large spoon until everything is evenly combined and all the oats are moistened. The batter will be thick and porridge-like, not pourable like regular muffin batter.
Step 5: Fold in Mix-ins
Gently fold in your chosen mix-ins (berries, chocolate chips, nuts, etc.). Reserve a small handful to press into the tops for a pretty presentation. Mix just until evenly distributed—don’t overmix or you’ll crush delicate berries.
Step 6: Fill Muffin Cups
Using a large spoon or ice cream scoop, divide the batter evenly among the 12 muffin cups. Fill them nearly to the top—these don’t rise dramatically like regular muffins. Press a few extra mix-ins on top of each cup for visual appeal. If using berries, this ensures every cup has visible fruit on top.
Step 7: Bake
Bake for 25-30 minutes, until the oatmeal cups are set in the center and golden brown around the edges. They should feel firm when gently pressed in the center. A toothpick inserted in the center should come out mostly clean (a few moist crumbs are okay, but no wet batter).
Step 8: Cool and Remove
Remove the muffin tin from the oven and let the cups cool in the pan for 5 minutes. This cooling time is important—it allows them to set up and firm enough to remove without falling apart. After 5 minutes, carefully remove the cups from the tin and transfer to a wire rack to cool completely.
Step 9: Serve and Store
Enjoy warm, at room temperature, or cold from the fridge. These cups are delicious at any temperature! Store cooled cups in an airtight container in the refrigerator for up to 5 days, or freeze for longer storage.
Notes
- Consistency Check: The batter should be thick like porridge, not runny. If it seems too wet, add 2-3 tablespoons more oats and let sit for 5 minutes before baking.
- Banana Ripeness Matters: Use very ripe bananas with brown spots for maximum sweetness and banana flavor. Underripe bananas won’t mash well and won’t add enough sweetness or moisture.
- Don’t Overmix: Once you add the oats, mix just until combined. Overmixing can make the cups tough and dense rather than tender.
- Liner Tip: Paper liners make cleanup easiest, but if you don’t use them, make sure to grease your muffin tin extremely well. These can be sticky! Silicone liners work great and are reusable.
- Baking Time Varies: Oven temperatures vary, so start checking at 25 minutes. The cups are done when the tops feel firm and the edges are lightly golden. Overbaking will dry them out.
- Customization: The base recipe is intentionally not overly sweet, allowing you to adjust sweetness based on mix-ins. If using very sweet add-ins like chocolate chips or dried fruit, you might reduce the honey slightly.
- Prep Time: 10 minutes
- Cook Time: 25 minutes
- Category: Breakfast
- Method: Baking
- Cuisine: American
- Diet: Gluten Free
Nutrition
- Serving Size: 1 oatmeal cup
- Calories: 145
- Sugar: 9g
- Sodium: 160mg
- Fat: 3.5g
- Saturated Fat: 1g
- Unsaturated Fat: 2g
- Trans Fat: 0g
- Carbohydrates: 25g
- Fiber: 3g
- Protein: 5g
- Cholesterol: 35mg
Tips & Variations
Flavor Variations:
- Apple Cinnamon: Add 1 cup diced apples, increase cinnamon to 2 teaspoons, add ¼ teaspoon nutmeg, and a handful of chopped walnuts
- Blueberry Lemon: Add 1 cup blueberries and 1 tablespoon lemon zest for bright, fresh flavor
- Chocolate Chip Banana Bread: Add ¾ cup chocolate chips and ¼ cup chopped walnuts
- Carrot Cake: Add 1 cup shredded carrots, ½ cup raisins, ¼ cup shredded coconut, and increase cinnamon to 2 teaspoons
- Peanut Butter & Jelly: Swirl 2-3 tablespoons peanut butter throughout batter and add ½ cup of your favorite berries
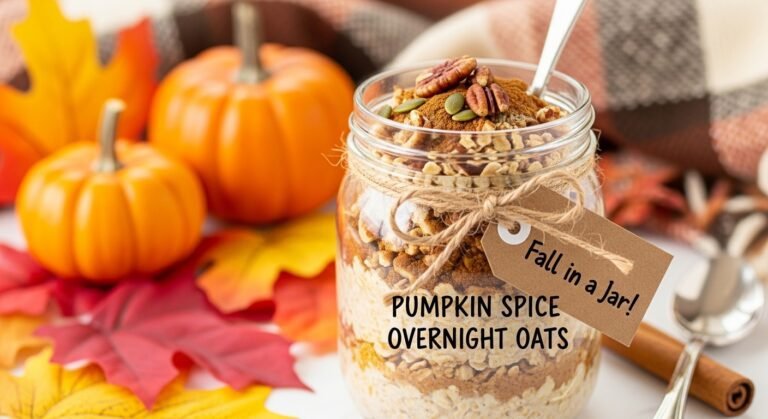
- Pumpkin Spice: Replace one banana with ½ cup pumpkin puree, add 1 teaspoon pumpkin pie spice
- Triple Berry: Mix ⅓ cup each of blueberries, raspberries, and diced strawberries
- Banana Nut: Add ½ cup chopped walnuts or pecans and extra banana slices on top
- Tropical: Add ½ cup shredded coconut, ½ cup diced pineapple, and ¼ cup chopped macadamia nuts
Dietary Modifications:
- Vegan: Replace eggs with flax eggs (2 tablespoons ground flaxseed + 6 tablespoons water, let sit 5 minutes), use plant milk and maple syrup instead of honey
- Lower Sugar: Reduce honey to 2 tablespoons or use mashed dates (about 6-8 Medjool dates) for natural sweetness
- Higher Protein: Add ⅓ cup vanilla protein powder and reduce oats by ⅓ cup, or stir in ¼ cup Greek yogurt
- Nut-Free: Skip nuts and use sunflower seed butter instead of peanut or almond butter
- Extra Nutrients: Add 2 tablespoons ground flaxseed or chia seeds, ¼ cup wheat germ, or sneak in ½ cup shredded zucchini
Texture Adjustments:
- Chewier Texture: Reduce milk by ¼ cup for denser, chewier cups
- Cake-like Texture: Add an extra egg and 2 tablespoons of flour or oat flour
- Crunchier Top: Sprinkle tops with a mixture of oats, brown sugar, and cinnamon before baking
Pro Chef Tips
Tip #1: The Toothpick Test Is Your Friend
Professional bakers rely on the toothpick test for perfect baking every time. Insert a toothpick in the center of a middle cup (those bake most slowly). It should come out with a few moist crumbs but no wet batter. If it comes out completely clean, you’ve slightly overbaked—remove immediately. Set a timer for 23 minutes and check from there rather than waiting the full 30 minutes.
Tip #2: Use the “Tilt and Tap” Method
After filling your muffin cups, lift the entire tin about 2 inches above the counter and drop it firmly. This simple action releases air bubbles and helps the batter settle evenly, resulting in cups with better texture and more uniform shape. Professional bakers do this with all batters!
Tip #3: Layer Your Mix-ins
For bakery-beautiful oatmeal cups, use this professional technique: Fill cups halfway with plain batter, add a layer of mix-ins, then top with remaining batter and press final mix-ins on top. This ensures mix-ins throughout the cup and a gorgeous top that showcases what’s inside—perfect for photos and presentation.
Tip #4: The Overnight Rest Method
For the most tender, moist oatmeal cups possible, mix your batter the night before and refrigerate it overnight before baking. The oats have time to fully hydrate, creating an incredibly moist, tender texture that’s superior to immediate baking. In the morning, just portion into muffin cups and bake. This also makes morning prep even faster!
Tip #5: Master the “Muffin Top” Look
To get those beautiful domed tops like bakery muffins, fill your muffin cups very full (nearly to the top) and start baking at 375°F for the first 5 minutes, then reduce to 350°F for the remaining time. The initial blast of heat creates rise and a slightly domed appearance. This is purely aesthetic—your cups will taste great either way!
Tip #6: Use Parchment Paper Strips
For the easiest removal possible (especially without liners), cut strips of parchment paper and place them in the bottom of each cup with excess hanging over the edges like little handles. After baking, just lift out using the parchment strips. Game-changer for cleanup!
Common Mistakes to Avoid
Mistake #1: Using Quick Oats Instead of Rolled Oats
Quick oats are too finely cut and will create mushy, gummy oatmeal cups with poor texture. They absorb liquid differently than rolled oats, making your cups dense and porridge-like rather than having pleasant structure. Always use old-fashioned rolled oats for the best results. Steel-cut oats won’t work either—they’re too hard and won’t soften enough during baking.
Mistake #2: Not Greasing the Pan Adequately
Even with non-stick pans, these cups can stick stubbornly if not properly prepared. If you’re not using liners, you need to grease generously—a light spray isn’t enough. Use cooking spray and then go over it again, or brush with melted butter or oil. The bottom and sides both need coverage. Better yet, use paper or silicone liners to guarantee easy removal.
Mistake #3: Filling Cups Unevenly
If you randomly spoon batter into cups without measuring, some will be overfilled and spill over while others will be underfilled and dry out. Use an ice cream scoop or ⅓ cup measure to portion evenly. Each cup should be filled nearly to the top (about ⅞ full) for uniform baking. Uneven cups also mean uneven baking times, resulting in some overbaked and some underbaked.
Mistake #4: Overbaking
The biggest texture killer! Because these are made with oats rather than flour, they can go from perfectly moist to dry and crumbly very quickly. Start checking at 23-25 minutes rather than waiting the full 30. Remember they’ll continue cooking slightly as they cool in the hot pan. It’s better to underbake slightly than overbake—they’ll firm up as they cool.
Mistake #5: Using Underripe Bananas
Green or barely yellow bananas won’t mash properly, won’t add enough sweetness, and will result in cups that taste bland with chunks of hard banana throughout. You need very ripe bananas with brown spots for proper sweetness and moisture. If your bananas aren’t ripe, put them in a paper bag with an apple overnight, or roast them in their skins at 300°F for 15 minutes to speed ripening.
Mistake #6: Skipping the Cooling Time
Removing cups from the hot muffin tin immediately will cause them to fall apart or stick and tear. Those 5 minutes of cooling in the pan are crucial—they allow the cups to set and firm up enough to handle. Be patient! After 5 minutes, they’ll release beautifully and maintain their shape.