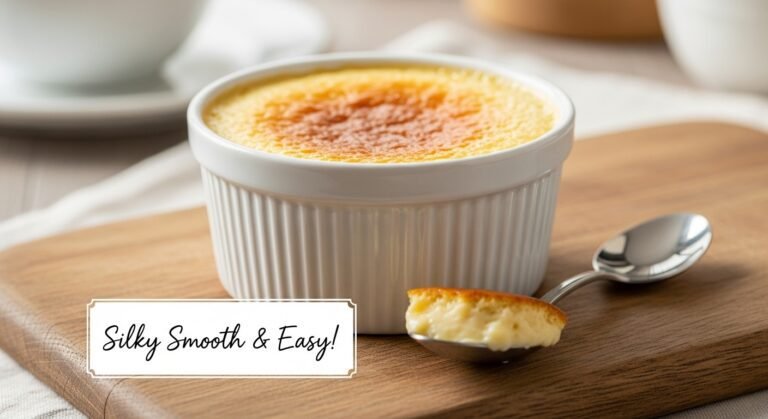
Classic Creamy Baked Custard Recipe (Silky Smooth & Easy!)
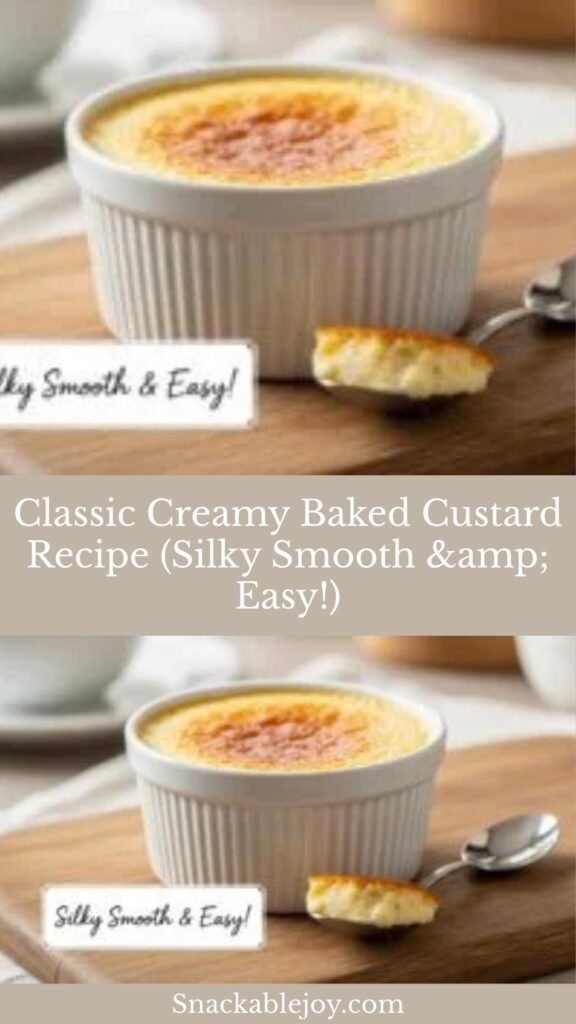
There’s something truly magical about a perfectly baked custard. This classic dessert is a creamy, silky-smooth comfort food that melts in your mouth with every spoonful. Made with simple pantry staples like eggs, milk, sugar, and vanilla, baked custard is an elegant yet effortless dessert that’s been gracing dinner tables for centuries.
Whether you’re looking for a nostalgic treat that reminds you of grandma’s kitchen, an impressive dessert for dinner guests, or a simple sweet ending to a weeknight meal, this baked custard recipe delivers every time. It’s gently baked in a water bath until just set, creating that signature jiggly texture that’s firm enough to hold its shape but soft enough to spoon through like silk. Serve it warm from the oven, chilled from the fridge, or at room temperature—it’s delicious any way you enjoy it. Top it with a sprinkle of nutmeg, fresh berries, or a drizzle of caramel for an extra special touch.
History / Background
Baked custard has a rich history that spans multiple continents and centuries, making it one of the oldest and most beloved desserts in the culinary world. The origins of custard can be traced back to ancient Rome, where cooks discovered that eggs could thicken and set milk-based mixtures when heated gently. The word “custard” itself comes from the Old French “croustade,” which originally referred to a pie with a crust.
During the Middle Ages, custards became extremely popular throughout Europe, particularly in England and France. They were often baked in pastry shells and served at royal banquets as a symbol of wealth and sophistication, since eggs, milk, and sugar were expensive commodities at the time. In medieval England, “custard” specifically referred to an open pie filled with a sweet or savory egg mixture.
By the 17th and 18th centuries, baked custard as we know it today—without the pastry crust—became a staple in British and American home cooking. Colonial American cooks embraced this simple dessert because it required only basic ingredients that most households kept on hand. The recipe was passed down through generations, appearing in nearly every handwritten recipe book and community cookbook across the country.
In the American South, baked custard became particularly cherished as a comforting, economical dessert that could feed a crowd. Churches and social gatherings often featured large pans of custard topped with nutmeg. Meanwhile, variations of baked custard appeared around the world: Spain’s flan, France’s crème caramel, Italy’s panna cotta, and Portugal’s pastéis de nata all share the same foundation of eggs and milk transformed into creamy perfection.
Today, baked custard remains a timeless classic that connects us to centuries of culinary tradition. It’s a testament to the beauty of simple, wholesome ingredients prepared with care and patience.
Why You’ll Love This Recipe
This classic baked custard recipe is about to become your new favorite go-to dessert, and here’s why: it combines old-fashioned comfort with modern convenience, delivering restaurant-quality results without any complicated techniques or hard-to-find ingredients. The gentle baking method creates an incredibly smooth, velvety texture that’s far superior to stovetop custards, and the subtle vanilla flavor with a hint of nutmeg is pure nostalgia in a dish.
Here’s what makes this recipe truly special:
- Only 6 simple ingredients – You probably have everything you need in your kitchen right now: eggs, milk, sugar, vanilla, salt, and nutmeg
- Budget-friendly – This elegant dessert costs just pennies per serving, making it perfect for feeding a family or a crowd without breaking the bank
- Foolproof water bath method – The gentle, even heat prevents cracking and curdling, ensuring perfect results every single time, even for beginners
- Naturally gluten-free – No flour means this dessert is safe for those avoiding gluten, with absolutely no modifications needed
- Make-ahead friendly – Bake it a day in advance and store it in the fridge, making entertaining and meal prep effortless
- Versatile serving options – Enjoy it warm, cold, or at room temperature, and customize with endless topping possibilities
- Impressive presentation – Individual ramekins look sophisticated and special, yet require minimal effort to create
- Comforting and nostalgic – This recipe tastes like childhood memories and Sunday dinners at grandma’s house
- Healthier dessert option – Made with wholesome ingredients like eggs and milk, it offers protein and calcium alongside its sweetness
- Beginner-friendly – No tempering, no complicated steps, just mix, pour, and bake for guaranteed success
Ingredient Notes
Let me walk you through each ingredient and why it matters for creating the perfect baked custard:
Eggs – The star of the show! Eggs provide the structure and that signature silky texture. Use large eggs at room temperature for the best results. The yolks add richness and a beautiful golden color, while the whites help the custard set properly. Don’t skip bringing them to room temperature—cold eggs can affect the texture and baking time.
Whole Milk – Creates the creamy base of your custard. Whole milk (3.25% fat) gives you the best flavor and texture. You can substitute with 2% milk if needed, but the custard will be slightly less rich. For an ultra-decadent version, replace half the milk with heavy cream. Avoid skim milk, as it doesn’t have enough fat to create that luscious mouthfeel.
Granulated Sugar – Sweetens the custard and helps create that smooth texture. The amount in this recipe provides a balanced, not-too-sweet flavor that lets the vanilla shine through. You can adjust the sugar up or down by a tablespoon or two based on your preference.
Pure Vanilla Extract – This is where quality really matters! Pure vanilla extract adds incredible depth and that warm, comforting aroma. Skip the imitation stuff and invest in real vanilla—you’ll absolutely taste the difference. For an extra special touch, you can use vanilla bean paste or scrape the seeds from half a vanilla bean.
Salt – Just a pinch enhances all the other flavors and balances the sweetness. It might seem like a tiny amount, but it makes a big difference in the overall taste profile.
Ground Nutmeg – The traditional topping for baked custard! Freshly grated nutmeg is incredible, but pre-ground works perfectly fine. The warm, slightly sweet spice adds a nostalgic finishing touch. If you’re not a nutmeg fan, try cinnamon instead, or skip it entirely for a plain vanilla custard.
Equipment Needed
Having the right tools makes this recipe even easier. Here’s what you’ll need:
- 6-8 ramekins or custard cups (6-ounce capacity) – Individual serving dishes that create that classic presentation
- Large mixing bowl – For whisking together your custard mixture
- Whisk – Essential for creating a smooth, lump-free custard base
- Measuring cups and spoons – Accurate measurements ensure consistent results
- Fine-mesh strainer – For straining out any egg bits or foam for ultra-smooth custard
- Large roasting pan or baking dish – Must be deep enough to hold water and accommodate all your ramekins
- Kettle or large pot – For heating water for the water bath
- Oven thermometer (optional but helpful) – Ensures your oven temperature is accurate for gentle, even baking
Print

Baked Custard Recipe
This classic baked custard recipe creates silky-smooth, creamy individual custards with a delicate vanilla flavor and warm nutmeg topping. Baked gently in a water bath for foolproof results every time, it’s an elegant yet simple dessert that’s perfect for any occasion.
- Total Time: 1 hour
- Yield: 6-8 servings 1x
Ingredients
Scale- 4 large eggs, room temperature
- 2½ cups whole milk, warmed
- ⅓ cup granulated sugar
- 1½ teaspoons pure vanilla extract
- ¼ teaspoon salt
- Ground nutmeg, for sprinkling
- Boiling water, for water bath
Instructions
- Preheat and Prepare: Preheat your oven to 325°F (165°C). Place 6-8 ramekins or custard cups in a large roasting pan or baking dish. Set aside. Begin heating water in a kettle or large pot for the water bath.
- Warm the Milk: In a small saucepan over medium-low heat, warm the milk until it’s hot but not boiling (about 160°F). You should see steam rising from the surface. This step helps the custard bake more evenly and prevents curdling. Remove from heat and set aside.
- Whisk the Eggs: In a large mixing bowl, whisk together the eggs, sugar, vanilla extract, and salt until well combined and slightly frothy. Don’t over-beat—you want to mix thoroughly but avoid incorporating too much air, which can create bubbles in your finished custard.
- Temper and Combine: Slowly pour the warm milk into the egg mixture while whisking constantly. This gentle tempering process prevents the eggs from scrambling. Whisk until everything is fully incorporated and the mixture is smooth.
- Strain the Mixture: Pour the custard mixture through a fine-mesh strainer into a large measuring cup or pitcher with a spout. This removes any bits of cooked egg and creates an ultra-smooth texture. Discard any foam or solids left in the strainer.
- Fill the Ramekins: Carefully pour the strained custard mixture into your prepared ramekins, filling each about three-quarters full. Sprinkle the top of each custard generously with ground nutmeg.
- Create the Water Bath: Place the roasting pan with ramekins in the preheated oven. Carefully pour the hot water into the pan around the ramekins until the water reaches halfway up the sides of the ramekins. This water bath (bain-marie) ensures gentle, even cooking and prevents the edges from overcooking.
- Bake: Bake for 40-50 minutes, until the custards are set around the edges but still slightly jiggly in the center (about the size of a quarter). The internal temperature should reach 170-175°F. Remember, they’ll continue to set as they cool, so don’t overbake!
- Cool: Carefully remove the roasting pan from the oven. Using tongs or a spatula, remove each ramekin from the water bath and place on a wire cooling rack. Let cool for 15-20 minutes before serving warm, or refrigerate for at least 2 hours to serve chilled.
Notes
- The custard is done when it jiggles slightly in the center like Jell-O. If there’s liquid sloshing around, it needs more time.
- For perfectly smooth tops, use a spoon to remove any foam or bubbles from the surface before baking.
- Different ovens vary in temperature, so start checking your custards at 35 minutes to prevent overbaking.
- Custards will continue to firm up as they cool, so err on the side of slightly underdone rather than overbaked.
- For easier cleanup, place a kitchen towel in the bottom of your roasting pan before adding ramekins—this prevents sliding and protects the ramekins.
- Prep Time: 15 minutes
- Cook Time: 45 minutes
- Category: Desert
- Method: Baking
- Cuisine: American
- Diet: Gluten Free
Nutrition
- Serving Size: 1 custard (based on 6 servings)
- Calories: 145
- Sugar: 14g
- Sodium: 150mg
- Fat: 6g
- Saturated Fat: 3g
- Unsaturated Fat: 2.5g
- Trans Fat: 0g
- Carbohydrates: 15g
- Fiber: 0g
- Protein: 7g
- Cholesterol: 135mg
Tips & Variations
Flavor Variations:
- Chocolate Custard: Add 3 tablespoons of cocoa powder and an extra tablespoon of sugar to the egg mixture
- Maple Custard: Replace half the sugar with pure maple syrup for a subtle maple flavor
- Coconut Custard: Substitute 1 cup of the milk with full-fat coconut milk and add ½ teaspoon coconut extract
- Coffee Custard: Dissolve 2 tablespoons instant espresso powder in the warm milk before adding to eggs
- Citrus Custard: Add 1 tablespoon lemon or orange zest to the mixture for a bright, fresh flavor
- Almond Custard: Replace vanilla extract with almond extract (use just 1 teaspoon as it’s stronger)
Dietary Modifications:
- Dairy-Free: Use full-fat oat milk or cashew milk (avoid almond milk as it’s too thin)
- Lower Sugar: Reduce sugar to ¼ cup or use a sugar substitute like monk fruit sweetener
- Egg-Free: Unfortunately, eggs are essential to the structure of custard and cannot be substituted
Serving Twists:
- Top with fresh berries, sliced peaches, or caramelized banana
- Drizzle with caramel sauce, chocolate ganache, or fruit compote
- Sprinkle with toasted coconut, crushed pistachios, or graham cracker crumbs
- Serve alongside shortbread cookies or biscotti for dipping
- Create a brûlée topping by sprinkling with sugar and torching with a kitchen torch
Pro Chef Tips
Temperature Control is Everything: The key to silky custard is low, gentle heat. If your oven runs hot, reduce the temperature to 300°F and extend the baking time slightly. Use an oven thermometer to verify your actual oven temperature—this single tool will revolutionize your baking results.
The Jiggle Test Never Lies: When checking for doneness, gently shake the pan. The custard should jiggle like set Jell-O in the center (about a quarter-sized area) but be firm around the edges. If the whole surface waves like liquid, keep baking. If nothing moves at all, you’ve overbaked it, though it will still taste delicious.
Room Temperature Ingredients are Non-Negotiable: Starting with room temperature eggs helps them incorporate smoothly and prevents temperature shock when you add the warm milk. Let eggs sit on the counter for 30-60 minutes before beginning, or place them in a bowl of warm water for 5-10 minutes.
Don’t Skip the Straining Step: Even if your mixture looks perfectly smooth, straining removes chalazae (those white egg strands), any bits of cooked egg, and surface foam. This single step elevates your custard from homemade to bakery-quality.
Master the Pour: When adding hot water to the bain-marie, pull the oven rack out slightly and pour carefully using a measuring cup or pitcher with a spout. This prevents accidentally splashing water into your custards and saves your arms from the heat.
Carryover Cooking is Real: Custards continue to cook from residual heat even after you remove them from the oven. Always underbake slightly—that jiggly center will set perfectly as it cools. Overbaked custard becomes grainy and can develop an eggy taste.
Chill for the Cleanest Slices: If you want to unmold your custards for an elegant plated presentation, refrigerate them for at least 4 hours or overnight. Run a thin knife around the edge, place a small plate on top, and flip confidently. The chilled custard releases cleanly and holds its shape beautifully.
Common Mistakes to Avoid
Mistake #1: Boiling the Milk
Adding boiling milk directly to eggs will scramble them instantly. Always heat milk to steaming but not boiling (around 160°F), and pour it slowly while whisking constantly. This gentle tempering is the foundation of smooth custard.Mistake #2: Skipping the Water Bath
Baking custard without a water bath results in a rubbery texture, curdled edges, and cracked surfaces. The water bath insulates the custards and provides even, gentle heat. It’s absolutely essential—don’t skip it!Mistake #3: Overbaking
The most common error! Overbaked custard becomes grainy, watery, and develops an unpleasant eggy flavor. Remember: slightly jiggly in the center when you remove them from the oven. They’ll continue cooking as they cool and will be perfectly set.Mistake #4: Using Cold Ingredients
Cold eggs won’t incorporate smoothly, and cold milk takes longer to heat the custard mixture, resulting in uneven texture. Bring eggs to room temperature and warm your milk before mixing for the silkiest results.Mistake #5: Forgetting to Check Oven Temperature
Most home ovens are off by 15-25 degrees. If your custards consistently overcook or undercook, invest in an oven thermometer. This simple tool solves so many baking mysteries and ensures consistent results every time.Storage & Meal Prep
Refrigerator Storage:
Baked custard stores beautifully in the refrigerator, making it perfect for make-ahead desserts. Once completely cooled to room temperature, cover each ramekin tightly with plastic wrap or aluminum foil, or transfer custards to an airtight container. Properly stored, baked custard will keep fresh in the refrigerator for 3-4 days. The texture actually improves after a day in the fridge as the flavors meld together.Serving Temperature:
One of the best things about baked custard is its versatility. You can enjoy it straight from the oven while it’s still warm and comforting, at room temperature after cooling on the counter, or chilled from the refrigerator. Each temperature offers a slightly different experience—warm custard is soft and delicate, while chilled custard is firmer and more refreshing. Let personal preference be your guide!Reheating Instructions:
If you’ve refrigerated your custards and want to serve them warm, there are two gentle reheating methods. For individual portions, microwave on 50% power for 20-30 seconds, checking frequently to avoid overheating. For a more even reheat, place ramekins in a shallow pan of hot water and warm in a 300°F oven for 10-15 minutes. Never reheat at full power or high heat, as this can cause the custard to curdle or become watery.Room Temperature Note:
Because custard contains eggs and dairy, don’t leave it at room temperature for more than 2 hours. After serving, promptly return any leftovers to the refrigerator to ensure food safety.Make-Ahead & Freezer Notes
Make-Ahead Success:
Baked custard is an absolute dream for advance preparation, making it ideal for entertaining or meal prepping your desserts for the week. You can bake the custards up to 2 days before you plan to serve them. Once completely cooled, cover tightly and refrigerate. The custards will actually benefit from this resting time as the flavors develop and the texture becomes even more luscious. Simply remove from the fridge about 30 minutes before serving if you prefer them at room temperature, or serve cold directly from the refrigerator.Freezing (With Caveats):
While technically possible, freezing baked custard is not recommended because the delicate texture changes significantly during freezing and thawing. The smooth, creamy consistency can become slightly grainy or watery, and you may notice separation. However, if you absolutely need to freeze custard, here’s the best approach: Let custards cool completely, then wrap each ramekin tightly in plastic wrap followed by aluminum foil, or transfer to freezer-safe containers. Freeze for up to 1 month.Thawing Frozen Custard:
Transfer frozen custards to the refrigerator and let thaw slowly overnight (8-12 hours). Never thaw at room temperature, as this promotes bacterial growth. Once thawed, give the custard a gentle stir if any separation has occurred. The texture won’t be quite as silky as fresh custard, but it will still taste delicious.Best Approach:
For optimal results, skip the freezer entirely and simply bake your custards 1-2 days before needed. The make-ahead convenience is nearly the same, but the quality is vastly superior. Your guests (or your family) will definitely notice and appreciate the difference!Serving Suggestions
Baked custard is wonderfully versatile and pairs beautifully with so many accompaniments. Here are my favorite ways to serve this classic dessert:
Classic Presentations:
- Serve chilled in the ramekin with a simple sprinkle of extra nutmeg and a dollop of whipped cream
- Unmold onto a dessert plate and surround with fresh berry compote or macerated strawberries
- Top with a generous handful of fresh blueberries, raspberries, or sliced peaches
- Drizzle with warm caramel sauce and sprinkle with flaky sea salt for a salted caramel twist
Fruit Pairings:
Fresh or stewed fruit complements the rich, creamy custard perfectly. Try sliced bananas with a pinch of cinnamon, roasted plums with honey, cherry compote, mango slices with lime zest, or a mixed berry medley. The brightness of fruit cuts through the richness beautifully.Crunchy Contrasts:
Add textural interest with crumbled gingersnap cookies, crushed vanilla wafers, toasted sliced almonds or pecans, granola sprinkled on top, or buttery shortbread cookies on the side for dipping.Decadent Additions:
Take your custard over the top with chocolate shavings or chocolate sauce drizzle, dulce de leche spooned over the top, a scoop of vanilla ice cream alongside warm custard, butterscotch sauce, or a brûléed sugar crust torched just before serving.Beverage Pairings:
Complete your dessert course with freshly brewed coffee or espresso (the classic pairing), Earl Grey or chamomile tea, dessert wine like Moscato or late-harvest Riesling, or a glass of cold milk for a nostalgic touch.Make It a Meal:
Baked custard works beautifully as a light dessert after heavier main courses like pot roast, braised short ribs, roasted chicken, or Sunday ham. It’s also lovely for brunch alongside quiche, fresh fruit salad, and pastries.FAQs Section
Q: Why is my custard watery or curdled?
A: This typically happens from overbaking at too high a temperature. The proteins in the eggs contract too quickly, squeezing out moisture and creating a curdled texture. Always use a water bath, bake at 325°F or lower, and remove custards when they’re still slightly jiggly in the center. Remember, they continue cooking from residual heat as they cool.Q: Can I make one large custard instead of individual ramekins?
A: Absolutely! Pour the mixture into a 1.5-quart baking dish and increase the baking time to 60-75 minutes. Check for doneness the same way—the center should jiggle slightly while the edges are set. Large custards take longer to bake through and require extra care to avoid overbaking the edges.Q: Why does my custard have bubbles or a foamy top?
A: Air bubbles form from vigorous whisking or pouring. Prevent this by whisking gently just until combined, straining the mixture through a fine-mesh sieve, and using a spoon to skim off any surface foam before baking. You can also use a kitchen torch to quickly pop surface bubbles right before baking.Q: Can I use low-fat or skim milk instead of whole milk?
A: You can, but the custard will be noticeably less creamy and rich. The fat content in whole milk is essential for that luscious texture and satisfying mouthfeel. If you’re watching calories, 2% milk is a better compromise than skim. For the richest custard, use half whole milk and half heavy cream.Q: My custard cracked on top—is it ruined?
A: Cracks usually indicate slight overbaking, but your custard is still perfectly delicious! The cracks are purely cosmetic. You can hide them with whipped cream, fruit topping, or a dusting of cocoa powder. To prevent cracks in the future, bake at a lower temperature, use a water bath, and remove custards when they’re still a bit jiggly.Q: How do I know when my custard is done without a thermometer?
A: Use the jiggle test! Gently shake the pan—the custard should be set around the edges but jiggle slightly in the center (about a quarter-sized area). It should look like Jell-O, not liquid. Insert a knife near the center (not the middle)—it should come out mostly clean with just a little moisture. The center will continue to set as it cools.Q: Can I make this recipe without vanilla extract?
A: Yes, though vanilla adds wonderful depth of flavor. You can substitute with other extracts like almond (use half the amount as it’s stronger), maple, or coconut. You could also infuse the milk with a cinnamon stick, citrus zest, or coffee beans—just heat the milk with your flavoring, let steep for 15 minutes, then strain before adding to the eggs.Conclusion
There you have it—the ultimate guide to creating silky, smooth, absolutely perfect baked custard right in your own kitchen! This timeless dessert proves that the simplest ingredients, when treated with a little care and attention, can create something truly magical. Whether you’re baking these creamy custards for a special dinner party, a cozy family dessert, or just because you’re craving something sweet and comforting, this recipe delivers every single time.
The beauty of baked custard lies not just in its delicious flavor, but in its versatility and make-ahead convenience. You can dress it up with fancy toppings for guests or enjoy it plain with just a sprinkle of nutmeg for a quiet evening at home. It’s gluten-free, budget-friendly, and uses ingredients you probably already have on hand. Plus, once you master the basic technique, you can experiment with all sorts of fun flavor variations to keep things interesting.
I hope this recipe becomes a staple in your dessert rotation, just as it has in mine. There’s something so satisfying about pulling those perfectly set custards from the oven, knowing you’ve created something both nostalgic and elegant with your own two hands. Don’t forget to save this recipe to your Pinterest boards so you can find it easily when that custard craving hits!
Now grab those eggs and get baking—your perfect, creamy, dreamy baked custard is waiting. And when you make this recipe, I’d absolutely love to hear how it turned out for you! Happy baking, friends! 🥄✨