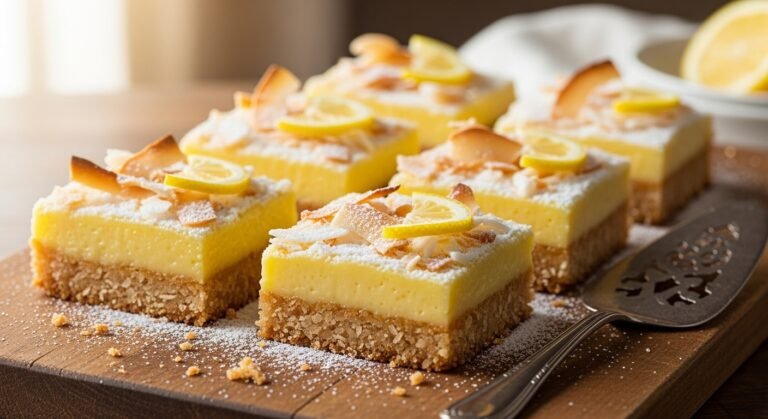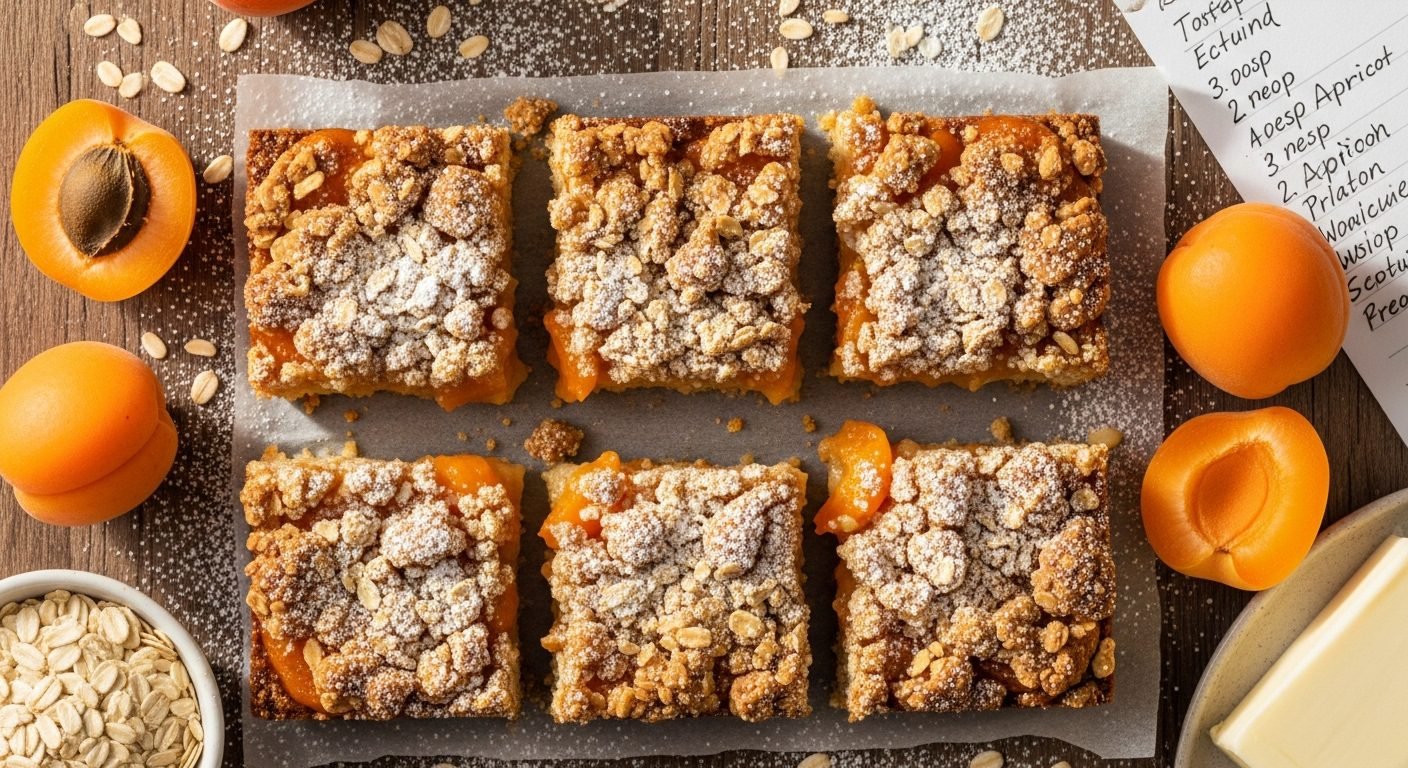
Easy Apricot Bars Recipe with Buttery Oat Crumble
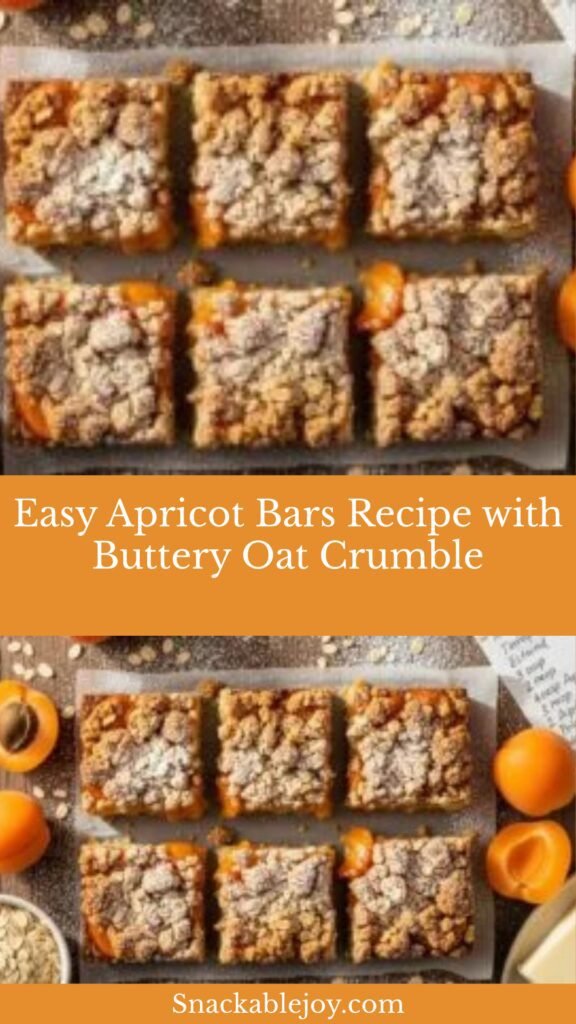
There’s something wonderfully nostalgic about apricot bars. These delightful treats combine a buttery, crumbly oat crust with a sweet-tart apricot filling that strikes the perfect balance between fruity freshness and comforting sweetness. Whether you’re hosting a brunch, packing lunches for the week, or simply craving a homemade dessert that doesn’t require hours in the kitchen, these apricot bars are your answer. They’re incredibly easy to make, require just one pan, and deliver bakery-quality results that’ll have everyone asking for the recipe. The golden, crispy edges give way to a tender center bursting with jammy apricot goodness, making each bite an absolute delight.
History / Background
Apricot bars have their roots in Central European baking traditions, particularly in Austrian and Hungarian pastry-making where apricots have been celebrated for centuries. The combination of buttery shortbread-style crusts with fruit preserves became popular in American home baking during the mid-20th century, as homemakers sought simple yet impressive desserts that could feed a crowd without breaking the bank. Apricots, which thrive in California’s sunny climate, became widely available in preserved form, making them accessible year-round to home bakers across the country.
The genius of this recipe lies in its simplicity—it’s essentially a fruit-filled cousin of the classic crumb bar, which gained popularity in church cookbooks and community recipe exchanges throughout the 1950s and 60s. These bars were often called “Kolacky bars” or “fruit squares” and represented the perfect potluck dessert: easy to transport, feeds many people, and universally loved. Today, apricot bars have experienced a renaissance among home bakers who appreciate their retro charm and the way they showcase fruit without being overly sweet or complicated.
Why You’ll Love This Recipe
These apricot bars are about to become your new go-to dessert for so many reasons. The recipe uses simple pantry staples you probably already have on hand, and the entire process takes less than an hour from start to finish. The beauty of these bars lies in their versatility—they’re elegant enough for a dinner party yet casual enough for a Tuesday afternoon snack. The oat crumble adds a wonderful texture and nutty flavor that complements the bright apricot filling perfectly.
Key benefits that make this recipe a winner:
- Beginner-friendly – No special techniques or pastry skills required
- One-bowl preparation – Minimal cleanup means more time enjoying your creation
- Customizable – Easily adapt with different preserves or add-ins
- Make-ahead friendly – Actually taste better the next day
- Budget-conscious – Uses affordable, accessible ingredients
- Crowd-pleaser – Loved by kids and adults alike
- Portion-controlled – Cut into bars for easy serving and storing
- Freezer-friendly – Make a double batch and freeze for future treats
Ingredient Notes
Understanding your ingredients helps you bake with confidence and make smart substitutions when needed. Here’s what goes into these delicious apricot bars:
All-Purpose Flour forms the structure of both the crust and crumble topping. You can substitute with a 1:1 gluten-free baking flour if needed, though the texture will be slightly more delicate.
Old-Fashioned Oats add texture, nuttiness, and that classic crumble-bar appearance. Use rolled oats, not quick-cooking or steel-cut. Quick oats will make the bars mushy, while steel-cut won’t soften properly.
Brown Sugar contributes moisture and a subtle molasses flavor that pairs beautifully with apricots. Light or dark brown sugar both work—dark will give a slightly deeper flavor.
Butter is essential for that rich, crumbly texture. Use unsalted butter so you can control the salt level. The butter should be cold and cubed for the best crumb texture.
Apricot Preserves are the star of the show. Choose a good-quality preserve with visible fruit pieces for the best flavor and texture. Apricot jam works too, though preserves have a chunkier texture that’s ideal.
Salt enhances all the flavors and balances the sweetness. Don’t skip it—even a small amount makes a noticeable difference.
Baking Powder provides just a tiny bit of lift to keep the bars from being too dense.
Vanilla Extract adds warmth and depth to the overall flavor profile.
Lemon Juice (optional but recommended) brightens the apricot filling and adds a pleasant tang that cuts through the sweetness.
Equipment Needed
You don’t need a fancy kitchen to make these bars—just a few basic tools:
- 9×13-inch baking pan – This is the standard size that yields perfectly proportioned bars
- Parchment paper – Makes removal and cleanup incredibly easy
- Large mixing bowl – For combining the crumble mixture
- Pastry cutter or fork – To cut the cold butter into the dry ingredients
- Measuring cups and spoons – For accurate measurements
- Small bowl – For mixing the apricot filling with lemon juice
- Rubber spatula or spoon – For spreading the filling
- Cooling rack – Allows air circulation for proper cooling
- Sharp knife – For cutting clean bar edges
Print

Apricot Bars Recipe
These buttery apricot bars feature a crumbly oat crust and topping with a sweet-tart apricot preserve filling. Perfect for potlucks, lunchboxes, or afternoon tea, they’re easy to make and even easier to love.
- Total Time: 50 minutes (plus cooling time)
- Yield: 24 bars 1x
Ingredients
ScaleFor the Crust and Topping:
- 2 cups all-purpose flour
- 2 cups old-fashioned rolled oats
- 1 cup packed brown sugar
- 1 cup (2 sticks) cold unsalted butter, cubed
- 1 teaspoon baking powder
- ½ teaspoon salt
- 1 teaspoon vanilla extract
For the Filling:
- 1½ cups apricot preserves
- 1 tablespoon lemon juice (optional but recommended)
- 2 tablespoons all-purpose flour
Instructions
- Preheat and Prep: Preheat your oven to 350°F (175°C). Line a 9×13-inch baking pan with parchment paper, leaving some overhang on the sides for easy removal later.
- Make the Crumble Mixture: In a large mixing bowl, combine the flour, oats, brown sugar, baking powder, and salt. Whisk together until evenly distributed.
- Cut in the Butter: Add the cold, cubed butter and vanilla extract to the dry ingredients. Using a pastry cutter or fork, work the butter into the mixture until it resembles coarse crumbs with some pea-sized pieces of butter remaining. This should take about 3-4 minutes. You can also use your fingertips to rub the butter into the flour mixture.
- Form the Crust: Reserve about 1½ cups of the crumble mixture for the topping. Press the remaining mixture firmly and evenly into the bottom of your prepared pan. Use the bottom of a measuring cup or your hands to pack it down well—a firm crust prevents a soggy bottom.
- Prepare the Filling: In a small bowl, stir together the apricot preserves, lemon juice, and 2 tablespoons of flour. The flour helps thicken the filling slightly and prevents it from being too runny.
- Assemble: Spread the apricot mixture evenly over the pressed crust layer, leaving about a ¼-inch border around the edges. Use a spatula to spread it gently—you don’t want to disturb the crust layer.
- Add the Topping: Sprinkle the reserved crumble mixture evenly over the apricot filling. Don’t press it down—just let it sit loosely on top for that perfect crumbly texture.
- Bake: Place the pan in the preheated oven and bake for 35-40 minutes, or until the top is golden brown and the filling is bubbling around the edges.
- Cool Completely: This is crucial! Remove the pan from the oven and let it cool completely on a wire rack for at least 2 hours. The bars need this time to set properly, or they’ll be too soft to cut cleanly.
- Cut and Serve: Once completely cool, use the parchment paper overhang to lift the entire bar out of the pan. Place on a cutting board and use a sharp knife to cut into 24 squares. Wipe the knife clean between cuts for the neatest edges
Notes
- For extra flavor, add ½ teaspoon of almond extract to the crust mixture along with the vanilla.
- If your apricot preserves are very chunky, you can pulse them a few times in a food processor for a smoother filling.
- The bars will firm up significantly as they cool, so be patient—cutting them warm will result in messy, crumbly bars.
- Store in an airtight container at room temperature for up to 5 days, or refrigerate for up to 10 days.
- Prep Time: 15 minutes
- Cook Time: 35 minutes
- Category: Dessert, Snack
- Method: Baking
- Cuisine: American
- Diet: Vegetarian
Nutrition
- Serving Size: 1 bar (1/24 of recipe)
- Calories: 185
- Sugar: 16g
- Sodium: 85mg
- Fat: 8g
- Saturated Fat: 5g
- Unsaturated Fat: 2.5g
- Trans Fat: 0g
- Carbohydrates: 28g
- Fiber: 1g
- Protein: 2g
- Cholesterol: 20mg
Tips & Variations
One of the best things about apricot bars is how easily they adapt to your preferences and what you have on hand. Here are some delicious ways to customize this recipe:
Different Fruit Preserves: Swap the apricot for raspberry, strawberry, peach, or mixed berry preserves. Cherry preserves create a particularly elegant variation. You can even mix two flavors—try half apricot and half raspberry for a beautiful color contrast.
Add Nuts: Fold ½ cup of chopped almonds, pecans, or walnuts into the crumble mixture for extra crunch and richness. Sliced almonds sprinkled on top before baking look especially pretty.
Coconut Lovers: Replace ½ cup of the oats with sweetened shredded coconut for a tropical twist that pairs beautifully with apricot.
Spice It Up: Add ½ teaspoon of cinnamon, ¼ teaspoon of cardamom, or a pinch of nutmeg to the crumble mixture for warming spice notes.
Healthier Version: Use coconut oil instead of butter, swap half the flour for whole wheat flour, and reduce the sugar to ¾ cup. They’ll be slightly less indulgent but still delicious.
Chocolate Drizzle: Once cooled, drizzle melted white or dark chocolate over the bars for an extra-special presentation.
Lemon Zest: Add the zest of one lemon to the crumble mixture for a bright, citrusy note that enhances the apricot flavor.
Pro Chef Tips
Taking your apricot bars from good to absolutely exceptional comes down to a few professional techniques:
Keep Everything Cold: Cold butter is the secret to a truly crumbly, tender crust. If your kitchen is warm, pop your mixing bowl in the freezer for 10 minutes before starting. Some bakers even freeze the cubed butter for 15 minutes before cutting it into the flour.
Don’t Overmix: Once the butter is incorporated into pea-sized pieces, stop mixing. Overworking the dough develops gluten and makes the bars tough instead of tender.
Press Firmly, Crumble Loosely: The bottom crust should be packed tightly to create a sturdy base, but the top layer should be loose crumbs. This contrast in texture is what makes these bars so satisfying to bite into.
Use Quality Preserves: Since the filling is such a prominent part of these bars, invest in good preserves. Check the ingredient list—fruit should be the first ingredient, not corn syrup. Brands with visible fruit pieces create the most appealing filling.
The Parchment Paper Sling: Don’t skip lining your pan with parchment paper that extends up and over the sides. This simple trick makes removal foolproof and gives you perfectly clean edges.
Cool Completely: I know I’ve mentioned this already, but it bears repeating—warm bars will fall apart. The filling needs time to set as it cools. For the cleanest cuts, some bakers even refrigerate the bars for 30 minutes before cutting.
Toothpick Test: The bars are done when the edges are golden brown and a toothpick inserted into the center comes out with just a few moist crumbs. If it comes out completely clean, you’ve slightly overbaked them.
Common Mistakes to Avoid
Even simple recipes can go wrong if you’re not aware of potential pitfalls. Here are the most common issues and how to prevent them:
Soggy Bottom Crust: This happens when the bottom layer isn’t pressed firmly enough or if the filling is too liquid. Make sure to pack that crust layer tightly and add the flour to your preserves to help thicken the filling.
Crumbly Bars That Fall Apart: Usually caused by cutting the bars before they’ve cooled completely, or not using enough butter in the crumble mixture. Patience is key—let them cool fully, even if it takes several hours.
Dry, Hard Texture: Overbaking is the culprit here. Keep a close eye during the last 10 minutes of baking. The bars should be golden but not dark brown, and the filling should be bubbling around the edges.
Uneven Browning: Make sure your oven is properly preheated and consider rotating the pan halfway through baking if your oven has hot spots. Placing the pan in the center rack ensures even heat distribution.
Too Sweet or One-Dimensional Flavor: Don’t skip the salt and lemon juice—these ingredients balance the sweetness and add complexity to the flavor profile. Even ¼ teaspoon of salt makes a noticeable difference.
Storage & Meal Prep
Proper storage keeps your apricot bars tasting fresh and delicious for days:
Room Temperature: Store cooled, cut bars in an airtight container with parchment paper between layers to prevent sticking. They’ll stay fresh at room temperature for up to 5 days. This is ideal if you plan to eat them within the week.
Refrigerator: For longer storage, refrigerate the bars in an airtight container for up to 10 days. The cold actually improves the texture slightly, making them even more firm and sliceable. Bring to room temperature before serving, or enjoy them chilled—both ways are delicious.
Individual Wrapping: For lunchboxes or grab-and-go snacks, wrap individual bars in plastic wrap or parchment paper. They’re perfect for tucking into lunch bags or keeping in your purse for a quick energy boost.
Reheating: While these bars are delicious at room temperature or chilled, you can warm them slightly in the microwave for 10-15 seconds if you prefer a softer, more tender texture. They’re particularly lovely warmed and served with vanilla ice cream for dessert.
Freshness Tip: If your bars start to dry out slightly after a few days, place a slice of bread in the container with them. The bread will become stale, but it transfers moisture to the bars, keeping them soft.
Make-Ahead & Freezer Notes
These apricot bars are fantastic make-ahead treats, perfect for busy schedules and meal planning:
Prepare the Crumble in Advance: You can make the crumble mixture up to 2 days ahead and store it in the refrigerator in an airtight container. This actually helps the butter stay cold, resulting in an even better texture. Just proceed with assembling and baking when you’re ready.
Freeze Before Baking: Assemble the entire pan of bars, cover tightly with plastic wrap and aluminum foil, and freeze for up to 3 months. When ready to bake, you can bake from frozen—just add 10-15 minutes to the baking time. This is perfect for having a homemade dessert ready with minimal effort.
Freeze Baked Bars: Once completely cooled, cut the bars and freeze them in a single layer on a baking sheet for about an hour. Then transfer to a freezer-safe container or bag with parchment paper between layers. They’ll keep beautifully for up to 3 months.
Thawing Method: For best results, thaw frozen bars overnight in the refrigerator, then bring to room temperature before serving. If you’re in a hurry, they can thaw at room temperature in about 2 hours.
Quick Refresh: If frozen bars seem a bit dry after thawing, warm them in a 300°F oven for 5-7 minutes to refresh the texture and bring back that fresh-baked flavor.
Gift-Giving: Frozen bars are perfect for gifting! Wrap them individually while frozen, pack in a decorative tin or box, and they’ll thaw by the time you deliver them. Include reheating instructions for a thoughtful touch.
Serving Suggestions
Apricot bars are wonderfully versatile and can be served in many delightful ways:
Classic Coffee Companion: These bars shine alongside a hot cup of coffee or tea. The buttery, not-too-sweet flavor profile makes them ideal for breakfast or an afternoon break. Try them with a cappuccino, Earl Grey tea, or even a chai latte.
Dessert Service: Elevate these humble bars to dinner-party status by serving them warm with a scoop of vanilla ice cream or a dollop of freshly whipped cream. A drizzle of caramel sauce takes them over the top.
Brunch Spread: Include apricot bars on your brunch table alongside fresh fruit, yogurt parfaits, and quiche. They’re easier than making individual pastries but look just as impressive.
Picnic Perfect: Pack these for outdoor dining—they travel well, don’t require refrigeration for a few hours, and are easy to eat without utensils. Pair with fresh berries and a thermos of iced tea.
Cheese Board Addition: Believe it or not, these bars pair wonderfully with soft cheeses like brie or cream cheese. The sweet-tart apricot complements the creamy, tangy cheese beautifully.
Holiday Cookie Tray: These bars hold their own on holiday cookie platters and add variety in texture and flavor. They’re especially welcome when everyone else brings chocolate-based treats.
Beverage Pairings: Beyond coffee and tea, try these with sparkling water, lemonade, or even a light dessert wine like Moscato d’Asti. The apricot flavor pairs beautifully with anything citrusy or lightly sweet.
FAQs Section
Can I use fresh apricots instead of preserves?
While preserves are easier and more reliable, you can use fresh apricots. You’ll need about 2 cups of diced fresh apricots mixed with ½ cup sugar, 2 tablespoons cornstarch, and 1 tablespoon lemon juice. Simmer this mixture on the stovetop for 10-15 minutes until thickened, cool completely, then use as your filling. Keep in mind this only works when apricots are in season and ripe.
Why are my bars falling apart when I cut them?
The most common reason is cutting them too soon. The filling needs to cool and set completely—at least 2 hours, ideally longer. Also, make sure you pressed the bottom crust firmly enough to create a solid base. Using a very sharp knife and wiping it clean between cuts also helps create clean edges.
Can I make these gluten-free?
Yes! Substitute the all-purpose flour with a 1:1 gluten-free baking flour blend. Make sure your oats are certified gluten-free as well. The texture will be slightly more delicate, so be extra careful when cutting and serving, but the flavor will be just as delicious.
How do I know when the bars are done baking?
Look for golden brown edges and a topping that’s turned a rich golden color. The filling should be bubbling around the edges. The center may look slightly underdone, but it will firm up as it cools. Overbaking leads to dry, hard bars, so err on the side of caution.
Can I double this recipe?
Absolutely! Use two 9×13-inch pans or one large half-sheet pan. Keep the baking time the same, though check a few minutes early if using a large pan since it will be slightly thinner. This is perfect for large gatherings or if you want to freeze one pan for later.
What if I don’t have preserves, only jam?
Jam works perfectly fine! The main difference is that jam has a smoother consistency while preserves have visible fruit chunks. Your bars will be just as delicious, just slightly smoother in texture. The flour you add to the filling helps thicken it regardless of which you use.
Can I reduce the sugar?
You can reduce the brown sugar to ¾ cup without dramatically affecting the texture, though the bars will be less sweet and slightly less tender. Going lower than that may result in a drier, less cohesive crumble. Remember that the apricot filling provides sweetness too, so the crumble doesn’t need to be overly sweet.
Conclusion
There you have it—everything you need to create bakery-worthy apricot bars right in your own kitchen! These golden, crumbly treats are proof that the best recipes don’t have to be complicated. With just a handful of pantry staples and less than an hour of active time, you can create something that looks impressive, tastes incredible, and brings joy to everyone who tries them.
Whether you’re a seasoned baker or just starting your baking journey, these apricot bars are forgiving, flexible, and absolutely delicious. They’re perfect for sharing with neighbors, bringing to potlucks, tucking into lunchboxes, or simply enjoying with your afternoon coffee while you put your feet up and take a well-deserved break.
So preheat that oven, grab your apricot preserves, and get ready to fill your kitchen with the most wonderful aroma of butter, oats, and sweet fruit baking to golden perfection. Your family and friends will be so impressed, and we won’t tell them just how easy these were to make. Happy baking, and I can’t wait to hear how your apricot bars turn out! Don’t forget to share your creations and let me know if you tried any of the fun variations. There’s nothing I love more than seeing your baking successes!