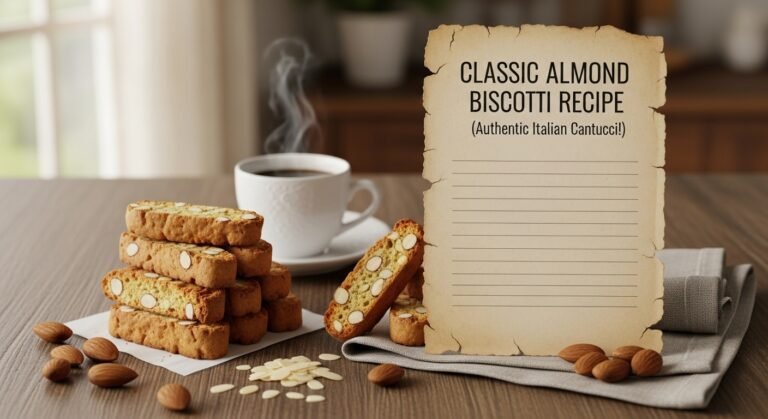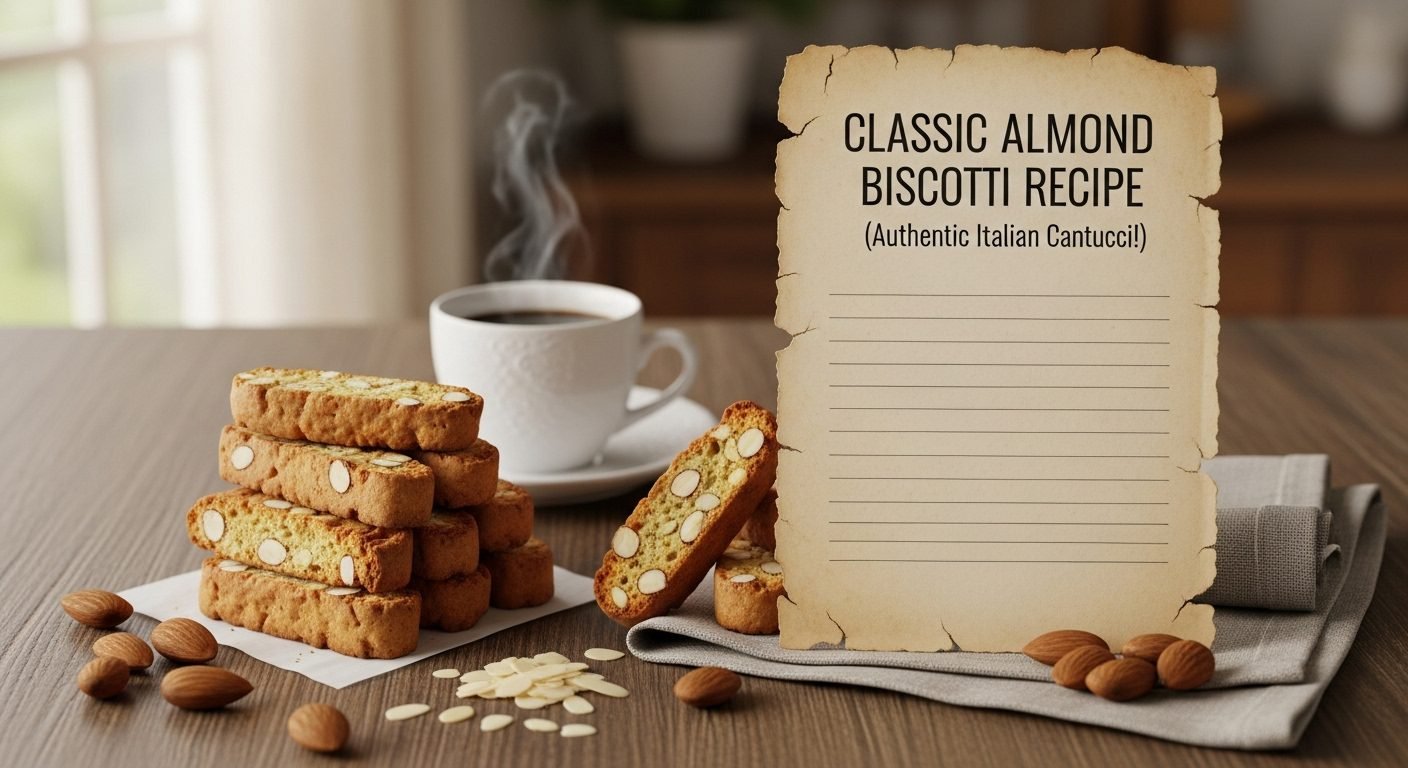
Classic Almond Biscotti Recipe (Authentic Italian Cantucci!)

There’s nothing quite like the satisfaction of dunking a perfectly crunchy Almond Biscotti into your morning coffee or afternoon espresso! These traditional Italian twice-baked cookies are the gold standard of biscotti—featuring crunchy whole almonds studded throughout a golden, toasted exterior with just the right amount of sweetness. If you’ve only tried store-bought biscotti, you’re in for a real treat. Homemade almond biscotti are in a league of their own, with incredible almond flavor, a satisfying snap, and that signature rustic charm that makes them look like they came straight from a Tuscan bakery.
Almond biscotti, also known as “cantucci” or “biscotti di Prato” in Italy, are wonderfully versatile cookies that fit seamlessly into any part of your day. Serve them for breakfast alongside a cappuccino, offer them as an elegant dessert with Vin Santo (Italian dessert wine) or coffee, package them as thoughtful homemade gifts during the holidays, or keep a jar on your counter for an anytime treat. They’re perfect for entertaining because they look impressive, taste incredible, and can be made well in advance. Whether you’re hosting an Italian dinner party, building a cookie gift basket, planning a coffee bar at a brunch, or simply craving something special with your afternoon tea, these classic almond biscotti are always the right choice.
History / Background
Almond biscotti hold a place of honor in Italian culinary history as one of the country’s oldest and most beloved cookies. The word “biscotti” comes from the Latin “bis” (twice) and “coctus” (baked), literally meaning “twice-cooked.” This ancient baking technique dates back to Roman times when soldiers and sailors carried these dry, crunchy cookies on long journeys because their low moisture content prevented spoilage—essential before refrigeration existed.
The modern almond biscotti we know and love originated in the medieval city of Prato in Tuscany, sometime during the 14th century. These original “cantucci di Prato” were created by bakers who perfected the twice-baking method, transforming simple ingredients—flour, sugar, eggs, and almonds—into cookies that could last for months. Historical records from the 1500s show that these cookies were so valued they were often given as diplomatic gifts and carried by merchants on trade routes throughout Europe.
The recipe remained relatively unchanged for centuries, passed down through generations of Tuscan bakers. What made Prato’s version special was the use of whole, unpeeled almonds and a traditional twice-baking process that created an incomparably crunchy texture perfect for dunking in Vin Santo, Tuscany’s famous sweet dessert wine. This pairing became so iconic that it’s still considered the traditional way to enjoy biscotti in Italy today.
Italian immigrants brought biscotti recipes to America in the late 19th and early 20th centuries, where they remained popular within Italian-American communities. However, it wasn’t until the 1990s coffee culture boom that biscotti exploded in mainstream popularity across the United States. Suddenly, these humble Italian cookies appeared in every coffeehouse, becoming synonymous with sophisticated coffee drinking. Today, almond biscotti remain the most authentic and traditional variety, exactly as they were made in Prato over 600 years ago.
Why You’ll Love This Recipe
These Classic Almond Biscotti are everything a cookie should be and more! They combine authentic Italian tradition with foolproof home baking techniques that guarantee success every single time.
Here’s why this recipe deserves to become your go-to biscotti:
- Authentically Italian – This is the real deal, made the traditional Tuscan way with simple, quality ingredients
- Perfectly Crunchy – The twice-baking method creates that ideal texture for dunking without crumbling
- Simple Ingredients – Made with pantry staples you probably already have, plus almonds
- Beginner-Friendly – Even if you’ve never made biscotti before, this recipe guides you through each step
- Impressive Presentation – They look bakery-quality and incredibly sophisticated
- Incredibly Long Shelf Life – Stays fresh for weeks, making them perfect for gifting or keeping on hand
- Budget-Friendly – Almonds are affordable, and one batch makes 30+ cookies
- No Fancy Equipment – Just basic baking tools you already own
- Healthier Cookie Option – Lower in fat and sugar than most cookies, with protein-rich almonds
- Versatile for Any Occasion – Perfect for breakfast, dessert, gifts, or everyday snacking
- Customizable – Easy to adapt with different flavors while maintaining authenticity
- Freezer-Friendly – Both dough and baked biscotti freeze beautifully
- Coffee Shop Quality – Save money by making your own coffeehouse-style biscotti at home
Ingredient Notes
Understanding your ingredients is the foundation of great baking! Here’s what goes into these authentic biscotti:
All-Purpose Flour – The backbone of the recipe, providing structure for those perfectly crunchy cookies. For gluten-free biscotti, use a 1:1 gluten-free flour blend and add 1/2 teaspoon xanthan gum if your blend doesn’t include it.
Whole Almonds – The star of the show! Traditional Tuscan biscotti use whole almonds with their skins on for the most authentic flavor and appearance. Use raw, unsalted almonds for best results. You can substitute blanched (skinless) almonds if you prefer a lighter appearance, but skin-on is traditional.
Granulated Sugar – Provides sweetness without overpowering the almond flavor. Traditional biscotti aren’t overly sweet, which makes them perfect for dunking in coffee or wine.
Eggs – The binding agent that holds everything together. Use large eggs at room temperature for easier incorporation. The eggs give biscotti their characteristic sturdy structure.
Butter – Just a small amount adds richness and helps create tender crumb between the crunchy exterior. Use unsalted butter at room temperature. Some traditional recipes use olive oil instead for a more rustic flavor.
Almond Extract – This is non-negotiable for authentic almond biscotti! It intensifies the almond flavor exponentially. Use pure almond extract, not imitation, for the best results.
Vanilla Extract – Adds depth and warmth to the flavor profile. Pure vanilla extract is always preferred over imitation.
Baking Powder – Provides gentle lift during the first bake. Traditional biscotti aren’t puffy or cake-like, so we use a moderate amount.
Salt – Enhances all the flavors and balances the sweetness. Don’t skip it—even a small amount makes a huge difference.
Optional: Anise Seeds – 1-2 teaspoons of anise seeds add that classic Italian biscotti flavor with licorice-like notes. This is traditional but divisive. Use only if you enjoy anise flavor.
Optional: Orange Zest – One tablespoon of fresh orange zest adds a beautiful citrus brightness that complements almonds perfectly. This variation is popular in some Italian regions.
Equipment Needed
Gather these basic tools before you begin for smooth, stress-free baking:
- Large Mixing Bowl – For combining all your ingredients
- Medium Mixing Bowl – For whisking together dry ingredients
- Whisk – For mixing dry ingredients and beating eggs
- Electric Mixer or Whisk – Stand mixer, hand mixer, or strong whisk for beating eggs and sugar (a whisk works fine for this recipe)
- Measuring Cups and Spoons – For accurate measurements
- Wooden Spoon or Sturdy Spatula – For mixing in the flour and nuts by hand
- Baking Sheet – A standard half-sheet pan (13×18 inches) works perfectly
- Parchment Paper or Silicone Baking Mat – Essential for preventing sticking
- Sharp Serrated Knife – This is crucial for slicing the baked logs cleanly without crumbling
- Cutting Board – For slicing the logs
- Wire Cooling Rack – Allows proper air circulation for cooling
- Pastry Brush (Optional) – For brushing logs with egg wash for extra shine
- Kitchen Timer – To prevent overbaking
Print

Almond Biscotti Recipe
Traditional Italian Almond Biscotti (Cantucci di Prato) with whole almonds and the perfect crunchy texture. These authentic twice-baked cookies are ideal for dunking in coffee, espresso, or Vin Santo, and they stay fresh for weeks!
- Total Time: 1 hour 15 minutes (plus cooling time)
- Yield: 30-35 biscotti 1x
Ingredients
Scale- 2 1/2 cups all-purpose flour
- 1 1/2 teaspoons baking powder
- 1/2 teaspoon salt
- 3/4 cup granulated sugar
- 3 large eggs, room temperature
- 4 tablespoons unsalted butter, melted and slightly cooled
- 1 1/2 teaspoons almond extract
- 1 teaspoon vanilla extract
- 1 1/2 cups whole almonds, raw and unsalted (skin-on for traditional style)
- 1-2 teaspoons anise seeds (optional, for traditional flavor)
- 1 tablespoon orange zest (optional)
For Egg Wash:
- 1 egg, beaten with 1 tablespoon water
Instructions
- Preheat and Prepare – Preheat your oven to 350°F (175°C). Line a large baking sheet with parchment paper or a silicone baking mat. Set aside.
- Toast the Almonds – Spread the whole almonds on a separate baking sheet and toast in the preheated oven for 8-10 minutes until fragrant and lightly golden. Shake the pan halfway through. Watch carefully to prevent burning. Remove and let cool completely. Keep the oven at 350°F.
- Mix Dry Ingredients – In a medium bowl, whisk together the flour, baking powder, and salt. Set aside.
- Beat Eggs and Sugar – In a large mixing bowl, whisk together the eggs and sugar vigorously for 2-3 minutes until the mixture is light, thick, and pale yellow. This incorporates air and creates a better texture.
- Add Wet Ingredients – Whisk in the melted (but cooled) butter, almond extract, vanilla extract, and orange zest (if using) until fully combined.
- Combine Wet and Dry – Add the flour mixture to the wet ingredients and stir with a wooden spoon or sturdy spatula until just combined. The dough will be thick and slightly sticky.
- Add Almonds – Fold in the cooled toasted almonds (and anise seeds if using) until evenly distributed throughout the dough. Make sure the nuts are fully incorporated.
- Shape the Logs – Turn the dough out onto your prepared baking sheet. With lightly floured hands, divide the dough in half. Shape each half into a log approximately 12-14 inches long, 2-3 inches wide, and about 3/4 inch tall. Space the logs at least 3 inches apart as they will spread during baking. Don’t worry about making them perfectly smooth—rustic is authentic!
- Apply Egg Wash – Brush the tops and sides of both logs generously with the beaten egg wash. This creates a beautiful golden, shiny crust.
- First Bake – Bake for 25-30 minutes until the logs are golden brown, firm to the touch, and a toothpick inserted in the center comes out clean. The logs will spread and flatten slightly—this is normal. They may develop small cracks on top, which is perfect.
- Cool the Logs – Remove from the oven and let the logs cool on the baking sheet for 15-20 minutes. Don’t skip this step or they’ll crumble when sliced. Keep the oven at 350°F. The logs should feel firm and be cool enough to handle comfortably.
- Slice with Care – Transfer the cooled logs to a cutting board. Using a sharp serrated knife, cut each log on a diagonal into 1/2 to 3/4-inch thick slices. Use a gentle sawing motion rather than pressing down. Wipe the knife clean between cuts if it gets sticky.
- Arrange for Second Bake – Lay the sliced biscotti cut-side down on the same baking sheet (you may need two sheets). They can be close together as they won’t spread further.
- Second Bake – Return to the oven and bake for 12-15 minutes. Flip each biscotto over and bake for another 12-15 minutes until both sides are golden brown and feel dry to the touch. For extra-crunchy biscotti, bake a few minutes longer.
- Final Cooling – Transfer the biscotti to a wire cooling rack and let them cool completely. They will continue to crisp up and harden as they cool—this is when the magic happens! They should be very hard and crunchy once completely cool.
- Store and Enjoy – Once completely cooled, store in an airtight container at room temperature for up to 1 month. Enjoy with your favorite coffee, tea, or dessert wine!
Notes
- Cooling is Critical – Don’t rush the cooling period between bakes. The logs need time to firm up or they’ll crumble. Wait at least 15 minutes, preferably 20.
- Sharp Knife Essential – A serrated bread knife works best. A dull knife will crush the logs instead of slicing cleanly through them.
- Toasting Almonds – This step is crucial for maximum flavor. Raw almonds taste flat compared to toasted.
- Texture Preference – The longer you bake during the second session, the crunchier they’ll be. For slightly softer biscotti (though still crunchy), reduce second bake time by 3-4 minutes per side.
- Authentic Almonds – Skin-on almonds are traditional and provide the best flavor and most authentic appearance. Blanched almonds work but are less traditional.
- Storage Improves Flavor – Biscotti actually taste better after a day or two as flavors meld and develop.
- Prep Time: 20 minutes
- Cook Time: 55 minutes (includes both baking sessions)
- Category: Desert
- Method: Baking
- Cuisine: Italian
- Diet: Vegetarian
Nutrition
- Serving Size: 1 biscotti
- Calories: 85
- Sugar: 5g
- Sodium: 40mg
- Fat: 3.5g
- Saturated Fat: 1g
- Unsaturated Fat: 2.5g
- Trans Fat: 0g
- Carbohydrates: 11g
- Fiber: 1g
- Protein: 2.5g
- Cholesterol: 25mg
Tips & Variations
Make these traditional biscotti your own with these delicious variations:
Chocolate-Dipped Almond Biscotti – Dip one end of cooled biscotti in melted dark chocolate and place on parchment paper to set. This makes them extra special and gift-worthy!
Double Almond Biscotti – Add 1/4 cup almond flour to the dough along with the regular flour for even more intense almond flavor throughout.
Cranberry Almond Biscotti – Fold in 1/2 cup dried cranberries along with the almonds for a beautiful pop of color and tart flavor contrast.
Cherry Almond Biscotti – Add 1/2 cup dried cherries for a classic Italian flavor combination. This variation is especially popular.
Chocolate Chip Almond Biscotti – Fold in 1/2 cup mini chocolate chips for kids (and adults!) who love chocolate.
Lemon Almond Biscotti – Replace orange zest with lemon zest and add 1 teaspoon lemon extract for a bright, citrusy version.
Espresso Almond Biscotti – Add 2 tablespoons instant espresso powder to the dry ingredients for coffee-lovers.
Mixed Nut Biscotti – Use 1 cup almonds plus 1/2 cup hazelnuts, walnuts, or pistachios for variety.
Vegan Almond Biscotti – Replace eggs with flax eggs (3 tablespoons ground flax + 9 tablespoons water, let sit 5 minutes), use vegan butter or olive oil, and skip the egg wash. Brush with plant milk instead.
Gluten-Free Biscotti – Use a 1:1 gluten-free flour blend plus 1/2 teaspoon xanthan gum. The texture will be slightly more delicate but still delicious.
Sugar-Free Version – Replace sugar with a granulated sugar substitute like erythritol or monk fruit sweetener following package conversion directions.
Pro Chef Tips
Elevate your biscotti from homemade to professional bakery-quality:
Tip #1: The Toast Makes the Difference – Never skip toasting the almonds. This single step multiplies the almond flavor tenfold and brings out their natural oils and sweetness. It’s the difference between good and exceptional biscotti.
Tip #2: Room Temperature is Key – Using room temperature eggs helps them incorporate smoothly into the dough and creates better texture. Take eggs out of the fridge 30 minutes before baking, or place them in warm water for 5 minutes.
Tip #3: The Diagonal Slice – Always cut your biscotti at a 45-degree angle rather than straight across. This creates that classic elegant shape, gives you more surface area for dunking, and looks more professional.
Tip #4: The Cooling Sweet Spot – There’s a perfect window for slicing: 15-20 minutes after the first bake. Too soon and they crumble; too late and they’re rock-hard. They should feel firm but still slightly warm to the touch.
Tip #5: Freeze for Easier Slicing – If your logs are crumbly or difficult to slice, pop them in the freezer for 10-15 minutes after the initial cooling period. This firms them up just enough for cleaner cuts.
Tip #6: Low and Slow for Maximum Crunch – If you want ultra-crunchy biscotti that can withstand extended dunking, lower the oven to 325°F for the second bake and bake for 15-20 minutes per side instead. They’ll dry out more thoroughly.
Tip #7: The Tap Trick – After removing the biscotti from the oven following the second bake, tap them on the counter. They should sound hollow and feel very light—this indicates they’re perfectly dried and crunchy.
Tip #8: Steam Revival – If your biscotti are too hard even for dunking, place them in an airtight container with a slice of fresh bread for 12-24 hours. They’ll absorb just enough moisture to become more manageable while keeping their structure.
Common Mistakes to Avoid
Learn from these common pitfalls to ensure perfect biscotti every time:
Mistake #1: Slicing Too Early – This is the number one reason biscotti crumble and fall apart. The internal structure needs time to set after the first bake. Be patient and wait the full 15-20 minutes even though you’re excited to continue. Test by gently pressing the log—it should feel completely firm.
Mistake #2: Using a Dull or Wrong Knife – A chef’s knife or dull knife will crush the logs instead of slicing through them cleanly. Always use a sharp serrated knife (like a bread knife) with a gentle sawing motion. Apply minimal downward pressure.
Mistake #3: Making Logs Too Thick – Many beginners make their logs too tall and thick. Keep them under 1 inch in height. Thick logs don’t bake evenly, can have raw centers, and yield fewer biscotti. Go wide and flat, not tall and puffy.
Mistake #4: Skipping the Almond Toasting – Raw almonds have a subtly bitter, flat taste compared to toasted ones. This 8-minute step transforms the entire flavor profile of your biscotti. It’s simply not optional for authentic results.
Mistake #5: Overbaking the First Time – If you bake the logs too long during the first bake, they become too dry and brittle to slice without shattering. They should be golden and firm, but not rock-hard. Slightly underdone is better than overdone for the first bake.
Mistake #6: Not Spacing Logs Apart – The dough spreads significantly during the first bake. If your logs are placed too close together (less than 3 inches apart), they’ll merge into one giant biscotti blob. Give them plenty of room.
Mistake #7: Storing While Warm – Storing biscotti before they’re completely cooled creates condensation in your container, which makes them soggy instead of crispy. Always wait until they’re room temperature and completely firm before storing.
Storage & Meal Prep
Proper storage ensures your biscotti maintain that perfect crispy texture for weeks:
Room Temperature Storage – Store completely cooled biscotti in an airtight container at room temperature for up to 4 weeks. Yes, four weeks! The double baking creates such a dry environment that they’re incredibly shelf-stable. Layer them with parchment paper between rows if stacking.
Maintaining Maximum Crispness – To keep biscotti as crunchy as possible, add a food-safe silica gel packet to your storage container (the kind that comes in vitamin bottles or beef jerky). Never refrigerate biscotti—the humidity will soften them.
Container Selection – Glass jars or metal tins work better than plastic containers, which can trap moisture. Make sure whatever you use has an airtight seal.
Reviving Lost Crispness – If your biscotti lose their crunch due to humidity (especially in summer), spread them on a baking sheet and warm in a 275°F oven for 8-10 minutes. Let cool completely before storing again. They’ll be as crispy as day one!
Adjusting Texture – If your biscotti are too hard for your preference (some people prefer a slightly softer bite), place them in an airtight container with half a slice of fresh bread for 12-24 hours. The biscotti will absorb just enough moisture to soften slightly while maintaining structure.
Travel and Gifting – Biscotti are among the best cookies for shipping and gifting because they’re so sturdy. Wrap them individually in cellophane bags, layer them in decorative tins with tissue paper, or pack them in boxes. They won’t break during transport like delicate cookies.
Make-Ahead & Freezer Notes
Biscotti are perfect for advance preparation—ideal for busy schedules and holiday planning!
Freezing Baked Biscotti – Completely cooled biscotti freeze beautifully for up to 3 months with no loss of quality. Arrange them in a single layer on a baking sheet and freeze until solid (about 1 hour), then transfer to a freezer-safe container or bag. This prevents them from sticking together. Thaw at room temperature for 30 minutes before serving.
Freezing After First Bake (My Favorite Method!) – After baking and completely cooling the logs, wrap them individually in plastic wrap, then in aluminum foil. Freeze for up to 3 months. When ready to finish, let them thaw for 15-20 minutes, slice, and complete the second bake as directed. This method spreads out the work beautifully.
Freezing Unbaked Dough – Shape the logs and freeze them unbaked. Wrap tightly in plastic wrap and aluminum foil. Freeze for up to 2 months. Bake directly from frozen, adding 5-10 minutes to the first bake time. No thawing needed!
Pre-Sliced for Convenience – You can freeze already-sliced biscotti after the second bake. Place parchment paper between layers to prevent sticking. This allows you to pull out just a few biscotti at a time for unexpected guests.
Make-Ahead Timeline – Bake the logs up to 3 days in advance, wrap well, and store at room temperature. Slice and complete the second bake the day you plan to serve or gift them. This strategy keeps them ultra-fresh.
Refreshing Frozen Biscotti – For best results after freezing, warm thawed biscotti in a 275°F oven for 5-7 minutes. This restores their fresh-baked aroma and crispy texture perfectly.
Holiday Preparation – Make multiple batches of logs in November, freeze them, then slice and finish baking throughout December as needed for gifts and entertaining. This makes holiday baking so much more manageable!
Serving Suggestions
Biscotti are wonderfully versatile! Here’s how to serve them like an Italian:
The Traditional Way – In Tuscany, biscotti are always served with Vin Santo, a sweet amber-colored dessert wine. Dip the biscotto into the wine and let it soften slightly before eating. This centuries-old tradition is pure magic.
Coffee and Espresso – The most popular modern pairing! Serve alongside espresso, cappuccino, caffe latte, or American drip coffee. The dunking ritual makes every coffee break special.
Afternoon Tea Service – Excellent with Earl Grey, English Breakfast, green tea, or herbal teas. The subtle sweetness won’t overpower delicate tea flavors.
Dessert Platter – Arrange biscotti on a platter with fresh fruit, chocolate truffles, and small pastries for an impressive Italian-inspired dessert spread.
With Gelato or Ice Cream – Traditional Italian gelaterias often serve a biscotto alongside gelato. Try them with vanilla bean gelato, pistachio, hazelnut, or chocolate. You can even use them as edible spoons!
Breakfast Basket – Include them in a continental breakfast spread with croissants, butter, jam, fresh fruit, and yogurt for an Italian-inspired morning.
Cheese Course Accompaniment – Serve with soft, mild cheeses like mascarpone, fresh ricotta, or robiola. Add honey and fresh figs for an elegant presentation.
Hot Chocolate Dunkers – Wonderful with thick Italian-style hot chocolate or regular hot cocoa during cold weather months.
Wine Pairing Beyond Vin Santo – Also pairs beautifully with Moscato d’Asti, late-harvest Riesling, Port, or sweet Sherry.
Holiday Cookie Exchange – These stand out on any cookie tray and look incredibly impressive next to standard chocolate chip cookies.
Gift Presentation Ideas – Stack 8-10 biscotti vertically in a clear cellophane bag tied with raffia or ribbon, layer them in a decorative Italian ceramic container, or arrange them in a wooden crate with coffee beans and a coffee mug for a complete gift set.
FAQs Section
Q: What’s the difference between biscotti and cantucci?
A: They’re the same thing! “Cantucci” is the traditional Tuscan name, while “biscotti” is the more general Italian term meaning “twice-baked cookies.” Specifically, “cantucci di Prato” refers to the traditional almond biscotti from Prato, Tuscany—which is exactly what this recipe makes. In Italy, you’ll hear both terms used interchangeably.Q: Can I use blanched almonds instead of almonds with skin?
A: Absolutely! Blanched (skinless) almonds will give you a lighter, more uniform appearance. However, skin-on almonds are traditional in authentic cantucci and provide slightly more flavor and nutrients. The choice is purely aesthetic and personal preference—both work perfectly.Q: Why are my biscotti falling apart when I slice them?
A: This usually means one of three things: the logs weren’t cooled long enough (wait at least 15-20 minutes), they were underbaked during the first bake (they should feel completely firm), or you’re using too much downward pressure with your knife. Use a sharp serrated knife with a gentle sawing motion rather than pressing down. If they’re still crumbly, try freezing the logs for 10 minutes before slicing.Q: How hard should biscotti be?
A: Authentic Italian biscotti are meant to be very hard and crunchy—almost rock-hard when not dunked. This is intentional! They’re specifically designed to soften when dunked in liquid without falling apart or getting soggy. If you bite into one dry, it should be quite hard. If you prefer softer biscotti, reduce the second baking time by 4-5 minutes per side, but know they’ll be more fragile when dunked.Q: Can I make biscotti without the second bake?
A: You can, but they won’t be true biscotti. After just one bake, they’re essentially soft cookies that will become soggy immediately when dunked. The second bake is what removes moisture and creates that signature dry, crunchy texture that makes biscotti perfect for dunking. It’s the defining characteristic of authentic biscotti and shouldn’t be skipped.Q: My biscotti spread too much during the first bake. What happened?
A: Excessive spreading usually means the dough was too wet, the butter was too warm when added, or your kitchen was very hot when you shaped the logs. Make sure to let melted butter cool to barely warm before adding it. Also, ensure you’re measuring flour correctly (spoon it into the cup and level off—don’t scoop). If your kitchen is very warm, chill the shaped logs for 15 minutes before the first bake.Q: Can I add chocolate chips to almond biscotti?
A: Yes, but this isn’t traditional. If you want to add chocolate chips, use 1/2 to 3/4 cup of mini chocolate chips folded in with the almonds. However, be aware that chocolate softens the biscotti slightly and makes them less shelf-stable. They’ll still be delicious but should be consumed within 1-2 weeks rather than 4 weeks.Conclusion
And there you have it—everything you need to create authentic, bakery-quality Italian Almond Biscotti in your own kitchen! These classic cookies are a testament to the beauty of simple ingredients transformed through traditional techniques. From that first satisfying crunch to the nutty almond flavor that develops with every bite, these biscotti deliver a truly authentic Italian experience.
The wonderful thing about biscotti is that they’re actually much easier to make than they look, yet they never fail to impress. Whether you’re building your morning coffee ritual, creating homemade gifts that will be treasured, planning an Italian-themed dinner party, or simply want a sophisticated cookie that lasts for weeks, this traditional recipe has you covered. And because they improve with age, you can bake once and enjoy for an entire month!
I hope these authentic cantucci di Prato bring a little taste of Tuscany into your home and become a beloved recipe you return to again and again. There’s something deeply satisfying about the ritual of dunking a homemade biscotto into your coffee, knowing you’ve created something that connects you to centuries of Italian baking tradition.
Happy baking, and may your biscotti always be perfectly crunchy and ready for dunking! ☕🥖✨