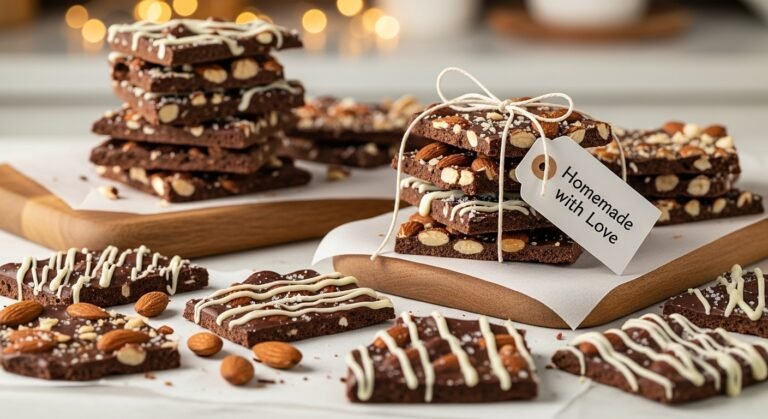
Easy Chocolate Almond Bark Recipe (Perfect for Gift-Giving!)
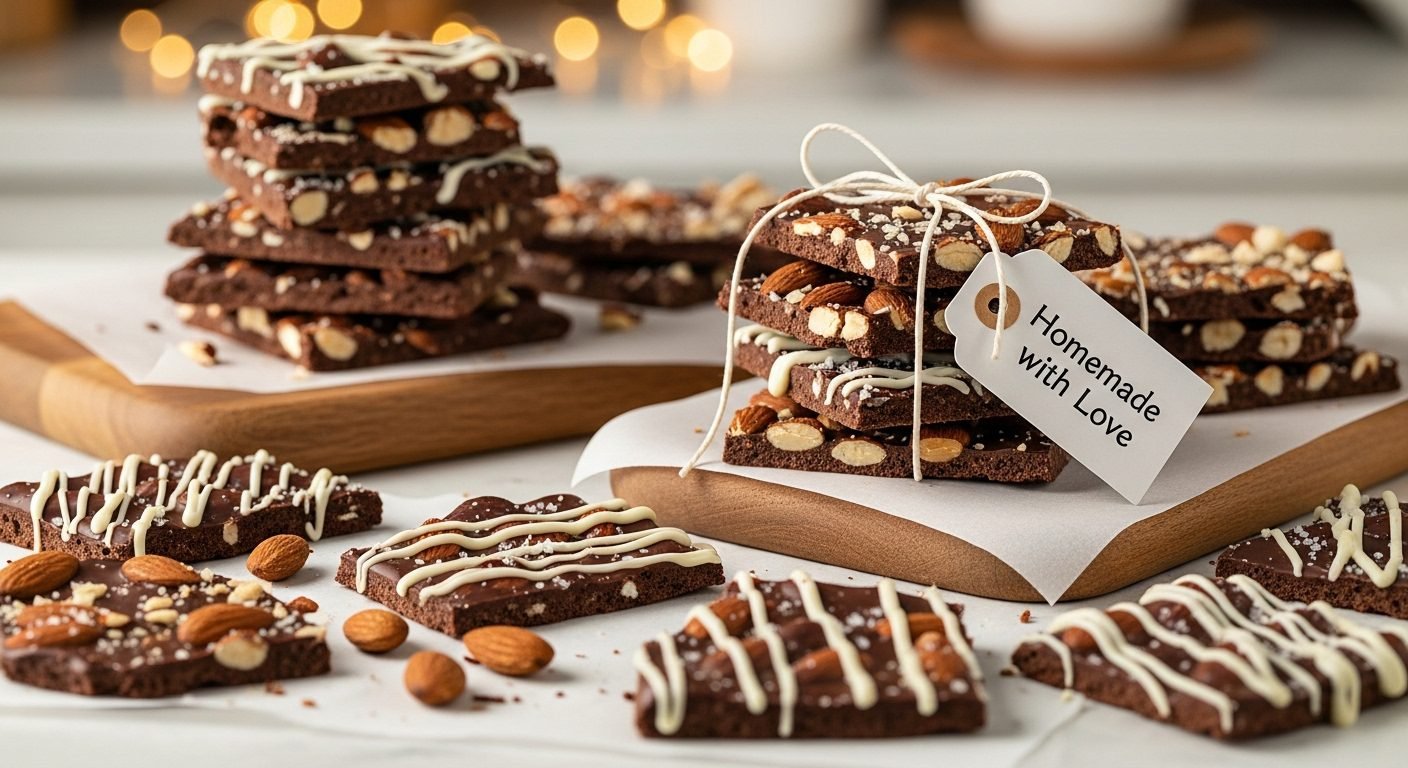
There’s something wonderfully satisfying about the combination of rich chocolate and crunchy almonds in every bite of homemade almond bark. This classic confection is deceptively simple to make, requiring just two main ingredients and about 20 minutes of your time. The result? A professional-looking candy that tastes like it came from an expensive chocolatier, but costs a fraction of the price and requires absolutely no special skills.
Chocolate almond bark is one of those versatile treats that fits perfectly into so many occasions. Make it for holiday gift-giving, package it up for teacher appreciation gifts, serve it at parties, or simply keep a batch in your pantry for when the chocolate craving hits. The beautiful contrast of dark chocolate against pale almonds creates an elegant presentation, while the satisfying crunch and smooth chocolate melt make it absolutely irresistible. Best of all, this is a no-bake recipe that even beginners can master on their first try. Whether you’re an experienced baker or someone who’s never made candy before, you’re going to love how easy and impressive this chocolate almond bark turns out.
History / Background
Almond bark has an interesting place in American confectionery history, though its name can be somewhat confusing. The term “almond bark” actually refers to two different things in modern usage: a type of candy coating product sold in blocks (often used as a chocolate substitute), and the actual candy we’re making today – real chocolate studded with almonds.
The candy itself – chocolate embedded with nuts and broken into irregular pieces – has roots that stretch back centuries. The concept of combining nuts with chocolate dates back to when chocolate first arrived in Europe from the Americas in the 16th century. Spanish and Italian confectioners were among the first to experiment with adding local nuts like almonds to chocolate, creating some of the earliest versions of what we’d recognize as chocolate bark today.
Almonds themselves have an ancient history. Native to the Middle East and Mediterranean regions, almonds have been cultivated for over 4,000 years and were prized by ancient civilizations including the Egyptians, Greeks, and Romans. Spanish missionaries brought almond trees to California in the mid-1700s, and by the 1900s, California had become the world’s largest almond producer – a distinction it still holds today.
The specific treat we call “almond bark” or “chocolate bark” became popular in America during the 20th century, particularly from the 1950s onward when home candy-making experienced a surge in popularity. The term “bark” comes from its appearance – the irregular, broken pieces resemble tree bark. This rustic, natural look became part of its charm, distinguishing it from molded candies and perfectly uniform confections.
During the mid-20th century, candy companies began producing a product called “almond bark” – a vanilla or chocolate-flavored coating that could be used as a more affordable, easier-to-work-with alternative to real chocolate. This product didn’t actually contain almonds; the name referred to the bark-like appearance when broken. This created some confusion that persists today, but traditional chocolate almond bark – made with real chocolate and real almonds – has remained a beloved homemade treat.
Chocolate almond bark gained particular popularity as a holiday candy. Its elegant appearance, simple preparation, and long shelf life made it ideal for Christmas gift-giving. Home cooks could make large batches efficiently and package them beautifully without the complexity of more demanding candy recipes like truffles or caramels.
Today, chocolate almond bark remains a favorite among home candy-makers. It represents the perfect intersection of simplicity and sophistication – requiring minimal skill but producing impressive, delicious results that never go out of style.
Why You’ll Love This Recipe
This chocolate almond bark recipe is about to become your go-to candy recipe for every occasion, and I’m excited to tell you why. It combines simplicity with elegance in a way that few recipes can match, creating a treat that looks and tastes expensive while being incredibly easy and affordable to make.
Here’s why this recipe is absolutely fantastic:
- Only 2 main ingredients – Just chocolate and almonds (plus optional sea salt)
- No baking required – Perfect for hot summer days or when you don’t want to heat up the kitchen
- Ready in 20 minutes – Active prep time is minimal, most time is just waiting for it to set
- Beginner-friendly – If you can melt chocolate and stir, you can make this successfully
- Infinitely customizable – Change up nuts, add-ins, or chocolate types for endless variations
- Naturally gluten-free – Safe for those avoiding gluten (verify ingredient labels)
- Budget-friendly – Makes a large batch for very little money compared to store-bought
- Perfect for gifts – Package it beautifully for impressive homemade presents
- Long shelf life – Stays fresh for weeks when stored properly
- Kid-friendly activity – Children love helping make this simple treat
- Crowd-pleasing – The chocolate-nut combination appeals to almost everyone
- Impressive presentation – Looks professional and gourmet with zero special skills
- No special equipment – Everything you need is probably already in your kitchen
- Scales easily – Double or triple the recipe effortlessly for large gatherings
Ingredient Notes
Let me walk you through the ingredients for chocolate almond bark, explaining why each component matters and what options you have for customization.
Chocolate: This is the star of your almond bark, so quality makes a real difference in the final result. You have several excellent options:
- Chocolate Chips: Semi-sweet, dark chocolate, or milk chocolate chips all work beautifully. For the smoothest results, add 1 tablespoon of coconut oil or shortening per 12 ounces of chips. Chocolate chips contain stabilizers that prevent them from melting as smoothly as bar chocolate, so the added fat helps create a glossy, pourable consistency.
- Chocolate Bars: High-quality chocolate bars (like Ghirardelli, Lindt, or Guittard) create the richest flavor and smoothest texture. Chop them into uniform pieces for even melting. You typically won’t need to add any oil or fat when using quality bar chocolate.
- Chocolate Melting Wafers (Candy Melts): These are specifically designed for candy-making and melt very smoothly without any additions. They come in various flavors and colors. While convenient, they don’t taste quite as rich and chocolatey as real chocolate. They’re excellent for ease of use but not ideal if you want the deepest chocolate flavor.
For this recipe, I recommend using dark or semi-sweet chocolate for the best flavor balance with the almonds. Milk chocolate works too but can be quite sweet. A good rule of thumb: if you enjoy eating the chocolate plain, you’ll love it in bark form.
Almonds: Use whole raw almonds, roasted almonds, or sliced almonds – all work wonderfully, each creating a slightly different texture and appearance:
- Whole Roasted Almonds: Create substantial crunch and nutty flavor. They’re my personal favorite for classic almond bark. Look for raw almonds and toast them yourself for the best flavor, or buy pre-roasted (unsalted or lightly salted).
- Sliced Almonds: Distribute more evenly throughout the bark and create a more delicate, refined appearance. They’re perfect if you want thinner bark with nuts in every bite.
- Slivered Almonds: Somewhere between whole and sliced, offering a nice compromise.
- Marcona Almonds: These Spanish almonds are rounder, sweeter, and more buttery than regular almonds. They’re more expensive but create an incredibly luxurious bark if you want to splurge.
For the best flavor, toast your almonds before adding them to the chocolate. Toasting intensifies their nutty flavor dramatically. Simply spread them on a baking sheet and bake at 350°F for 7-10 minutes, stirring once halfway through, until fragrant and lightly golden.
Sea Salt (Optional): A small sprinkle of flaky sea salt on top of the bark before it sets elevates this from good to absolutely incredible. The salt enhances the chocolate flavor and adds a sophisticated touch. Use flaky sea salt like Maldon rather than regular table salt for the best effect.
Coconut Oil or Shortening (Optional): If using chocolate chips, adding 1 tablespoon per 12 ounces helps thin the chocolate for easier spreading and creates a shinier finish. This is optional but recommended for the smoothest results.
Equipment Needed
One of the best things about chocolate almond bark is that it requires absolutely minimal equipment – you probably have everything you need already. Here’s what you’ll need:
- Baking sheet (rimmed or flat) – A standard half-sheet pan (18×13 inches) is perfect for a large batch
- Parchment paper or silicone baking mat – Essential for easy release; wax paper will NOT work
- Microwave-safe bowl – For melting chocolate (glass or ceramic)
- Rubber spatula or wooden spoon – For stirring melted chocolate
- Offset spatula or butter knife – For spreading the chocolate evenly
- Measuring cups – For accurate ingredient measurements
- Small baking sheet (optional) – For toasting almonds if not using pre-roasted
Nice to Have but Not Essential:
- Double boiler – If you prefer to melt chocolate on the stovetop rather than microwave
- Candy thermometer – Only if you want to temper your chocolate (advanced technique, not necessary)
Print

Chocolate Almond Bark Recipe
This easy chocolate almond bark is made with just two ingredients – rich chocolate and crunchy almonds. It’s perfect for gift-giving, holiday treats, or anytime you want a simple yet impressive homemade candy. No baking required!
- Total Time: 25 minutes (including setting time)
- Yield: About 1.5 pounds (approximately 24-30 pieces) 1x
Ingredients
Scale- 16 ounces (1 pound) dark or semi-sweet chocolate (chips, bars, or melting wafers)
- 1½ cups whole roasted almonds (or sliced almonds)
- 1 tablespoon coconut oil or shortening (optional, only if using chocolate chips)
- ½ teaspoon flaky sea salt (optional but recommended)
Instructions
Step 1: Prepare Your Workspace
Line a large baking sheet with parchment paper or a silicone baking mat. Make sure the paper lies flat and covers the entire surface. Set aside. If using raw almonds, toast them now: spread them on a baking sheet and bake at 350°F for 7-10 minutes until fragrant and lightly golden. Let cool completely before using.
Step 2: Melt the Chocolate
Microwave method: Place the chocolate (and coconut oil if using chocolate chips) in a large microwave-safe bowl. Microwave on 50% power for 30 seconds, then stir. Continue microwaving in 15-20 second intervals at 50% power, stirring thoroughly after each interval, until the chocolate is completely melted and smooth. This typically takes 2-3 minutes total. Don’t rush with high power – chocolate burns easily and becomes grainy if overheated.
Stovetop method: Fill a medium saucepan with about 2 inches of water and bring to a gentle simmer. Place the chocolate in a heat-safe bowl that fits over the pan without touching the water (double boiler setup). Stir constantly until the chocolate is completely melted and smooth, then remove from heat.
The melted chocolate should be glossy, smooth, and warm (not hot). If it seems too thick, stir in a bit more coconut oil, one teaspoon at a time.
Step 3: Add the Almonds
Reserve about ¼ cup of almonds for topping. Add the remaining almonds to the melted chocolate and stir until all the almonds are well coated with chocolate. The mixture should look studded with nuts throughout – you want a good chocolate-to-nut ratio in every bite.
Step 4: Pour and Spread
Pour the chocolate-almond mixture onto your prepared baking sheet. Using an offset spatula or the back of a spoon, spread the mixture into a rough rectangle or oval shape, about ¼ to ½ inch thick. Don’t worry about making it perfectly even or shaped – the rustic, irregular appearance is part of almond bark’s charm. Just aim for relatively even thickness so it breaks into nice pieces later.
Step 5: Add Toppings
Immediately sprinkle the reserved ¼ cup of almonds over the top of the spread chocolate, pressing them in very gently so they stick. If using sea salt, sprinkle it evenly over the surface now, while the chocolate is still wet. Use a light hand – a little salt goes a long way.
Step 6: Let Set
Allow the chocolate almond bark to set completely at room temperature. This typically takes 45 minutes to 1 hour, depending on your room temperature. You’ll know it’s ready when the chocolate is completely hard and no longer shiny or tacky to the touch.
For faster setting, you can place the baking sheet in the refrigerator for 20-30 minutes. However, room temperature setting creates a better finish with less chance of chocolate bloom (white streaks).
Step 7: Break into Pieces
Once completely set, break the bark into irregular pieces. You can do this with your hands, or use the edge of a knife to tap and crack the bark. Aim for pieces that are 2-3 inches across, though they’ll naturally break wherever they want to. The irregular, rustic pieces are part of the appeal!
Step 8: Store or Serve
Serve immediately or store in an airtight container at room temperature for up to 3 weeks, or refrigerate for up to 2 months.
Notes
- Chocolate Quality: Better quality chocolate = better tasting bark. This is a simple recipe where ingredient quality really shines through.
- Toasting Almonds: Don’t skip this step if using raw almonds! Toasting intensifies the nutty flavor dramatically.
- Thin vs. Thick: Thinner bark (¼ inch) is more delicate and snaps cleanly; thicker bark (½ inch) is more substantial and indulgent. Both are delicious.
- Setting Time: Room temperature setting is preferred for the best finish, but refrigeration speeds things up if you’re in a hurry.
- Storage: Keep bark in a cool, dry place. Avoid humidity, which can make chocolate sticky.
- Variations: Feel free to add dried fruit, other nuts, or sprinkles to customize your bark.
- Prep Time: 10 minutes
- Cook Time: 5 minutes (melting chocolate)
- Category: Candy, Dessert, Snack
- Method: No-Bake
- Cuisine: American
- Diet: Gluten Free
Nutrition
- Serving Size: 1 piece (approximately 1 ounce)
- Calories: 155
- Sugar: 12g
- Sodium: 35mg
- Fat: 11g
- Saturated Fat: 5g
- Unsaturated Fat: 5g
- Trans Fat: 0g
- Carbohydrates: 14g
- Fiber: 2g
- Protein: 3g
- Cholesterol: 0mg
Tips & Variations
Once you’ve mastered basic chocolate almond bark, the creative possibilities are endless! Here are some delicious ways to customize this recipe.
Different Nut Combinations:
- Mixed Nut Bark: Use a combination of almonds, pecans, cashews, and walnuts for variety
- Pistachio Bark: Replace almonds with roasted pistachios for beautiful green color and unique flavor
- Macadamia Bark: Use macadamia nuts for an ultra-buttery, luxurious version
- Peanut Bark: Swap in roasted peanuts for a more affordable, kid-friendly option
- Hazelnut Bark: Use toasted hazelnuts for a sophisticated European-style treat
Fruit & Nut Combinations:
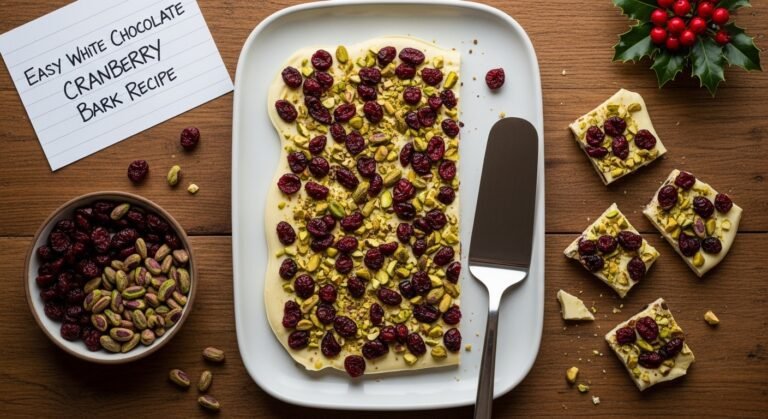
- Cranberry Almond Bark: Add ½ cup dried cranberries for tart sweetness
- Cherry Almond Bark: Mix in dried cherries for a classic flavor pairing
- Apricot Almond Bark: Add chopped dried apricots for Mediterranean flair
- Raisin Almond Bark: Stir in golden or regular raisins for traditional appeal
Chocolate Variations:
- Dark Chocolate Bark: Use 70% cacao or higher for intense chocolate flavor
- Milk Chocolate Bark: Sweeter and creamier, perfect for kids
- White Chocolate Bark: Creates beautiful contrast with the brown almonds
- Marble Bark: Swirl dark and white chocolate together before adding nuts
- Triple Chocolate Bark: Layer dark, milk, and white chocolate
Flavor Additions:
- Espresso Almond Bark: Add 1 tablespoon instant espresso powder to melted chocolate
- Orange Almond Bark: Add 1 teaspoon orange zest and ¼ teaspoon orange extract
- Mint Chocolate Bark: Add ½ teaspoon peppermint extract; top with crushed candy canes
- Cinnamon Almond Bark: Add ½ teaspoon ground cinnamon for warmth
- Coconut Almond Bark: Add ½ cup toasted coconut flakes
- Spicy Bark: Add a pinch of cayenne pepper for sweet heat
Special Occasion Variations:
- Holiday Bark: Add red and green M&Ms or festive sprinkles for Christmas
- Valentine’s Bark: Use pink chocolate and heart-shaped sprinkles
- S’mores Bark: Add mini marshmallows and crushed graham crackers
- Birthday Bark: Add colorful sprinkles and mini chocolate chips
Pro Chef Tips
Want to create chocolate almond bark that rivals professional chocolatiers? Here are expert techniques that will elevate your candy-making.
Toast Your Almonds Properly: The single biggest flavor improvement comes from properly toasted almonds. Spread them in a single layer on a baking sheet and toast at 350°F for 7-10 minutes, stirring halfway through. They’re ready when they smell intensely nutty and have turned light golden brown. Let them cool completely before adding to chocolate – hot nuts can cause the chocolate to seize.
Control Chocolate Temperature: Chocolate is temperature-sensitive. For melting wafers or chips, aim for 85-90°F for dark chocolate or 80-85°F for milk and white chocolate. Too hot and the chocolate will be thin and can scorch; too cool and it will be thick and difficult to spread. Test by feeling the bottom of the bowl – it should feel warm but comfortable to touch.
Add Texture with Varied Sizes: Mix whole almonds with some roughly chopped almonds and a few sliced almonds. This creates more visual interest and varying levels of crunch throughout each piece.
Create Professional Thickness: For the most elegant bark, aim for a consistent ¼ inch thickness. This creates bark that’s substantial enough to not feel fragile but thin enough to snap cleanly and melt quickly in your mouth. Use an offset spatula for the most even spreading.
Work Quickly but Calmly: Once you pour chocolate onto the pan, work relatively quickly to spread it and add toppings before it starts to set. However, don’t rush so much that you create a mess. You have about 2-3 minutes of working time before the chocolate begins to firm up.
Press Toppings Gently: When adding those final whole almonds or sea salt on top, press them very gently into the chocolate. You want them to stick but not sink completely. Light pressure is all you need.
Room Temperature Setting for Best Finish: While refrigeration speeds up setting, room temperature produces the most beautiful finish. Rapid temperature changes can cause chocolate bloom (whitish streaks or spots), which doesn’t affect taste but looks less professional. If you must refrigerate, let the bark come to room temperature before removing it from the container to prevent condensation.
Score for Clean Breaks: For more uniform pieces, you can lightly score the bark with a knife after about 10 minutes (when it’s partially set). This creates guidelines for breaking later. However, random, irregular pieces are traditional and equally beautiful.
Use High-Quality Chocolate: This is a simple recipe where quality really matters. Premium chocolate contains more cocoa butter, which melts more smoothly and tastes significantly better. It’s worth spending a bit more for brands like Ghirardelli, Guittard, or European chocolates.
Layer for Visual Impact: For an impressive presentation, spread half your chocolate-nut mixture, let it partially set for 5-7 minutes, then spread the remaining half on top. This creates visible layers when you break the bark.
Common Mistakes to Avoid
Even though chocolate almond bark is simple, there are a few common pitfalls that can affect your results. Here’s how to avoid them.
Burning the Chocolate: Chocolate scorches easily, especially in the microwave. Always use 50% power and short intervals (15-20 seconds after the initial 30 seconds). Stirring thoroughly between each interval distributes heat evenly and prevents hot spots. Burnt chocolate tastes bitter and can’t be saved – you’ll need to start over. If you smell burning, stop immediately, even if the chocolate isn’t fully melted yet.
Chocolate Seizing (Becoming Grainy and Clumpy): This happens when even a tiny bit of water or steam comes into contact with melting chocolate. Make sure all your bowls, spoons, and tools are completely dry. If using the double boiler method, don’t let the bowl touch the water and make sure no steam escapes up the sides. If chocolate does seize, you can sometimes save it by stirring in coconut oil, one tablespoon at a time, but prevention is much easier.
Adding Hot Almonds to Chocolate: If your almonds are still warm from toasting and you add them to melted chocolate, they can cause the chocolate to overheat and become too thin, or even cause seizing if they have any residual moisture. Always let toasted almonds cool completely to room temperature before mixing with chocolate.
Spreading Too Thick or Too Thin: If your bark is too thick (over ¾ inch), it becomes difficult to bite through and can feel heavy. Too thin (less than inch), and it’s fragile and breaks into tiny, unsatisfying pieces. Aim for that sweet spot of ¼ to ½ inch thickness for the best texture and eating experience.
Not Using Parchment Paper: Never use wax paper instead of parchment paper – wax paper will stick to the chocolate and peel off in pieces, ruining your bark. Parchment paper or silicone baking mats are the only good options. If you absolutely don’t have either, you can very lightly grease the pan, but parchment is strongly preferred.
Storing in Humid Conditions: Chocolate absorbs moisture from the air, which can make it soft, sticky, and can cause sugar bloom (white spots or streaks). Always store chocolate bark in an airtight container in a cool, dry place. Don’t make or store it in very humid conditions if possible. If you live in a humid climate, refrigeration might be necessary despite the risk of bloom.
Storage & Meal Prep
Proper storage ensures your chocolate almond bark stays fresh, crisp, and delicious for as long as possible. Here’s everything you need to know.
Room Temperature Storage: Chocolate almond bark stores beautifully at room temperature for up to 3 weeks in ideal conditions. Place the broken pieces in an airtight container, layering them with wax paper or parchment paper between layers to prevent sticking. Store the container in a cool, dry place (ideally 65-70°F) away from direct sunlight, heat sources, and strong odors. A pantry or cupboard is perfect. Chocolate absorbs odors easily, so keep it away from strong-smelling foods like onions or spices.
Refrigerator Storage: If your kitchen is warm (above 75°F) or if you live in a humid climate, refrigerate the bark in an airtight container for up to 2 months. Layer pieces with parchment paper between layers. Let the bark come to room temperature before serving for the best texture and flavor – cold chocolate doesn’t melt in your mouth as pleasantly. When removing from the refrigerator, keep it sealed until it reaches room temperature to prevent condensation from forming on the surface.
Avoiding Bloom: Chocolate bloom (white streaks or spots) occurs when chocolate is exposed to temperature fluctuations or moisture. While harmless and doesn’t affect taste, it looks less appealing. Prevent bloom by: storing at consistent temperature, keeping away from moisture, avoiding refrigeration if possible, and allowing refrigerated bark to warm up while still sealed.
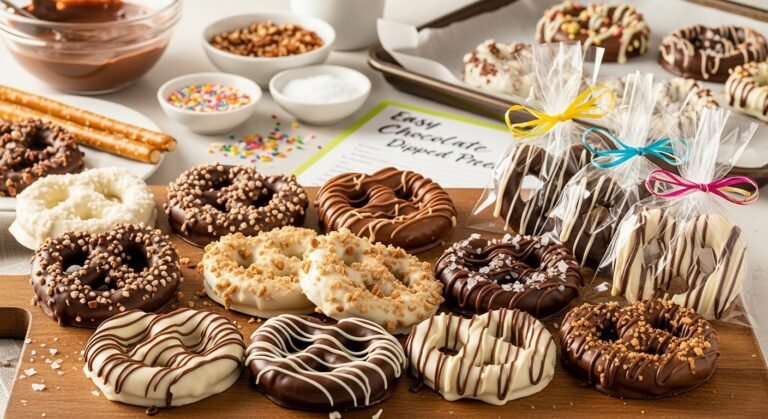
Gift Packaging: When packaging bark as gifts, place pieces in decorative tins, cellophane bags tied with ribbon, or pretty boxes lined with tissue paper or parchment. Remove as much air as possible from bags. Include a note suggesting recipients store in a cool, dry place and consume within 2-3 weeks for best quality.
Signs of Freshness: Fresh chocolate almond bark should snap cleanly when broken, have a glossy appearance, and taste rich with no stale or rancid notes. If the chocolate tastes waxy or the almonds taste stale, it’s past its prime. Properly stored bark usually stays excellent for the full storage time.
Make-Ahead & Freezer Notes
Chocolate almond bark is an excellent make-ahead treat, perfect for reducing holiday stress or preparing for special occasions well in advance.
Making Ahead: You can make chocolate almond bark up to 3 weeks before you need it if stored at room temperature, or up to 2 months ahead if refrigerated. This makes it perfect for holiday preparation. Many people make multiple batches of different bark varieties in early December to have ready for all their gift-giving needs throughout the month.
Freezing Chocolate Almond Bark: Yes, chocolate bark freezes exceptionally well for up to 6 months! This is perfect if you want to make a large batch and save some for later, or if you need to prepare far in advance. To freeze: break the bark into pieces, layer them in a freezer-safe container with parchment paper between layers, seal tightly removing as much air as possible, and label with the date.
Thawing Instructions: Remove frozen bark from the freezer and let it thaw at room temperature while still sealed in its container. This prevents condensation from forming on the chocolate surface. Thawing takes about 1-2 hours depending on how much you’re thawing. Once at room temperature, open the container and the bark will be just as fresh and delicious as the day you made it.
Batch Preparation: If you’re making large quantities for gifts or events, you can work in batches. Melt chocolate, mix with nuts, spread on one baking sheet, and while that’s setting, start the next batch on another sheet. You can easily make 3-4 batches (4-6 pounds of bark) in an afternoon. This is much more efficient than trying to make one huge batch.
Timing for Events: For the freshest results at parties or events, make bark 1-3 days ahead and store at room temperature. For gift-giving, make it no more than 1 week in advance for peak freshness. Package gifts 1-2 days before giving.
Serving Suggestions
While chocolate almond bark is wonderful on its own, there are many creative ways to serve and present this versatile treat.
Dessert Platters: Arrange broken pieces of chocolate almond bark on a large platter alongside other desserts like cookies, brownies, fruit, and cheese. The bark adds beautiful visual contrast with its irregular shapes and provides a lighter option compared to frosted treats. It’s elegant enough for formal dinners yet casual enough for family gatherings.
Coffee and Tea Service: Serve a few pieces of bark with afternoon coffee or tea. The chocolate-nut combination pairs beautifully with coffee, especially espresso or dark roasts. It’s also lovely with Earl Grey tea, chai, or herbal teas. Place a few pieces on the saucer or serve on a small plate alongside the beverage.
Ice Cream Topping: Break bark into smaller pieces and use as a topping for vanilla, coffee, or chocolate ice cream. The contrast of cold, creamy ice cream with crunchy, rich bark is absolutely divine. You can also crush it finely and sprinkle over sundaes.
Gift Baskets: Include chocolate almond bark in homemade gift baskets along with other treats like cookies, hot cocoa mix, gourmet coffee, tea, or wine. The bark adds a sophisticated, artisanal touch that elevates the entire basket. Package it in clear cellophane bags so recipients can see the beautiful chocolate-nut combination.
Holiday Cookie Trays: Include chocolate almond bark on holiday cookie platters alongside traditional cookies, fudge, and other candies. The variety in texture, appearance, and flavor makes cookie trays more interesting. Bark also tends to be one of the first things to disappear!
Cheese Boards: Surprisingly, chocolate almond bark pairs wonderfully with certain cheeses. Include a few pieces on a cheese board alongside sharp cheddar, aged gouda, or brie. The sweet-savory combination is sophisticated and unexpected. Pair with crackers, fresh fruit, and a nice wine for an impressive appetizer spread.
Party Favors: Package 2-3 pieces in small favor boxes or bags as party favors for weddings, baby showers, birthdays, or corporate events. Customize with ribbon in your event colors. Bark is sturdy enough to be packaged well in advance without worry about crushing or damage.
Movie Night Snack: Serve a bowl of broken bark pieces during family movie nights. It’s perfect for sharing and passing around, and the chocolate-nut combo satisfies both sweet and salty cravings.
Hostess Gifts: Package bark in a decorative tin or jar and bring as a hostess gift to dinner parties. It’s thoughtful, homemade, and shows more effort than store-bought treats while being budget-friendly.
FAQs Section
Can I use chocolate chips or do I need to buy bar chocolate?
You can absolutely use chocolate chips! They’re convenient and work well for bark. For the smoothest, most pourable consistency, add 1 tablespoon of coconut oil or shortening per 12 ounces (2 cups) of chips. This is because chocolate chips contain stabilizers that help them hold their shape during baking, which makes them slightly thicker when melted. The added fat thins them to a better spreading consistency and creates a glossier finish. If you’re using high-quality chocolate bars, you typically won’t need to add anything – they melt beautifully on their own.
Do I have to toast the almonds first?
While not absolutely required, toasting almonds makes a dramatic difference in flavor. Raw almonds taste mild and slightly flat, while toasted almonds develop a deep, rich, nutty flavor that complements the chocolate perfectly. Toasting takes just 7-10 minutes and is simple – spread almonds on a baking sheet and bake at 350°F until fragrant and lightly golden. If you’re using pre-roasted almonds, you can skip this step, but I still recommend a quick 5-minute toast to refresh their flavor.
Why does my chocolate have white spots or streaks?
Those white spots or streaks are called chocolate bloom, which comes in two types: fat bloom (caused by temperature changes) and sugar bloom (caused by moisture). While it looks unappealing, bloom doesn’t affect food safety or taste significantly. It happens when chocolate is stored in fluctuating temperatures or exposed to humidity. Prevent bloom by storing bark at consistent room temperature in an airtight container, or if refrigerating, allow it to come to room temperature while still sealed to prevent condensation. If your bark has developed bloom, it’s still perfectly safe to eat.
Can I make this without nuts for allergies?
Absolutely! You can make delicious chocolate bark without any nuts. Try these add-ins instead: toasted pumpkin seeds (pepitas), sunflower seeds, crispy rice cereal, crushed pretzels, dried fruit (cranberries, cherries, raisins), shredded coconut, mini marshmallows, or crushed cookies. You can also make plain chocolate bark with just sea salt on top, which is elegant and nut-free. Just follow the same method, substituting your chosen add-ins for the almonds.
How long does chocolate almond bark last?
When stored properly in an airtight container at room temperature in a cool, dry place, chocolate almond bark stays fresh for up to 3 weeks. If refrigerated, it lasts up to 2 months. Frozen, it keeps beautifully for up to 6 months. The chocolate remains safe to eat even longer, but the almonds can eventually become stale or rancid, which affects flavor quality. For gift-giving, I recommend making bark no more than 1-2 weeks in advance for peak freshness.
Can I use milk chocolate or white chocolate instead?
Yes! Milk chocolate creates a sweeter, creamier bark that’s especially kid-friendly. White chocolate creates a beautiful visual with the brown almonds and has a sweet, vanilla-like flavor. Keep in mind that both milk and white chocolate are more sensitive to heat than dark chocolate, so be extra careful when melting – use lower power settings and shorter intervals. White chocolate in particular can seize easily, so work carefully and make sure all tools are completely dry.
My chocolate is too thick to spread – what should I do?
Thick chocolate is usually caused by one of two things: it’s not warm enough, or it needs to be thinned. First, try reheating it briefly in 10-15 second intervals, stirring between each, until it’s more fluid. If it’s still too thick after warming, add a thinning agent. For chocolate chips or bars, add coconut oil or shortening (start with 1 teaspoon per 12 ounces of chocolate). For melting wafers, add paramount crystals or