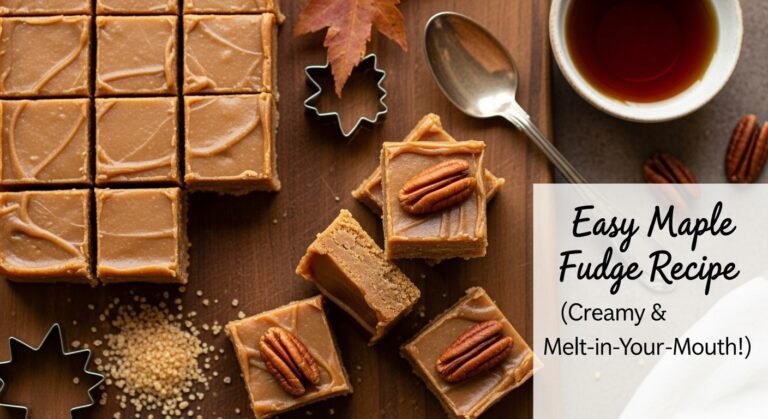
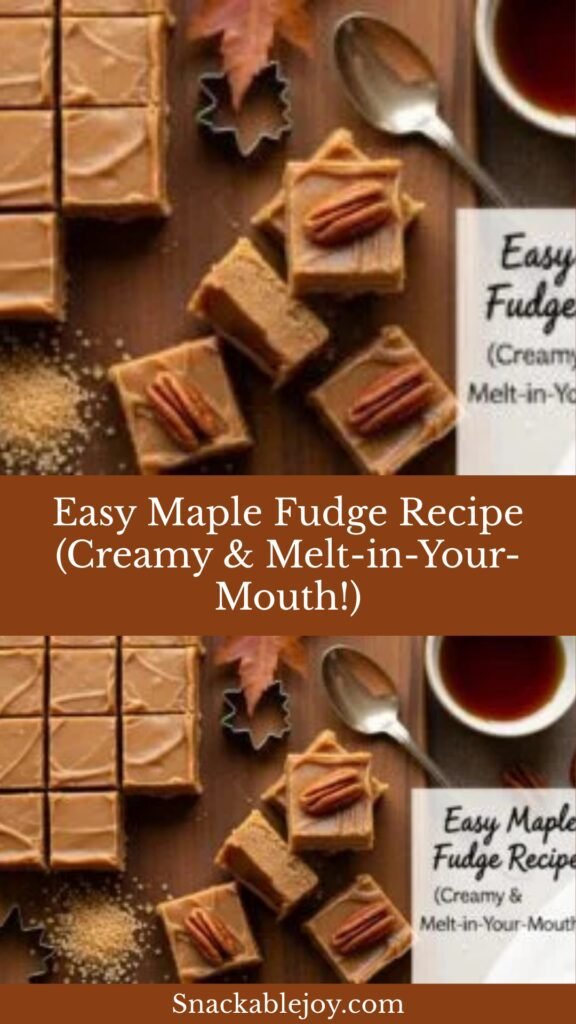
Easy Maple Fudge Recipe (Creamy Melt-in-Your-Mouth!)
There’s something utterly magical about maple fudge – that smooth, creamy texture combined with the rich, complex sweetness of pure maple syrup. This maple fudge recipe creates the most incredible melt-in-your-mouth candy that tastes like autumn in New England. Unlike traditional chocolate fudge, maple fudge has a unique, sophisticated flavor profile that celebrates one of nature’s most delicious sweeteners.
What makes maple fudge so special is its simplicity and elegance. With just a handful of ingredients and about 30 minutes, you can create a confection that rivals anything from a high-end candy shop. The beautiful caramel color and distinctive maple flavor make it perfect for fall gatherings, holiday gift-giving, or anytime you want to impress guests with something homemade and memorable. This fudge is incredibly versatile too – package it in decorative tins for teachers, neighbors, and coworkers, or serve it on a dessert platter at Thanksgiving. The smooth, creamy squares practically melt on your tongue, leaving behind that wonderful maple sweetness that keeps everyone reaching for just one more piece.
History / Background
Maple fudge has deep roots in North American food culture, particularly in the maple-producing regions of New England, Quebec, and eastern Canada. To understand maple fudge, we first need to appreciate the ancient tradition of maple sugaring itself.
Indigenous peoples of northeastern North America were the first to discover that maple tree sap could be collected and boiled down into syrup and sugar. They developed sophisticated tapping and collection methods long before European colonizers arrived. The Algonquin, Iroquois, and other Native American tribes would make cuts in maple tree bark during late winter and early spring, collecting the sap in birch bark containers. They would then boil the sap by dropping hot stones into it or by leaving it out to freeze overnight and removing the ice (which is water, leaving behind more concentrated sugar).
European settlers learned these techniques from Native Americans and quickly incorporated maple products into their own cuisine. By the 1700s, maple sugaring had become an important seasonal activity for farming communities throughout New England and eastern Canada. Before cane sugar became widely available and affordable in the 19th century, maple sugar was often the primary sweetener used in American households.
Fudge itself is a relatively modern confection, with its origins traced to America in the late 1800s. The exact origin story is debated, but one popular tale credits a batch of “fudged” caramels – meaning a mistake or failure – at a women’s college in the 1880s. The mistake turned out to be delicious, and fudge was born. The original recipes were typically chocolate-based and required precise temperature control and beating to achieve that characteristic smooth, creamy texture.
Maple fudge emerged as a natural variation on traditional fudge, particularly in regions where maple syrup was abundant and treasured. Vermont, New Hampshire, Maine, and Quebec became especially famous for their maple confections, including maple fudge, maple cream (also called maple butter), and maple sugar candies. These treats became popular souvenirs for tourists visiting during fall foliage season and symbols of regional pride.
Traditional maple fudge-making was often a community activity, with families gathering during sugaring season to boil down sap and make various maple products. Sugar shacks – small buildings where sap was boiled and processed – became social gathering places where people would taste fresh maple treats, including warm maple fudge.
Today, maple fudge remains a beloved specialty of New England and eastern Canada, though its popularity has spread throughout North America. It’s particularly popular during autumn and the holiday season, evoking feelings of cozy warmth and traditional craftsmanship. Modern recipes have simplified the process while maintaining that incredible flavor and texture that has delighted candy lovers for generations.
Why You’ll Love This Recipe
This maple fudge recipe is going to become one of your most treasured candy recipes, and here’s why. It delivers authentic maple flavor with a smooth, creamy texture that’s absolutely divine. Unlike some fudge recipes that can be temperamental or require precise timing, this one is straightforward and reliable.
Here’s why this recipe is absolutely wonderful:
- Incredible maple flavor – Made with real maple syrup for authentic, rich taste
- Smooth and creamy texture – Melts in your mouth with no grainy crystals
- Simple ingredients – Just five basic ingredients you probably have on hand
- No candy thermometer required – Visual cues and timing make it foolproof (though a thermometer helps)
- Ready in 30 minutes – Quick enough to make on a whim
- Perfect for gifting – Makes beautiful homemade presents that everyone appreciates
- Naturally gluten-free – Safe for those with gluten sensitivities
- Long shelf life – Stays fresh for weeks when stored properly
- Impressive results – Looks and tastes professional despite being easy
- Budget-friendly – Makes a large batch for a reasonable cost
- Crowd-pleasing – Appeals to both kids and adults
- Versatile – Perfect for holidays, parties, bake sales, or everyday treats
- Regional specialty – Brings a taste of New England tradition to your kitchen
Ingredient Notes
Let me walk you through each ingredient so you understand exactly what makes this maple fudge so special and how to choose the best options.
Pure Maple Syrup: This is the star of the show, so quality really matters here. You absolutely must use pure maple syrup – not pancake syrup or maple-flavored syrup, which are mostly corn syrup with artificial flavoring. Real maple syrup comes in different grades:
- Grade A Golden (Delicate Taste): Lightest color and mildest flavor, made early in the season
- Grade A Amber (Rich Taste): Medium color with more pronounced maple flavor
- Grade A Dark (Robust Taste): Darker with bold maple flavor
- Grade A Very Dark (Strong Taste): Darkest with the most intense flavor
For fudge, I recommend Grade A Dark or Amber for the best flavor balance – enough maple taste to shine through without being overwhelming. The syrup should be fresh and stored properly. Old or improperly stored maple syrup can develop off flavors.
Granulated Sugar: Works alongside the maple syrup to create the right texture and sweetness. The sugar helps the fudge set properly and contributes to the smooth, creamy texture. Don’t substitute with brown sugar or other sweeteners as they have different properties that will affect the final result.
Heavy Cream: Adds richness, creaminess, and helps create that smooth, melt-in-your-mouth texture. Heavy cream (also called heavy whipping cream) has a high fat content (36-40%), which is essential for proper fudge texture. Don’t substitute with milk or half-and-half – you need the high fat content for the best results. Some recipes use evaporated milk, but heavy cream produces superior texture and flavor.
Butter (Unsalted): Adds richness, flavor, and helps prevent crystallization. Unsalted butter lets you control the salt level precisely. The butter should be cut into small pieces so it melts easily when stirred in. Real butter is essential – don’t use margarine or butter substitutes as they contain water and other ingredients that will affect the texture.
Vanilla Extract: Enhances and rounds out all the other flavors. Pure vanilla extract is best, though imitation vanilla will work in a pinch. The vanilla is added at the end so the delicate flavor compounds don’t cook off.
Salt (Optional): A tiny pinch of salt enhances the sweetness and brings out the maple flavor. Even though it’s optional, I highly recommend it – the difference is noticeable. Use fine sea salt or regular table salt.
Equipment Needed
Maple fudge doesn’t require specialized equipment, but having the right tools makes the process much smoother and more enjoyable. Here’s what you’ll need:
- Heavy-bottomed saucepan (3-4 quart capacity) – Essential for even heat distribution and preventing scorching. A heavy bottom is crucial for candy-making.
- Wooden spoon or heat-resistant silicone spatula – For stirring the hot mixture
- Candy thermometer (optional but recommended) – Clips to the side of your pan for accurate temperature readings
- 8×8-inch square baking pan – Standard size for this recipe; creates fudge that’s the perfect thickness
- Parchment paper or aluminum foil – Lines the pan for easy removal
- Measuring cups and spoons – For accurate measurements
- Butter knife or offset spatula – For spreading fudge evenly in the pan
- Sharp knife – For cutting the set fudge into squares
- Pastry brush – For brushing down sugar crystals on pan sides (optional)
- Wire cooling rack – To cool the pan after pouring
- Mixing bowl – For beating the fudge if using the traditional method
Print

Maple Fudge Recipe
This creamy maple fudge is made with pure maple syrup and has the most incredible melt-in-your-mouth texture. It’s smooth, rich, and captures the essence of autumn in every bite. Perfect for holidays, gifts, or anytime you’re craving something sweet!
- Total Time: 2 hours 25 minutes (including cooling/setting time)
- Yield: 64 small pieces (1-inch squares) or 36 larger pieces 1x
Ingredients
Scale- 2 cups pure maple syrup (Grade A Dark or Amber recommended)
- 2 cups granulated sugar
- 1 cup heavy cream
- 4 tablespoons (1/2 stick) unsalted butter, cut into small pieces
- 1 teaspoon pure vanilla extract
- Pinch of salt (optional but recommended)
Instructions
Step 1: Prepare Your Pan
Line an 8×8-inch square baking pan with parchment paper or aluminum foil, leaving an overhang on two opposite sides for easy removal later. This is important – don’t skip this step or your fudge will stick to the pan. Lightly butter the parchment paper or foil. Set the prepared pan aside.
Step 2: Combine Ingredients
In a heavy-bottomed 3-4 quart saucepan, combine the maple syrup, sugar, and heavy cream. Stir gently with a wooden spoon until the ingredients are mixed together. Don’t worry if the sugar isn’t completely dissolved yet – it will dissolve as the mixture heats.
Step 3: Heat the Mixture
Place the saucepan over medium heat. Stir constantly until the sugar completely dissolves and the mixture comes to a boil. This takes about 5-7 minutes. Once boiling, stop stirring. If you have a candy thermometer, clip it to the side of the pan now, making sure the bulb doesn’t touch the bottom of the pan.
If you notice sugar crystals forming on the sides of the pan, use a wet pastry brush to brush them down into the mixture. This helps prevent crystallization, which can make your fudge grainy.
Step 4: Cook to Soft Ball Stage
Allow the mixture to boil without stirring until it reaches 234-238°F (112-114°C) on a candy thermometer. This is called the soft ball stage and is crucial for proper fudge texture. This typically takes 10-15 minutes of boiling, depending on your stove and pan.
If you don’t have a candy thermometer, you can test by dropping a small amount of the mixture into a cup of cold water. At soft ball stage, it will form a soft, pliable ball that flattens when removed from the water. It should hold its shape but be easily moldable.
Watch the mixture carefully during the last few minutes of cooking. The temperature can rise quickly at the end, and going past soft ball stage will result in harder, more brittle fudge.
Step 5: Add Butter and Cool
Once the mixture reaches the proper temperature, immediately remove the pan from heat. Add the butter pieces and the pinch of salt (if using) but do NOT stir yet. Let the mixture cool undisturbed until it reaches 110°F (43°C). This cooling period takes about 45-60 minutes and is essential for achieving smooth, creamy fudge. Don’t rush this step by placing the pan in cold water or refrigerator – slow cooling at room temperature is important.
Step 6: Beat the Fudge
Once cooled to 110°F (or when you can comfortably hold your hand against the bottom of the pan), add the vanilla extract. Now begin beating the mixture vigorously with a wooden spoon. This is where the magic happens! As you beat, the fudge will gradually lose its glossy appearance and become lighter in color and thicker in texture. This process takes 5-10 minutes of continuous beating. Your arm will get tired – that’s normal!
The fudge is ready when it starts to lose its shine, becomes noticeably thicker, and begins to hold its shape when you lift the spoon. It should still be pourable but will have transformed from a thin syrup to a thick, creamy mixture.
Step 7: Pour and Spread
Immediately pour the beaten fudge into your prepared pan. Work quickly because the fudge will continue to set as you work. Use a buttered knife or offset spatula to spread it evenly into the corners and smooth the top. Don’t worry about making it perfectly smooth – a slightly rustic look is charming.
Step 8: Cool and Cut
Let the fudge cool completely at room temperature. This takes at least 2 hours, though overnight is even better. The fudge needs to set fully before cutting. Once completely set, use the parchment paper overhang to lift the entire slab of fudge out of the pan. Place it on a cutting board.
Using a sharp knife, cut the fudge into squares. For small candy-sized pieces, cut into 1-inch squares (8 rows by 8 rows = 64 pieces). For larger serving pieces, cut into 1.5-inch squares (about 6 rows by 6 rows = 36 pieces). Wipe your knife clean between cuts for the neatest edges.
Notes
- Temperature Accuracy: Using a candy thermometer is highly recommended for consistent results. Invest in a good one if you plan to make candy regularly.
- Don’t Stir While Boiling: After the mixture comes to a boil, resist the urge to stir. Stirring can cause crystallization, resulting in grainy fudge.
- Beating is Essential: The beating process is what creates that smooth, creamy texture. Don’t skip it or rush it.
- Humidity Matters: Like all candy, maple fudge is best made on dry days. High humidity can prevent proper setting.
- Storage: Store in an airtight container at room temperature for up to 2 weeks, or refrigerate for up to 1 month.
- Pure Maple Syrup Only: Pancake syrup or maple-flavored syrup will NOT work. You must use pure maple syrup.
- Prep Time: 10 minutes
- Cook Time: 15 minutes
- Category: Candy, Dessert
- Method: Stovetop
- Cuisine: American (New England)
- Diet: Gluten Free
Nutrition
- Serving Size: 1 piece (1-inch square)
- Calories: 75
- Sugar: 12g
- Sodium: 10mg
- Fat: 2g
- Saturated Fat: 1.5g
- Unsaturated Fat: 0.5g
- Trans Fat: 0g
- Carbohydrates: 14g
- Fiber: 0g
- Protein: 0g
- Cholesterol: 7mg
Tips & Variations
Once you’ve mastered the basic maple fudge recipe, there are many delicious ways to customize it to your taste. Here are some creative variations to try.
Maple Walnut Fudge: Add 1 cup of toasted, chopped walnuts to the fudge just before pouring it into the pan. Walnuts and maple are a classic combination. Toast the walnuts first in a 350°F oven for 7-8 minutes for the best flavor.
Maple Pecan Fudge: Similar to walnut, but using pecans instead. Pecans have a buttery sweetness that pairs beautifully with maple. Use 1 cup of toasted, chopped pecans.
Maple Bacon Fudge: For a sweet and savory twist, fold in 1/2 cup of crumbled, crispy cooked bacon just before pouring into the pan. Sounds unusual, but it’s absolutely delicious! The salty bacon enhances the maple flavor.
Sea Salt Maple Fudge: Sprinkle flaky sea salt over the top of the fudge immediately after spreading it in the pan. The salt crystals add a gourmet touch and enhance the sweetness.
Maple Chocolate Swirl: Melt 4 ounces of dark chocolate and swirl it through the maple fudge just after pouring it into the pan. Use a knife to create marble patterns.
Maple Bourbon Fudge: Replace the vanilla extract with 1 tablespoon of bourbon for an adult version with sophisticated flavor. The bourbon complements the maple beautifully.
Maple Cinnamon Fudge: Add 1/2 teaspoon of ground cinnamon to the mixture along with the vanilla. The warm spice enhances the autumn feeling.
Dairy-Free Maple Fudge: Replace the heavy cream with full-fat coconut cream and use dairy-free butter. The texture will be slightly different but still delicious.
Maple Cream Layered Fudge: Make a half batch of maple fudge and a half batch of vanilla fudge (using corn syrup instead of maple syrup). Layer them in the pan for a beautiful two-tone effect.
Pro Chef Tips
Want to achieve candy-shop quality maple fudge? Here are professional techniques that will take your fudge-making to the next level.
Invest in a Good Candy Thermometer: Temperature accuracy is crucial in candy making. A reliable candy thermometer is worth every penny. Test your thermometer’s accuracy by placing it in boiling water – it should read 212°F (100°C) at sea level. If it reads higher or lower, adjust your target temperatures accordingly.
Use a Heavy Pan: A heavy-bottomed saucepan distributes heat evenly and prevents hot spots that can cause scorching or uneven cooking. Thin pans are the enemy of good candy making. If you don’t have a heavy pan, consider investing in one if you plan to make candy regularly.
Prevent Crystallization: Sugar crystals on the sides of the pan can cause the entire batch to crystallize, resulting in grainy fudge. Prevent this by: (1) stirring only until sugar dissolves, then stopping, (2) using a wet pastry brush to wash down any crystals that form on the sides, and (3) not stirring once the mixture starts boiling.
Cool Slowly and Undisturbed: This is perhaps the most important tip for smooth fudge. The cooling period allows sugar crystals to form in a very small, fine structure. If you stir or disturb the fudge while it’s hot, large crystals can form, making your fudge grainy. Be patient during the cooling phase.
Beat at the Right Temperature: Starting to beat the fudge at exactly 110°F is important. Too hot and it won’t set properly; too cool and it will be difficult to pour. If you don’t have a thermometer, the bottom of the pan should feel barely warm – comfortable to hold your hand against for several seconds.
Beat Vigorously: Don’t be timid when beating the fudge. Vigorous beating is what creates that smooth, creamy texture by encouraging the formation of tiny sugar crystals. Your arm should genuinely feel tired by the time you’re done. This is a workout!
Work Quickly After Beating: Once the fudge begins to lose its gloss and thicken, pour it immediately. If you wait too long, it will start to set in the pan and be difficult to spread. Have your prepared pan ready before you start beating.
Score Before Fully Set: For the cleanest cuts, you can lightly score the fudge while it’s still slightly soft (after about 30 minutes of cooling). Then finish cutting once it’s fully set. This prevents cracking.
Room Temperature Ingredients: While not critical, having your butter at cool room temperature (not cold from the fridge) helps it incorporate more smoothly when added to the hot mixture.
Common Mistakes to Avoid
Even experienced candy makers can run into issues with fudge. Here are the most common problems and how to avoid them.
Grainy, Crystallized Fudge: This is the most common fudge problem. It’s caused by sugar crystallization and can happen for several reasons: stirring while the mixture is boiling, crystals forming on the pan sides that aren’t brushed down, beating the fudge while it’s still too hot, or rushing the cooling process. To prevent it, follow the recipe carefully – don’t stir once boiling begins, brush down any crystals, cool to exactly 110°F before beating, and be patient during cooling.
Fudge Won’t Set (Too Soft): If your fudge remains soft and doesn’t firm up, it wasn’t cooked to a high enough temperature. The mixture must reach 234-238°F (soft ball stage) for proper texture. Without a thermometer, it’s easy to underestimate the temperature. Invest in a good candy thermometer for reliable results. If your fudge is too soft, you can try re-cooking it – return it to the pan, add 2 tablespoons of water, reheat to the proper temperature, and start again.
Fudge Too Hard and Brittle: This happens when the mixture was cooked beyond soft ball stage. Even a few degrees makes a big difference in candy making. At 240°F and above, you’re entering firm ball stage, which creates harder candy. Watch your thermometer carefully during the last few minutes of cooking, and remove from heat as soon as you reach 238°F.
Fudge Sticks to Pan: This happens when you don’t properly line your pan with parchment or foil, or when you don’t butter the lining. Always line your pan and lightly grease the lining. The parchment overhang is also crucial for easy removal – don’t skip it.
Burnt or Scorched Flavor: This occurs when the mixture cooks too quickly or in a thin pan that creates hot spots. Always use medium heat (not high) and a heavy-bottomed pan. Stir constantly until the sugar dissolves and the mixture comes to a boil. Once boiling, you stop stirring, but watch it carefully. If you notice any darkening or burning smell, remove from heat immediately – unfortunately, there’s no saving burnt candy, and you’ll need to start over.
Fudge Seizes or Becomes Lumpy When Beating: If you haven’t cooled the mixture to 110°F before beating, or if you’ve let it cool too much (below 100°F), it can become difficult to work with. Follow temperature guidelines carefully. The mixture should still be somewhat warm but not hot when you begin beating.
Storage & Meal Prep
Proper storage keeps your maple fudge fresh and maintains that perfect creamy texture. Here’s everything you need to know about storing this delicious treat.
Room Temperature Storage: Maple fudge stores beautifully at room temperature for up to 2 weeks. Place the cut squares in an airtight container, layering them between sheets of wax paper or parchment paper to prevent sticking. Store the container in a cool, dry place away from direct sunlight and heat sources. A pantry or cupboard is perfect.
Refrigerator Storage: For longer storage, refrigerate maple fudge in an airtight container for up to 1 month. Layer pieces with wax paper or parchment paper between each layer. Let the fudge come to room temperature for about 15-20 minutes before serving for the best texture and flavor. Cold fudge is harder and doesn’t melt in your mouth as pleasantly.
Avoiding Moisture: Like all sugar-based confections, maple fudge can become sticky if exposed to moisture or humidity. Make sure your storage container has a tight seal. If you live in a very humid climate, consider storing fudge in the refrigerator rather than at room temperature.
Gift Packaging: When packaging maple fudge as gifts, place pieces in decorative tins, boxes, or cellophane bags. If using bags, remove as much air as possible before sealing. Include a note suggesting recipients store it in an airtight container and consume within 2 weeks for best quality.
Signs of Freshness: Fresh maple fudge should be creamy, smooth, and moist. If it becomes dry, hard, or develops a white sugar bloom on the surface, it’s past its prime. While still safe to eat, the texture won’t be as pleasant.
Make-Ahead & Freezer Notes
Maple fudge is an excellent make-ahead treat, especially during busy holiday seasons. Here’s how to plan ahead successfully.
Making Ahead for Holidays: You can make maple fudge up to 2 weeks before you need it if stored properly at room temperature, or up to 1 month ahead if refrigerated. This makes it perfect for holiday baking marathons. Many people make all their candy and cookies in early December to have them ready for gift-giving throughout the month.
Freezing Maple Fudge: Yes, maple fudge freezes beautifully for up to 3 months! This is especially useful if you want to make large batches or prepare well in advance. To freeze, wrap individual pieces or small portions tightly in plastic wrap, then place in a freezer-safe container or bag. Remove as much air as possible to prevent freezer burn.
Thawing Instructions: Remove frozen fudge from the freezer and let it thaw at room temperature while still wrapped. This prevents condensation from forming on the fudge surface. Thawing takes about 1-2 hours depending on portion size. Once thawed, unwrap and store in an airtight container. The fudge will taste just as fresh as the day you made it.
Batch Preparation: If you’re making multiple batches for gifts or large gatherings, you can make several batches over several days. The fudge doesn’t all have to be made at once. Each batch takes about 30 minutes of active time plus cooling time. Many candy makers dedicate one weekend day to making 3-4 batches of different treats.
Gifting Timeline: For the freshest gifts, make maple fudge no more than 1 week before giving. Package it 1-2 days before your event or holiday. This ensures recipients get the freshest, most flavorful fudge possible.
Serving Suggestions
While maple fudge is wonderful on its own, there are many creative ways to serve and enjoy this delicious treat.
Holiday Dessert Platters: Arrange maple fudge squares on a festive platter alongside other holiday treats like cookies, chocolate truffles, peppermint bark, and nut clusters. The golden color and distinct flavor make it stand out beautifully.
With Coffee or Tea: Maple fudge pairs wonderfully with coffee, especially darker roasts that can stand up to the sweetness. It’s also delicious with black tea, chai, or herbal teas. Serve a few pieces with afternoon coffee or tea for a special treat.
Fall Dessert Boards: Create a fall-themed dessert board featuring maple fudge, caramel apples, spiced nuts, dried fruits, and artisan cheeses. The maple fudge adds authentic autumn flavor.
Gift Tins and Baskets: Package maple fudge in decorative tins or baskets along with other homemade treats like cookies, candied nuts, or flavored coffee. It makes a thoughtful, impressive gift for teachers, neighbors, coworkers, or hostess gifts.
Ice Cream Topping: Crumble small pieces of maple fudge over vanilla, butter pecan, or coffee ice cream for an incredible dessert. The contrast of cold ice cream and sweet fudge is delightful.
Alongside Cheese: Surprisingly, maple fudge pairs wonderfully with sharp cheeses like aged cheddar or manchego. The sweet-savory combination is sophisticated and delicious. Include it on a cheese board for an unexpected treat.
Lunch Box Treats: Pack a piece or two in lunch boxes as a special dessert. Wrap individually in wax paper or small bags. It’s a nice surprise that doesn’t require refrigeration.
Party Favors: Wrap 2-3 pieces in cellophane tied with ribbon as party favors for fall weddings, baby showers, or birthday parties. Customize the ribbon colors to match your event theme.
Bake Sale Items: Maple fudge is perfect for bake sales. Package pieces in small bags and price them at $2-3 per bag. They’re attractive, distinctive, and don’t require refrigeration.
FAQs Section
Do I really need a candy thermometer?
While it’s possible to make maple fudge without a candy thermometer using the cold water test, a thermometer makes the process much more reliable and consistent. Candy making requires precise temperatures, and even a few degrees can make the difference between perfect fudge and disappointing results. Candy thermometers are inexpensive (usually $10-20) and will last for years, making them a worthwhile investment if you plan to make candy more than once. That said, if you don’t have one, the cold water test (dropping a small amount into cold water and checking the texture) does work – it just requires more practice and experience.
Can I use pancake syrup instead of pure maple syrup?
No, unfortunately pancake syrup won’t work for this recipe. Pancake syrup (like brands such as Mrs. Butterworth’s or Aunt Jemima) is primarily corn syrup with artificial maple flavoring and doesn’t contain real maple syrup. It has completely different properties and won’t create the right texture or flavor. You must use pure maple syrup, which is made by boiling down sap from maple trees. Yes, it’s more expensive, but it’s essential for authentic maple fudge. Look for bottles labeled “Pure Maple Syrup” – it’s usually in the breakfast aisle or specialty foods section.
Why is my fudge grainy instead of smooth?
Grainy fudge is caused by large sugar crystals forming instead of the tiny crystals that create smooth texture. This happens when: (1) you stirred the mixture while it was boiling, (2) sugar crystals on the pan sides weren’t brushed down and fell back into the mixture, (3) you started beating before the mixture cooled to 110°F, or (4) the mixture was disturbed during the cooling phase. To prevent grainy fudge, follow the recipe carefully, be patient during cooling, and don’t skip any steps.
Can I make this recipe dairy-free or vegan?
Yes, with some modifications. Replace the heavy cream with full-fat coconut cream (the thick part from a can of coconut milk) and use vegan butter. The texture will be slightly different but still delicious. Coconut cream doesn’t have quite as high a fat content as heavy cream, so the mouthfeel might be slightly less rich, but it works well. Make sure your maple syrup is certified vegan, as some maple syrup producers use animal products in processing.
My fudge won’t set – what can I do?
If your fudge hasn’t set after several hours, it wasn’t cooked to a high enough temperature. You can try to save it by returning it to the pan, adding 2-3 tablespoons of water, and reheating it to the proper temperature (234-238°F). Once it reaches the right temperature, remove from heat, cool to 110°F, beat, and pour into the pan again. This doesn’t always work perfectly, but it’s worth trying rather than throwing the batch away. To prevent this in the future, make sure you use a candy thermometer and cook to the exact temperature specified.
How do I know when the fudge is ready after beating?
The fudge is ready to pour when it loses its glossy shine, becomes noticeably lighter in color, and thickens to the point where it starts to hold its shape when you lift the spoon. It should still be pourable but will have transformed from a thin, shiny syrup to a thick, matte mixture. This typically takes 5-10 minutes of vigorous beating. If you beat too long, it will become too thick to pour and will set in the pan; if you don’t beat enough, it will be too soft. The visual change from glossy to matte is your best indicator.
Can I halve or double this recipe?
You can halve this recipe easily – just use all ingredients in half quantities and a smaller pan (like 4×8 inches or 5×7 inches). Cooking time will be slightly shorter, so watch your thermometer carefully. Doubling is trickier because the larger volume takes longer to reach temperature and cool, which can affect results. If you need more fudge, I recommend making multiple batches rather than doubling. Plus, if something goes wrong with one batch, you haven’t wasted all your ingredients!
Conclusion
Congratulations! You now have everything you need to make the most incredible, creamy, melt-in-your-mouth maple fudge. This recipe is truly special – it captures the essence of autumn and traditional candy-making while being accessible enough for home cooks to master.
I hope this recipe becomes a treasured part of your holiday traditions, just as it has for countless families in New England and beyond. There’s something deeply satisfying about making candy from scratch, transforming simple ingredients into something magical. Whether you’re making maple fudge for gifts, holiday gatherings, or simply to enjoy at home, it’s sure to bring smiles and create sweet memories.
Don’t forget to pin this recipe to your Pinterest boards so you can find it easily whenever you need an impressive homemade treat! And when you make this maple fudge, I’d love to hear how it turned out. Did you try any variations? Who did you share it with