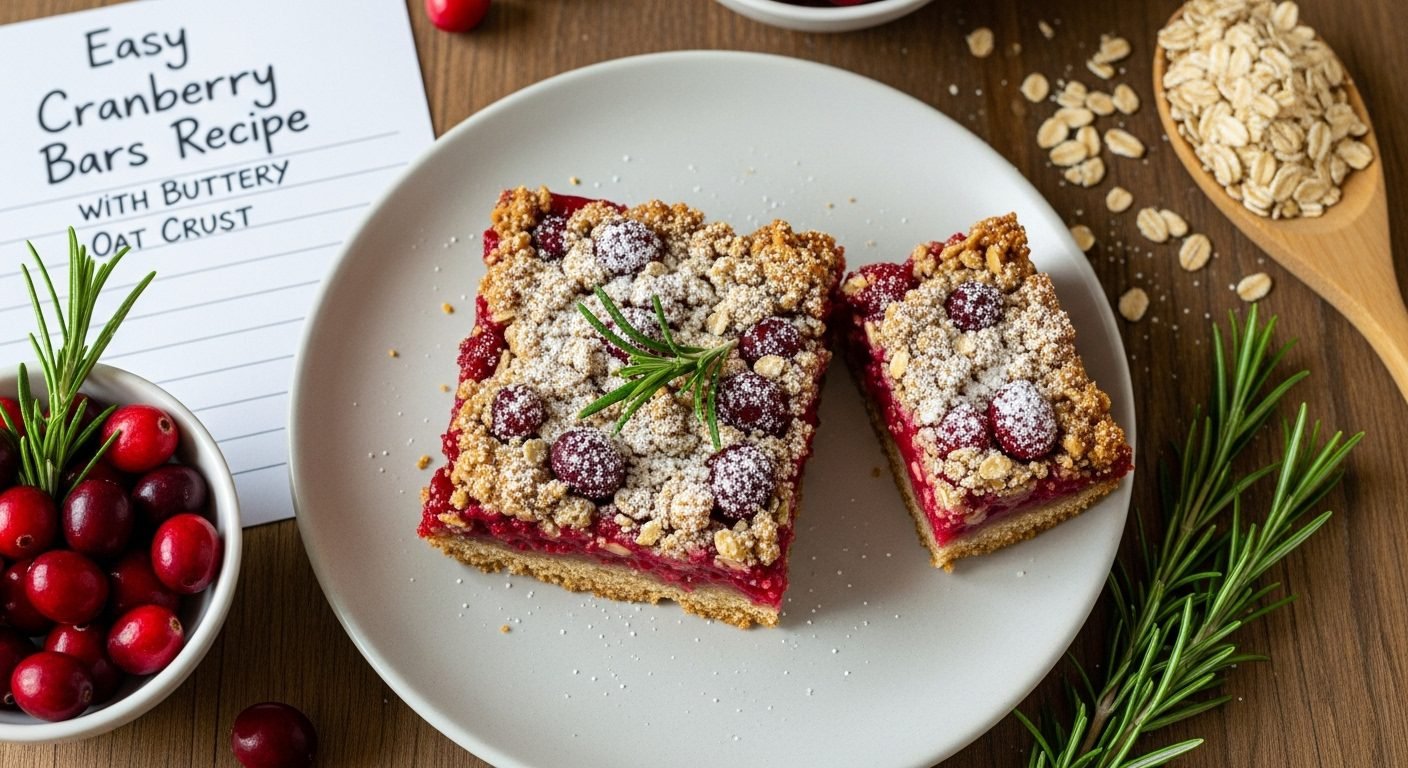
Easy Cranberry Bars Recipe with Buttery Oat Crust
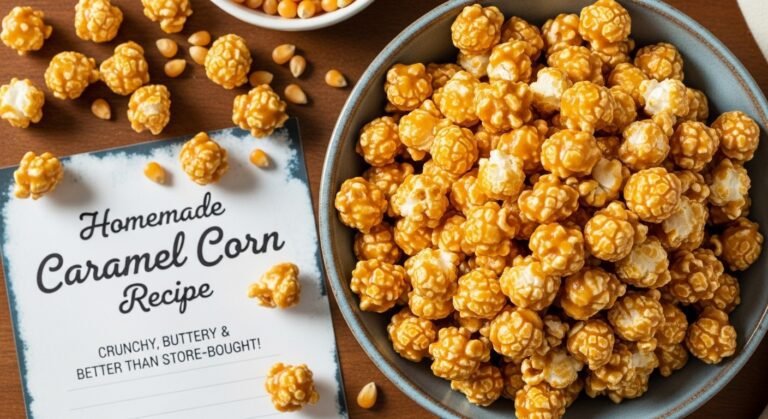
There’s something magical about the combination of tart cranberries nestled between layers of sweet, buttery oat crust. These cranberry bars are the perfect balance of tangy and sweet, with a crumbly texture that melts in your mouth. Whether you’re planning a holiday gathering, need a potluck contribution, or simply want to enjoy a homemade dessert with your afternoon coffee, these bars deliver every single time.
What I love most about this recipe is how it transforms simple pantry ingredients into something truly special. The vibrant ruby-red cranberry filling provides a beautiful pop of color, while the golden oat topping adds a satisfying crunch. These bars look impressive but are surprisingly easy to make, even for beginner bakers. They’re also incredibly versatile – you can enjoy them as a dessert, a sweet breakfast treat, or an afternoon snack with tea.
History / Background
Cranberry bars have their roots deeply planted in American baking tradition, particularly in New England where cranberries have been cultivated for centuries. Native Americans were the first to harvest wild cranberries from bogs, using them for food, medicine, and dye. They introduced cranberries to early European settlers, who quickly incorporated them into their baking repertoire.
The concept of fruit bars – those beloved layered treats with fruit filling sandwiched between buttery crusts – became popular in American home kitchens during the mid-20th century. As convenience baking gained momentum in the 1950s and 1960s, recipes that combined simple ingredients to create impressive results became treasured additions to family recipe boxes. Cranberry bars fit perfectly into this tradition, offering a way to showcase America’s native berry in an accessible, crowd-pleasing format.
What makes cranberry bars particularly special is their connection to holiday baking. While cranberry sauce has long been a Thanksgiving staple, creative home bakers began exploring other ways to feature these tart berries throughout the fall and winter months. Cranberry bars emerged as a festive alternative to traditional cookies and brownies, offering a sophisticated flavor profile that appeals to both adults and children.
The oat-based crust and topping in this recipe reflects another American baking tradition – the use of oats in desserts. Oats were an affordable, pantry-stable ingredient that added wonderful texture and a subtle nutty flavor to baked goods. Combined with butter and brown sugar, they create that irresistible crumbly texture we associate with the best fruit bars and crisps.
Today, cranberry bars remain a beloved treat, especially during the holidays. They’ve become a staple at Christmas cookie exchanges, Thanksgiving dessert tables, and winter potlucks across the country. Their beautiful presentation and perfect balance of flavors make them a timeless classic that continues to bring joy to home bakers and their lucky recipients.
Why You’ll Love This Recipe
These cranberry bars are about to become your new favorite dessert, and for good reason. They strike that perfect balance between being impressive enough for special occasions yet simple enough for a weeknight treat. The recipe is forgiving, reliable, and produces consistently beautiful results every single time.
Here’s why this recipe is absolutely amazing:
- Simple ingredients – Everything you need is probably already in your pantry and fridge
- Make-ahead friendly – Perfect for holiday prep when you need to bake in advance
- Freezer-friendly – Doubles easily and freezes beautifully for up to 3 months
- Beautiful presentation – The ruby-red cranberry layer looks stunning and festive
- Perfect texture contrast – Buttery, crumbly oat layers with a tangy-sweet filling
- Crowd-pleasing flavor – Not too sweet, with a sophisticated tart note from the cranberries
- Budget-friendly – Uses affordable ingredients without any specialty items
- Minimal cleanup – Everything bakes in one pan
- Versatile serving – Works as dessert, breakfast, or a snack
- Holiday favorite – A festive addition to any celebration from Thanksgiving through New Year’s
Ingredient Notes
Let me walk you through the key ingredients that make these cranberry bars absolutely irresistible. Understanding what each component does will help you bake with confidence.
Fresh or Frozen Cranberries: Both work beautifully in this recipe. Fresh cranberries are typically available from September through December, while frozen cranberries are available year-round. No need to thaw frozen cranberries – use them straight from the freezer. The cranberries provide that signature tart flavor and gorgeous color.
All-Purpose Flour: Forms the structure of your crust and topping. You can substitute with a 1:1 gluten-free flour blend if needed, though the texture will be slightly different.
Old-Fashioned Rolled Oats: These create that wonderful crumbly, textured topping and base. Don’t substitute with quick oats or instant oats – they’re too fine and won’t give you the same satisfying texture. Steel-cut oats won’t work either as they won’t soften properly during baking.
Granulated Sugar: Sweetens the cranberry filling. Since cranberries are quite tart, the sugar is essential for balance. You can reduce it slightly if you prefer a tangier bar.
Brown Sugar: Adds moisture and a deeper, caramel-like sweetness to the oat layers. Light or dark brown sugar both work – dark brown sugar will give a slightly more robust molasses flavor.
Butter: Use unsalted butter so you can control the salt level. The butter should be cold and cubed for the crust mixture. Real butter is key here – don’t substitute with margarine as it won’t provide the same rich flavor and texture.
Orange Zest: This is optional but highly recommended! It brightens the cranberry flavor and adds a subtle citrus note that elevates the entire bar. Fresh orange zest is best, but in a pinch, you could use 1/4 teaspoon of orange extract.
Cornstarch: Thickens the cranberry filling so it sets properly and doesn’t make your bars soggy. Don’t skip this ingredient.
Vanilla Extract: Adds warmth and depth to both the crust and the filling.
Salt: Enhances all the other flavors and balances the sweetness. Even a small amount makes a big difference.
Equipment Needed
You won’t need any fancy equipment for these cranberry bars – just a few basic kitchen tools that most home bakers already own. Here’s what you’ll need to gather before you start:
- 9×13-inch baking pan – This is the standard size for bar recipes and ensures proper thickness
- Parchment paper or aluminum foil – For easy removal and cleanup
- Large mixing bowl – For combining the oat crust mixture
- Medium saucepan – To cook the cranberry filling on the stovetop
- Wooden spoon or silicone spatula – For stirring the cranberry mixture
- Measuring cups and spoons – For accurate measurements
- Pastry blender or fork – To cut butter into the oat mixture (you can also use your hands)
- Microplane or zester – If using orange zest
- Sharp knife – For cutting the cooled bars
- Wire cooling rack – To cool the bars completely before cutting
Print

Cranberry Bars Recipe
These delicious cranberry bars feature a buttery oat crust, a tangy-sweet cranberry filling, and a crumbly oat topping. Perfect for holiday gatherings or anytime you’re craving a fruity dessert treat.
- Total Time: 1 hour 10 minutes (plus cooling time)
- Yield: 24 bars 1x
Ingredients
ScaleFor the Oat Crust and Topping:
- 2 cups all-purpose flour
- 2 cups old-fashioned rolled oats
- 1 cup packed light brown sugar
- 1/2 teaspoon baking soda
- 1/2 teaspoon salt
- 1 cup (2 sticks) cold unsalted butter, cubed
- 1 teaspoon vanilla extract
For the Cranberry Filling:
- 4 cups fresh or frozen cranberries
- 1 cup granulated sugar
- 1/4 cup water
- 2 tablespoons cornstarch
- 1 tablespoon orange zest (optional but recommended)
- 1 teaspoon vanilla extract
Instructions
Step 1: Prepare Your Pan and Preheat the Oven
Preheat your oven to 350°F (175°C). Line a 9×13-inch baking pan with parchment paper, leaving an overhang on two sides so you can easily lift the bars out later. You can also use aluminum foil lightly greased with butter. Set the pan aside.
Step 2: Make the Cranberry Filling
In a medium saucepan, combine the cranberries, granulated sugar, water, and orange zest (if using). Place over medium heat and bring to a simmer, stirring occasionally. The cranberries will start to pop and break down after about 5-7 minutes. This is exactly what you want – those pops mean the cranberries are releasing their juices.
In a small bowl, mix the cornstarch with 2 tablespoons of cold water to create a slurry. Once the cranberry mixture is bubbling and most berries have burst, stir in the cornstarch slurry. Continue cooking, stirring constantly, for another 2-3 minutes until the mixture thickens noticeably. It should coat the back of your spoon. Remove from heat and stir in the vanilla extract. Set aside to cool slightly while you prepare the crust.
Step 3: Prepare the Oat Crust Mixture
In a large mixing bowl, whisk together the flour, oats, brown sugar, baking soda, and salt until well combined. Make sure there are no lumps of brown sugar remaining.
Add the cold, cubed butter to the flour mixture. Using a pastry blender, two forks, or your fingertips, work the butter into the dry ingredients until the mixture resembles coarse crumbs. You want some pea-sized pieces of butter remaining – this creates that desirable crumbly texture. The mixture should hold together when you squeeze it in your hand. Drizzle in the vanilla extract and mix to combine.
Step 4: Assemble the Bars
Take about two-thirds of the oat mixture (approximately 4 cups) and press it firmly into the bottom of your prepared baking pan. Use your hands or the bottom of a measuring cup to pack it down evenly. You want a solid, compact base layer that won’t crumble when you cut the bars.
Pour the cranberry filling over the crust, spreading it evenly with a spatula all the way to the edges. Take the remaining oat mixture and crumble it evenly over the top of the cranberry layer. Don’t press it down – you want a loose, crumbly topping that will become golden and crispy during baking.
Step 5: Bake
Place the pan in your preheated oven and bake for 45-50 minutes. The bars are done when the top is golden brown and you can see the cranberry filling bubbling around the edges. The topping should be crisp and lightly browned.
Step 6: Cool and Cut
This is the hardest part – waiting! Remove the pan from the oven and place it on a wire cooling rack. Let the bars cool completely in the pan, at least 2 hours or even overnight. This cooling time is crucial because it allows the cranberry filling to set properly. If you try to cut them while warm, they’ll be messy and won’t hold their shape.
Once completely cool, use the parchment paper overhang to lift the entire slab out of the pan. Place it on a cutting board and use a sharp knife to cut into bars. Wipe the knife clean between cuts for the neatest edges. Cut into 24 bars (6 rows by 4 rows).
Notes
- Fresh vs. Frozen Cranberries: Both work equally well. If using frozen, do not thaw them first – use them straight from the freezer.
- Cranberry Filling Consistency: The filling should be thick and jammy, not watery. Make sure you cook it long enough after adding the cornstarch.
- Cutting Clean Bars: For the cleanest cuts, refrigerate the bars for 30 minutes before cutting. Use a sharp knife and wipe it clean between each cut.
- Storage: Store in an airtight container at room temperature for up to 3 days, or refrigerate for up to 1 week.
- Sweetness Level: If you prefer a less tart filling, you can increase the sugar in the cranberry mixture to 1 1/4 cups.
- Prep Time: 20 minutes
- Cook Time: 50 minutes
- Category: Desert, Bars
- Method: Baking
- Cuisine: American
- Diet: Vegetarian
Nutrition
- Serving Size: 1 bar
- Calories: 185
- Sugar: 18g
- Sodium: 95mg
- Fat: 8g
- Saturated Fat: 5g
- Unsaturated Fat: 2.5g
- Trans Fat: 0g
- Carbohydrates: 27g
- Fiber: 2g
- Protein: 2g
- Cholesterol: 20mg
-
Tips & Variations
One of the best things about this cranberry bar recipe is how adaptable it is. Here are some creative ways to customize it to your taste or dietary needs.
Mixed Berry Version: Replace 2 cups of cranberries with frozen blueberries or raspberries for a mixed berry bar. This mellows the tartness slightly while adding beautiful color variations.
Nutty Topping: Add 1/2 cup of chopped pecans or walnuts to the crumbly topping for extra crunch and richness. Toast the nuts first for even better flavor.
Spiced Cranberry Bars: Add 1/2 teaspoon of ground cinnamon and 1/4 teaspoon of ground ginger to the cranberry filling for a warming, spiced variation perfect for cold weather.
Lemon Cranberry Bars: Swap the orange zest for lemon zest and add 1 tablespoon of fresh lemon juice to the cranberry filling. The lemon-cranberry combination is refreshingly bright.
Coconut Cranberry Bars: Replace 1/2 cup of the oats with sweetened shredded coconut in both the crust and topping for a tropical twist.
White Chocolate Drizzle: Once the bars are completely cool and cut, drizzle melted white chocolate over the top for an elegant finishing touch. This adds sweetness and visual appeal.
Gluten-Free Option: Use a 1:1 gluten-free baking flour and certified gluten-free oats. The texture will be slightly more delicate but still delicious.
Less Sweet Version: Reduce the granulated sugar in the filling to 3/4 cup if you prefer a more tart, less sweet bar. This lets the natural cranberry flavor shine through more prominently.
Pro Chef Tips
Want to take your cranberry bars from good to absolutely incredible? Here are some professional techniques that will elevate your baking game.
Cold Butter is Crucial: Make sure your butter is truly cold when you cut it into the oat mixture. Cold butter creates those wonderful flaky, crumbly layers. If your kitchen is warm, you can even freeze the cubed butter for 10 minutes before using it.
Don’t Overmix: When combining the butter with the dry ingredients, stop as soon as the mixture resembles coarse crumbs. Overmixing develops gluten and can make your bars tough instead of tender and crumbly.
Compact That Bottom Layer: The key to bars that hold together is a well-pressed bottom crust. Use real pressure – the bottom of a measuring cup works great – to pack the oat mixture firmly into the pan. If the base is loose, your bars will crumble when you cut them.
Let the Filling Cool Slightly: Pouring hot filling directly onto the crust can start to melt the butter in the base layer. Let the cranberry mixture cool for 5-10 minutes after cooking. It should still be spreadable but not steaming hot.
Use Parchment Paper: This isn’t just for easy cleanup – the parchment overhang allows you to lift the entire slab out of the pan before cutting. This makes cutting clean, professional-looking bars so much easier.
Patience with Cooling: I know it’s tempting to cut into these bars right away, but resist! The filling needs time to set completely. Room temperature cooling for at least 2 hours is necessary, but overnight is even better. If you’re in a rush, you can refrigerate them to speed up the process.
Sharp Knife, Clean Cuts: Use a large, sharp chef’s knife and wipe it clean with a damp towel between each cut. This prevents dragging cranberry filling and gives you those beautiful, bakery-worthy edges.
Toast Your Oats (Optional): For an extra depth of flavor, spread your oats on a baking sheet and toast them at 350°F for 7-10 minutes until lightly golden and fragrant before adding them to your recipe. This adds a wonderful nutty dimension.
Common Mistakes to Avoid
Even experienced bakers can run into issues with bar recipes. Here are the most common problems and how to avoid them.
Soggy Bottom Crust: This happens when the filling is too watery or when you don’t press the bottom layer firmly enough. Make sure you cook the cranberry filling until it’s thick and jammy, not runny. The cornstarch is essential – don’t skip it or reduce the amount. Also, pack that bottom crust layer down really well to create a solid barrier.
Bars Fall Apart When Cutting: This usually means they weren’t cooled completely before cutting. Cranberry filling needs time to set as it cools. If you cut too early, everything will be messy and won’t hold its shape. Be patient and wait at least 2 hours, or refrigerate for faster setting.
Dry, Crumbly Topping: If you didn’t use enough butter or the butter wasn’t properly incorporated, your topping can turn out dry and sandy instead of moist and crumbly. Make sure you work the butter into the dry ingredients until the mixture can hold together when squeezed. Every bit of the oat mixture should have some butter contact.
Burnt Edges, Raw Center: This indicates your oven temperature might be off or you’re baking on the wrong rack. Always use an oven thermometer to verify temperature accuracy – many ovens run hot or cold. Bake on the center rack for the most even heat distribution. If your edges are browning too quickly, loosely tent the pan with aluminum foil for the last 15 minutes of baking.
Too Tart or Too Sweet: The balance of tart cranberries and sweet topping is what makes these bars special. If your cranberries are especially tart, you might need an extra 1/4 cup of sugar in the filling. Conversely, if you find them too sweet, reduce the granulated sugar slightly. Remember, the tartness of cranberries can vary depending on the variety and whether they’re fresh or frozen.
Storage & Meal Prep
Proper storage ensures your cranberry bars stay fresh and delicious for as long as possible. Here’s everything you need to know about keeping them at their best.
Room Temperature Storage: These bars can be stored in an airtight container at room temperature for up to 3 days. Place a sheet of parchment paper between layers if you’re stacking them to prevent sticking. They’re perfect for setting out on a dessert table or keeping on the counter for easy snacking. The texture stays wonderfully crumbly at room temperature.
Refrigerator Storage: For longer storage, keep your cranberry bars in an airtight container in the refrigerator for up to 1 week. The cool temperature actually helps them maintain their shape even better, making them ideal for make-ahead situations. Let them come to room temperature for 15-20 minutes before serving for the best flavor and texture, or enjoy them cold if you prefer.
Individual Wrapping: If you’re packing these for lunchboxes or gifts, wrap individual bars in plastic wrap or parchment paper. This keeps them fresh and makes them portable. They’re sturdy enough to toss in a lunch bag without falling apart.
Avoiding Sogginess: Always store cranberry bars in a container with a tight-fitting lid. Don’t use containers that are too large – excess air can dry them out. If you notice any moisture building up inside the container, place a paper towel in with the bars to absorb it.
Make-Ahead & Freezer Notes
These cranberry bars are absolutely fantastic for make-ahead baking, which makes them ideal for busy holiday schedules or meal prep situations.
Baking in Advance: You can bake these bars up to 2 days before you need them. Once completely cool, cover tightly with plastic wrap or store in an airtight container. They actually taste even better the next day as the flavors have time to meld together.
Freezing Baked Bars: Cranberry bars freeze beautifully for up to 3 months. Cut them into individual bars first, then wrap each bar tightly in plastic wrap. Place the wrapped bars in a freezer-safe bag or container, removing as much air as possible. Label with the date so you remember when you made them.
Thawing: To thaw frozen bars, remove them from the freezer and let them sit at room temperature for 1-2 hours. You can also thaw them overnight in the refrigerator. They’ll taste just as fresh as the day you baked them.
Freezing Unbaked: You can also freeze the assembled, unbaked bars. Prepare the recipe up through the assembly stage (bottom crust, filling, crumbly topping), then cover tightly with plastic wrap and aluminum foil. Freeze for up to 2 months. When ready to bake, you can bake directly from frozen – just add 10-15 extra minutes to the baking time.
Freezing Just the Filling: The cranberry filling can be made ahead and frozen separately in a freezer-safe container for up to 3 months. Thaw overnight in the refrigerator before using. This is great if you want to prep components in advance to make final assembly quicker.
Best Reheating Method: If you prefer your cranberry bars warm (especially delicious with vanilla ice cream!), place individual bars on a microwave-safe plate and heat for 15-20 seconds. You can also warm them in a 300°F oven for 5-7 minutes. Don’t overheat or the topping can become tough.
Serving Suggestions
Cranberry bars are delicious on their own, but pairing them with the right accompaniments can take them to the next level. Here are some wonderful serving ideas for different occasions.
With Coffee or Tea: These bars are perfect alongside your morning coffee or afternoon tea. The tart cranberry cuts through the richness beautifully. Try them with a caramel latte, English breakfast tea, or even a spiced chai for a cozy treat.
Dessert Presentation: Serve warm bars topped with a scoop of vanilla ice cream or a dollop of fresh whipped cream. The contrast between the warm, tangy bar and cold, creamy topping is absolutely divine. A drizzle of caramel sauce adds extra indulgence.
Holiday Dessert Table: These bars are stunning on a holiday dessert spread. Arrange them on a festive platter with other seasonal treats like gingerbread cookies, peppermint brownies, and sugar cookies. Their ruby-red color adds beautiful visual interest.
Brunch Addition: Include cranberry bars as part of a brunch buffet alongside quiche, fresh fruit, breakfast casseroles, and pastries. They bridge the gap between breakfast pastry and dessert perfectly.
With Cheese: For a sophisticated pairing, serve cranberry bars with a cheese board featuring sharp cheddar, creamy brie, or tangy goat cheese. The sweet-tart cranberries complement cheese beautifully, similar to the classic combination of cranberry sauce and cheese.
Beverage Pairings: Beyond coffee and tea, these bars pair wonderfully with apple cider, hot chocolate, cranberry juice spritzers, or even a glass of dessert wine like late-harvest Riesling or tawny port.
À la Mode: Turn these bars into a restaurant-quality dessert by serving them warm with premium vanilla ice cream, a drizzle of white chocolate, and a sprig of fresh mint for garnish.
Lunchbox Treat: Pack these bars in school lunches or work lunch bags as a special homemade treat. They’re sturdy, not too messy, and don’t require refrigeration for a few hours.
FAQs Section
Can I use dried cranberries instead of fresh or frozen?
While fresh or frozen cranberries work best for this recipe, you can use dried cranberries in a pinch. You’ll need to rehydrate them first – soak 2 1/2 cups of dried cranberries in 1 cup of hot water or orange juice for 30 minutes, then drain before using. The texture and flavor won’t be quite the same, but it’s a workable substitution. You may also want to reduce the sugar slightly since dried cranberries are often already sweetened.
Why are my bars crumbly and falling apart?
The most common reason is cutting them before they’ve cooled completely. The cranberry filling needs time to set as it cools, which acts as a binding agent. Make sure you let the bars cool for at least 2 hours, or refrigerate them for faster setting. Also ensure you pressed the bottom crust layer firmly into the pan – a loose bottom layer won’t hold together properly. Finally, make sure your butter was properly incorporated into the oat mixture; the butter is what binds everything together.
Can I make these bars vegan?
Yes! Replace the butter with vegan butter or coconut oil in a 1:1 ratio. Coconut oil will give a slightly different flavor and texture, but it works well. Make sure all other ingredients (like vanilla extract) are also vegan-friendly. The bars will be slightly less rich but still delicious.
My cranberry filling is watery – what went wrong?
This usually happens when the filling wasn’t cooked long enough after adding the cornstarch. The cornstarch needs to reach a certain temperature to activate its thickening power. Make sure you boil the mixture for at least 2-3 minutes after adding the cornstarch slurry, stirring constantly. The mixture should be noticeably thick and coat the back of your spoon. If your filling is already made and too thin, you can return it to the stove and cook it longer, or add a bit more cornstarch mixed with cold water.
Can I double this recipe?
Absolutely! This recipe doubles beautifully. Use two 9×13-inch pans or one large sheet pan (approximately 13×18 inches). Keep in mind that if using a sheet pan, your bars will be thinner, so reduce the baking time by about 10 minutes and watch carefully for doneness. All the flavor and texture will remain the same.
How do I know when the bars are done baking?
The bars are done when the top is golden brown and crispy-looking, and you can see the cranberry filling bubbling around the edges of the pan. The topping should be lightly browned but not dark or burnt. If you gently press the center with your finger (carefully – it’s hot!), it should feel set, not jiggly. Generally, 45-50 minutes is the perfect baking time, but every oven is different, so use visual cues as your guide.
What’s the best way to cut clean bars?
The secret is patience and the right tools. First, make sure the bars are completely cool – this is non-negotiable. Refrigerating them for 30 minutes before cutting helps even more. Use a large, sharp chef’s knife, and wipe it clean with a damp towel between each cut. Cut with a firm, straight downward motion rather than sawing back and forth. Lifting the entire slab out of the pan using parchment paper overhang before cutting also makes this process much easier.
Conclusion
There you have it – everything you need to make the most incredible cranberry bars that will have everyone asking for the recipe! These bars are truly the perfect addition to your baking repertoire, whether you’re preparing for the holidays, hosting a potluck, or simply treating yourself to something homemade and delicious.
I hope you love these cranberry bars as much as my family and I do. They’ve become a holiday tradition in our house, and I have a feeling they’ll become one in yours too. The combination of that buttery, crumbly oat topping with the tangy-sweet cranberry filling is simply irresistible.
Don’t forget to save this recipe to your Pinterest boards so you can find it easily whenever the cranberry craving hits! And if you make these bars, I’d absolutely love to hear how they turned out for you. Did you try any of the variations? Did they disappear as quickly at your house as they do at mine?
Happy baking, and enjoy every delicious, ruby-red bite of these wonderful cranberry bars!