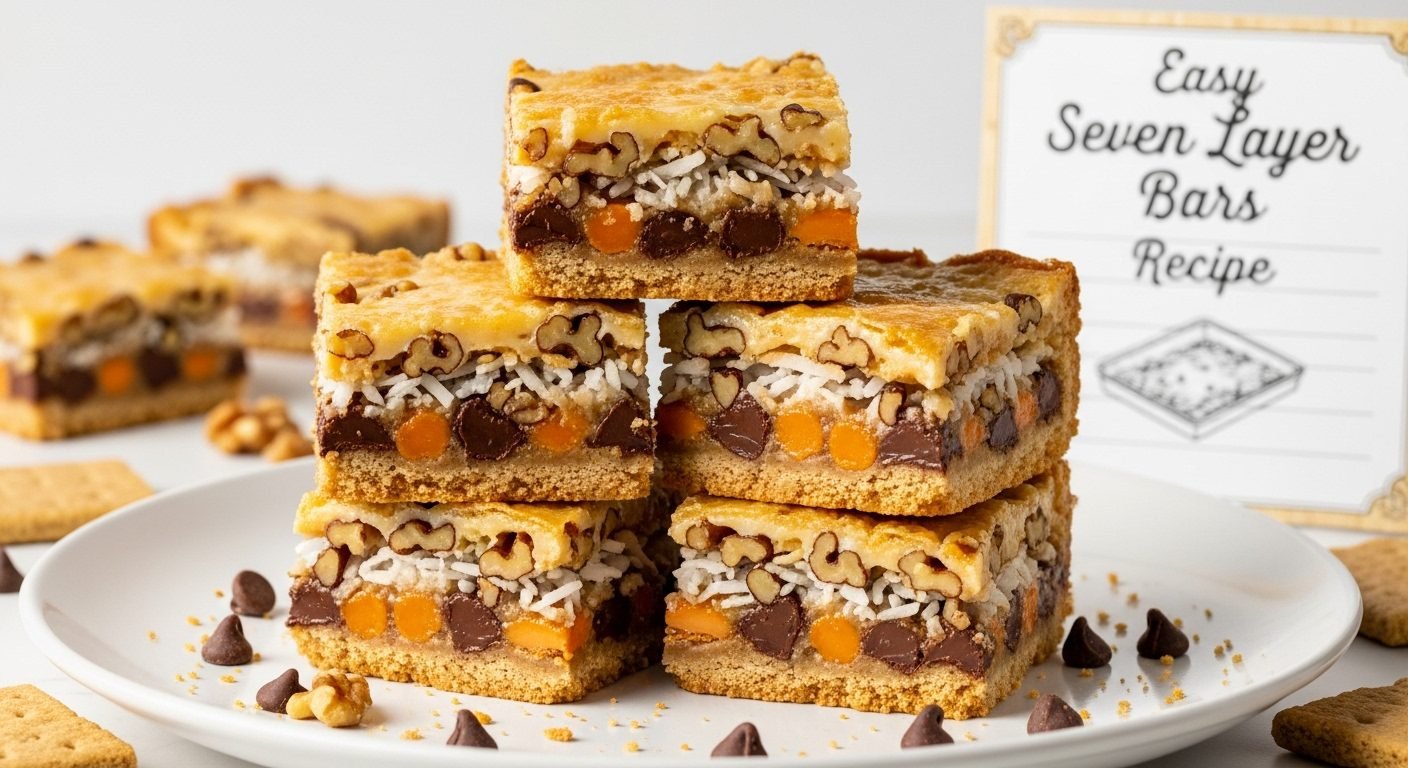
Easy Seven Layer Bars Recipe – Classic Magic Bars with Graham Cracker Crust
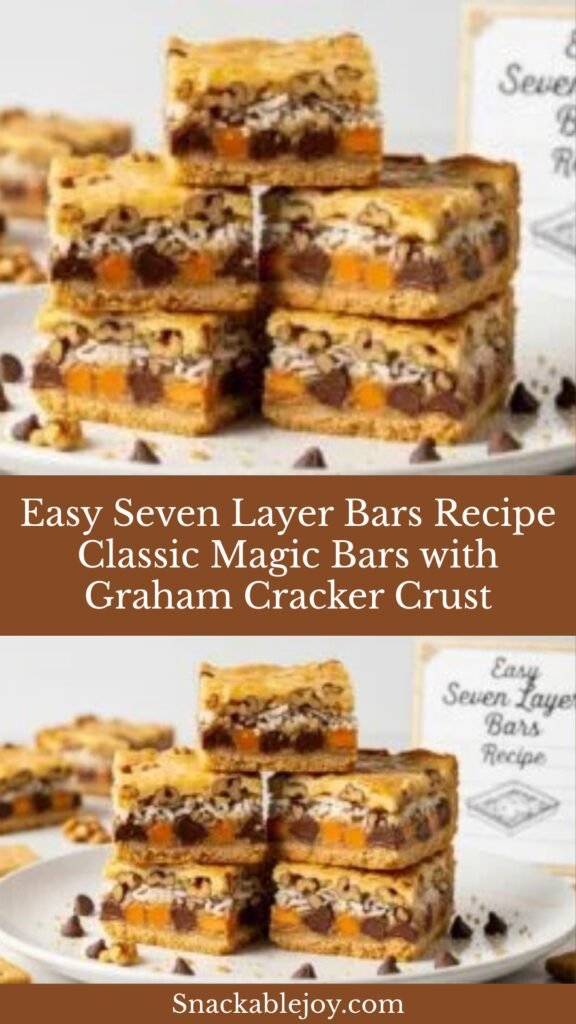
Seven Layer Bars, also known as Magic Bars or Hello Dolly Bars, are an iconic American dessert that’s as easy to make as they are delicious to eat. These no-fuss bars feature seven simple layers: a buttery graham cracker crust, sweetened condensed milk, chocolate chips, butterscotch chips, shredded coconut, chopped nuts, and more chocolate on top. The magic happens in the oven where all these ingredients meld together into gooey, chewy, irresistible bars that taste like they required far more effort than they actually did.
This crowd-pleasing dessert is perfect for bake sales, potlucks, holidays, birthday parties, or any time you need a treat that travels well and feeds a crowd. They’re especially popular during the holiday season, making frequent appearances at Christmas cookie exchanges and Thanksgiving dessert tables. The best part? You don’t need any special baking skills or techniques—if you can stir melted butter and open packages, you can make these bars. They’re foolproof, forgiving, and guaranteed to disappear fast.
History / Background
Seven Layer Bars have a fascinating history that’s deeply intertwined with American food culture and convenience cooking. The recipe first appeared in the 1960s on the back of cans of Eagle Brand Sweetened Condensed Milk, a product that had become a pantry staple in American homes. The Eagle Brand company, owned by Borden (famous for their Elsie the Cow mascot), created this recipe as a way to showcase the versatility of their signature product and encourage home bakers to keep it on hand.
The recipe quickly became a sensation because it perfectly captured the spirit of mid-century American baking: easy, quick, and impressive. During this era, convenience foods were celebrated as modern marvels that freed homemakers from hours of labor. A recipe that required no mixing bowl, no creaming of butter and sugar, and no complicated techniques was revolutionary. You literally just layer ingredients in a pan and bake—it was almost too easy to believe.
The bars earned several nicknames over the decades. “Magic Bars” referred to the magical way sweetened condensed milk binds everything together without any mixing. “Hello Dolly Bars” became popular after Carol Channing starred in the Broadway musical “Hello, Dolly!” in the 1960s—the dessert was as sweet and crowd-pleasing as the show itself. Some Southern bakers call them “Dream Bars” or “Heavenly Hash Bars.”
The original recipe has remained largely unchanged for over 60 years, which is a testament to its perfection. However, home bakers have created countless variations, swapping different chips, nuts, and add-ins while maintaining the essential technique. The bars have become a nostalgic favorite, often passed down through families and associated with childhood memories of holiday baking and special occasions.
What makes Seven Layer Bars so enduring is their perfect balance of flavors and textures. The graham cracker crust provides a sturdy, slightly sweet base. The sweetened condensed milk acts as both sweetener and binder, caramelizing slightly in the oven to create chewiness. The chocolate and butterscotch add richness, the coconut contributes chew and tropical sweetness, and the nuts provide crunch and depth. It’s a symphony of flavors that somehow works perfectly together.
Why You’ll Love This Recipe
These Seven Layer Bars are about to become your go-to dessert for every occasion, and here’s why: they deliver bakery-level deliciousness with almost zero effort. You’ll feel like you’re getting away with something when people rave about them and you know how simple they were to make.
Here’s what makes this recipe exceptional:
- No mixer required – Everything layers into the pan with no mixing needed
- Ready in under an hour – Just 10 minutes prep plus baking time
- Foolproof technique – Nearly impossible to mess up
- Customizable layers – Swap ingredients to match your preferences
- Feeds a crowd – One 9×13 pan makes 24 generous bars
- Budget-friendly – Uses affordable pantry staples
- Kid-friendly – Children can help layer ingredients
- Great for gifting – Travels well and looks impressive
- Make-ahead friendly – Actually tastes better the next day
- Nostalgic appeal – Brings back childhood memories for many
- Crowd-pleaser – Appeals to almost everyone’s taste
- Versatile occasions – Perfect for holidays, bake sales, potlucks, or weeknight treats
Ingredient Notes
Graham Cracker Crumbs: The foundation of these bars, graham cracker crumbs create a sturdy, slightly sweet crust that holds everything together. You’ll need about 1½ cups of crumbs, which equals approximately 10-12 full graham cracker sheets. You can buy pre-made crumbs in a box or make your own by crushing graham crackers in a food processor or placing them in a zip-top bag and crushing with a rolling pin. Homemade crumbs are often fresher and more flavorful. If needed, you can substitute vanilla wafer crumbs or digestive biscuit crumbs.
Unsalted Butter: Melted butter binds the graham cracker crumbs and helps create the crust. Use unsalted butter so you can control the salt level in your bars. The butter should be fully melted and slightly cooled before mixing with crumbs. Don’t substitute with margarine or oil—butter provides the best flavor and texture.
Sweetened Condensed Milk: This is the magic ingredient that makes these bars work. Sweetened condensed milk is thick, sweet, and sticky—very different from evaporated milk (don’t confuse them!). It acts as both sweetener and glue, holding all the layers together while adding caramel-like sweetness. As it bakes, it caramelizes slightly, creating that signature chewy texture. Use a full 14-ounce can. There’s no substitute that works quite the same way.
Semi-Sweet Chocolate Chips: Chocolate is essential for these bars. Semi-sweet chocolate chips provide the perfect balance of sweetness and chocolate flavor. You’ll use them in two layers—scattered in the middle and sprinkled on top. Choose quality chocolate chips for best results. You can substitute milk chocolate chips for a sweeter bar or dark chocolate chips for a more sophisticated flavor.
Butterscotch Chips: These add a distinctive caramel-butter flavor and lovely golden color. Butterscotch chips complement the chocolate beautifully and add complexity to the flavor profile. If you can’t find butterscotch chips or don’t enjoy them, you can substitute with peanut butter chips, white chocolate chips, or just use more chocolate chips.
Sweetened Shredded Coconut: Coconut adds chewiness, tropical flavor, and visual appeal. Use sweetened shredded coconut (not desiccated unsweetened coconut, which is too dry). The moisture in sweetened coconut helps create the right texture. If you’re not a coconut fan, you can reduce the amount or omit it entirely, though the bars won’t be quite as traditional.
Chopped Pecans or Walnuts: Nuts add crunch, richness, and depth of flavor. Pecans are traditional and provide a buttery sweetness, while walnuts offer earthier notes. Chop them coarsely—you want visible pieces for texture. You can also use sliced almonds, chopped cashews, or a mix of nuts. For nut-free bars, substitute with sunflower seeds or crispy rice cereal.
Salt: Just a pinch of salt in the crust enhances all the other flavors and prevents the bars from tasting too sweet. Don’t skip this small but important ingredient.
Equipment Needed
The beauty of Seven Layer Bars is that they require minimal equipment:
- 9×13-inch baking pan – Standard size for this recipe (metal or glass works)
- Parchment paper or aluminum foil – For easy removal and cleanup (optional but highly recommended)
- Medium microwave-safe bowl or small saucepan – For melting butter
- Measuring cups and spoons – For accurate measurements
- Fork or spoon – For mixing crust and spreading layers
- Cutting board and knife – For chopping nuts
- Wire cooling rack – For cooling the bars
- Sharp knife – For cutting clean bars
Print

Seven Layer Bars Recipe
These classic Seven Layer Bars (also known as Magic Bars) feature a buttery graham cracker crust layered with sweetened condensed milk, chocolate chips, butterscotch chips, coconut, and pecans. This no-mixer dessert comes together in just 10 minutes of prep and bakes into gooey, chewy, irresistible bars that are perfect for any occasion. A nostalgic favorite that’s foolproof and always a crowd-pleaser!
- Total Time: 35 minutes (plus cooling time)
- Yield: 24 servings 1x
Ingredients
ScaleFor the Crust:
- 1½ cups (150g) graham cracker crumbs (about 10-12 full graham crackers)
- ½ cup (115g) unsalted butter, melted
- 2 tablespoons granulated sugar
- ¼ teaspoon salt
For the Layers:
- 1 can (14 ounces/396g) sweetened condensed milk
- 1 cup (170g) semi-sweet chocolate chips
- 1 cup (170g) butterscotch chips
- 1⅓ cups (100g) sweetened shredded coconut
- 1 cup (120g) chopped pecans or walnuts
- ½ cup (85g) additional semi-sweet chocolate chips (for topping)
Instructions
Prepare the Pan:
- Preheat and prep: Preheat your oven to 350°F (175°C). Line a 9×13-inch baking pan with parchment paper, leaving some overhang on the sides (this makes it easy to lift the bars out later for clean cutting). Alternatively, you can grease the pan well with butter or cooking spray, but parchment is recommended for easiest removal.
Make the Crust:
- Mix the crust: In a medium bowl, combine graham cracker crumbs, melted butter, sugar, and salt. Stir with a fork until the mixture resembles wet sand and all the crumbs are evenly moistened. The mixture should hold together when squeezed.
- Press the crust: Pour the crumb mixture into the prepared pan. Using your hands or the bottom of a measuring cup, press the crumbs firmly and evenly into the bottom of the pan, creating a compact layer that reaches all corners. Press firmly—a well-packed crust prevents the bars from falling apart. Make sure the crust is level and even.
Layer the Ingredients:
- Add chocolate chips: Sprinkle 1 cup of semi-sweet chocolate chips evenly over the crust. Spread them out so they cover most of the surface but don’t worry about perfection—uneven layers add to the rustic charm.
- Add butterscotch chips: Sprinkle the butterscotch chips evenly over the chocolate chips, distributing them across the entire surface.
- Add coconut: Scatter the shredded coconut evenly over the chips, creating a relatively uniform layer. Don’t press down—just let it sit on top naturally.
- Add nuts: Sprinkle the chopped pecans or walnuts evenly over the coconut layer, again distributing them across the entire surface.
- Pour condensed milk: Here’s the magic moment! Open your can of sweetened condensed milk and drizzle it evenly over the entire surface, trying to cover as much area as possible. Use a spoon to spread it if needed, but it doesn’t have to be perfect—the milk will spread during baking. Make sure to get the edges and corners. The milk will seep down through all the layers, binding everything together.
- Top with more chocolate: Sprinkle the remaining ½ cup of chocolate chips over the top for extra chocolate appeal and a prettier presentation.
Bake:
- Bake the bars: Place the pan in the preheated oven and bake for 25-30 minutes. The bars are done when the edges are golden brown and bubbling, the coconut is lightly toasted, and the center is set but still slightly soft. Don’t overbake—you want these to stay chewy and gooey. If the coconut or nuts start browning too quickly, tent the pan loosely with aluminum foil for the last 5-10 minutes of baking.
Cool and Cut:
- Cool completely: Remove the pan from the oven and place it on a wire cooling rack. Let the bars cool completely in the pan—this takes at least 2 hours and preferably longer. This cooling time is crucial! The bars need to set up completely or they’ll fall apart when you try to cut them. For cleanest cuts, refrigerate for 1-2 hours or even overnight.
- Cut into bars: Once completely cool, use the parchment paper overhang to lift the entire slab out of the pan onto a cutting board. Using a sharp knife (wipe it clean between cuts for the neatest bars), cut into 24 squares (6 rows by 4 rows). For extra clean cuts, you can chill the bars in the refrigerator for an hour before cutting, and heat your knife under hot water, wiping dry between cuts.
Notes
- Cooling is essential: Don’t rush the cooling process. These bars need time to set up properly or they’ll be a gooey mess when you try to cut them.
- Customize your layers: Feel free to swap different chips, nuts, or add-ins based on your preferences. The ratio of ingredients is flexible.
- Prevent sticking: Line your pan with parchment paper for easiest removal and cleanest cuts.
- Even distribution: Try to distribute each layer evenly for consistent bars, but don’t stress about perfection.
- Storage improves texture: These actually taste better the next day after the flavors have melded together.
- Make them thicker: For extra thick bars, use an 8×8 or 9×9 pan and increase baking time by 5-10 minutes.
- Prep Time: 10 minutes
- Cook Time: 25 minutes
- Category: Desert
- Method: Baking
- Cuisine: American
- Diet: Gluten Free
Nutrition
- Serving Size: 1 bar (1/24 of recipe)
- Calories: 245
- Sugar: 24g
- Sodium: 95gm
- Fat: 14g
- Saturated Fat: 7g
- Unsaturated Fat: 6g
- Trans Fat: 0g
- Carbohydrates: 29g
- Fiber: 1g
- Protein: 3g
- Cholesterol: 15mg
Tips & Variations
Triple Chocolate Bars: Omit the butterscotch chips and use dark chocolate chips, milk chocolate chips, and white chocolate chips for a chocolate lover’s dream. Add a tablespoon of cocoa powder to the crust for extra chocolate intensity.
Peanut Butter Lover’s Bars: Replace butterscotch chips with peanut butter chips and use peanuts instead of pecans. Drizzle melted peanut butter over the top after baking for even more peanut butter flavor.
Tropical Paradise Bars: Use white chocolate chips instead of semi-sweet, add ½ cup of dried pineapple chunks or dried mango, and increase the coconut to 2 cups. Add ½ teaspoon coconut extract to the condensed milk before pouring.
S’mores Bars: Add 1 cup of mini marshmallows on top during the last 5 minutes of baking. Use only chocolate chips (no butterscotch) and increase the graham cracker crumbs to 2 cups for more pronounced graham flavor.
Salted Caramel Bars: Drizzle with caramel sauce after baking and sprinkle with flaky sea salt. You can also add caramel bits as one of the layers.
Nut-Free Version: Replace nuts with sunflower seeds, pepitas (pumpkin seeds), or crispy rice cereal for crunch without nuts. This makes them school-safe for bake sales.
Coconut-Free Version: Replace coconut with old-fashioned oats, crispy rice cereal, or crushed pretzels for a different texture. The bars won’t be quite as traditional but still delicious.
Mint Chocolate Bars: Use milk chocolate chips and add ½ teaspoon peppermint extract to the condensed milk. Top with crushed Andes mints or candy canes during holidays.
Lighter Version: Use reduced-fat sweetened condensed milk and reduce the chocolate chips and butterscotch chips to ¾ cup each. The texture will be slightly less rich but still tasty.
Pro Chef Tips
Toast your coconut: For deeper flavor and prettier presentation, toast your coconut before adding it to the bars. Spread it on a baking sheet and bake at 350°F for 3-5 minutes, stirring once, until lightly golden. This creates a more complex, nutty flavor and ensures it gets crispy during baking rather than chewy.
Press that crust firmly: The single most important step is pressing the graham cracker crust firmly into the pan. Use the bottom of a measuring cup or glass to really pack it down. A firmly pressed crust creates a stable foundation that won’t crumble when you cut the bars. Weak, loosely packed crust is the #1 reason these bars fall apart.
Strategic condensed milk distribution: When pouring the sweetened condensed milk, professional bakers pour it in stripes or circles rather than one big blob. This makes it easier to spread evenly across the surface. Use a spoon or offset spatula to gently spread it to the edges and corners—getting condensed milk all the way to the edges helps seal everything together.
The toothpick test doesn’t apply: Unlike cakes or brownies, you can’t use a toothpick to test doneness. These bars should look golden on top with bubbling edges and slightly soft in the center. They’ll firm up dramatically as they cool. If you overbake them, they’ll be dry and hard instead of chewy and gooey.
Cold cutting technique: For the absolute cleanest cuts, refrigerate the cooled bars for 1-2 hours until they’re completely cold and firm. Then use a large sharp knife, heating it under hot water and wiping it dry between each cut. This technique gives you bakery-perfect squares with clean edges.
Layer timing strategy: Some professional bakers bake the crust for 5 minutes alone before adding layers. This creates an extra-sturdy foundation. While not necessary, it can help if you’re having issues with the bars holding together.
Double the batch: These freeze beautifully, so consider making a double batch using two pans. Having Seven Layer Bars in your freezer is like having dessert insurance for unexpected guests or last-minute needs.
Common Mistakes to Avoid
Mistake #1: Cutting the bars before they’re completely cool. This is the most common error and the fastest way to end up with a crumbly mess instead of neat bars. The sweetened condensed milk needs time to set up and firm as it cools—this takes at least 2 hours at room temperature or 1 hour in the refrigerator. If you try to cut them warm or even slightly warm, they’ll fall apart and you’ll have a gooey disaster. Patience is key!
Mistake #2: Not pressing the crust firmly enough. A loosely packed crust will crumble and fall apart when you cut the bars. You need to really press those graham cracker crumbs firmly and evenly into the pan, creating a compact layer. Use the bottom of a measuring cup or your hands to pack it down hard. Think of it like packing snow for a snowball—firm and cohesive.
Mistake #3: Confusing sweetened condensed milk with evaporated milk. These are completely different products! Sweetened condensed milk is thick, sweet, and sticky—it’s milk with most of the water removed and lots of sugar added. Evaporated milk is thin, unsweetened, and pourable. Using evaporated milk will result in bars that don’t set up properly and aren’t sweet enough. Always check the label carefully.
Mistake #4: Overbaking the bars. These bars should come out of the oven looking slightly underdone in the center—they’ll firm up dramatically as they cool. If you bake them until they look completely set and brown all over, they’ll be dry and hard instead of chewy and gooey. Look for golden edges, lightly toasted coconut, and a center that still looks slightly soft and shiny.
Mistake #5: Skipping the parchment paper. While you can make these without lining the pan, parchment paper makes removal SO much easier and results in much cleaner cuts. Without it, you’ll have to cut the bars in the pan and try to remove them one at a time, which often results in broken, messy bars. The parchment overhang lets you lift the entire slab out for perfect cutting.
Storage & Meal Prep
Room Temperature Storage: Seven Layer Bars can be stored at room temperature for 2-3 days if your kitchen isn’t too warm. Store them in an airtight container with parchment paper between layers to prevent sticking. They’ll stay chewy and delicious, though slightly softer than when refrigerated.
Refrigerator Storage: For longer storage, keep the bars in an airtight container in the refrigerator for up to 1 week. They actually taste great cold—the texture becomes firmer and fudgier. Let them sit at room temperature for 10-15 minutes before serving if you prefer a softer texture. Layer them with parchment paper between rows to prevent sticking.
Preventing Stickiness: These bars can be quite sticky due to the condensed milk. To prevent them from sticking together during storage, place small squares of parchment paper or wax paper between layers in your storage container.
Texture Over Time: These bars actually improve over time as the flavors meld together. Day 2 is often even better than Day 1. The sweetened condensed milk continues to distribute through the layers, creating an even more cohesive bar.
Individual Wrapping: For lunch boxes, gifting, or bake sales, wrap individual bars in plastic wrap or place them in small cellophane bags tied with ribbon. They travel beautifully and stay fresh for several days.
Make-Ahead & Freezer Notes
Make-Ahead Instructions: Seven Layer Bars are an excellent make-ahead dessert. You can bake them up to 3 days before you need them and store them in an airtight container in the refrigerator. Many bakers swear they taste even better after 24-48 hours when the flavors have fully melded together. This makes them perfect for holiday baking marathons—make them early in the week and check them off your list.
Freezing Instructions: These bars freeze exceptionally well for up to 3 months, making them perfect for advance baking or for keeping on hand for unexpected guests. To freeze, let the bars cool completely, then cut them into individual servings. Wrap each bar individually in plastic wrap, then place all the wrapped bars in a freezer-safe zip-top bag or airtight container. This prevents freezer burn and makes it easy to grab just one or two bars at a time.
Thawing Method: Thaw frozen bars in the refrigerator overnight for best texture, or let them sit at room temperature for 1-2 hours. You can also enjoy them partially frozen—they’re delicious with a slightly firm, fudgy texture when still cold from the freezer. Some people prefer them this way!
Freeze Before or After Cutting: You can freeze the entire uncut slab if you prefer. Wrap it tightly in plastic wrap, then aluminum foil, and freeze for up to 3 months. Thaw overnight in the refrigerator, then cut into bars. However, cutting before freezing makes them more convenient to grab one at a time.
Gift-Giving: Frozen bars are perfect for gifting. Place individually wrapped frozen bars in a decorative tin or box—they’ll stay fresh during transport and the recipient can enjoy them over several days.
Serving Suggestions
Seven Layer Bars are delicious on their own, but here are some wonderful ways to serve and present them:
Classic Presentation: Arrange bars on a pretty platter lined with parchment paper or a decorative doily. Dust lightly with powdered sugar for a finished look, or drizzle with melted chocolate for extra elegance.
Ice Cream Sundae Base: Crumble a Seven Layer Bar over vanilla ice cream for an incredible sundae. The contrast of cold ice cream and chewy bar is amazing. Drizzle with hot fudge or caramel sauce.
Coffee Pairing: These bars are perfect alongside coffee, cappuccino, or espresso. The sweet richness balances beautifully with bitter coffee. They’re ideal for afternoon coffee breaks or dessert after dinner.
Dessert Boards: Include Seven Layer Bars on a dessert charcuterie board alongside fresh fruit, chocolate-covered strawberries, cookies, and brownies. Cut them into smaller bite-sized pieces for easier sharing.
Beverage Pairings: Serve with cold milk (classic!), hot chocolate, coffee, or tea. For adults, they pair surprisingly well with port, bourbon, or sweet dessert wines.
Holiday Cookie Platters: These bars are a staple on Christmas cookie plates. Their colorful layers look festive alongside sugar cookies, fudge, and other holiday treats.
Casual Gatherings: Perfect for bake sales, potlucks, tailgating, picnics, birthday parties, or any casual gathering where you need a portable dessert that feeds a crowd.
Dress Them Up: For more elegant occasions, cut into smaller squares, place each in a mini cupcake liner, and arrange on a tiered serving stand.
FAQs Section
Can I make these in a different size pan?
Yes! For thicker bars, use an 8×8 or 9×9 inch pan and increase the baking time by 5-10 minutes. For thinner, crispier bars, use a larger jelly roll pan (10×15 inches), but watch carefully as they’ll bake faster—check at 20 minutes. A 9×13 pan is the standard size that creates bars with the ideal thickness and texture.Why are my bars falling apart when I cut them?
The most common reason is cutting them before they’re completely cool. The bars need at least 2 hours to cool completely so the sweetened condensed milk can set up properly. Also check that you pressed the crust firmly enough—a loose crust won’t hold together. Finally, make sure you used sweetened condensed milk (not evaporated milk) and the full amount.Can I leave out the coconut or nuts?
Absolutely! While these ingredients are traditional, you can customize based on preferences or allergies. Replace coconut with more chocolate chips, crushed pretzels, or crispy rice cereal. Replace nuts with seeds (sunflower or pumpkin), more coconut, or additional chips. The bars will still be delicious, just different from the classic version.Do these need to be refrigerated?
Not necessarily, but it depends on your climate and how long you’re storing them. In cool weather, they’re fine at room temperature for 2-3 days. In hot or humid weather, refrigerate them to prevent the chocolate from melting and the bars from becoming too soft. Refrigeration also extends their shelf life to about a week.Can I use homemade sweetened condensed milk?
While possible, it’s not recommended. Store-bought sweetened condensed milk has the exact consistency and sugar content needed for these bars to set up properly. Homemade versions can be too thin or too thick, resulting in bars that don’t hold together well. The canned product is specifically formulated for baking.Why is my coconut burning before the bars are done?
If the coconut on top is browning too quickly, tent the pan loosely with aluminum foil for the last 5-10 minutes of baking. This allows the bars to finish cooking while protecting the coconut from over-browning. Using sweetened coconut rather than unsweetened also helps since it has more moisture.Can I make these gluten-free?
Yes! Simply substitute gluten-free graham crackers or gluten-free cookies (like vanilla wafers or digestive biscuits) for the crust. Make sure your chocolate chips and other add-ins are certified gluten-free. The rest of the ingredients are naturally gluten-free.Conclusion
Congratulations—you now have everything you need to make perfect Seven Layer Bars that will have everyone asking for the recipe! These magical bars are proof that simple doesn’t mean boring, and easy doesn’t mean less impressive. With just a few pantry staples and minimal effort, you’ll create a dessert that looks beautiful, tastes amazing, and brings joy to everyone who tries them.
The beauty of this recipe is its flexibility. Once you master the basic technique, you can customize the layers to match any occasion, preference, or dietary need. They’re equally at home at elegant holiday parties and casual weekend barbecues. And the fact that they’re make-ahead friendly and freeze beautifully means you can always have a homemade dessert ready when you need one.
I hope these Seven Layer Bars become a beloved tradition in your home just like they are in so many families across America. There’s something special about a recipe that’s been bringing smiles for over 60 years—it’s comfort food at its finest.
If you try this recipe, I’d love to hear how they turned out! Drop a comment below sharing your experience, any creative variations you tried, or questions you might have. And if you loved these bars (which I know you will), please share this recipe on Pinterest so other home bakers can discover this classic treat too.
Happy baking, and here’s to creating sweet memories in your kitchen! 🍫🥥✨