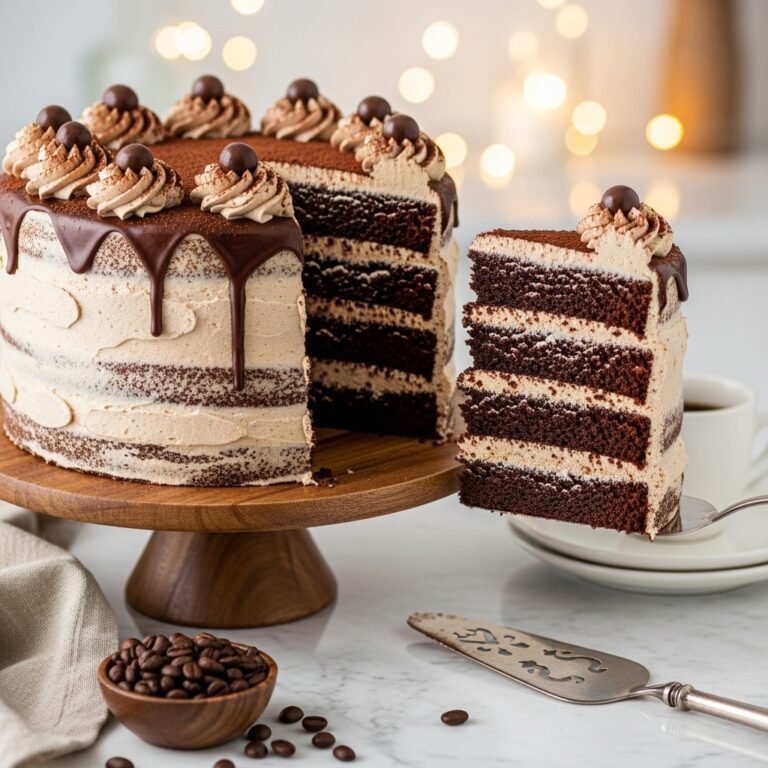
Best Mocha Cake Recipe – Rich, Moist Coffee Chocolate Layer Cake
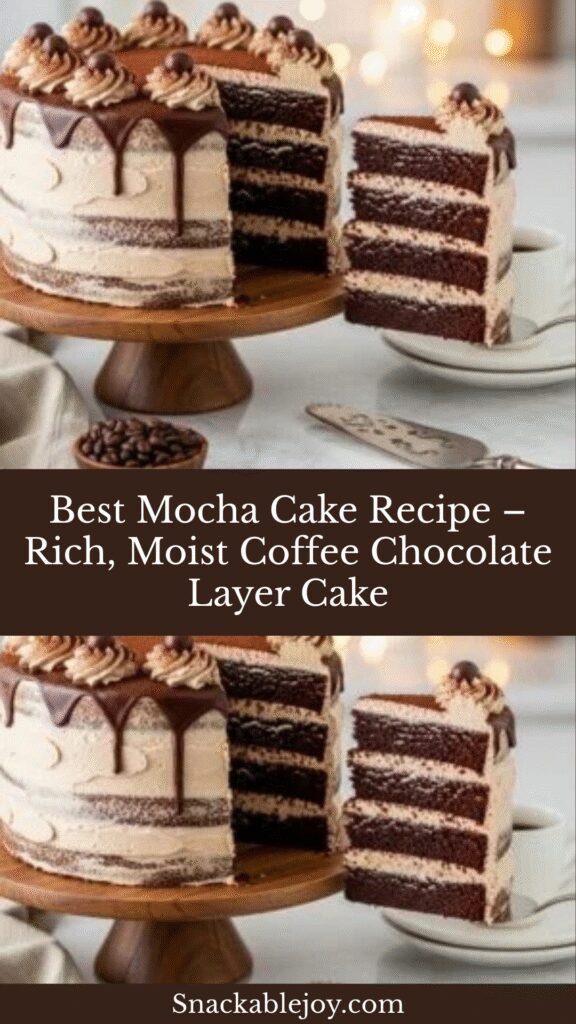
Imagine the most decadent chocolate cake you’ve ever tasted, but with a sophisticated twist—bold espresso that deepens every bite and elevates the chocolate to new heights. That’s exactly what this Mocha Cake delivers. This stunning layered cake combines rich chocolate cake infused with coffee, silky mocha buttercream frosting, and a beautiful presentation that looks like it came straight from a fancy bakery. But here’s the secret: it’s surprisingly simple to make at home.
Mocha Cake is the perfect choice when you want to impress at birthdays, celebrations, dinner parties, or any time you’re craving something truly special. Coffee lovers especially adore this cake because the espresso doesn’t just add coffee flavor—it actually amplifies the chocolate, making it taste richer and more complex. The combination creates a sophisticated dessert that’s not overly sweet but packed with deep, satisfying flavor. Whether you’re celebrating a milestone or just treating yourself to a weekend baking project, this mocha cake delivers bakery-quality results that will have everyone begging for seconds and asking for the recipe.
History / Background
The marriage of coffee and chocolate is a culinary love story that spans centuries and continents. Chocolate originated in Mesoamerica, where the ancient Aztecs and Mayans consumed cacao as a bitter beverage, while coffee has its roots in Ethiopia before spreading through the Arab world and eventually to Europe. When these two ingredients finally met in European cafés during the 17th and 18th centuries, pastry chefs quickly discovered that they were flavor soulmates.
The term “mocha” itself has an interesting history. It originally referred to coffee from the port city of Mocha in Yemen, known for producing beans with naturally chocolatey undertones. Over time, “mocha” evolved to describe the combination of coffee and chocolate in Western cuisine—particularly in beverages like the mocha latte that became popular in American and European coffee houses.
Mocha cake as we know it today emerged from European café culture, particularly in Austria and France, where elaborate coffee houses served sophisticated pastries alongside their coffee drinks. The French were especially masterful at creating coffee-flavored desserts, and their techniques for making génoise and buttercream provided the foundation for the layered mocha cakes that became popular worldwide. By the mid-20th century, mocha cake had become a staple in American bakeries, often featured as a special occasion cake that felt more grown-up and refined than traditional chocolate cake.
Today, mocha cake remains beloved because it perfectly balances indulgence with sophistication. The coffee doesn’t overpower—instead, it enhances the chocolate, creating a depth of flavor that makes this cake irresistible to both coffee enthusiasts and chocolate lovers. It’s become a Pinterest favorite because it photographs beautifully and offers home bakers a chance to create something truly impressive.
Why You’ll Love This Recipe
This Mocha Cake isn’t just another chocolate cake recipe—it’s the cake that will become your go-to for every special occasion. The combination of deep chocolate flavor enhanced by espresso, paired with clouds of mocha buttercream, creates something truly memorable that tastes as amazing as it looks.
Here’s why this recipe deserves a permanent spot in your baking repertoire:
- Incredibly moist texture – The combination of buttermilk, oil, and hot coffee creates a tender, melt-in-your-mouth crumb that stays fresh for days
- Easy one-bowl method – Despite looking impressive, this cake uses a simple mixing technique that doesn’t require special skills or complicated steps
- Coffee amplifies chocolate – The espresso doesn’t make it taste like coffee cake—it makes the chocolate taste richer, deeper, and more intense
- Bakery-quality frosting – The mocha buttercream is silky smooth, pipes beautifully, and tastes incredible without being too sweet
- Make-ahead friendly – The cake layers can be baked in advance and frozen, making it perfect for planning ahead for parties
- Crowd-pleaser for adults – This sophisticated flavor profile appeals to grown-up palates while still being accessible and delicious
- Customizable layers – Make it as a two-layer cake for casual gatherings or go all-out with three or four layers for show-stopping celebrations
- Impressive presentation – The dark, rich color and smooth frosting create a stunning look that photographs beautifully for Instagram and Pinterest
Ingredient Notes
Understanding your ingredients helps you achieve the best results every time. Here’s what you need to know about each component:
All-Purpose Flour: The foundation of the cake structure. Measure carefully by spooning into the cup and leveling off, or use a kitchen scale for precision. Don’t substitute with cake flour as it will change the texture significantly.
Cocoa Powder: Use unsweetened cocoa powder—either natural or Dutch-process works beautifully. Dutch-process gives a darker, richer color and more mellow flavor, while natural cocoa provides a more intense chocolate taste with slight tanginess. Don’t use sweetened cocoa mix.
Instant Espresso Powder: This is the secret ingredient that makes chocolate taste more chocolatey. It dissolves easily and provides concentrated coffee flavor. Find it in the coffee aisle or baking section. Regular instant coffee works in a pinch but use 1.5 times the amount.
Hot Coffee or Water: Adding hot liquid to cocoa powder “blooms” it, intensifying the chocolate flavor. Use freshly brewed strong coffee for maximum flavor, or hot water if you prefer less coffee taste.
Buttermilk: Creates incredible tenderness and a slight tang that balances the sweetness. The acidity also reacts with baking soda for perfect rise. No buttermilk? Make your own by adding 1 tablespoon white vinegar or lemon juice to 1 cup of milk and letting it sit for 5 minutes.
Vegetable Oil: Unlike butter, oil creates an extra moist texture that stays soft even when refrigerated. Canola, vegetable, or light olive oil all work well. Don’t substitute with melted butter or the texture will be denser.
Eggs: Use large eggs at room temperature—they incorporate more easily and create better structure. Take them out of the fridge 30 minutes before baking or place in warm water for 5 minutes.
Granulated Sugar: Provides sweetness, moisture, and helps create that tender crumb. Don’t reduce the amount significantly as sugar plays a structural role in cakes.
Baking Powder and Baking Soda: These leavening agents work together to create the perfect rise. Make sure yours are fresh (check expiration dates) or your cake won’t rise properly.
Vanilla Extract: Pure vanilla extract adds warmth and rounds out all the flavors. It’s especially important in chocolate cakes to prevent them from tasting flat.
Butter for Frosting: Use unsalted butter softened to room temperature for the buttercream. It should be soft enough to leave an indent when pressed but not greasy or melted. Quality butter makes a huge difference in frosting flavor.
Powdered Sugar: Also called confectioners’ sugar, this is essential for smooth, creamy buttercream. Sift it if it’s lumpy to prevent gritty frosting.
Equipment Needed
Having the right tools makes baking this cake so much easier:
- Two 9-inch round cake pans – For classic layer cake. You can also use three 8-inch pans for a taller cake
- Parchment paper – Line the bottom of pans to ensure cakes release perfectly
- Large mixing bowl – For the one-bowl cake batter mixing method
- Electric mixer (stand or hand) – Essential for making fluffy, smooth buttercream frosting
- Whisk and rubber spatula – For mixing batter and scraping down bowls
- Measuring cups and spoons – For accurate measurements (or better yet, a kitchen scale)
- Cooling racks – Allow air to circulate around cakes for even cooling
- Offset spatula – Makes frosting the cake layers smooth and professional-looking
- Cake turntable (optional but helpful) – Makes frosting and decorating much easier
- Piping bags and tips (optional) – If you want to add decorative frosting details
- Serrated knife or cake leveler – For trimming domed tops to create flat, even layers
Print

Mocha Cake Recipe
This decadent Mocha Cake features moist, tender chocolate cake layers infused with espresso, filled and frosted with silky smooth coffee buttercream. It’s the perfect sophisticated dessert for coffee lovers and special occasions, combining rich chocolate with bold coffee flavor in every bite.
- Total Time: 2 hours 15 minutes
- Yield: 12 servings 1x
Ingredients
ScaleFor the Mocha Cake:
- 2 cups all-purpose flour
- 2 cups granulated sugar
- 3/4 cup unsweetened cocoa powder
- 2 teaspoons baking powder
- 1 1/2 teaspoons baking soda
- 1 teaspoon salt
- 2 large eggs, at room temperature
- 1 cup buttermilk, at room temperature
- 1 cup strong brewed coffee, hot
- 1/2 cup vegetable oil
- 2 teaspoons vanilla extract
- 2 tablespoons instant espresso powder
For the Mocha Buttercream:
- 1 1/2 cups unsalted butter, softened to room temperature (3 sticks)
- 5 cups powdered sugar, sifted
- 1/4 cup unsweetened cocoa powder
- 3 tablespoons instant espresso powder
- 1/4 cup heavy cream or whole milk
- 2 teaspoons vanilla extract
- Pinch of salt
For Garnish (optional):
- Chocolate shavings or curls
- Chocolate-covered espresso beans
- Cocoa powder for dusting
Instructions
Step 1: Prepare Pans and Preheat Oven
Preheat your oven to 350°F (175°C). Grease two 9-inch round cake pans thoroughly with butter or cooking spray. Line the bottoms with parchment paper circles, then grease the parchment too. Lightly dust with cocoa powder and tap out the excess. This ensures your cakes release perfectly without sticking.Step 2: Mix Dry Ingredients
In a large mixing bowl, whisk together the flour, sugar, cocoa powder, baking powder, baking soda, and salt until well combined and no lumps remain. The thorough mixing ensures even distribution of leavening agents for consistent rise throughout the cake.Step 3: Combine Wet Ingredients
In a medium bowl or large measuring cup, whisk together the eggs, buttermilk, oil, and vanilla extract until smooth and fully incorporated. The mixture should be homogeneous with no streaks of egg.Step 4: Bloom the Espresso
Stir the instant espresso powder into the hot coffee until completely dissolved. This “blooms” both the coffee and will bloom the cocoa powder when added, intensifying all the flavors. Let it cool slightly if it’s boiling hot.Step 5: Mix the Batter
Add the wet ingredients to the dry ingredients and mix with a whisk or electric mixer on low speed just until combined—don’t overmix. The batter will be thick at this point. Now pour in the hot coffee mixture and mix until smooth. The batter will be quite thin and liquid—this is correct! The thin batter is what creates that incredibly moist texture.Step 6: Bake the Cakes
Divide the batter evenly between the prepared pans (use a kitchen scale for precision if you have one). Bake for 30-35 minutes, until a toothpick inserted in the center comes out clean or with just a few moist crumbs, and the cake springs back when lightly pressed. The cakes should pull away slightly from the pan edges.Step 7: Cool Completely
Let the cakes cool in the pans for 10 minutes, then run a knife around the edges and invert onto cooling racks. Peel off the parchment paper and let cool completely before frosting—at least 1 hour. If you try to frost warm cakes, the buttercream will melt into a mess.Step 8: Make the Mocha Buttercream
In a large bowl, beat the softened butter with an electric mixer on medium-high speed for 3-4 minutes until light, fluffy, and pale in color. Dissolve the espresso powder in 2 tablespoons of the heavy cream. Sift together the powdered sugar and cocoa powder. Add half of the sugar mixture to the butter and beat on low speed until incorporated. Add the espresso mixture, vanilla, salt, and remaining cream, then beat until smooth. Add the remaining sugar mixture and beat on low, then increase to medium-high and beat for 3-4 minutes until light and fluffy.Step 9: Assemble the Cake
If your cakes have domed tops, use a serrated knife to level them off for flat, even layers. Place one cake layer on a serving plate or cake board. Spread about 1 cup of buttercream on top, creating an even layer all the way to the edges. Place the second cake layer on top, pressing down gently. Apply a thin “crumb coat” of frosting all over the cake to seal in crumbs, then refrigerate for 15 minutes. Finish with the remaining frosting, smoothing it with an offset spatula.Step 10: Decorate and Serve
Garnish with chocolate shavings, chocolate-covered espresso beans, or a dusting of cocoa powder if desired. For clean slices, use a sharp knife dipped in hot water and wiped dry between each cut. Serve at room temperature for the best flavor and texture.Notes
- The cake batter will be very thin—don’t worry, this is correct and creates the moist texture
- Make sure all ingredients are at room temperature for the smoothest batter
- Don’t skip the cooling time before frosting or your buttercream will melt
- For more intense coffee flavor, increase espresso powder to 3 tablespoons in the cake
- Store frosted cake covered at room temperature for 1 day, or refrigerate for up to 5 days
- Prep Time: 25 minutes
- Cook Time: 30 minutes
- Category: Desert
- Method: Baking
- Cuisine: American
- Diet: Vegetarian
Nutrition
- Serving Size: 1 slice (1/12 of cake)
- Calories: 645
- Sugar: 72g
- Sodium: 420mg
- Fat: 32g
- Saturated Fat: 16g
- Unsaturated Fat: 14g
- Trans Fat: 0g
- Carbohydrates: 87g
- Fiber: 3g
- Protein: 6g
- Cholesterol: 95mg