The Ultimate Dulce de Leche Cake Recipe – Moist, Creamy Irresistible

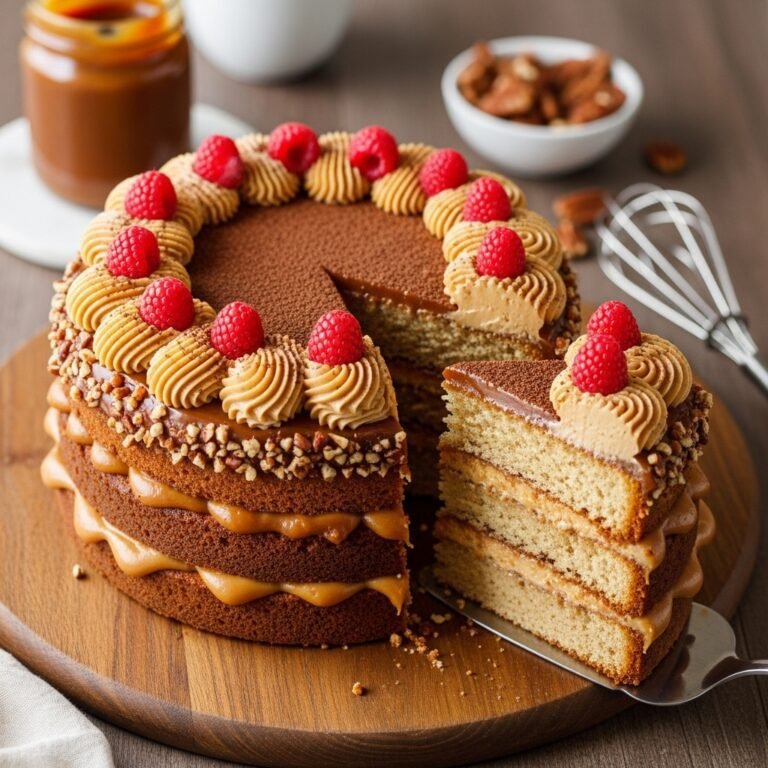
If you’ve ever tasted the rich, creamy sweetness of dulce de leche, you know it’s absolutely heavenly. Now imagine that caramel goodness baked into a tender, moist cake that melts in your mouth with every bite. This Dulce de Leche Cake is the dessert dreams are made of – layers of fluffy vanilla cake soaked in dulce de leche, frosted with creamy caramel buttercream, and drizzled with even more dulce de leche on top.
This show-stopping dessert is perfect for birthdays, holiday gatherings, dinner parties, or whenever you want to impress your guests with something truly special. It looks elegant and tastes like it came from a fancy bakery, but I promise you can make it right in your own kitchen. Whether you’re celebrating a milestone or just treating yourself on a Tuesday night (no judgment here!), this cake delivers pure indulgence in every slice.
History / Background
Dulce de leche, which translates to “sweet milk” or “candy of milk” in Spanish, has been beloved across Latin America for centuries. While its exact origins are debated – with Argentina, Uruguay, and several other countries claiming to be its birthplace – one thing is certain: this caramelized milk confection has captured hearts worldwide.
The most popular origin story comes from Argentina in the early 19th century. Legend has it that a maid was cooking milk and sugar for General Juan Manuel de Rosas when she was called away. She forgot about the pot on the stove, and when she returned, the milk had transformed into a thick, golden caramel spread. What could have been a disaster became a culinary treasure!
Traditional dulce de leche is made by slowly simmering milk and sugar for hours until it caramelizes into a thick, spreadable consistency. Different regions have their own variations – some add vanilla, others prefer it darker and more intensely caramelized. In Mexico, you’ll find “cajeta” made with goat’s milk, while Colombians enjoy “arequipe.”
Dulce de leche cake became popular as Latin American baking traditions spread globally. Bakers discovered that this luscious caramel could elevate a simple cake into something extraordinary. Today, it’s a staple at celebrations across South America and has gained a devoted following in the United States, especially among home bakers looking to create something memorable.
Why You’ll Love This Recipe
This Dulce de Leche Cake is about to become your new favorite dessert, and here’s why. The combination of moist vanilla cake layers with rich caramel creates a flavor profile that’s sophisticated yet comforting. It’s the kind of cake that makes people close their eyes and smile after the first bite.
Here’s what makes this recipe absolutely irresistible:
- Incredibly moist texture – The dulce de leche keeps the cake tender for days
- Not overly sweet – Balanced flavors that let the caramel shine without being cloying
- Impressive presentation – Looks bakery-quality but surprisingly achievable at home
- Make-ahead friendly – Actually tastes better the next day as flavors meld
- Crowd-pleaser guaranteed – I’ve never met anyone who didn’t love this cake
- Versatile for any occasion – Dress it up or down depending on your event
- Uses accessible ingredients – No hard-to-find specialty items needed
- Feeds a crowd – One cake serves 12-16 people generously
Whether you’re a confident baker or just starting your baking journey, this recipe guides you through each step with clear instructions. The result? A stunning cake that’ll have everyone asking for the recipe.
Ingredient Notes
Let’s talk about what goes into making this magnificent cake. Understanding your ingredients helps you make smart substitutions and ensures the best results.
All-Purpose Flour: The foundation of your cake structure. I recommend measuring by weight if possible, or using the spoon-and-level method to avoid dense cake. Cake flour can be substituted for an even more tender crumb, but all-purpose works beautifully.
Dulce de Leche: The star of the show! You can use store-bought (look for it in the Latin foods aisle or baking section) or make your own by simmering a can of sweetened condensed milk. I prefer Nestlé La Lechera or Häagen-Dazs brands for consistent quality. You’ll need it for three components: soaking the cake layers, mixing into the frosting, and drizzling on top.
Unsalted Butter: Provides richness and helps create a tender crumb. Always use unsalted so you can control the salt level. Make sure it’s at room temperature for proper creaming – it should leave a slight indent when pressed but not be greasy or melted.
Granulated Sugar: Sweetens the cake and helps create structure. Don’t reduce the amount as it affects texture.
Eggs: Bind ingredients together and add moisture. Room temperature eggs incorporate better into the batter. If you forgot to take them out, place them in warm water for 5 minutes.
Whole Milk: Adds moisture and richness. Whole milk is preferred over low-fat for the best texture, but 2% will work in a pinch. Don’t use skim milk as it’ll make the cake dry.
Vanilla Extract: Enhances all the other flavors. Use pure vanilla extract, not imitation, for the best taste.
Baking Powder & Baking Soda: These leaveners help the cake rise and create that perfect fluffy texture. Make sure they’re fresh (check expiration dates!) or your cake won’t rise properly.
Salt: A small amount enhances sweetness and balances flavors. Don’t skip it!
Heavy Cream: Used in the frosting for a smooth, creamy consistency. Can substitute half-and-half if needed, though the frosting will be slightly less rich.
Equipment Needed
Having the right tools makes baking so much easier and more enjoyable. Here’s what you’ll need to create your Dulce de Leche Cake masterpiece:
- Three 8-inch or 9-inch round cake pans – For even, beautiful layers
- Parchment paper – Prevents sticking and makes cake removal foolproof
- Stand mixer or hand mixer – Essential for creaming butter and whipping frosting
- Large mixing bowls (at least 2) – One for dry ingredients, one for wet
- Measuring cups and spoons – Precision matters in baking
- Wire cooling racks – Allows air circulation so cakes cool evenly
- Rubber spatula – For scraping down bowl sides and folding batter
- Offset spatula – Makes frosting layers smooth and professional-looking
- Cake turntable (optional but helpful) – Rotating makes frosting much easier
- Toothpicks or cake tester – To check doneness
- Small saucepan – For warming dulce de leche for soaking
- Pastry brush – To apply dulce de leche soak to cake layers
- Piping bag with round tip (optional) – For decorative drizzle
Print

Dulce de Leche Cake Recipe
An incredibly moist vanilla cake layered with dulce de leche and topped with creamy caramel buttercream frosting. This Latin American-inspired dessert is perfect for celebrations and guaranteed to impress your guests with its rich, caramel flavor and beautiful presentation.
- Total Time: 1 hour 30 minutes (plus cooling and assembly)
- Yield: 12-16 servings 1x
Ingredients
ScaleFor the Cake:
- 3 cups all-purpose flour
- 1 tablespoon baking powder
- ½ teaspoon baking soda
- ½ teaspoon salt
- 1 cup (2 sticks) unsalted butter, room temperature
- 2 cups granulated sugar
- 4 large eggs, room temperature
- 2 teaspoons vanilla extract
- 1½ cups whole milk, room temperature
For the Dulce de Leche Soak:
- ¾ cup dulce de leche
- ¼ cup heavy cream
For the Dulce de Leche Buttercream:
- 1½ cups (3 sticks) unsalted butter, room temperature
- 4 cups powdered sugar
- 1 cup dulce de leche
- 3-4 tablespoons heavy cream
- 1 teaspoon vanilla extract
- Pinch of salt
For Topping:
- ½ cup dulce de leche, for drizzling
- Flaky sea salt (optional)
Instructions
Step 1: Prepare Your Pans
Preheat your oven to 350°F (175°C). Grease three 8-inch or 9-inch round cake pans with butter or non-stick spray. Line the bottoms with parchment paper circles and grease the paper too. This double insurance prevents any sticking disasters.Step 2: Mix Dry Ingredients
In a large bowl, whisk together the flour, baking powder, baking soda, and salt. Set this aside – you’ll add it to the wet ingredients later.Step 3: Cream Butter and Sugar
In your stand mixer bowl (or large bowl with hand mixer), beat the softened butter and sugar on medium-high speed for 4-5 minutes. The mixture should be light, fluffy, and almost white in color. This step incorporates air, which helps create a tender cake.Step 4: Add Eggs and Vanilla
Reduce mixer speed to medium. Add eggs one at a time, beating well after each addition. Scrape down the bowl sides between additions. Mix in the vanilla extract.Step 5: Alternate Dry and Wet
With mixer on low speed, add the flour mixture in three additions, alternating with the milk in two additions. Begin and end with flour. Mix each addition just until combined – overmixing develops gluten and makes cake tough. The batter should be smooth but don’t overwork it.Step 6: Divide and Bake
Divide batter evenly among your three prepared pans (about 2½ cups per pan for 8-inch pans). Smooth the tops with a spatula. Tap pans gently on the counter to release air bubbles. Bake for 25-30 minutes, or until a toothpick inserted in the center comes out clean and the cake springs back when lightly pressed.Step 7: Cool Cakes
Let cakes cool in pans for 10 minutes, then carefully turn out onto wire racks. Remove parchment paper and let cool completely before assembling – this takes about 1 hour. Trying to frost warm cake is a recipe for melted frosting disaster!Step 8: Make Dulce de Leche Soak
While cakes cool, whisk together ¾ cup dulce de leche and ¼ cup heavy cream in a small saucepan over low heat until smooth and pourable. Set aside to cool slightly.Step 9: Make Buttercream
Beat butter in a large bowl on medium speed until creamy, about 2 minutes. Reduce speed to low and gradually add powdered sugar, one cup at a time. Add dulce de leche, 3 tablespoons heavy cream, vanilla, and salt. Increase speed to medium-high and beat for 3-4 minutes until light and fluffy. If frosting is too thick, add remaining tablespoon of cream.Step 10: Level Cake Layers
If your cakes have domed tops, use a long serrated knife to carefully slice them off so layers stack evenly. Place first layer on your serving plate or cake stand.Step 11: Soak and Fill
Brush the top of the first layer generously with dulce de leche soak. Spread about ¾ cup of buttercream on top, creating an even layer that goes all the way to the edges. Place second cake layer on top, press gently, and repeat the soaking and frosting process.Step 12: Add Final Layer and Crumb Coat
Place the third layer on top (bottom-side up for a flat surface). Soak this layer too. Apply a thin layer of buttercream all over the cake – this is your “crumb coat” that seals in crumbs. Refrigerate for 20-30 minutes until firm.Step 13: Final Frosting
Remove cake from fridge and apply remaining buttercream in a thicker, final coat. Use your offset spatula to create smooth sides and top, or leave it rustic if you prefer. A cake turntable makes this step much easier.Step 14: Drizzle and Finish
Warm ½ cup dulce de leche in the microwave for 15-20 seconds until pourable but not hot. Drizzle over the top of the cake, letting it drip down the sides. If desired, sprinkle with a tiny bit of flaky sea salt for a sweet-salty contrast.Step 15: Chill and Serve
Refrigerate cake for at least 30 minutes to set the frosting before slicing. Remove from fridge 15-20 minutes before serving for best flavor and texture. Use a sharp knife dipped in hot water (and wiped dry) for clean slices.Notes
- Make-Ahead Tip: Cake layers can be baked up to 2 days ahead. Wrap tightly in plastic wrap and store at room temperature, or freeze for up to 3 months.
- Dulce de Leche Thickness: Brands vary in thickness. If yours is very thick, thin it slightly with cream before using in the soak.
- Frosting Consistency: If buttercream is too soft, refrigerate for 15 minutes. If too stiff, add cream by the teaspoon.
- Room Temperature Ingredients: This is crucial! Cold ingredients don’t incorporate well and can lead to dense cake.
- Don’t Skip the Crumb Coat: This thin first layer of frosting prevents crumbs from mixing into your final frosting layer.
- Storage: Keep refrigerated due to the dulce de leche. Bring to cool room temperature before serving for the best texture and flavor.
- Prep Time: 30 minutes
- Cook Time: 25-30 minutes
- Category: Desert
- Method: Baking
- Cuisine: Latin AmericaN
- Diet: Vegetarian
Nutrition
- Serving Size: 1 slice (1/14 of cake)
- Calories: 685
- Sugar: 72g
- Sodium: 285mg
- Fat: 35g
- Saturated Fat: 21g
- Unsaturated Fat: 11g
- Trans Fat: 0g
- Carbohydrates: 89g
- Fiber: 1g
- Protein: 7g
- Cholesterol: 145mg
Tips & Variations
Want to customize this cake to your taste? Here are some delicious ways to make it your own:
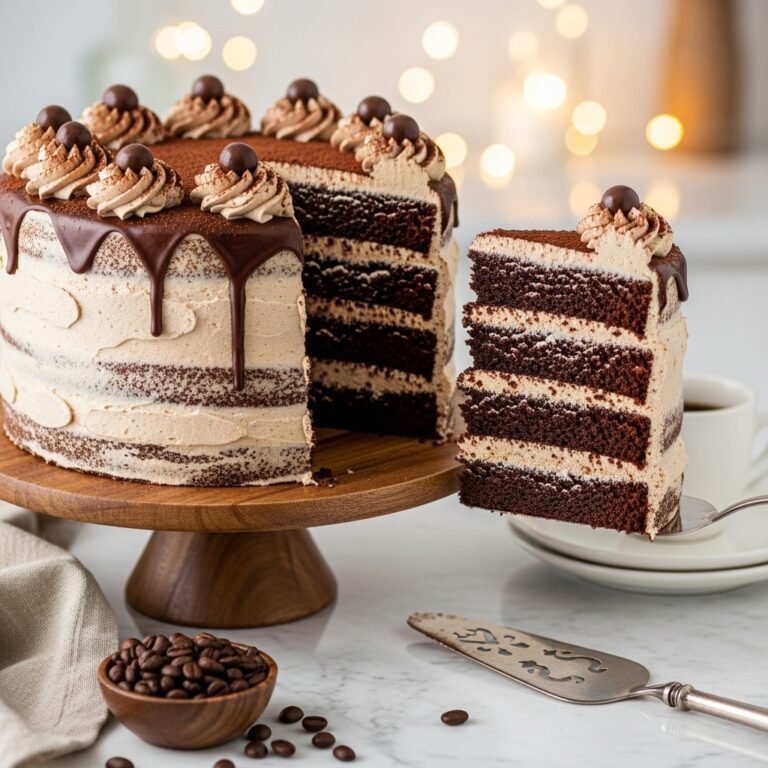
Chocolate Dulce de Leche Cake: Replace ½ cup of flour with unsweetened cocoa powder for chocolate cake layers. The chocolate-caramel combo is absolutely divine!
Coffee-Enhanced: Add 2 tablespoons of instant espresso powder to the cake batter for a subtle coffee flavor that enhances the caramel notes.
Salted Caramel Version: Mix ½-1 teaspoon of flaky sea salt into the buttercream for a salted caramel effect. Sprinkle more on top for garnish.
Smaller Batch: Cut the recipe in half and bake in two 8-inch pans for a smaller, two-layer cake that serves 6-8.
Cupcake Conversion: Use this batter to make 24-30 cupcakes instead. Bake at 350°F for 18-22 minutes. Fill and top with dulce de leche buttercream.
Coconut Twist: Toast 1 cup of shredded coconut and press onto the sides of the frosted cake for texture and tropical flavor.
Caramel Pecan: Fold ½ cup of toasted chopped pecans into the buttercream and sprinkle more on top with the dulce de leche drizzle.
Lighter Frosting: Substitute half the buttercream with stabilized whipped cream for a lighter (though less stable) frosting option.
Pro Chef Tips
Want your Dulce de Leche Cake to taste like it came from a professional bakery? Here are insider secrets that make all the difference:
Room Temperature is Non-Negotiable: This is the most important tip! Cold butter won’t cream properly, cold eggs can cause curdling, and cold milk can make the batter seize. Plan ahead and take ingredients out 1-2 hours before baking.
Weigh Your Flour: If you have a kitchen scale, use it! Measure 360g instead of 3 cups for perfect accuracy. Too much flour is the number one cause of dry, dense cake.
Don’t Overbake: Check your cake at 23 minutes. It’s done when a toothpick has just a few moist crumbs (not wet batter). The cake continues cooking slightly as it cools, so removing it right at the perfect moment prevents dryness.
Level Your Cake Layers: Professional cakes look professional because they’re perfectly level. Invest in a cake leveler or carefully use a serrated knife with a gentle sawing motion.
Generous Dulce de Leche Soak: Don’t be shy with the soak! It penetrates the cake and keeps it incredibly moist for days. The cake should feel slightly damp on top after brushing.
Butter Temperature for Frosting: Your butter should be 65-68°F – cool but soft. If it’s too warm (greasy), your frosting will be soupy. If too cold, it won’t whip properly. It should hold its shape but be easily spreadable.
Avoid Air Pockets in Frosting: After spreading frosting on each layer, gently press down with your hand (on top of the next cake layer) to eliminate air pockets that can cause layers to shift.
The Hot Knife Trick: For magazine-worthy slices, dip your knife in very hot water, wipe it dry, and cut in one smooth motion. Clean and reheat the knife between each slice.
Common Mistakes to Avoid
Even experienced bakers can stumble with layer cakes. Here’s how to sidestep the most common pitfalls:
Mistake #1: Opening the Oven Too Early
Resist the urge to check your cakes before 20 minutes! Opening the oven causes temperature drops that can make cakes sink in the middle. Trust the process and only check once after the minimum baking time.Mistake #2: Frosting Warm Cake
I know it’s tempting when you’re excited to see the finished product, but this is a disaster waiting to happen. Warm cake causes buttercream to melt and slide right off. Always let cakes cool completely – at least one hour at room temperature.Mistake #3: Skipping the Crumb Coat
That first thin layer of frosting isn’t optional! It seals in all the crumbs so your final coat is smooth and beautiful. Trying to do it all in one thick layer results in crumb-covered frosting.Mistake #4: Not Tasting Your Dulce de Leche
Brands vary dramatically in sweetness and thickness. Taste yours before using and adjust accordingly. Too thick? Thin with cream. Too sweet? Add a pinch of salt.Mistake #5: Overmixing the Batter
Once you add flour, mix just until you can’t see dry streaks anymore. Overmixing develops gluten strands that make your cake tough and chewy instead of tender and light. A few small lumps are fine!Mistake #6: Using Old Leaveners
Baking powder and baking soda lose potency over time. If yours are more than 6 months old, they might not provide enough lift. Test baking powder by adding a teaspoon to hot water – it should fizz vigorously.Mistake #7: Uneven Layer Thickness
Eyeballing batter division leads to lopsided cakes. Use a kitchen scale or measuring cups to divide batter evenly among pans for layers that are the same height.Storage & Meal Prep
Proper storage keeps your Dulce de Leche Cake tasting fresh and delicious for days after baking.
Room Temperature Storage: If your home is cool (below 70°F) and you’ll eat the cake within 1-2 days, you can keep it covered at room temperature. Use a cake dome or inverted large bowl to protect it.
Refrigerator Storage: Because this cake contains dairy-rich dulce de leche and buttercream, refrigeration is recommended, especially in warm weather. Store covered in the fridge for up to 5 days. The cake actually gets more moist and flavorful after a day or two as the dulce de leche continues to soak in.
Bringing to Room Temperature: This is important! Cold cake has muted flavors and dense texture. Remove the cake from the fridge 30-45 minutes before serving. The buttercream will soften and the flavors will bloom beautifully.
Covering Options: A cake dome is ideal, but you can also use plastic wrap. If using plastic wrap, insert toothpicks into the top of the cake first, then drape the wrap over them so it doesn’t stick to the frosting.
Individual Slice Storage: Wrap individual slices tightly in plastic wrap, then place in an airtight container. This is perfect for portion control and grab-and-go treats. Slices stay fresh for 4-5 days refrigerated.
Shelf Life: The cake is best within the first 3-4 days, though it remains safe to eat for up to 5 days when properly refrigerated. The texture may become slightly firmer over time but will still be delicious.
Make-Ahead & Freezer Notes
This cake is wonderfully make-ahead friendly, which makes it perfect for party planning and reducing day-of stress.
Baking Layers Ahead: Bake your cake layers up to 2 days in advance. Let them cool completely, then wrap each layer tightly in plastic wrap (two layers of wrap is even better). Store at room temperature. They’ll actually be easier to handle and less crumbly when slightly older.
Freezing Unfrosted Layers: For longer storage, freeze wrapped cake layers for up to 3 months. Freeze them on a flat surface until solid, then you can stack them to save space. Thaw overnight in the fridge (still wrapped) before assembling. The texture will be just as good as fresh!
Making Buttercream Ahead: Prepare buttercream up to 3 days ahead and store in an airtight container in the fridge. Before using, let it come to room temperature, then re-whip it for 2-3 minutes to restore the fluffy texture. It’ll look separated at first but will come back together beautifully.
Freezing Assembled Cake: You can freeze the fully assembled and frosted cake, though the drizzle should be added after thawing. Place the finished cake in the freezer uncovered for 1 hour until frosting is firm, then wrap carefully in plastic wrap and foil. Freeze for up to 2 months.
Best Thawing Method: Move the frozen cake to the refrigerator and let it thaw slowly overnight while still wrapped. This prevents condensation from forming on the frosting. Once thawed, let it come to room temperature before serving. Add the dulce de leche drizzle after thawing for the freshest look.
Day-Before Assembly: For maximum freshness with minimum day-of work, bake layers 1-2 days ahead (stored wrapped at room temperature), make buttercream 1 day ahead (refrigerated), then assemble and frost the cake the day before your event. Refrigerate overnight and bring to room temperature before serving.
Serving Suggestions
This rich, indulgent Dulce de Leche Cake pairs beautifully with several accompaniments that balance its sweetness:
Beverage Pairings: Serve with strong brewed coffee or espresso to cut through the sweetness. The slight bitterness of coffee perfectly complements the caramel notes. Hot tea (especially Earl Grey or chai) is also lovely. For a special occasion, try it with a dessert wine like Tawny Port or sweet Riesling.
Ice Cream Addition: A scoop of vanilla ice cream or dulce de leche ice cream alongside each slice turns this into an truly decadent dessert. The cold ice cream against the soft cake is textural heaven.
Fresh Fruit: Serve with fresh berries (strawberries, raspberries, or blackberries) on the side. The tartness cuts through the rich caramel and adds a refreshing element.
Whipped Cream: A dollop of lightly sweetened whipped cream (not too sweet since the cake is rich) adds a light, airy contrast.
After-Dinner Dessert: This cake is rich enough to be the finale to a lighter meal. Consider serving after grilled proteins and salad, or a Latin-inspired dinner with dishes like empanadas, churrasco, or chimichurri chicken.
Celebration Centerpiece: This cake is stunning enough to be the star of birthday parties, bridal showers, anniversary dinners, or holiday gatherings. The golden caramel color makes it especially beautiful for autumn celebrations.
Portion Size Matters: Because this cake is quite rich, serve moderate slices (about 1-inch thick). Your guests can always come back for more! Smaller portions mean more people can enjoy it without feeling overwhelmed.
FAQs Section
Q: Can I use store-bought dulce de leche or do I need to make it from scratch?
A: Store-bought is absolutely fine and what I usually use! Look for brands like Nestlé La Lechera in the Latin foods aisle, or sometimes it’s near ice cream toppings. Making homemade dulce de leche is wonderful but time-consuming (simmering sweetened condensed milk for 2-3 hours), so save yourself the trouble unless you really want to.Q: My frosting turned out too soft and won’t hold its shape. What went wrong?
A: This usually happens because your butter was too warm or your kitchen is hot. Pop the frosting in the fridge for 15-20 minutes, then re-whip it. If it’s still too soft, you can beat in an additional ½ cup of powdered sugar to help stabilize it. Next time, make sure your butter is cool room temperature (65-68°F), not warm and greasy.Q: Can I make this as a sheet cake instead of a layer cake?
A: Yes! Pour all the batter into a greased 9×13-inch pan and bake for 35-40 minutes. Let it cool, poke holes all over with a skewer, pour the dulce de leche soak over it, then spread with half the buttercream recipe. Drizzle with dulce de leche. It won’t be as dramatic but will still be delicious!Q: How do I know when my cake is done baking?
A: Look for these signs: the cake should be golden brown, pulling slightly away from the pan sides, spring back when gently pressed in the center, and a toothpick inserted in the middle should come out with just a few moist crumbs (not wet batter). Start checking at 23 minutes but it may need up to 30 minutes depending on your oven.Q: My cake layers turned out dense instead of fluffy. What happened?
A: The most common culprits are: over-measuring flour (use the spoon-and-level method), overmixing the batter after adding flour (mix just until combined), old leavening agents (check those expiration dates), or oven temperature too low (use an oven thermometer to verify your oven’s actual temperature matches the dial).Q: Can I make this cake dairy-free or vegan?
A: The structure of this cake really depends on butter, eggs, and milk, so substitutions will significantly change the result. For the adventurous: try vegan butter, flax eggs (1 tablespoon ground flaxseed + 3 tablespoons water per egg, let sit 5 minutes), and coconut or oat milk. Use coconut cream-based dulce de leche alternative. Results won’t be identical but can still be tasty.Q: The dulce de leche drizzle hardened too much when I poured it over the cake. Help!
A: Dulce de leche sets up as it cools. Warm it in the microwave for 15-20 seconds and stir until it’s pourable but not hot. You want it about the consistency of honey – fluid enough to drip but thick enough not to run everywhere. If you accidentally made it too hot and it ran too much, pop the cake in the fridge to set it quickly.Conclusion
There you have it – your complete guide to making an absolutely stunning Dulce de Leche Cake that’ll have everyone convinced you’re a professional baker! This cake brings together everything we love about homemade desserts: it’s beautiful, impressive, and tastes incredible, yet it’s totally achievable in your own kitchen with standard ingredients.
The combination of tender vanilla cake, luscious dulce de leche, and creamy buttercream creates flavor and texture magic in every bite. While it has several components, none of them are particularly difficult, and the result is so worth the effort. Plus, once you make this cake once, you’ll feel confident making it again and again.
I’d love to hear how your Dulce de Leche Cake turns out! Did you add any fun variations? Are you making it for a special occasion? Drop a comment below with your experience, and don’t forget to rate the recipe if you try it. Your feedback helps other home bakers decide to give it a try!
And here’s the thing – a cake this pretty NEEDS to be shared on Pinterest! Please pin this recipe to your dessert boards so you can find it easily later, and so other bakers can discover it too. There’s something special about sharing delicious recipes, and I appreciate you helping spread the dulce de leche love.
Happy baking, friend! May your cake layers be even, your frosting be smooth, and your dulce de leche be perfectly drippy. 🍰✨