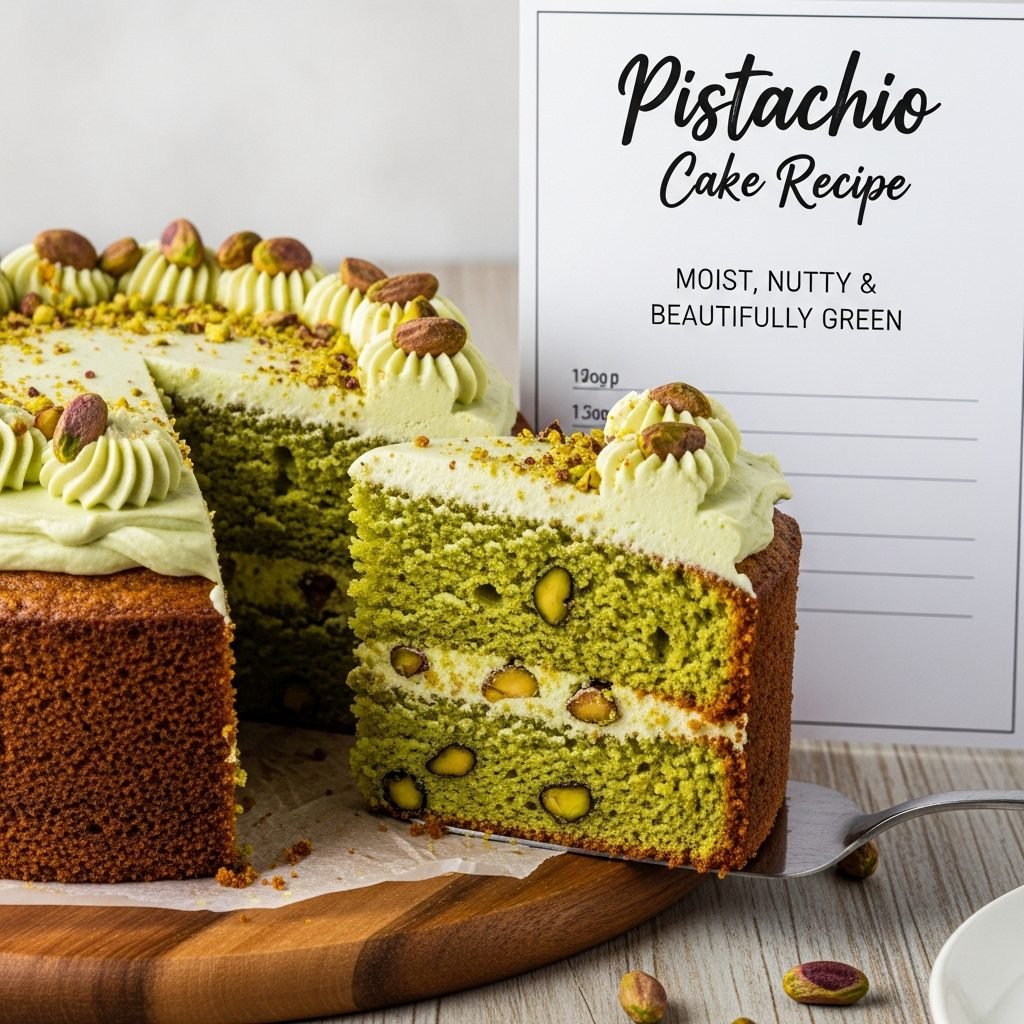
Pistachio Cake Recipe – Moist, Nutty Beautifully Green
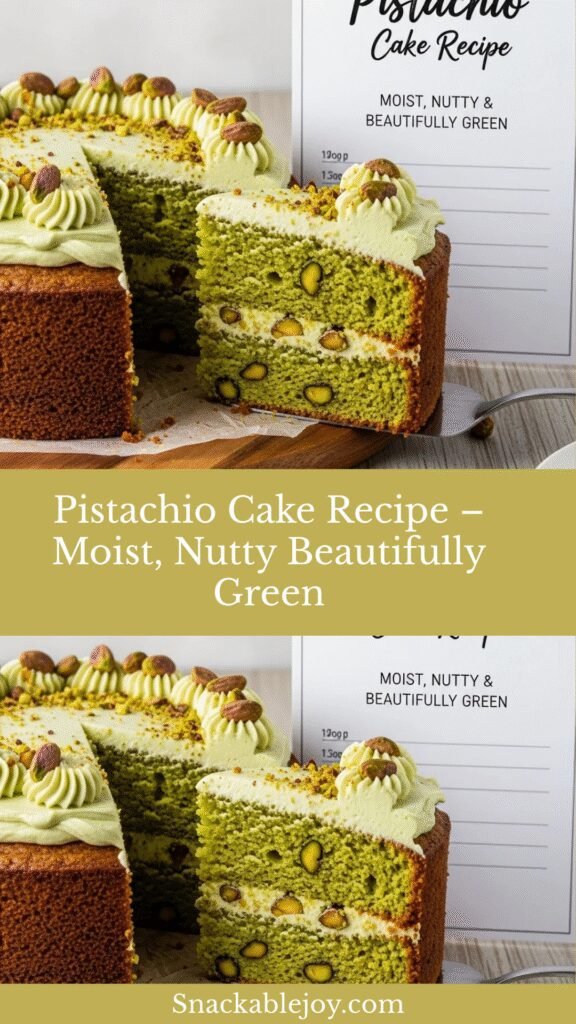
If you’ve been searching for a cake that’s both elegantly sophisticated and wonderfully unique, this pistachio cake is about to become your new obsession. Imagine slicing into a tender, moist cake with a gorgeous natural pale green hue, tasting the subtle nuttiness of real pistachios in every bite, and enjoying a flavor that’s sweet but not cloying—refined but completely comforting. This isn’t your average cake; it’s something special that stands out at any gathering while remaining surprisingly approachable to make at home.
Pistachio cake has that magical quality of feeling fancy enough for special occasions yet cozy enough for weekend baking. The flavor is distinctive without being overpowering—nutty, slightly buttery, with a delicate sweetness that pairs beautifully with everything from cream cheese frosting to simple whipped cream or even a light glaze. What really sets this cake apart is its stunning natural color (no artificial dyes needed!) and the incredible moisture that ground pistachios provide. It stays fresh for days and actually tastes even better the next day as the flavors deepen and meld. Perfect for birthdays, spring celebrations, Easter, baby showers, bridal showers, or simply when you want to bake something that will make everyone ask for the recipe, this pistachio cake delivers on every level. The best part? Despite looking and tasting like it came from an upscale bakery, it’s genuinely easy to make with straightforward techniques any home baker can master.
History / Background
Pistachios have been cultivated for thousands of years, with origins tracing back to the Middle East and Central Asia around 7000 BCE. These prized green nuts were considered a delicacy in ancient Persia (modern-day Iran), where they were reserved for royalty. The Queen of Sheba is said to have demanded that all pistachios grown in her land be reserved exclusively for herself and her court. From there, pistachios spread throughout the Mediterranean, becoming integral to the cuisines of Turkey, Greece, Italy, and the broader Middle Eastern region.
In traditional Middle Eastern and Mediterranean baking, pistachios have long been featured in desserts like baklava, halva, Turkish delight, and various pastries. However, pistachio cake as we know it in Western baking—a light, fluffy layer cake flavored with ground pistachios—is a more modern creation that emerged as pistachios became more widely available in Europe and America during the 20th century.
The commercialization of pistachio farming in California beginning in the 1970s made these nuts much more accessible and affordable to American home bakers. As food processors became common kitchen appliances in the 1980s and 90s, grinding nuts at home became easy, leading to increased experimentation with nut-based cakes. Pistachio cake gained particular popularity in upscale bakeries and restaurants in the 2000s and 2010s as part of the artisan baking movement that emphasized unique flavors and natural ingredients.
Today, pistachio cake represents a beautiful fusion of ancient ingredient with modern baking techniques. It honors the nut’s prestigious history while making it accessible in a familiar American layer cake format. The cake has become especially trendy on social media and Pinterest thanks to its photogenic pale green color and its association with sophisticated, Instagram-worthy baking.
Why You’ll Love This Recipe
This pistachio cake combines elegance with ease, delivering bakery-quality results without requiring professional pastry skills. It’s one of those rare recipes that looks incredibly impressive, tastes absolutely divine, and doesn’t require you to spend all day in the kitchen or master complicated techniques.
Here’s what makes this recipe truly special:
- Unique, sophisticated flavor – Stands out from typical chocolate and vanilla cakes
- Naturally beautiful color – Gorgeous pale green hue without artificial food coloring
- Incredibly moist texture – The ground pistachios keep it tender for days
- Not too sweet – Refined sweetness that appeals to adult palates
- Versatile for occasions – Works for everything from casual gatherings to elegant celebrations
- Stays fresh longer – Nut oils keep the cake moist; tastes great for 4-5 days
- Easy to customize – Pairs beautifully with various frostings and fillings
- Pinterest-perfect presentation – That distinctive green color photographs beautifully
- Make-ahead friendly – Can be baked in advance and freezes exceptionally well
- Conversation starter – Guests always ask about the unique flavor
- Accessible ingredients – Pistachios are now readily available in most grocery stores
- Allergy-friendly option – Can be a wonderful choice for those who can’t have chocolate
This recipe proves that special occasion cakes don’t have to be complicated or time-consuming. With clear instructions and quality ingredients, you can create something truly memorable.
Ingredient Notes
Shelled Pistachios: The star ingredient! Use raw, unsalted, shelled pistachios for the best flavor and most vibrant color. You’ll grind these into a fine meal, which provides both flavor and structure to the cake. Look for bright green pistachios without dark spots—the greener they are, the more vibrant your cake will be. California pistachios tend to be brighter green than Middle Eastern varieties. Buy them already shelled to save time, but if you can only find in-shell, you’ll need about double the weight.
All-Purpose Flour: Provides structure. Combined with the ground pistachios, it creates the perfect tender crumb. You can substitute with a 1:1 gluten-free flour blend if needed, though the texture will be slightly different.
Butter: Use unsalted butter at room temperature. Butter provides flavor, moisture, and helps create a tender crumb. Room temperature butter (soft enough to leave an indent when pressed but not greasy) creams properly with sugar. European-style butter with higher fat content creates even richer results.
Sugar: Granulated white sugar provides sweetness and helps create the cake’s structure. Some recipes use a combination of white and powdered sugar, but granulated works beautifully here.
Eggs: Large eggs at room temperature are essential. They provide structure, moisture, and help bind everything together. Room temperature eggs emulsify better with the other ingredients, creating smoother batter.
Sour Cream or Greek Yogurt: Adds moisture, tenderness, and a slight tang that balances the sweetness. Full-fat works best, but low-fat can work in a pinch. The acidity also helps activate the baking powder for better rise.
Milk: Whole milk is ideal for richness, but 2% works fine. The milk adds moisture and helps achieve the perfect batter consistency.
Almond Extract: Enhances the nutty flavor of pistachios without overpowering them. Almond and pistachio are botanical cousins, so they complement each other beautifully. Use pure almond extract, not imitation.
Vanilla Extract: Pure vanilla extract adds depth and rounds out all the other flavors. Don’t use imitation—the artificial taste is noticeable in delicate cakes like this.
Baking Powder and Baking Soda: These leavening agents help the cake rise and create a light, fluffy texture. Make sure they’re fresh (not expired) for best results.
Salt: Just a pinch enhances all the other flavors and prevents the cake from tasting flat.
Equipment Needed
- Food processor or high-powered blender – Essential for grinding pistachios into fine meal
- Two 8-inch or 9-inch round cake pans – For layer cake; must be the same size
- Parchment paper – For lining pan bottoms and preventing sticking
- Large mixing bowls – At least two for different components
- Electric mixer – Stand mixer or hand mixer; stand mixer is easier
- Rubber spatula – For folding and scraping bowls
- Whisk – For combining dry ingredients
- Measuring cups and spoons – Accurate measurements are crucial in baking
- Cooling racks – For cooling cake layers completely
- Offset spatula – For frosting the cake smoothly
- Sifter or fine-mesh sieve – For sifting dry ingredients
- Toothpick or cake tester – For testing doneness
Print

Pistachio Cake Recipe
This pistachio cake is moist, tender, and beautifully flavored with real ground pistachios. The naturally green crumb is stunning, and the delicate nutty flavor pairs perfectly with cream cheese frosting or simple whipped cream.
- Total Time: 1 hour 55 minutes
- Yield: 10-12 servings 1x
Ingredients
ScaleFor the Pistachio Cake:
- 1½ cups raw, unsalted, shelled pistachios
- 1¾ cups all-purpose flour
- 1½ teaspoons baking powder
- ½ teaspoon baking soda
- ½ teaspoon salt
- ¾ cup (1½ sticks) unsalted butter, room temperature
- 1½ cups granulated sugar
- 3 large eggs, room temperature
- 1 teaspoon vanilla extract
- ½ teaspoon almond extract
- ¾ cup sour cream or full-fat Greek yogurt, room temperature
- ½ cup whole milk, room temperature
For the Cream Cheese Frosting (Optional):
- 8 oz cream cheese, softened
- ½ cup (1 stick) unsalted butter, softened
- 3 cups powdered sugar, sifted
- 1 teaspoon vanilla extract
- 2-3 tablespoons heavy cream or milk
- Pinch of salt
For Decoration:
- ¼ cup chopped pistachios
- Whole pistachios (optional)
Instructions
Prepare the Pistachios and Pans:
- Preheat oven: Preheat your oven to 350°F (175°C). Grease two 8-inch or 9-inch round cake pans, line the bottoms with parchment paper circles, grease the parchment, and lightly flour the pans. Tap out excess flour.
- Grind pistachios: In a food processor, pulse the pistachios until they’re finely ground into a meal-like consistency, similar to almond flour. Be careful not to over-process or they’ll turn into pistachio butter. You should have about 1½ cups of pistachio meal. Set aside.
- Mix dry ingredients: In a medium bowl, whisk together the flour, baking powder, baking soda, and salt. Add the ground pistachios and whisk to combine evenly. Set aside.
Make the Cake Batter:
- Cream butter and sugar: In a large bowl using an electric mixer, beat the room temperature butter and sugar together on medium-high speed for 3-4 minutes until light, fluffy, and pale in color. Scrape down the sides of the bowl as needed.
- Add eggs: Add the eggs one at a time, beating well after each addition and scraping down the bowl between additions. The mixture should look smooth and creamy.
- Add extracts: Mix in the vanilla and almond extracts until combined.
- Combine wet ingredients: In a small bowl or measuring cup, whisk together the sour cream and milk until smooth.
- Alternate additions: With the mixer on low speed, add the dry pistachio-flour mixture in three additions, alternating with the sour cream mixture in two additions. Begin and end with the dry ingredients. Mix each addition just until combined—don’t overmix. The batter should be thick but pourable, with a beautiful pale green color.
- Divide batter: Divide the batter evenly between the two prepared pans (use a kitchen scale for accuracy if you have one, or eyeball approximately 2½ cups per pan). Smooth the tops with a spatula and gently tap the pans on the counter to release air bubbles.
Bake the Cakes:
- Bake: Bake for 28-32 minutes (8-inch pans) or 25-28 minutes (9-inch pans), until a toothpick inserted in the center comes out clean or with a few moist crumbs, and the tops spring back when lightly pressed.
- Cool: Let the cakes cool in the pans on wire racks for 10-15 minutes. Then run a knife around the edges, carefully invert onto the racks, remove the parchment paper, and let cool completely before frosting (at least 1 hour).
Make the Cream Cheese Frosting:
- Beat cream cheese and butter: In a large bowl with an electric mixer, beat the softened cream cheese and butter together on medium speed for 2-3 minutes until smooth, creamy, and well combined.
- Add sugar gradually: With the mixer on low, gradually add the sifted powdered sugar, 1 cup at a time, beating well after each addition. Scrape down the bowl as needed.
- Add flavorings: Mix in the vanilla extract and a pinch of salt.
- Adjust consistency: Add heavy cream 1 tablespoon at a time until the frosting reaches your desired consistency—spreadable but not too soft. Beat on medium-high for 1-2 minutes until light and fluffy.
Assemble the Cake:
- Level layers (optional): If your cake layers have domed tops, use a serrated knife to level them for easier, more stable stacking.
- First layer: Place one cake layer on a cake board or serving plate (flat side up if you leveled it). Spread about 1 cup of frosting evenly over the top using an offset spatula.
- Second layer: Place the second cake layer on top, flat side up for a smooth surface.
- Frost the cake: Apply a thin crumb coat of frosting all over the cake (top and sides) to seal in crumbs. Refrigerate for 15-20 minutes until firm. Then apply the remaining frosting in a thicker, final layer, smoothing with an offset spatula.
- Decorate: Garnish the top with chopped pistachios, pressing some gently into the sides if desired. Add whole pistachios for extra decoration if you like.
- Chill and serve: Refrigerate the cake for at least 30 minutes to set the frosting. Remove from the refrigerator 20-30 minutes before serving for the best texture and flavor. Slice with a sharp knife, wiping it clean between cuts.
Notes
- For the most vibrant green color, use the freshest, greenest pistachios you can find. California pistachios tend to be brighter than other varieties.
- Don’t over-grind the pistachios or they’ll release oils and become paste-like. Pulse in short bursts and stop when they reach a fine meal consistency.
- Room temperature ingredients are crucial for proper mixing and texture. Set eggs, butter, sour cream, and milk out 1-2 hours before baking.
- Don’t overmix once you add the flour mixture—mix just until combined for tender cake.
- The cake can be baked a day ahead, wrapped tightly, and stored at room temperature before frosting.
- For simpler presentation, skip the frosting and serve with whipped cream and fresh berries.
- The frosted cake can be made 1-2 days ahead and refrigerated.
- Prep Time: 25 minutes
- Cook Time: 30 minutes
- Category: Desert
- Method: Baking
- Cuisine: American
- Diet: Vegetarian
Nutrition
- Serving Size: 1 slice (based on 12 servings)
- Calories: 485
- Sugar: 45g
- Sodium: 260mg
- Fat: 26g
- Saturated Fat: 12g
- Unsaturated Fat: 12g
- Trans Fat: 0g
- Carbohydrates: 58g
- Fiber: 2g
- Protein: 7g
- Cholesterol: 95mg
Tips & Variations
Flavor Variations:
- Pistachio Rose Cake: Add 1 teaspoon rose water to the batter for Middle Eastern-inspired flavor
- Pistachio Lemon: Add zest of 2 lemons to batter and use lemon cream cheese frosting
- Pistachio Cardamom: Add ½ teaspoon ground cardamom for warm, aromatic spice
- Pistachio Orange: Add orange zest and replace almond extract with orange extract
- Chocolate Pistachio: Add chocolate ganache between layers for decadent twist
Frosting Alternatives:
- Simple Glaze: Mix 2 cups powdered sugar with 3-4 tablespoons milk for easy drizzle
- Whipped Cream: Stabilized whipped cream for lighter, less sweet option
- Swiss Meringue Buttercream: Silky, elegant frosting that’s less sweet than American
- Mascarpone Frosting: Italian cream cheese for sophisticated European flavor
- White Chocolate Ganache: Pour over cake for glossy, elegant finish
Dietary Adaptations:
- Gluten-Free: Use 1:1 gluten-free flour blend (texture will be slightly different)
- Dairy-Free: Use coconut oil instead of butter, and dairy-free yogurt and milk
- Reduced Sugar: Decrease sugar to 1¼ cups (cake will be less sweet but still good)
Presentation Ideas:
- Create an ombre effect with varying shades of green frosting
- Use a “naked cake” style with minimal frosting on sides
- Add edible flowers for spring/summer celebrations
- Dust with powdered sugar for simple elegance
- Create a pistachio cream filling with chopped pistachios
Pro Chef Tips
The Pistachio Grinding Sweet Spot: When grinding pistachios, you want a fine, flour-like consistency but NOT pistachio butter. Pulse in short 1-2 second bursts rather than running the food processor continuously. Stop and check frequently. The pistachios should look like coarse sand or fine meal—if you see them starting to clump or look wet, you’ve gone too far. Over-ground pistachios release oils that make the batter greasy and heavy.
Room Temperature Ingredients are Non-Negotiable: This bears repeating because it’s so crucial: room temperature ingredients emulsify properly, creating smooth batter and even texture. Cold ingredients don’t mix evenly and can cause the batter to curdle or become lumpy. Set everything out 1-2 hours before baking. To quick-warm eggs, place them in a bowl of warm (not hot) water for 5-10 minutes.
Don’t Skimp on Creaming Time: That 3-4 minutes of beating butter and sugar together isn’t arbitrary—it’s aerating the batter, creating tiny air pockets that make your cake light and fluffy. Properly creamed butter and sugar should be pale, fluffy, and noticeably increased in volume. If you stop too early, your cake will be dense. This is one of the most important steps for texture.
The Gentle Fold Method: Once you start adding flour, be gentle! Overmixing develops gluten, which makes cake tough and dense instead of tender. Mix on low speed and stop as soon as you don’t see dry streaks anymore. A few tiny flour specks are okay—they’ll disappear during baking. Your arm might want to keep mixing, but resist!
The Toothpick Test Timing: Don’t overbake! The toothpick should come out clean or with a few moist crumbs—not wet batter, but definitely not completely clean and dry. Overbaked cake is dry cake. Start checking at the minimum time and remember that the cake continues cooking for a few minutes from residual heat after you remove it from the oven.
Cooling Completely is Essential: I know waiting is hard, but frosting warm or even slightly warm cake causes disaster. The heat melts the frosting, causing it to slide off in a soupy mess. Cake must be completely cool to room temperature—at least 1 hour on wire racks. Speed this up by chilling wrapped layers in the refrigerator for 30 minutes if you’re impatient.
The Crumb Coat Game-Changer: Professional bakers always do a crumb coat—that thin first layer of frosting that traps crumbs. It creates a smooth base for your final frosting layer, preventing those annoying green crumbs from showing through white frosting. Apply a thin layer, chill for 15-20 minutes until firm, then apply the final thick layer. The result looks infinitely more professional.
Common Mistakes to Avoid
Over-Processing Pistachios into Butter: This is the number one mistake! If you grind pistachios too long, their natural oils release and they turn into a paste or butter. This makes your cake dense, greasy, and heavy instead of light and fluffy. Always pulse in short bursts and check frequently. Stop when they look like coarse flour or fine breadcrumbs. If you accidentally make pistachio butter, you’ll need to start over with fresh nuts—there’s no fixing it.
Using Salted or Roasted Pistachios: Salted pistachios throw off the flavor balance, making your cake taste oddly salty. Roasted pistachios have a darker color (your cake won’t be as green) and a toasted flavor that overpowers the delicate pistachio taste you want. Always use raw, unsalted pistachios. If you can only find lightly salted, reduce or omit the salt in the recipe, but raw unsalted is really best.
Skipping the Parchment Paper: Pistachio cakes are particularly prone to sticking because of the nut oils. Greasing and flouring helps, but parchment paper circles on the bottom are insurance. It takes 30 seconds to trace and cut circles, and it guarantees your layers release cleanly every time. Don’t skip this step unless you enjoy spending 20 minutes trying to coax stuck cake out of pans.
Overmixing the Batter: Once flour goes in, gentle is key. Overmixing develops gluten strands that make cake tough, chewy, and dense instead of tender and light. The batter should come together quickly—as soon as you stop seeing dry flour streaks, stop mixing! Those extra 30 seconds of mixing might seem harmless, but they create noticeable texture problems.
Not Bringing Frosted Cake to Room Temperature Before Serving: Cold cake from the refrigerator is dense, firm, and lacks flavor. The butterfat in both cake and frosting needs to soften to reveal full flavor and achieve that tender, melt-in-your-mouth texture. Always remove cake from refrigerator 20-30 minutes before serving. Cold cake tastes muted and texturally disappointing; room temperature cake tastes amazing.
Storage & Meal Prep
Room Temperature Storage: If your kitchen isn’t too warm (below 70°F) and you’ll eat the cake within 24 hours, you can store unfrosted cake layers wrapped tightly at room temperature. However, frosted cake with cream cheese frosting must be refrigerated due to the dairy content.
Refrigerator Storage: Store the frosted cake covered in the refrigerator for up to 4-5 days. Place it in a cake keeper, or cover loosely with plastic wrap (use toothpicks to tent it so wrap doesn’t touch the frosting). The cake stays remarkably moist and actually tastes even better after a day as flavors develop.
Preventing Dryness: The ground pistachios contain oils that keep this cake moist longer than typical cakes. However, always store covered to prevent it from drying out. If storing unfrosted layers, wrap them tightly in plastic wrap to seal in moisture.
Freezing Unfrosted Layers: The cake layers freeze beautifully! Once completely cool, wrap each layer tightly in plastic wrap, then in aluminum foil. Freeze for up to 3 months. Thaw overnight in the refrigerator or at room temperature for 2-3 hours before frosting. The texture will be virtually identical to fresh.
Freezing Frosted Cake: You can freeze the assembled, frosted cake. Flash-freeze it uncovered for 1-2 hours until the frosting is firm, then wrap carefully in plastic wrap and foil. Freeze for up to 2 months. Thaw overnight in the refrigerator, still wrapped, then bring to room temperature before serving.
Individual Slice Storage: Leftover slices can be wrapped individually in plastic wrap and stored in an airtight container in the refrigerator for up to 5 days, or frozen for up to 3 months. This makes grabbing a piece easy and convenient.
Make-Ahead & Freezer Notes
Perfect Make-Ahead Timeline: This cake is ideal for making ahead—the components store beautifully, and the assembled cake actually improves after a day. Breaking the work into stages also makes the process much more manageable.
Component Timeline:
- Cake layers: Bake up to 2 days ahead and store wrapped at room temperature, or freeze for up to 3 months
- Cream cheese frosting: Make up to 1 week ahead and refrigerate, or freeze for up to 3 months
- Assembled cake: Complete 1-2 days before your event and refrigerate
Day-Before Strategy (Recommended): The ideal approach for stress-free entertaining is to bake the cake layers the day before your event. Wrap them tightly and store at room temperature overnight. The day of, make the frosting and assemble the cake in the morning. Refrigerate, then bring to room temperature 30 minutes before serving. This splits the work perfectly.
Week-Before Prep: For maximum advance planning, bake the cake layers up to a week ahead and freeze them. Make the frosting and freeze it separately. Two days before your event, thaw everything in the refrigerator. The day before, assemble and decorate. Day-of, just bring to room temperature and serve.
Freezing Guidelines:
- Wrap unfrosted layers individually in plastic wrap, then foil
- Freeze frosting in an airtight container
- Thaw both overnight in refrigerator
- Bring frosting to room temperature and rewhip before using
- Thawed components are indistinguishable from fresh
Holiday Planning: For holidays or major events, complete the cake 2 days before. This gives you breathing room while ensuring freshness. The flavors actually improve after 24-48 hours as they meld.
Serving Suggestions
Classic Elegant Presentation:
This pistachio cake is stunning and unique enough to stand on its own, but thoughtful accompaniments can enhance the experience:
- Fresh berries: Raspberries, strawberries, or blueberries provide color and tart contrast
- Whipped cream: Light dollop on the side for creamy richness
- Lemon curd: Tart lemon complements the nutty pistachio beautifully
- Rose water syrup: Drizzle for Middle Eastern-inspired elegance
- Vanilla ice cream: Classic pairing; cold-warm contrast is lovely
- Edible flowers: Roses, violets, or pansies for romantic presentation
- Honey drizzle: Light drizzle of good honey enhances nuttiness
Beverage Pairings:
- Turkish coffee or espresso: Strong coffee complements the nutty flavor perfectly
- Earl Grey tea: The bergamot in Earl Grey pairs beautifully with pistachio
- Prosecco or Champagne: Bubbles and acidity balance the richness
- Dessert wine: Moscato or late harvest Riesling complement the sweetness
- Rose wine: Dry rosé provides elegant contrast
- Mint tea: Refreshing herbal pairing for Middle Eastern vibes
- Milk: Simple, classic, especially for children
Occasion-Specific Serving:
- Spring celebrations: Perfect for Easter with its fresh green color
- Baby showers: Gender-neutral green works for any theme
- Bridal showers: Sophisticated and elegant for celebrations
- Birthdays: Unique alternative to typical chocolate or vanilla
- Mother’s Day: Refined and special for celebrating mom
- Persian New Year (Nowruz): Traditional ingredients for cultural celebration
- Weddings: Increasingly popular as an alternative wedding cake flavor
- Afternoon tea: Cut into small pieces for proper tea service
Plating for Special Occasions:
- Place slice on white plate with raspberry coulis swoosh
- Add a quenelle of whipped cream and fresh berries
- Dust plate edge with powdered sugar
- Garnish with candied pistachios and edible gold leaf
- Add a small mint sprig for color
- Drizzle with honey or rose syrup
- Include fresh rose petals for romantic touch
FAQs Section
Q: Can I use pistachio pudding mix instead of real pistachios?
A: While some recipes do use instant pistachio pudding mix, I strongly recommend using real pistachios for infinitely better flavor, texture, and natural color. Pudding mix contains artificial flavors and colors that taste noticeably fake and chemical. Real pistachios provide authentic nutty flavor, beautiful natural color, and much better texture. The difference is dramatic—it’s truly worth using the real thing.Q: My cake isn’t very green. How do I make it greener?
A: The green color comes entirely from the pistachios themselves, so using the brightest green pistachios possible is key. California pistachios tend to be greener than Iranian or Turkish varieties. Make sure your pistachios are fresh—old, stale pistachios turn brown and won’t give good color. Some bakers add a tiny drop of green gel food coloring to enhance the natural color, but it’s not necessary and I prefer the natural pale green. Avoid liquid food coloring as it can affect texture.Q: Can I make this cake without almond extract?
A: Yes! While almond extract enhances the nutty flavor (pistachio and almond are botanical cousins), you can omit it or replace it with additional vanilla extract. The cake will still be delicious, just slightly less complex in flavor. If anyone has tree nut allergies, definitely omit the almond extract as it can trigger reactions.Q: Why did my cake turn out dense instead of light and fluffy?
A: Dense cake usually results from one of several issues: over-ground pistachios that became paste-like (making the batter heavy), overmixing after adding flour (develops too much gluten), expired leavening agents (check those dates!), not properly creaming butter and sugar (should be light and fluffy, taking 3-4 minutes), or using cold ingredients that don’t emulsify properly. Make sure to follow each step carefully for best results.Q: Can I make this as cupcakes?
A: Absolutely! This batter makes about 20-24 cupcakes. Line cupcake pans with paper liners, fill each about ⅔ full, and bake at 350°F for 18-22 minutes until a toothpick comes out clean. Let cool completely before frosting. You can use the same cream cheese frosting or try a simpler glaze.Q: How do I store leftover pistachios after opening?
A: Pistachios contain oils that can go rancid, so proper storage is important. Store shelled pistachios in an airtight container in the refrigerator for up to 3 months, or in the freezer for up to 6 months. Let them come to room temperature before grinding for baking. Fresh pistachios should smell sweet and nutty, not stale or bitter.Q: My frosting is too soft and won’t hold its shape. What do I do?
A: Soft frosting means it’s too warm. Cream cheese frosting needs properly softened (not warm or melted) butter and cream cheese to work correctly. If your frosting is too soft, refrigerate it for 15-20 minutes, then rewhip it with the mixer—the cooling will firm it up. If it’s still too soft, you may need to add more powdered sugar (¼ cup at a time) or briefly chill again. In warm weather, cream cheese frosting can be challenging—work in a cool kitchen when possible.Q: Can I make this cake ahead and freeze it?
A: Yes! Both the unfrosted layers and the fully assembled frosted cake freeze beautifully. For layers, wrap tightly in plastic wrap and foil, freeze for up to 3 months, and thaw before frosting. For the assembled cake, flash-freeze until firm, then wrap carefully and freeze for up to 2 months. Thaw overnight in the refrigerator, then bring to room temperature before serving. The texture remains excellent.Conclusion
There’s something truly special about serving a pistachio cake—the way people’s eyes widen at that gorgeous pale green color when you cut into it, the way they pause after the first bite to savor the unique, sophisticated flavor, and the way everyone inevitably asks for the recipe. This cake has that rare quality of being both impressive and approachable, special enough for celebrations but comforting enough for weekend baking.
Whether you’re making this pistachio cake for a milestone birthday, a spring gathering, a bridal shower, or simply because you want to try something beautifully different, this recipe delivers on every level. It proves that baking something extraordinary doesn’t require complicated techniques or hours of work—just quality ingredients, clear instructions, and a little bit of love.
I’d absolutely love to hear about your pistachio cake adventures! Did you try any flavor variations? How did your guests react to the unique flavor? What occasion did you make it for? Drop a comment below and share your experience—I read every comment and love celebrating your baking successes! And if this recipe brings you as much joy as it brings me, please save it to your Pinterest boards and share it with friends who appreciate beautiful, delicious, unique desserts. Let’s spread the pistachio love!
Now grab those pistachios and let’s create something absolutely stunning! 🥮💚✨