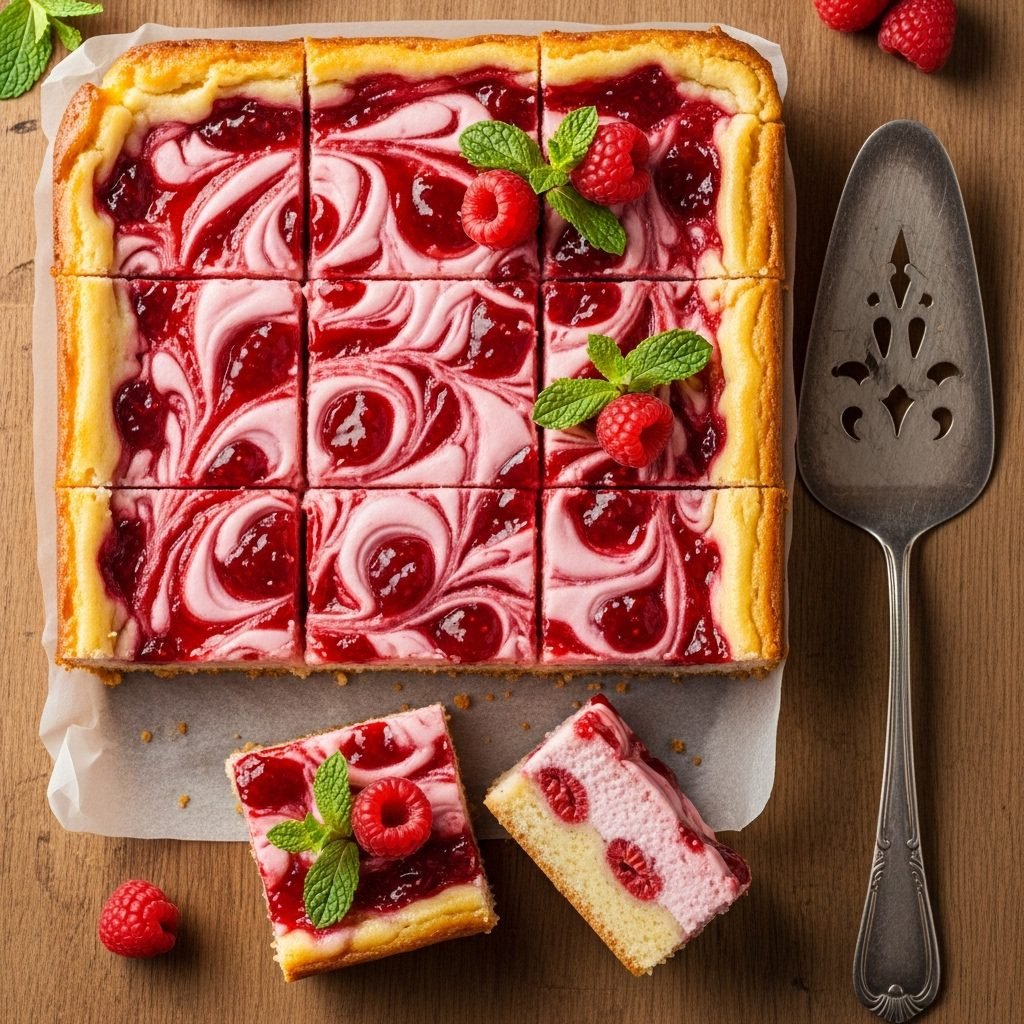
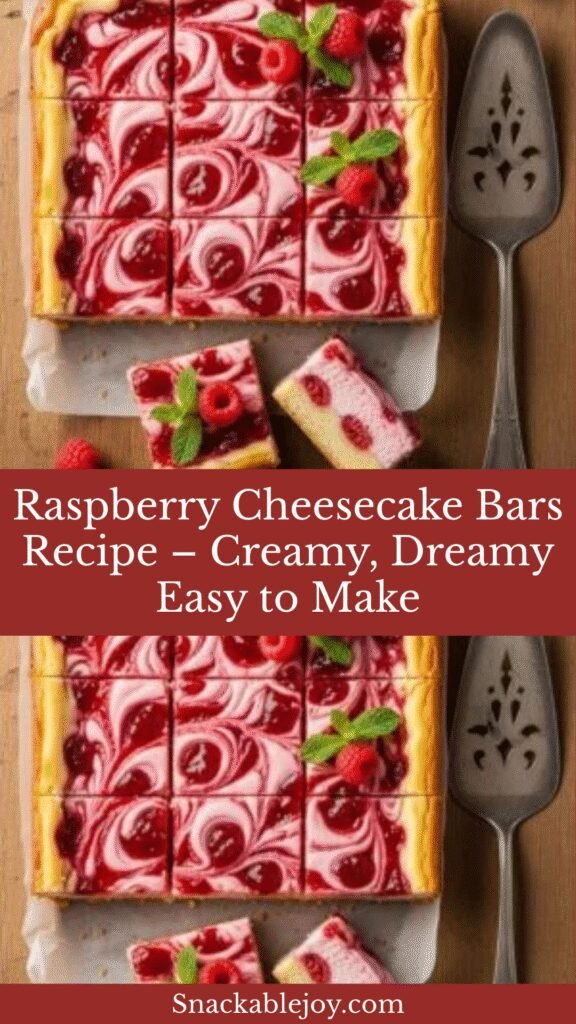
Raspberry Cheesecake Bars Recipe – Creamy, Dreamy Easy to Make
If you’re searching for the perfect dessert that combines creamy cheesecake with bright, tangy raspberries, these Raspberry Cheesecake Bars are exactly what you need. These stunning bars feature a buttery graham cracker crust, a rich and velvety cheesecake filling, and a beautiful raspberry swirl topping that looks as incredible as it tastes. Whether you’re hosting a summer barbecue, bringing dessert to a potluck, celebrating a birthday, or simply treating your family to something special on a Sunday afternoon, these bars are guaranteed crowd-pleasers that disappear fast.
What makes these raspberry cheesecake bars so special is their perfect balance of flavors and textures. The sweet, crumbly crust provides the ideal foundation, while the smooth cream cheese filling delivers that classic cheesecake taste we all crave. The raspberry layer adds a fruity brightness that cuts through the richness beautifully, making each bite feel indulgent yet refreshing. Plus, they’re much easier to make than a traditional round cheesecake since there’s no water bath required and they bake in a simple rectangular pan. You can slice them into neat squares for serving, which makes them perfect for parties, bake sales, or packing into lunchboxes as a special treat.
History / Background
Cheesecake has been beloved for thousands of years, with ancient Greeks serving a simple version made from cheese, honey, and wheat to Olympic athletes as an energy source. The Romans adopted this concept and spread it throughout Europe, where each region developed its own variation. However, the modern American-style cheesecake we know and love today didn’t emerge until cream cheese was accidentally invented in 1872 by a New York dairyman named William Lawrence, who was trying to recreate French Neufchâtel cheese.
Cheesecake bars specifically gained popularity in American home kitchens during the mid-20th century as busy home cooks sought easier alternatives to traditional round cheesecakes. The bar format eliminated the need for springform pans, water baths, and the anxiety of wondering whether the center was properly set. By baking cheesecake in a rectangular pan, home bakers could create perfectly portioned servings that were easier to transport and serve at gatherings.
The addition of raspberries to cheesecake is a match made in dessert heaven. Raspberries have been cultivated in Europe since the 16th century and were brought to North America by European settlers. Their natural tartness and beautiful ruby color make them an ideal companion to rich, creamy desserts. The combination of raspberry and cheesecake became especially popular in the 1980s and 1990s when fruit-topped cheesecakes became a restaurant dessert menu staple. Today, raspberry cheesecake bars remain one of the most requested desserts at potlucks, holiday gatherings, and summer celebrations across America. They represent the perfect evolution of a classic dessert, combining tradition with convenience and delivering impressive results that anyone can achieve in their home kitchen.
Why You’ll Love This Recipe
These raspberry cheesecake bars deliver all the satisfaction of traditional cheesecake with a fraction of the stress and difficulty. They’re proof that you don’t need professional pastry skills or specialized equipment to create something absolutely stunning and delicious. The recipe is genuinely approachable for bakers of all levels while producing results that look and taste like they came from an upscale bakery.
Here’s what makes this recipe truly special:
- No water bath required – Bake directly in the oven without complicated setups
- No springform pan needed – Use a standard 9×13 baking dish you already own
- Perfect for crowds – Makes 24 bars, ideal for parties and potlucks
- Easily portable – Cut and transport without worrying about slices falling apart
-
- Make-ahead friendly – Actually tastes better after chilling overnight
- Stunning presentation – The raspberry swirl creates gorgeous marbled effect
- Balanced flavors – Tangy cream cheese meets sweet-tart raspberry perfection
- Clean slicing – Bars cut beautifully for neat, professional-looking portions
- Budget-friendly – Costs significantly less than buying from a bakery
- Customizable – Easy to swap raspberry for other fruits or flavors
- No mixer fatigue – Simpler mixing process than traditional cheesecake
- Kid-approved – The fruity element makes it appealing to all ages
This recipe takes everything people love about cheesecake and makes it accessible, practical, and absolutely foolproof.
Ingredient Notes
For the Crust:
Graham Cracker Crumbs: The classic cheesecake base that provides buttery, slightly sweet foundation. You’ll need about 2 sleeves of graham crackers crushed into fine crumbs. You can buy pre-crushed crumbs to save time, or make your own by pulsing crackers in a food processor or crushing them in a zip-top bag with a rolling pin.
Unsalted Butter: Binds the crumbs together and adds richness. Melted butter is essential for coating all the crumbs evenly. Salted butter can work if that’s what you have—just omit the added salt.
Granulated Sugar: Just a touch sweetens the crust without making it candy-like. It also helps the crust hold together better.
For the Cheesecake Filling:
Cream Cheese: The star ingredient that creates that signature tangy, creamy cheesecake texture. Use full-fat cream cheese (the blocks, not the spreadable kind in tubs) and make absolutely sure it’s at room temperature. Cold cream cheese creates lumps that won’t smooth out.
Granulated Sugar: Sweetens the filling and balances the tanginess of cream cheese. The amount can be adjusted slightly to taste, but don’t reduce it too much or the cheesecake will taste overly tangy.
Sour Cream: Adds extra tanginess and creates incredibly smooth, creamy texture. Full-fat sour cream is best, but low-fat can work. Greek yogurt can substitute in a pinch, though the flavor will be slightly different.
Eggs: Provide structure and help the cheesecake set properly. Room temperature eggs incorporate more smoothly into the batter. You’ll need 3 large eggs.
Vanilla Extract: Enhances all the other flavors and adds depth. Pure vanilla extract tastes noticeably better than imitation.
All-Purpose Flour: Just a tablespoon helps stabilize the filling and prevent cracking. Some recipes skip this, but I find it creates better texture.
For the Raspberry Topping:
Fresh or Frozen Raspberries: Both work equally well! Frozen raspberries are often more affordable and available year-round. No need to thaw them before cooking.
Granulated Sugar: Sweetens the naturally tart raspberries and helps create the thick sauce consistency.
Cornstarch: Thickens the raspberry mixture so it doesn’t make the cheesecake soggy. This is essential—don’t skip it.
Lemon Juice: Brightens the raspberry flavor and adds a subtle tangy note that complements the cream cheese beautifully.
Equipment Needed
- 9×13-inch baking pan – Standard rectangular pan; glass or metal both work
- Aluminum foil or parchment paper – For lining the pan and easy removal
- Large mixing bowls – At least two for different components
- Electric mixer – Stand mixer or hand mixer makes quick work of cream cheese
- Medium saucepan – For cooking the raspberry topping
- Whisk – For mixing raspberry sauce
- Rubber spatula – For scraping bowls and spreading filling
- Measuring cups and spoons – Accuracy matters in baking
- Food processor – Optional, for crushing graham crackers
- Toothpick or knife – For swirling raspberry into cheesecake
- Wire cooling rack – For cooling the bars properly

Raspberry Cheesecake Bars Recipe
These raspberry cheesecake bars feature a buttery graham cracker crust, creamy cheesecake filling, and beautiful swirls of homemade raspberry sauce. They’re easier than traditional cheesecake and perfect for feeding a crowd!
- Total Time: 5 hours
- Yield: 24 bars 1x
Ingredients
For the Crust:
- 2 cups graham cracker crumbs (about 16 full crackers)
- ½ cup (1 stick) unsalted butter, melted
- ¼ cup granulated sugar
- Pinch of salt
For the Cheesecake Filling:
- 24 oz (three 8-oz packages) cream cheese, softened to room temperature
- 1 cup granulated sugar
- 1 cup sour cream, room temperature
- 3 large eggs, room temperature
- 2 teaspoons vanilla extract
- 1 tablespoon all-purpose flour
For the Raspberry Swirl:
- 2 cups fresh or frozen raspberries
- ⅓ cup granulated sugar
- 2 tablespoons water
- 1 tablespoon cornstarch mixed with 1 tablespoon water
- 1 tablespoon fresh lemon juice
Instructions
Prepare the Pan and Crust:
- Preheat and prep: Preheat your oven to 325°F (163°C). Line a 9×13-inch baking pan with aluminum foil or parchment paper, leaving overhang on the sides for easy removal later. Lightly spray with non-stick cooking spray.
- Make the crust: In a medium bowl, combine graham cracker crumbs, melted butter, sugar, and salt. Mix with a fork until the mixture resembles wet sand and holds together when pressed.
- Press the crust: Pour the crumb mixture into your prepared pan. Press firmly and evenly into the bottom using the bottom of a measuring cup or your hands. Make sure it’s compact and reaches all corners.
- Pre-bake: Bake the crust for 10 minutes. Remove from oven and set aside to cool slightly while you prepare the filling.
Make the Raspberry Swirl:
- Cook raspberries: In a medium saucepan over medium heat, combine raspberries, sugar, and 2 tablespoons water. Cook, stirring occasionally and mashing the berries with a spoon, until the mixture breaks down and becomes juicy, about 5 minutes.
- Thicken: Mix cornstarch with 1 tablespoon water to create a slurry. Add to the raspberry mixture along with lemon juice. Stir constantly and cook for 1-2 minutes until the mixture thickens noticeably.
- Strain (optional): For a smoother sauce without seeds, press the mixture through a fine-mesh strainer. For more texture, leave it as is. Set aside to cool slightly.
Make the Cheesecake Filling:
- Beat cream cheese: In a large bowl using an electric mixer, beat the softened cream cheese on medium speed for 2-3 minutes until completely smooth, creamy, and fluffy with no lumps. Scrape down the sides of the bowl frequently.
- Add sugar: Add the sugar and beat for another 2 minutes until well combined and fluffy.
- Add sour cream: Mix in the sour cream and vanilla extract, beating until smooth and incorporated.
- Add flour: Add the flour and mix just until combined.
- Add eggs: Add eggs one at a time, beating on low speed after each addition just until incorporated. Don’t overmix—too much air creates cracks. Scrape down the bowl between additions.
Assemble and Bake:
- Pour filling: Pour the cheesecake batter over the pre-baked crust, spreading it evenly with a spatula. Gently tap the pan on the counter a few times to release air bubbles.
- Add raspberry swirl: Drop spoonfuls of the raspberry mixture over the top of the cheesecake filling, distributing it somewhat evenly across the surface.
- Create swirl: Using a knife, toothpick, or skewer, gently swirl the raspberry through the cheesecake in figure-eight or S-shaped patterns. Don’t over-swirl or the colors will muddy—a few swirls create beautiful marbling.
- Bake: Bake at 325°F for 38-42 minutes. The cheesecake is done when the edges are set but the center still has a slight wobble when you gently shake the pan (about 2-3 inches in the center). It will firm up as it cools.
Cool and Chill:
- Cool gradually: Turn off the oven and crack the door open. Let the cheesecake bars cool in the oven for 30 minutes. This gradual cooling helps prevent cracks.
- Room temperature cool: Remove from oven and cool completely to room temperature on a wire rack, about 1-2 hours.
- Refrigerate: Cover the pan with plastic wrap and refrigerate for at least 4 hours, but preferably overnight. The bars must be completely cold and firm before cutting.
- Cut and serve: Use the foil or parchment overhang to lift the entire cheesecake out of the pan. Place on a cutting board. Use a large, sharp knife (wiped clean between cuts) to slice into 24 bars. Serve chilled and enjoy!
Notes
- Room temperature ingredients are crucial for smooth, lump-free filling. Set cream cheese, eggs, and sour cream out 1-2 hours before baking.
- Don’t overmix the batter after adding eggs—this incorporates too much air and can cause cracks.
- The center should still wobble slightly when done. It will continue to set as it cools.
- For cleanest cuts, chill overnight, use a sharp knife, and wipe the knife clean between each cut.
- If you want seedless raspberry swirl, strain the cooked mixture through a fine-mesh sieve.
- The bars can be cut into 16 larger servings or 32 smaller bite-sized pieces depending on your needs.
- Prep Time: 20 minutes
- Cook Time: 40 minutes
- Category: Desert
- Method: Baking
- Cuisine: American
- Diet: Vegetarian
Nutrition
- Serving Size: 1 bar (based on 24 servings)
- Calories: 215
- Sugar: 17g
- Sodium: 150mg
- Fat: 14g
- Saturated Fat: 8g
- Unsaturated Fat: 4g
- Trans Fat: 0g
- Carbohydrates: 20g
- Fiber: 1g
- Protein: 4g
- Cholesterol: 60mg
Tips & Variations
Flavor Variations:
- Blueberry Cheesecake Bars: Substitute blueberries for raspberries in the topping
- Strawberry Cheesecake Bars: Use strawberries; cook a bit longer as they’re less juicy
- Mixed Berry: Use a combination of raspberries, blueberries, and blackberries
- Lemon Cheesecake Bars: Omit fruit swirl; add 2 tablespoons lemon zest and 2 tablespoons lemon juice to filling
- Chocolate Raspberry: Add ½ cup mini chocolate chips to the filling before baking
- Oreo Crust: Replace graham crackers with crushed Oreos for chocolate crust
- Salted Caramel: Drizzle with salted caramel sauce instead of raspberry swirl
- White Chocolate Raspberry: Fold ½ cup melted white chocolate into filling
Crust Variations:
- Use vanilla wafers, Biscoff cookies, or gingersnaps instead of graham crackers
- Add ½ cup finely chopped pecans or almonds to the crust for nutty flavor
- Use chocolate graham crackers for chocolate crust
- Make a pretzel crust for sweet-salty combination
Healthier Modifications:
- Use reduced-fat cream cheese and sour cream (texture will be slightly less rich)
- Reduce sugar in filling to ¾ cup if you prefer less sweet
- Use whole wheat graham crackers for added fiber
- Top with fresh raspberries instead of cooked sauce to reduce sugar
Presentation Ideas:
- Dust with powdered sugar before serving
- Top each bar with a fresh raspberry and mint leaf
- Drizzle with white chocolate for elegant finish
- Serve on individual plates with extra raspberry sauce
- Add a dollop of whipped cream when serving
Pro Chef Tips
Room Temperature Ingredients are Non-Negotiable: This is the number one secret to smooth, lump-free cheesecake filling. Cold cream cheese will never fully smooth out, no matter how long you beat it. Set your cream cheese, eggs, and sour cream out on the counter 1-2 hours before starting. If you forget, you can soften cream cheese by removing it from the package and microwaving on 50% power for 15-20 seconds, then letting it rest.
The Pre-Bake Crust Secret: Baking the crust for 10 minutes before adding the filling serves multiple purposes: it sets the crust so it doesn’t get soggy, creates a barrier between crust and filling, and develops deeper flavor. Don’t skip this step—it makes a noticeable difference in the final texture.
Low and Slow Baking Prevents Cracks: Baking at 325°F rather than higher temperatures helps the cheesecake cook evenly without the edges overcooking while the center catches up. The gradual cooling in the oven with the door cracked is equally important—rapid temperature changes cause cracks.
The Wobble Test: Cheesecake bars are done when the outer 2-3 inches are set but the center still has a slight wobble—like gelatin. It should NOT look liquid, but it shouldn’t be completely firm either. The residual heat continues cooking it as it cools. An instant-read thermometer should read 150-155°F in the center.
Make the Raspberry Sauce First: This allows it to cool slightly while you prepare the filling, making it easier to swirl without sinking. If it’s too hot, it can create uneven patches or cause the cheesecake to crack.
The Knife-Cleaning Trick: For professional-looking cuts, use a large, sharp knife dipped in hot water and wiped completely dry between each cut. The hot knife glides through cleanly, and wiping removes cheesecake residue that would drag and create messy edges.
Lifting Out is Easier Than Cutting in the Pan: Using the foil or parchment overhang to lift the entire cheesecake out onto a cutting board makes cutting much easier and gives you cleaner edges. You have better control and visibility when cutting on a flat surface.
Common Mistakes to Avoid
Using Cold Cream Cheese: This is the most common mistake and results in lumpy filling with visible cream cheese chunks that never smooth out. Those lumps don’t disappear during baking—they stay lumpy! Always allow cream cheese to come to room temperature (it should feel soft when you press it) before beginning. This takes 1-2 hours at room temperature or can be carefully accelerated in the microwave.
Overmixing After Adding Eggs: Once eggs go in, mix on low speed and only until just incorporated. Overmixing incorporates too much air, which expands during baking and then deflates during cooling, causing cracks and sunken centers. After eggs are added, gentle mixing is key.
Overbaking: Cheesecake that’s baked until the center is completely firm will be dry, dense, and may crack. The center should still have a slight wobble when you gently shake the pan—it firms up considerably as it cools. Resist the urge to keep baking until it’s completely set.
Cutting While Still Warm: I know it’s tempting, but cutting warm or room-temperature cheesecake bars creates a mess. The filling is too soft and will smear and fall apart. The bars must be completely chilled (preferably overnight) for clean, beautiful slices. Patience pays off here!
Not Lining the Pan: Trying to cut and serve cheesecake bars directly from the pan is frustrating and creates messy portions. Lining with foil or parchment with overhang allows you to lift the entire thing out, making cutting on a board much easier and more precise.
Skipping the Gradual Cool: Taking hot cheesecake straight from a hot oven into cold air causes rapid temperature change that leads to cracking. The 30-minute gradual cool in the turned-off oven with the door cracked allows gentle temperature transition that keeps the surface smooth.
Storage & Meal Prep
Refrigerator Storage: Raspberry cheesecake bars must be stored in the refrigerator and will keep beautifully for 5-7 days when properly covered. Once cut, store the bars in an airtight container with parchment or wax paper between layers to prevent sticking. Alternatively, cover the uncut pan tightly with plastic wrap or aluminum foil. The bars actually taste better after a day or two as the flavors meld and develop.
Individual Wrapping: For grab-and-go convenience, wrap individual bars in plastic wrap once fully chilled. This makes them perfect for packed lunches, lunchboxes, or portioning out throughout the week. They stay fresh and are easy to transport.
Maintaining Texture: Cheesecake bars should always be stored cold. Don’t leave them at room temperature for more than 2 hours (1 hour if it’s hot weather) as the cream cheese filling can spoil. Always refrigerate leftovers promptly after serving.
Preventing Sogginess: The pre-baked crust helps prevent sogginess, but if storing for several days, placing parchment paper between the bars and the container bottom provides extra protection. The crust should stay crisp and intact throughout storage.
Freezer Storage: Great news—these bars freeze exceptionally well! Once completely cooled and chilled, cut into individual bars, wrap each bar tightly in plastic wrap, then place wrapped bars in a freezer-safe zip-top bag or container. Freeze for up to 3 months. Thaw overnight in the refrigerator before serving.
Serving from Cold: These bars are best served cold, straight from the refrigerator. The chilled temperature provides the best texture and flavor. Remove from the fridge just before serving rather than letting them sit out.
Make-Ahead & Freezer Notes
Perfect Make-Ahead Dessert: Raspberry cheesecake bars are actually one of the best make-ahead desserts because they absolutely require chilling time anyway, and they taste even better after sitting overnight. This makes them ideal for entertaining—you can completely finish them 1-2 days before your event, freeing up time for other preparations.
1-2 Days Ahead (Ideal): The sweet spot for making these bars is 1-2 days before serving. Make the bars completely, chill overnight, then cut the day you plan to serve. The flavors are fully developed, the texture is perfect, and all your work is done ahead of time. Store covered in the refrigerator.
Up to 3 Days Ahead: You can push it to 3 days if needed. The bars will still be delicious, though the crust may soften very slightly with extended storage. Keep well-covered in the refrigerator until ready to cut and serve.
Component Prep: You can make the raspberry sauce 3-4 days ahead and store it in an airtight container in the refrigerator. The crust can be pressed into the pan and pre-baked a day ahead, wrapped tightly and kept at room temperature. Then you only need to make the filling and assemble on the baking day.
Freezing for Long-Term Storage: These bars freeze beautifully, making them perfect for batch baking or keeping on hand for unexpected guests. Freeze cut bars individually wrapped in plastic wrap, then stored together in a freezer bag with as much air removed as possible. Properly wrapped bars maintain quality for up to 3 months.
Thawing Instructions: Thaw frozen bars overnight in the refrigerator, still wrapped. Don’t thaw at room temperature or in the microwave—slow thawing maintains the best texture. Once thawed, remove wrapping and serve cold. The texture will be nearly identical to fresh.
Transporting: If taking these to a party or potluck, transport them cold in the pan covered with foil, or pack cut bars in a container with ice packs. Keep refrigerated until serving time for food safety and best texture.
Serving Suggestions
Classic Presentation:
These raspberry cheesecake bars are stunning on their own, but a few simple additions can make them even more special:
- Fresh raspberries: A couple of fresh berries on top of each bar adds color and reinforces flavor
- Whipped cream: Light dollop on the side provides creamy contrast
- Mint leaves: Fresh mint sprig adds elegance and a pop of green
- Powdered sugar dusting: Light dusting through a fine sieve creates bakery-style finish
- Extra raspberry sauce: Drizzle additional sauce on the plate for restaurant presentation
- White chocolate drizzle: Melted white chocolate zigzagged over the top looks sophisticated
Beverage Pairings:
- Coffee: Hot coffee or espresso cuts through the richness beautifully
- Tea: Chamomile, English Breakfast, or berry herbal teas complement nicely
- Milk: Classic pairing, especially for kids
- Dessert wine: Moscato or late harvest Riesling echo the fruity notes
- Sparkling water: With lemon or lime provides refreshing contrast
- Champagne: For celebrations, the bubbles cleanse the palate between bites
Occasion-Specific Serving:
- Brunch: Cut into smaller pieces and arrange on a platter with fresh berries
- Baby showers: The pink raspberry swirls make these perfect for celebrations
- Birthday parties: Easier than cake for feeding crowds; add birthday candles
- Potlucks: Transport in the pan, cut on-site for maximum freshness
- Picnics: Pack individual wrapped bars in a cooler with ice packs
- Holiday dessert tables: Beautiful color makes them festive for any celebration
- Afternoon tea: Cut into tiny bite-sized portions for tea service
Plating for Special Occasions:
- Place bar on a white plate with raspberry coulis design
- Add a small scoop of vanilla ice cream or gelato on the side
- Create a “deconstructed” presentation with crumbled crust, cheesecake bite, and sauce
- Garnish plate rim with fresh berries and edible flowers
- Serve on vintage dessert plates with gold forks for elegant touch
FAQs Section
Q: Can I use store-bought raspberry sauce instead of making my own?
A: While homemade tastes best and has better consistency, you can use high-quality store-bought raspberry preserves or jam in a pinch. Thin it slightly with 1-2 tablespoons of water or lemon juice and heat it until pourable. However, preserves tend to be sweeter and may sink more than the homemade cornstarch-thickened version. For best results, make the homemade sauce—it only takes 10 minutes!
Q: Why did my cheesecake bars crack?
A: Cracks happen for several reasons: overbaking (the center should still wobble slightly when done), overmixing after adding eggs (incorporates too much air), rapid temperature changes (always do the gradual cool in the turned-off oven), or opening the oven door during baking. The good news? Cracks don’t affect taste at all, and they’re easily hidden under toppings! Follow the temperature guidelines carefully to minimize cracking.
Q: Can I make these without eggs?
A: Eggs are really crucial for the structure and texture of cheesecake. However, you could try using a commercial egg replacer designed for baking (like Bob’s Red Mill Egg Replacer), using the equivalent of 3 eggs according to package directions. The texture will be different—less custardy and more like a no-bake cheesecake—but it can work. I haven’t tested this variation personally, so results may vary.
Q: Do I have to use sour cream?
A: Sour cream adds tanginess and creates incredibly smooth, creamy texture, but you can substitute with plain Greek yogurt (full-fat is best) for similar results. You could also use additional cream cheese (8 oz more) and omit the sour cream entirely, though the texture will be denser and richer. Don’t substitute with milk or regular yogurt—you need that thickness and tang.
Q: My raspberry sauce is too thick/too thin. How do I fix it?
A: If it’s too thick and paste-like, stir in water 1 tablespoon at a time until it reaches a thick but pourable consistency—like maple syrup. If it’s too thin and runny, make another cornstarch slurry (1 teaspoon cornstarch mixed with 1 teaspoon water) and stir it into the simmering sauce, cooking for another minute until thickened. The sauce should be thick enough to sit on top of the cheesecake without immediately sinking.
Q: Can I make these in a different size pan?
A: Yes, but you’ll need to adjust baking time. An 8×8 square pan will make thicker bars and require about 50-55 minutes baking time. A 9×9 pan needs about 45-48 minutes. The bars will be thinner in a larger pan, so reduce baking time to 30-35 minutes. Always use the wobble test rather than relying solely on time to determine doneness.
Q: How do I get such clean cuts?
A: The secret is fully chilling the bars (overnight is best), using a large sharp knife, and wiping the knife clean with a hot damp towel between every single cut. Dip the knife in hot water, wipe completely dry, cut, then wipe the knife clean before the next cut. It seems tedious but makes an enormous difference in presentation. Also, lift the entire cheesecake out of the pan using the foil overhang before cutting—it’s much easier on a cutting board.
Q: Can I use frozen raspberries?
A: Absolutely! Frozen raspberries work perfectly for the sauce—no need to thaw them first. They actually break down more quickly when cooking, making the sauce easier. Frozen berries are also more budget-friendly and available year-round. The result tastes just as good as fresh.
Conclusion
There’s something incredibly satisfying about pulling a pan of raspberry cheesecake bars from the refrigerator, seeing those gorgeous pink swirls marbled through creamy cheesecake, and knowing you created something this beautiful and delicious in your own kitchen. These bars prove that impressive desserts don’t require professional training or fancy equipment—just good ingredients, clear instructions, and a little patience during the chilling time.
Whether you’re making these raspberry cheesecake bars for a crowd, treating your family to something special, or simply indulging your cheesecake cravings without the fuss of a traditional cake, this recipe delivers every single time. It’s become my go-to dessert when I want to look like a baking superstar without actually breaking a sweat.
I’d absolutely love to hear about your raspberry cheesecake bar adventures! What toppings did you try? Did you experiment with different crust options? How did they go over at your gathering? Drop a comment below and share your experience—I read every single comment and love celebrating your baking wins! And if this recipe brings you as much joy as it brings me, please save it to your Pinterest boards and share it with friends who appreciate delicious, easy desserts. Let’s spread the cheesecake love!
Now grab that cream cheese and let’s create something amazing! 🍰💕