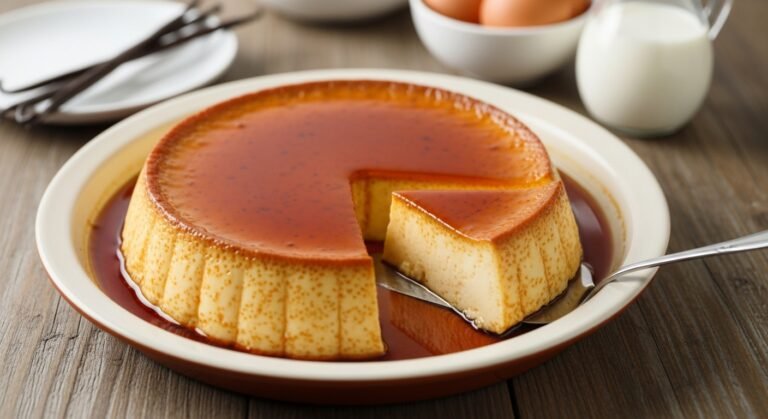
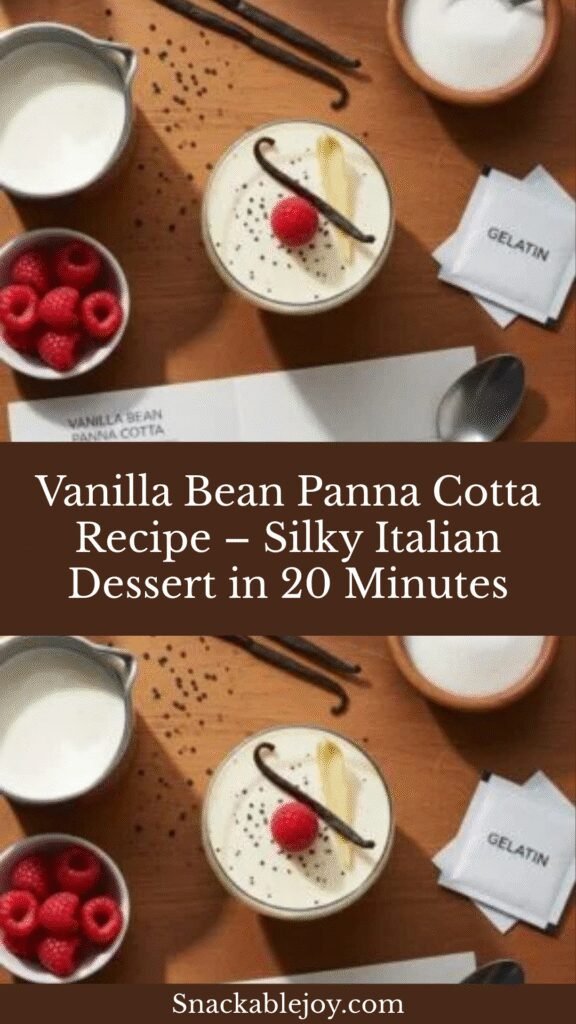
Vanilla Bean Panna Cotta Recipe – Silky Italian Dessert in 20 Minutes
If you’re looking for a dessert that screams elegance but whispers “easy,” vanilla bean panna cotta is your answer. This Italian classic is one of the most sophisticated desserts you can make with minimal effort—it requires no baking, no complicated techniques, and just a handful of simple ingredients. The result? A silky-smooth, creamy custard with the most gorgeous vanilla bean specks throughout, topped with whatever your heart desires—fresh berries, fruit compote, caramel sauce, or simply enjoyed in its pure, unadulterated form.
Panna cotta (which literally translates to “cooked cream” in Italian) has that magical ability to feel both luxurious and comforting at the same time. It’s the kind of dessert that impresses dinner party guests but is easy enough to whip up on a Tuesday evening when you’re craving something special. The gentle wobble when you unmold it, the way it melts on your tongue, and those beautiful flecks of real vanilla bean make it absolutely irresistible. Whether you’re hosting an elegant dinner party, celebrating a special occasion, planning a romantic dinner for two, or simply treating yourself to something extraordinary, vanilla bean panna cotta never disappoints.
History / Background
Panna cotta is a relatively modern addition to Italian cuisine, originating in the Piedmont region of northern Italy sometime in the early 1900s. Unlike many Italian desserts with ancient roots stretching back centuries, panna cotta is a 20th-century creation that has taken the culinary world by storm in just over 100 years.
The exact origin story is somewhat debated, but most food historians agree that panna cotta was created in the Langhe region of Piedmont, an area famous for its excellent dairy products, wines, and truffles. Some accounts credit a Hungarian woman living in the Langhe who made a similar cream-based dessert and shared her technique with local cooks. Others believe it evolved from traditional Piedmontese cream-based desserts that were thickened with fish bones (yes, really—before gelatin became commercially available).
What we do know is that panna cotta remained relatively obscure outside of Piedmont until the 1960s and 70s, when it began appearing on restaurant menus throughout Italy. By the 1990s, it had become an international sensation, adopted by chefs worldwide who loved its versatility, elegant simplicity, and make-ahead convenience. Today, you’ll find endless variations—from classic vanilla to exotic flavors like lavender, earl grey, matcha, and rose—but the traditional vanilla bean version remains the gold standard.
Panna cotta represents the Italian philosophy of cucina povera—creating something extraordinary from simple, quality ingredients. It’s a dessert that proves you don’t need elaborate techniques or expensive equipment to create restaurant-worthy elegance. Just cream, sugar, gelatin, and vanilla—that’s the magic.
Why You’ll Love This Recipe
This vanilla bean panna cotta recipe is proof that the best desserts don’t have to be complicated. Unlike temperamental soufflés, finicky macarons, or labor-intensive layer cakes, panna cotta is remarkably forgiving and virtually foolproof once you understand the simple technique. It’s a dessert that makes you look like a culinary genius while requiring less active time than most cookie recipes.
Here’s what makes this recipe truly special:
- Incredibly easy – No baking, no water baths, no tricky techniques
- Ready in 20 minutes – Active prep time is minimal; the fridge does the rest
- Make-ahead perfection – Actually improves when made 1-2 days ahead
- Naturally gluten-free – Perfect for guests with gluten sensitivities
- Elegant presentation – Looks like it came from a fancy restaurant
- Endlessly customizable – Top with anything from berries to caramel
- Budget-friendly luxury – Tastes expensive but costs pennies per serving
- Impressive but approachable – Guests think you’re a professional chef
- Light yet satisfying – Rich but not heavy; the perfect ending to any meal
- Stable and reliable – Won’t deflate, crack, or fall apart like other desserts
- Beautiful vanilla flavor – Real vanilla beans create incomparable taste and appearance
This recipe strikes that perfect balance between impressive and achievable, making it ideal for both entertaining and everyday indulgence. It’s the dessert I turn to when I want to wow people without stress.
Ingredient Notes
Heavy Cream: The star ingredient that gives panna cotta its signature richness and silky texture. Heavy cream (also called heavy whipping cream) has the highest fat content, which is essential for that luxurious mouthfeel. Don’t substitute with half-and-half or light cream—you’ll sacrifice the texture and richness that makes panna cotta special.
Whole Milk: Balances the heavy cream, preventing the panna cotta from being too rich while maintaining creaminess. Whole milk is ideal; 2% can work in a pinch but will be slightly less luxurious. Avoid skim milk—the fat content matters here.
Granulated Sugar: Provides just enough sweetness without overwhelming the delicate vanilla flavor. The amount can be adjusted to taste, but don’t eliminate it entirely—sugar also affects the texture and how the gelatin sets.
Vanilla Bean: This is where the magic happens. A real vanilla bean pod creates those gorgeous black specks throughout and provides complex, floral vanilla flavor that extract alone simply cannot match. Yes, vanilla beans are expensive, but one pod flavors six servings, making it worthwhile. Look for plump, moist beans (not dry and brittle) from Madagascar, Tahiti, or Mexico.
Vanilla Extract: Used in addition to the vanilla bean to boost and round out the vanilla flavor. Pure vanilla extract is essential—imitation vanilla has a harsh, artificial taste that’s especially noticeable in delicate desserts like this. Even with a vanilla bean, the extract adds depth.
Unflavored Gelatin: The thickening agent that transforms cream into panna cotta’s signature wobble. Use powdered unflavored gelatin (like Knox brand). Don’t substitute with flavored Jello—it won’t work and will add unwanted sweetness and artificial flavor. Gelatin sheets (leaf gelatin) can be substituted using a 1:1 ratio by weight.
Cold Water: Used to bloom (hydrate) the gelatin before adding it to the warm cream. This step is crucial—never add dry gelatin directly to hot liquid or you’ll get lumps.
Salt: Just a tiny pinch enhances all the other flavors and prevents the panna cotta from tasting flat or one-dimensional.
Equipment Needed
- Medium saucepan – For heating the cream mixture; 2-3 quart capacity
- Whisk – For stirring and ensuring smooth texture
- Sharp knife – For splitting the vanilla bean
- Small bowl – For blooming the gelatin
- Measuring cups and spoons – Accuracy is important for proper setting
- Fine-mesh strainer – For removing vanilla bean and any skin from heated cream
- Serving dishes – Six ramekins (4-6 oz each), small bowls, or decorative glasses
- Plastic wrap or small plates – For covering while chilling
- Paring knife – Optional, for unmolding if desired
- Serving plates – If unmolding the panna cotta
Optional but helpful:
- Small offset spatula for releasing edges when unmolding
- Decorative molds or silicone molds for special shapes
- Piping bag if adding decorative toppings

Vanilla Bean Panna Cotta Recipe
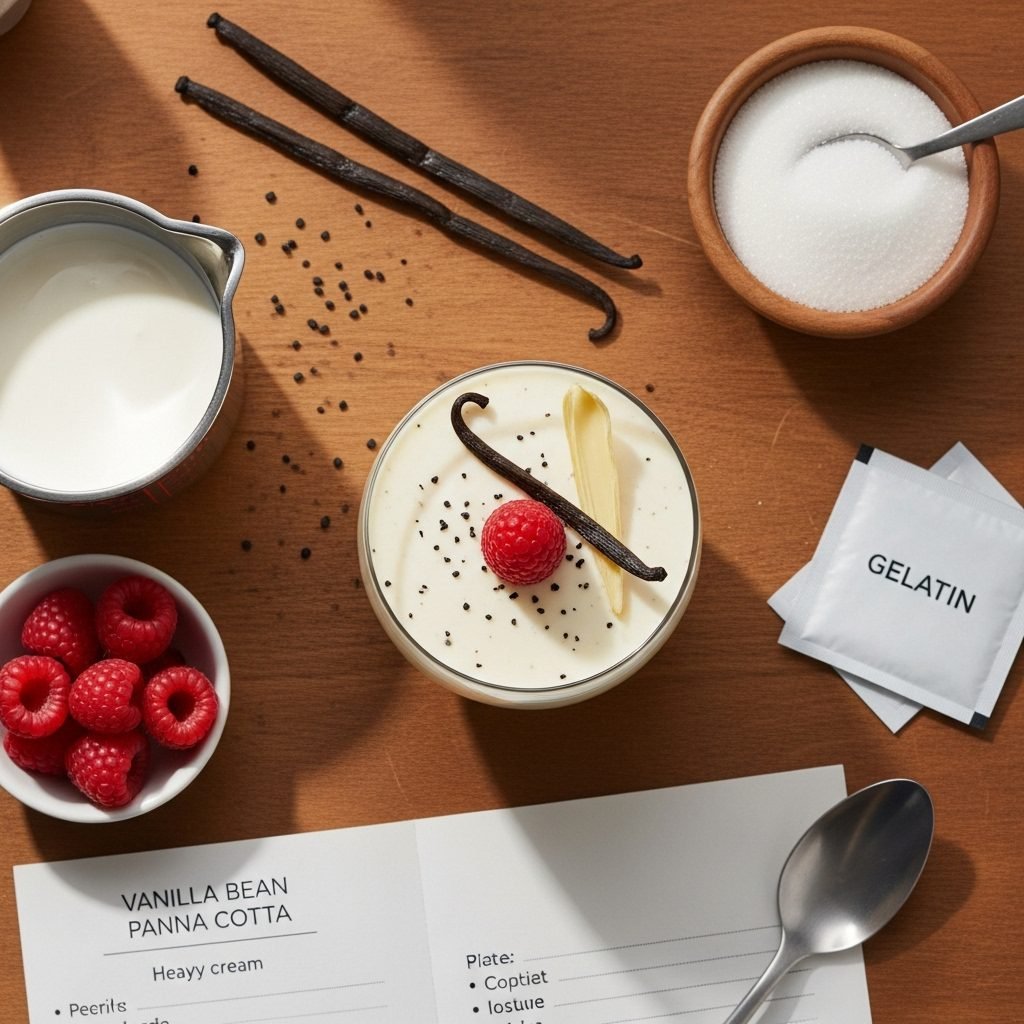
This classic vanilla bean panna cotta is a silky-smooth Italian dessert made with just six ingredients. Infused with real vanilla bean and topped with fresh berries, it’s an elegant yet easy make-ahead dessert perfect for any occasion.
- Total Time: 4 hours 20 minutes
- Yield: 6 servings 1x
Ingredients
- 1 tablespoon (1 packet) unflavored gelatin powder
- 3 tablespoons cold water
- 2 cups heavy cream
- 1 cup whole milk
- ½ cup granulated sugar
- 1 vanilla bean pod
- 1 teaspoon pure vanilla extract
- Pinch of salt
For Serving (Optional):
- Fresh berries (strawberries, raspberries, blueberries)
- Berry compote or fruit sauce
- Caramel sauce
- Fresh mint leaves for garnish
Instructions
Vanilla Bean Panna Cotta Recipe – Silky Italian Dessert in 20 Minutes
Introduction of Recipe
If you’re looking for a dessert that screams elegance but whispers “easy,” vanilla bean panna cotta is your answer. This Italian classic is one of the most sophisticated desserts you can make with minimal effort—it requires no baking, no complicated techniques, and just a handful of simple ingredients. The result? A silky-smooth, creamy custard with the most gorgeous vanilla bean specks throughout, topped with whatever your heart desires—fresh berries, fruit compote, caramel sauce, or simply enjoyed in its pure, unadulterated form.
Panna cotta (which literally translates to “cooked cream” in Italian) has that magical ability to feel both luxurious and comforting at the same time. It’s the kind of dessert that impresses dinner party guests but is easy enough to whip up on a Tuesday evening when you’re craving something special. The gentle wobble when you unmold it, the way it melts on your tongue, and those beautiful flecks of real vanilla bean make it absolutely irresistible. Whether you’re hosting an elegant dinner party, celebrating a special occasion, planning a romantic dinner for two, or simply treating yourself to something extraordinary, vanilla bean panna cotta never disappoints.
History / Background
Panna cotta is a relatively modern addition to Italian cuisine, originating in the Piedmont region of northern Italy sometime in the early 1900s. Unlike many Italian desserts with ancient roots stretching back centuries, panna cotta is a 20th-century creation that has taken the culinary world by storm in just over 100 years.
The exact origin story is somewhat debated, but most food historians agree that panna cotta was created in the Langhe region of Piedmont, an area famous for its excellent dairy products, wines, and truffles. Some accounts credit a Hungarian woman living in the Langhe who made a similar cream-based dessert and shared her technique with local cooks. Others believe it evolved from traditional Piedmontese cream-based desserts that were thickened with fish bones (yes, really—before gelatin became commercially available).
What we do know is that panna cotta remained relatively obscure outside of Piedmont until the 1960s and 70s, when it began appearing on restaurant menus throughout Italy. By the 1990s, it had become an international sensation, adopted by chefs worldwide who loved its versatility, elegant simplicity, and make-ahead convenience. Today, you’ll find endless variations—from classic vanilla to exotic flavors like lavender, earl grey, matcha, and rose—but the traditional vanilla bean version remains the gold standard.
Panna cotta represents the Italian philosophy of cucina povera—creating something extraordinary from simple, quality ingredients. It’s a dessert that proves you don’t need elaborate techniques or expensive equipment to create restaurant-worthy elegance. Just cream, sugar, gelatin, and vanilla—that’s the magic.
Why You’ll Love This Recipe
This vanilla bean panna cotta recipe is proof that the best desserts don’t have to be complicated. Unlike temperamental soufflés, finicky macarons, or labor-intensive layer cakes, panna cotta is remarkably forgiving and virtually foolproof once you understand the simple technique. It’s a dessert that makes you look like a culinary genius while requiring less active time than most cookie recipes.
Here’s what makes this recipe truly special:
- Incredibly easy – No baking, no water baths, no tricky techniques
- Ready in 20 minutes – Active prep time is minimal; the fridge does the rest
- Make-ahead perfection – Actually improves when made 1-2 days ahead
- Naturally gluten-free – Perfect for guests with gluten sensitivities
- Elegant presentation – Looks like it came from a fancy restaurant
- Endlessly customizable – Top with anything from berries to caramel
- Budget-friendly luxury – Tastes expensive but costs pennies per serving
- Impressive but approachable – Guests think you’re a professional chef
- Light yet satisfying – Rich but not heavy; the perfect ending to any meal
- Stable and reliable – Won’t deflate, crack, or fall apart like other desserts
- Beautiful vanilla flavor – Real vanilla beans create incomparable taste and appearance
This recipe strikes that perfect balance between impressive and achievable, making it ideal for both entertaining and everyday indulgence. It’s the dessert I turn to when I want to wow people without stress.
Ingredient Notes
Heavy Cream: The star ingredient that gives panna cotta its signature richness and silky texture. Heavy cream (also called heavy whipping cream) has the highest fat content, which is essential for that luxurious mouthfeel. Don’t substitute with half-and-half or light cream—you’ll sacrifice the texture and richness that makes panna cotta special.
Whole Milk: Balances the heavy cream, preventing the panna cotta from being too rich while maintaining creaminess. Whole milk is ideal; 2% can work in a pinch but will be slightly less luxurious. Avoid skim milk—the fat content matters here.
Granulated Sugar: Provides just enough sweetness without overwhelming the delicate vanilla flavor. The amount can be adjusted to taste, but don’t eliminate it entirely—sugar also affects the texture and how the gelatin sets.
Vanilla Bean: This is where the magic happens. A real vanilla bean pod creates those gorgeous black specks throughout and provides complex, floral vanilla flavor that extract alone simply cannot match. Yes, vanilla beans are expensive, but one pod flavors six servings, making it worthwhile. Look for plump, moist beans (not dry and brittle) from Madagascar, Tahiti, or Mexico.
Vanilla Extract: Used in addition to the vanilla bean to boost and round out the vanilla flavor. Pure vanilla extract is essential—imitation vanilla has a harsh, artificial taste that’s especially noticeable in delicate desserts like this. Even with a vanilla bean, the extract adds depth.
Unflavored Gelatin: The thickening agent that transforms cream into panna cotta’s signature wobble. Use powdered unflavored gelatin (like Knox brand). Don’t substitute with flavored Jello—it won’t work and will add unwanted sweetness and artificial flavor. Gelatin sheets (leaf gelatin) can be substituted using a 1:1 ratio by weight.
Cold Water: Used to bloom (hydrate) the gelatin before adding it to the warm cream. This step is crucial—never add dry gelatin directly to hot liquid or you’ll get lumps.
Salt: Just a tiny pinch enhances all the other flavors and prevents the panna cotta from tasting flat or one-dimensional.
Equipment Needed
- Medium saucepan – For heating the cream mixture; 2-3 quart capacity
- Whisk – For stirring and ensuring smooth texture
- Sharp knife – For splitting the vanilla bean
- Small bowl – For blooming the gelatin
- Measuring cups and spoons – Accuracy is important for proper setting
- Fine-mesh strainer – For removing vanilla bean and any skin from heated cream
- Serving dishes – Six ramekins (4-6 oz each), small bowls, or decorative glasses
- Plastic wrap or small plates – For covering while chilling
- Paring knife – Optional, for unmolding if desired
- Serving plates – If unmolding the panna cotta
Optional but helpful:
- Small offset spatula for releasing edges when unmolding
- Decorative molds or silicone molds for special shapes
- Piping bag if adding decorative toppings
📋 Recipe Card
Prep Time: 15 minutes
Cook Time: 5 minutes
Chill Time: 4 hours
Total Time: 4 hours 20 minutes
Yield: 6 servings
Category: Dessert
Method: Stovetop
Cuisine: Italian
Diet: Gluten-Free, Vegetarian
Description
This classic vanilla bean panna cotta is a silky-smooth Italian dessert made with just six ingredients. Infused with real vanilla bean and topped with fresh berries, it’s an elegant yet easy make-ahead dessert perfect for any occasion.
Ingredients
- 1 tablespoon (1 packet) unflavored gelatin powder
- 3 tablespoons cold water
- 2 cups heavy cream
- 1 cup whole milk
- ½ cup granulated sugar
- 1 vanilla bean pod
- 1 teaspoon pure vanilla extract
- Pinch of salt
For Serving (Optional):
- Fresh berries (strawberries, raspberries, blueberries)
- Berry compote or fruit sauce
- Caramel sauce
- Fresh mint leaves for garnish
Instructions
Bloom the Gelatin:
- Prepare gelatin: Pour the cold water into a small bowl. Sprinkle the gelatin evenly over the surface and let it sit undisturbed for 5 minutes. The gelatin will absorb the water and become thick and spongy—this is called “blooming.” Don’t stir it during this time.
Prepare the Vanilla Bean:
- Split vanilla bean: Using a sharp knife, slice the vanilla bean lengthwise down the middle. Use the back of your knife to scrape out all the tiny seeds inside both halves. Reserve both the seeds and the scraped pod—you’ll use everything.
Make the Panna Cotta Base:
- Combine cream mixture: In a medium saucepan, combine the heavy cream, whole milk, sugar, vanilla bean seeds, scraped vanilla pod, and a pinch of salt. Place over medium heat.
- Heat and dissolve: Whisk frequently as the mixture heats, ensuring the sugar dissolves completely. Bring just to a gentle simmer—you’ll see small bubbles forming around the edges and steam rising. Do not let it come to a full boil. This should take about 5-7 minutes.
- Remove from heat: As soon as the mixture reaches a simmer, remove the saucepan from the heat immediately.
Add the Gelatin:
- Incorporate bloomed gelatin: Add the bloomed gelatin (it will look like a solid blob) to the hot cream mixture. Whisk vigorously until the gelatin dissolves completely, about 1-2 minutes. The mixture should look completely smooth with no gelatin lumps visible.
- Add vanilla extract: Stir in the vanilla extract for extra vanilla depth.
Strain and Pour:
- Strain the mixture: Place a fine-mesh strainer over a large measuring cup or bowl with a pouring spout. Pour the entire panna cotta mixture through the strainer to remove the vanilla bean pod and any skin that may have formed on the cream. Press gently with a spoon to get all the liquid through.
- Prepare serving dishes: Lightly oil or spray six 4-6 oz ramekins or serving glasses with neutral-flavored cooking spray if you plan to unmold them. If serving directly in the dishes, no need to grease them.
- Portion into dishes: Carefully pour the strained panna cotta mixture evenly into your prepared serving dishes, filling them about ¾ full (leaving room for toppings if desired).
Chill:
- Cool slightly: Let the filled dishes sit at room temperature for about 15-20 minutes to cool slightly. This prevents condensation from forming when you cover them.
- Cover and refrigerate: Cover each dish with plastic wrap or a small plate. Refrigerate for at least 4 hours, or preferably overnight, until the panna cotta is completely set. It should wobble gently when you shake it but hold its shape.
Serve:
- Serve as is or unmold: You can serve panna cotta directly in the ramekins or glasses, or unmold them onto plates. To unmold: run a thin knife around the edge, dip the bottom of the ramekin in hot water for 3-5 seconds, place a plate on top, and flip quickly. The panna cotta should release easily with a gentle shake.
- Add toppings: Top with fresh berries, berry sauce, caramel, or any topping you love. Garnish with a fresh mint leaf if desired. Serve immediately and enjoy!
Notes
- The panna cotta should have a gentle wobble when set, not be rubbery or too firm. If yours is too firm, you may have used too much gelatin or cooked it too long.
- Real vanilla bean makes a noticeable difference, but if you don’t have one, you can use 2 teaspoons of vanilla extract total (though you’ll miss those beautiful vanilla specks).
- Don’t skip the straining step—it ensures silky-smooth texture and removes the vanilla pod.
- If using leaf gelatin (gelatin sheets) instead of powdered: use 3 sheets of gelatin (about 6g total), soaked in cold water until soft, squeezed dry, then added to the hot cream.
- For easy unmolding, use a light hand when greasing ramekins—too much oil can affect texture and leave residue on the panna cotta.
- The panna cotta is perfectly set when it wobbles like Jell-O when you gently shake the dish—it should be firm but still have movement.
- Prep Time: 15 minutes
- Cook Time: 5 minutes
- Category: Desert
- Method: Stovetop
- Cuisine: Italian
- Diet: Gluten Free
Nutrition
- Serving Size: 1 panna cotta (without toppings)
- Calories: 315
- Sugar: 18g
- Sodium: 55mg
- Fat: 26g
- Saturated Fat: 16g
- Unsaturated Fat: 8g
- Trans Fat: 0g
- Carbohydrates: 19g
- Fiber: 0g
- Protein: 4g
- Cholesterol: 95mg
Tips & Variations
Flavor Variations:
- Coffee Panna Cotta: Add 2 tablespoons instant espresso powder to the cream mixture for elegant coffee flavor
- Chocolate Panna Cotta: Whisk in 4 oz melted dark chocolate after adding gelatin for rich chocolate version
- Coconut Panna Cotta: Replace 1 cup heavy cream with coconut cream and add ½ teaspoon coconut extract
- Lavender Panna Cotta: Add 1 tablespoon culinary lavender to the cream, steep 10 minutes, then strain
- Earl Grey Panna Cotta: Steep 3 Earl Grey tea bags in the hot cream for 5 minutes, remove before adding gelatin
- Lemon Panna Cotta: Add zest of 2 lemons to the cream mixture and 1 tablespoon lemon juice after straining
- Rose Panna Cotta: Add 1-2 teaspoons rose water after straining (start with 1 teaspoon—rose is strong!)
- Buttermilk Panna Cotta: Replace 1 cup heavy cream with buttermilk for tangy, lighter version
Topping Ideas:
- Classic berries: Fresh strawberries, raspberries, blueberries, or blackberries
- Berry coulis: Puréed and strained berry sauce for elegant presentation
- Caramel sauce: Salted or regular caramel drizzle
- Fruit compote: Stewed seasonal fruits with light syrup
- Citrus segments: Fresh orange or grapefruit segments with mint
- Balsamic strawberries: Macerated strawberries with aged balsamic
- Chocolate sauce: Warm chocolate ganache drizzled on top
- Passion fruit: Fresh passion fruit pulp spooned over
- Honey and nuts: Drizzle of honey with toasted pistachios or almonds
- Amarena cherries: Italian sour cherries in syrup
Presentation Ideas:
- Serve in elegant wine glasses or coupes for layers visibility
- Use decorative silicone molds for special shapes (flowers, hearts, etc.)
- Create a two-tone effect by layering vanilla with another flavor
- Serve in vintage teacups for charming afternoon tea presentation
- Use mini glass jars for portable, picnic-friendly desserts
Pro Chef Tips
The Wobble Factor: Perfect panna cotta should have a gentle, seductive wobble—somewhere between firm Jell-O and loose custard. If it’s too firm and rubbery, you’ve used too much gelatin or overcooled it. If it’s too loose and doesn’t hold its shape, you need slightly more gelatin or longer chilling time. The sweet spot is when it jiggles enticingly but holds its shape when unmolded.
Temperature Control is Everything: Never let the cream mixture boil—a gentle simmer with tiny bubbles around the edges is perfect. Boiling can scorch the cream and create an unpleasant cooked flavor. Also, make sure the gelatin goes into hot (not lukewarm) liquid so it dissolves completely without lumps.
Room Temperature Rest Before Chilling: Let the filled ramekins sit at room temperature for 15-20 minutes before refrigerating. If you put piping-hot liquid directly in the fridge, condensation forms on top, which can dilute the surface and create an unappealing watery layer.
The Vanilla Bean Extraction Trick: To get every precious bit of vanilla from your bean, after scraping out the seeds, add the whole scraped pod to the cream while heating. Those pods still contain tons of flavor. After straining, you can even rinse the pod, let it dry, and add it to your sugar container for vanilla-scented sugar.
Unmolding Like a Pro: The secret to clean unmolding is a quick (3-5 second) dip in hot water—just the bottom, not the sides. Too long and the panna cotta starts melting; too short and it won’t release. Have your serving plate ready, work quickly, and give the ramekin a firm shake if needed. A thin knife run around the edge first helps release the seal.
Quality Ingredients Matter: Since panna cotta has so few ingredients, quality really shines through. Use the best heavy cream you can find (preferably not ultra-pasteurized), real vanilla beans (Madagascar are classic, Tahitian are more floral), and pure vanilla extract. The difference is noticeable.
The Ice Bath Shortcut: If you’re in a hurry, place the saucepan in an ice bath after adding the gelatin and stir until the mixture cools to room temperature. Then pour into dishes and refrigerate. This speeds up setting time significantly—you can have set panna cotta in 2-3 hours instead of 4-6.
Common Mistakes to Avoid
Adding Gelatin to Boiling Liquid: If your cream mixture is violently boiling when you add the gelatin, the high heat can actually damage the gelatin’s ability to set properly. Always remove from heat and let it cool for a minute before adding the bloomed gelatin. The mixture should be hot but not boiling.
Not Blooming the Gelatin Properly: Sprinkling gelatin directly into hot liquid without blooming creates impossible-to-dissolve lumps that ruin texture. Always bloom gelatin in cold water first for 5 minutes until it looks spongy and swollen. This hydrates the gelatin so it dissolves smoothly in the hot cream.
Using Too Much or Too Little Gelatin: The ratio matters! Too much gelatin creates rubbery, unpleasant panna cotta that bounces instead of wobbles. Too little and it won’t set at all—you’ll have sweet cream soup. Stick to the recipe ratio: 1 tablespoon (1 packet/2¼ teaspoons) per 3 cups of liquid is the standard for perfect wobble.
Skipping the Straining Step: Even if your mixture looks smooth, straining is essential. It removes the vanilla bean pod (obviously), but also catches any bits of skin that formed on the cream, undissolved gelatin, or vanilla bean pieces. This step is the difference between good and restaurant-quality smooth.
Not Chilling Long Enough: Patience is crucial! Panna cotta needs at least 4 hours to fully set, and overnight is even better. If you try to unmold it too early, it will fall apart and ruin your presentation. Don’t rush this step—the waiting is part of the process.
Over-Greasing the Molds: If you plan to unmold, use the lightest possible coating of neutral oil or cooking spray. Too much oil leaves a visible, greasy film on your beautiful panna cotta and can affect the taste. A quick spray is all you need—the gelatin will release easily.
Storage & Meal Prep
Refrigerator Storage: Panna cotta keeps beautifully in the refrigerator for up to 4-5 days when properly stored. Keep them covered with plastic wrap directly touching the surface to prevent them from absorbing refrigerator odors and to keep the surface from drying out. The flavor actually improves after a day as the vanilla fully permeates the cream.
Storing Before Topping: For best results, store panna cotta plain and add toppings like berries, sauces, or whipped cream just before serving. This prevents the toppings from bleeding into the cream and keeps everything looking fresh and appetizing.
Unmolded Storage: If you’ve already unmolded your panna cotta onto plates, cover loosely with plastic wrap (try not to let it touch the surface) and refrigerate. They’re best eaten within 24 hours of unmolding as they can dry out slightly when exposed to air.
Maintaining Shape: If storing for several days, keep panna cotta in the molds or serving dishes. Once unmolded, they’re more delicate and can lose their shape if jostled or stored improperly.
Not Freezer-Friendly: Don’t freeze panna cotta. The gelatin breaks down during freezing and thawing, causing the texture to become grainy and separated with visible water pockets. This is definitely a dessert to make fresh and enjoy within the week.
Transportation: If bringing to a party or potluck, transport in the original serving dishes, covered and kept cold in a cooler. Unmold at your destination for the most impressive presentation. Panna cotta travels surprisingly well as long as it stays cold.
Make-Ahead & Freezer Notes
Perfect Make-Ahead Dessert: Panna cotta is actually one of the best make-ahead desserts because it must chill for several hours anyway. In fact, it tastes better when made 1-2 days in advance, as the vanilla flavor develops and mellows beautifully. This makes it ideal for dinner parties—you can cross dessert off your list days before your guests arrive.
1-2 Days Ahead (Ideal): Make the panna cotta 1-2 days before serving for optimal flavor and texture. Store covered in the refrigerator until ready to serve. Add any toppings, sauces, or garnishes just before serving to keep everything fresh and vibrant.
Up to 4 Days Ahead: You can push it to 4 days ahead if needed, though the texture may become slightly firmer and the flavor can start picking up refrigerator odors if not properly sealed. Make sure plastic wrap is touching the surface of each panna cotta.
Same-Day Timeline: If making the same day, prepare at least 5-6 hours before serving to allow adequate setting time. The panna cotta needs minimum 4 hours but is better with more time. Plan accordingly so you’re not rushing.
Unmolding Timing: If you plan to unmold the panna cotta, you can do this up to 2 hours before serving. Place unmolded panna cotta on serving plates, cover loosely with plastic wrap, and refrigerate until needed. This saves you from last-minute stress when guests arrive.
Batch Making: This recipe is easily doubled or tripled if you’re feeding a crowd. Just make sure you have enough serving dishes and refrigerator space. Multiple batches can be made simultaneously since the process is quick.
Not Freezer-Friendly: As mentioned, don’t freeze panna cotta. The gelatin structure breaks down completely, resulting in grainy, separated texture when thawed. This is a fresh/refrigerated dessert only.
Room Temperature Serving: Some people prefer panna cotta slightly less cold. You can remove it from the refrigerator 10-15 minutes before serving to take the chill off, but don’t let it sit longer or it may start to soften too much.
Serving Suggestions
Classic Italian Style:
Panna cotta is traditionally served very simply in Italy—often just with a berry coulis or fresh seasonal fruit. The simplicity allows the delicate vanilla cream to shine:
- Fresh berries: The classic pairing; the slight tartness balances the rich cream
- Berry coulis: Puréed and strained raspberries or strawberries with a touch of sugar
- Balsamic reduction: A sophisticated drizzle that adds depth and acidity
- Espresso: Serve alongside a shot of espresso for authentic Italian experience
- Amaretti cookies: Crunchy almond cookies on the side for textural contrast
American Dinner Party Style:
- Caramel sauce: Salted caramel drizzled over creates delicious sweet-salty contrast
- Whipped cream: Light dollop on top with fresh berries
- Chocolate shavings: Dark chocolate curls for elegant presentation
- Mint garnish: Fresh mint sprig adds color and subtle freshness
- Dessert wine: Moscato d’Asti or Vin Santo alongside
Seasonal Variations:
- Spring: Top with strawberries, rhubarb compote, and edible flowers
- Summer: Fresh peach slices, blueberries, and honey drizzle
- Fall: Spiced apple compote, caramel sauce, and cinnamon
- Winter: Cranberry sauce, pomegranate seeds, and orange zest
Coffee and Tea Pairings:
- Espresso or strong coffee: Cuts through the richness beautifully
- Earl Grey tea: The bergamot complements vanilla wonderfully
- Herbal tea: Chamomile or mint tea provides refreshing contrast
- Dessert wine: Late harvest Riesling or Moscato
Complete Meal Context:
Panna cotta works beautifully after rich, heavy meals because it’s light and refreshing despite being creamy. Serve it after:
- Italian dinner (pasta, risotto, osso buco)
- Grilled meats or seafood
- Heavy comfort food (it provides welcome lightness)
- Multi-course dinner parties (elegant palate cleanser)
FAQs Section
Q: Can I make panna cotta without a vanilla bean?
A: Yes! While a real vanilla bean creates those beautiful specks and complex flavor, you can use 2-3 teaspoons of pure vanilla extract total instead. Add half with the cream while heating and the rest after straining. The flavor will still be lovely, just less visually dramatic and slightly less complex. Never use imitation vanilla—the artificial flavor is too noticeable in such a delicate dessert.
Q: My panna cotta didn’t set. What went wrong?
A: There are a few possible culprits: not enough gelatin (make sure you used the full tablespoon), gelatin that wasn’t properly bloomed or dissolved (check for lumps), or not enough chilling time (minimum 4 hours required). Also, some fresh fruits contain enzymes that break down gelatin—if you mixed fresh pineapple, kiwi, papaya, or figs into the mixture, they’ll prevent setting. These fruits need to be cooked first to deactivate the enzymes.
Q: Can I use agar-agar instead of gelatin for a vegetarian version?
A: Yes! Agar-agar (made from seaweed) works as a gelatin substitute for vegetarian/vegan panna cotta. However, the ratio and method are different. Use about 1 teaspoon of agar-agar powder per 2 cups of liquid, and it must be boiled to activate (unlike gelatin). The texture is slightly different—a bit firmer and less creamy-soft—but still delicious.
Q: Why is my panna cotta rubbery instead of creamy?
A: Rubbery texture means too much gelatin was used. The ratio of gelatin to liquid is crucial—1 tablespoon per 3 cups of liquid creates that perfect wobble. Also, make sure you’re measuring gelatin by tablespoons, not packets—packets can vary. If your panna cotta turned out rubbery, reduce the gelatin slightly next time (try 2 teaspoons instead of 1 tablespoon).
Q: Can I make panna cotta dairy-free?
A: You can create a dairy-free version using full-fat coconut milk (not the kind in cartons—use canned) or a combination of coconut cream and almond milk. The flavor will be different and distinctly coconutty, but it can be delicious. Use the same gelatin ratio. Be aware that some plant-based milks are too thin and won’t create the proper rich texture.
Q: How do I know when panna cotta is properly set?
A: Gently shake the ramekin—properly set panna cotta should wobble uniformly like Jell-O but hold its shape. If you touch the surface lightly with your finger, it should be firm and spring back, not leave a dent or feel liquid. For unmolding, run a knife around the edge—if it releases cleanly, it’s ready. If it still seems liquid, give it more time.
Q: Can I use different sized molds?
A: Absolutely! The recipe makes about 3 cups of panna cotta mixture, so you can portion it into any combination that equals that volume: six 4-oz ramekins, four 6-oz glasses, one large mold for the table, or even mini 2-oz portions for appetizer-sized desserts. Just adjust chilling time—larger molds need 6-8 hours, while tiny portions may set in 2-3 hours.
Q: Why does my panna cotta have a skin on top?
A: A skin forms when the surface is exposed to air during cooling and chilling. This is why it’s important to cover each ramekin with plastic wrap as soon as the panna cotta cools slightly. If a skin does form, you can carefully lift it off before serving, but it’s better to prevent it by proper covering.
Conclusion
There’s something absolutely magical about making panna cotta at home—the way the vanilla bean releases its tiny seeds into the cream, the anticipation as you wait for it to set, and that moment when you unmold a perfectly wobbly, silky-smooth dessert that looks like it came from a five-star restaurant. This recipe proves that impressive desserts don’t have to be complicated, time-consuming, or stressful.
Whether you’re making vanilla bean panna cotta for a special celebration, preparing it ahead for a dinner party, or simply treating yourself to something beautiful on an ordinary evening, this elegant Italian dessert delivers every single time. It’s a recipe that makes you feel accomplished, creative, and just a little bit fancy—and isn’t that what great desserts are all about?
I’d absolutely love to hear about your panna cotta adventures! What toppings did you choose? Did you try any flavor variations? Are you team “served in the glass” or team “unmolded drama”? Drop a comment below and share your experience—I read every comment and love celebrating your kitchen successes. And if this recipe brings you as much joy as it brings me, please save it to your Pinterest boards and share it with friends who appreciate simple elegance. Let’s spread the panna cotta love!
Now go grab that vanilla bean and create something beautiful! ✨🍮