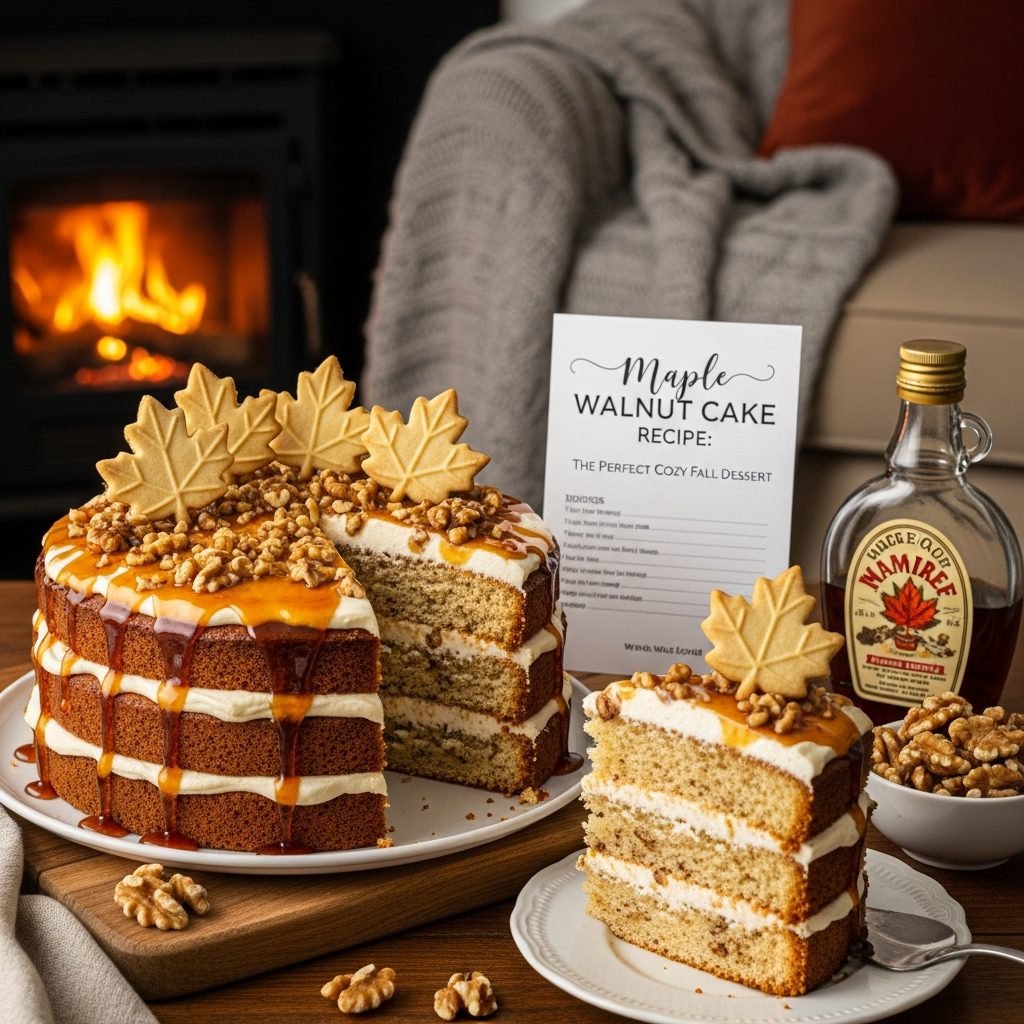
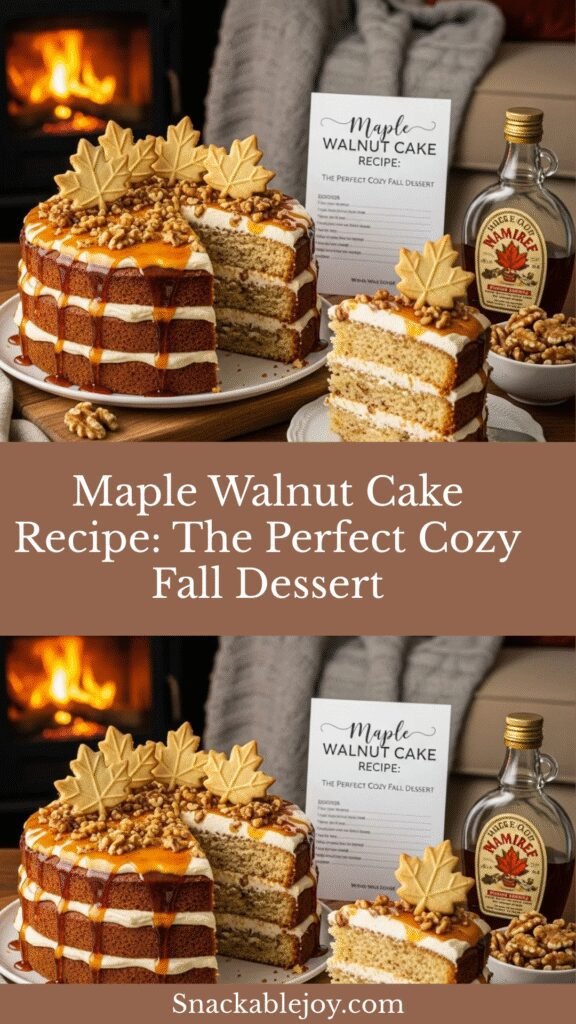
Maple Walnut Cake Recipe: The Perfect Cozy Fall Dessert
Get ready to fall in love with the most delicious autumn dessert you’ll ever make! This Maple Walnut Cake is pure comfort in every bite—a moist, tender cake infused with rich maple syrup and studded with crunchy toasted walnuts, all topped with a silky maple buttercream frosting that’ll make you weak in the knees. It’s the perfect balance of sweet maple flavor, nutty crunch, and buttery softness that tastes like a warm hug on a crisp fall day.
What makes this cake truly special is how it captures the essence of autumn in dessert form. The deep, complex sweetness of real maple syrup combined with the earthy richness of walnuts creates a flavor profile that’s sophisticated yet incredibly comforting. Every slice reveals a golden, fluffy crumb dotted with toasted walnut pieces, while that maple frosting adds just the right amount of sweetness without being overwhelming.
This Maple Walnut Cake is absolutely perfect for Thanksgiving dinners, holiday gatherings, cozy weekend brunches, or any time you want to impress guests with something that tastes like it came from a fancy bakery but is surprisingly easy to make at home. It’s also wonderful for fall birthday celebrations, potluck contributions, or simply treating yourself to something special on a lazy Sunday afternoon. Whether you’re an experienced baker or just starting your cake-making journey, this recipe delivers consistent, beautiful results that’ll have everyone asking for seconds—and the recipe!
History / Background
The combination of maple and walnuts in baking has deep roots in North American culinary tradition, particularly in New England and Eastern Canada where both ingredients have been harvested and celebrated for centuries. Native Americans were the first to discover how to tap maple trees and boil the sap into syrup, teaching early European settlers this valuable skill. Similarly, black walnuts and other walnut varieties grew abundantly in North American forests and became a staple ingredient in colonial cooking.
Maple syrup production became particularly important in Vermont, New Hampshire, Maine, Quebec, and other northeastern regions, where sugar maple trees thrived in the cold climate. By the 18th and 19th centuries, maple syrup was not just a sweetener but a symbol of regional identity and self-sufficiency. Farmers would have “sugaring off” parties in early spring when the sap ran, celebrating the first harvest of the year with maple-flavored treats.
The specific pairing of maple and walnuts in cake form likely evolved in the late 19th and early 20th centuries as home baking became more sophisticated. Victorian-era cookbooks began featuring elaborate cakes for special occasions, and resourceful bakers in maple-producing regions naturally incorporated their local treasure into desserts. Walnuts, which were cheaper and more accessible than imported nuts, made the perfect complement to maple’s sweetness with their slightly bitter, earthy flavor.
Maple walnut became an iconic flavor combination that extended beyond cake—it appeared in ice cream, cookies, fudge, and candies. The pairing achieved such popularity that by the mid-20th century, “maple walnut” was as recognizable as “chocolate chip” or “vanilla.” This cake represents a continuation of that beloved tradition, bringing together two ingredients that have defined North American autumn baking for generations.
Today, Maple Walnut Cake has experienced a renaissance as people seek out nostalgic, seasonal flavors and appreciate the use of natural sweeteners like pure maple syrup. It’s become a staple at fall farmers’ markets, specialty bakeries, and home kitchens where bakers want to create something that feels authentically seasonal and deeply satisfying.
Why You’ll Love This Recipe
This Maple Walnut Cake recipe has been perfected through countless test batches to deliver exactly what you want: incredible moisture, tender crumb, rich maple flavor, and perfectly balanced sweetness. I’ve baked this cake for family gatherings, Thanksgiving dinners, and fall celebrations, and it never fails to steal the show—even competing with pie!
Here’s what makes this recipe absolutely irresistible:
- Incredible moisture – Stays tender and soft for days thanks to the maple syrup and sour cream
- Rich, authentic maple flavor – Uses real maple syrup, not artificial flavoring
- Perfect texture contrast – Soft cake with crunchy toasted walnuts throughout
- Not overly sweet – The maple provides natural sweetness that’s perfectly balanced
- Impressive but approachable – Looks fancy but uses straightforward techniques
- Seasonal and special – Captures the essence of autumn in dessert form
- Crowd-pleaser guaranteed – Appeals to kids and adults alike
- Make-ahead friendly – Actually tastes better the next day as flavors develop
- Versatile serving – Perfect for casual family dinners or elegant holiday tables
- Uses natural ingredients – Real maple syrup, butter, and walnuts create authentic flavor
- Freezer-friendly – Can be made weeks in advance for stress-free entertaining
Ingredient Notes
Understanding your ingredients helps you become a better baker and ensures the best possible results. Let’s explore what makes this Maple Walnut Cake so special.
All-Purpose Flour: This provides the structure for your cake. I recommend measuring by spooning flour into your measuring cup and leveling it off, or better yet, weighing it at 315g for 2½ cups. For a slightly more tender crumb, you can substitute cake flour (add 2 tablespoons extra per cup). Gluten-free? Use a 1:1 gluten-free baking flour blend.
Pure Maple Syrup: This is the star ingredient—do NOT substitute with pancake syrup or maple-flavored syrup! You need 100% pure maple syrup for authentic flavor. I recommend Grade A Dark Amber (formerly Grade B) for the most robust maple flavor. Lighter grades work but have more delicate flavor. The maple syrup provides both sweetness and that characteristic maple taste we’re after.
Walnuts: Use fresh walnuts for the best flavor—they should smell sweet and nutty, not bitter or rancid. Toasting them before adding to the batter is essential for bringing out their rich, complex flavor. If someone has a nut allergy, you can omit them, though you’ll lose the textural contrast. Pecans make an excellent substitute if you prefer their buttery sweetness.
Butter: Use unsalted butter at room temperature (soft enough to leave a fingerprint but not greasy or melted). Room temperature butter creams properly with sugar, creating the light, fluffy texture we want. European-style butter with higher fat content creates even richer flavor if you want to splurge!
Brown Sugar and Granulated Sugar: The combination creates depth of flavor. Brown sugar (which contains molasses) adds moisture and a subtle caramel note that complements maple beautifully. Granulated sugar helps with structure and balanced sweetness. Both are important for the right texture and taste.
Eggs: Use large eggs at room temperature. Room temperature eggs incorporate more smoothly into the batter and create better volume. To quickly warm cold eggs, place them in a bowl of warm (not hot) water for 5-10 minutes before using.
Sour Cream: This is the secret to incredible moisture and tenderness! The acidity tenderizes the gluten and adds richness. Full-fat sour cream is essential—don’t use low-fat versions. Greek yogurt can substitute in a pinch, though sour cream gives slightly better results.
Vanilla Extract: Pure vanilla extract enhances all the other flavors, particularly the maple. It’s worth using the real stuff rather than imitation vanilla.
Baking Powder and Baking Soda: These leavening agents work together to create the perfect rise and tender crumb. Make sure they’re fresh (check expiration dates!) or your cake won’t rise properly.
Salt: Enhances all the flavors and balances the sweetness. Never skip salt in baking—it’s essential!
Heavy Cream (for frosting): Creates a silky, smooth buttercream that’s easy to spread. Whole milk can substitute if needed.
Equipment Needed
Having the right tools makes baking easier and produces better results. Here’s what you’ll need:
- Two 8-inch or 9-inch round cake pans – For creating beautiful layers
- Parchment paper – Line pan bottoms to prevent sticking
- Stand mixer or hand mixer – Makes mixing and frosting much easier
- Large mixing bowls (at least 2) – One for dry ingredients, one for wet
- Medium mixing bowl – For toasting and preparing walnuts
- Measuring cups and spoons – Accuracy matters in baking
- Kitchen scale (optional but recommended) – Most accurate measurement method
- Whisk – For combining dry ingredients
- Rubber spatula – For scraping bowls and folding
- Wire cooling racks – Essential for proper cooling
- Toothpick or cake tester – To check doneness
- Offset spatula – Makes frosting layers easier and more professional
- Serrated knife – For leveling cake layers if needed
- Small saucepan – For toasting walnuts
- Sifter or fine-mesh strainer – For lump-free powdered sugar in frosting
Print

Maple Walnut Cake Recipe
This Maple Walnut Cake features moist, tender layers infused with pure maple syrup and studded with toasted walnuts, all covered in silky maple buttercream frosting. It’s the ultimate fall dessert that’s perfect for holidays and special occasions.
- Total Time: 55 minutes (plus cooling time)
- Yield: 12-14 servings 1x
Ingredients
ScaleFor the Maple Walnut Cake:
- 2½ cups (315g) all-purpose flour
- 2 teaspoons baking powder
- ½ teaspoon baking soda
- ½ teaspoon salt
- ¾ cup (170g) unsalted butter, room temperature
- ¾ cup (150g) granulated sugar
- ½ cup (110g) packed light brown sugar
- 3 large eggs, room temperature
- ¾ cup (180ml) pure maple syrup
- 2 teaspoons pure vanilla extract
- ¾ cup (180g) sour cream, room temperature
- ½ cup (120ml) whole milk, room temperature
- 1½ cups (180g) walnuts, toasted and chopped
For the Maple Buttercream Frosting:
- 1 cup (2 sticks or 226g) unsalted butter, room temperature
- 4-5 cups (480-600g) powdered sugar, sifted
- ½ cup (120ml) pure maple syrup
- 2-3 tablespoons heavy cream or whole milk
- 1 teaspoon pure vanilla extract
- Pinch of salt
- Additional toasted walnuts for decoration (optional)
Instructions
Step 1: Preheat and Prepare
Preheat your oven to 350°F (175°C). Grease two 8-inch or 9-inch round cake pans with butter or baking spray, then line the bottoms with parchment paper rounds. Grease the parchment too for double insurance against sticking. Set aside.Step 2: Toast the Walnuts
In a dry skillet over medium heat, toast the chopped walnuts for 3-5 minutes, stirring frequently, until fragrant and lightly golden. Watch carefully—they can burn quickly! Transfer to a plate to cool completely. Toasting brings out the rich, nutty flavor and removes any bitterness.Step 3: Mix Dry Ingredients
In a large bowl, whisk together the flour, baking powder, baking soda, and salt until well combined. Whisking ensures all leavening agents are evenly distributed for uniform rising. Set aside.Step 4: Cream Butter and Sugars
In your stand mixer bowl (or large bowl with hand mixer), beat the room-temperature butter on medium speed for 1 minute until smooth. Add both sugars and beat on medium-high speed for 3-4 minutes until light, fluffy, and pale in color. This creaming process incorporates air that creates tender texture. Scrape down the bowl sides occasionally.Step 5: Add Eggs and Flavorings
Add eggs one at a time, beating well after each addition (about 30 seconds per egg). The mixture may look slightly curdled—that’s normal! Add the maple syrup and vanilla extract, beating until combined. The mixture will be quite liquidy at this point—don’t worry!Step 6: Combine Wet Ingredients
In a separate bowl or large measuring cup, whisk together the sour cream and milk until smooth. This makes it easier to incorporate into the batter.Step 7: Alternate Adding Dry and Wet
With mixer on low speed, add the flour mixture in three additions, alternating with the sour cream mixture in two additions. Start and end with flour: flour, sour cream mixture, flour, sour cream mixture, flour. Mix just until each addition is incorporated—don’t overmix! Scrape down the bowl to catch any unmixed bits.Step 8: Fold in Walnuts
Using a rubber spatula, gently fold the cooled toasted walnuts into the batter by hand until evenly distributed. The batter should be thick, smooth, and studded with walnut pieces.Step 9: Bake the Cakes
Divide the batter evenly between your prepared pans (use a kitchen scale for precision). Smooth the tops with a spatula. Bake for 28-32 minutes, or until a toothpick inserted in the center comes out clean or with just a few moist crumbs, and the tops spring back when lightly touched.Step 10: Cool Completely
Let cakes cool in the pans on wire racks for 10-15 minutes. This brief rest helps them set. Then carefully turn them out onto wire racks, remove parchment, and let cool completely (at least 1 hour) before frosting. Frosting warm cakes will cause melting disasters!Step 11: Make Maple Buttercream
In a clean mixing bowl, beat room-temperature butter on medium speed for 2 minutes until creamy. Add 3 cups of powdered sugar, maple syrup, vanilla, and salt. Beat on low until sugar is incorporated, then increase to medium-high and beat for 3 minutes until fluffy. Add cream 1 tablespoon at a time until you reach desired consistency. Add more powdered sugar if too thin, more cream if too thick. Taste and adjust maple flavor if desired.Step 12: Assemble and Frost
If your cake layers have domed tops, use a serrated knife to level them. Place first layer on a cake stand or plate, spread about 1 cup of frosting evenly on top. Add second layer and frost the top and sides of the entire cake. Use an offset spatula for smooth, professional results. A thin “crumb coat” first (refrigerate 15 minutes to set) then final frosting layer gives the cleanest finish.Step 13: Decorate and Serve
Decorate with additional toasted walnut halves or pieces on top if desired. Refrigerate for 30 minutes to set the frosting before slicing for cleanest cuts. Slice, serve, and enjoy the compliments!Notes
- Use pure maple syrup – Artificial syrup won’t provide authentic flavor
- Toast your walnuts – Essential step for maximum flavor
- Room temperature ingredients – Critical for proper mixing and texture
- Don’t overmix after adding flour – Keeps cake tender
- Cool completely before frosting – Prevents melting
- Cake tastes better the next day – Flavors meld and deepen overnight
- Prep Time: 25 minutes
- Cook Time: 30 minutes
- Category: Desert
- Method: Baking
- Cuisine: American
- Diet: Vegetarian
Nutrition
- Serving Size: 1 slice (1/12 of cake)
- Calories: 585
- Sugar: 58g
- Sodium: 235mg
- Fat: 31g
- Saturated Fat: 14g
- Unsaturated Fat: 15g
- Trans Fat: 0g
- Carbohydrates: 72g
- Fiber: 1.5g
- Protein: 6g
- Cholesterol: 95mg
Tips & Variations
Flavor Variations:
- Maple Pecan Cake: Substitute pecans for walnuts for sweeter, butterier flavor
- Spiced Maple Walnut: Add 1 teaspoon cinnamon and ¼ teaspoon nutmeg to batter
- Bourbon Maple Walnut: Add 2 tablespoons bourbon to the frosting for adult version
- Brown Butter Maple: Brown your butter before using for extra nutty depth
- Coffee Maple Walnut: Add 1 tablespoon instant espresso powder to enhance flavors
Frosting Variations:
- Cream Cheese Maple Frosting: Replace half the butter with cream cheese for tang
- Maple Cream Cheese: Mix equal parts cream cheese frosting and maple buttercream
- Lighter Maple Whipped Cream: Fold maple syrup into stabilized whipped cream
- Maple Glaze: For simpler finish, drizzle with maple glaze instead of buttercream
Dietary Modifications:
- Gluten-Free: Use 1:1 gluten-free flour blend (add ½ teaspoon xanthan gum if blend doesn’t include it)
- Dairy-Free: Use vegan butter and plant-based sour cream and milk alternatives
- Nut-Free: Omit walnuts entirely or substitute with toasted sunflower seeds
- Reduced Sugar: Reduce granulated sugar to ½ cup (texture will be slightly affected)
Format Variations:
- Sheet Cake: Bake in 9×13″ pan for 35-40 minutes, frost as single layer
- Cupcakes: Make 24 cupcakes, bake 18-22 minutes at 350°F
- Bundt Cake: Use bundt pan, bake 50-60 minutes, drizzle with maple glaze
- Three 6-inch Layers: Create taller, more dramatic presentation
Pro Chef Tips
The Creaming Method Creates Texture: Professional bakers know that properly creaming butter and sugar is what creates light, tender cake. Beat for the full 3-4 minutes—the mixture should look noticeably paler, fluffier, and almost doubled in volume. This incorporates air bubbles that create fine crumb structure. Under-creamed butter produces dense cake.
Toast Walnuts for Maximum Flavor: Never skip toasting the walnuts! Raw walnuts can taste bitter and their flavor doesn’t bloom. Toasting for just 3-5 minutes transforms them, bringing out rich, complex, almost buttery notes that complement the maple beautifully. Cool them completely before folding into batter to prevent melting butter.
Room Temperature Matters for Emulsion: All dairy ingredients (butter, eggs, sour cream, milk) should be at room temperature (around 65-70°F). When everything is the same temperature, they emulsify into a smooth, homogeneous batter. Cold ingredients can cause curdling or separation, resulting in uneven texture and density in the finished cake.
Grade A Dark Amber Maple Syrup is Best: For baking, choose Grade A Dark Amber maple syrup (formerly called Grade B). It has more robust, concentrated maple flavor that stands up to other ingredients and heat. Lighter grades (Golden or Amber) are lovely for pancakes but can get lost in baking. The investment in good syrup makes a dramatic difference.
The Alternate Mixing Method Prevents Toughness: Adding dry and wet ingredients alternately (starting and ending with dry) is a classic technique that prevents gluten overdevelopment. If you dump all the flour in at once, you’ll need to mix longer, which develops more gluten and creates tough, chewy cake instead of tender crumb.
Crumb Coat Before Final Frosting: Apply a thin layer of frosting all over the cake first (the “crumb coat”), then refrigerate for 15-20 minutes until firm. This seals in all the crumbs. Then apply your final, smooth layer of frosting over the crumb coat for perfectly clean, professional finish with no cake crumbs mixed into your frosting.
Common Mistakes to Avoid
Using Imitation Maple Syrup: This is the biggest mistake! Pancake syrup or maple-flavored syrup contains corn syrup, artificial flavors, and additives—it will NOT give you authentic maple flavor. The cake will taste generic and artificially sweet rather than having that beautiful, complex maple taste. Always use 100% pure maple syrup for this recipe.
Not Toasting the Walnuts: Raw walnuts can taste bitter and their flavor doesn’t develop properly in the baking process. Toasting is a non-negotiable step that takes only 3-5 minutes but transforms the flavor dramatically. The heat brings out oils and creates rich, nutty complexity that’s essential to this cake’s character.
Overmixing After Adding Flour: Once flour hits your wet ingredients, gluten development begins. Mix only until you can’t see dry flour streaks, then STOP immediately. Overmixing creates tough, dense, chewy cake instead of the tender, soft texture we want. It’s okay if mixing takes a minute or two on low speed—just avoid prolonged or vigorous mixing.
Frosting Warm Cake: I cannot stress this enough—your cake layers must be completely cool to room temperature before frosting! Warm cake will melt buttercream, causing it to slide off and creating a mess. Always wait at least 1 full hour after baking, or even refrigerate cooled layers for 15 minutes before assembling for insurance.
Using Old or Rancid Walnuts: Walnuts contain oils that can go rancid, especially if stored improperly or for too long. Rancid walnuts taste bitter and unpleasant, ruining your entire cake. Always smell and taste your walnuts before using—they should smell sweet and nutty, not paint-like or bitter. Store walnuts in the freezer for longest freshness.
Storage & Meal Prep
Room Temperature Storage: Frosted Maple Walnut Cake can be stored covered at room temperature for up to 3 days. Use a cake dome or cover loosely with plastic wrap (don’t let it touch the frosting). The cake actually improves after sitting 24 hours as flavors meld and moisture distributes evenly, making it even more tender!
Refrigerator Storage: Because this cake uses buttercream frosting with dairy, you can refrigerate it covered for up to 5 days. The cold will firm up the frosting considerably, so remove the cake from refrigerator 30-60 minutes before serving to let it come to room temperature for best texture and flavor. Cold cake mutes flavors.
Storing Unfrosted Layers: Unfrosted cake layers can be wrapped tightly in plastic wrap and stored at room temperature for up to 2 days, or refrigerated for up to 4 days. This is actually a great strategy—bake your layers a day ahead, then frost the day of your event for maximum freshness and minimum stress!
Keeping Cake Moist: If your cake starts to dry out slightly, place a slice of bread or apple wedge in the storage container with the cake. The cake will absorb moisture from the bread/apple. Replace daily. This trick works surprisingly well for extending freshness!
Make-Ahead & Freezer Notes
Freezing Unfrosted Cake Layers (Best Method!): Bake your cake layers, let them cool completely, then wrap each layer tightly in two layers of plastic wrap followed by aluminum foil. Label and freeze flat for up to 3 months. When ready to use, thaw overnight in the refrigerator (still wrapped), then bring to room temperature before frosting. The texture remains perfect!
Freezing Frosted Cake: You can freeze fully frosted and decorated cake! Place it in the freezer uncovered for 1-2 hours until the frosting is rock-hard, then wrap carefully in plastic wrap and foil. Freeze for up to 2 months. Thaw overnight in refrigerator, then bring to room temperature before serving. The frosting may look slightly different but tastes fine.
Freezing Individual Slices: Cut cake into individual slices, wrap each slice tightly in plastic wrap, then place all wrapped slices in a freezer bag. Freeze for up to 3 months. Thaw individual slices at room temperature for 1-2 hours, or microwave frozen slices for 30 seconds for instant cake gratification!
Make-Ahead Frosting: Buttercream frosting can be made up to 1 week ahead and refrigerated in airtight container, or frozen for up to 3 months. When ready to use, bring to room temperature, then re-whip with your mixer for 2-3 minutes to restore fluffy texture. Add splash of cream if it seems too thick.
Strategic Timeline for Holidays: For stress-free entertaining, bake cake layers 2-3 days ahead (or even weeks ahead if freezing), make frosting 1-2 days ahead (refrigerate), then assemble and decorate the morning of or night before your event. This spreads out the work and ensures everything is fresh!
Serving Suggestions
Maple Walnut Cake is stunning on its own, but thoughtful accompaniments enhance the experience beautifully.
Beverage Pairings:
- Hot Coffee: The slight bitterness perfectly balances the maple sweetness
- Black Tea: Earl Grey or English Breakfast complement the autumn flavors
- Hot Apple Cider: Doubles down on fall flavors for cozy seasonal pairing
- Bourbon or Whiskey: For adult gatherings, spirits echo the maple and walnut notes
- Cold Milk: Classic pairing that never disappoints
Ice Cream Pairing: Serve slices with a scoop of vanilla bean, butter pecan, or maple walnut ice cream on the side. The cold ice cream melting into the warm (or room temperature) cake creates an irresistible combination. French vanilla ice cream is particularly lovely.
Whipped Cream: A dollop of lightly sweetened whipped cream (perhaps with a splash of bourbon or vanilla) adds lightness and provides textural contrast to the rich buttercream frosting.
Fresh Fruit: Balance the richness with sliced fresh pears, apples, or a handful of fresh berries. The fruit provides freshness and acidity that cleanses the palate between bites of the sweet, rich cake.
Caramel Sauce: Drizzle each slice with warm caramel sauce (or dulce de leche) for extra indulgence. The caramel echoes the maple’s complexity and adds glossy elegance to plating.
Holiday Table Presentation: For Thanksgiving or holiday dinners, serve on white plates with a dusting of cinnamon, a few whole toasted walnuts, and a small drizzle of pure maple syrup for elegant presentation that showcases the cake’s beautiful color and texture.
FAQs Section
Can I use pancake syrup instead of pure maple syrup?
No, please don’t! Pancake syrup (like Mrs. Butterworth’s or Aunt Jemima) is primarily corn syrup with maple flavoring and won’t give you authentic maple taste. The cake will taste generic and artificially sweet. Pure maple syrup is essential for real maple flavor—it’s worth the investment for this special cake.Why did my cake turn out dense instead of fluffy?
Several factors cause dense cake: not creaming butter and sugar long enough (beat for full 3-4 minutes), using cold ingredients that don’t emulsify properly, overmixing after adding flour (develops too much gluten), or expired leavening agents. Also ensure you’re measuring flour correctly—spoon and level, don’t scoop and pack.Can I make this as a sheet cake instead of layers?
Absolutely! Bake the batter in a greased and parchment-lined 9×13-inch pan for 35-40 minutes, until a toothpick comes out clean. Let it cool completely, then frost right in the pan for easy serving. Sheet cakes are perfect for casual gatherings and potlucks where presentation is less formal.How do I know when the cake is done baking?
The cake is done when: a toothpick inserted in the center comes out clean or with just a few moist crumbs (not wet batter), the top springs back when lightly touched, the edges are pulling away slightly from the pan sides, and the cake is golden brown. Start checking at 28 minutes to avoid overbaking.Can I make this cake ahead of time?
Yes! This is actually an excellent make-ahead cake. Unfrosted layers can be baked up to 2 days ahead and stored wrapped at room temperature, or frozen for up to 3 months. The fully assembled and frosted cake can be made 1 day ahead—it actually tastes better the next day as flavors meld and develop!My frosting is too thick/thin—how do I fix it?
If frosting is too thick: Add more cream or milk, 1 teaspoon at a time, beating after each addition until you reach desired consistency. If frosting is too thin: Add more powdered sugar, ¼ cup at a time, beating until it thickens to spreadable consistency. Temperature also affects consistency—if it’s too soft, refrigerate for 10-15 minutes.Can I make this cake without walnuts for nut allergies?
Yes! Simply omit the walnuts entirely for a pure maple cake that’s still delicious. The texture will be slightly different (less crunchy contrast), but the maple flavor will shine through beautifully. You could substitute toasted sunflower seeds if you want some crunch without tree nuts.Conclusion
There you have it—everything you need to create the most incredible Maple Walnut Cake that’ll become your go-to fall and holiday dessert! This cake is pure autumn magic with its rich maple flavor, crunchy toasted walnuts, and silky frosting that brings it all together. Whether you’re celebrating Thanksgiving, hosting a cozy gathering, or simply treating yourself to something special, this cake delivers warmth, comfort, and absolutely delicious flavor in every bite.
The beauty of this recipe is that it tastes like something from an upscale bakery but comes together with simple techniques and accessible ingredients. Once you’ve made it, you’ll find yourself wanting to bake it again and again throughout the fall and winter seasons. It’s the kind of cake that creates memories and becomes part of your family’s treasured recipe collection.
I’d absolutely love to hear how your Maple Walnut Cake turns out! Are you making it for a special occasion or just because it’s autumn and you deserve something wonderful? Did you try any of the variations? Drop a comment below and share your baking adventures—I read every comment and genuinely love connecting with fellow home bakers!
Please save this recipe to your Pinterest dessert board so you’ll have it ready for every fall gathering and holiday celebration (trust me, once people taste this cake, they’ll request it constantly!). And if you snap a photo of your gorgeous maple masterpiece, tag me on social media—I absolutely love seeing your beautiful creations!
Now grab that bottle of pure maple syrup and get ready to bake some autumn magic. Your kitchen is about to smell absolutely incredible, and you’re about to serve the most delicious cake that celebrates the best flavors of the season. Happy baking, friends! 🍁🍰✨