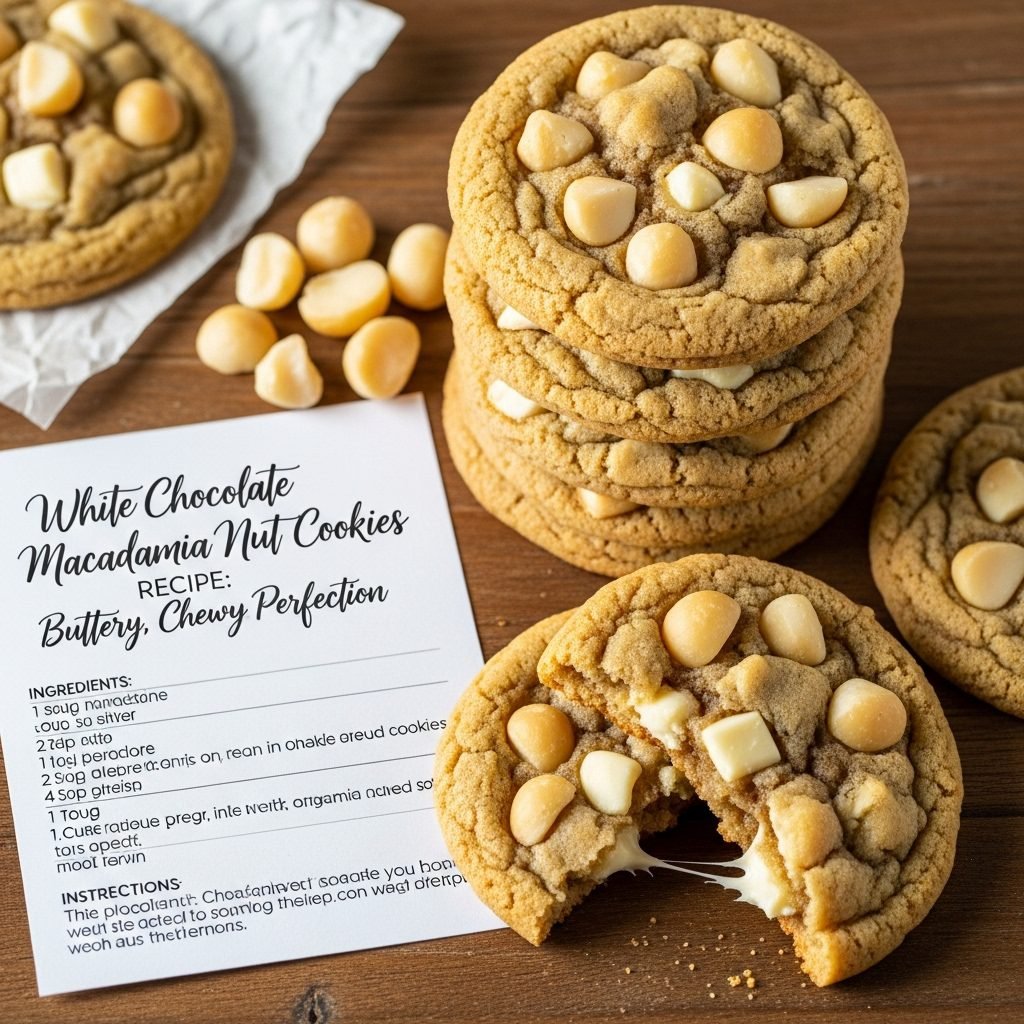
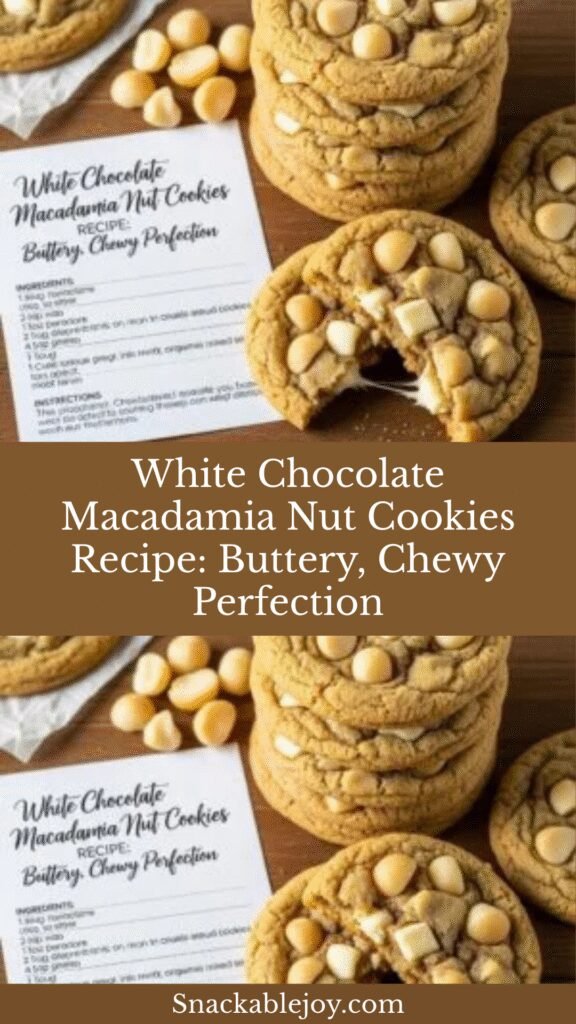
White Chocolate Macadamia Nut Cookies Recipe: Buttery, Chewy Perfection
Get ready to fall in love with the most luxurious cookie combination you’ll ever taste! White Chocolate Macadamia Nut Cookies are the epitome of indulgent baking—buttery, soft-centered cookies studded with creamy white chocolate chunks and crunchy, buttery macadamia nuts. This isn’t your everyday chocolate chip cookie; it’s a sophisticated upgrade that feels like a tropical vacation in cookie form.
What makes these cookies so irresistible is the perfect balance of sweet and nutty flavors paired with an incredible textural contrast. The white chocolate melts into creamy pockets of sweetness, while the macadamia nuts provide that satisfying crunch and rich, buttery taste that’s absolutely addictive. These cookies have golden-brown edges that are slightly crispy, giving way to soft, chewy centers that stay tender for days.
These cookies are perfect for any occasion where you want to impress: holiday cookie exchanges, fancy brunch spreads, afternoon tea parties, bake sales, or simply treating yourself to something special. They’re also wonderful as homemade gifts—package them in a pretty tin or cellophane bag, and you’ve got a present that looks and tastes expensive but costs just a fraction of store-bought gourmet cookies. Whether you’re an experienced baker or just starting out, this recipe is straightforward and forgiving, delivering bakery-quality results every single time!
History / Background
While chocolate chip cookies have been an American staple since Ruth Wakefield’s famous creation in the 1930s, White Chocolate Macadamia Nut Cookies are a relatively modern innovation that emerged in the 1980s and quickly became a gourmet cookie sensation.
The story of these cookies is intrinsically tied to Hawaii, where macadamia nuts have been cultivated commercially since the early 1900s. Native to Australia, macadamia trees were introduced to Hawaii in 1881, and the islands’ volcanic soil and tropical climate proved ideal for growing these prized nuts. By the mid-20th century, Hawaii was producing the majority of the world’s macadamia nuts, and they became synonymous with Hawaiian cuisine and culture.
The cookie itself gained widespread popularity in the 1980s when high-end bakeries and cookie shops began experimenting with premium ingredients. Mrs. Fields Cookies, founded by Debbi Fields in 1977, is often credited with popularizing this particular combination on a national scale. The company’s White Chunk Macadamia cookie became one of their signature offerings, introducing millions of Americans to this luxurious flavor pairing.
What made these cookies revolutionary was the use of white chocolate—a controversial ingredient that purists didn’t even consider “real” chocolate since it contains no cocoa solids. However, its creamy, vanilla-forward sweetness proved to be the perfect complement to the rich, buttery macadamia nuts. The combination felt exotic and upscale, offering a more sophisticated alternative to traditional chocolate chip cookies.
Throughout the 1990s and 2000s, White Chocolate Macadamia Nut Cookies became a staple at upscale coffee shops, bakeries, and cookie companies. They represented a premium product—both macadamia nuts and white chocolate were more expensive than standard baking ingredients, making these cookies feel special and indulgent. The trend spread from Hawaii to the mainland, and eventually around the world, with home bakers creating their own versions of this beloved recipe.
Today, these cookies remain a symbol of gourmet home baking. They’ve achieved classic status while maintaining their special-occasion appeal. Every bite still delivers that same sense of indulgence and tropical luxury that made them famous decades ago.
Why You’ll Love This Recipe
This White Chocolate Macadamia Nut Cookie recipe has been perfected through countless batches to deliver exactly what you want: thick, bakery-style cookies with crispy edges, soft centers, and generous amounts of white chocolate and nuts in every bite. I’ve tested different ratios, baking temperatures, and techniques to ensure these cookies turn out perfect every single time.
Here’s what makes this recipe absolutely irresistible:
- Bakery-quality results at home – These taste like they came from an expensive cookie shop
- Perfect texture combination – Crispy edges meet soft, chewy centers with crunchy nuts
- Loaded with mix-ins – Generous amounts of white chocolate and macadamias in every cookie
- Easy to make – Straightforward process with no complicated techniques required
- Consistent results – This recipe is reliable and foolproof for bakers of all levels
- Make-ahead friendly – Dough freezes beautifully for fresh-baked cookies anytime
- Impressive presentation – They look professional and taste even better
- Buttery, rich flavor – The combination of butter, white chocolate, and macadamias is pure luxury
- Special but approachable – Fancy enough for gifts, easy enough for weeknight baking
- Crowd-pleaser guaranteed – Even people who claim they don’t like white chocolate love these
- Great for gifting – Package them up for teachers, neighbors, or anyone special
Ingredient Notes
Let’s break down what makes these cookies so special and discuss why each ingredient matters. Understanding your ingredients helps you become a better baker and troubleshoot if needed.
All-Purpose Flour: This provides the structure for your cookies. I recommend measuring by spooning flour into your measuring cup and leveling it off, rather than scooping directly from the bag (which packs in too much flour and creates dry cookies). For best results, use 280g if you have a kitchen scale. For a gluten-free version, use a 1:1 gluten-free baking flour blend, though the texture will be slightly different.
Butter: Use unsalted butter so you can control the salt level perfectly. The butter must be at room temperature—soft enough that you can leave a fingerprint when you press it, but not melted or overly greasy. This temperature is crucial for proper creaming, which creates the right texture. European-style butter with higher fat content creates even richer cookies if you want to go extra fancy!
Brown Sugar and Granulated Sugar: The combination is key! Brown sugar (which contains molasses) creates chewiness and adds depth of flavor, while granulated sugar helps cookies spread and creates those crispy edges. I use mostly brown sugar in this recipe for maximum chewiness. Make sure your brown sugar is soft and fresh—if it’s hardened, microwave it with a damp paper towel for 20 seconds to soften.
Eggs: Use large eggs at room temperature. Room temperature eggs incorporate more smoothly into the butter mixture and create better texture. To quickly warm cold eggs, place them in a bowl of warm (not hot) water for 5-10 minutes before using.
Vanilla Extract: Pure vanilla extract is worth the investment in cookies where the flavor really shines through. Imitation vanilla has a harsher, artificial taste that’s noticeable in delicate cookies like these. The vanilla enhances both the white chocolate and macadamia flavors beautifully.
White Chocolate: This is where quality really matters! Use good white chocolate bars or chips—check the ingredients and make sure cocoa butter is listed, not just “vegetable oil.” Real white chocolate contains cocoa butter, which gives it that creamy, melt-in-your-mouth quality. I prefer chopping white chocolate bars into chunks rather than using chips, as the irregular pieces create better melty pockets. Ghirardelli, Lindt, or Guittard are excellent choices.
Macadamia Nuts: Buy roasted, salted macadamias for the best flavor—the salt enhances the sweetness and provides contrast. You can buy them whole and chop them yourself (preferred for texture control), or purchase pre-chopped. Raw macadamias work too but won’t have quite as much flavor. Toast them in a dry skillet for 3-5 minutes if using raw nuts to bring out their buttery taste.
Baking Soda and Baking Powder: This recipe uses both leavening agents to create the perfect texture—they work together to give cookies lift while maintaining chewiness. Make sure yours are fresh (check expiration dates) for proper rising.
Salt: Essential for balancing sweetness and enhancing flavors. Don’t skip it! Even if you use salted macadamias, you still need salt in the dough.
Equipment Needed
Having the right tools makes baking easier, more enjoyable, and produces better results. Here’s what you’ll need:
- Stand mixer or hand mixer – Makes creaming butter and sugar much easier and more effective
- Large mixing bowls (at least 2) – One for wet ingredients, one for dry
- Measuring cups and spoons – Accuracy is important for consistent results
- Kitchen scale (optional but recommended) – The most accurate way to measure ingredients
- Baking sheets (at least 2) – For baking multiple batches efficiently
- Parchment paper or silicone baking mats – Prevents sticking and ensures even baking
- Cookie scoop – A 2-tablespoon cookie scoop ensures uniform size and saves time
- Wire cooling racks – Allows proper air circulation so cookies cool evenly
- Rubber spatula – For scraping down bowl sides and folding in mix-ins
- Sharp knife and cutting board – If chopping white chocolate bars or whole macadamia nuts
- Small bowl – For whisking dry ingredients together
- Plastic wrap – If chilling dough
- Airtight container – For storing finished cookies
Print

White Chocolate Macadamia Cookie Recipe
These White Chocolate Macadamia Nut Cookies are bakery-quality treats featuring buttery, chewy centers with crispy edges, loaded with creamy white chocolate chunks and crunchy macadamia nuts. They’re luxurious, indulgent, and surprisingly easy to make at home!
- Total Time: 45 minutes
- Yield: 24 large cookies 1x
Ingredients
ScaleFor the Cookie Dough:
- 2½ cups (280g) all-purpose flour
- 1 teaspoon baking soda
- ½ teaspoon baking powder
- ¾ teaspoon salt
- 1 cup (2 sticks or 226g) unsalted butter, room temperature
- 1 cup (220g) packed light brown sugar
- ½ cup (100g) granulated sugar
- 2 large eggs, room temperature
- 2 teaspoons pure vanilla extract
- 1½ cups (255g) white chocolate chunks or chips
- 1½ cups (180g) macadamia nuts, roughly chopped
Instructions
Step 1: Preheat and Prepare
Position your oven racks in the upper and lower thirds of the oven and preheat to 350°F (175°C). Line two baking sheets with parchment paper or silicone baking mats. Having everything ready before you start mixing makes the process smooth and ensures even baking. Set aside.Step 2: Whisk Dry Ingredients
In a medium bowl, whisk together the flour, baking soda, baking powder, and salt until well combined. Whisking ensures all the leavening agents are evenly distributed throughout the flour, which means your cookies will rise uniformly. Set this bowl aside—you’ll add it to the wet ingredients later.Step 3: Cream Butter and Sugars
In a large bowl using your stand mixer or hand mixer, beat the room-temperature butter, brown sugar, and granulated sugar together on medium-high speed for 3-4 minutes until light, fluffy, and pale in color. This creaming process is crucial—it incorporates air into the dough, creating cookies that are tender rather than dense. Scrape down the bowl sides occasionally with a spatula to ensure everything mixes evenly. The mixture should look almost doubled in volume and noticeably lighter when properly creamed.Step 4: Add Eggs and Vanilla
Add the eggs one at a time, beating well after each addition (about 30-45 seconds per egg). The mixture might look slightly curdled after adding eggs—that’s completely normal and will come together once you add the flour. Add the vanilla extract and mix until fully incorporated. Scrape down the bowl sides again to catch any unmixed bits.Step 5: Incorporate Dry Ingredients
With your mixer on low speed, gradually add the flour mixture to the butter mixture, mixing just until no dry streaks of flour remain and the dough comes together. Don’t overmix once you’ve added flour, or your cookies will be tough! Stop mixing as soon as everything is incorporated. The dough should be thick, soft, and slightly sticky.Step 6: Fold in Mix-Ins
Using a rubber spatula or wooden spoon, gently fold in the white chocolate chunks and chopped macadamia nuts until they’re evenly distributed throughout the dough. Make sure every scoop will have plenty of both mix-ins—that’s what makes these cookies so special! Reserve a small handful of white chocolate and nuts if you want to press extras into the tops before baking for a professional bakery look.Step 7: Shape the Cookies
Using a cookie scoop or tablespoon, scoop dough into balls about 2 tablespoons each (roughly the size of a golf ball). Place them on your prepared baking sheets, spacing them about 3 inches apart to allow for spreading. If you reserved some mix-ins, press a few pieces of white chocolate and macadamia nuts into the top of each dough ball for beautiful presentation. Don’t flatten the dough balls—let them bake as rounded mounds.Step 8: Bake to Golden Perfection
Bake for 11-13 minutes, rotating the baking sheets halfway through (swap top and bottom, front to back) for even browning. The cookies are done when the edges are golden brown and set, but the centers still look slightly underdone and puffy. They’ll look too soft—that’s exactly what you want! They continue cooking on the hot baking sheet after you remove them from the oven. Overbaking is the enemy of chewy cookies, so err on the side of slightly underdone.Step 9: Cool Properly
Let the cookies cool on the baking sheet for 5 minutes—this cooling time is essential for them to set properly without falling apart. After 5 minutes, use a spatula to transfer them to a wire cooling rack to cool completely. They’ll firm up as they cool while maintaining that perfect chewy center. Try to resist eating them all warm, though I completely understand if you can’t!Step 10: Repeat and Store
Repeat the baking process with remaining dough, allowing the baking sheets to cool slightly between batches (or use additional baking sheets). Once cookies are completely cool, store them in an airtight container where they’ll stay fresh and chewy for up to 5 days—if they last that long!Notes
- Room temperature ingredients – Critical for proper texture and mixing
- Don’t overbake – Cookies should look slightly underdone when removed from oven
- Quality white chocolate – Make sure it contains cocoa butter, not just vegetable oil
- Chop your own chocolate – Irregular chunks create better melty pockets than uniform chips
- Cookie scoop recommended – Ensures uniform size for even baking
- Chill dough if needed – If dough is too soft, refrigerate for 30 minutes before scooping
- Prep Time: 15 minutes
- Cook Time: 12 minutes per batch
- Category: Desert
- Method: Baking
- Cuisine: American
- Diet: Vegetarian
Nutrition
- Serving Size: 1 cookie
- Calories: 245
- Sugar: 18g
- Sodium: 145mg
- Fat: 14g
- Saturated Fat: 7g
- Unsaturated Fat: 6g
- Trans Fat: 0g
- Carbohydrates: 28g
- Fiber: 1g
- Protein: 3g
- Cholesterol: 35mg
Tips & Variations
Mix-In Variations:
- Dark Chocolate Macadamia: Replace white chocolate with dark chocolate chunks for contrast
- Triple Chocolate: Use a combination of white, milk, and dark chocolate chunks
- Coconut Addition: Add ½ cup shredded coconut for a tropical twist
- Different Nuts: Substitute cashews, pecans, or walnuts if macadamias are unavailable
- Dried Fruit: Add ½ cup chopped dried cherries or cranberries for tartness
Flavor Enhancements:
- Coconut Extract: Replace ½ teaspoon vanilla with coconut extract for island vibes
- Almond Extract: Add ¼ teaspoon almond extract to complement the macadamias
- Orange Zest: Add 1 tablespoon orange zest for bright citrus notes
- Lime Zest: Add 1 tablespoon lime zest for a Key lime pie-inspired variation
- Espresso Powder: Add 1 teaspoon instant espresso to deepen flavors
Dietary Modifications:
- Gluten-Free: Use 1:1 gluten-free flour blend (texture will be slightly different)
- Dairy-Free White Chocolate: Use vegan white chocolate chips (several brands available)
- Reduced Sugar: You can reduce sugar by ¼ cup total, though texture will be affected
Size and Shape Variations:
- Giant Cookies: Use ¼ cup dough per cookie, bake 14-16 minutes
- Mini Cookies: Use 1 tablespoon dough per cookie, bake 8-10 minutes
- Cookie Bars: Press dough into a 9×13″ pan, bake 25-30 minutes, cut into squares
Pro Chef Tips
The Creaming Stage Creates Texture: Professional bakers know that the creaming process is what creates light, tender cookies. Beat butter and sugars for the full 3-4 minutes—the mixture should be noticeably paler, fluffier, and almost doubled in volume. This incorporates air that helps cookies rise and creates a delicate crumb. Under-creamed cookies will be dense; properly creamed cookies are tender and delightful.
Chop White Chocolate Bars, Don’t Use Only Chips: Here’s a pro secret: white chocolate bars chopped into irregular chunks create better texture and flavor than uniform chips. The irregular pieces create pockets of melted chocolate that vary in size, making each bite interesting. Chips are formulated to hold their shape, so they don’t melt as beautifully. Use half chopped bars and half chips for best results, or chop bars entirely.
Toast Your Macadamias for Maximum Flavor: Even if you buy roasted macadamias, a quick toast in a dry skillet over medium heat for 3-4 minutes amplifies their buttery flavor dramatically. Watch carefully and stir frequently to prevent burning. Let them cool completely before adding to dough. This extra step takes just minutes but makes a noticeable difference in the final cookie.
The Underbake Principle: Professional bakers always slightly underbake cookies for chewy centers. When you remove them from the oven, these cookies should look puffy with centers that seem too soft—almost undercooked. They’ll sink and firm up as they cool on the pan. If they look completely done in the oven, they’ll be overdone once cooled. Trust the timing and visual cues: golden edges, pale centers.
Chill Dough for Thicker Cookies: If you prefer ultra-thick, bakery-style cookies that don’t spread much, refrigerate your dough for 30 minutes to 1 hour before baking. The cold dough takes longer to spread in the oven, resulting in taller, thicker cookies. You can also freeze shaped dough balls for 15 minutes before baking for even more height.
The Pan Rotation Trick: Halfway through baking, rotate your sheets front to back AND swap top and bottom positions. Ovens have hot spots and temperature variations, so this ensures all cookies bake evenly. It’s especially important when baking multiple sheets simultaneously.
Common Mistakes to Avoid
Using Melted or Overly Soft Butter: Butter should be at room temperature (around 65-68°F), soft enough to press a finger into but still holding its shape. Butter that’s too warm or melted causes cookies to spread too much and become thin and greasy. If your butter got too soft, pop it in the fridge for 10 minutes to firm up before using.
Skipping the Room Temperature Eggs: Cold eggs don’t incorporate smoothly into room-temperature butter and can cause the mixture to look curdled or separated. They also create uneven texture in the finished cookies. Always let eggs sit at room temperature for 30 minutes, or quick-warm them in a bowl of warm water for 10 minutes before using.
Overmixing After Adding Flour: Once you add flour to the mixture, mix only until you can’t see dry streaks anymore, then stop immediately. Overmixing develops gluten in the flour, making cookies tough and cake-like instead of tender and chewy. It’s okay if mixing takes a little time on low speed—just avoid vigorous or prolonged mixing once flour is added.
Using Low-Quality White Chocolate: Not all white chocolate is created equal! Some brands use vegetable oil instead of cocoa butter, which creates a waxy texture and artificial flavor. Check ingredients—real white chocolate lists cocoa butter. The quality difference is dramatic and worth the extra dollar or two per bag.
Overbaking the Cookies: This is the most common mistake! These cookies should be removed when edges are set and golden but centers still look pale and slightly underdone. They will NOT look done, and you might panic—but trust the process! They continue baking on the hot sheet for several minutes after removal. If you wait until they look fully baked, they’ll be dry and hard once cooled.
Storage & Meal Prep
Room Temperature Storage: Store completely cooled cookies in an airtight container at room temperature for up to 5 days. To keep them extra soft and chewy, place a slice of bread in the container with the cookies—they’ll absorb moisture from the bread. Replace the bread every couple of days. Layer cookies between sheets of parchment paper to prevent them from sticking together if they contain lots of melted chocolate.
Maintaining Freshness: If your cookies lose their chewiness after a day or two, here’s a trick: place them in an airtight container with a damp (not wet) paper towel draped over the top (not touching cookies), seal, and leave overnight. The moisture will soften them. Alternatively, microwave individual cookies for 10-15 seconds to soften and warm them, making them taste freshly baked.
Refrigerator Storage: While not necessary, cookies can be refrigerated in an airtight container for up to 10 days. The cold makes them firmer, so let them sit at room temperature for 10-15 minutes before eating, or warm them briefly in the microwave (15 seconds) or a 300°F oven (5 minutes) to restore that fresh-baked texture.
Cookie Jar Strategy: These cookies are perfect for cookie jars! Choose a container with a tight seal to maintain freshness. If you live in a humid climate, the white chocolate may bloom (develop white streaks) but it’s still safe to eat and doesn’t affect flavor.
Make-Ahead & Freezer Notes
Freezing Cookie Dough (Best Method!): This is my favorite make-ahead strategy! Scoop dough into balls, place on a baking sheet, and freeze until solid (about 2 hours). Transfer frozen dough balls to a freezer-safe zip-top bag or container, removing as much air as possible. They’ll keep for up to 3 months. Bake directly from frozen—no thawing needed!—just add 1-2 extra minutes to the baking time. Fresh cookies anytime you want them!
Freezing Baked Cookies: Fully cooled cookies freeze beautifully for up to 3 months. Layer them between sheets of parchment paper in an airtight container or freezer bag. Thaw at room temperature for 20-30 minutes, or warm frozen cookies in a 300°F oven for 5-7 minutes to enjoy them warm and soft like they just came out of the oven. The white chocolate may develop slight bloom after freezing but it doesn’t affect taste.
Refrigerating Dough: You can make the dough up to 3 days ahead and refrigerate it in an airtight container. Actually, chilled dough often bakes into even better cookies—the flour hydrates fully, flavors deepen, and cookies spread less for a thicker final product. Let dough sit at room temperature for 10-15 minutes before scooping if it’s too firm.
Batch Baking Strategy: Mix up a double or triple batch of dough, shape all cookies, freeze them, then bake in small batches throughout the month. This strategy gives you fresh-baked cookies whenever you want without repeated mixing and cleanup. Perfect for busy schedules or spontaneous cookie cravings!
Pre-Measuring Dry Ingredients: Measure and whisk together all dry ingredients up to 1 week ahead and store in an airtight container or bag. Label it clearly. When you’re ready to bake, you’ll save time and can jump straight to the creaming stage.
Serving Suggestions
White Chocolate Macadamia Nut Cookies are delicious on their own, but pairing them thoughtfully enhances the experience.
Beverage Pairings:
- Coffee: The rich, buttery cookies pair beautifully with coffee—try them with a latte, cappuccino, or cold brew
- Tea: Earl Grey, chai, or vanilla rooibos complement the white chocolate and macadamia flavors
- Milk: Classic cold milk for dunking is always perfect with any cookie
- Hot Chocolate: White hot chocolate creates a dreamy monochromatic pairing
- Dessert Wine: Try with Moscato d’Asti or late-harvest Riesling for special occasions
Ice Cream Sandwiches: Use two slightly underbaked cookies (softer and more pliable) with a scoop of vanilla, coconut, or macadamia nut ice cream in between. Roll the edges in crushed macadamias for extra pizzazz. These are absolutely divine!
Cookie Platters: Arrange these cookies on a platter with other varieties like chocolate chip, oatmeal raisin, and snickerdoodles for a beautiful dessert spread at parties or gatherings. The white chocolate stands out visually and offers something different.
Breakfast Treat: Serve one alongside your morning coffee with Greek yogurt and fresh fruit for a more balanced indulgent breakfast. The protein from nuts and yogurt helps balance the sweetness.
Dessert Toppings: Crumble these cookies over vanilla ice cream, layer them in parfaits with whipped cream and berries, or use them to top cheesecakes or cream pies for added texture and flavor.
Gift Packaging: Layer these cookies in a decorative tin or clear cellophane bag tied with ribbon. They’re beautiful enough to give as hostess gifts, teacher appreciation presents, or holiday gifts. Include the recipe card if people ask—they will!
FAQs Section
Can I use white chocolate chips instead of chunks?
Absolutely! White chocolate chips work perfectly in this recipe. However, chopping white chocolate bars into irregular chunks creates better texture with more varied melty pockets throughout the cookies. For best results, use half chips (which hold their shape better) and half chopped bars (which create melty pockets).Why are my cookies flat and spreading too much?
Several factors cause flat cookies: butter that was too warm/melted when mixing (should be room temp but still firm), old leavening agents (check expiration dates), measuring flour incorrectly (use spoon-and-level method), oven not hot enough (use oven thermometer to verify), or not enough flour in the dough. Also ensure you’re creaming butter and sugar for the full 3-4 minutes to incorporate enough air. If dough seems too soft, refrigerate it for 30 minutes before baking.Can I substitute a different nut for macadamias?
Yes! Macadamias are expensive, so feel free to substitute with cashews (similar buttery flavor), chopped pecans, walnuts, or even almonds. The flavor will be slightly different but still delicious. Toast whatever nuts you use in a dry skillet for 3-5 minutes to enhance their flavor before adding to the dough.How do I know when the cookies are done?
These cookies are done when the edges are golden brown and set but the centers still look pale and slightly puffy—almost underdone. They should jiggle slightly in the middle when you gently shake the pan. Remove them at this point—they’ll continue cooking on the hot baking sheet and firm up as they cool. If you wait until they look completely done in the oven, they’ll be overbaked and dry once cooled.Can I make these cookies gluten-free?
Yes! Use a 1:1 gluten-free baking flour blend (like Bob’s Red Mill or King Arthur Measure for Measure). The texture will be slightly different—perhaps a bit more crumbly—but still delicious. Make sure your blend contains xanthan gum or add ½ teaspoon if it doesn’t. All other ingredients remain the same.Why is my white chocolate seizing or getting grainy?
White chocolate is delicate and can seize (become grainy and lumpy) if it gets too hot or comes in contact with water. Make sure all your equipment is completely dry. If chunks are seizing in the oven, your oven might be running hot—use an oven thermometer to check temperature. Quality white chocolate with cocoa butter melts more smoothly than cheaper varieties.How long do these cookies stay fresh?
Stored in an airtight container at room temperature, these cookies stay fresh and chewy for up to 5 days. For longer storage, freeze them for up to 3 months. The white chocolate may develop slight white streaks (bloom) after freezing, but this doesn’t affect flavor and the cookies will still taste amazing!Conclusion
There you have it—everything you need to create perfect White Chocolate Macadamia Nut Cookies that rival any bakery! These luxurious cookies with their buttery richness, creamy white chocolate, and crunchy macadamias are truly special. They’re the kind of cookie that makes people close their eyes and sigh with happiness after the first bite. Whether you’re baking them for a special occasion or just treating yourself to something wonderful, these cookies deliver every single time.
The combination of crispy edges and soft, chewy centers studded with premium ingredients creates a cookie experience that feels indulgent and special. Once you’ve mastered this recipe, you’ll find yourself making them again and again—for holidays, potlucks, gifts, or simply because you deserve something delicious. The best part? They’re surprisingly simple to make and require no special techniques, just quality ingredients and a little bit of care.
I’d absolutely love to hear how your White Chocolate Macadamia Nut Cookies turn out! Did you try any of the variations? What occasion are you baking them for? Drop a comment below and share your baking adventures—I read every single comment and genuinely love connecting with fellow cookie enthusiasts!
Please save this recipe to your Pinterest dessert board so you can find it easily whenever that cookie craving hits (and trust me, once you’ve made these once, the cravings will be frequent!). If you snap a photo of your gorgeous batch, tag me on social media—I absolutely love seeing your beautiful baking creations and sharing them with our community!
Now grab your white chocolate and macadamias, and get ready to bake some seriously impressive cookies. Your kitchen is about to smell incredible, and you’re about to have the chewiest, most luxurious cookies ever. Happy baking, friends! 🍪✨
AI Image Generation Prompt
Final White Chocolate Macadamia Nut Cookies – Styled Hero Shot:
“Create a photorealistic image of a stack of three White Chocolate Macadamia Nut Cookies positioned on a rustic white ceramic plate, set on a light oak wooden table. The cookies should display perfect bakery-style characteristics: thick and substantial (approximately ¾ inch thick), with golden-brown crispy edges that show slight caramelization. The tops should have a beautiful textured surface with visible large white chocolate chunks and golden-tan macadamia nut pieces pressed into the surface and throughout. One cookie should be broken in half and positioned in front of the stack to showcase the interior: soft, chewy, golden-brown center with generous pockets of melted white chocolate and macadamia nuts distributed throughout. The broken cookie should show a slight pull-apart effect with stretchy, melted white chocolate connecting the two halves.
The cookies should look substantial and indulgent, not flat—showing a nice dome shape that indicates perfect texture. Visible white chocolate chunks should appear creamy and slightly melted in some areas, with a few whole macadamia nut pieces visible on the surface. A few artistic crumbs should scatter naturally on the plate and wooden surface. The color palette should feature warm golden-brown cookies contrasting beautifully with creamy white chocolate chunks and light tan macadamia nuts.
Lighting: Bright, natural window light coming from the left side at a 45-degree angle, creating soft, appetizing highlights on the white chocolate pieces and gentle shadows on the right side of the cookies. The lighting should be clean, fresh, and perfect for Pinterest—bright and inviting but not harsh or overexposed, with a slight glow on the melted white chocolate areas.
Angle: Three-quarter view from slightly above (approximately 30 degrees from horizontal), positioned to showcase both the stacked cookies and the beautiful cross-section of the broken cookie in front. The camera should capture the texture, thickness, and generous mix-ins clearly.
Props and styling: Place two whole raw macadamia nuts casually on the wooden table surface near the plate. Add a few small white chocolate chunks scattered artistically around the plate. Include a small glass of cold milk with condensation droplets on the glass positioned slightly out of focus in the background right. A folded natural linen napkin in cream or soft beige should rest beside the plate. A small sprig of fresh mint or a few edible flowers could add a subtle pop of