Classic Crème Brûlée Recipe: Master This French Dessert at Home

There’s something utterly magical about cracking through the glassy, caramelized sugar shell of a perfectly made crème brûlée to discover the silky, vanilla-scented custard beneath. This iconic French dessert has captivated dessert lovers for centuries, and once you taste that contrast between the crisp, bittersweet caramelized top and the cool, creamy custard, you’ll understand why it remains one of the most beloved restaurant desserts of all time.
The name “crème brûlée” literally means “burnt cream” in French, and that’s exactly what makes this dessert so special—the dramatic finishing touch where you torch a layer of sugar until it melts and caramelizes into a thin, brittle crust. That satisfying crack when you tap your spoon through the surface is half the appeal! But beyond the showmanship, crème brûlée is actually one of the simplest elegant desserts you can master at home.
This classic dessert is perfect for special occasions like Valentine’s Day, anniversary dinners, holiday gatherings, or any time you want to end a meal with something truly impressive. Despite its fancy French restaurant reputation, crème brûlée uses just a handful of simple ingredients—eggs, cream, sugar, and vanilla—and comes together more easily than you might think. The key is understanding a few basic techniques, and I’m here to walk you through every single step so you can create restaurant-quality crème brûlée in your own kitchen!
History / Background
Crème brûlée has a fascinating and somewhat disputed history that food historians have debated for centuries. While we know it as a quintessentially French dessert, several countries actually claim to have invented it first, making its true origins a delicious culinary mystery.
The earliest known recipe for a dessert resembling crème brûlée appears in François Massialot’s 1691 cookbook “Cuisinier Royal et Bourgeois,” where he describes a custard called “crème brûlée” that was served to French royalty. However, some culinary historians argue that similar custard desserts existed even earlier. England’s “burnt cream” or “Trinity cream” (allegedly created at Trinity College, Cambridge in the 1630s) is remarkably similar, featuring the same custard base with a caramelized sugar top.
Spain also enters the debate with “crema catalana,” a traditional Catalan dessert that predates the documented French version by several centuries. Crema catalana differs slightly—it’s flavored with cinnamon and citrus and thickened with cornstarch rather than relying solely on eggs—but the caramelized sugar topping is unmistakably similar. The technique of burning sugar on top of custards appears in Spanish cookbooks dating back to medieval times.
What we can say with certainty is that by the 18th century, crème brûlée had become firmly established in French haute cuisine. It was served in the finest Parisian restaurants and aristocratic homes, where the dramatic tableside caramelization of the sugar top added theater to elegant dinners. The dessert remained popular in France but was relatively unknown in America until the 1980s.
The modern crème brûlée renaissance began when influential chef Paul Bocuse and nouvelle cuisine champions brought it back into fashion in the 1970s and 80s. American restaurants quickly adopted it, and by the 1990s, crème brûlée had become a mainstay on upscale restaurant menus across the United States. The introduction of affordable kitchen torches made it accessible to home cooks, and it has remained one of the most popular “restaurant-worthy” desserts people love to master at home.
Today, crème brûlée represents the pinnacle of simple elegance in desserts—a testament to how just a few quality ingredients, properly treated, can create something truly extraordinary. Its enduring popularity proves that sometimes the classics never go out of style.
Why You’ll Love This Recipe
I’ll be honest: crème brûlée might sound intimidating if you’ve never made it before, but I promise it’s actually one of the most forgiving and straightforward elegant desserts you can make. Once you understand the basic technique, you’ll find yourself making it again and again because it’s surprisingly simple and never fails to impress.
Here’s what makes this recipe absolutely irresistible:
- Elegant simplicity – Uses just five basic ingredients you probably already have on hand
- Make-ahead friendly – Perfect for dinner parties since you make it the day before
- Restaurant-quality at home – Save money by creating upscale desserts yourself
- Incredibly rich and satisfying – A little goes a long way, making it feel extra indulgent
- Impressive presentation – The caramelized top adds drama and sophistication
- Customizable flavors – The classic vanilla base works with countless flavor variations
- Gluten-free naturally – No flour or gluten-containing ingredients needed
- Perfect texture every time – The water bath method ensures silky, smooth custard
- Fun interactive element – Torching the sugar top is genuinely exciting and satisfying
- Portion-controlled – Individual ramekins mean built-in serving sizes
- Universal crowd-pleaser – I’ve never met anyone who doesn’t love crème brûlée!
Ingredient Notes
The beauty of crème brûlée lies in its simplicity—just a handful of quality ingredients combine to create something absolutely extraordinary. Let’s break down each component and why it matters.
Heavy Cream: This is the foundation of your custard, providing that luxurious, silky richness that makes crème brûlée so decadent. Use heavy cream (also called heavy whipping cream) with at least 36% fat content. Don’t substitute with half-and-half, light cream, or milk—you need the high fat content for proper texture and richness. The cream should be as fresh as possible for the best flavor.
Egg Yolks: These are what give crème brûlée its signature custardy texture and beautiful golden color. The yolks thicken the cream when heated gently, creating that silky-smooth consistency. Use large, fresh eggs and separate them carefully—you only need the yolks. Save the egg whites for meringues, macarons, or morning omelets! Room temperature yolks incorporate more smoothly, though this isn’t as critical as in some baking recipes.
Granulated Sugar: You’ll need sugar in two places: in the custard base for sweetness, and on top for caramelization. Regular white granulated sugar works perfectly. Some recipes call for superfine sugar for the custard (it dissolves more easily), but regular sugar works fine if you whisk well. For the caramelized top, granulated sugar is essential—powdered sugar won’t caramelize properly.
Pure Vanilla Extract or Vanilla Bean: This is where flavor magic happens! I highly recommend using a real vanilla bean if possible—scraping those tiny seeds into your cream creates incomparable vanilla flavor and those beautiful little flecks throughout the custard. If vanilla beans aren’t available or are outside your budget, use pure vanilla extract (not imitation). Plan on 2 teaspoons of high-quality extract. Vanilla bean paste is also an excellent option that combines the convenience of extract with the visual appeal and flavor of real beans.
Salt: Just a tiny pinch enhances all the other flavors and prevents the custard from tasting flat. Don’t skip it! Salt is the secret ingredient that makes sweet desserts taste even better by providing flavor balance.
Equipment Needed
Having the right tools makes crème brûlée much easier to execute perfectly. Here’s what you’ll need:
- Six 4-6 ounce ramekins – Shallow, wide ramekins are ideal; they provide more surface area for that glorious caramelized top
- Kitchen torch – Essential for achieving that perfect glassy caramelized sugar crust (see substitution note below)
- Large roasting pan or baking dish – Needs to be deep enough to hold water halfway up the ramekins
- Medium saucepan – For heating the cream mixture
- Large mixing bowl – For whisking egg yolks and sugar
- Whisk – For smoothly combining ingredients
- Fine-mesh strainer – Crucial for removing any cooked egg bits and ensuring silky custard
- Measuring cups and spoons – Precision matters in custard-making
- Ladle or large measuring cup with spout – Makes pouring custard into ramekins easier
- Kitchen towel – To line the bottom of your roasting pan (prevents ramekins from sliding)
- Plastic wrap or aluminum foil – For covering ramekins while they chill
- Kettle or large pot – For heating water for the water bath
- Oven thermometer (optional but helpful) – To verify accurate oven temperature
Note on torches: If you don’t have a kitchen torch, you can use your oven’s broiler as a last resort, though results won’t be quite as good. Place ramekins on a baking sheet and broil on the highest setting for 1-3 minutes, watching constantly. The sugar caramelizes unevenly this way, but it works in a pinch.
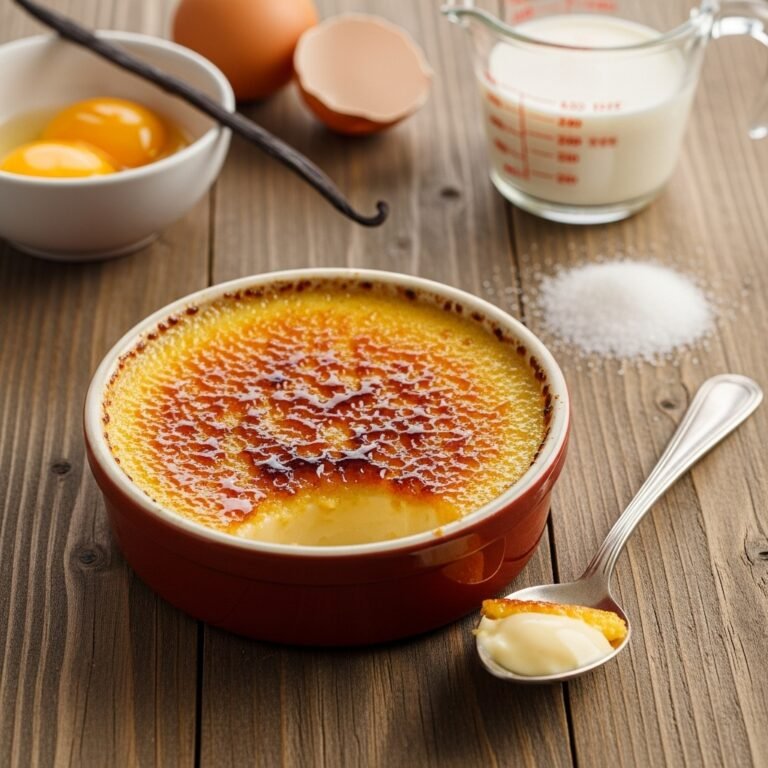
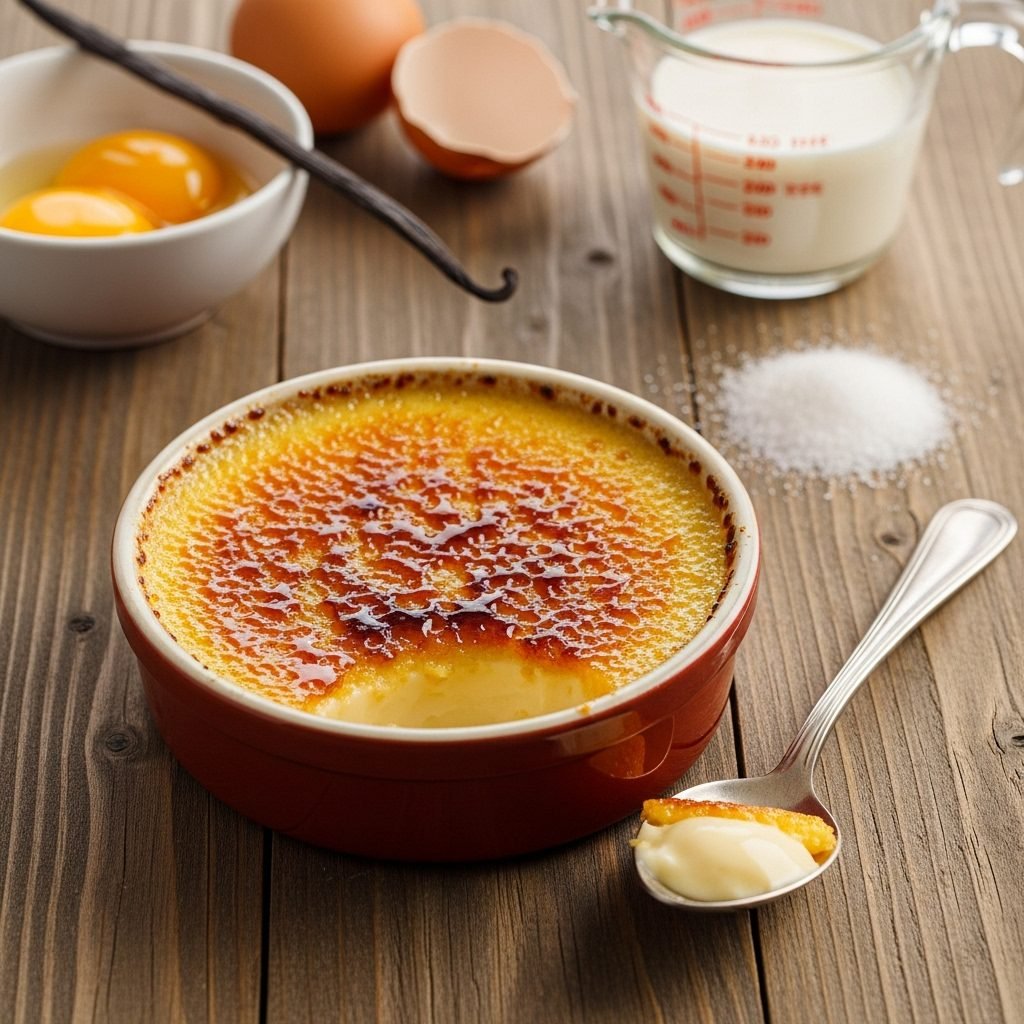
Crème Brûlée Recipe
This classic Crème Brûlée features a silky-smooth vanilla custard base topped with a crisp layer of caramelized sugar. Simple yet elegant, this French restaurant favorite is surprisingly easy to make at home and perfect for impressing dinner guests.
- Total Time: 4 hours (includes chilling time)
- Yield: 6 servings 1x
Ingredients
For the Custard:
- 2 cups (480ml) heavy cream
- 1 vanilla bean, split lengthwise (or 2 teaspoons pure vanilla extract)
- 5 large egg yolks
- ½ cup (100g) granulated sugar, divided
- Pinch of salt
For the Caramelized Topping:
- 3-6 tablespoons granulated sugar (about ½-1 tablespoon per ramekin)
Instructions
Step 1: Preheat Oven and Prepare Water Bath
Position your oven rack in the center and preheat to 325°F (165°C). Place a kitchen towel in the bottom of a large roasting pan or baking dish (this prevents ramekins from sliding and provides insulation). Arrange six 4-6 ounce ramekins on top of the towel. Put a kettle of water on to boil—you’ll need this for the water bath later.
Step 2: Infuse the Cream with Vanilla
Pour the heavy cream into a medium saucepan. If using a vanilla bean, split it lengthwise with a sharp knife and scrape out the seeds with the back of the knife. Add both the seeds and the scraped pod to the cream (the pod adds extra flavor). Heat over medium heat, stirring occasionally, until the cream just begins to simmer and small bubbles form around the edges—about 5 minutes. Don’t let it come to a rolling boil. Remove from heat and let it steep for 10-15 minutes to infuse maximum vanilla flavor. If using vanilla extract instead, you’ll add it later.
Step 3: Whisk Egg Yolks and Sugar
While the cream is steeping, combine the egg yolks, ¼ cup of the sugar, and a pinch of salt in a large mixing bowl. Whisk vigorously for about 2 minutes until the mixture becomes pale yellow, thick, and slightly ribbony when you lift the whisk. This step is important—it helps dissolve the sugar and creates the base for your silky custard.
Step 4: Temper the Egg Mixture
Remove the vanilla pod from the cream (rinse it, dry it, and save it for vanilla sugar!). Very slowly pour about ½ cup of the warm cream into the egg yolk mixture while whisking constantly. This is called tempering—it gradually raises the temperature of the eggs without scrambling them. Once incorporated, slowly whisk in the remaining cream until completely combined. If using vanilla extract instead of a vanilla bean, stir it in now.
Step 5: Strain the Custard
Pour the custard mixture through a fine-mesh strainer into a large measuring cup or bowl with a spout (this makes pouring easier). This crucial step removes any bits of cooked egg, vanilla bean seeds that clumped together, or any other particles, ensuring your custard is perfectly smooth and silky. Don’t skip this step!
Step 6: Fill the Ramekins
Carefully pour or ladle the strained custard into the prepared ramekins, filling each one about ¾ full, leaving about ¼ inch from the rim. If any bubbles form on the surface, gently skim them off with a spoon or pop them with a kitchen torch for a smooth finish.
Step 7: Create the Water Bath
Carefully place the roasting pan with the filled ramekins in the oven. Then, slowly pour hot water from your kettle into the roasting pan until it reaches about halfway up the sides of the ramekins. Be careful not to splash water into the custards! The water bath (called a “bain-marie”) ensures gentle, even cooking and prevents the edges from overcooking while the centers set.
Step 8: Bake Until Just Set
Bake for 40-45 minutes, until the custards are set around the edges but still have a slight jiggle in the center—about the size of a quarter. They should look like barely set Jell-O when you gently shake a ramekin. The centers will continue cooking from residual heat after you remove them. Don’t overbake or the custard will be grainy instead of silky! Start checking at 35 minutes if using shallow ramekins.
Step 9: Cool and Chill
Carefully remove the roasting pan from the oven. Using tongs or a towel, remove each ramekin from the water bath and place on a wire rack to cool to room temperature, about 30 minutes. Once cooled, cover each ramekin with plastic wrap and refrigerate for at least 2 hours, but preferably 4 hours or overnight. The custards need this time to fully set and develop flavor.
Step 10: Caramelize the Sugar Topping
When ready to serve, remove the ramekins from the refrigerator. Blot any condensation from the tops with a paper towel. Sprinkle ½ to 1 tablespoon of granulated sugar evenly over the top of each custard, tilting and tapping the ramekin to ensure even coverage and remove any excess. Using a kitchen torch, hold the flame 2-3 inches from the surface and move it in a circular motion until the sugar melts and caramelizes to a deep amber color. Let the sugar harden for 1-2 minutes before serving—it will crack beautifully when tapped with a spoon!
Step 11: Serve Immediately
Serve the crème brûlée within 10-15 minutes of torching for the best contrast between the warm, crispy sugar top and the cold, creamy custard. The caramelized sugar will gradually soften if it sits too long. Encourage guests to crack through the top with their spoons for that satisfying crunch!
Notes
- Temperature matters – Don’t let the cream boil, and don’t overbake the custard
- The jiggle test – Custards should wobble slightly in the center when done, like Jell-O
- Water bath is essential – It prevents curdling and ensures silky texture
- Chill completely – At least 2 hours, but overnight is even better
- Torch technique – Keep the flame moving to avoid burning spots
- Serve timing – Torch just before serving for optimal texture contrast
- Sugar amount – Use enough to create a thin, even layer but not so much it’s too thick to caramelize properly
- Prep Time: 15 minutes
- Cook Time: 40-45 minutes
- Category: Dessert
- Method: Baking water
- Cuisine: French
- Diet: Gluten Free
Nutrition
- Serving Size: 1 crème brûlée
- Calories: 365
- Sugar: 19g
- Sodium: 45mg
- Fat: 30g
- Saturated Fat: 18g
- Unsaturated Fat: 10g
- Trans Fat: 0g
- Carbohydrates: 20g
- Fiber: 0g
- Protein: 4g
- Cholesterol: 265mg