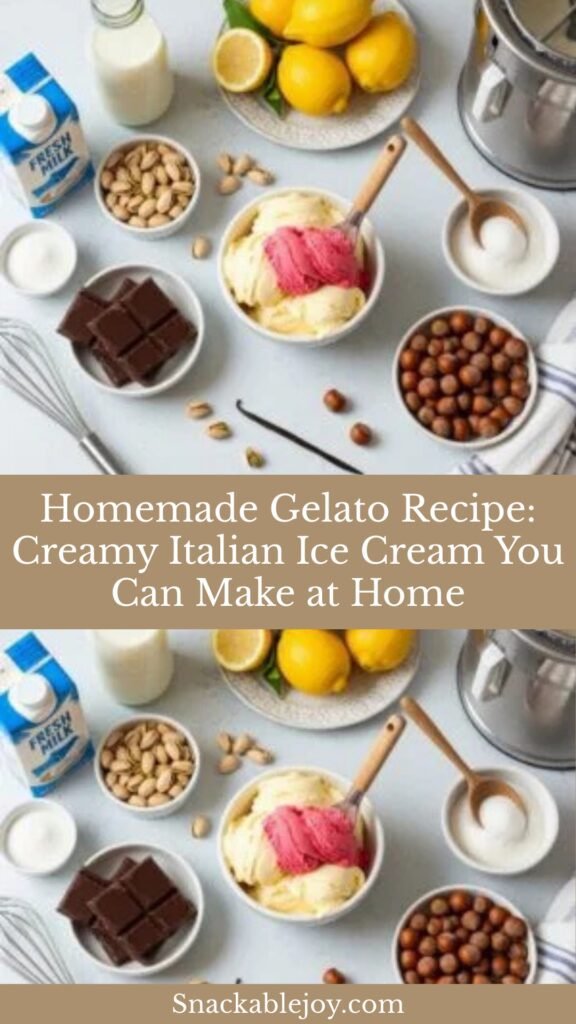
Homemade Gelato Recipe: Creamy Italian Ice Cream You Can Make at Home
There’s something absolutely magical about authentic Italian gelato—that silky, intensely flavored frozen dessert that makes regular ice cream seem almost ordinary in comparison. If you’ve ever wandered the cobblestone streets of Rome or Florence with a cone of pistachio or stracciatella gelato in hand, you know exactly what I’m talking about. Today, I’m thrilled to share my foolproof homemade gelato recipe that brings that dreamy Italian gelateria experience right into your kitchen. This recipe creates a perfectly smooth, rich gelato with that characteristic dense texture and bold flavor that makes gelato so irresistible. Whether you’re making classic vanilla, decadent chocolate, or any flavor your heart desires, this base recipe will guide you to gelato perfection every single time.
Introduction of Recipe
Gelato is Italy’s answer to ice cream, but it’s so much more than just a frozen dessert—it’s a culinary experience that transforms simple ingredients into something extraordinary. Unlike American-style ice cream, gelato contains less air and less fat, which creates that signature dense, creamy texture and allows flavors to shine through more intensely. This homemade gelato recipe walks you through creating authentic Italian-style gelato in your own kitchen, using a custard base that’s churned slowly to achieve that perfect consistency. It’s ideal for summer entertaining, special celebrations, romantic dinner finales, or simply when you want to treat yourself to something truly special. The best part? Once you master this base recipe, you can customize it with endless flavor variations, from classic vanilla and rich chocolate to sophisticated flavors like hazelnut, pistachio, lemon, or even lavender honey.
History / Background
Gelato’s history stretches back centuries to Renaissance Italy, where the Medici family is credited with popularizing frozen desserts among European nobility. The word “gelato” simply means “frozen” in Italian, but its creation represents a culinary evolution that began in ancient Rome, where people enjoyed flavored ice and snow brought down from the mountains. Modern gelato as we know it truly took shape in 16th-century Florence, when architect Bernardo Buontalenti created a frozen dessert using milk, honey, and egg yolk for the Medici court. This innovation marked the beginning of gelato’s journey from aristocratic luxury to beloved everyday treat.
By the 19th century, gelato-making had become a respected craft throughout Italy, with gelaterias opening in every town and city. Italian immigrants brought their gelato-making traditions to America and around the world, though the dessert remained distinctly Italian in character. What makes gelato different from ice cream isn’t just its ingredients—it’s the entire philosophy behind it. Traditional Italian gelato makers, called gelatieri, emphasize using fresh, high-quality ingredients and churning the mixture at a slower speed than ice cream, which incorporates less air and creates that characteristic smooth, dense texture. Gelato is also served at a slightly warmer temperature than ice cream (around 10-15°F warmer), which makes it taste creamier and allows the flavors to blossom on your palate. Today, artisanal gelato has experienced a renaissance worldwide, with gelaterias popping up in major cities and home cooks discovering that making authentic gelato at home is not only possible but incredibly rewarding.
Why You’ll Love This Recipe
This homemade gelato recipe delivers restaurant-quality results that will have your family and friends convinced you’ve secretly been training in an Italian gelateria. The custard-based method creates an incredibly smooth texture without ice crystals, and the lower fat content compared to traditional ice cream means the flavors taste brighter and more intense.
Here’s why this recipe is a winner:
- Authentic Italian texture – Dense, smooth, and creamy, just like gelato from Florence or Rome
- Intensely flavored – Less fat means flavor compounds shine through beautifully
- Surprisingly simple – Requires basic ingredients and straightforward techniques
- Endlessly customizable – Use this base recipe to create any flavor you can imagine
- Impressive results – Looks and tastes like professional gelato, perfect for entertaining
- More economical than store-bought premium gelato – Make large batches for a fraction of the cost
- No stabilizers or artificial ingredients – You control exactly what goes into your dessert
- Perfect consistency every time – This tested recipe delivers foolproof results
- Special dietary flexibility – Can be adapted for various dietary needs with ingredient substitutions
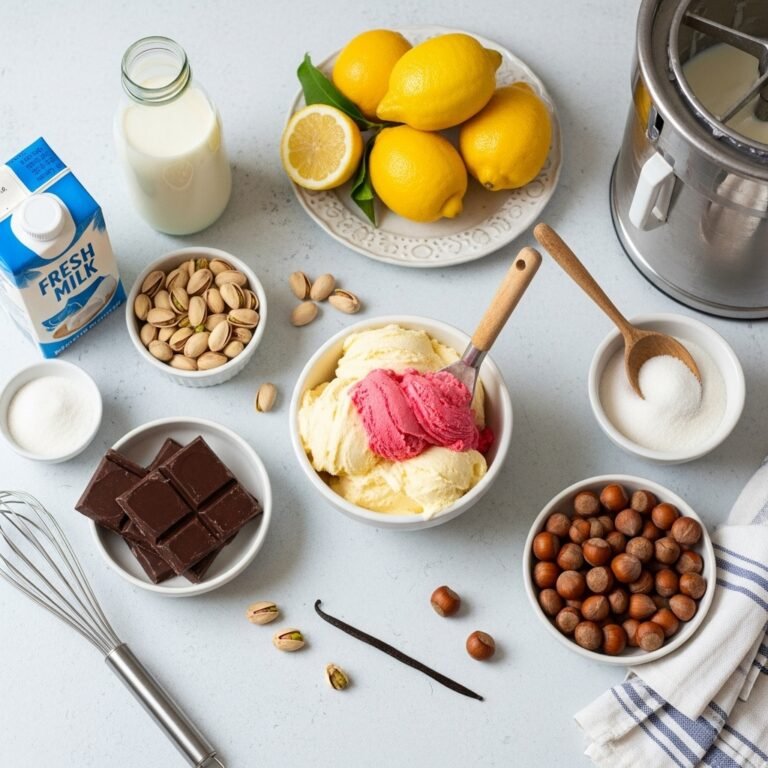
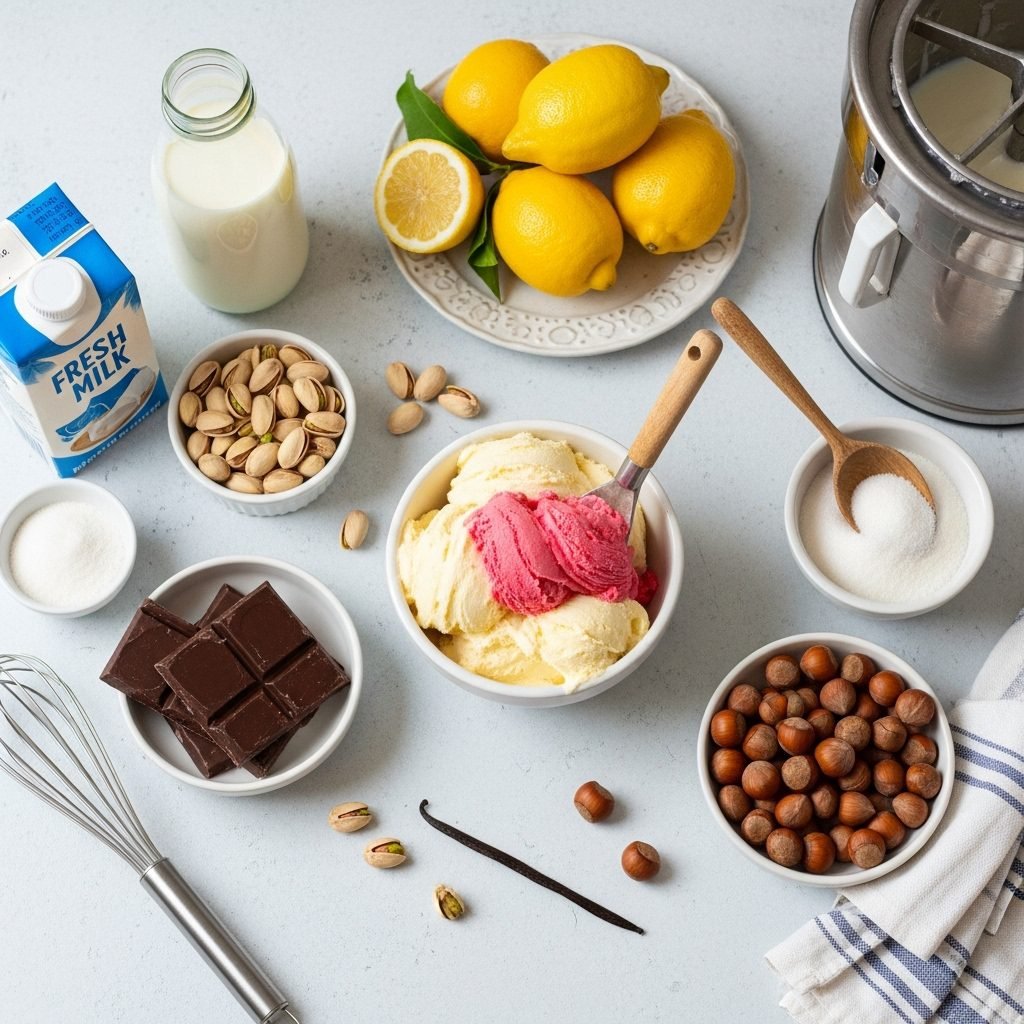
Ingredient Notes
Whole Milk: The foundation of gelato, providing creaminess without excessive fat. Whole milk is essential—don’t substitute with low-fat varieties as they won’t create the proper texture. The milk should be fresh and high-quality for the best flavor.
Heavy Cream: While gelato contains less cream than American ice cream, a small amount creates richness and body. You can adjust the milk-to-cream ratio slightly, but maintaining mostly milk keeps the texture authentically dense rather than fluffy.
Granulated Sugar: Sweetens the gelato and also lowers the freezing point, which keeps the texture smooth and scoopable. The sugar dissolves completely into the warm custard, creating a perfectly sweet base without grittiness.
Egg Yolks: These are the secret to gelato’s silky texture. The yolks create a custard base that prevents ice crystals and adds luxurious richness. Use fresh eggs at room temperature for easier incorporation. If you’re concerned about raw eggs, you can use pasteurized eggs.
Vanilla Extract or Vanilla Bean: For classic vanilla gelato, use pure vanilla extract or scrape the seeds from a vanilla bean pod for the most authentic, intense flavor. Quality matters tremendously here—imitation vanilla will produce inferior results.
Pinch of Salt: Enhances all the other flavors and balances the sweetness. Never skip the salt, even though it seems like a tiny amount.
Optional Flavor Additions: Depending on your chosen flavor, you might add cocoa powder, espresso, nut pastes, fruit purees, or other flavorings. Always use high-quality ingredients for the most intense, true flavors.
Substitution Notes: For dairy-free gelato, you can use full-fat coconut milk or oat milk, though the texture will differ slightly. For egg-free versions, cornstarch can create a custard-like consistency, but the texture won’t be quite as silky. For lower sugar options, you can replace some sugar with erythritol, but don’t reduce sugar by more than 25% or the texture will become icy.
Equipment Needed
- Medium heavy-bottomed saucepan – For heating the milk mixture without scorching
- Mixing bowls (at least 2) – For whisking eggs and preparing the custard
- Whisk – Essential for smooth egg incorporation
- Fine-mesh strainer – To strain out any cooked egg bits and ensure silky texture
- Digital thermometer – For monitoring custard temperature precisely (optional but helpful)
- Ice cream maker or gelato machine – Required for proper churning and texture
- Rubber spatula – For scraping down bowls and pans
- Freezer-safe container with lid – For storing finished gelato (shallow containers work best)
- Plastic wrap – To press against gelato surface and prevent ice crystals
- Ice bath setup (large bowl filled with ice water) – For rapidly cooling the custard
Print

Gelato Recipe
Authentic Italian gelato with a silky-smooth custard base that’s less fatty than ice cream but more intensely flavored. This homemade recipe creates professional-quality gelato with that signature dense, creamy texture that melts beautifully on your tongue.
- Total Time: 5 hours (including cooling and churning)
- Yield: 6-8 servings (approximately 1 quart) 1x
Ingredients
ScaleFor the Gelato Base:
- 2 cups (480ml) whole milk
- 1 cup (240ml) heavy cream
- ¾ cup (150g) granulated sugar, divided
- 5 large egg yolks, at room temperature
- 1 tablespoon pure vanilla extract (or 1 vanilla bean, seeds scraped)
- ⅛ teaspoon fine sea salt
Optional Flavor Variations:
- Chocolate Gelato: Add ½ cup Dutch-process cocoa powder and 3 oz melted dark chocolate
- Pistachio Gelato: Add ¾ cup pistachio paste
- Hazelnut Gelato: Add ⅔ cup hazelnut paste (gianduja)
- Coffee Gelato: Add 3 tablespoons instant espresso powder
- Strawberry Gelato: Fold in 1 cup pureed fresh strawberries after churning
Instructions
Step 1: Prepare the Egg Mixture
In a medium mixing bowl, whisk together the egg yolks and ¼ cup of sugar until the mixture becomes pale yellow and slightly thickened, about 2 minutes. This process, called “ribboning,” ensures your eggs won’t scramble when you add the hot milk. Set aside.Step 2: Heat the Milk and Cream
In a medium heavy-bottomed saucepan, combine the whole milk, heavy cream, remaining ½ cup sugar, and salt. Heat over medium heat, stirring occasionally with a whisk or wooden spoon, until the mixture is steaming hot and tiny bubbles form around the edges (about 170°F/77°C). Do not let it boil. Remove from heat.Step 3: Temper the Eggs
This is the crucial step that prevents scrambled eggs in your gelato. Very slowly pour about ½ cup of the hot milk mixture into the bowl with the egg yolks while whisking constantly. This gradually raises the temperature of the eggs. Add another ½ cup of hot milk mixture, whisking continuously. Now pour the tempered egg mixture back into the saucepan with the remaining milk mixture, whisking constantly.Step 4: Cook the Custard
Return the saucepan to medium-low heat. Cook, stirring constantly with a wooden spoon or heat-resistant spatula, until the mixture thickens slightly and coats the back of the spoon (it should reach 170-175°F/77-80°C on a digital thermometer). When you run your finger across the spoon, it should leave a clear trail. This takes about 5-8 minutes. Do not let the mixture boil or the eggs will curdle.Step 5: Strain and Flavor
Immediately remove from heat and strain the custard through a fine-mesh strainer into a clean bowl to remove any cooked egg bits. Stir in the vanilla extract (or vanilla bean seeds) and any other flavorings you’re using. For chocolate gelato, whisk in the cocoa powder and melted chocolate at this stage while the custard is still warm.Step 6: Cool Completely
Set the bowl in an ice bath (a larger bowl filled with ice and cold water) and stir occasionally until cooled to room temperature, about 20 minutes. Then cover with plastic wrap, pressing it directly against the surface of the custard to prevent a skin from forming. Refrigerate for at least 4 hours or overnight. The custard must be completely cold before churning for the best texture.Step 7: Churn the Gelato
Pour the chilled custard into your ice cream maker and churn according to the manufacturer’s instructions, typically 25-30 minutes. Gelato should be churned at a slightly slower speed than ice cream if your machine allows speed adjustment. The gelato is ready when it’s thickened to a soft-serve consistency and pulls away from the sides of the machine.Step 8: Freeze to Firm
Transfer the freshly churned gelato to a freezer-safe container. Press plastic wrap directly onto the surface, then cover with an airtight lid. Freeze for at least 3-4 hours to firm up to a scoopable consistency. For the best texture, let the gelato sit at room temperature for 5-10 minutes before scooping.Notes
- Temperature is crucial: Use a digital thermometer when making the custard to avoid scrambling eggs or undercooking.
- Complete cooling matters: The custard must be completely cold before churning for proper texture development.
- Don’t over-churn: Stop churning when the gelato reaches soft-serve consistency; over-churning can make it grainy.
- Serve at proper temperature: Gelato is best served at 10-15°F warmer than ice cream (around 10-15°F/-12 to -9°C) for optimal creaminess.
- First 24 hours are best: Homemade gelato has the finest texture within the first day or two of making it.
- Prevent ice crystals: Always press plastic wrap directly against the gelato surface before sealing the container.
- Prep Time: 20 minutes (plus cooling time: 4 hours or overnight)
- Cook Time: 15 minutes
- Category: Desert
- Method: Stovetop + Ice Cream Maker
- Cuisine: Italian
- Diet: Gluten Free
Nutrition
- Serving Size: ½ cup (approximately 85g)
- Calories: 245 kcal
- Sugar: 24g
- Sodium: 65mg
- Fat: 14g
- Saturated Fat: 8g
- Unsaturated Fat: 5g
- Trans Fat: 0g
- Carbohydrates: 25g
- Fiber: 0g
- Protein: 5g
- Cholesterol: 165mg
Tips & Variations
Flavor Customization:
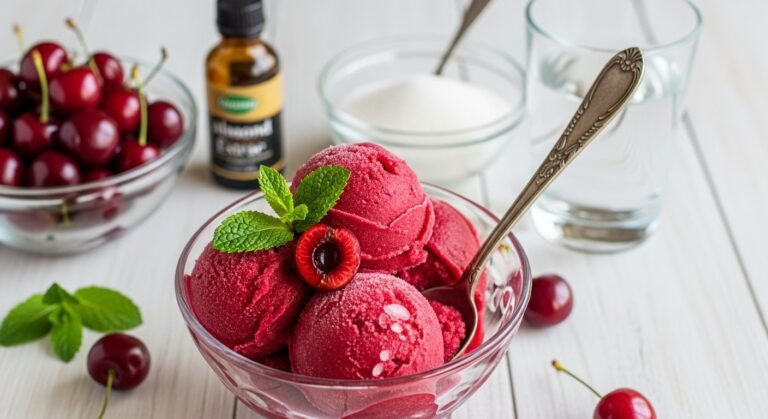
- Fruit Gelato: Puree fresh fruit (strawberries, peaches, mangoes) and fold into the base after churning, or reduce fruit into a concentrated syrup to add before churning
- Nut-Based Flavors: Substitute nut pastes (pistachio, hazelnut, almond) for incredibly rich, authentic Italian flavors
- Spiced Gelato: Infuse the milk with cinnamon sticks, cardamom pods, or star anise while heating, then strain before adding eggs
- Chocolate Variations: Use different percentages of dark chocolate (60-85%) for varying intensity, or add chocolate chips or chunks after churning
- Coffee Lovers: Steep whole espresso beans in the warming milk for 30 minutes, strain, then proceed with recipe
- Caramel Swirl: Make a salted caramel sauce and ribbon it through the gelato during the final freeze
Texture Modifications:
- For extra-creamy gelato, increase cream to 1½ cups and reduce milk to 1½ cups
- For lighter gelato, use 2½ cups milk and ½ cup cream
- Add 1-2 tablespoons of corn syrup or glucose to prevent ice crystal formation during long storage
- For vegan gelato, use full-fat coconut milk and cornstarch instead of eggs for thickening
Sweetness Adjustments:
- Reduce sugar slightly (by 2-3 tablespoons maximum) for less sweet gelato, but note that texture may become slightly icier
- Use honey or maple syrup for ¼ of the sugar for unique flavor depth
- Add a pinch of espresso powder to chocolate gelato to intensify flavor without adding coffee taste
Pro Chef Tips
Master the Custard: The key to exceptional gelato texture is perfectly cooked custard. Use a thermometer and remove from heat the moment it reaches 175°F. Overheating creates a grainy texture, while underheating won’t thicken properly. The “coat the spoon” test is also reliable—when you can draw a line through the custard on the spoon and it holds, you’re done.
Quality Ingredients Make All the Difference: Since gelato has fewer ingredients than many desserts, each component’s quality shines through dramatically. Use the best vanilla extract you can afford, fresh organic eggs, and high-fat content dairy. For chocolate gelato, use premium cocoa powder and real chocolate rather than chips.
Embrace the Overnight Rest: While it’s tempting to rush the process, letting your custard base rest overnight in the refrigerator allows the flavors to marry beautifully and the mixture to fully hydrate, resulting in noticeably smoother gelato. Professional gelato makers always age their bases for 8-24 hours.
Don’t Skip the Tempering: Adding hot liquid directly to eggs will create scrambled eggs every time. The tempering process (gradually warming the eggs with small amounts of hot liquid) is non-negotiable. Whisk constantly and add the hot liquid in a slow, steady stream—patience here pays off tremendously.
Understand Your Ice Cream Maker: Pre-freeze your ice cream maker bowl for at least 24 hours (longer if your freezer isn’t very cold). A properly frozen bowl is essential for proper churning. If your gelato isn’t thickening after 30 minutes, your bowl wasn’t cold enough.
Churn Cold, Store Colder: Always churn custard that’s been thoroughly chilled (40°F or below). Then store finished gelato at the back of your freezer where the temperature is most consistent, not in the door where temperature fluctuates.
Common Mistakes to Avoid
Scrambling the Eggs: This happens when you add hot liquid too quickly to the eggs or overheat the custard. Always temper gradually and use a thermometer. If you do get small bits of cooked egg, strain them out immediately—your gelato will still be smooth.
Over-Churning: Many home cooks churn gelato until it’s completely firm, but this incorporates too much air and can make the texture grainy. Stop churning when it reaches soft-serve consistency; it will firm up perfectly in the freezer.
Skipping the Straining Step: Even if you think your custard looks smooth, always strain it. This removes any tiny cooked egg bits and ensures the silkiest possible texture. This one step separates amateur gelato from professional results.
Not Cooling the Custard Completely: Rushing the cooling process by churning warm or room-temperature custard results in icy, crystalline gelato. The custard must be thoroughly chilled (ideally overnight) for proper texture development.
Storing Improperly: Gelato exposed to air develops ice crystals and freezer burn quickly. Always press plastic wrap directly against the surface before sealing with a lid, and consume within 1-2 weeks for optimal texture and flavor.
Storage & Meal Prep
Short-Term Storage: Transfer freshly churned gelato to a shallow, freezer-safe container with an airtight lid. Press plastic wrap directly onto the gelato surface before covering to prevent ice crystals and freezer burn. Properly stored gelato maintains optimal texture for 3-5 days and remains good for up to 2 weeks, though the texture gradually becomes icier over time.
Long-Term Storage: While gelato is best enjoyed fresh, you can store it for up to 1 month in the freezer. For longer storage, press a layer of parchment paper directly on the surface, then cover with plastic wrap, and finally seal with the container lid. This triple protection minimizes ice crystal formation and freezer burn.
Preventing Ice Crystals: Ice crystals are the enemy of smooth gelato. Always ensure your gelato is stored in the coldest part of your freezer (not the door) where temperature remains constant. Minimize opening the container repeatedly—scoop what you need and immediately return to the freezer. Some gelato makers add a tablespoon of vodka or corn syrup to the base, which lowers the freezing point and helps maintain smoothness during storage.
Serving from Frozen: Gelato should be served slightly warmer than ice cream for the creamiest texture. Remove from the freezer 5-10 minutes before serving to soften slightly. If it’s too hard to scoop, let it sit at room temperature a bit longer, or run your ice cream scoop under warm water between scoops.
Reheating/Softening Tips: Never microwave gelato to soften it, as this can create uneven melting and destroy the texture. If your gelato becomes too hard, transfer it to the refrigerator for 15-20 minutes rather than leaving it at room temperature, which can cause surface melting while the center remains frozen.
Make-Ahead & Freezer Notes
Advance Preparation: The custard base can be made up to 3 days in advance and stored in the refrigerator before churning. In fact, aging the base overnight improves texture and flavor development, making this an ideal make-ahead dessert for entertaining. Prepare the custard 1-2 days before you need the gelato, then churn it the day before or day of serving.
Freezer-Friendly Details: Homemade gelato is absolutely freezer-friendly, though it’s best enjoyed within the first week of preparation when the texture is at its peak. Unlike commercial gelato with stabilizers, homemade versions can develop ice crystals over time as temperature fluctuates. For the best texture, store in shallow containers rather than deep ones—this allows the gelato to freeze and thaw more evenly.
Best Reheating/Serving Method: There’s no “reheating” for gelato, but proper thawing technique matters tremendously. Remove your gelato from the freezer and let it temper at room temperature for 5-10 minutes before serving. This slight softening allows the gelato to reach its ideal serving temperature (10-15°F warmer than ice cream), which makes it creamier and more flavorful. If you’re serving guests, remove the gelato from the freezer at the beginning of the meal so it’s perfectly softened by dessert time.
Batch Cooking Tips: Double or triple this recipe if your ice cream maker can accommodate it (check your machine’s capacity). If making multiple batches, prepare several different custard bases on the same day, then churn them one at a time. Store each flavor in separate containers for a personal gelato bar at your next gathering.
Serving Suggestions
Gelato is stunning on its own, but these pairings elevate it to an unforgettable dessert experience:
Classic Italian Pairings:
- Serve in a small bowl with a crisp pizzelle cookie or delicate biscotti alongside
- Create an affogato by pouring hot espresso over vanilla gelato for a sophisticated coffee dessert
- Pair with traditional Italian almond cantuccini for textural contrast
- Serve with fresh berries macerated in balsamic vinegar and a touch of sugar
Elegant Plated Desserts:
- Sandwich gelato between two thin chocolate wafer cookies for elegant gelato sandwiches
- Serve a small scoop alongside a warm fruit tart or crostata
- Create a gelato flight with three complementary flavors (chocolate, vanilla, and hazelnut)
- Top with a drizzle of aged balsamic vinegar reduction for an upscale twist
Fun Casual Options:
- Serve in sugar cones or waffle cones for a classic gelateria experience
- Create gelato floats with Italian soda or prosecco for adults
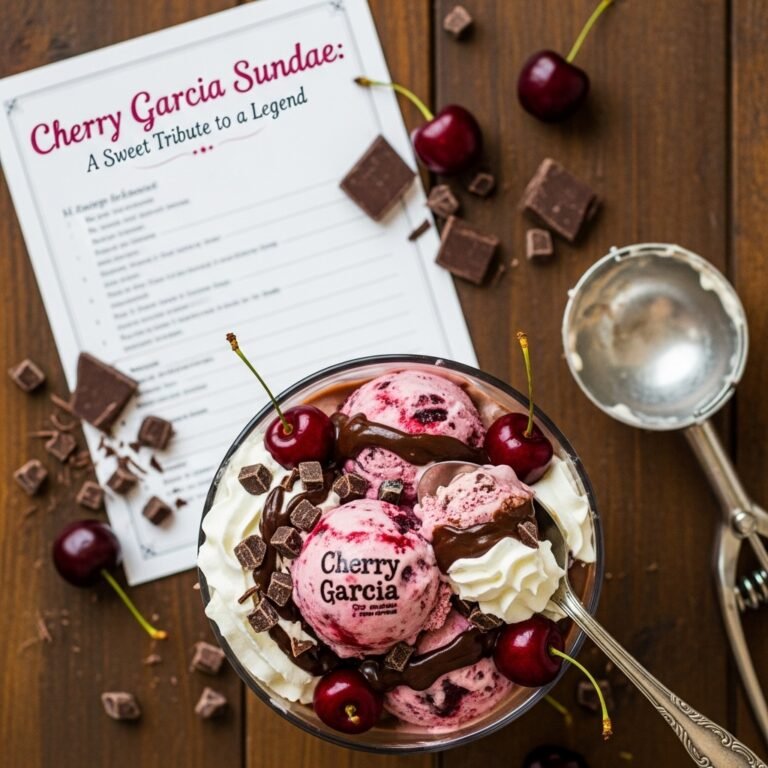
- Make gelato sundaes with hot fudge, whipped cream, and amarena cherries
- Pair with warm brownies or chocolate chip cookies for an indulgent contrast
Beverage Pairings:
- Espresso or cappuccino (especially with nut-flavored gelatos)
- Dessert wines like Vin Santo, Moscato d’Asti, or sweet Marsala
- Limoncello (particularly with fruit gelatos)
- Sparkling water with lemon for palate cleansing between flavors
Garnishing Ideas:
- Fresh mint leaves for a pop of color
- Shaved dark chocolate or cocoa nibs
- Toasted pistachios, hazelnuts, or almonds
- Fresh fruit like berries, sliced peaches, or figs
- A drizzle of honey, caramel, or fruit coulis
FAQs Section
Q: What’s the difference between gelato and ice cream?
A: Gelato contains less fat (more milk, less cream) and is churned more slowly than ice cream, which incorporates less air and creates a denser, smoother texture. Gelato is also served at a slightly warmer temperature (10-15°F warmer), making it taste creamier and more intensely flavored. American ice cream typically contains 14-18% butterfat, while gelato contains 4-9% butterfat.Q: Do I absolutely need an ice cream maker to make gelato?
A: While an ice cream maker produces the smoothest, most authentic texture, you can make gelato without one using the no-churn method. Pour your prepared custard into a shallow pan, freeze until solid, then break into chunks and blend in a food processor until smooth. Return to the freezer and repeat this process 2-3 times every 45 minutes. The texture won’t be quite as smooth as machine-churned gelato, but it’s still delicious.Q: Why did my gelato turn out icy instead of creamy?
A: Icy gelato usually results from one of several issues: the custard wasn’t cold enough before churning, the ice cream maker bowl wasn’t frozen adequately, there wasn’t enough fat or sugar in the recipe, or the gelato was stored improperly allowing ice crystals to form. Make sure to age your custard overnight, freeze your ice cream maker bowl for at least 24 hours, and press plastic wrap directly onto the gelato surface before freezing.Q: Can I make gelato without eggs?
A: Yes, though the texture will be slightly different. Replace the egg yolks with 2 tablespoons of cornstarch mixed with ¼ cup of the milk before heating. This creates a thickened base similar to custard, though it won’t be quite as rich and silky. Some gelato flavors, like fruit sorbetto, traditionally don’t contain eggs at all.Q: How long does homemade gelato last in the freezer?
A: Homemade gelato is best consumed within 3-5 days for optimal texture, but it will remain safe to eat for up to 2 weeks if stored properly (with plastic wrap pressed against the surface and an airtight lid). Unlike commercial gelato with stabilizers, homemade versions can develop ice crystals over time, becoming icier in texture after the first week.Q: My gelato is too hard to scoop straight from the freezer. What should I do?
A: This is normal! Unlike commercial ice cream with stabilizers, homemade gelato freezes quite hard. Remove it from the freezer 5-10 minutes before serving to let it temper to the ideal serving temperature. You can also dip your ice cream scoop in warm water between scoops. If it’s consistently too hard, you can add 1-2 tablespoons of corn syrup or vodka to the base before churning, which lowers the freezing point.Q: Can I use flavored extracts instead of fresh ingredients?
A: Absolutely! High-quality extracts like almond, peppermint, coconut, or hazelnut work beautifully in gelato. Start with 1 tablespoon of extract and adjust to taste. However, for fresh fruit flavors, pureed fresh fruit will always taste more vibrant and authentic than artificial extracts. Coffee gelato works wonderfully with instant espresso powder dissolved in the warm milk mixture.Conclusion
Making authentic Italian gelato at home is one of those incredible cooking experiences that feels both indulgent and accomplishing. There’s something deeply satisfying about transforming simple ingredients—milk, cream, eggs, and sugar—into this luxuriously smooth, intensely flavored dessert that rivals anything you’d find in a Roman gelateria. While the process requires patience (particularly during the cooling stages), the hands-on time is minimal, and the results are absolutely spectacular.
Whether you choose classic Madagascar vanilla, rich dark chocolate, nutty pistachio, or any of the endless flavor variations, this gelato recipe delivers professional-quality results every single time. The custard-based method ensures that silky texture without ice crystals, while the lower fat content allows the flavors to shine through brilliantly. Your family and friends will be amazed when you casually serve homemade gelato at your next dinner party or summer gathering.
I encourage you to try this recipe this weekend and experience the joy of homemade gelato. Start with vanilla to master the technique, then let your creativity run wild with flavor combinations. Don’t forget to share your gelato-making success! Leave a comment below telling me which flavor you tried, pin this recipe to your Pinterest boards so you can find it easily later, and share photos of your beautiful gelato creations on social media. Tag me so I can see your delicious results—I love seeing how my recipes come to life in your kitchens!
Now grab your ice cream maker and get ready to create the most incredible gelato you’ve ever tasted. Buon appetito! 🍨