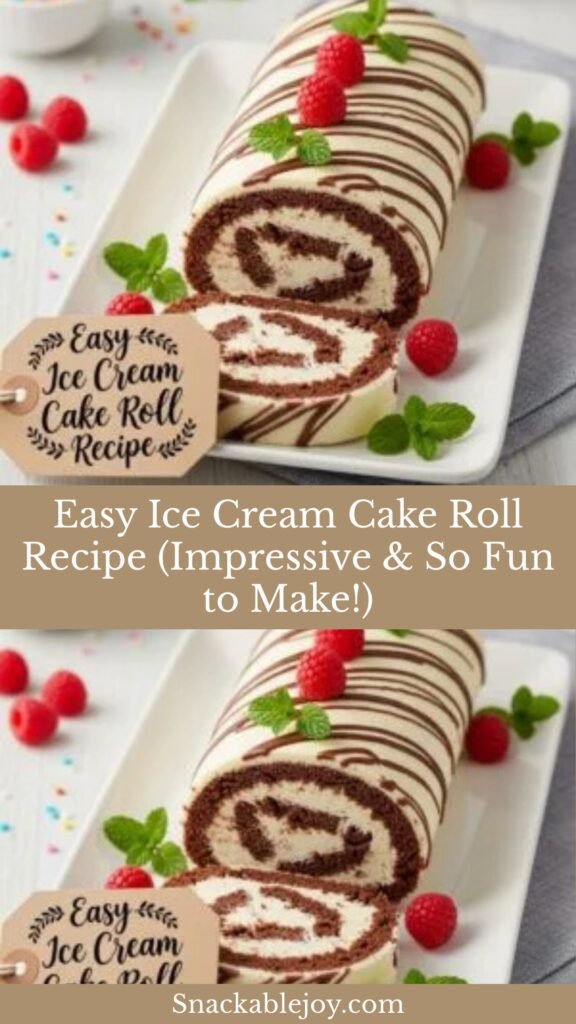
Easy Ice Cream Cake Roll Recipe (Impressive & So Fun to Make!)
Get ready to make one of the most impressive, show-stopping desserts that looks like it came from a fancy bakery but is surprisingly achievable at home—the Ice Cream Cake Roll! If you’ve been intimidated by those beautiful spiral desserts you see at parties and bakeries, I’m about to show you that with a little patience and the right technique, you can create this stunning treat in your own kitchen. Trust me, the reactions from your family and friends will be absolutely worth it!
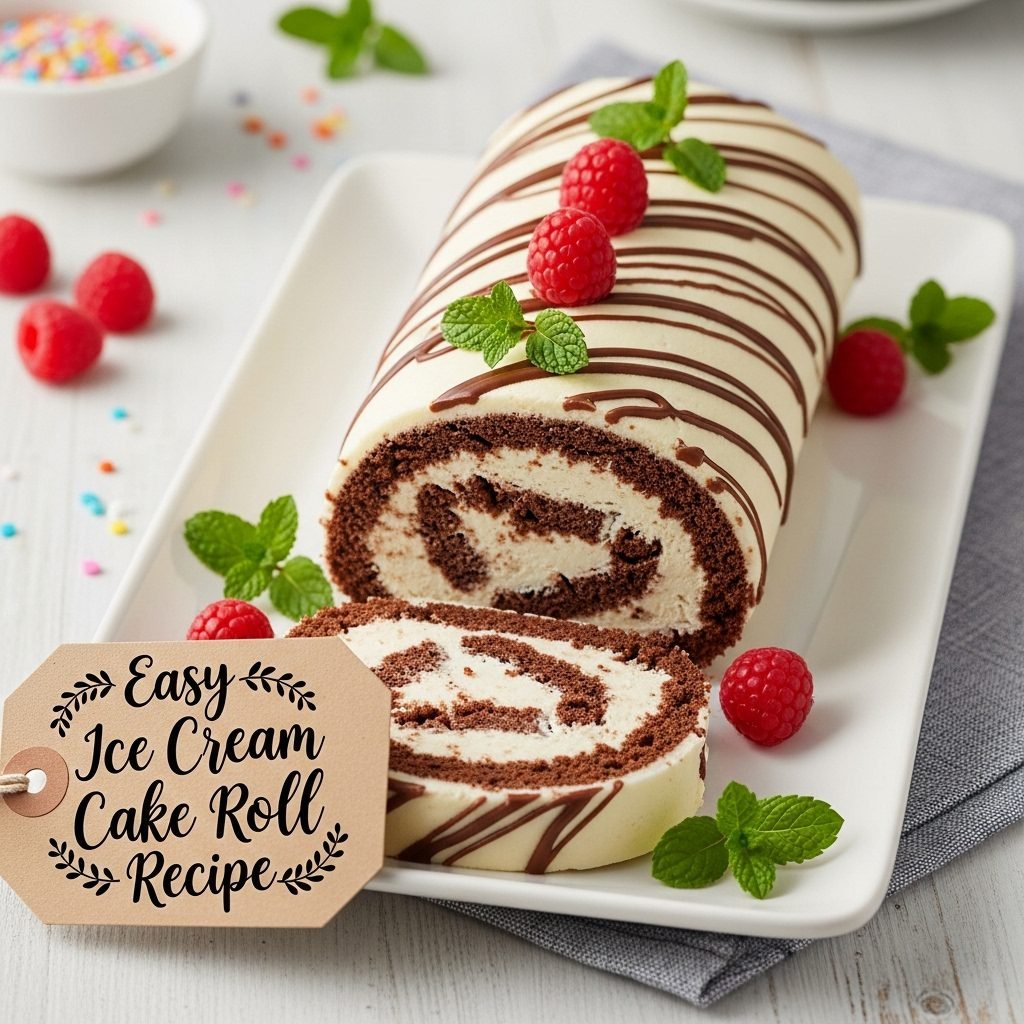
An Ice Cream Cake Roll is a soft, fluffy sponge cake that’s baked thin, rolled up while still warm (to “train” it not to crack), then unrolled, filled with your favorite ice cream, rolled back up, and frozen solid. When sliced, it reveals a gorgeous pinwheel pattern—chocolate cake spiraling with vanilla ice cream, or whatever flavor combination you dream up! The result is a dessert that’s part cake, part ice cream, and 100% delicious. Each slice gives you the perfect ratio of tender cake to creamy ice cream in every bite.
This incredible dessert is perfect for summer birthdays when you want something cold and celebratory, holiday gatherings when you need an impressive make-ahead dessert, special occasions and dinner parties (the wow factor is real!), when you want to combine cake AND ice cream (why choose?), or simply when you’re ready to try a fun baking project that yields spectacular results. It’s become a beloved American dessert tradition, especially popular for birthdays, Fourth of July, and Christmas celebrations.
What makes this homemade version truly special is the complete customization—you choose the cake flavor (chocolate, vanilla, red velvet!), the ice cream filling (any flavor you love!), and the toppings (fudge, caramel, whipped cream, sprinkles!). Plus, it’s actually easier than making a traditional layer cake—no frosting skills required, and you can make it days ahead since it lives in the freezer. The hardest part is waiting for it to freeze before you can slice and serve!
History / Background
The Ice Cream Cake Roll, also known as an Ice Cream Swiss Roll or Ice Cream Jelly Roll, has a fascinating history that combines European baking traditions with American ice cream obsession. To understand this dessert, we need to look at both the cake roll (Swiss roll/jelly roll) tradition and the American innovation of filling it with ice cream.
The concept of rolled cakes dates back centuries in European baking. The Swiss roll (called “Biskuitroulade” in German-speaking countries) has been made in Central Europe since at least the 19th century, though despite its name, it likely didn’t originate in Switzerland. The technique of spreading jam or cream on a thin sponge cake and rolling it up was practiced across Europe, with each country having its own version—the French had their bûche de Noël (Yule log), the British their jam roly-poly, and the Portuguese their torta de laranja.
The rolled cake came to America with European immigrants in the 1800s and became popular in American home baking by the early 20th century. American cookbooks from the 1920s-1930s frequently featured “jelly roll” recipes—thin sponge cakes rolled with jelly, jam, or whipped cream filling. The key technique of rolling the warm cake in a towel to “train” it not to crack was established early and remains the secret to successful cake rolls today.
The innovation of filling a cake roll with ice cream appears to be distinctly American, emerging in the mid-20th century as home freezers became common in American households. Before widespread home freezer ownership (1950s-1960s), ice cream desserts were limited to what you could make and eat immediately. Once families had freezers, creative home bakers started experimenting with frozen desserts that could be made ahead.
The Ice Cream Cake Roll gained mainstream popularity in the 1960s and 1970s, appearing in women’s magazines, community cookbooks, and on packages of cake mix (companies like Betty Crocker promoted cake roll recipes). It became a signature dessert for summer entertaining—you could make it days ahead, store it in the freezer, and pull it out for instant dessert. Perfect for the era’s dinner party culture!
The dessert became especially popular for children’s birthday parties as an alternative to traditional frosted cakes. Kids loved the novelty of cake and ice cream combined, and the spiral pattern when sliced was visually exciting. Ice cream cake rolls became a staple at American celebrations, particularly for summer birthdays when you wanted something cold.
Commercially, various ice cream companies began producing pre-made ice cream cake rolls, recognizing the appeal of this convenience dessert. However, homemade versions remained popular because of the endless customization possibilities—you could match cake and ice cream flavors to any theme, from red velvet with cream cheese ice cream to chocolate cake with mint chip ice cream.
The dessert experienced a resurgence in the 2000s-2010s with the rise of food blogs and Pinterest. Home bakers discovered (or rediscovered) cake rolls and began sharing creative variations. The visual appeal of the spiral slice made it incredibly Instagram and Pinterest-worthy. Modern versions feature elaborate flavor combinations, multiple ice cream layers, and artistic decorations that would make vintage cookbook writers amazed.
Today, the Ice Cream Cake Roll represents the best of American home baking innovation—taking a classic European technique and adapting it to American tastes and modern convenience. It’s a dessert that looks bakery-professional but is achievable for home cooks, combines two beloved desserts (cake + ice cream) into one spectacular treat, and brings genuine joy to celebrations.
Why You’ll Love This Recipe
This Ice Cream Cake Roll recipe is about to become your new favorite special occasion dessert, and I’m genuinely excited to tell you why! Not only does it look absolutely stunning—that perfect spiral when you slice it never fails to impress—but it’s also surprisingly achievable even if you’ve never made a cake roll before. Yes, there’s a technique to learn (the rolling!), but I promise it’s easier than you think, and even if your roll isn’t perfect, it will still taste incredible!
Making an Ice Cream Cake Roll at home means you control every element: the cake flavor, the ice cream choice, the toppings and decorations, and you can customize it for any theme or dietary need. Plus, it’s the ultimate make-ahead dessert—you prepare it days in advance, keep it in the freezer, and just slice and serve when ready. No last-minute stress, no frosting skills required, just pure frozen deliciousness waiting for you!
Here’s why this recipe will become your go-to celebration dessert:
- Absolutely Show-Stopping: That spiral slice impresses every single time—guaranteed “wows!”
- Surprisingly Achievable: Looks professional but follows simple steps anyone can learn
- Ultimate Make-Ahead: Prepare up to a week ahead, store in freezer, slice when ready
- No Frosting Required: The ice cream IS the filling—no frosting skills needed!
- Endless Customization: Any cake flavor + any ice cream flavor = infinite possibilities
- Perfect Cake-to-Ice-Cream Ratio: Every bite has both elements in ideal proportions
- Crowd-Pleasing: Appeals to all ages, combines two favorite desserts
- Budget-Friendly: Costs $10-15 to make versus $30-40 for bakery ice cream cakes
- Fun to Make: The rolling process is genuinely enjoyable and satisfying
- Freezer-Stable: Stores beautifully for days or weeks
- Serves a Crowd: One roll yields 10-12 slices easily
- Holiday-Ready: Perfect for Fourth of July, Christmas (peppermint!), birthdays, any celebration
- No Special Equipment: Just a jelly roll pan and some parchment paper
- Easier Than Layer Cakes: No stacking, leveling, or crumb-coating required
- Kid-Friendly Project: Children love helping and watching the rolling process
Ingredient Notes
Let’s explore the simple but important ingredients that create this spectacular dessert!
For the Cake:
Eggs: You’ll need 4 large eggs for a standard jelly roll pan. Eggs provide structure, lift, and richness. They should be at room temperature for best volume when beaten. Cannot substitute—eggs are essential for the sponge cake structure that allows rolling without cracking.
Granulated Sugar: ¾ cup sweetens the cake and helps create that tender, flexible crumb. The sugar also helps stabilize the beaten eggs. Can reduce slightly (to ⅔ cup) if you prefer less sweet, but don’t eliminate entirely.
All-Purpose Flour: ¾ cup provides structure. Cake flour works even better (creates more tender crumb), but all-purpose is fine. For gluten-free, use a 1:1 gluten-free baking blend, but the cake may be slightly more delicate.
Cocoa Powder: 3 tablespoons for chocolate cake rolls (omit for vanilla cake). Use unsweetened cocoa powder—Dutch-process creates darker color, natural cocoa works too.
Baking Powder: ½ teaspoon helps the cake rise slightly and creates a tender texture. Fresh baking powder is important—if yours is old, the cake may be dense.
Salt: ¼ teaspoon enhances all flavors. Don’t skip—it balances sweetness.
Vanilla Extract: 1 teaspoon adds flavor depth. Use pure vanilla extract, not imitation, for best flavor.
Powdered Sugar (for rolling): Used to dust the towel—prevents sticking and adds slight sweetness. Essential for the rolling technique!
For the Filling:
Ice Cream: You’ll need about 1-1.5 quarts (4-6 cups) depending on how thick you spread it. The ice cream should be slightly softened but not melted—spreadable but not soupy.
Best choices: Premium ice creams with higher fat content spread better and taste richer. Vanilla is classic and versatile. Chocolate, strawberry, coffee, mint chip, cookies & cream, dulce de leche—choose any flavor! Avoid ice creams with large chunks (they make rolling difficult) or very icy textures (they don’t spread well).
Optional Toppings:
- Chocolate fudge sauce, caramel sauce, or fruit sauce
- Whipped cream
- Sprinkles, chocolate shavings, or crushed cookies
- Fresh berries
Equipment Needed
Making an Ice Cream Cake Roll requires some specific equipment, but nothing too specialized!
Essential:
- 15×10-inch jelly roll pan: This specific size is important for proper cake thickness
- Parchment paper: For lining the pan—crucial for easy cake removal
- Clean kitchen towel: For rolling the warm cake (use a lint-free flour sack towel or smooth cotton towel)
- Electric mixer: Stand mixer or hand mixer for beating eggs to proper volume
- Mixing bowls: Medium and large
- Sifter or fine-mesh strainer: For sifting dry ingredients together
- Offset spatula or butter knife: For spreading softened ice cream
- Plastic wrap: For wrapping the rolled cake before freezing
- Aluminum foil: Additional wrap for freezer storage
- Sharp serrated knife: For slicing the frozen roll
Optional but Helpful:
- Cooling rack: For cooling the cake in the pan
- Timer: Cake bakes quickly (12-15 minutes), so timing matters
- Ice cream scoop: For scooping ice cream onto cake evenly
Print

Ice Cream Cake Roll Recipe
This Ice Cream Cake Roll features a soft, tender chocolate sponge cake rolled with creamy vanilla ice cream, then frozen until firm. When sliced, it reveals a beautiful spiral pattern of cake and ice cream—perfect for birthdays, holidays, and special occasions. It’s easier than it looks and can be made days ahead!
- Total Time: 4+ hours (includes freezing time)
- Yield: 10-12 servings 1x
Ingredients
ScaleFor the Chocolate Cake:
- 4 large eggs, room temperature
- ¾ cup (150g) granulated sugar
- ¾ cup (90g) all-purpose flour (or cake flour for more tender crumb)
- 3 tablespoons (15g) unsweetened cocoa powder
- ½ teaspoon baking powder
- ¼ teaspoon salt
- 1 teaspoon vanilla extract
- Powdered sugar (for dusting towel)
For the Filling:
- 1 to 1.5 quarts (4-6 cups) ice cream, slightly softened (vanilla is classic)
Optional Toppings:
- Chocolate or caramel sauce
- Whipped cream
- Sprinkles or chocolate shavings
Instructions
Step 1: Prep and Preheat
- Preheat oven to 375°F (190°C).
- Line a 15×10-inch jelly roll pan with parchment paper, letting it extend slightly over the edges for easy removal. Lightly spray the parchment with cooking spray.
- Lay out a clean, lint-free kitchen towel on your counter. Generously dust the entire towel with powdered sugar (about ¼ cup). Set aside—you’ll use this immediately after baking.
Step 2: Make the Cake Batter
- In a medium bowl, sift together flour, cocoa powder, baking powder, and salt. Set aside.
- In a large mixing bowl using an electric mixer, beat eggs on high speed for about 1 minute until frothy.
- Gradually add granulated sugar while continuing to beat. Beat on high speed for 4-5 minutes until the mixture is very thick, pale, tripled in volume, and forms ribbons when you lift the beaters. This step is crucial—the beaten eggs create the cake’s structure!
- Gently fold in vanilla extract.
- Sift the dry ingredients over the egg mixture in three additions, gently folding after each addition with a rubber spatula. Fold just until no flour streaks remain—do NOT overmix or you’ll deflate the eggs!
Step 3: Bake
- Pour batter into the prepared jelly roll pan. Gently spread to edges with an offset spatula, ensuring even thickness.
- Bake for 12-15 minutes, until the cake springs back when lightly touched and a toothpick inserted in the center comes out clean. Do NOT overbake—the cake should be soft and flexible for rolling!
- The moment the cake is done, remove from oven.
Step 4: Roll the Cake (Critical Step!)
- IMMEDIATELY while the cake is hot, run a knife around the edges to loosen.
- Invert the entire pan onto the powdered-sugar-dusted towel. The cake should release onto the towel with the parchment paper on top.
- Carefully peel off the parchment paper.
- Starting from one short end, roll the cake UP in the towel (the towel rolls up inside the cake). This “trains” the cake to hold a rolled shape and prevents cracking later.
- Place the rolled cake (in the towel) seam-side down on a cooling rack.
- Let cool COMPLETELY to room temperature, about 1 hour. The cake must be fully cool before adding ice cream!
Step 5: Fill with Ice Cream
- Remove your ice cream from the freezer and let it soften at room temperature for 10-15 minutes—it should be spreadable but not melted (soft-serve consistency).
- Once the cake is completely cool, carefully unroll it (leave it on the towel).
- Spread the softened ice cream evenly over the entire surface of the cake, leaving about ½ inch border around the edges (the ice cream will spread to edges when you roll).
- Working quickly (so ice cream doesn’t melt), re-roll the cake starting from the same short end, this time WITHOUT the towel. Use the towel to help lift and guide the cake as you roll, but don’t roll the towel inside.
- The cake should now be rolled with ice cream inside!
Step 6: Freeze
- Wrap the rolled cake tightly in plastic wrap, then wrap again in aluminum foil.
- Place in the freezer seam-side down.
- Freeze for at least 4 hours, preferably overnight, until completely firm and solid.
Step 7: Serve
- Remove from freezer about 5-10 minutes before slicing (makes cutting easier).
- Unwrap and place on a serving platter.
- Using a sharp serrated knife, slice into 1-inch thick rounds. Clean the knife between slices for neat cuts.
- Serve immediately, optionally drizzled with chocolate sauce, caramel, or topped with whipped cream!
Notes
- The rolling technique is KEY: Roll the cake while hot in the towel, let it cool completely rolled up, then unroll, fill, and re-roll. This prevents cracking!
- Don’t overbake: A slightly under-baked cake is more flexible. Check at 12 minutes!
- Ice cream consistency matters: Too soft and it will ooze out; too hard and it won’t spread. Aim for soft-serve texture.
- Work quickly with ice cream: Have everything ready before you unroll the cooled cake.
- Freeze thoroughly: The cake roll must be frozen solid before slicing or it will fall apart.
- Storage: Wrapped well, keeps frozen for up to 1 week (quality) or 1 month (still edible but may develop freezer burn).
- Vanilla cake version: Omit cocoa powder, increase flour to 1 cup total.
- Prep Time: 30 minutes
- Cook Time: 12-15 minutes
- Category: Desert
- Method: Baking
- Cuisine: American
- Diet: Gluten Free
Nutrition
- Serving Size: 1 slice (⅟₁₀ of cake roll)
- Calories: 245
- Sugar: 28g
- Sodium: 95mg
- Fat: 9g
- Saturated Fat: 5g
- Unsaturated Fat: 3.5g
- Trans Fat: 0g
- Carbohydrates: 37g
- Fiber: 1g
- Protein: 5g
- Cholesterol: 90mg
Tips & Variations
Customize Your Perfect Ice Cream Cake Roll:
- Vanilla Cake Roll: Omit cocoa powder, use 1 cup total flour, increase vanilla to 2 teaspoons. Perfect with any ice cream flavor!
- Red Velvet Ice Cream Roll: Use ½ cup flour, 2 tablespoons cocoa, add 1 tablespoon red food coloring. Fill with cream cheese ice cream!
- Mint Chocolate Chip: Chocolate cake + mint chocolate chip ice cream + chocolate ganache drizzle.
- Cookies & Cream: Vanilla cake + cookies & cream ice cream + crushed Oreos on top.
- Strawberry Shortcake: Vanilla cake + strawberry ice cream + fresh strawberry topping.
- Coffee Lover’s: Chocolate cake + coffee ice cream + chocolate-covered espresso beans for garnish.
- Peanut Butter Cup: Chocolate cake + peanut butter ice cream + peanut butter cups chopped on top.
- Birthday Cake: Vanilla cake + birthday cake or funfetti ice cream + rainbow sprinkles.
- Pumpkin Spice (Fall): Spice cake (add cinnamon, nutmeg, ginger) + pumpkin or cinnamon ice cream.
- Peppermint Bark (Christmas): Chocolate cake + peppermint ice cream + crushed candy canes.
- Neapolitan: Vanilla cake + layers of chocolate, vanilla, and strawberry ice cream.
- Healthier Version: Use reduced-fat ice cream or frozen yogurt, reduce sugar in cake to ⅔ cup.
Pro Chef Tips
Professional Secrets for Perfect Ice Cream Cake Rolls:
- The Ribbon Test for Beaten Eggs: Professional pastry chefs use the “ribbon test” to know when eggs are beaten enough. Lift your mixer beaters and let the egg mixture fall back into the bowl—it should form a “ribbon” that sits on the surface for 2-3 seconds before disappearing back in. If it immediately disappears, keep beating. Under-beaten eggs = dense, tough cake that cracks when rolled. Properly beaten eggs = light, flexible cake that rolls beautifully. This step alone determines success or failure!
- The Towel Roll MUST Happen While Hot: This is non-negotiable in professional kitchens! The moment the cake comes out of the oven and is flipped onto the towel, you must roll it immediately while it’s still hot and steaming. Hot cake is pliable and “remembers” the rolled shape as it cools. If you let it cool flat, the cake sets in that shape and will crack when you try to roll it later. Professional bakers move fast here—there’s no waiting. Hot cake + towel roll + cool completely in the rolled position = crack-free rolling every time!
- Gentle Folding Preserves Volume: When you fold the dry ingredients into the beaten eggs, professional technique is crucial. Use a large rubber spatula and “fold” rather than stirring: Cut down through the center of the mixture, sweep along the bottom of the bowl, and bring the spatula up the side, turning the mixture over itself. Rotate the bowl 90 degrees and repeat. This motion incorporates ingredients while preserving the air bubbles you worked so hard to create by beating the eggs. Stirring or overmixing deflates those bubbles, creating a dense cake. Pro bakers fold just until no flour streaks remain—usually 30-40 gentle folds total.
- Ice Cream Tempering is an Art: Professional pastry chefs don’t just “let ice cream sit out.” They have a specific technique: Remove ice cream from freezer and let it sit at room temperature for exactly 10-15 minutes (set a timer!), then stir it vigorously with a sturdy spoon to break up any ice crystals and achieve uniform soft-serve consistency. Too soft (melty) = it oozes out when rolling; too hard = impossible to spread evenly. The perfect consistency looks like thick frosting—spreadable but holds its shape. Professionals test by trying to spread a spoonful—if it glides smoothly, it’s ready; if it’s a struggle, it needs more softening.
- The Border Rule Prevents Squish-Out: Professional cake decorators always leave a ½-inch border of unfilled space around the edges when spreading fillings. Why? When you roll, pressure pushes the filling toward the edges, and that border space gives it somewhere to go. Fill all the way to the edges and you’ll have ice cream squishing out the sides as you roll, creating a mess. The border also accounts for the natural spreading that happens when you slice—filling migrates slightly with each cut. This small detail is the difference between neat, professional-looking slices and messy ones!
- Sharp Knife + Heat Between Cuts: Professional bakeries slice frozen desserts using a very sharp serrated knife that they dip in hot water and wipe dry between EVERY cut. The hot knife melts through the ice cream cleanly instead of dragging and creating ragged edges. Here’s the exact technique: Fill a tall glass with very hot water. Before each slice, dip the knife fully into the hot water for 5-10 seconds, then wipe completely dry with a towel (water drops create ice crystals). Make one smooth cut with gentle sawing motion. Repeat the hot-water dip for every single slice. Yes, it takes time, but the result is bakery-perfect slices!
- The Professional Freeze is Strategic: Commercial freezers are much colder than home freezers (they go down to -20°F or lower vs. home freezers at 0°F). To compensate, professionals freeze their ice cream rolls for longer than minimum times and wrap them exceptionally well. Professional wrap technique: First layer of plastic wrap pressed directly against the entire surface (no air gaps), second layer of plastic wrap in the opposite direction, then heavy-duty aluminum foil wrapping everything. This triple protection prevents freezer burn and ice crystal formation, keeping the roll fresh for up to a month while maintaining quality. Worth the extra minute of wrapping!
Common Mistakes to Avoid
- Not Rolling the Cake While Hot: This is the #1 reason homemade cake rolls crack and fall apart! The cake MUST be rolled while it’s still hot from the oven—the heat makes it pliable and flexible. As it cools in the rolled position, it “sets” in that shape. If you let the cake cool flat and try to roll it cold, the structure has set in a flat position and will crack dramatically when bent. Solution: The second the cake comes out of the oven, work quickly—flip it onto the powdered-sugar towel, peel off parchment, and roll it up immediately while it’s still steaming hot. Don’t hesitate or wait—speed is essential here!
- Overbeating the Batter After Adding Flour: When folding dry ingredients into the beaten eggs, home cooks often think “I need to mix this really well” and stir vigorously or use the mixer. Wrong! The beaten eggs contain thousands of tiny air bubbles that create the cake’s light, tender structure. Overmixing deflates those bubbles, resulting in a dense, tough, inflexible cake that cracks when rolled. Solution: Once you add the flour mixture, switch to gentle folding with a rubber spatula, not mixing or stirring. Fold just until no flour streaks remain—usually 30-40 gentle strokes. The batter should still look fluffy and voluminous. Under-mixing slightly is better than over-mixing!
- Overbaking the Cake: An overbaked cake is dry, stiff, and will crack the moment you try to roll it. The cake should bake just until it springs back when touched (12-15 minutes), and honestly, slightly under-baked is better than over-baked for rolling purposes. Many home cooks leave it in “just one more minute” to be sure, but that minute can make the difference between flexible and brittle. Solution: Start checking at 12 minutes. The cake should be set but still soft. If a toothpick comes out with just a few moist crumbs, that’s perfect—pull it out! The residual heat will finish cooking it as it cools.
- Adding Ice Cream That’s Too Soft or Too Hard: Getting ice cream consistency right is tricky! Too soft (melted/soupy) and it soaks into the cake, oozes out the sides when rolling, and makes the whole thing a melty mess. Too hard (straight from freezer) and it’s impossible to spread evenly, tears the delicate cake when you try to spread it, and creates a lumpy filling. Solution: Remove ice cream from freezer 10-15 minutes before you need it (set a timer!). It should look like soft-serve or thick frosting—spreadable but still cold and holding its shape. Test by trying to spread a spoonful; if it glides smoothly, you’re ready. If it’s a struggle, give it another 5 minutes.
- Not Freezing Long Enough Before Slicing: Eager home cooks often can’t wait and try to slice the roll after just 2-3 hours in the freezer. The result? The roll squishes when you cut it, the slices fall apart, the ice cream hasn’t fully hardened, and you end up with a melted mess instead of neat spirals. Solution: Freeze for MINIMUM 4 hours, but overnight is ideal (8-12 hours). The roll should be rock-solid frozen before you attempt to slice it. When you unwrap it, it should feel like a frozen log, not give at all when pressed. Only then will you get those perfect, clean spiral slices that make this dessert so impressive!
Storage & Meal Prep
Storing Your Ice Cream Cake Roll:
- Wrapped in Freezer: This is THE storage method! Once the ice cream cake roll is completely frozen, keep it wrapped tightly in plastic wrap and aluminum foil in the freezer. Properly wrapped, it maintains best quality for up to 1 week, and remains safe to eat for up to 1 month (though ice crystals may form after 2 weeks affecting texture slightly).
- Prevent Freezer Burn: The triple-wrap method works best—plastic wrap directly against the surface, second layer of plastic in the opposite direction, then heavy-duty aluminum foil over everything. This prevents air exposure that causes freezer burn and ice crystal formation.
- Sliced Portions: If you’ve sliced the entire roll and have leftovers, wrap individual slices in plastic wrap and store in an airtight container in the freezer for up to 1 week. Perfect for grabbing a single serving!
- Do Not Refrigerate: Once frozen, this dessert must stay frozen until serving. Refrigerator temperatures will melt the ice cream and make everything soggy. It’s freezer or nothing!
No Reheating: This is a frozen dessert—you never “reheat” it! Simply remove from freezer 5-10 minutes before serving to make slicing easier.
Make-Ahead & Freezer Notes
Perfect Make-Ahead Timeline:
Up to 1 Week Ahead:
- Bake cake, roll in towel, cool completely
- Unroll, fill with ice cream, re-roll
- Wrap tightly (plastic wrap + foil)
- Freeze solid
- Keep frozen until serving day
Day of Serving:
- Remove from freezer 5-10 minutes before slicing
- Unwrap, slice with hot knife
- Serve immediately
Freezer Storage Best Practices:
- Wrap thoroughly: Triple wrap prevents freezer burn
- Label with date: So you know when you made it
- Store flat: Don’t stand it upright or stack things on top
- Back of freezer: Coldest spot, away from door opening
- Avoid temperature fluctuations: Don’t let it partially thaw and refreeze
Can You Freeze Just the Cake?
Yes! You can bake the cake, roll it in the towel, let it cool, then wrap the rolled cake (still in the towel) and freeze for up to 3 months. When ready to use, thaw at room temperature for 1 hour, unroll, fill with ice cream, re-roll, and proceed with freezing. This is great for making components ahead!
Best Make-Ahead Strategy:
Most people make the entire ice cream cake roll 2-3 days before their event. It’s completely ready in the freezer, you just unwrap and slice when it’s time for dessert. No last-minute stress, no wondering if it will turn out—it’s already done and waiting!
Serving Suggestions
Ice Cream Cake Roll is a complete dessert on its own, but here’s how to make it extra special:
Serving Enhancements:
- Chocolate or Caramel Sauce: Drizzle over each slice for extra decadence
- Whipped Cream: Dollop beside each slice
- Fresh Berries: Strawberries, raspberries, or blueberries add fresh contrast
- Chocolate Shavings: Elegant garnish
- Sprinkles or Crushed Cookies: Fun for birthday presentations
- Mint Leaves: Pretty garnish for photos
Occasion Pairings:
- Birthday Parties: Serve as the birthday cake—add candles to the whole roll before slicing!
- Summer BBQs: Perfect frozen dessert for hot weather
- Fourth of July: Make with red, white, and blue theme (strawberry ice cream, vanilla cake, blue sprinkles)
- Christmas: Peppermint or eggnog ice cream versions
- Dinner Parties: Impressive finale that’s already portioned
- Holiday Gatherings: Make-ahead convenience for busy hosts
Beverage Pairings:
- Coffee or espresso (the classic pairing)
- Hot chocolate (in winter)
- Milk (especially for kids)
- Dessert wine or port (for adults)
FAQs Section
Q: Why did my cake crack when I rolled it?
A: Cracking happens for several reasons: (1) You didn’t roll it while hot—the cake must be rolled immediately while steaming hot from the oven. Hot cake is pliable; cooled cake is set and brittle. (2) Overbaked—even one extra minute can dry out the cake, making it crack-prone. Start checking at 12 minutes. (3) Overbeaten batter after adding flour—this deflates the eggs and creates dense, inflexible cake. Fold gently, don’t overmix. (4) Not enough moisture—ensure you’re measuring flour correctly (spoon into cup, level off—don’t pack). Solution: Always roll while hot, check early for doneness, fold gently, and if your cake does crack, don’t panic! You can hide cracks by placing that side on the bottom, or cover them with sauce/toppings when serving.
Q: Can I make this without eggs?
A: Unfortunately, eggs are structural to sponge/roll cakes—they provide the lift, structure, and flexibility needed. There’s no reliable egg substitute that creates the same tender, rollable texture. If you need egg-free dessert, consider a different style like ice cream sandwiches or an ice cream trifle. Commercially made egg replacers (like Bob’s Red Mill) might work in theory, but results are unpredictable and the cake may crack.
Q: What if I don’t have a jelly roll pan?
A: The 15×10-inch jelly roll pan is really important because it creates the right cake thickness—thin enough to roll easily, thick enough to have substance. If you use a larger pan, the cake will be too thin and tear; smaller pan = too thick and won’t roll. That said, a 13×9-inch pan can work in a pinch (your roll will be shorter and fatter), or any rimmed baking sheet with similar dimensions. Just ensure you have sides/rims to contain the batter. In a pinch, a large cookie sheet with edges works, though your roll might be an odd shape. Line whatever pan you use thoroughly with parchment!
Q: How far ahead can I make this?
A: The ice cream cake roll can be made up to 1 week ahead for best quality, or up to 1 month ahead if wrapped extremely well (though texture may suffer slightly from ice crystal formation after 2 weeks). For optimal texture and flavor, 2-3 days ahead is ideal. Make it on Wednesday for a Saturday party—perfect timing! The convenience of make-ahead is one of this dessert’s best features. Just ensure it’s wrapped tightly (plastic wrap + aluminum foil) to prevent freezer burn, and store it in the back of the freezer where temperature is most stable.
Q: Can I use store-bought cake or cake mix?
A: For the rolled cake component, homemade from scratch works best because you control the texture and baking time to achieve that flexible, rollable consistency. However, YES, you can use a white or chocolate cake mix! Use the recipe on the box but bake it in a jelly roll pan for 12-15 minutes instead of the time/pan specified. The timing is crucial—overbaked cake mix will crack. Some bakers add an extra egg to cake mix for more structure and flexibility. It won’t be quite as tender as from-scratch, but it works! Just follow the same rolling-while-hot technique.
Q: My ice cream melted too much while spreading. What do I do?
A: If your ice cream becomes too soft/melty while spreading, you have two options: (1) Quick freeze: Roll up the cake with the too-soft ice cream anyway (work fast!), wrap immediately, and put in the freezer for 30 minutes, then unwrap and reshape if needed before re-wrapping and continuing to freeze. The cake will help contain the ice cream as it re-hardens. (2) Start over with filling: If it’s really soupy, carefully scrape off the melted ice cream, put the unrolled cake back in the fridge to chill, put the ice cream back in the freezer to re-harden (30-60 minutes), then try again with properly softened consistency. Prevention: Work in a cool kitchen, have ice cream at perfect soft-serve consistency, and move quickly!
Q: Can I add multiple ice cream flavors?
A: Absolutely! For a Neapolitan effect, spread three different softened ice creams in stripes across the unrolled cake (chocolate, vanilla, strawberry), then roll. The spiral will show three colors! Or do layers: spread vanilla, freeze briefly (20 minutes), spread strawberry on top, freeze briefly, then roll. Multiple flavors look stunning when sliced. Just make sure all ice creams are properly softened for spreading, and work quickly so the first flavor doesn’t melt while you’re spreading subsequent ones.
Q: What’s the best way to slice frozen cake roll without it crumbling?
A: Professional technique: Use a long, sharp serrated knife. Fill a tall glass or pitcher with very hot water. Before each cut, dip the knife completely in the hot water for 5-10 seconds, then wipe it completely dry with a towel (moisture creates ice crystals). Make one smooth slicing motion using gentle back-and-forth sawing. After each slice, dip the knife in hot water again and wipe dry before the next cut. The hot knife melts through the ice cream cleanly instead of dragging, creating perfect spiral slices. Yes, it’s tedious to dip-and-wipe between every cut, but the results are bakery-perfect! Also, let the roll sit at room temperature for 5-10 minutes before slicing—slightly softened edges cut more cleanly than rock-hard frozen.
Conclusion
And there you have it—your complete guide to making a stunning, bakery-worthy Ice Cream Cake Roll in your own kitchen! This dessert might look intimidating at first (rolling a cake? filling it with ice cream? seriously?!), but I promise you, once you understand the simple techniques—especially that crucial hot-roll-in-towel step—you’ll realize it’s completely achievable. And the best part? Even if your roll isn’t absolutely perfect, it will still taste amazing and look impressive when sliced. That spiral pattern has a way of making everything look professional!
The real magic of the Ice Cream Cake Roll is how it combines impressive presentation with make-ahead convenience and endless customization. You can make it days before your party (no last-minute stress!), customize it to any theme or flavor preference (chocolate-mint for Christmas, strawberry for Valentine’s, birthday cake ice cream for celebrations!), and serve it knowing that every single person—kids to grandparents—will love getting cake AND ice cream in one perfect slice. It’s the dessert that makes you look like a baking superstar with surprisingly simple techniques.
Remember the essential keys to success: beat those eggs until thick and ribbony (this creates the flexible cake structure), bake just until done—don’t overbake (12-15 minutes, start checking early!), roll the cake while it’s still hot in the towel (this is THE secret to crack-free rolling), let it cool completely before filling (patience!), spread ice cream that’s soft-serve consistency (not melted, not rock-hard), freeze thoroughly before slicing (minimum 4 hours, overnight is better), and use the hot-knife technique for clean cuts. Follow these principles and you’ll create beautiful spiral slices every time!
Now it’s time to roll your way to dessert glory! I’m so excited to hear about your Ice Cream Cake Roll adventure. What flavor combination did you choose? Did your roll turn out perfectly on the first try, or did you learn some lessons along the way? How did your family and friends react when you sliced it and revealed that gorgeous spiral? Drop a comment below and share your experience—I read every comment and genuinely love hearing about your baking journeys (successes and learning moments alike!). And if you successfully created that stunning spiral dessert that made everyone say “you made this?!”, please pin this recipe to your favorite Pinterest board so your friends can discover the joy of making ice cream cake rolls at home. Your shares help our baking community grow and inspire others to try new techniques!
Here’s to desserts that look professional but are achievable at home, to the perfect marriage of cake and ice cream in every bite, to make-ahead convenience that saves your sanity during party planning, to that satisfying moment when you slice the roll and reveal the perfect spiral, and to the joy on people’s faces when they taste something that’s both familiar and special. May your eggs always beat to perfect ribbons, your cakes roll without cracking, your ice cream be the perfect consistency, and your freezer have room for this spectacular dessert! Happy baking and rolling, friends! 🍰🍦✨