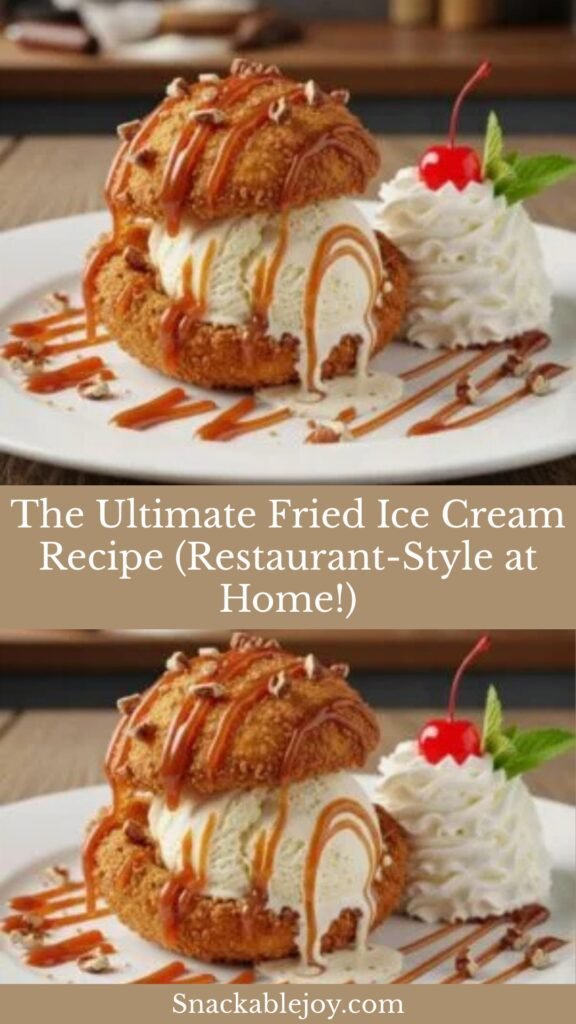
The Ultimate Fried Ice Cream Recipe (Restaurant-Style at Home!)
Get ready to make one of the most impressive, crowd-pleasing desserts you’ll ever serve—Fried Ice Cream! If you’ve been captivated by that magical combination of hot and cold, crispy and creamy at Mexican restaurants or Asian eateries, and you’ve wondered how they achieve that seemingly impossible feat, I’m about to reveal all the secrets. This show-stopping dessert is surprisingly doable at home, and trust me, the reactions from your family and friends will be absolutely priceless!
Fried Ice Cream is exactly what it sounds like—a scoop of ice cream that’s been coated in a crunchy shell and briefly deep-fried (or sometimes baked for an easier method) so the outside gets hot, crispy, and golden while the inside stays frozen and creamy. The result is an absolutely mind-blowing contrast of temperatures and textures: hot meets cold, crispy meets creamy, sweet meets cinnamon-spicy. Each bite delivers that satisfying crunch followed by smooth, cold ice cream—it’s pure dessert magic!
This incredible dessert is perfect for special occasions and dinner parties when you want to wow guests, Cinco de Mayo or Mexican-themed celebrations, summer gatherings when you want something cold but exciting, birthdays and celebrations (kids and adults go crazy for it!), or simply when you want to create restaurant-quality dessert at home. It’s become an iconic finale at Mexican restaurants across America, but its origins are more complex and fascinating than you might think.
What makes this homemade version truly special is that you control everything—the ice cream flavor, the coating style (cornflakes, graham crackers, or panko!), the sweetness level, and whether to deep-fry or take the easier baked route. Plus, making it at home reveals that this “impossible” dessert is actually quite achievable with proper technique and preparation. The secret? Freeze everything SUPER solid before frying. That’s it—that’s the magic!
History / Background
Fried Ice Cream has one of the most debated and contested origin stories in the dessert world, with multiple countries and cultures claiming to have invented this culinary marvel. The truth, as is often the case with beloved foods, is that the concept likely evolved independently in different places, with each culture adding their own spin.
The earliest documented version of fried ice cream appears in a 1893 cookbook from Philadelphia, where a recipe describes ice cream rolled in breadcrumbs and briefly fried. However, this American version didn’t catch on widely and remained relatively obscure for decades.
The most commonly cited origin story points to the 1893 Chicago World’s Fair (World’s Columbian Exposition), where vendors allegedly served fried ice cream as a novelty. However, historical documentation of this is sparse, and it may be more legend than fact. What we do know is that Americans were experimenting with the concept in the late 19th century, though it never became mainstream.
Fast forward to Asia, where fried ice cream took on new life. Japanese tempura techniques—where foods are coated in batter and quickly fried at very high temperatures—provided a perfect method for frying ice cream. Japanese chefs understood that extremely hot oil and minimal frying time could crisp a coating before the ice cream inside melted. This technique spread throughout Asia in the mid-20th century.
In America, fried ice cream’s modern popularity explosion came through Mexican restaurants in the 1970s and 1980s. Chi-Chi’s, a Mexican restaurant chain, claimed to have invented “Mexican Fried Ice Cream” and popularized it nationwide. Their version featured vanilla ice cream rolled in crushed cornflakes and cinnamon, then deep-fried and served in a crispy tortilla bowl with honey, whipped cream, and a cherry. This became THE version Americans associate with fried ice cream.
However, Chi-Chi’s likely adapted the concept from authentic Mexican cuisine. In Mexico, there’s a traditional dessert called “helado frito” that predates the American chain restaurant version. Mexican street vendors and restaurants had been serving variations of fried ice cream for years, often featuring it at celebrations and festivals.
The confusion about origins is partly because “fried ice cream” is a concept—a technique—that multiple cultures could logically develop. The basic principle (freeze something solid, coat it, fry briefly in very hot oil) is straightforward enough that inventive cooks in different places could arrive at it independently.
What’s indisputable is that Mexican restaurants in America made fried ice cream a phenomenon. Throughout the 1980s and 1990s, practically every Mexican restaurant in the USA added it to their dessert menu. It became THE signature dessert to order after tacos and enchiladas—the grand finale that left diners amazed and satisfied.
The dessert also appears in Chinese-American restaurants, where it’s often called “fried ice cream balls” and served with a lighter, tempura-style coating and chocolate or fruit sauces. Asian versions tend to be smaller, with a thinner coating, while Mexican-American versions are typically larger with a thick, crunchy cornflake coating.
Today, fried ice cream represents the best of fusion cuisine—taking a simple concept and adapting it through different cultural lenses to create multiple delicious variations. The home cooking version became popular in the 2000s and 2010s as food blogs and YouTube videos demystified the technique, showing that with proper freezing and quick frying, anyone could achieve this “impossible” dessert at home.
Why You’ll Love This Recipe
This homemade Fried Ice Cream recipe is about to become your secret weapon for impressing literally everyone, and I’m so excited to share why! Not only does it taste absolutely incredible—that hot-cold, crispy-creamy contrast is pure dessert perfection—but it’s also way easier than it looks. Yes, it requires some advance planning (freezing time), but the actual hands-on work is simple and totally doable for home cooks. The reactions alone make it worth the effort!
Making Fried Ice Cream at home means you control the flavors (vanilla is classic, but chocolate, dulce de leche, or strawberry work too!), the coating (cornflakes, graham crackers, panko, or crushed cookies), the sweetness level, and you can even skip the deep-frying and bake them for an easier, less messy method. Plus, you’ll save money—restaurant fried ice cream costs $8-12 per serving, while homemade costs about $2-3!
Here’s why this recipe will become your go-to impressive dessert:
- Absolutely Jaw-Dropping: Guests are always amazed—hot and cold simultaneously seems impossible!
- Surprisingly Achievable: Looks professional but uses simple techniques anyone can master
- Incredibly Fun to Make: The whole process feels like a fun kitchen experiment
- Budget-Friendly: Costs $2-3 per serving versus $8-12 at restaurants
- Highly Customizable: Choose any ice cream flavor, any coating, any toppings
- Make-Ahead Friendly: Prep days in advance, fry right before serving
- Kid-Approved: Children absolutely love the novelty and fun of it
- Perfect for Parties: Makes 4-6 servings easily, scales up well
- Two Method Options: Deep-fry for authentic texture OR bake for easier, healthier version
- Restaurant-Quality Results: Tastes exactly like what you get at Mexican restaurants
- Great Conversation Starter: Everyone wants to know how you did it!
- Freezer-Stable: Make the coated balls weeks ahead and fry when needed
- Adaptable for Dietary Needs: Use dairy-free ice cream, gluten-free coatings, etc.
- Pure Indulgence: This is celebration food—special, exciting, memorable
Ingredient Notes
Let’s break down the simple ingredients that create this show-stopping dessert!
Ice Cream: Your foundation! The ice cream needs to be VERY firm and high-quality. Options:
Vanilla: Classic choice, traditional for Mexican fried ice cream. Use premium vanilla (not light or low-fat—higher fat content stays frozen longer)
Chocolate: Works beautifully, especially with graham cracker coating
Dulce de Leche or Caramel: Extra decadent, Mexican-inspired
Strawberry: Fun twist, pretty pink color
Coffee or Cookies & Cream: Delicious variations
You’ll need about 1 pint (4 cups) for 4 large servings. The ice cream must be very hard-frozen—the harder the better! Cheap, soft ice cream melts too fast. Use premium brands with higher fat content (like Häagen-Dazs, Breyers Natural, or Tillamook) for best results.
Coating (Choose One or Mix):
Crushed Cornflakes: Traditional Mexican restaurant style, creates thick, crunchy shell. You’ll need about 3-4 cups of cornflakes, crushed fine (not powder, but small pieces).
Graham Crackers: Sweeter, cookie-like coating. Need about 2 cups crushed.
Panko Breadcrumbs: Asian-style, lighter and crispier. About 2 cups.
Crushed Cookies: Vanilla wafers, Nilla wafers, or animal crackers work great!
The coating should be finely crushed but not powdered—you want texture!
Cinnamon & Sugar: Essential for that signature flavor! Mix 2 tablespoons sugar with 1-2 teaspoons ground cinnamon. This gets mixed into your coating.
Eggs: You’ll need 2-3 eggs, beaten. This is the “glue” that makes the coating stick to the frozen ice cream.
Optional Coating Additions: Shredded coconut (tropical twist), chopped nuts (pecans or almonds), or cocoa powder (for chocolate version).
For Serving:
- Honey or chocolate sauce for drizzling
- Whipped cream
- Maraschino cherry
- Optional: Cinnamon tortilla bowl (buy pre-made or make your own)
Frying Oil (if frying): You’ll need about 2-3 inches of neutral oil (vegetable, canola, or peanut oil) in your pot for deep-frying. The oil must reach 375-400°F—very hot!
Equipment Needed
Making Fried Ice Cream requires some specific tools, but nothing too specialized!
Essential:
- Ice cream scoop: For forming uniform balls
- Baking sheet: For freezing the ice cream balls
- Parchment paper or plastic wrap: To prevent sticking
- Shallow bowls or plates: For dipping station (beaten eggs, coating mixture)
- Deep fryer OR heavy pot: For frying (if using fry method)
- Candy/deep-fry thermometer: Critical for monitoring oil temperature
- Spider strainer or slotted spoon: For removing fried ice cream from oil
- Paper towels: For draining
Optional but Helpful:
- Cookie scoop: For uniform ice cream balls
- Freezer-safe containers: For storing coated balls
- Oven and baking sheet: If using bake method instead of frying
- Small tortilla bowls: For serving (can buy pre-made)
Print

Fried Ice Cream Recipe
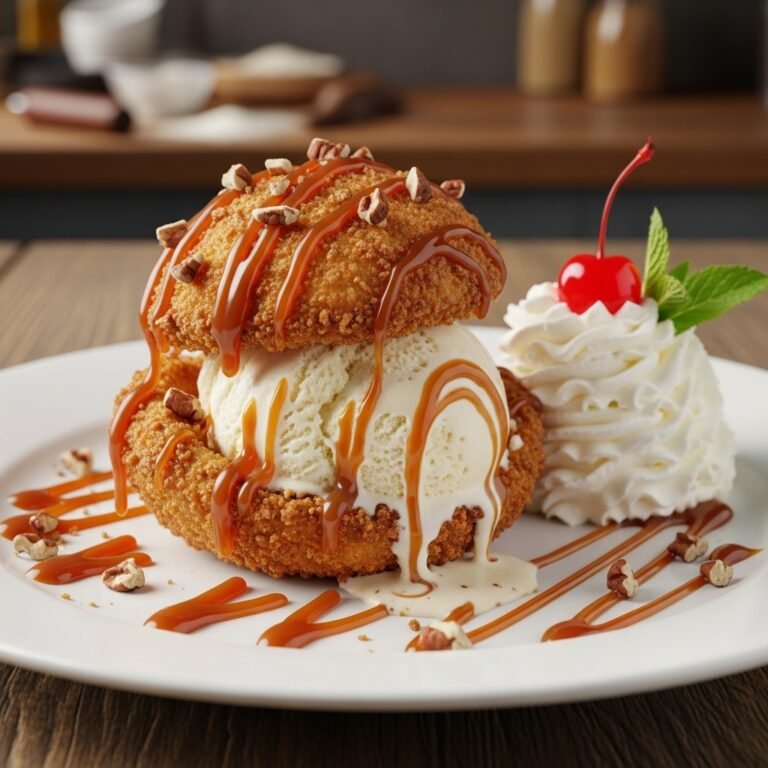
This restaurant-style Fried Ice Cream features scoops of hard-frozen ice cream coated in crunchy cinnamon-sugar cornflakes, then briefly deep-fried (or baked!) so the outside is hot and crispy while the inside stays cold and creamy. It’s the ultimate hot-and-cold dessert that tastes exactly like what you get at Mexican restaurants—and it’s surprisingly easy to make at home!
- Total Time: 4+ hours (includes freezing time)
- Yield: 4 servings 1x
Ingredients
ScaleFor the Ice Cream Balls:
- 1 quart (4 cups) vanilla ice cream (premium, full-fat)
- 3-4 cups cornflakes, crushed into coarse crumbs
- 2 tablespoons granulated sugar
- 1½ teaspoons ground cinnamon
- 2-3 large eggs, beaten
- Vegetable or canola oil for frying (about 2 quarts)
For Serving:
- Honey or chocolate sauce
- Whipped cream
- Maraschino cherries
- Optional: Cinnamon tortilla bowls
Instructions
Step 1: Scoop and Initial Freeze (4+ hours ahead)
- Line a baking sheet with parchment paper or plastic wrap.
- Working quickly, use an ice cream scoop to form 4 large, round balls of ice cream (about 1 cup each, or the size of a baseball). Press firmly to compact the ice cream—no air pockets!
- Place the balls on the prepared baking sheet, spacing them apart.
- Immediately place in the freezer for at least 2 hours, or until rock-solid. The harder, the better! Overnight is ideal.
Step 2: Prepare Coating Mixture
- In a shallow bowl or pie plate, crush cornflakes into coarse crumbs (use your hands, a rolling pin, or pulse briefly in food processor—don’t turn them into powder, leave some texture).
- Mix in 2 tablespoons sugar and 1½ teaspoons cinnamon until evenly distributed.
- In a separate shallow bowl, beat 2-3 eggs until smooth.
- Set up your dipping station: beaten eggs, then coating mixture.
Step 3: First Coating (Do this quickly!)
- Remove one ice cream ball from freezer at a time (leave others frozen).
- Roll quickly in beaten egg, coating completely.
- Immediately roll in cornflake mixture, pressing firmly so coating sticks all over. The layer should be thick and even.
- Return to the parchment-lined baking sheet.
- Repeat with remaining balls, working fast!
- Return all coated balls to freezer for 1-2 hours until solid again.
Step 4: Second Coating (Essential for thick crust!)
- Remove balls from freezer one at a time again.
- Repeat the coating process: dip in egg, roll in cornflake mixture, pressing firmly.
- This double coating creates that thick, restaurant-style crust that won’t break during frying.
- Return to freezer for at least 2 more hours, preferably overnight. The balls should be frozen SOLID before frying—this is the key to success!
Step 5: Fry (or Bake)
Deep-Frying Method (Traditional):
- Heat 2-3 inches of oil in a heavy pot or deep fryer to 375-400°F (use a thermometer—this temperature is crucial!).
- Working with ONE ball at a time, carefully lower it into the hot oil using a spider strainer or slotted spoon.
- Fry for 8-15 seconds ONLY—just until the coating turns golden brown. Do NOT fry longer or the ice cream will melt!
- Quickly remove and place on paper towels to drain for just a second.
- Immediately transfer to a serving plate/bowl.
- Repeat with remaining balls (let oil return to temperature between batches).
Baking Method (Easier Alternative):
- Preheat oven to 500°F (yes, very hot!).
- Place frozen, coated ice cream balls on a parchment-lined baking sheet.
- Bake for 8-10 minutes, watching carefully, until coating is golden and crispy.
- Remove immediately and serve.
Step 6: Serve Immediately
- Place each fried ice cream in a serving bowl (or crispy tortilla bowl for authenticity).
- Drizzle with honey or chocolate sauce.
- Top with whipped cream and a cherry.
- Serve IMMEDIATELY—don’t let them sit! The magic is in eating them while the outside is still hot and the inside is still frozen.
Notes
- Freezing is CRITICAL: The ice cream must be frozen rock-solid before frying. If it’s even slightly soft, it will melt instantly. When in doubt, freeze longer!
- Oil temperature matters: Too cool (under 350°F) and the coating absorbs oil and becomes soggy; too hot (over 425°F) and the coating burns before crisping. 375-400°F is the sweet spot.
- Work fast during coating: Don’t let ice cream balls sit out—coat one, return to freezer, then do the next.
- Double coating is essential: The first coat often has thin spots; the second ensures complete coverage.
- Frying time is BRIEF: 8-15 seconds maximum! You’re just crisping the coating, not cooking the ice cream.
- Serve immediately: Fried ice cream waits for no one! Have plates ready, guests seated, and serve the moment they’re done.
- Baking method: Less authentic texture but way easier and less messy. Still delicious!
- Prep Time: 30 minutes (active)
- Cook Time: 1-2 minutes per ball (frying) OR 8-10 minutes (baking)
- Category: Desert
- Method: Deep-Frying OR Baking
- Cuisine: Mexican-American / Fusion
- Diet: Gluten Free
Nutrition
- Serving Size: 1 fried ice cream ball
- Calories: 420
- Sugar: 38g
- Sodium: 240mg
- Fat: 22g
- Saturated Fat: 10g
- Unsaturated Fat: 11g
- Trans Fat: 0g
- Carbohydrates: 52g
- Fiber: 1g
- Protein: 5g
- Cholesterol: 95mg
Tips & Variations
Customize Your Perfect Fried Ice Cream:
- Chocolate Lover’s Version: Use chocolate ice cream, mix cocoa powder into cornflake coating, drizzle with chocolate sauce.
- Strawberry Cheesecake Style: Use strawberry ice cream, graham cracker coating, top with strawberry sauce and whipped cream.
- Churro Fried Ice Cream: Extra cinnamon-sugar in coating, serve with caramel sauce and whipped cream.
- Cookies & Cream: Use cookies & cream ice cream, crushed Oreo coating, chocolate drizzle.
- Coconut Paradise: Mix shredded coconut into coating, use coconut or vanilla ice cream, top with pineapple sauce.
- Peanut Butter Cup: Use chocolate ice cream, crush Reese’s Puffs cereal for coating, peanut butter drizzle.
- Healthier Baked Version: Always bake instead of fry, use lower-fat ice cream, smaller portions.
- Gluten-Free: Use gluten-free cornflakes or crushed gluten-free cookies for coating.
- Dairy-Free/Vegan: Use coconut milk or oat milk ice cream (must be very firm!), ensure coating ingredients are vegan.
- Miniature Fried Ice Cream Bites: Make small balls using a cookie scoop for bite-sized treats perfect for parties.
- Fruity Twist: Add freeze-dried fruit powder to coating for intense fruit flavor.
- Adult Version: Soak the coating in rum or Kahlua before applying (alcohol lowers melting point slightly, so freeze extra-solid!).
Pro Chef Tips
Professional Secrets for Perfect Fried Ice Cream:
- The Ultra-Hard Freeze is Everything: Restaurant kitchens often use blast freezers that go far below home freezer temperatures. Your home freezer (0°F) works, but the harder you can get that ice cream, the better. Professional tip: After the final coating, freeze the balls for 24 hours minimum, and if you have a deep freezer that goes colder than a regular freezer, use that! Some chefs even place the coated balls in the very back of the freezer where it’s coldest. The ice cream should be so hard it’s difficult to pierce with a spoon. This ultra-hard freeze is what allows that magical 15-second fry window.
- Oil Temperature Precision is Non-Negotiable: Professional deep fryers maintain exact temperatures, which is why restaurant fried ice cream is so consistent. At home, use a candy/deep-fry thermometer clipped to your pot and monitor constantly. The oil MUST be 375-400°F when the ice cream ball goes in. Too cool and the coating absorbs oil, becoming greasy and soggy before crisping. Too hot and the outside burns while the inside starts melting. Some chefs heat oil to 400°F, then drop it to 375°F when adding ice cream, accounting for temperature drop from the frozen ball.
- The Triple-Coat Technique: While this recipe calls for double coating, professional kitchens often do THREE coats for extra insurance. After the second coat freezes solid, they do one more: egg, then coating, then freeze again for several hours. This creates an incredibly thick crust that insulates the ice cream even better and creates that super-crunchy texture you get at high-end restaurants. It’s more work, but for special occasions, it’s worth it!
- Compact Your Scoops Like Your Life Depends On It: Home cooks often scoop ice cream loosely with air pockets. Professionals pack it HARD. When scooping, press down firmly multiple times to compress the ice cream and eliminate any air spaces. Air pockets create weak spots where heat penetrates faster, causing uneven melting. Some chefs actually use their hands (with gloves) to firmly press and shape each ball, ensuring maximum density. The denser the ice cream ball, the better it holds up to frying.
- The Spider Strainer is Your Best Friend: Professional fry cooks never use regular slotted spoons for delicate items like fried ice cream. They use spider strainers (those Asian-style wire mesh scoops with long handles). The wide, shallow basket and fine mesh allow you to gently lower the ice cream ball into oil without dropping it (which could splash hot oil or crack the coating), and remove it smoothly without damaging the delicate crust. It’s a $10 investment that makes a huge difference!
- Serve on Chilled Plates: Here’s a pro move most home cooks miss—chill your serving plates/bowls in the freezer for at least 30 minutes before plating. The cold plate slows down melting from the bottom, giving you precious extra seconds before the ice cream starts softening. Restaurants do this for all frozen desserts. It seems like a small detail but significantly extends the perfect-texture window!
- The Double-Fry Station: Some Mexican restaurants use a clever system—they have TWO pots of oil. The first at 400°F for the initial crisp (8-10 seconds), then they quickly transfer to a second pot at 350°F for final color (5 seconds). This two-stage method creates incredible crunch while minimizing heat transfer. At home, you can approximate this by frying at 400°F for 8 seconds, removing, letting it rest for 10 seconds (oil drips off), then a quick 5-second second dip at 375°F. Advanced technique, but produces restaurant-perfect results!
Common Mistakes to Avoid
- Not Freezing Long Enough or Hard Enough: This is by far the #1 reason homemade fried ice cream fails! If your ice cream balls aren’t frozen absolutely solid—and I mean rock-hard, almost difficult to scoop—they WILL melt immediately when they hit the hot oil. The coating crisps in 8-15 seconds, but if the ice cream underneath is even slightly soft, it starts melting in 3-4 seconds and you end up with a melted mess. Solution: After each coating stage, freeze for minimum 2 hours, preferably 4-6 hours or overnight. Before frying, the balls should feel like frozen solid spheres, not soft scoops. When in doubt, freeze longer!
- Oil Not Hot Enough: Many home cooks are nervous about super-hot oil and keep the temperature too low (300-325°F). At these temperatures, the coating takes too long to crisp (30+ seconds), which gives the ice cream time to melt. You end up with soggy, oil-soaked coating and partially melted ice cream. The oil MUST be 375-400°F—use a thermometer, don’t guess! At proper temperature, the coating flash-crisps in 8-15 seconds, protecting the ice cream. Yes, it feels scary-hot, but that’s exactly what you need!
- Thin or Incomplete Coating: If your coating has thin spots, gaps, or doesn’t completely cover the ice cream, hot oil will find those weak points and melt the ice cream underneath, causing catastrophic failure (the ball literally falls apart in the oil—not fun!). Solution: The double coating is non-negotiable, and you must press firmly to ensure thick, even coverage with no bare spots. Some people miss the “bottom” where the scoop rested on the pan—make sure to coat that area thoroughly when you pick up the ball!
- Frying Too Long: Home cooks often think “the longer it fries, the better it gets” but the opposite is true for fried ice cream! Any longer than 15 seconds and you’re courting disaster. The coating might look perfect at 20 seconds, but the ice cream inside is starting to melt. By 30 seconds, you’ll have a hot, crispy shell with liquid ice cream soup inside that leaks out when you cut into it. Watch the clock—the moment the coating turns golden brown (usually 8-15 seconds depending on oil temp), GET IT OUT! Don’t second-guess yourself.
- Not Serving Immediately: Fried ice cream’s magic window is about 60-90 seconds after frying. That’s when the temperature contrast is most dramatic and the texture is perfect. After 2-3 minutes, the ice cream starts softening significantly, the coating starts losing crispness from residual heat, and the experience diminishes. Many home cooks fry all the balls, THEN start plating and adding toppings. Wrong! Have everything ready—plates, sauces, whipped cream, spoons—BEFORE you start frying. Fry one ball, immediately plate it, add toppings, serve it, THEN fry the next one. Yes, guests might eat at slightly different times, but that’s better than everyone eating mediocre, melted fried ice cream!
Storage & Meal Prep
Storing Your Fried Ice Cream:
- Coated Balls (Pre-Frying): This is where fried ice cream excels at make-ahead! Once you’ve completed the double coating and the balls are frozen solid, you can store them in the freezer for up to 2 weeks before frying. Wrap each ball individually in plastic wrap, then place in a freezer-safe container or bag to prevent freezer burn. When ready to serve, fry directly from frozen—no thawing needed!
- After Frying: There is NO storage after frying—fried ice cream must be eaten immediately! Within 2-3 minutes of frying, the ice cream starts melting and the magic is lost. Do not attempt to save leftover fried ice cream; it becomes a soggy, melted mess.
- Baked Version: Same rules apply—the coated balls can be stored frozen for weeks, but once baked, serve immediately. No storage after baking.
Meal Prep Strategy:
The beauty of fried ice cream is that all the prep work can be done days or even weeks ahead:
- Week 1: Scoop ice cream balls, initial freeze
- Week 2: Do double coating, final freeze
- Day of serving: Just fry and serve!
This makes fried ice cream perfect for dinner parties—all the work is done ahead, and you just need 2 minutes of frying right before dessert.
Make-Ahead & Freezer Notes
Smart Preparation Timeline:
Up to 2 Weeks Ahead:
- Scoop ice cream balls, freeze solid (2+ hours)
- First coating (egg + cornflakes), freeze solid (2+ hours)
- Second coating, freeze solid (2+ hours minimum, overnight preferred)
- Wrap individually in plastic wrap, store in freezer-safe container
Day Of Serving:
- Heat oil to proper temperature (375-400°F)
- Fry balls one at a time, 8-15 seconds each
- Serve immediately
Freezer Storage Best Practices:
- Wrap well: Prevent freezer burn with plastic wrap, then place in airtight container or freezer bag
- Label and date: So you know when you made them
- Store in back of freezer: Coldest spot, away from door opening
- Don’t stack: Keep balls from touching if possible (they can freeze together)
Can You Refreeze After Frying?
Absolutely not! Once fried, the coating is cooked and the ice cream has started its melting process. If you try to refreeze it, you get a soggy coating, icy (not creamy) ice cream, and generally disappointing texture. Fried ice cream is a “make and serve immediately” dessert—there’s no saving it for later!
Serving Suggestions
Fried Ice Cream is a complete dessert on its own, but here’s how to create that full restaurant experience:
Traditional Toppings & Garnishes:
- Honey: Classic drizzle, adds floral sweetness
- Chocolate Sauce: Hot fudge or chocolate syrup
- Caramel Sauce: Dulce de leche for Mexican flair
- Whipped Cream: Generous dollop on top
- Maraschino Cherry: For that retro diner look
- Cinnamon Sugar: Extra sprinkle for spice lovers
Serving Vessels:
- Crispy Tortilla Bowl: Traditional Mexican restaurant style (buy pre-made or fry your own)
- Simple Dessert Bowl: Let the fried ice cream be the star
- Plate with Sauce Design: Drizzle sauce artistically on plate before placing fried ice cream
Complete Mexican Feast:
- Serve after tacos, enchiladas, or fajitas
- Pair with tres leches cake or churros for dessert spread
- Offer alongside flan or sopapillas for variety
Party Presentation:
- Make a “Fried Ice Cream Bar” with multiple flavors and toppings
- Let guests customize their own with sauce and topping options
- Serve with coffee or Mexican hot chocolate
FAQs Section
Q: Can I bake instead of fry?
A: Yes! Baking is easier, less messy, and healthier. Preheat your oven to 500°F (very hot!), place the frozen, coated ice cream balls on a parchment-lined baking sheet, and bake for 8-10 minutes until the coating is golden and crispy. The texture won’t be quite as crispy as deep-fried, and you won’t get that “just fried” oil flavor, but it’s still delicious and impressive! The super-hot oven crisps the coating quickly before the ice cream melts. Watch carefully and remove the moment the coating browns. Serve immediately, just like the fried version!
Q: Why did my ice cream melt before the coating crisped?
A: This happens for one of three reasons: (1) Ice cream wasn’t frozen hard enough—it needs to be rock-solid, frozen for hours or overnight. (2) Oil wasn’t hot enough—it must be 375-400°F. At lower temperatures, the coating takes too long to crisp, giving ice cream time to melt. (3) You fried too long—the coating crisps in just 8-15 seconds! Any longer and the heat penetrates to the ice cream. Solution: Freeze your balls longer (overnight if possible), use a thermometer to confirm oil temperature, and watch the clock—remove the moment the coating turns golden, even if it feels too fast!
Q: Can I use low-fat or light ice cream?
A: Not recommended! Low-fat and light ice creams have higher water content and less fat, which means they melt much faster than premium, full-fat ice cream. The fat in regular ice cream provides insulation and stays frozen longer. Light ice cream will likely melt before your coating even crisps, resulting in disaster. Stick with premium, full-fat ice cream brands (Häagen-Dazs, Breyers Natural, Tillamook, Ben & Jerry’s). The higher fat content is essential for this recipe—it’s not the time to count calories!
Q: How far ahead can I make the coated balls?
A: You can make them up to 2 weeks ahead! Once you’ve completed the double coating and the balls are frozen solid, wrap each one individually in plastic wrap, place in a freezer-safe container or bag, and freeze for up to 2 weeks (some sources say up to 1 month, but quality is best within 2 weeks). This makes fried ice cream perfect for party planning—do all the prep work days or weeks ahead, then just fry right before serving. The longer they stay frozen solid, the better they’ll hold up during frying!
Q: What’s the best coating?
A: Cornflakes are the traditional choice for Mexican-style fried ice cream—they create that thick, super-crunchy coating you get at restaurants. Graham crackers provide a sweeter, cookie-like coating that works beautifully with chocolate or vanilla ice cream. Panko breadcrumbs create a lighter, crispier (less sweet) coating similar to Asian-style fried ice cream. Crushed cookies (Nilla wafers, vanilla wafers) are sweet and flavorful. You can even mix coatings—50% cornflakes + 50% graham crackers is popular! Choose based on your preferred flavor profile. Just make sure whatever you use is crushed into coarse crumbs, not powder!\
Q: My coating fell off during frying. What went wrong
A: Coating falls off for several reasons: (1) Incomplete coverage—if there were bare spots or thin areas, the coating doesn’t adhere properly. Solution: The double coating is essential, and press firmly to ensure thick, even coverage everywhere. (2) Coating didn’t freeze solid after applying—if the egg “glue” wasn’t frozen hard, it can’t hold the coating during frying. Solution: Freeze for at least 2 hours after each coating, preferably longer. (3) Oil temperature was wrong—if too cool, the coating gets soggy and slides off; if too hot, it can bubble violently and break. Solution: Maintain 375-400°F precisely. (4) Rough handling—dropping the ball into oil instead of gently lowering it can crack the coating. Solution: Use a spider strainer to carefully lower the ball into oil. The fix: Ensure complete, thick coverage, freeze thoroughly, and handle gently!
Q: Can I make fried ice cream without eggs?
A: The eggs act as the adhesive that makes the coating stick to the frozen ice cream, so they’re pretty important! However, you can try these egg-free alternatives: Condensed milk: Brush a thin layer of sweetened condensed milk on the frozen ice cream ball, then roll in coating—the sugar in condensed milk acts as glue when frozen. Light corn syrup: Similar concept, very sticky when frozen. Aquafaba (chickpea liquid): Whisk until frothy and use like beaten eggs—this is the best vegan option. Dairy-free milk: Use very thick plant milk (like canned coconut cream) as a substitute. None work quite as perfectly as eggs, but these alternatives can work in a pinch, especially for those with egg allergies or following vegan diets!
Q: Why do Mexican restaurants serve it in a tortilla bowl?
A: The crispy fried tortilla bowl is a traditional Mexican restaurant presentation that adds extra crunch, looks impressive, and reinforces the Mexican theme of the dessert (even though fried ice cream itself has contested Mexican origins!). The tortilla bowl is typically a flour tortilla that’s been pressed into a bowl shape and deep-fried until crispy, then dusted with cinnamon sugar. It’s purely presentation and adds another textural element—crunchy bowl, crunchy coating, creamy ice cream. You can buy pre-made crispy tortilla bowls at many grocery stores, or make your own by frying flour tortillas in a bowl-shaped mold. However, they’re completely optional—the fried ice cream is delicious served in a regular bowl too!
Conclusion
And there you have it—your complete, detailed guide to making restaurant-quality Fried Ice Cream right in your own kitchen! This recipe might seem intimidating at first (hot and cold? Frying ice cream? Impossible!), but I promise you, once you understand the simple secret—freeze everything super solid—you’ll realize it’s totally achievable. And the reactions from your family and friends when you serve this seemingly impossible dessert? Absolutely priceless! You’ll feel like a culinary magician!
The real beauty of homemade fried ice cream is how it combines impressive presentation with surprisingly simple technique. Yes, you need to plan ahead for freezing time, but the actual hands-on work is straightforward: scoop, freeze, coat, freeze, coat again, freeze, then fry for 15 seconds. That’s it! The “magic” isn’t magic at all—it’s just smart temperature management. And once you nail it the first time, you’ll want to make it for every special occasion because nothing else gets quite the same “wow” factor!
Remember the essential keys to success: freeze your ice cream balls rock-solid at every stage (when in doubt, freeze longer!), use premium full-fat ice cream for best results, apply a thick double coating with no bare spots, heat your oil to exactly 375-400°F using a thermometer, fry for only 8-15 seconds maximum (watch the clock!), and serve immediately—fried ice cream waits for no one! Follow these principles and you’ll create perfect hot-outside, cold-inside, crispy-creamy dessert magic every single time!
Now it’s time to create your own fried ice cream magic! I’m genuinely excited to hear about your experience. Did you go traditional with vanilla and cornflakes, or get creative with flavors? Did you deep-fry or take the easier baked route? How did your guests react—were they impressed? Did you nail it on the first try or learn some lessons along the way? Drop a comment below and share your fried ice cream journey—I read every comment and absolutely love hearing your success stories (and learning experiences!). And if you successfully created that impossible hot-and-cold masterpiece that made everyone’s jaw drop, please pin this recipe to your favorite Pinterest board so your friends can discover the joy of making restaurant-style fried ice cream at home. Your shares help our community grow and spread the dessert love!
Here’s to desserts that defy logic and physics, to hot-and-cold perfection in every bite, to impressive presentations that make you look like a professional chef, to the pure joy on people’s faces when they taste something magical, and to the satisfaction of proving that “impossible” restaurant desserts are actually achievable at home with the right technique. May your ice cream always be frozen solid, your oil always be the perfect temperature, your coating always be crispy and complete, and your fried ice cream always deliver that mind-blowing temperature contrast that makes this dessert legendary! Happy frying and amazing, friends! 🍦🔥✨