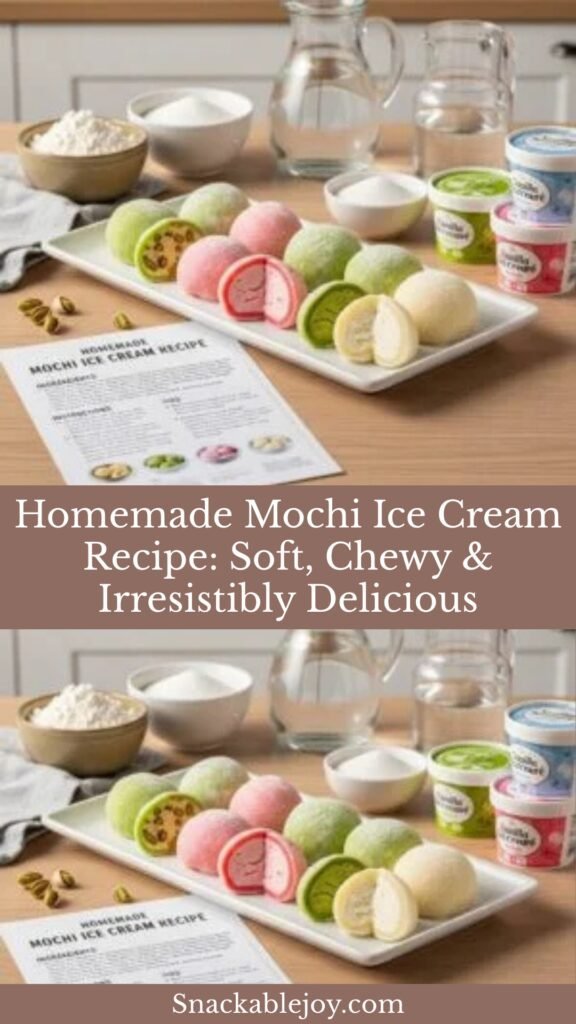
Homemade Mochi Ice Cream Recipe: Soft, Chewy & Irresistibly Delicious
If you’ve ever bitten into one of those adorable little mochi ice cream balls and wondered how on earth they create that magical combination of soft, chewy rice cake wrapped around cold, creamy ice cream, I have wonderful news: you can absolutely make them at home, and it’s easier than you might think!
Mochi ice cream has taken the dessert world by storm, and it’s not hard to understand why. These bite-sized treats offer something truly unique—a textural experience unlike anything else in the frozen dessert universe. The outer layer is pliable and slightly sweet, yielding to reveal a perfectly portioned scoop of ice cream inside. It’s the kind of dessert that makes you close your eyes and smile with pure satisfaction.
What makes mochi ice cream so special? It’s that incredible contrast between the soft, pillowy mochi wrapper and the cold, creamy ice cream within. The chewy texture of the mochi gives way to smooth ice cream, creating a multi-sensory experience with every bite. Plus, each piece is self-contained and portion-controlled—no bowls, spoons, or dripping cones required. Just pop one in your mouth and experience dessert perfection.
These delightful treats are perfect for summer parties, elegant dinner party finales, casual movie nights, or any occasion when you want something sweet but not overwhelming. They’re particularly wonderful for entertaining since guests can simply grab one (or three!) without any serving fuss. Kids are fascinated by them, adults find them sophisticated, and everyone appreciates their neat, mess-free format.
Ready to bring this Japanese-American fusion dessert into your own kitchen? Let’s create something truly special together!
History & Background
Mochi ice cream represents a beautiful fusion of Japanese tradition and American innovation, with a fascinating story that spans cultures and centuries.
Traditional mochi (餅) has been part of Japanese cuisine for over a thousand years. This chewy rice cake is made from mochigome, a short-grain glutinous rice that’s pounded into a smooth, elastic paste. In Japan, mochi holds deep cultural significance—it’s central to New Year celebrations (as kagami mochi), used in religious offerings, and enjoyed in countless forms throughout the year. The process of making mochi was traditionally a community event called mochitsuki, where families would gather to pound steamed rice with large wooden mallets.
The genius idea of wrapping ice cream in mochi, however, is a distinctly Japanese-American creation. In 1993, Frances Hashimoto, a Japanese-American businesswoman and the president of Mikawaya confectionery in Los Angeles, invented mochi ice cream. Hashimoto’s family had been making traditional Japanese confections in Los Angeles since 1910, and she saw an opportunity to create something that bridged Japanese tradition with American tastes.
The innovation was revolutionary: by wrapping small balls of ice cream in thin sheets of mochi, Hashimoto created a completely new dessert format. The mochi kept the ice cream contained and portion-controlled while adding its beloved chewy texture. She introduced mochi ice cream to American consumers through Trader Joe’s stores, and the product became an immediate sensation.
Today, mochi ice cream has grown from a specialty ethnic product into a mainstream American dessert phenomenon. You’ll find it in grocery store freezers, Asian supermarkets, high-end restaurants, and trendy dessert shops across the country. It represents one of the most successful Japanese-American food fusions, honoring traditional mochi-making while creating something entirely new and beloved.
Why You’ll Love This Recipe
Making mochi ice cream at home might seem intimidating, but this recipe proves it’s absolutely achievable—and incredibly rewarding. Once you master the technique, you’ll never want to buy store-bought again.
Here’s why this recipe deserves a spot in your dessert repertoire:
- Impressive Yet Achievable: These look like they require professional skills, but the technique is surprisingly straightforward once you understand the process.
- Endlessly Customizable: Use any ice cream flavor you love! The mochi wrapper works with everything from green tea to strawberry to cookies and cream.
- Perfect Portion Control: Each mochi ball is a self-contained treat—no oversized portions or guilt about “just one more scoop.”
- No Utensils Required: Grab and go! These neat, mess-free treats are perfect for parties and entertaining.
- Unique Textural Experience: That soft-chewy-to-cold-creamy bite is something truly special that you can’t get from any other dessert.
- Make-Ahead Friendly: Prepare a batch and freeze for whenever cravings strike. They keep beautifully for weeks.
- Budget-Friendly: Homemade mochi ice cream costs a fraction of store-bought premium brands.
- Naturally Gluten-Free: Made with glutinous rice flour (which is gluten-free despite the name!), this recipe works for those avoiding wheat.
- Fun Project: Making mochi is an enjoyable, hands-on kitchen activity that’s great for cooking with kids or a fun date night project.
Ingredient Notes
Understanding your ingredients is key to mochi ice cream success. Let’s explore what makes each component essential:
Glutinous Rice Flour (Mochiko or Shiratamako): This is THE essential ingredient—regular rice flour won’t work! Glutinous rice flour (also called sweet rice flour) comes from short-grain sticky rice and creates that characteristic chewy, elastic texture. Despite the name “glutinous,” it contains no gluten—the term refers to its sticky, glue-like consistency. Mochiko (Japanese) and glutinous rice flour (often Thai) are interchangeable for this recipe.
Sugar: Adds sweetness to the mochi wrapper and helps keep it pliable when frozen. White granulated sugar dissolves cleanly, but some recipes use a portion of powdered sugar for smoother texture.
Water: Hydrates the rice flour to create the mochi dough. Some recipes use milk for added richness, but water produces the most authentic, clean flavor.
Cornstarch or Potato Starch: Essential for preventing sticking! You’ll dust your work surface, hands, and finished mochi generously with starch. It keeps everything manageable and prevents the sticky dough from becoming a frustrating mess.
Ice Cream: Use any flavor you love! The key is starting with firm, well-frozen ice cream. Popular choices include green tea (matcha), strawberry, mango, vanilla, chocolate, and red bean. Pre-scoop and freeze ice cream balls before wrapping for best results.
Food Coloring (Optional): Traditional mochi ice cream is often tinted to match the ice cream inside—pink for strawberry, green for matcha, etc. Gel food coloring works best as it doesn’t add extra liquid.
Equipment Needed
Mochi ice cream requires some specific equipment, but nothing you can’t find in a well-stocked kitchen or easily purchase:
- Microwave-Safe Bowl: For cooking the mochi dough. Glass or ceramic works well.
- Small Ice Cream Scoop or Melon Baller: For creating uniform ice cream balls. A 1.5-inch (small) scoop is ideal.
- Baking Sheet: For freezing ice cream balls and finished mochi.
- Parchment Paper or Silicone Baking Mat: Prevents sticking when freezing ice cream balls.
- Plastic Wrap: Essential for wrapping ice cream balls before coating with mochi, and for covering mochi dough.
- Rubber Spatula: For stirring the mochi dough during cooking.
- Rolling Pin: For flattening mochi dough evenly.
- Round Cookie Cutter (3-inch): For cutting uniform mochi circles. A drinking glass works in a pinch.
- Fine Mesh Strainer: For dusting starch evenly over surfaces.
- Kitchen Scale (Optional but Helpful): For precise measurements, especially of rice flour.
- Disposable Gloves (Optional): Make handling sticky mochi much easier
Print

Mochi Ice Cream Recipe
Homemade Mochi Ice Cream features soft, chewy mochi wrappers encasing perfectly portioned balls of your favorite ice cream. This Japanese-American fusion dessert offers a unique textural experience with every bite—pillowy mochi yielding to cold, creamy ice cream. Easier than you think and endlessly customizable!
- Total Time: 2-3 hours (including freezing)
- Yield: 12 mochi ice cream balls 1x
Ingredients
ScaleFor the Ice Cream Balls:
- 1 pint ice cream, any flavor (or multiple flavors)
For the Mochi Wrapper:
- 1 cup (150g) glutinous rice flour (mochiko)
- ¼ cup (50g) granulated sugar
- ¾ cup (180ml) water
- Cornstarch or potato starch for dusting (about 1 cup)
Optional:
- Gel food coloring to tint mochi
- Additional flavoring (matcha powder, cocoa powder)
Instructions
Prepare the Ice Cream Balls (Do This First!):
- Line a baking sheet: Cover a small baking sheet with parchment paper.
- Scoop ice cream: Using a small ice cream scoop (about 1.5 inches), scoop 12 balls of ice cream onto the prepared baking sheet. Work quickly to prevent melting.
- Shape into balls: Using your hands or two spoons, shape each portion into a smooth ball. Don’t worry about perfection—they’ll be wrapped.
- Freeze until solid: Place the baking sheet in the freezer for at least 2 hours, or until the ice cream balls are completely frozen solid. Overnight is ideal.
Make the Mochi Dough:
- Combine dry ingredients: In a microwave-safe bowl, whisk together the glutinous rice flour and sugar.
- Add water: Pour in the water and whisk until smooth with no lumps. Add food coloring now if using.
- Cover and microwave: Cover the bowl loosely with plastic wrap. Microwave on high for 1 minute.
- Stir and repeat: Remove, stir well with a wet spatula, re-cover, and microwave for another 1 minute.
- Final cooking: Stir again, re-cover, and microwave for 30 seconds to 1 minute more until the mochi is translucent, glossy, and very sticky. It should stretch when pulled.
- Prepare work surface: Generously dust a clean work surface with cornstarch. Have more starch nearby.
- Turn out dough: Scrape the hot mochi onto the starched surface. Dust the top with more starch.
- Roll out: Using a starch-dusted rolling pin, roll the mochi to about ⅛-inch thickness. Dust with more starch as needed to prevent sticking.
- Cut circles: Using a 3-inch round cookie cutter dusted with starch, cut out 12 circles. Re-roll scraps to cut additional circles if needed.
Assemble the Mochi Ice Cream:
- Work quickly: Remove 3-4 ice cream balls from the freezer at a time (keep rest frozen).
- Place ice cream: Put one frozen ice cream ball in the center of a mochi circle.
- Wrap: Pull the edges of the mochi up and around the ice cream, pinching together at the top to seal. The mochi should stretch to cover completely.
- Smooth the seal: Pinch off any excess mochi at the seal point and smooth with your fingers.
- Place seam-side down: Set the finished mochi ice cream ball seam-side down on the parchment-lined baking sheet.
- Repeat: Continue with remaining ice cream balls and mochi circles.
- Final freeze: Freeze assembled mochi ice cream for at least 1 hour before serving to firm up.
Notes
- The ice cream balls MUST be frozen solid before wrapping. Soft ice cream will melt and make wrapping impossible.
- Work quickly once mochi is cooked—it becomes less pliable as it cools. If it stiffens, you can briefly microwave it for 10-15 seconds to soften.
- Cornstarch is your best friend! Use it generously to prevent sticking.
- Don’t worry if your first few aren’t perfect. The technique improves quickly with practice.
- For matcha mochi, add 1 tablespoon matcha powder to the dry ingredients.
- Make sure your hands are dusted with starch when handling mochi.
- The mochi dough is HOT right out of the microwave—let it cool slightly before handling.
- Prep Time: 45 minutes (plus freezing time)
- Cook Time: 6 minutes
- Category: Dessert, Frozen Treats
- Method: Microwave
- Cuisine: Japanese-American
- Diet: Gluten Free
Nutrition
- Serving Size: 1 mochi ball
- Calories: 125
- Sugar: 11g
- Sodium: 25mg
- Fat: 4g
- Saturated Fat: 2.5g
- Unsaturated Fat: 1g
- Trans Fat: 0g
- Carbohydrates: 21g
- Fiber: 0g
- Protein: 2g
- Cholesterol: 15mg
Tips & Variations
Mochi ice cream is wonderfully adaptable. Here are exciting ways to customize your creations:
Classic Green Tea (Matcha): Add 1 tablespoon matcha powder to the mochi dough and use green tea ice cream inside. The most traditional and sophisticated flavor combination.
Strawberry Dream: Tint mochi pink and wrap around strawberry ice cream. Add freeze-dried strawberry powder to the mochi for extra flavor.
Chocolate Lover’s: Add 2 tablespoons cocoa powder to the mochi dough and wrap around chocolate ice cream. Dust finished mochi with additional cocoa.
Mango Madness: Tint mochi yellow-orange and use mango or mango-coconut ice cream. Popular in Asian dessert shops!
Red Bean (Azuki): The most traditional filling! Use red bean ice cream or actual sweetened red bean paste (anko) instead of ice cream.
Cookies and Cream: Keep mochi plain or tint it gray with food coloring; wrap around cookies and cream ice cream.
Tropical Coconut: Add coconut extract to the mochi dough and use coconut ice cream. Roll in toasted shredded coconut instead of starch.
Black Sesame: Add black sesame powder to the mochi for striking gray color and nutty flavor. Use black sesame ice cream inside.
Dairy-Free: Use any dairy-free ice cream (coconut-based works particularly well) for a vegan-friendly version.
Pro Chef Tips
Ready to make professional-quality mochi ice cream? These expert insights ensure success:
Freeze ice cream balls overnight: The harder your ice cream balls, the easier wrapping becomes. Slightly soft ice cream is the #1 cause of frustration. Overnight freezing is ideal.
Get your mise en place ready: Before cooking the mochi, have your starch-dusted surface prepared, rolling pin dusted, cookie cutter ready, and ice cream balls waiting in the freezer. Once the mochi is cooked, you need to work quickly.
Test mochi doneness properly: Properly cooked mochi should be translucent (not opaque white), very glossy, extremely sticky, and stretch easily without tearing. Undercooked mochi will tear when wrapping.
Work with warm mochi: The dough is most pliable when warm. If it cools and stiffens during assembly, microwave the remaining dough for 10-15 seconds to restore elasticity.
Use a light touch with starch: You need enough starch to prevent sticking, but too much creates a dry, powdery coating on your finished product. Brush off excess starch from mochi circles before wrapping.
Stretch, don’t pull: When wrapping ice cream, gently stretch the mochi around the ball rather than pulling it. Pulling can tear the dough.
Master the pinch: Gather the mochi edges at the top of the ice cream ball, twist slightly, then pinch off any excess. Smooth the seal point with damp fingers if needed.
Common Mistakes to Avoid
Mochi ice cream has a learning curve, but avoiding these common mistakes will set you up for success:
Using Regular Rice Flour: This is the most critical mistake! Regular rice flour will NOT work—you must use glutinous rice flour (mochiko). Regular rice flour produces a grainy, non-stretchy dough that can’t wrap around ice cream.
Working with Soft Ice Cream: If your ice cream isn’t frozen rock-solid, it will melt during wrapping, making the process messy and frustrating. Freeze ice cream balls overnight, and only remove a few at a time during assembly.
Undercooking the Mochi: Undercooked mochi looks opaque white instead of translucent and tears easily instead of stretching. Keep microwaving in 30-second increments until it’s glossy and stretchy.
Not Using Enough Starch: Mochi is incredibly sticky. Skimping on cornstarch means the dough will stick to your surface, rolling pin, hands, and cookie cutter. Be generous!
Rolling Mochi Too Thick: Thick mochi overwhelms the ice cream. Roll to about ⅛-inch thickness—thin enough to wrap easily but thick enough to handle without tearing.
Storage & Meal Prep
Mochi ice cream is the ultimate make-ahead frozen dessert. Here’s how to store it properly:
Finished Mochi Ice Cream: Store in an airtight container in the freezer for up to 2 weeks. For best quality, consume within 1 week. The mochi may firm up slightly over time but will soften at room temperature.
Individual Wrapping: For best results, wrap each mochi ice cream ball individually in plastic wrap before storing in a container. This prevents them from sticking together and protects against freezer burn.
Serving from Frozen: Remove mochi ice cream from freezer 2-5 minutes before serving. This allows the mochi wrapper to soften slightly to its ideal chewy texture while keeping the ice cream cold.
Pre-Made Mochi Circles: You can roll and cut mochi circles ahead, stack them between parchment paper, wrap tightly, and refrigerate for up to 24 hours. Bring to room temperature and microwave briefly if needed before using.
Ice Cream Balls: Pre-scooped and frozen ice cream balls will keep in the freezer for weeks before wrapping. Just make sure they’re well-covered to prevent freezer burn.
Make-Ahead & Freezer Notes
Mochi ice cream is perfectly designed for make-ahead preparation:
Best Make-Ahead Strategy:
- Day 1: Scoop and freeze ice cream balls
- Day 2 (or later): Make mochi, wrap ice cream, final freeze
- Day 3+: Enjoy whenever cravings strike!
Freezer Storage: Properly wrapped mochi ice cream keeps for up to 2 weeks in the freezer without significant quality loss. Beyond that, the mochi texture may become slightly tough.
Flash Freeze First: After assembling, freeze mochi ice cream balls on a baking sheet for 1 hour before transferring to a container. This prevents them from sticking together.
Thawing: Never fully thaw mochi ice cream. Simply let it sit at room temperature for 2-5 minutes to soften the mochi wrapper while keeping the ice cream frozen inside.
Reheating Mochi Dough: Leftover raw mochi dough can be refrigerated for 1-2 days. Microwave in 10-second bursts until pliable again before using.
Party Prep: For parties, make mochi ice cream 2-3 days ahead. Store in the freezer and set out a serving plate about 5 minutes before guests arrive.
Serving Suggestions
Mochi ice cream is a complete dessert on its own, but here are wonderful ways to serve and present it:
Elegant Dessert Platter: Arrange assorted flavors on a beautiful platter for parties. The variety of colors makes a stunning presentation.
Japanese Tea Service: Serve alongside traditional Japanese green tea (matcha or sencha). The bitter tea perfectly complements the sweet mochi.
Asian Fusion Meal Finale: Perfect ending to sushi dinners, ramen nights, or any Asian-inspired meal.
Ice Cream Bar Alternative: Instead of a sundae bar, offer a mochi ice cream selection. Less messy, portion-controlled, and more unique!
Kids’ Party Feature: Children love the novelty and colors. Smaller portions make them perfect for little hands.
After-Dinner Palate Cleanser: The light, refreshing nature of mochi ice cream works beautifully after heavy meals.
Gift Boxes: Package assorted flavors in small gift boxes for a thoughtful homemade present.
Dessert Course Pairing: Serve one or two mochi alongside other small desserts for a multi-dessert tasting experience.
FAQs
What is glutinous rice flour and where do I buy it? Glutinous rice flour (also called sweet rice flour or mochiko) is flour made from short-grain sticky rice. Despite the name “glutinous,” it contains NO gluten—the term refers to its sticky, glue-like texture when cooked. Find it in Asian grocery stores, the international aisle of regular supermarkets, or online. Popular brands include Koda Farms Mochiko and Bob’s Red Mill.
Why is my mochi tearing instead of stretching? Most likely it’s undercooked. Properly cooked mochi should be translucent and glossy, not opaque white. Microwave in 30-second increments until it reaches this stage. It should stretch easily when pulled. Also ensure you’re using glutinous rice flour, not regular rice flour.
How long should mochi ice cream sit out before eating? Remove from freezer 2-5 minutes before serving. This allows the mochi wrapper to soften to its ideal chewy texture while keeping the ice cream frozen inside. If the mochi feels too firm, wait another minute or two.
Can I make mochi without a microwave? Yes! Steam the mochi dough instead. Place the mixture in a heatproof bowl, cover, and steam over simmering water for 15-20 minutes, stirring occasionally, until translucent and smooth. The stovetop method takes longer but works perfectly.
Why did my mochi ice cream crack or split? This usually happens when mochi is rolled too thin, cooled too much before wrapping, or when wrapping over ice cream that isn’t fully frozen. Work with warm mochi, roll to ⅛-inch thickness, and use rock-solid ice cream balls.
Can I use store-bought mochi wrappers? Some Asian grocery stores sell pre-made mochi sheets in the frozen section. They work for wrapping ice cream though the texture may differ slightly from fresh-made. Thaw slightly before using.
Is mochi ice cream gluten-free? Yes! Despite containing “glutinous” rice flour, mochi is naturally gluten-free. The term “glutinous” refers to the sticky texture, not the presence of gluten. Just verify your ice cream and any add-ins are also gluten-free.
Conclusion
And there you have it—homemade Mochi Ice Cream that rivals anything you’d find in a specialty store! This recipe transforms a seemingly complex Japanese-American dessert into something absolutely achievable in your own kitchen.
What makes mochi ice cream so special is that incredible textural journey—the soft, chewy mochi giving way to cold, creamy ice cream in one perfect bite. It’s a sensory experience that never gets old, whether you’re trying it for the first time or the hundredth.
Once you’ve mastered the basic technique, the flavor possibilities become endless. Green tea matcha, strawberry, mango, chocolate, black sesame—each variation offers a new adventure while using the same fundamental skills. You might find yourself making batch after batch, experimenting with colors and flavors, and never wanting to buy store-bought again.
I hope this recipe gives you the confidence to try something new and brings some delicious Japanese-American fusion magic into your kitchen. The process is hands-on and fun, the results are impressive, and the eating experience is absolutely delightful.
Now it’s your turn to make some mochi magic! I’d absolutely love to hear how your mochi ice cream turns out. Did you try any creative flavor combinations? Master the wrapping technique on your first try? Have tips to share with fellow mochi-makers? Drop a comment below and share your experience!
And if this recipe inspired you to try something new, please share it on Pinterest so others can discover the joy of homemade mochi ice cream too. Here’s to soft mochi, cold ice cream, and desserts that make ordinary moments feel special. Happy mochi-making! 🍡🍦