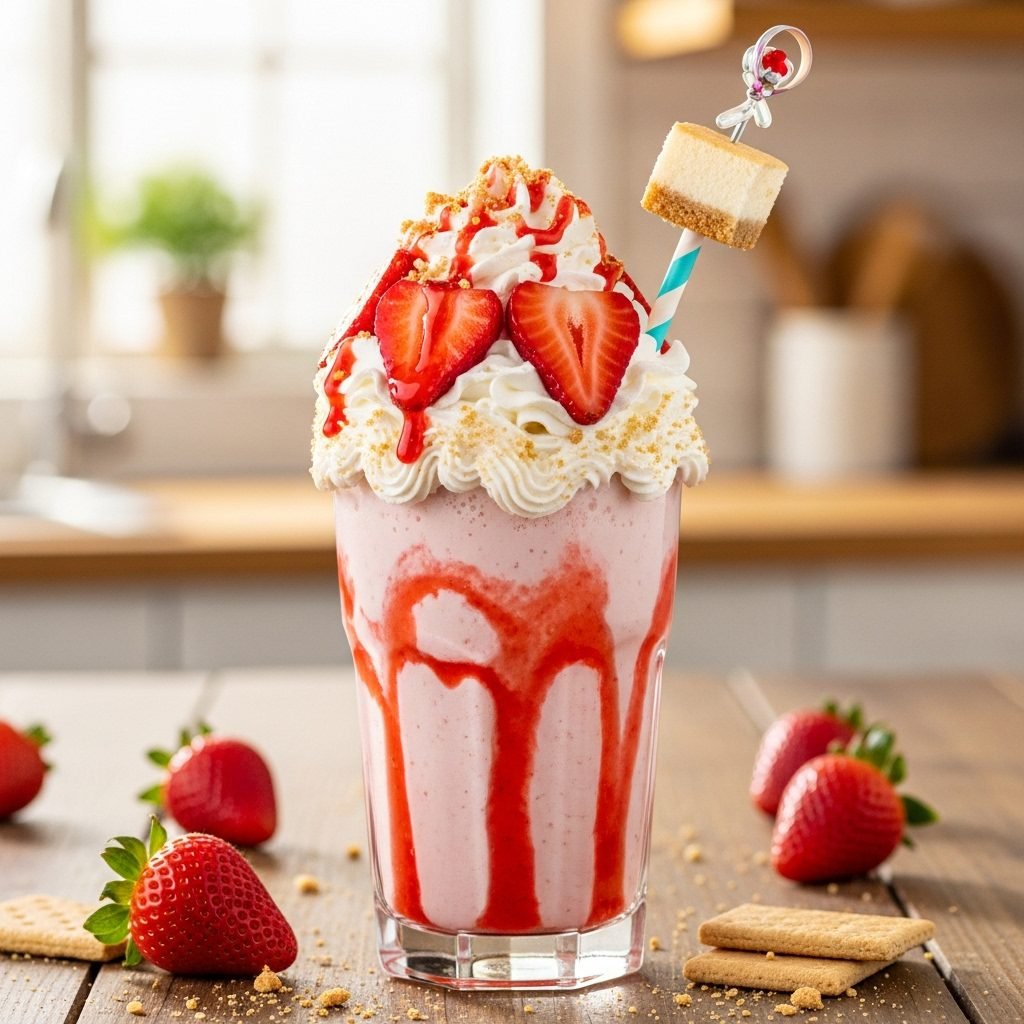
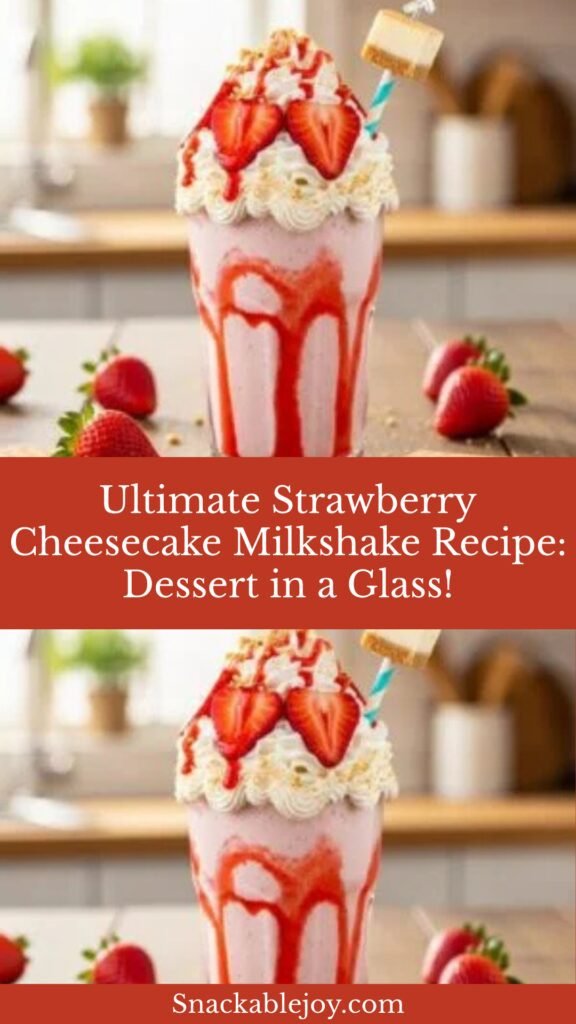
Ultimate Strawberry Cheesecake Milkshake Recipe: Dessert in a Glass!
Imagine taking a slice of rich, creamy cheesecake and a handful of fresh strawberries, then transforming them into the most indulgent, drinkable dessert you’ve ever experienced. That’s exactly what this Strawberry Cheesecake Milkshake delivers! This isn’t just another milkshake—it’s a full-blown dessert experience that captures all the flavors of classic strawberry cheesecake in a thick, creamy, utterly irresistible glass.
This decadent milkshake combines vanilla ice cream, cream cheese, fresh or frozen strawberries, graham cracker crumbs, and a touch of sweetness to create something that tastes exactly like your favorite cheesecake, but in slurpable form. Each sip delivers that signature tangy cream cheese flavor, sweet strawberry goodness, and even the buttery graham cracker crust taste that makes cheesecake so addictive.
Strawberry cheesecake milkshakes have become wildly popular in American diners, ice cream shops, and increasingly in home kitchens. They’re perfect for so many occasions—summer pool parties, birthday celebrations, Valentine’s Day treats, girls’ night in, movie nights, or simply when you’re craving something outrageously delicious and want it RIGHT NOW. Unlike actual cheesecake, which requires hours of baking, chilling, and waiting, this milkshake delivers that same satisfaction in just 5 minutes with a blender.
The best part? This recipe is incredibly forgiving and customizable. You can make it thicker or thinner, sweeter or tangier, more strawberry-forward or more cheesecake-heavy—whatever your heart desires. It’s become my go-to recipe when I want to impress guests with minimal effort or treat myself to something special without the guilt of eating an entire slice of cheesecake (though let’s be honest, the calorie count might be similar, but somehow drinking it feels more acceptable!).
History / Background
The milkshake itself has a fascinating American history dating back to the late 1800s, though those early versions bore little resemblance to what we know today. The original “milkshakes” were alcoholic whiskey drinks, and it wasn’t until the early 1900s that the term referred to a wholesome beverage made with milk, syrup, and ice cream. The invention of the electric blender in 1922 revolutionized milkshakes, making them the thick, creamy treats we love today.
Cheesecake, on the other hand, has ancient roots stretching back to ancient Greece, where it was served to athletes during the first Olympic games. The modern cream cheese-based cheesecake we’re familiar with is an American innovation, developed in New York in the late 1800s after cream cheese was accidentally invented by a New York dairyman in 1872 while trying to recreate French Neufchâtel cheese.
The iconic New York-style cheesecake—dense, rich, and tangy from cream cheese—became a staple of American dessert culture throughout the 20th century. Strawberry topping emerged as the most popular cheesecake accompaniment, creating the classic strawberry cheesecake combination that remains the most beloved cheesecake flavor in America.
The fusion of milkshakes and cheesecake flavors represents a uniquely American innovation that likely emerged from the creative minds of soda fountain operators and diner cooks in the mid-to-late 20th century. As American food culture has always celebrated decadence, creativity, and the “more is more” philosophy, it was only natural that someone would think, “Why not blend cheesecake into a milkshake?”
The strawberry cheesecake milkshake probably gained serious traction in the 1990s and 2000s as chain restaurants and ice cream shops began featuring increasingly elaborate specialty shakes. Places like Johnny Rockets, Steak ‘n Shake, and independent ice cream parlors started experimenting with adding actual cheesecake pieces, cream cheese, and graham crackers to their shakes. The trend exploded on social media in the 2010s as food photography became popular, and these photogenic, over-the-top shakes became Instagram sensations.
Today, the strawberry cheesecake milkshake represents the perfect intersection of nostalgia, indulgence, and shareability. It’s comfort food and celebration food all at once—a liquid love letter to one of America’s favorite desserts. Home cooks have embraced making their own versions, discovering that these restaurant-quality treats are surprisingly simple to recreate at home with a good blender and quality ingredients.
Why You’ll Love This Recipe
This strawberry cheesecake milkshake is about to become your new favorite indulgence, and I’m not exaggerating when I say it might just ruin regular milkshakes for you. Once you experience this perfect blend of creamy, tangy, sweet, and utterly decadent flavors, basic chocolate or vanilla shakes will seem boring by comparison.
What makes this recipe truly special is how it captures the exact essence of strawberry cheesecake while being infinitely easier to make. No baking, no water baths, no waiting for things to chill overnight, no worrying about cracks in the top. Just blend and enjoy immediate gratification in the most delicious way possible.
Here’s why you’re going to fall head over heels for this strawberry cheesecake milkshake:
- Ready in 5 minutes – Seriously faster than driving to get a milkshake, and tastes better than most restaurants!
- Tastes exactly like the real dessert – The cream cheese and graham crackers make this authentically cheesecake-flavored
- No baking required – All the cheesecake flavor without turning on your oven
- Perfectly thick and creamy – That ideal milkshake consistency that requires a straw but doesn’t break it
- Gorgeous presentation – That pretty pink color with whipped cream on top is absolutely Instagram-worthy
- Customizable sweetness – Adjust to your preference from lightly sweet to dessert-level indulgent
- Kid and adult approved – Everyone from age 5 to 95 will love this treat
- Uses simple ingredients – No specialty items you can’t find at a regular grocery store
- Fun to make – There’s something magical about watching it all blend together
- Perfect for entertaining – Impress guests with this restaurant-quality creation
- Portion control friendly – Easier to enjoy a reasonable serving than with a whole cheesecake sitting there
- Versatile for occasions – Works for celebrations, date nights, summer treats, or just because
- Better than store-bought – Control the quality of ingredients and avoid artificial flavors
Whether you’re a cheesecake fanatic, a milkshake enthusiast, or someone who just appreciates really good desserts, this recipe checks all the boxes. It’s indulgent enough to feel special but simple enough to make any day of the week.
Ingredient Notes
Let’s talk about what goes into this magnificent creation. Each ingredient plays a crucial role in recreating that authentic strawberry cheesecake experience:
Vanilla Ice Cream: This is your base and your primary source of creaminess. Use high-quality vanilla ice cream—not frozen yogurt, not “frozen dairy dessert,” but real ice cream with a high fat content. Premium brands like Häagen-Dazs, Ben & Jerry’s, or Tillamook work beautifully because they have less air whipped in and more actual cream, creating a richer, thicker shake. The better your ice cream, the better your milkshake. I recommend using about 3-4 generous scoops (roughly 2 cups) per serving. Let it soften for 5-10 minutes at room temperature before blending—it should be soft enough to scoop easily but not melted. This makes blending easier and creates a smoother texture.
Cream Cheese: This is the magic ingredient that transforms a regular strawberry shake into a cheesecake shake! Use full-fat brick-style cream cheese (like Philadelphia brand), not the spreadable kind in a tub, which has different consistency and additives. You’ll need about 3-4 ounces per serving—that’s roughly half a standard 8-ounce package. Critical tip: The cream cheese MUST be softened to room temperature before blending. Cold, hard cream cheese will create lumps that won’t blend smoothly no matter how long you blend. Leave it out on the counter for 30-60 minutes before making your shake, or microwave it for 10-15 seconds (just until soft, not melted).
Fresh or Frozen Strawberries: Fresh strawberries at peak ripeness deliver the best flavor—choose berries that are deep red, fragrant, and free from white shoulders or green tips. You’ll need about 1 cup of hulled and sliced berries. However, frozen strawberries work brilliantly too and are actually my secret weapon in winter. They’re frozen at peak ripeness, blend into a thicker consistency, and eliminate the need for extra ice. If using frozen, no need to thaw—add them straight from the freezer. You can also use a combination of fresh and frozen.
Milk: This helps thin the shake to drinkable consistency and makes blending easier. Whole milk creates the richest result, but 2% works fine if you prefer something lighter. The amount you use (typically ½ to 1 cup) determines your shake’s thickness—start with less and add more if needed. For extra richness, substitute heavy cream for half the milk, or use half-and-half. Non-dairy folks can use almond milk, oat milk, or coconut milk, though the flavor will be slightly different.
Graham Cracker Crumbs: These are essential for that authentic cheesecake crust flavor! You can buy pre-made graham cracker crumbs or crush whole graham crackers yourself (about 4-5 full cracker sheets equals ½ cup crumbs). Some people blend the crumbs into the shake; others prefer them as a garnish. I like doing both—blend some in for flavor throughout, and save some for rimming the glass or sprinkling on top.
Sweetener: Depending on your ice cream’s sweetness and your strawberries’ ripeness, you may want additional sweetener. White sugar, honey, or maple syrup all work. You can also use strawberry syrup for extra strawberry intensity. Start with 1-2 tablespoons and adjust to taste. If your berries are super sweet and your ice cream is premium (which tends to be sweeter), you might not need any additional sweetener at all.
Vanilla Extract: Just a splash (½ teaspoon) enhances all the other flavors and adds depth. Use pure vanilla extract, not imitation, for the best flavor.
Optional – Whipped Cream: For topping! You can use canned whipped cream for convenience or make your own by whipping heavy cream with a bit of sugar. Homemade tastes better, but canned is perfectly acceptable and much easier.
Optional – Fresh Strawberry and Graham Cracker for Garnish: These make your milkshake look professional and Pinterest-worthy. A whole strawberry on the rim and a graham cracker wedge stuck into the whipped cream elevate the presentation dramatically.
Equipment Needed
The good news is that making this cheesecake milkshake requires minimal equipment, most of which you probably already own:
- High-powered blender: This is your most important tool. A Vitamix, Blendtec, or Ninja blender works perfectly. Even a standard countertop blender will do the job, though you may need to stop and scrape down the sides more often. An immersion blender won’t work well for this—you really need a proper blender jar.
- Measuring cups and spoons: For accurate measurements, especially important when you’re making this for the first time
- Ice cream scoop: Makes portioning the ice cream easy and consistent
- Knife and cutting board: For hulling and slicing fresh strawberries
- Spatula: For scraping down the blender sides and for softening your cream cheese
- Tall glasses: Milkshakes look best in tall, clear glasses where you can see that gorgeous pink color. Mason jars, old-fashioned milkshake glasses, or even large water glasses work great. Plan on 16-20 ounce capacity.
- Thick straws: Regular straws might collapse under the pressure of this thick shake—invest in those wider milkshake straws or reusable stainless steel straws
- Small plate (optional): For rimming your glass with graham cracker crumbs
- Whisk or electric mixer (optional): If you’re making homemade whipped cream
That’s really all you need! The blender does most of the work, and the rest is just assembly and presentation.
Print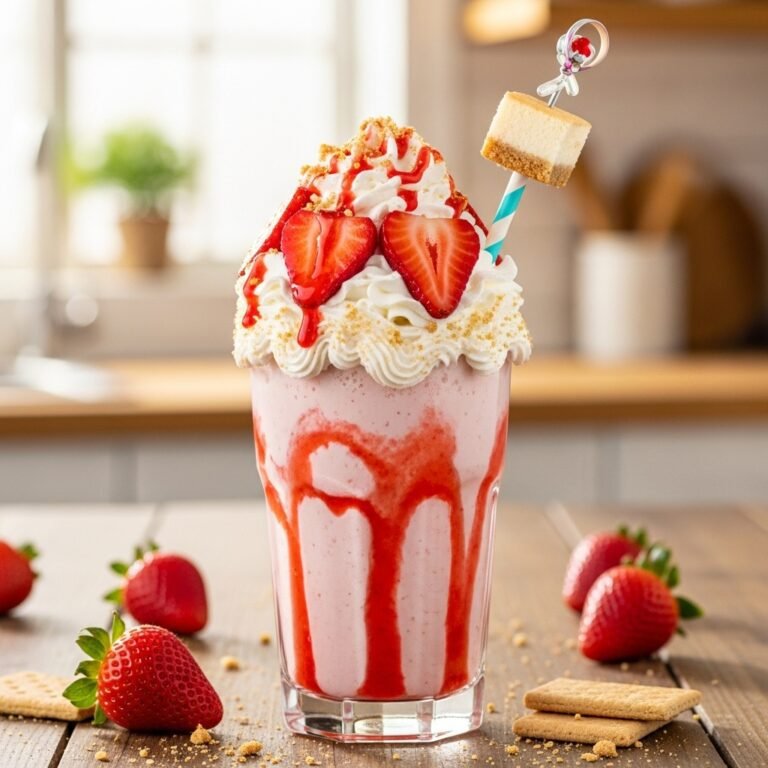
Strawberry Cheesecake Milkshake Recipe
This ultra-indulgent Strawberry Cheesecake Milkshake tastes exactly like your favorite dessert in drinkable form! It’s thick, creamy, perfectly sweet, and features real cream cheese and graham crackers for authentic cheesecake flavor. Ready in just 5 minutes!
- Total Time: 5 minutes
- Yield: 2 large milkshakes 1x
Ingredients
- 4 cups (about 8 scoops) vanilla ice cream, slightly softened
- 6 ounces cream cheese, softened to room temperature
- 1 cup fresh strawberries, hulled and sliced (or 1 cup frozen strawberries)
- ¾ cup whole milk (adjust for desired thickness)
- ½ cup graham cracker crumbs, divided
- 2-3 tablespoons sugar or honey (optional, adjust to taste)
- 1 teaspoon pure vanilla extract
- Whipped cream for topping
- 2 whole fresh strawberries for garnish
- 2 graham cracker squares for garnish
- Extra graham cracker crumbs for rimming glasses (optional)
Instructions
- Prepare your ingredients: Let your ice cream sit at room temperature for 5-10 minutes until it’s soft enough to scoop easily but not melted. If you forgot to soften your cream cheese, cut it into small cubes and microwave for 10-15 seconds until soft. Hull and slice your fresh strawberries (or measure out frozen ones). Have everything ready before you start blending.
- Optional – Rim your glasses: If you want that professional touch, spread a thin layer of cream cheese or corn syrup around the rim of your serving glasses, then dip the rims in graham cracker crumbs. Set the prepared glasses in the freezer while you make the milkshake—this keeps them nice and cold.
- Add ingredients to blender: Start with the liquid first (milk) to help the blending process. Add milk to your blender, then add the softened cream cheese in chunks. Next, add the strawberries, then the ice cream scoops on top. Add ¼ cup of the graham cracker crumbs (save the rest for topping), sweetener if using, and vanilla extract.
- Blend on low first: Start blending on low speed for about 10 seconds. This helps break everything down without splashing or getting air pockets. You might need to stop and use a spatula to push ingredients toward the blades if your blender isn’t catching everything.
- Increase to high speed: Once everything is roughly combined, increase to high speed and blend for 30-45 seconds until completely smooth and creamy. The mixture should be thick but pourable—if you can’t see any movement at all, it’s too thick. If it’s too thin and runny, it needs more ice cream.
- Check consistency and adjust: Stop the blender and check your milkshake’s thickness. Insert a spoon—it should stand up but slowly fall over. Too thick to blend? Add 2-4 tablespoons more milk and pulse briefly. Too thin? Add another scoop or two of ice cream and blend again. Remember, the shake will thicken slightly as it sits.
- Taste and adjust sweetness: Dip a clean spoon and taste. Need more strawberry flavor? Add a few more berries. Not sweet enough? Add another tablespoon of sugar or a drizzle of honey. Want more cheesecake tang? Add another ounce of cream cheese. Blend briefly after any additions.
- Pour into glasses: Remove your prepared glasses from the freezer. Pour the milkshake into glasses—it should be thick enough that it pours slowly. If you want a layered effect, you can alternate pouring strawberry shake with plain vanilla ice cream for visual interest.
- Top generously: Add a generous swirl of whipped cream on top. Sprinkle with remaining graham cracker crumbs. Press a graham cracker square into the whipped cream at an angle. Make a small cut in a fresh strawberry and slide it onto the rim of the glass.
- Serve immediately: Insert thick straws and serve right away while it’s perfectly cold and thick. Milkshakes wait for no one—they’re at their absolute best within the first 5-10 minutes of making them!
Notes
- Cream cheese temperature is crucial: Room temperature cream cheese is non-negotiable for a smooth shake. Cold cream cheese creates lumps that won’t blend out.
- Adjust thickness: The ratio of ice cream to milk controls thickness. Start with less milk—you can always add more, but you can’t take it away.
- Sweetness varies: Depending on your ice cream brand, strawberry ripeness, and personal preference, you may need more or less sweetener. Always taste before serving.
- Make it thicker: Use frozen strawberries instead of fresh, use less milk, or add more ice cream.
- Make it thinner: Add milk 2 tablespoons at a time until desired consistency is reached.
- Scaling: This recipe easily doubles, triples, or halves. Just maintain the same ratios.
- Blender struggles: If your blender is struggling, add a bit more milk and blend in short pulses, stopping to stir and scrape down sides between pulses.
- Prep Time: 5 minutes
- Cook Time: 0 minutes
- Category: Dessert, Beverage, Treat
- Method: Blending
- Cuisine: American
- Diet: Gluten Free
Nutrition
- Serving Size: 1 large milkshake (about 20 oz)
- Calories: 685
- Sugar: 68g
- Sodium: 380mg
- Fat: 38g
- Saturated Fat: 23g
- Unsaturated Fat: 12g
- Trans Fat: 1g
- Carbohydrates: 76g
- Fiber: 2g
- Protein: 12g
- Cholesterol: 125mg
Tips & Variations
The beauty of this milkshake is how adaptable it is to your preferences and what you have on hand. Here are some fantastic ways to customize:
Chocolate strawberry cheesecake shake: Add 2 tablespoons of cocoa powder or chocolate syrup, or use chocolate ice cream instead of vanilla. You can also drizzle chocolate sauce inside the glass before pouring for a stunning presentation.
Mixed berry cheesecake shake: Replace strawberries with a mix of raspberries, blueberries, and blackberries for a different berry profile. Each berry brings its own unique tang and color.
Oreo strawberry cheesecake shake: Add 4-5 Oreo cookies to the blender for cookies-and-cream cheesecake flavor. This creates an amazing texture and adds another dimension of flavor.
Protein-packed version: Add a scoop of vanilla protein powder to make this more of a substantial meal replacement. Greek yogurt can partially replace some cream cheese for added protein too.
Lighter version: Use low-fat ice cream, reduced-fat cream cheese (Neufchâtel), and skim milk. Replace some ice cream with frozen banana for natural sweetness and creaminess with fewer calories. It won’t be quite as decadent, but still delicious!
Dairy-free/vegan: Use dairy-free vanilla ice cream (coconut or cashew-based work best), vegan cream cheese, and non-dairy milk. The flavor will be slightly different but still wonderful.
Add-ins for texture: Throw in cheesecake pieces, white chocolate chips, freeze-dried strawberries, or strawberry jam for extra bursts of flavor and texture.
Boozy adult version: Add 1-2 ounces of strawberry liqueur, vanilla vodka, or Baileys Irish Cream for a grown-up dessert cocktail.
Swirl effect: Blend half the recipe without strawberries (plain cheesecake shake), then blend the other half with extra strawberries. Layer them in the glass for a beautiful pink and white swirl.
Sugar-free option: Use sugar-free ice cream, skip added sweetener, and use fresh, very ripe strawberries for natural sweetness.
Pro Chef Tips
After making countless batches and learning from professional ice cream shops, I’ve discovered some tricks that make a real difference:
Freeze your glasses: Put your serving glasses in the freezer for at least 15 minutes before making your shake. This keeps your milkshake cold longer and prevents it from melting too quickly.
The soft-serve secret: For an ultra-smooth, soft-serve-like texture, add 2 tablespoons of corn syrup or light corn syrup to your shake. This is the secret commercial ice cream makers use—it prevents ice crystals and creates impossibly smooth texture.
Layer flavors for complexity: Don’t blend all your strawberries at once. Blend most of them into the shake, then add a few fresh chopped strawberries at the end with just a quick pulse. This creates little bursts of fresh strawberry flavor throughout.
The cream cheese technique: Before adding cream cheese to the blender, whisk it separately with a few tablespoons of your milk until smooth and creamy. This pre-mixing ensures it incorporates perfectly without any lumps—professional ice cream shops do this!
Temperature contrast: Keep your ice cream cold and your cream cheese room temperature. This temperature difference actually helps things blend better and creates the ideal final serving temperature.
Blend in stages: Add your ingredients in the order listed (liquids first, then soft ingredients, then frozen/hard ingredients on top). This layering helps your blender grab everything properly and reduces the chances of getting stuck.
Don’t over-blend: Once smooth, stop! Over-blending introduces too much air and warms up the mixture, making it thinner. Blend just until you achieve a smooth consistency—usually 45-60 seconds total.
The straw test: To check if your shake is the perfect thickness, insert a wide straw. Pull it out and tip it horizontally—the shake should slowly ooze out, not pour quickly or stay completely stuck. That’s the sweet spot!
Make a “milkshake sauce”: Blend extra strawberries with a little cream cheese and sugar to create a strawberry cheesecake sauce. Drizzle this inside your glass before pouring the shake for extra flavor and a stunning presentation.
Graham cracker infusion: For even more crust flavor, let graham cracker crumbs soak in your milk for 5-10 minutes before blending. This infuses the milk with that buttery, honey-graham flavor.
Common Mistakes to Avoid
Even though milkshakes seem simple, several common errors can prevent yours from being perfect:
Using cold, hard cream cheese: This is the #1 mistake! Cold cream cheese will NOT blend smoothly, no matter how powerful your blender. You’ll end up with cream cheese chunks throughout your shake. Always soften it to room temperature first—this is non-negotiable.
Over-thinning with too much milk: It’s tempting to add a lot of liquid to make blending easier, but this creates a thin, runny shake instead of a thick, spoonable one. Start with less milk than you think you need—you can always add more, but you can’t take it away. A proper milkshake should be thick enough to eat with a spoon.
Using low-quality ice cream: Cheap ice cream with lots of air and stabilizers doesn’t create the same rich, creamy texture as premium brands. The higher fat content in quality ice cream makes a huge difference. Avoid “frozen dairy dessert”—if the label doesn’t say “ice cream,” it’s not ice cream.
Blending too long: Over-blending melts your ice cream and incorporates too much air, resulting in a thin, foamy shake instead of thick and creamy. Once everything is smooth (usually 45-60 seconds), stop immediately.
Not adjusting sweetness: Strawberries vary wildly in sweetness, and different ice cream brands have different sugar levels. Always taste your shake before serving and adjust. A few extra tablespoons of sugar or honey can transform it from “meh” to “amazing.”
Serving in warm glasses: Warm glasses melt your shake faster. Always use chilled glasses, preferably ones that have been in the freezer.
Wrong strawberry ratio: Too many strawberries overwhelms the cheesecake flavor and makes it just a strawberry shake. Too few and you lose the strawberry component. The 1 cup measurement in this recipe is the sweet spot for balanced flavor.
Storage & Meal Prep
Milkshakes are definitely best enjoyed fresh, but life happens, and it’s good to know your options:
Can you refrigerate milkshakes? Yes, but with caveats. Store leftover milkshake in an airtight container in the freezer (not the fridge!) for up to 2 days. It will freeze solid. To enjoy, let it sit at room temperature for 15-20 minutes until it reaches soft-serve consistency, then give it a good stir or quick blend to restore the texture.
Why freeze instead of refrigerate? Milkshakes in the regular refrigerator separate badly—the ice cream melts, leaving you with sweet milk at the bottom and ice crystals on top. Freezing maintains the integrity better.
Texture after storage: Even with proper storage, your shake won’t be quite the same as fresh. The texture will be slightly different—less smooth, more icy. It’s still tasty but not quite that perfect milkshake consistency. This is why fresh is always best!
Individual portions: If you know you’ll want milkshakes throughout the week, consider portioning the prepared shake into individual serving containers before freezing. This way, you only thaw what you’ll drink.
Shelf life: Properly frozen, leftover shake lasts about 3-5 days before ice crystals form and quality declines. After that, the texture becomes too icy and separated to be enjoyable.
Can you save ingredients? Absolutely! Pre-measure your ingredients into freezer bags (ice cream, strawberries, graham crackers). When you want a shake, dump the frozen bag contents into your blender with milk and softened cream cheese. This cuts prep time to virtually nothing.
Make-Ahead & Freezer Notes
Planning ahead? Here’s how to prep for easy milkshake making:
Ingredient prep packs: Portion ice cream, strawberries, and graham cracker crumbs into individual freezer bags. When craving strikes, dump one bag into the blender with milk and softened cream cheese. Milkshake in 2 minutes!
Freeze strawberry puree: Blend fresh strawberries into a smooth puree when they’re in season and at their peak. Pour into ice cube trays and freeze. Pop 3-4 strawberry puree cubes into your shake instead of fresh strawberries—works beautifully and intensifies strawberry flavor.
Freeze in popsicle molds: Pour your prepared milkshake mixture into popsicle molds for strawberry cheesecake popsicles! These are incredible on hot summer days and keep for up to 2 months in the freezer. Kids go absolutely crazy for these.
Make a milkshake “base”: Blend cream cheese with a little milk and sweetener until smooth. Freeze in ice cube trays. When you want a cheesecake shake, blend these cubes with ice cream, strawberries, and milk. The pre-blended cream cheese means no risk of lumps!
Ice cream storage tip: If your ice cream gets too hard between shakes, store it in a gallon-size freezer bag inside its container. This makes scooping easier by insulating it slightly.
Not recommended for long-term freezing: While you can freeze the finished shake, it’s really meant to be consumed fresh or within a few days. After a week in the freezer, ice crystals and flavor degradation make it less appealing.
“Reheating” method: There’s no reheating needed (obviously!), but to bring frozen leftover shake back to life: remove from freezer, let sit at room temperature for 15-20 minutes until it reaches soft-serve consistency, then stir vigorously or give it a very quick (5-second) blend to restore the smooth texture.
Serving Suggestions
Strawberry cheesecake milkshakes are versatile and pair wonderfully with various foods and occasions:
Classic diner pairing: Serve alongside burgers, fries, onion rings, or grilled cheese sandwiches for that classic American diner experience. The sweet shake balances salty, savory foods perfectly.
As the dessert: This milkshake IS dessert! Serve it instead of cake at birthday parties, after dinner parties, or as a special weekend treat. It’s guaranteed to impress.
Brunch beverage: Believe it or not, these make a fun brunch drink served alongside waffles, pancakes, or French toast. It’s like having dessert with breakfast (no judgment here!).
Movie night treat: Instead of popcorn or candy, make these milkshakes for movie night at home. They feel special and indulgent without requiring you to leave the couch.
Party pleaser: Set up a “milkshake bar” at parties with various toppings—whipped cream, sprinkles, chocolate chips, crushed cookies, fresh berries, and multiple syrup options. Let guests customize their shakes!
Summer poolside: Serve these at pool parties or BBQs. They’re refreshing, impressive, and everyone loves them. Make a big batch and serve from a pitcher over ice.
Valentine’s Day or anniversaries: The pink color and romantic strawberry-cheesecake flavor make these perfect for romantic occasions. Serve in wine glasses with fancy garnishes for an elegant presentation.
What pairs well:
- Salty foods like french fries, pretzels, or potato chips
- Chocolate chip cookies or brownies (yes, dessert with dessert!)
- Grilled sandwiches or burgers
- Pizza (especially if you’re feeding teenagers!)
- Fresh fruit platter
- Cheese and crackers (savory-sweet contrast)
- Nothing—it’s perfect on its own!
Presentation ideas: Serve with long spoons so people can eat the whipped cream and garnishes, add colorful paper straws, rim glasses with graham cracker crumbs, drizzle chocolate or strawberry sauce inside the glass before pouring, add a full strawberry and mint leaf for color contrast.
FAQs Section
Can I make this without a blender?
Unfortunately, no. A proper blender is essential for creating that smooth, creamy milkshake texture. A food processor might work in a pinch, though it won’t be quite as smooth. An immersion blender definitely won’t work—you need the container and blade setup of a standard blender to properly incorporate the ice cream. If you don’t have a blender, consider it an investment—they’re incredibly versatile kitchen tools!
Why doesn’t my milkshake taste like cheesecake?
This usually means you didn’t use enough cream cheese or it wasn’t distributed evenly. Make sure you’re using a full 6 ounces of cream cheese for 2 servings, and that it’s completely softened before blending. Also, the graham cracker crumbs are essential for that crust flavor—don’t skip them! Finally, make sure you’re using real cream cheese (brick style), not cream cheese spread or Neufchâtel, which have different flavors.
Can I use frozen cheesecake instead of cream cheese?
Absolutely! In fact, using actual cheesecake pieces is a shortcut some people prefer. Use about 1 cup of frozen cheesecake chunks instead of the cream cheese. This adds even more authentic flavor and eliminates the need to soften cream cheese. Just break the cheesecake into chunks and blend with your other ingredients. The graham crust from real cheesecake is a bonus!
How do I make it thicker/thinner?
For a thicker shake: use less milk (start with ½ cup instead of ¾), use frozen strawberries instead of fresh, add an extra scoop or two of ice cream, or add a small handful of ice cubes. For a thinner shake: add milk 2 tablespoons at a time until desired consistency, use all fresh strawberries instead of frozen, or let the ice cream soften more before blending.
Can kids drink this?
Absolutely! This is a kid-friendly treat with no alcohol or coffee. However, it is quite rich and high in sugar, so consider it an occasional treat rather than an everyday drink. You might want to serve smaller portions to young children. Some parents dilute it slightly with extra milk to make it less intense and stretch servings further.
What if I don’t have graham crackers?
You can substitute vanilla wafer cookies, digestive biscuits, or even Nilla wafers. In a pinch, you could use a teaspoon of honey and a tiny pinch of cinnamon to mimic that sweet, lightly spiced graham flavor, though you’ll lose the textural element. Some people use crushed pretzels for a sweet-salty twist!
My blender keeps getting stuck. Help!
This is common with thick milkshakes. Try these solutions: Add a bit more milk (2-4 tablespoons), make sure your ice cream is properly softened before adding it, blend in pulses rather than continuously, use the tamper that came with your blender to push ingredients down while blending, add your liquid ingredients first before frozen ones, or stop the blender, stir with a spatula, then resume blending. If all else fails, your shake might just be too thick—which isn’t necessarily a bad thing! Add a splash more milk and it should blend more easily.
Does this taste artificial or too sweet?
Not if you use quality ingredients! Real cream cheese, fresh strawberries, and premium ice cream create an authentic, natural flavor. The sweetness level is completely adjustable—if you find it too sweet, reduce or eliminate the added sugar and use unsweetened milk. The natural sugars from strawberries and ice cream provide plenty of sweetness for many people. If it tastes artificial, you might be using ice cream with artificial vanilla flavoring—switch to a brand with real vanilla.
Conclusion
And there you have it—your complete guide to making the most amazing, restaurant-quality Strawberry Cheesecake Milkshake right in your own kitchen! This isn’t just another milkshake recipe; it’s a full-blown dessert experience that brings together two of America’s favorite treats into one utterly irresistible creation.
What I absolutely love about this recipe is how it delivers pure indulgence and joy without requiring any special skills or fancy equipment. In just 5 minutes, with ingredients you can grab from any grocery store, you can create something that rivals (and honestly, probably beats) what you’d pay $8-10 for at a restaurant or ice cream shop. Plus, you get to customize it exactly to your preferences—thicker, thinner, sweeter, tangier, more strawberry-forward, or more cheesecake-heavy. It’s YOUR perfect milkshake.
Whether you make this for a special celebration, a weekend treat, a creative date night dessert, or simply because you deserve something wonderful on a random Tuesday, I promise this strawberry cheesecake milkshake will not disappoint. It’s become my go-to recipe when I want to impress guests with minimal effort, treat my family to something special, or satisfy that intense cheesecake craving without turning on the oven.
Now I’m dying to hear about YOUR strawberry cheesecake milkshake experience! Did you add any creative twists? What did your family think? Did it satisfy your cheesecake cravings? Drop a comment below and share your thoughts—I read every single one and love hearing from you! And if this recipe made you smile (or you know it would make someone else’s day), please pin it to your favorite Pinterest boards and share it with your friends. Help spread the milkshake love!
Now grab that blender, round up those ingredients, and treat yourself to liquid cheesecake heaven. Your taste buds are about to throw a party! 🍓🍰🥤
Happy blending, friends!