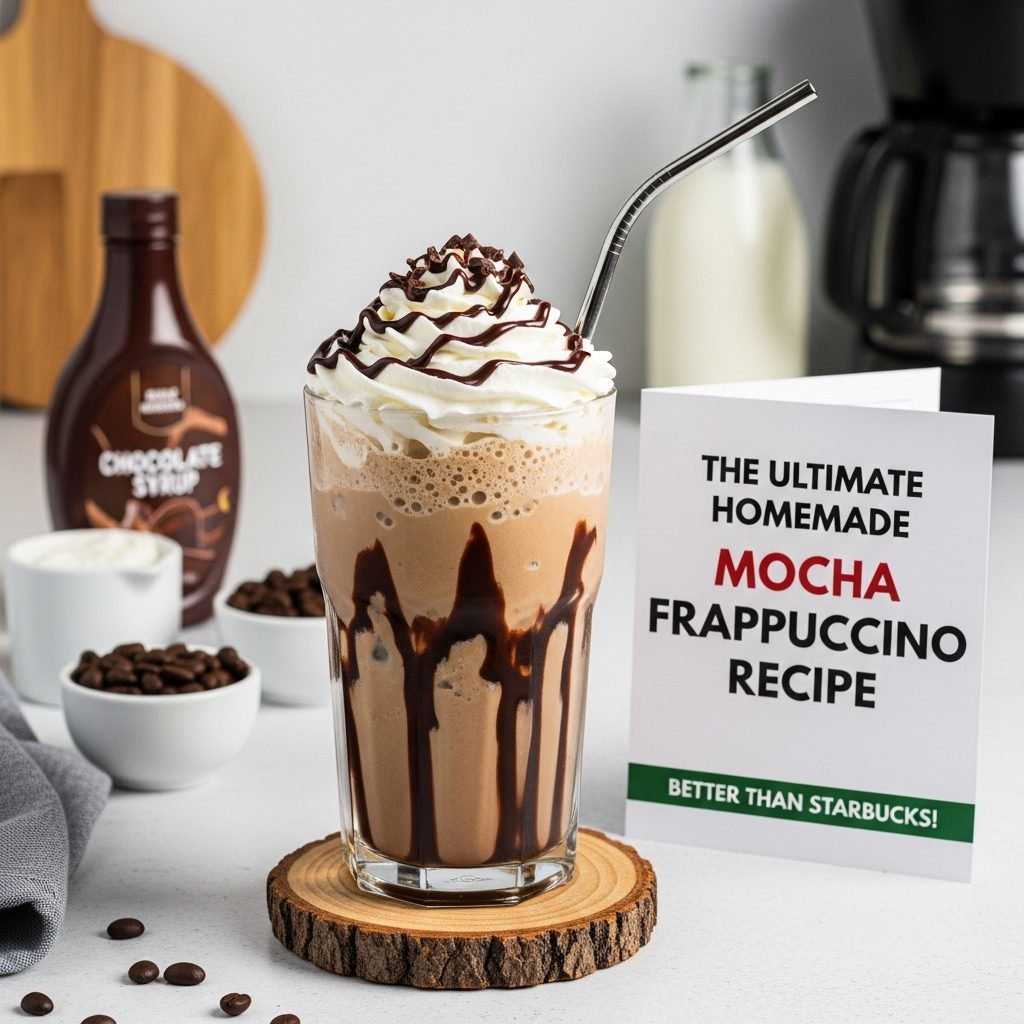
The Ultimate Homemade Mocha Frappuccino Recipe (Better Than Starbucks!)
Craving that signature Starbucks Mocha Frappuccino but don’t want to spend $6 every time? This homemade Mocha Frappuccino recipe delivers all the creamy, chocolatey, coffee-infused goodness you love—right from your own kitchen! This blended coffee drink combines rich espresso (or strong coffee), decadent chocolate, milk, and ice into a frosty, indulgent treat that’s perfect for warm afternoons, weekend brunches, or anytime you need a pick-me-up that feels like a luxurious coffeehouse experience.
What makes this recipe truly special is how incredibly easy it is to customize. Want it sweeter? Add more chocolate syrup. Need an extra caffeine kick? Double the espresso. Prefer it dairy-free? Swap in your favorite plant-based milk. This Mocha Frappuccino is endlessly adaptable and costs just a fraction of what you’d pay at a coffee shop. Plus, you control exactly what goes into your drink—no mystery ingredients, just pure coffee bliss. Whether you’re a coffee enthusiast, a chocolate lover, or simply someone who appreciates a delicious frozen beverage, this recipe will become your go-to summer refreshment.
History / Background
The Frappuccino has become an iconic part of American coffee culture, but its story begins in the early 1990s. The original Frappuccino was actually created by The Coffee Connection, a small Massachusetts-based coffee shop chain, in 1992. The name itself is a clever portmanteau of “frappé” (a Greek iced coffee drink made with instant coffee) and “cappuccino” (the Italian espresso-based beverage).
When Starbucks acquired The Coffee Connection in 1994, they also acquired the rights to the Frappuccino name and recipe. Recognizing the massive potential of this blended iced coffee beverage, Starbucks refined the formula and launched it nationwide in 1995. The timing was perfect—Americans were developing an increasingly sophisticated palate for specialty coffee drinks, and the Frappuccino offered a sweet, accessible entry point for those who found traditional espresso drinks too intense.
The Mocha Frappuccino specifically became one of the most popular variations, combining two universally beloved flavors: coffee and chocolate. This pairing has roots going back centuries—chocolate and coffee both originate from tropical climates and were considered luxury items in European society. The Mocha name itself references the port city of Mocha in Yemen, historically famous for its coffee trade, though over time “mocha” has come to simply mean the coffee-chocolate flavor combination.
Today, the Frappuccino has evolved from a simple iced coffee drink into a cultural phenomenon, with countless variations available at coffee shops worldwide. But the beauty of making your own Mocha Frappuccino at home is that you’re participating in a tradition of coffee creativity while making it entirely your own. This recipe honors that heritage while giving you complete control over ingredients, sweetness, and intensity—something the original creators would surely appreciate.
Why You’ll Love This Recipe
This Mocha Frappuccino recipe is about to become your new obsession, and here’s why: it delivers coffeehouse quality in just five minutes, using ingredients you probably already have in your kitchen. There’s something deeply satisfying about recreating your favorite café drink at home—the sense of accomplishment, the cost savings, and the ability to customize every element to your exact preferences.
Here’s what makes this recipe absolutely irresistible:
- Budget-Friendly: Save $5-6 per drink! Make four servings for less than the cost of one store-bought Frappuccino
- Quick & Easy: Ready in just 5 minutes with minimal cleanup—just blend and enjoy
- Customizable: Adjust sweetness, coffee intensity, and chocolate levels to match your perfect taste
- No Special Equipment: Just a standard blender—no expensive coffee machines required
- Better Ingredients: Control the quality of your coffee, chocolate, and milk—no artificial flavors or excessive sugar unless you want them
- Portion Control: Make exactly as much as you need, from a single serving to a pitcher for entertaining
- Dietary Adaptations: Easily make it vegan, sugar-free, or lighter with simple substitutions
- Impressive: Serve these at brunch or parties and watch everyone ask for the recipe
- Year-Round Treat: Perfect for summer refreshment or a winter indulgence when you want something cold and cozy
This recipe proves that café-quality beverages don’t require barista training or complicated techniques. It’s foolproof, forgiving, and absolutely delicious every single time.
Ingredient Notes
Let’s break down what makes this Mocha Frappuccino so incredibly delicious, ingredient by ingredient:
Strong Brewed Coffee or Espresso: The foundation of any great Frappuccino. Use strong coffee (brewed double-strength) or actual espresso for the best flavor. Cold coffee works perfectly—in fact, it’s ideal because it won’t melt your ice. If you only have hot coffee, let it cool completely first or brew it directly over ice. Instant espresso powder works in a pinch (dissolve 2 tablespoons in 1/4 cup hot water, then chill).
Milk: Whole milk creates the creamiest, richest texture, but 2% works beautifully too. For dairy-free versions, oat milk provides the best creamy consistency, followed by coconut milk or almond milk. Avoid skim milk—you’ll lose that signature velvety texture that makes Frappuccinos so indulgent.
Chocolate Syrup: This is where the “mocha” comes in! Use quality chocolate syrup like Hershey’s, Ghirardelli, or Torani. For a deeper chocolate flavor, try using cocoa powder (2-3 tablespoons) combined with a bit of sugar instead. Dark chocolate syrup creates a more sophisticated, less sweet version that coffee purists will love.
Granulated Sugar: Balances the bitter notes from coffee and enhances the chocolate flavor. Start with 2 tablespoons and adjust to taste—you can always add more. For alternatives, try honey, maple syrup, or agave nectar. Sugar-free options include stevia, monk fruit sweetener, or erythritol.
Ice: The secret to the perfect texture! Use about 2 cups of ice cubes for a thick, slushy consistency. Crushed ice blends more easily but can water down your drink slightly. Coffee ice cubes (freeze leftover coffee in ice cube trays) are a game-changer—they maintain the coffee intensity as they melt.
Whipped Cream: The crowning glory! Homemade whipped cream is easy (just heavy cream and a bit of sugar, whipped to stiff peaks) or use store-bought. For dairy-free, try coconut whipped cream. This is technically optional, but let’s be honest—it’s absolutely essential for the full experience.
Chocolate Sauce for Drizzling: That final artistic touch. Use the same chocolate syrup, or melt real chocolate chips (1/4 cup with 1 tablespoon milk) for a more luxurious finish.
Equipment Needed
Making a perfect Mocha Frappuccino requires minimal equipment, most of which you probably already own:
- High-Powered Blender: A Vitamix, Ninja, or similar blender works best for crushing ice smoothly. A standard blender works too—just blend a bit longer and add ice gradually. The key is enough power to create that signature slushy texture without large ice chunks.
- Measuring Cups & Spoons: For accurate ingredient measurements, ensuring consistency every time you make this recipe.
- Coffee Maker or Espresso Machine: Whatever you normally use to brew coffee works perfectly. French press, drip coffee maker, Keurig, or stovetop espresso maker—they all work.
- Tall Glass: A 16-ounce glass is ideal for serving. Clear glass lets you show off the beautiful layers and that drizzled chocolate.
- Straw: A wide straw works best for sipping the thick, frosty texture. Reusable straws are eco-friendly and perfect for regular Frappuccino enjoyment.
- Ice Cube Trays: (Optional but recommended) If you want to make coffee ice cubes ahead of time for an even more intense coffee flavor.
Print

Mocha Frappuccino Recipe
This homemade Mocha Frappuccino rivals any coffeehouse version with its perfect balance of rich coffee, decadent chocolate, and creamy texture. Blended to icy perfection in just 5 minutes, this refreshing beverage is infinitely customizable and costs a fraction of store-bought versions.
- Total Time: 5 minutes
- Yield: 2 servings (about 16 oz each) 1x
Ingredients
Scale- 1 cup strong brewed coffee, cooled (or 2 shots espresso mixed with 3/4 cup water)
- 1 cup whole milk (or milk of choice)
- 3 tablespoons chocolate syrup, plus more for drizzling
- 2 tablespoons granulated sugar (adjust to taste)
- 2 cups ice cubes
- 1/2 cup whipped cream (for topping)
- 2 tablespoons chocolate sauce (for garnish)
Instructions
- Brew and Cool Your Coffee: If you haven’t already, brew 1 cup of strong coffee (use double the normal amount of grounds) or prepare 2 shots of espresso. Let it cool to room temperature, or speed up the process by refrigerating for 15-20 minutes. Cold coffee is essential to prevent ice from melting too quickly.
- Gather Your Ingredients: Measure out your milk, chocolate syrup, sugar, and ice. Having everything ready ensures quick blending and prevents the ice from melting while you search for ingredients.
- Combine Base Ingredients: Add the cooled coffee, milk, chocolate syrup, and sugar to your blender. Pour these liquid ingredients in first—this helps the blades move more freely once you add the ice.
- Add Ice: Add the 2 cups of ice cubes on top of the liquid ingredients. For the smoothest texture, use fresh ice cubes rather than ones that have been sitting out and started to melt.
- Blend Until Smooth: Start blending on low speed, then gradually increase to high. Blend for 30-45 seconds until the mixture is completely smooth and has a thick, slushy consistency. You shouldn’t see any large ice chunks. If your blender struggles, pause and stir with a spoon, then continue blending.
- Check Consistency: The perfect Frappuccino should be thick enough to hold its shape but still pourable. If it’s too thin, add a few more ice cubes and pulse. If it’s too thick, add a splash of milk and blend again.
- Prepare Glasses: Drizzle chocolate syrup around the inside of two tall glasses in a decorative pattern. Tilt and rotate the glass to create artistic chocolate streaks.
- Pour and Top: Divide the blended mixture between the prepared glasses, pouring carefully to maintain the chocolate drizzle pattern on the sides.
- Add Whipped Cream: Generously top each Frappuccino with whipped cream, creating a beautiful peaked dome that rises above the rim of the glass.
- Final Drizzle: Finish with a decorative drizzle of chocolate sauce over the whipped cream. Add a straw, and serve immediately for the best texture and temperature.
Notes
- For a stronger coffee flavor, use 3 shots of espresso or add 1 tablespoon of instant espresso powder to your brewed coffee.
- Coffee ice cubes prevent dilution: freeze leftover coffee in ice cube trays and use these instead of regular ice.
- Make it mocha-choca-latte by adding 1 tablespoon of cocoa powder along with the chocolate syrup.
- The Frappuccino will start to separate and melt after about 15-20 minutes, so enjoy it fresh.
- For a thicker, more milkshake-like consistency, reduce milk to 3/4 cup and increase ice to 2.5 cups.
- Prep Time: 5 minutes
- Cook Time: 0 minutes
- Category: Beverage, Dessert Drink
- Method: Blending
- Cuisine: American
- Diet: Gluten Free
Nutrition
- Serving Size: 1 Frappuccino (16 oz)
- Calories: 285
- Sugar: 38g
- Sodium: 95mg
- Fat: 9g
- Saturated Fat: 5.5g
- Unsaturated Fat: 3g
- Trans Fat: 0g
- Carbohydrates: 45g
- Fiber: 1g
- Protein: 6g
- Cholesterol: 30mg
Tips & Variations
Vanilla Mocha Frappuccino: Add 1 teaspoon of pure vanilla extract to the blender for a vanilla mocha twist that adds depth and warmth to the chocolate flavor.
White Chocolate Mocha: Substitute white chocolate sauce for regular chocolate syrup, or use 3 tablespoons of white chocolate chips melted with 1 tablespoon of milk.
Peppermint Mocha Frappuccino: Perfect for the holidays! Add 1/4 teaspoon of peppermint extract and top with crushed candy canes or peppermint pieces.
Skinny Version: Use unsweetened almond milk, sugar-free chocolate syrup, and a sugar substitute. Skip the whipped cream or use a light version. This reduces calories to approximately 120 per serving.
Extra Chocolatey: Add 1-2 tablespoons of cocoa powder or use dark chocolate syrup for a more intense chocolate experience that’s less sweet.
Protein-Packed: Add a scoop of chocolate or vanilla protein powder for a post-workout treat. You may need to reduce the sugar since most protein powders are already sweetened.
Caramel Mocha: Drizzle caramel sauce alongside the chocolate, or add 1 tablespoon of caramel syrup to the blend for a salted caramel mocha experience.
Vegan Version: Use oat milk or coconut milk, ensure your chocolate syrup is vegan, and top with coconut whipped cream. The result is just as creamy and indulgent.
Hazelnut Mocha: Add 1 tablespoon of hazelnut syrup or Nutella for a sophisticated European-inspired flavor profile.
Spiced Mocha: Add a pinch of cinnamon, cayenne pepper, or cardamom for a warming spice element that complements both coffee and chocolate beautifully.
Pro Chef Tips
Freeze Your Coffee Into Cubes: This is the single best tip for an intensely flavored Frappuccino. Regular ice cubes dilute the coffee as they melt, but coffee ice cubes maintain the flavor integrity throughout. Simply pour cooled coffee into ice cube trays and freeze overnight. Use these in place of regular ice for maximum coffee intensity.
Use Cold Ingredients: Everything going into your blender should be cold—milk, coffee, even the chocolate syrup if possible. This ensures your ice doesn’t melt prematurely during blending, maintaining that thick, creamy texture that defines a perfect Frappuccino.
Layer Your Blender Correctly: Always add liquids first, then ice. This creates a vortex that pulls ice down toward the blades, ensuring even blending without having to stop and stir constantly. This professional technique prevents those frustrating air pockets that leave chunks of ice unblended.
Pulse Before Full Blending: Start with a few quick pulses to break up the ice initially, then move to continuous blending. This prevents your blender motor from straining and creates a smoother final texture without overheating the blender.
The Texture Test: The perfect consistency should coat a spoon and hold soft peaks like thick soft-serve ice cream. If you lift your spoon out and the mixture slides off immediately, it’s too thin. If it won’t pour at all, it’s too thick.
Bloom Your Cocoa Powder: If using cocoa powder instead of chocolate syrup, first mix it with a tablespoon of hot coffee to create a paste. This “blooming” process activates the chocolate flavor compounds, creating a more intense, less chalky chocolate taste.
Chill Your Glasses: Pop your serving glasses in the freezer for 10-15 minutes before making your Frappuccino. This keeps your drink colder longer and prevents immediate melting, giving you more time to enjoy every sip.
Common Mistakes to Avoid
Using Hot Coffee: Adding hot or even warm coffee will melt your ice too quickly, leaving you with a watery, disappointing drink instead of that signature thick, frosty texture. Always cool your coffee completely—refrigerate it for at least 30 minutes or brew it the night before.
Over-Blending: Blending for too long incorporates too much air, creating a foamy, less dense texture instead of the smooth, thick consistency you want. Blend just until smooth—usually 30-45 seconds is perfect. Over-blending also causes the mixture to warm up slightly, accelerating melting.
Using Too Little Ice: Skimping on ice to save time or because you think it’ll be “close enough” results in a thin, slushy drink rather than a thick Frappuccino. The full 2 cups of ice is essential for achieving that signature texture. If anything, err on the side of too much ice rather than too little.
Not Adjusting for Your Blender’s Power: A high-powered blender like a Vitamix crushes ice effortlessly, while a standard blender needs more time and may require adding ice gradually. Know your equipment and adjust accordingly—trying to force a weak blender to process all the ice at once can burn out the motor or leave you with a chunky drink.
Forgetting to Taste and Adjust: Everyone’s sweetness preference is different. The recipe provides a baseline, but you should always taste before serving and adjust the sweetness or chocolate level. It’s much harder to fix after you’ve already poured it into glasses and added toppings.
Storage & Meal Prep
Immediate Serving: Mocha Frappuccinos are absolutely best enjoyed immediately after blending when the texture is perfect and the temperature is ideal. The ice begins melting within 10-15 minutes, causing separation and a watery texture.
Short-Term Holding: If you need to hold your Frappuccino for up to 30 minutes, pour it into an insulated tumbler with a lid and keep it in the freezer. This maintains temperature and texture better than leaving it at room temperature. Give it a quick stir before drinking.
Leftover Storage: While not ideal, you can refrigerate leftover Frappuccino in an airtight container for up to 24 hours. It will separate and lose its slushy texture, becoming more liquid. To revive it, reblend with a handful of fresh ice cubes. The flavor remains good, but the texture won’t match a freshly made version.
Prep-Ahead Components: The smartest meal prep strategy is to prepare the components separately. Brew and refrigerate your coffee (keeps for 1 week). Pre-measure chocolate syrup and sugar into small containers. Freeze coffee into ice cubes. When you’re ready for a Frappuccino, everything comes together in 2 minutes.
Avoiding Freezer Burn: Don’t try to freeze a blended Frappuccino for later—it turns icy and granular, losing all that creamy texture. The individual components freeze fine (especially the coffee ice cubes), but the finished drink must be enjoyed fresh.
Make-Ahead & Freezer Notes
Coffee Ice Cubes: This is your best make-ahead strategy. Brew a full pot of strong coffee, let it cool completely, and pour into ice cube trays. Freeze for at least 6 hours or overnight. These last for up to 3 months in the freezer and eliminate any prep time when you want a Frappuccino.
Coffee Concentrate: Make a batch of cold brew concentrate that lasts up to 2 weeks refrigerated. When ready to make your Frappuccino, use 1/2 cup concentrate mixed with 1/2 cup water in place of the regular coffee. This provides consistent, smooth coffee flavor every time.
Pre-Mixed Dry Ingredients: Combine sugar and cocoa powder (if using) in small containers or bags. This is especially helpful if you make Frappuccinos regularly—grab a pre-measured packet and dump it in the blender.
Batch Freezing: While you can’t freeze the finished Frappuccino, you can create freezer packs: combine coffee, milk, chocolate syrup, and sugar in freezer-safe bags, removing as much air as possible. Freeze flat for up to 1 month. When ready, partially thaw (about 50%), dump into the blender with additional ice, and blend. The texture won’t be quite as perfect as fresh but comes close.
Whipped Cream Prep: Make a large batch of homemade whipped cream and store in the refrigerator for up to 3 days. It may deflate slightly but can be rewhipped briefly before topping your Frappuccino. Alternatively, stabilized whipped cream (made with cream cheese or gelatin) lasts up to a week.
Best Reheating Method: This doesn’t apply to Frappuccinos since they’re served cold, but if your drink has become too liquid from sitting, reblending with fresh ice restores most of the original texture and makes it enjoyable again.
Serving Suggestions
A Mocha Frappuccino is delicious on its own, but pairing it with the right accompaniments creates a complete coffeehouse experience at home:
Breakfast Pairings: Serve alongside a buttery croissant, a slice of banana bread, cinnamon coffee cake, or a classic blueberry muffin. The sweetness of the Frappuccino balances beautifully with less-sweet breakfast pastries. Add a fruit salad for a refreshing contrast.
Brunch Menu: Include your Mocha Frappuccino as part of a weekend brunch spread with avocado toast, eggs Benedict, French toast, or quiche. It’s sophisticated enough to serve guests and casual enough for a relaxing morning at home.
Afternoon Treat: Pair with chocolate chip cookies (warm from the oven!), brownies, biscotti for dunking, or a slice of cheesecake. The coffee cuts through the richness of chocolate desserts, creating perfect balance.
Light Snacks: Serve with a cheese and fruit platter, mixed nuts, or yogurt parfait for a lighter afternoon pick-me-up that doesn’t feel too heavy.
Summer Entertaining: Make a pitcher’s worth (triple the recipe) and serve at poolside gatherings, backyard barbecues, or summer birthday parties. Set up a Frappuccino bar where guests customize their own drinks with various toppings and mix-ins.
Movie Night: This is a fun alternative to traditional movie snacks. Pair with buttered popcorn, candy, or homemade soft pretzels for a cozy night in.
Kids’ Version: Make a “Frappuccino” for children using decaf coffee or replacing coffee entirely with chocolate milk, then blending with ice and topping with whipped cream. They’ll feel included in the coffeehouse experience.
FAQs Section
Can I make this without a blender?
Unfortunately, a blender is essential for achieving the signature slushy texture of a Frappuccino. However, if you only have an immersion blender, you can crush the ice first using a rolling pin in a sealed bag, then use the immersion blender to combine everything in a tall container. The texture won’t be quite as smooth, but it works in a pinch.What if I don’t have espresso or strong coffee?
Regular brewed coffee works fine! Just brew it at double strength by using twice the amount of coffee grounds you normally would. Alternatively, instant espresso powder or instant coffee dissolved in a small amount of hot water creates concentrated coffee perfect for Frappuccinos. Start with 2 tablespoons instant coffee in 1/4 cup hot water, then add 3/4 cup cold water.How do I make this dairy-free?
Simply substitute your favorite plant-based milk for the regular milk—oat milk provides the creamiest texture closest to dairy milk, while almond or coconut milk work well too. Use coconut whipped cream for topping (available in stores or make your own from chilled canned coconut cream). Ensure your chocolate syrup is dairy-free (most brands are, but check labels).Why is my Frappuccino watery?
This usually happens when the coffee wasn’t cooled enough before blending, causing the ice to melt too quickly. It can also result from using too little ice or over-blending. The fix: make sure your coffee is completely cold, use the full 2 cups of ice, and blend only until smooth—about 30-45 seconds.Can I use decaf coffee?
Absolutely! Decaf coffee works perfectly in this recipe. The flavor remains delicious—you’ll still get all that coffee-chocolate goodness without the caffeine. This makes it perfect for evening treats or for those sensitive to caffeine.How can I make it less sweet?
Reduce the sugar to 1 tablespoon or eliminate it entirely, especially if your chocolate syrup is already quite sweet. You can also use unsweetened cocoa powder (2-3 tablespoons) instead of chocolate syrup, which gives you complete control over sweetness. Start with less and add more to taste.What’s the best chocolate syrup to use?
Ghirardelli and Torani syrups are premium options with rich chocolate flavor. Hershey’s chocolate syrup is a classic, accessible choice that works great. For a less sweet, more sophisticated taste, use dark chocolate syrup. Avoid extremely cheap brands as they can taste artificial and overly sweet.Conclusion
There you have it—your complete guide to making the perfect homemade Mocha Frappuccino! This recipe proves that you don’t need a fancy espresso machine or barista training to enjoy coffeehouse-quality drinks at home. With just a few simple ingredients and a blender, you can create a delicious, creamy, chocolate-coffee treat that rivals (and in many ways surpasses) anything you’d get from a café.
The beauty of this recipe lies in its versatility. Make it exactly as written for a classic experience, or customize it with any of the variations and tips to create your signature version. Whether you’re craving a midday pick-me-up, looking for a special weekend breakfast beverage, or wanting to impress guests at brunch, this Mocha Frappuccino delivers every single time.
Remember, the key elements are cold coffee, quality ingredients, the right ice-to-liquid ratio, and blending just until smooth. Master these basics, and you’ll be making Frappuccinos better than the pros in no time. Plus, think of all the money you’ll save—and the fun you’ll have experimenting with flavors!
I’d love to hear how your Mocha Frappuccino turns out! Did you try any of the variations? What’s your favorite way to customize it? Leave a comment below sharing your experience, and don’t forget to rate this recipe. If you loved it (and I know you will!), please share it on Pinterest so your friends can discover how easy it is to make coffeehouse drinks at home. Save this recipe to your coffee drinks board, and tag me in your photos—I can’t wait to see your beautiful, Instagram-worthy Frappuccinos!
Happy blending, and here’s to never waiting in line for overpriced coffee again! ☕🍫